この記事は公開されてから1年以上経過しています。情報が古い可能性がありますので、ご注意ください。
こんにちは、せーのです。今日はCloudFormationの新機能を使って構築のTipsをより簡単に実現する方法をご紹介します。
Blue-Green Deploymentってなんだっけ
Blue-Green Deploymentというのは運用時の事を考えたクラウドならではの構築手法の一つです。通常システムやサービスをアップデートする場合には稼働中のサーバーを1つずつ切り離し、サービス用のネットワークから外れたところでアップデート作業、終わったら再びオンラインに接続させる、というのを繰り返すのですが、この方法では現状オンラインになっているサーバーシステム(これをBlueと言います)をまるっとコピーして同じものを別環境に構築し(これをGreenと言います)、それをアップデート後、DNSのみ切り替えてアップデートした環境をオンラインにし、今まで稼働していた環境はそのまま廃棄してしまう、という方法です。詳しくは渡辺の記事を御覧ください。
Blue-Green DeploymentをCFnで実装するときの歯がゆいトコロ
というわけで継続的にサービスを運用することを考えるとこの方法はとても効率がよく、またネットワークVPCは同じもので、アプリケーションのみ色々なサービスを相乗りさせて相互連携させる、というような環境の場合にも応用が効きます。つまり、VPC層とサーバー層を(場合によってはnat層なども)構築スタックとして分けることによってベースの環境を維持したままサーバーに関わる層を切り替える、複数作るなど柔軟な構築が可能になるわけですね。
ところが実際にこの考えでCFnを構築していくと一つ、めんどくさい問題に引っかかります。それは「スタックを分けたことによってネットワーク層のIDをいちいち調べなければいけない」という問題です。どういうことでしょう。例えばあるVPCのあるサブネットにEC2を一つ立てたいとします。その場合CFnテンプレートが一つの場合は
"VPC" : {
  "Type" : "AWS::EC2::VPC",
  "Properties" : {
    "CidrBlock" : { "Fn::FindInMap" : [ { "Ref" : "Env" }, "VPC", "CIDR" ]},
    "EnableDnsSupport" : "true",
    "EnableDnsHostnames" : "true",
    "InstanceTenancy" : "default",
    "Tags" : [
      {"Key" : "service", "Value" : "test" }
    ]
  }
},
"FrontendSubnet1" : {
  "Type" : "AWS::EC2::Subnet",
  "Properties" : {
    "VpcId" : { "Ref" : "VPC" },
    "CidrBlock" : { "Fn::FindInMap" : [ { "Ref" : "Env" }, "FrontendSubnet1", "CIDR" ]},
    "AvailabilityZone" : { "Fn::Select" : [ "0", { "Fn::GetAZs" : { "Ref" : "AWS::Region" }}]},
    "Tags" : [
      {"Key" : "service", "Value" : "test" }
    ]
  }
},
"ec2" : {
  "Type" : "AWS::EC2::Instance",
  "Properties" : {
    "InstanceType" : "m3.medium",
    "BlockDeviceMappings" : [
      {
        "DeviceName" : "/dev/xvda",
        "Ebs" : { "VolumeSize" : { "Ref" : "NATAllocatedStorage" } }
      },
      {
        "DeviceName" : "/dev/sdb",
        "VirtualName" : "ephemeral0"
      }
    ],
    "KeyName" : "test",
    "IamInstanceProfile" : { "Ref" : "InstanceIAMProfile" },
    "SubnetId" : { "Ref" : "FrontendSubnet1" },
    "SourceDestCheck" : "false",
    "ImageId" : { "Fn::FindInMap" : [ "AWSAmazonLinuxAMI", { "Ref" : "AWS::Region" }, "hvm" ] },
    "SecurityGroupIds" : [
      { "Ref" : "DefaultSecurityGroup" }
    ],
    "Tags" : [
      {"Key" : "service", "Value" : "test" }
    ]
  }
}という風にEC2の所属するサブネットは{ "Ref" : "FrontendSubnet1" }とサブネットの変数を指定すればOKです。ですがサブネットを作ったスタックとEC2を作るスタックが分かれるとこの変数が使えません。この場合先にサブネットを作ったスタックを見て対象となるサブネットIDを確認し、EC2側のテンプレートにそのサブネットIDを書き込まないといけません。実作業上ではさすがにそれはめんどくさいので大抵はサブネットIDの部分をパラメータ化して、流し込む時に調べて埋め込む、といった作業を行います。これが1つ2つであればいいのですが通常の構築ではVPC ID、サブネットID x 6、nat用のEIP x nat数分、Internet gateway ID、default security group ID、、、とこれでもかこれでもかと出てきます。もしサーバー層を複数立てるのであればその倍、3倍地味なコピペ作業が延々と続きます。チェックも含めると大変な手間だったわけです。
Lambda-Backed Custom Resources
今回CloudFormationに新機能として加わった「Lambda-Backed Custom Resources」はそんな地味で単調なコピペ作業からあなたを開放してくれるかもしれません。この機能はCloudFormationを作成、修正、削除する際にLambdaを発火させ、その戻り値を変数として使用できる、という機能です。
ではこれを使うと上の地味地味作業がどのように変わるのでしょう。Lambdaを使うと
- VPC層のスタックをCFnで作成。OutPutに作成した各IDを出力する
- サーバー層のスタックを作成
- サーバー層に関連付けてあったLambdaが発火。VPC層のOutPutを検索して各IDを戻り値として取得
- サーバー層のスタックがLambdaの戻り値を変数として取得
- サーバー層のリソースに取得した変数を適用してサーバー層を構築する
とこのような事が可能になります。つまりあのめんどくさかったVPC IDやセキュリティグループ名のコピペが一切要らなくなるわけです。これらはコードを通して自動で行われるのでヒューマンエラーも無くなります。これは素晴らしいですね!
やってみる
では早速やってみましょう。今回は単純にこのような構成を考えてみました。

VPCの中にサブネットが2つあり、その中にEC2が一台ずつ立っている、というシンプルな構成です。通常ならこういう場合は頭にELB等をつけるのですが今回は単純化するためにこれでいきます。この構成のうち
- VPC
- サブネット
- Internet Gateway
- Security Group(VPC内疎通用)
- Security Group(SSHアクセス用)
で一つのスタック[based]として組み、
- EC2 x 2
- Security Group(HTTP疎通用)
を別のスタック[app]として組んでみたいと思います。 Lambdaは[app]側に組み込み、[based]の各IDを拾ってみたいと思います。それではまずは[based]から。
Basedを組む
{
  "AWSTemplateFormatVersion" : "2010-09-09",
  "Description" : "AWS CloudFormation Sample Template VPC_with_PublicIPs_And_DNS: Sample template that creates a VPC with DNS and public IPs enabled. Note that you are billed for the AWS resources that you use when you create a stack from this template.",
  "Parameters": {
    "Env": {
      "Description": "Choose the environment to create: 'Green', 'Blue' or 'Base'",
      "Type": "String",
      "Default" : "Base",
      "AllowedValues" : ["Green", "Blue", "Base"]
    }
  },
  "Mappings": {
    "AWSAmazonLinuxAMI": {
      "us-east-1":      { "name":"Virginia",   "201303": "ami-3275ee5b", "201309": "ami-35792c5c" },
      "us-west-2":      { "name":"Oregon",     "201303": "ami-ecbe2adc", "201309": "ami-d03ea1e0" },
      "us-west-1":      { "name":"California", "201303": "ami-66d1fc23", "201309": "ami-687b4f2d" },
      "eu-west-1":      { "name":"Ireland",    "201303": "ami-44939930", "201309": "ami-149f7863" },
      "ap-southeast-1": { "name":"Singapole",  "201303": "ami-aa9ed2f8", "201309": "ami-14f2b946" },
      "ap-southeast-2": { "name":"Sydney",     "201303": "ami-363eaf0c", "201309": "ami-a148d59b" },
      "ap-northeast-1": { "name":"Tokyo",      "201303": "ami-173fbf16", "201309": "ami-3561fe34", "201403" : "ami-a1bec3a0","hvm" : "ami-18869819" },
      "sa-east-1":      { "name":"SaoPaulo",   "201303": "ami-dd6bb0c0", "201309": "ami-9f6ec982" }
    }
  },
  "Resources" : {
    "VPC" : {
      "Type" : "AWS::EC2::VPC",
      "Properties" : {
        "EnableDnsSupport" : "true",
        "EnableDnsHostnames" : "true",
        "CidrBlock" : "10.0.0.0/16"
      }
    },
    "PublicSubnetAza" : {
      "Type" : "AWS::EC2::Subnet",
      "Properties" : {
        "VpcId" : { "Ref" : "VPC" },
        "CidrBlock" : "10.0.1.0/24"
      }
    },
    "PublicSubnetAzc" : {
      "Type" : "AWS::EC2::Subnet",
      "Properties" : {
        "VpcId" : { "Ref" : "VPC" },
        "CidrBlock" : "10.0.2.0/24"
      }
    },

    "InternetGateway" : {
      "Type" : "AWS::EC2::InternetGateway"
    },
    "VPCGatewayAttachment" : {
       "Type" : "AWS::EC2::VPCGatewayAttachment",
       "Properties" : {
         "VpcId" : { "Ref" : "VPC" },
         "InternetGatewayId" : { "Ref" : "InternetGateway" }
       }
    },
    "PublicRouteTable" : {
      "Type" : "AWS::EC2::RouteTable",
      "Properties" : {
        "VpcId" : { "Ref" : "VPC" }
      }
    },
    "PublicRoute" : {
      "Type" : "AWS::EC2::Route",
      "DependsOn" : "VPCGatewayAttachment",
      "Properties" : {
        "RouteTableId" : { "Ref" : "PublicRouteTable" },
        "DestinationCidrBlock" : "0.0.0.0/0",
        "GatewayId" : { "Ref" : "InternetGateway" }
      }
    },
    "PublicSubnetaRouteTableAssociation" : {
      "Type" : "AWS::EC2::SubnetRouteTableAssociation",
      "Properties" : {
        "SubnetId" : { "Ref" : "PublicSubnetAza" },
        "RouteTableId" : { "Ref" : "PublicRouteTable" }
      }
    },
    "PublicSubnetaNetworkAclAssociation" : {
      "Type" : "AWS::EC2::SubnetNetworkAclAssociation",
      "Properties" : {
        "SubnetId" : { "Ref" : "PublicSubnetAza" },
        "NetworkAclId" : { "Fn::GetAtt" : ["VPC", "DefaultNetworkAcl"] }
      }
    },
    "PublicSubnetcRouteTableAssociation" : {
      "Type" : "AWS::EC2::SubnetRouteTableAssociation",
      "Properties" : {
        "SubnetId" : { "Ref" : "PublicSubnetAzc" },
        "RouteTableId" : { "Ref" : "PublicRouteTable" }
      }
    },
    "PublicSubnetcNetworkAclAssociation" : {
      "Type" : "AWS::EC2::SubnetNetworkAclAssociation",
      "Properties" : {
        "SubnetId" : { "Ref" : "PublicSubnetAzc" },
        "NetworkAclId" : { "Fn::GetAtt" : ["VPC", "DefaultNetworkAcl"] }
      }
    },
    "DefaultSecurityGroup" : {
      "Type" : "AWS::EC2::SecurityGroup",
      "Properties" : {
        "VpcId" : { "Ref" : "VPC" },
        "GroupDescription" : "Allow all communications in VPC",
        "SecurityGroupIngress" : [
          { "IpProtocol" : "-1", "FromPort" : "0", "ToPort" : "65535", "CidrIp" : "0.0.0.0/0" }
        ],
        "Tags" : [
          { "Key" : "Name", "Value" : { "Fn::Join" : [ "-", [ "base", "Default", { "Ref" : "Env"} ] ] } }
        ]
      }
    },
    "CommonAdmSSHSecurityGroup" : {
      "Type" : "AWS::EC2::SecurityGroup",
      "Properties" : {
        "VpcId" : { "Ref" : "VPC" },
        "GroupDescription" : "Enable SSH access via port 22",
        "SecurityGroupIngress" : [
          { "IpProtocol" : "tcp", "FromPort" : "22", "ToPort" : "22", "CidrIp" : "0.0.0.0/0" }
        ],
        "Tags" : [
          { "Key" : "Name", "Value" : { "Fn::Join" : [ "-", [ "base", "Default", { "Ref" : "Env"} ] ] } }
        ]
      }
    }
  },
  "Outputs" : {
    "VPCId" : {
      "Description" : "VPC ID",
      "Value" :  { "Ref" : "VPC" }
    },
    "PublicSubnetAza" : {
      "Description" : "The subnet ID to use for public web servers",
      "Value" :  { "Ref" : "PublicSubnetAza" }
    },
    "PublicSubnetAzc" : {
      "Description" : "The subnet ID to use for public web servers",
      "Value" :  { "Ref" : "PublicSubnetAzc" }
    },
    "DefaultSecurityGroup" : {
      "Description" : "The security group ID to use for Resources inside VPC",
      "Value" :  { "Fn::GetAtt" : ["DefaultSecurityGroup", "GroupId"] }
    }
  }
}
OutPutにVPC、サブネットID、セキュリティグループIDをそれぞれ出力してあります。流してみるとこんなOutputが帰ってきます。

appを組む
次に[app]を組んでみます。[base]から取得してくるIDの部分はまだ空にしておきます。
{
  "AWSTemplateFormatVersion" : "2010-09-09",
  "Description" : "AWS CloudFormation Sample Template VPC_with_PublicIPs_And_DNS: Sample template that creates a VPC with DNS and public IPs enabled. Note that you are billed for the AWS resources that you use when you create a stack from this template.",
  "Parameters": {
    "Env": {
      "Description": "Choose the environment to create: 'Green', 'Blue' or 'Base'",
      "Type": "String",
      "Default" : "Green",
      "AllowedValues" : ["Green", "Blue", "Base"]
    },
     "KeyName": {
      "Description": "Name of an existing EC2 KeyPair to enable SSH access to the instances",
      "Type": "String",
      "MinLength": "1",
      "MaxLength": "64",
      "AllowedPattern": "[-_ a-zA-Z0-9]*",
      "ConstraintDescription": "can contain only alphanumeric characters, spaces, dashes and underscores."
    }
  },
  "Mappings": {
    "AWSAmazonLinuxAMI": {
      "us-east-1":      { "name":"Virginia",   "201303": "ami-3275ee5b", "201309": "ami-35792c5c", "hvm" : "ami-1ecae776" },
      "us-west-2":      { "name":"Oregon",     "201303": "ami-ecbe2adc", "201309": "ami-d03ea1e0" },
      "us-west-1":      { "name":"California", "201303": "ami-66d1fc23", "201309": "ami-687b4f2d" },
      "eu-west-1":      { "name":"Ireland",    "201303": "ami-44939930", "201309": "ami-149f7863" },
      "ap-southeast-1": { "name":"Singapole",  "201303": "ami-aa9ed2f8", "201309": "ami-14f2b946" },
      "ap-southeast-2": { "name":"Sydney",     "201303": "ami-363eaf0c", "201309": "ami-a148d59b" },
      "ap-northeast-1": { "name":"Tokyo",      "201303": "ami-173fbf16", "201309": "ami-3561fe34", "201403" : "ami-a1bec3a0","hvm" : "ami-18869819" },
      "sa-east-1":      { "name":"SaoPaulo",   "201303": "ami-dd6bb0c0", "201309": "ami-9f6ec982" }
    }
  },
  "Resources" : {
    "InstanceIAMRole" : {
      "Type" : "AWS::IAM::Role",
      "Properties" : {
        "AssumeRolePolicyDocument" : {
          "Statement" : [ {
            "Effect" : "Allow",
              "Principal" : {
                "Service" : [ "ec2.amazonaws.com" ]
              },
              "Action" : [ "sts:AssumeRole" ]
          } ]
        },
        "Path" : "/"
      }
    },
    "EC2ReadOnlyPolicy" : {
      "Type" : "AWS::IAM::Policy",
      "Properties" : {
        "PolicyName" : "EC2ReadOnly",
        "PolicyDocument" : {
          "Statement" : [
            {
              "Effect": "Allow",
              "Action": "ec2:Describe*",
              "Resource": "*"
            },
            {
              "Effect": "Allow",
              "Action": "elasticloadbalancing:Describe*",
              "Resource": "*"
            },
            {
              "Effect": "Allow",
              "Action": [
                "cloudwatch:ListMetrics",
                "cloudwatch:GetMetricStatistics",
                "cloudwatch:Describe*"
              ],
              "Resource": "*"
            },
            {
              "Effect": "Allow",
              "Action": "autoscaling:Describe*",
              "Resource": "*"
            }
          ]
        },
        "Roles" : [ { "Ref" : "InstanceIAMRole" } ]
      }
    },
    "InstanceIAMProfile" : {
      "Type" : "AWS::IAM::InstanceProfile",
      "Properties" : {
        "Path" : "/",
        "Roles" : [ { "Ref" : "InstanceIAMRole" } ]
      }
    },

    "Web01" : {
      "Type" : "AWS::EC2::Instance",
      "Properties" : {
        "InstanceType" : "t2.micro",
        "BlockDeviceMappings" : [
          {
            "DeviceName" : "/dev/xvda",
            "Ebs" : { "VolumeSize" : "8" }
          }
        ],
        "KeyName" : { "Ref" : "KeyName" },
        "IamInstanceProfile" : { "Ref" : "InstanceIAMProfile" },
        "SubnetId" : ,
        "SourceDestCheck" : "true",
        "ImageId" : { "Fn::FindInMap" : [ "AWSAmazonLinuxAMI", { "Ref" : "AWS::Region" }, "hvm" ] },
        "SecurityGroupIds" : [
          { "Ref" : "WebSecurityGroup" }
        ],
        "UserData" : { "Fn::Base64" : { "Fn::Join" : ["", [
          "#cloud-config","\n",
          "resize_rootfs: true","\n",
          "timezone: Asia/Tokyo","\n",
          "locale: ja_JP.UTF-8","\n"
        ] ] } },
        "Tags" : [
          {"Key" : "Name", "Value" : "web01" }
        ]
      }
    },
    "Web02" : {
      "Type" : "AWS::EC2::Instance",
      "Properties" : {
        "InstanceType" : "t2.micro",
        "BlockDeviceMappings" : [
          {
            "DeviceName" : "/dev/xvda",
            "Ebs" : { "VolumeSize" : "8" }
          }
        ],
        "KeyName" : { "Ref" : "KeyName" },
        "IamInstanceProfile" : { "Ref" : "InstanceIAMProfile" },
        "SubnetId" : ,
        "SourceDestCheck" : "true",
        "ImageId" : { "Fn::FindInMap" : [ "AWSAmazonLinuxAMI", { "Ref" : "AWS::Region" }, "hvm" ] },
        "SecurityGroupIds" : [
          { "Ref" : "WebSecurityGroup" }
        ],
        "UserData" : { "Fn::Base64" : { "Fn::Join" : ["", [
          "#cloud-config","\n",
          "resize_rootfs: true","\n",
          "timezone: Asia/Tokyo","\n",
          "locale: ja_JP.UTF-8","\n"
        ] ] } },
        "Tags" : [
          {"Key" : "Name", "Value" : "web02" }
        ]
      }
    },

    "WebSecurityGroup" : {
      "Type" : "AWS::EC2::SecurityGroup",
      "Properties" : {
        "VpcId" : ,
        "GroupDescription" : "Allow all communications in VPC",
        "SecurityGroupIngress" : [
          { "IpProtocol" : "-1", "FromPort" : "80", "ToPort" : "80", "CidrIp" : "0.0.0.0/0" }
        ],
        "Tags" : [
          { "Key" : "Name", "Value" : { "Fn::Join" : [ "-", [ "web", { "Ref" : "Env"} ] ] } }
        ]
      }
    }
  },
  "Outputs" : {
    "Web01id" : {
      "Description" : "Web01 ID",
      "Value" :  { "Ref" : "Web01" }
    },
    "Web02id" : {
      "Description" : "Web02 ID",
      "Value" :  { "Ref" : "Web02" }
    },
    "webSecurityGroup" : {
      "Description" : "The security group ID to use for public web servers",
      "Value" :  { "Fn::GetAtt" : ["WebSecurityGroup", "GroupId"] }
    }
  }
}
Lambdaを組む
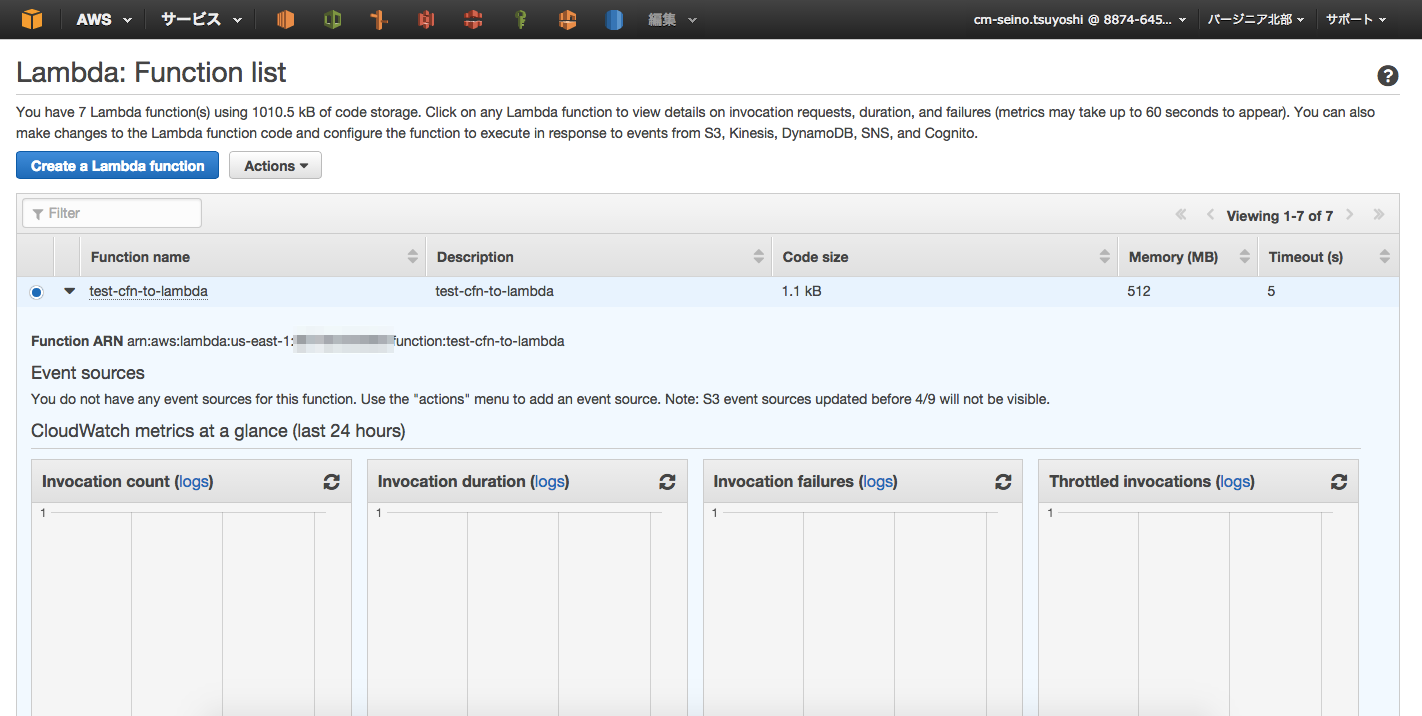
次にLambdaを組んでみます。
/**
* A sample Lambda function that takes an AWS CloudFormation stack name
* and returns the outputs from that stack.
**/

exports.handler = function(event, context) {

    console.log("REQUEST RECEIVED:\n", JSON.stringify(event));

    if (event.RequestType == "Delete") {
        sendResponse(event, context, "SUCCESS");
        return;
    }

    var stackName = event.ResourceProperties.StackName;
    var responseStatus = "FAILED";
    var responseData = {};

    // Verifies that a stack name was passed
    if (stackName) {
        var aws = require("aws-sdk");
        var cfn = new aws.CloudFormation();

        // Calls CloudFormation DescribeStacks
        cfn.describeStacks({StackName: stackName}, function(err, data) {
            if (err) {
                responseData = {Error: "DescribeStacks call failed"};
                console.log(responseData.Error + ":\n", err);
            }
            // Populates the return data with the outputs from the specified stack
            else {
                responseStatus = "SUCCESS";
                data.Stacks[0].Outputs.forEach(function(output) {
                    responseData[output.OutputKey] = output.OutputValue;
                });
            }
            sendResponse(event, context, responseStatus, responseData);
        });
    } else {
        responseData = {Error: "Stack name not specified"};
        console.log(responseData.Error);
        sendResponse(event, context, responseStatus, responseData);
    }
};

//Sends response to the pre-signed S3 URL
function sendResponse(event, context, responseStatus, responseData) {
   var responseBody = JSON.stringify({
        Status: responseStatus,
        Reason: "See the details in CloudWatch Log Stream: " + context.logStreamName,
        PhysicalResourceId: context.logStreamName,
        StackId: event.StackId,
        RequestId: event.RequestId,
        LogicalResourceId: event.LogicalResourceId,
        Data: responseData
    });

    console.log("RESPONSE BODY:\n", responseBody);

    var https = require("https");
    var url = require("url");

    var parsedUrl = url.parse(event.ResponseURL);
    var options = {
        hostname: parsedUrl.hostname,
        port: 443,
        path: parsedUrl.path,
        method: "PUT",
        headers: {
            "content-type": "",
            "content-length": responseBody.length
        }
    };

    var request = https.request(options, function(response) {
        console.log("STATUS: " + response.statusCode);
        console.log("HEADERS: " + JSON.stringify(response.headers));
        // Tell AWS Lambda that the function execution is done
        context.done();
    });

    request.on("error", function(error) {
        console.log("sendResponse Error:\n", error);
        // Tell AWS Lambda that the function execution is done
        context.done();
    });

    // write data to request body
    request.write(responseBody);
    request.end();
}
lambdaコードをざっと解説
Node.jsが得意な方はざっと読めばわかると思いますが、このコードはなんのこっちゃ、という方も多いかと思いますので簡単にざっと説明していきます。わかっている方は読み飛ばして下さい。
exports.handler = function(event, context) {

    console.log("REQUEST RECEIVED:\n", JSON.stringify(event));

    if (event.RequestType == "Delete") {
        sendResponse(event, context, "SUCCESS");
        return;
}exports.handlerがLambda Functionを書き出すハンドラとなります。ここから下がLambda Functionと思って頂いてよいかと思います。event.RequestTypeはCloudFormationからLambdaが発火された時に属性として入ってくる値の一つでCFnを「作成したのか」「修正したのか」「削除したのか」、という意味です。ここではもし削除しているのであればLambdaにてやることは特にないのでステータスに"SUCCESS"を突っ込んで送り返してしまう、ということですね。
    var stackName = event.ResourceProperties.StackName;
    var responseStatus = "FAILED";
    var responseData = {};

    // Verifies that a stack name was passed
    if (stackName) {
        var aws = require("aws-sdk");
        var cfn = new aws.CloudFormation();

        // Calls CloudFormation DescribeStacks
        cfn.describeStacks({StackName: stackName}, function(err, data) {
            if (err) {
                responseData = {Error: "DescribeStacks call failed"};
                console.log(responseData.Error + ":\n", err);
            }
            // Populates the return data with the outputs from the specified stack
            else {
                responseStatus = "SUCCESS";
                data.Stacks[0].Outputs.forEach(function(output) {
                    responseData[output.OutputKey] = output.OutputValue;
                });
            }
            sendResponse(event, context, responseStatus, responseData);
        });
    } else {
        responseData = {Error: "Stack name not specified"};
        console.log(responseData.Error);
        sendResponse(event, context, responseStatus, responseData);
    }
};event.ResourcePropertiesというのはevent、つまりCloudFormationのリソースにて設定されたプロパティ値、という事です。後述しますがここの「StackName」というプロパティに[Based]のStackNameが入ります。ここではその値を取り出しています。 次にCloudFormationのオブジェクトを作成してStackName、つまり今回でいう[Based]のスタックを検索しています。ここでエラーになった場合は。結果のデータにエラー内容を詰めてそのまま下のsendResponse(event, context, responseStatus, responseData);で戻り値を返します。この時ステータスは上の方でデフォルトとして設定している"FAILED"が返ります。成功の場合はresponseDataにOUTPUTのキーと値を詰めて返します。例えばキーに[VPCId]、値に[vpc-6eddfe0b]というような組み合わせをforEachによってキー分回して取得しています。 if (stackName) {というのはstackNameの値があれば、という意味で何らかのエラーによりstackNameが取れなかった場合を考慮してエラーハンドリングしています。
//Sends response to the pre-signed S3 URL
function sendResponse(event, context, responseStatus, responseData) {
   var responseBody = JSON.stringify({
        Status: responseStatus,
        Reason: "See the details in CloudWatch Log Stream: " + context.logStreamName,
        PhysicalResourceId: context.logStreamName,
        StackId: event.StackId,
        RequestId: event.RequestId,
        LogicalResourceId: event.LogicalResourceId,
        Data: responseData
    });

    console.log("RESPONSE BODY:\n", responseBody);

    var https = require("https");
    var url = require("url");

    var parsedUrl = url.parse(event.ResponseURL);
    var options = {
        hostname: parsedUrl.hostname,
        port: 443,
        path: parsedUrl.path,
        method: "PUT",
        headers: {
            "content-type": "",
            "content-length": responseBody.length
        }
    };

    var request = https.request(options, function(response) {
        console.log("STATUS: " + response.statusCode);
        console.log("HEADERS: " + JSON.stringify(response.headers));
        // Tell AWS Lambda that the function execution is done
        context.done();
    });

    request.on("error", function(error) {
        console.log("sendResponse Error:\n", error);
        // Tell AWS Lambda that the function execution is done
        context.done();
    });

    // write data to request body
    request.write(responseBody);
    request.end();
}ここは上の関数で処理をした後に戻り値を返す部分の中身です。CloudFormationからLambdaを呼ばれた時点でLambdaのeventソースの中にはCloudFormationのカスタムリソースから送信されるデータが入っています。Lambdaの役目としてはこの中の[ResponseURL]に対してLambdaの一連の処理から取得しているデータをJSON形式で送っておく、と言うものになります。[ResponseURL]にはcustom resource providerから AWS CloudFormation への応答を受信した署名済み Amazon S3 バケットが入ります。署名済みURLとなりますので外からはこのデータの中身は見えません。
データ[responseData]を含む必要な情報を[responseBody]に詰めてJSON化したらresponseURLに向けてPUTします(responseURLはS3バケットを指しているのでhttpsでPUT処理となります)。ここまでできたらrequestオブジェクトに詰め込んで流すのみです。
Lambda Roleの設定
Lambdaに対してIAM Roleを設定します。今回はCloudFormationの内容を参照するのでそれに必要な権限とCloudWatch Logsにログを吐くための権限をLambdaに対して設定します。
{
  "Version": "2012-10-17",
  "Statement": [
    {
      "Effect": "Allow",
      "Action": [
        "logs:*"
      ],
      "Resource": "arn:aws:logs:*:*:*"
    },
    {
      "Effect": "Allow",
      "Action": [
        "cloudformation:DescribeStacks"
      ],
      "Resource": "*"
    }
  ]
}
Lambdaの発火はCloudFormationのカスタムリソースにて設定するのでLambdaの画面での設定はこれで完了となります。
カスタムリソース作成
作ったLambda Functionを呼び出すためのカスタムリソースを作成します。Lambdaのレスポンスは[Custom::NetworkInfo]の[ServiceToken]プロパティにLambdaのARNをセットすることで呼び出せます。
"NetworkInfo": {
  "Type": "Custom::NetworkInfo",
  "Properties": {
    "ServiceToken": { "Fn::Join": [ "", [ "arn:aws:lambda:", { "Ref": "AWS::Region" }, ":", { "Ref": "AWS::AccountId" }, ":function:", {"Ref" : "LambdaFunctionName"} ] ] },
    "StackName": {
      "Ref": "NetworkStackName"
    }
  }
}
今回は[based]のstacknameを[NetworkStackName]、Lambda Function名を[LambdaFunctionName]としてパラメータに外出ししています。またARNを色々なAWSリソースを組み合わせてセットしていますが、もちろん文字列でベタッとコピペしても構いません。
そして作成したカスタムリソースは[Data]というプロパティとリンクします。Lambda Functionにて[Data]にはLambdaの[responseData]をセットしました。Lambda Functionにて[responseData]をresponseData[output.OutputKey] = output.OutputValue;とセットしたのでカスタムリソースは"Data": { [Outputのキー] : [Outputのバリュー] }という形で取り出せます。つまり{ "Fn::GetAtt": [ "NetworkInfo", "VPCId" ] }は[vpc-6eddfe0b]と取れることになります。
これらを含めて上の[app]を書き換えてみましょう。
{
  "AWSTemplateFormatVersion" : "2010-09-09",
  "Description" : "AWS CloudFormation Sample Template VPC_with_PublicIPs_And_DNS: Sample template that creates a VPC with DNS and public IPs enabled. Note that you are billed for the AWS resources that you use when you create a stack from this template.",
  "Parameters": {
    "Env": {
      "Description": "Choose the environment to create: 'Green', 'Blue' or 'Base'",
      "Type": "String",
      "Default" : "Green",
      "AllowedValues" : ["Green", "Blue", "Base"]
    },
     "KeyName": {
      "Description": "Name of an existing EC2 KeyPair to enable SSH access to the instances",
      "Type": "String",
      "MinLength": "1",
      "MaxLength": "64",
      "AllowedPattern": "[-_ a-zA-Z0-9]*",
      "ConstraintDescription": "can contain only alphanumeric characters, spaces, dashes and underscores."
    },
    "NetworkStackName": {
      "Description": "Name of an active CloudFormation stack that contains the networking resources, such as a subnet or security group, that will be used in this stack.",
      "Type": "String",
      "MinLength" : 1,
      "MaxLength" : 255,
      "AllowedPattern" : "^[a-zA-Z][-a-zA-Z0-9]*$",
      "Default" : "test-based"
    },
    "LambdaFunctionName": {
      "Description": "Name of the Lambda function.",
      "Type": "String",
      "MinLength" : 1,
      "MaxLength" : 255,
      "AllowedPattern" : "^[a-zA-Z][-a-zA-Z0-9]*$",
      "Default" : "test-cfn-to-lambda"
    }
  },
  "Mappings": {
    "AWSAmazonLinuxAMI": {
      "us-east-1":      { "name":"Virginia",   "201303": "ami-3275ee5b", "201309": "ami-35792c5c", "hvm" : "ami-1ecae776" },
      "us-west-2":      { "name":"Oregon",     "201303": "ami-ecbe2adc", "201309": "ami-d03ea1e0" },
      "us-west-1":      { "name":"California", "201303": "ami-66d1fc23", "201309": "ami-687b4f2d" },
      "eu-west-1":      { "name":"Ireland",    "201303": "ami-44939930", "201309": "ami-149f7863" },
      "ap-southeast-1": { "name":"Singapole",  "201303": "ami-aa9ed2f8", "201309": "ami-14f2b946" },
      "ap-southeast-2": { "name":"Sydney",     "201303": "ami-363eaf0c", "201309": "ami-a148d59b" },
      "ap-northeast-1": { "name":"Tokyo",      "201303": "ami-173fbf16", "201309": "ami-3561fe34", "201403" : "ami-a1bec3a0","hvm" : "ami-18869819" },
      "sa-east-1":      { "name":"SaoPaulo",   "201303": "ami-dd6bb0c0", "201309": "ami-9f6ec982" }
    }
  },
  "Resources" : {
    "InstanceIAMRole" : {
      "Type" : "AWS::IAM::Role",
      "Properties" : {
        "AssumeRolePolicyDocument" : {
          "Statement" : [ {
            "Effect" : "Allow",
              "Principal" : {
                "Service" : [ "ec2.amazonaws.com" ]
              },
              "Action" : [ "sts:AssumeRole" ]
          } ]
        },
        "Path" : "/"
      }
    },
    "EC2ReadOnlyPolicy" : {
      "Type" : "AWS::IAM::Policy",
      "Properties" : {
        "PolicyName" : "EC2ReadOnly",
        "PolicyDocument" : {
          "Statement" : [
            {
              "Effect": "Allow",
              "Action": "ec2:Describe*",
              "Resource": "*"
            },
            {
              "Effect": "Allow",
              "Action": "elasticloadbalancing:Describe*",
              "Resource": "*"
            },
            {
              "Effect": "Allow",
              "Action": [
                "cloudwatch:ListMetrics",
                "cloudwatch:GetMetricStatistics",
                "cloudwatch:Describe*"
              ],
              "Resource": "*"
            },
            {
              "Effect": "Allow",
              "Action": "autoscaling:Describe*",
              "Resource": "*"
            }
          ]
        },
        "Roles" : [ { "Ref" : "InstanceIAMRole" } ]
      }
    },
    "InstanceIAMProfile" : {
      "Type" : "AWS::IAM::InstanceProfile",
      "Properties" : {
        "Path" : "/",
        "Roles" : [ { "Ref" : "InstanceIAMRole" } ]
      }
    },

    "Web01" : {
      "Type" : "AWS::EC2::Instance",
      "Properties" : {
        "InstanceType" : "t2.micro",
        "BlockDeviceMappings" : [
          {
            "DeviceName" : "/dev/xvda",
            "Ebs" : { "VolumeSize" : "8" }
          }
        ],
        "KeyName" : { "Ref" : "KeyName" },
        "IamInstanceProfile" : { "Ref" : "InstanceIAMProfile" },
        "SubnetId" : { "Fn::GetAtt": [ "NetworkInfo", "PublicSubnetAza" ] },
        "SourceDestCheck" : "true",
        "ImageId" : { "Fn::FindInMap" : [ "AWSAmazonLinuxAMI", { "Ref" : "AWS::Region" }, "hvm" ] },
        "SecurityGroupIds" : [
          { "Ref" : "WebSecurityGroup" },
          { "Fn::GetAtt": [ "NetworkInfo", "DefaultSecurityGroup" ] }
        ],
        "UserData" : { "Fn::Base64" : { "Fn::Join" : ["", [
          "#cloud-config","\n",
          "resize_rootfs: true","\n",
          "timezone: Asia/Tokyo","\n",
          "locale: ja_JP.UTF-8","\n"
        ] ] } },
        "Tags" : [
          {"Key" : "Name", "Value" : "web01" }
        ]
      }
    },
    "Web02" : {
      "Type" : "AWS::EC2::Instance",
      "Properties" : {
        "InstanceType" : "t2.micro",
        "BlockDeviceMappings" : [
          {
            "DeviceName" : "/dev/xvda",
            "Ebs" : { "VolumeSize" : "8" }
          }
        ],
        "KeyName" : { "Ref" : "KeyName" },
        "IamInstanceProfile" : { "Ref" : "InstanceIAMProfile" },
        "SubnetId" : { "Fn::GetAtt": [ "NetworkInfo", "PublicSubnetAzc" ] },
        "SourceDestCheck" : "true",
        "ImageId" : { "Fn::FindInMap" : [ "AWSAmazonLinuxAMI", { "Ref" : "AWS::Region" }, "hvm" ] },
        "SecurityGroupIds" : [
          { "Ref" : "WebSecurityGroup" },
          { "Fn::GetAtt": [ "NetworkInfo", "DefaultSecurityGroup" ] }
        ],
        "UserData" : { "Fn::Base64" : { "Fn::Join" : ["", [
          "#cloud-config","\n",
          "resize_rootfs: true","\n",
          "timezone: Asia/Tokyo","\n",
          "locale: ja_JP.UTF-8","\n"
        ] ] } },
        "Tags" : [
          {"Key" : "Name", "Value" : "web02" }
        ]
      }
    },

    "WebSecurityGroup" : {
      "Type" : "AWS::EC2::SecurityGroup",
      "Properties" : {
        "VpcId" : { "Fn::GetAtt": [ "NetworkInfo", "VPCId" ] },
        "GroupDescription" : "Allow all communications in VPC",
        "SecurityGroupIngress" : [
          { "IpProtocol" : "-1", "FromPort" : "80", "ToPort" : "80", "CidrIp" : "0.0.0.0/0" }
        ],
        "Tags" : [
          { "Key" : "Name", "Value" : { "Fn::Join" : [ "-", [ "web", { "Ref" : "Env"} ] ] } }
        ]
      }
    },
    "NetworkInfo": {
  "Type": "Custom::NetworkInfo",
  "Properties": {
    "ServiceToken": { "Fn::Join": [ "", [ "arn:aws:lambda:", { "Ref": "AWS::Region" }, ":", { "Ref": "AWS::AccountId" }, ":function:", {"Ref" : "LambdaFunctionName"} ] ] },
    "StackName": {
      "Ref": "NetworkStackName"
    }
  }
}
  },
  "Outputs" : {
    "Web01id" : {
      "Description" : "Web01 ID",
      "Value" :  { "Ref" : "Web01" }
    },
    "Web02id" : {
      "Description" : "Web02 ID",
      "Value" :  { "Ref" : "Web02" }
    },
    "webSecurityGroup" : {
      "Description" : "WebSecurityGroup ID",
      "Value" :  { "Fn::GetAtt" : ["WebSecurityGroup", "GroupId"] }
    }
  }
}
ではこれを流してみましょう。結果はこうなりました。

上手くいったでしょうか。EC2を見てみると

サブネットIDもセキュリティグループも綺麗に入っていますね。CloudWatch Logsを見てみましょう。

Lambdaが動いて[based]のOutputを取得している事が確認できます。
まとめ
いかがでしょうか。Lambdaを使ったカスタムリソースを上手く使うことで多層スタックを柔軟に操作することが出来ます。プログラムで言う「疎結合」というやつですね。Blue-Green Deploymentにてスタックを構築する際には是非参考になさって下さい。
 5
5


