はじめまして、Nginx
この記事は公開されてから1年以上経過しています。情報が古い可能性がありますので、ご注意ください。
Nginxとは
Nginx(エンジンエックスと読む)は、軽量&高速に動くWebサーバーです。世界第3位の利用者数となっています。1位がApacheで2位がIISですから新興勢力の最有力とでもいいましょうか。今回はセットアップから動作確認までをご紹介します。
インストールは簡単。brewで1コマンドです。yumなどの他の管理ツールでも容易にインストール可能です。
brew install nginx
起動用に設定ファイルを編集する
Apacheでいうところのhttpd.confのように、Nginxではnginx.confを編集します。
vi /usr/local/etc/nginx/nginx.conf
中身はこんな感じ。明快です。起動するポートを設定するために、httpブロックのserverブロックのlistenを設定してください。80とか8080は他のWebサーバーやアプリケーションサーバーが占有している可能性があるので被らないように8088にしてみました。
#user  nobody;
worker_processes  1;

#error_log  logs/error.log;
#error_log  logs/error.log  notice;
#error_log  logs/error.log  info;

#pid        logs/nginx.pid;


events {
    worker_connections  1024;
}


http {
    include       mime.types;
    default_type  application/octet-stream;

    #log_format  main  '$remote_addr - $remote_user [$time_local] "$request" '
    #                  '$status $body_bytes_sent "$http_referer" '
    #                  '"$http_user_agent" "$http_x_forwarded_for"';

    #access_log  logs/access.log  main;

    sendfile        on;
    #tcp_nopush     on;

    #keepalive_timeout  0;
    keepalive_timeout  65;

    #gzip  on;

    server {
        listen       8088;
        server_name  localhost;

        #charset koi8-r;

        #access_log  logs/host.access.log  main;

        location / {
            root   html;
            index  index.html index.htm;
        }

        #error_page  404              /404.html;

        # redirect server error pages to the static page /50x.html
        #
        error_page   500 502 503 504  /50x.html;
        location = /50x.html {
            root   html;
        }

        # proxy the PHP scripts to Apache listening on 127.0.0.1:80
        #
        #location ~ \.php$ {
        #    proxy_pass   http://127.0.0.1;
        #}

        # pass the PHP scripts to FastCGI server listening on 127.0.0.1:9000
        #
        #location ~ \.php$ {
        #    root           html;
        #    fastcgi_pass   127.0.0.1:9000;
        #    fastcgi_index  index.php;
        #    fastcgi_param  SCRIPT_FILENAME  /scripts$fastcgi_script_name;
        #    include        fastcgi_params;
        #}

        # deny access to .htaccess files, if Apache's document root
        # concurs with nginx's one
        #
        #location ~ /\.ht {
        #    deny  all;
        #}
    }


    # another virtual host using mix of IP-, name-, and port-based configuration
    #
    #server {
    #    listen       8000;
    #    listen       somename:8080;
    #    server_name  somename  alias  another.alias;

    #    location / {
    #        root   html;
    #        index  index.html index.htm;
    #    }
    #}


    # HTTPS server
    #
    #server {
    #    listen       443;
    #    server_name  localhost;

    #    ssl                  on;
    #    ssl_certificate      cert.pem;
    #    ssl_certificate_key  cert.key;

    #    ssl_session_timeout  5m;

    #    ssl_protocols  SSLv2 SSLv3 TLSv1;
    #    ssl_ciphers  HIGH:!aNULL:!MD5;
    #    ssl_prefer_server_ciphers   on;

    #    location / {
    #        root   html;
    #        index  index.html index.htm;
    #    }
    #}

}
Nginx起動と動作確認
nginxコマンドで起動します。
/usr/local/Cellar/nginx/1.0.6/sbin/nginx
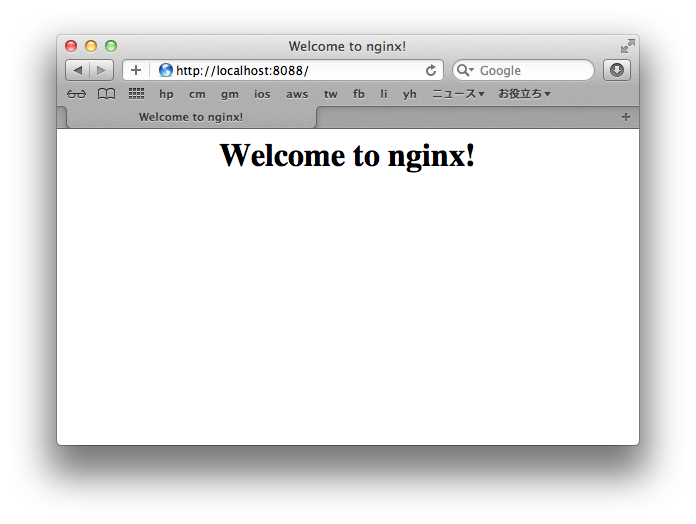
ブラウザでhttp://localhost:8088/と指定すれば以下のように表示されます。
まとめ
高速&軽量ということで、とりあえず試してみました。次回以降は、リバースプロキシとか、コンテンツキャッシュや圧縮など特徴的な機能を試してみたいと思います。Nginxを活用してインスタンス料金を押さえましょう!


