![[iOS] 常に並び替え可能なテーブルビューを作る方法](https://devio2023-media.developers.io/wp-content/uploads/2015/12/ios.png)
[iOS] 常に並び替え可能なテーブルビューを作る方法
この記事は公開されてから1年以上経過しています。情報が古い可能性がありますので、ご注意ください。
常に並び替え可能
iOS でテーブルビューの並び替えをする場合は、セルの右側にある 3 本ラインをドラッグ&ドロップして行うというのが一般的です。
しかしこの 3 本ラインのアイコンは UITableView の editing プロパティを YES にしなければ出現しません。
ですが editing プロパティを YES にすると、テーブルビュー全体にインデントがかかってしまいます。
今回ご紹介するものはインデントは付けたくないんだけど 3 本ラインは表示したいという時に使える小ネタです。
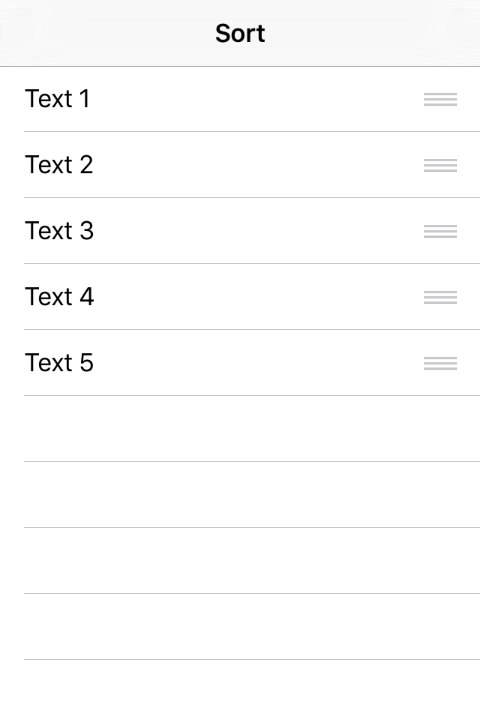
こんな画面を作ります
サンプルコード
- (void)viewDidLoad
{
    [super viewDidLoad];

    self.tableView.editing = YES;
}

- (BOOL)tableView:(UITableView *)tableView canEditRowAtIndexPath:(NSIndexPath *)indexPath
{
    return YES;
}

- (void)tableView:(UITableView *)tableView moveRowAtIndexPath:(NSIndexPath *)fromIndexPath toIndexPath:(NSIndexPath *)toIndexPath
{
    // セルがドロップされた時の処理
}

- (BOOL)tableView:(UITableView *)tableView canMoveRowAtIndexPath:(NSIndexPath *)indexPath
{
    return YES;
}

- (UITableViewCellEditingStyle)tableView:(UITableView *)tableView editingStyleForRowAtIndexPath:(NSIndexPath *)indexPath
{
    return UITableViewCellEditingStyleNone;
}

- (BOOL)tableView:(UITableView *)tableview shouldIndentWhileEditingRowAtIndexPath:(NSIndexPath *)indexPath
{
    return NO;
}
それぞれ解説します。
まず前提条件として、この画面はセルの並び替えのみ行うものと想定します。
その他の複雑な処理を行いたい場合については、今は考えません。
- viewDidLoad
- (void)viewDidLoad
{
    [super viewDidLoad];

    self.tableView.editing = YES;
}
ここでは tableView の editing を YES にしています。
これでこの tableView は編集モードになります。
この画面において、editing を NO にするタイミングはありません。
- tableView:canEditRowAtIndexPath:
- (BOOL)tableView:(UITableView *)tableView canEditRowAtIndexPath:(NSIndexPath *)indexPath
{
    return YES;
}
与えられた row が編集可能かどうかを指定します。
全てのセルで編集可能にしたいため YES にします。
- tableView:moveRowAtIndexPath:toIndexPath:
- (void)tableView:(UITableView *)tableView moveRowAtIndexPath:(NSIndexPath *)fromIndexPath toIndexPath:(NSIndexPath *)toIndexPath
{
    // セルがドロップされた時の処理
}
row が動いた時に呼ばれるメソッドです。
この時に行いたい処理は自前で実装します。
- tableView:canMoveRowAtIndexPath:
- (BOOL)tableView:(UITableView *)tableView canMoveRowAtIndexPath:(NSIndexPath *)indexPath
{
    return YES;
}
row が移動可能かどうかを指定します。
全て移動可能にするので YES を指定します。
- tableView:editingStyleForRowAtIndexPath:
- (UITableViewCellEditingStyle)tableView:(UITableView *)tableView editingStyleForRowAtIndexPath:(NSIndexPath *)indexPath
{
    return UITableViewCellEditingStyleNone;
}
編集のスタイルを指定します。
ここでは UITableViewCellEditingStyleNone を指定します。
この他に以下のスタイルが存在します。
- UITableViewCellEditingStyleDelete
- 削除スタイル
- 赤丸に -(マイナス)
- UITableViewCellEditingStyleInsert
- 挿入スタイル
- 緑丸に +(プラス)
- tableView:shouldIndentWhileEditingRowAtIndexPath:
- (BOOL)tableView:(UITableView *)tableview shouldIndentWhileEditingRowAtIndexPath:(NSIndexPath *)indexPath
{
    return NO;
}
編集モード時にインデントを付けるかどうかを指定します。
ここでは NO を指定します。
ポイント
ポイントとなるメソッドは以下の 2 つです。
- tableView:editingStyleForRowAtIndexPath:
- tableView:shouldIndentWhileEditingRowAtIndexPath:
これらをそれぞれ上記の設定にすることで、期待する画面が作成できます。
どちらかが欠けてもダメなので気をつけましょう。
ミレニアム・ファルコン製作日記 #16
16 号 表紙

パーツ


成果

今回の作業は以下の 2 つでした。
- 通路アーチを組み立てる
- 通路を組み立てる
通路アーチを組み立てはなかなかハードでした。
18 個のクッションパッドをニッパーで切り離し、この細かいパーツそれぞれに接着剤を付けアーチに貼り付けました。
この作業を x3 回です。
フォース使いすぎた。
ただ、ミレニアム・ファルコンの平面図を見る限り、このアーチはあと 10 個以上組み立てそうなんですよね。
・・・イヤな予感がするぜ!
おまけ
こちらは妻の友人が、私の息子のために編んでくれた BB-8 の人形です。(完全ハンドメイド)
スゴすぎる!!!

それではまた次回。
May the Force be with you!