![[iOS] Fabric 入門 #2 Twitter のタイムラインを表示する](https://devio2023-media.developers.io/wp-content/uploads/2015/01/fabric.png)
[iOS] Fabric 入門 #2 Twitter のタイムラインを表示する
この記事は公開されてから1年以上経過しています。情報が古い可能性がありますので、ご注意ください。
Twitter のタイムラインを表示する
前回は Fabric のアカウント登録と Twitter のログインまで試してみました。Twitter Kit の良いところは、Twitter API が使いやすいほかにツイート表示用の View も提供してくれているところが挙げられます。Twitter はツイートの表示方法について割と厳しい規約を設けており、Twitter クライアントを作成するときには準拠させる必要があります。Twitter Kit の TWTRTweetView を利用することで、Twitter の規約に則ったツイートの表示を簡単に実装できます。
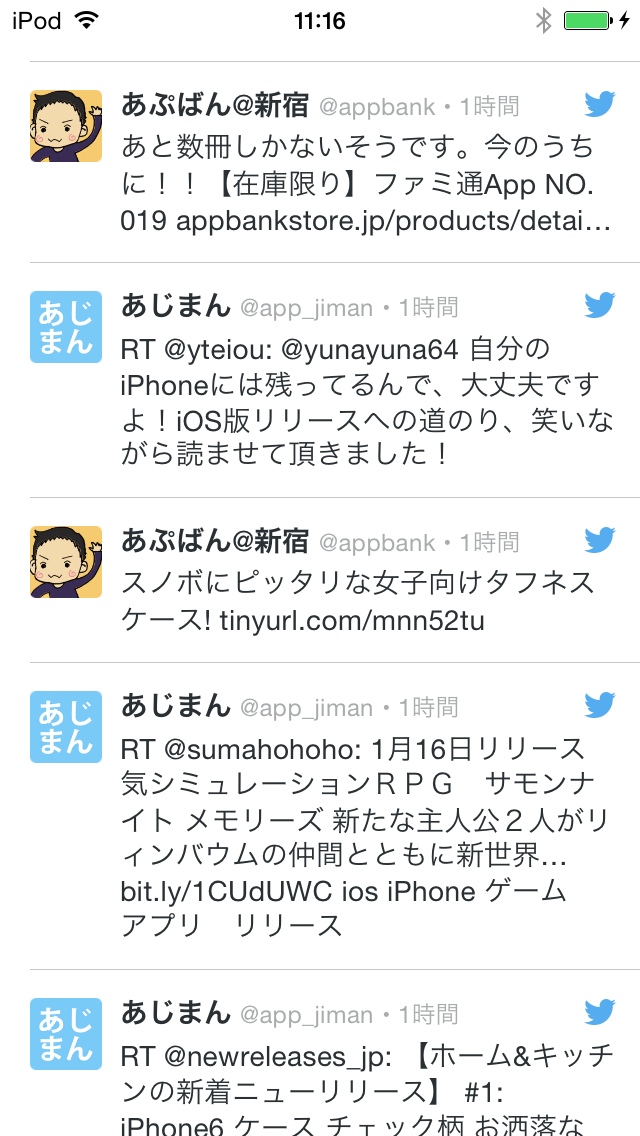
今回は Twitter のタイムライン取得 API をコールし、結果を TWTRTweetView を UITableView で表示するために用意されている TWTRTweetTableViewCell を使って、ツイートを表示するところまでやってみたいと思います。
2015/11/23 UITableView と iOS 9 (ATS) に関する注意点と、ソースコードを最新の推奨仕様に修正しました。
タイムラインを取得する
ということで、前回のコードのログイン処理の後にタイムラインを取得する処理を追加してみましょう。
なお、今回は UITableView クラスを使用しますので、予め Storyboard に UITableView を配置し、IBOutlet により ViewController で使用出来る状態にしておく必要があります。
#import "ViewController.h"
#import <TwitterKit/TwitterKit.h>

@interface ViewController () <UITableViewDataSource, UITableViewDelegate>

@property (weak, nonatomic) TWTRLogInButton *logInButton;
@property (weak, nonatomic) IBOutlet UITableView *tableView;
@property (strong, nonatomic) NSArray *tweets;

@end

@implementation ViewController

- (void)viewDidLoad {
    [super viewDidLoad];

    // UITableViewの設定
    [self.tableView registerClass:[TWTRTweetTableViewCell class] forCellReuseIdentifier:@"Cell"];
    self.tableView.hidden = YES;
    self.tableView.dataSource = self;
    self.tableView.delegate = self;

    // TWTRLogInButtonの設定
    TWTRLogInButton *logInButton = [TWTRLogInButton buttonWithLogInCompletion:^(TWTRSession *session, NSError *error) {
        if (error) {
            NSLog(@"Error : %@", error);
        } else {
            NSLog(@"UserName : %@", session.userName);
            self.logInButton.hidden = YES;
            self.tableView.hidden = NO;
            [self loadTweets:session.userID];
        }
    }];
    logInButton.center = self.view.center;
    self.logInButton = logInButton;
    [self.view addSubview:logInButton];
}

- (void)loadTweets:(NSString *)userId
{
    // タイムラインを取得
    NSString *endpoint = @"https://api.twitter.com/1.1/statuses/home_timeline.json";
    NSDictionary *parameters = @{};
    NSError *error = nil;
    TWTRAPIClient *client = [[TWTRAPIClient alloc] initWithUserID:userId];
    NSURLRequest *request = [client URLRequestWithMethod:@"GET"
                                                     URL:endpoint
                                              parameters:parameters
                                                   error:&error];
    if (error) {
        NSLog(@"Error: %@", error);
        return;
    }
    __weak typeof(self) weakSelf = self;
    [client sendTwitterRequest:request
                    completion:^(NSURLResponse *response, NSData *data, NSError *connectionError) {
                        if (connectionError) {
                            NSLog(@"Error: %@", error);
                            return;
                        }
                        NSError *jsonError = nil;
                        id jsonData = [NSJSONSerialization JSONObjectWithData:data
                                                                      options:NSJSONReadingMutableContainers
                                                                        error:&jsonError];
                        if (jsonError) {
                            NSLog(@"Error: %@", jsonError);
                            return;
                        }
                        weakSelf.tweets = [TWTRTweet tweetsWithJSONArray:jsonData];
                        [weakSelf.tableView reloadData];
                    }];
}

#pragma mark - UITableView

- (NSInteger)tableView:(UITableView *)tableView numberOfRowsInSection:(NSInteger)section {
    return [self.tweets count];
}

- (UITableViewCell *)tableView:(UITableView *)tableView cellForRowAtIndexPath:(NSIndexPath *)indexPath {
    TWTRTweetTableViewCell *cell = [self.tableView dequeueReusableCellWithIdentifier:@"Cell" forIndexPath:indexPath];
    [cell configureWithTweet:self.tweets[indexPath.row]];
    return cell;
}

- (CGFloat)tableView:(UITableView *)tableView heightForRowAtIndexPath:(NSIndexPath *)indexPath {
    return [TWTRTweetTableViewCell heightForTweet:self.tweets[indexPath.row] width:self.tableView.bounds.size.width];
}
Twitter API のリクエストには TWTRAPIClient インスタンスを使います。URLRequestWithMethod:URL:parameters:error: メソッドを呼ぶと、NSURLRequest を生成できます。この NSURLRequest インスタンスを使って、sendTwitterRequest:completion: で実際にリクエストを実行します。
レスポンスの NSData を NSJSONSerialization を使って JSONObject に変換したあと、TWTRTweet の tweetsWithJSONArray を呼ぶだけで TWTRTweet インスタンスにパースしてくれます。あとはこれをデータソースにすればOKです。
実行してみよう
以上で実装完了です!アプリを実行し、Twitter にログイン後、タイムラインが表示されるはずです。
まとめ
非常にシンプルなコードで Twitter のタイムラインを実装することができました。Twitter Kit の登場によって、Twitter クライアントアプリを実装するハードルがかなり低くなっているのではないでしょうか? ぜひ試してみてください!
参考
iOS 9 で実行する場合の注意点
TwitterKit を利用したネットワーク通信は、一部で HTTP 通信を利用しています。そのため、 ATS (App Transport Security) がデフォルトで有効となる iOS 9 SDK でビルドすると画像などが取得できない場合があります。その場合、次のようなエラーログがコンソールに表示されます。
2015-11-23 13:58:34.898 TwitterSample[29627:637914] NSURLSession/NSURLConnection HTTP load failed (kCFStreamErrorDomainSSL, -9802)
このような時は Info.plist で ATS を無効にするか Twitter のエンドポイントを除外する設定を行いましょう。以下は ATS を無効にする設定です。

なおエンドポイント指定の場合は api.twitter.com を指定します。
<key>NSAppTransportSecurity</key>
<dict>
    <key>NSAllowsArbitraryLoads</key>
    <true/>
    <key>NSExceptionDomains</key>
    <dict>
        <key>api.twitter.com</key>
        <dict>
            <key>NSExceptionRequiresForwardSecrecy</key>
            <false/>
        </dict>
    </dict>
</dict>
ATS に関するより詳細な情報は、以下を参照してください。