![[iOS 8] PhotoKit 11 – Photo Editing Extensionの実装 (後篇)](https://devio2023-media.developers.io/wp-content/uploads/2014/11/ios8.png)
[iOS 8] PhotoKit 11 – Photo Editing Extensionの実装 (後篇)
この記事は公開されてから1年以上経過しています。情報が古い可能性がありますので、ご注意ください。
はじめに
前回の記事に引き続き、Photo Editing Extensionの実装を進めていきます。
実装
PhotoEditingViewControllerクラスについて
Photo Editing Extensionのターゲット作成時に追加された「PhotoEditingViewController」クラスを実装していきます。
PhotoEditingViewControllerクラスは「PHContentEditingControllerプロトコル」に適合したUIViewControllerのサブクラスです。 Photo Editing Extension作成の残りの作業は、PHContentEditingControllerプロトコルで定義されているメソッド・プロパティを実装することです。
PhotoEditingViewControllerには元からPHContentEditingControllerプロトコルのメソッドが追加されているので、それらのメソッドの中身を追加していきます。
#pragma mark - PHContentEditingController

- (BOOL)canHandleAdjustmentData:(PHAdjustmentData *)adjustmentData {
    //
    return NO;
}

- (void)startContentEditingWithInput:(PHContentEditingInput *)contentEditingInput placeholderImage:(UIImage *)placeholderImage {
    //
}

- (void)finishContentEditingWithCompletionHandler:(void (^)(PHContentEditingOutput *))completionHandler {
    //
    dispatch_async(dispatch_get_global_queue(DISPATCH_QUEUE_PRIORITY_DEFAULT, 0), ^{
        //
    });
}

- (BOOL)shouldShowCancelConfirmation {
    //
    return NO;
}

- (void)cancelContentEditing {
    //
}
定数、プロパティの追加
編集データのフォーマット情報用の定数を「#import」文の下に追加します。
static NSString * const AdjustmentFormatIdentifier = @"com.example.PhotosEditSampleApp";
static NSString * const FormatVersion = @"1.0";
前回の作業で追加した「segmentedControl」プロパティの下に、以下の4つのプロパティを追加します。
/**
 *  選択中のフィルタの名
 */
@property (copy, nonatomic) NSString *selectedFilterName;

/**
 *  最初に選択されていたフィルタ名
 */
@property (copy, nonatomic) NSString *initialFilterName;

/**
 *  CIContext
 */
@property (strong, nonatomic) CIContext *ciContext;

/**
 *  フィルタ名格納用のNSArray
 */
@property (copy, nonatomic) NSArray *filterNames;
「viewDidLoad」メソッドを修正
以下のようにviewDidLoadメソッドにコードを追加します。filterNamesプロパティにフィルタの名前を格納しておきます。
- (void)viewDidLoad
{
    [super viewDidLoad];

    // ここから下を追加
    self.ciContext = [CIContext contextWithOptions:nil];
    self.filterNames = @[@"CISepiaTone", @"CIPhotoEffectChrome", @"CIPhotoEffectInstant"];
    self.imageView.contentMode = UIViewContentModeScaleAspectFit;
    self.imageView.clipsToBounds = YES;
}
「canHandleAdjustmentData」メソッドの実装
「canHandleAdjustmentData」メソッドは写真に対する以前の編集を続行できるかどうかを判断する必要がある時によばれます。
このメソッドでYESを返却した場合は、編集用のオリジナルデータが提供され、以前行なった編集を再現したり、加工を加えたりすることができます。 NOを返した場合は、レンダリング済みのデータが提供されます。
- (BOOL)canHandleAdjustmentData:(PHAdjustmentData *)adjustmentData
{
    return [adjustmentData.formatIdentifier isEqualToString:AdjustmentFormatIdentifier] && [adjustmentData.formatVersion isEqualToString:FormatVersion];
}
「startContentEditingWithInput:placeholderImage:」メソッドの実装
このメソッドは編集用のデータが利用可能になったタイミングで呼ばれます。
- (void)startContentEditingWithInput:(PHContentEditingInput *)contentEditingInput placeholderImage:(UIImage *)placeholderImage
{
    // imageViewへの画像をセットする
    self.input = contentEditingInput;
    self.imageView.image = self.input.displaySizeImage;


    // 選択済のフィルタ名を復元する
    NSString *filterName;
    @try {
        PHAdjustmentData *adjustmentData = contentEditingInput.adjustmentData;
        if (adjustmentData) {
            filterName = [NSKeyedUnarchiver unarchiveObjectWithData:adjustmentData.data];
        }
    }
    @catch (NSException *exception) {
        NSLog(@"Exception decoding adjustment data: %@", exception);
    }
    if (!filterName) {
        // filterNameが取り出せない場合(初めての編集の場合)は、デフォルトのフィルタ名を設定する
        self.selectedFilterName = self.filterNames[0];
    } else {
        self.selectedFilterName = filterName;
    }

    // 初期選択されていたフィルタ名を保持しておく
    self.initialFilterName = self.selectedFilterName;
    // segmentedControlの初期値を設定
    self.segmentedControl.selectedSegmentIndex = [self.filterNames indexOfObject:self.selectedFilterName];
}
「finishContentEditingWithCompletionHandler:」メソッドの実装
このメソッドは、ユーザーが写真の編集セッションの完了を選択したタイミングで呼ばれます。
- (void)finishContentEditingWithCompletionHandler:(void (^)(PHContentEditingOutput *))completionHandler
{
    // バックグラウンドキュー上でレンダリングと生成物作成を行う
    dispatch_async(dispatch_get_global_queue(DISPATCH_QUEUE_PRIORITY_DEFAULT, 0), ^{

        if (self.input.mediaType == PHAssetMediaTypeImage) {
            // フルサイズのイメージを取得する
            NSURL *url = [self.input fullSizeImageURL];
            int orientation = [self.input fullSizeImageOrientation];
            CIImage *inputImage = [CIImage imageWithContentsOfURL:url options:nil];
            inputImage = [inputImage imageByApplyingOrientation:orientation];

            // フィルターを適用、NSDataを作成する
            CIFilter *filter = [CIFilter filterWithName:self.selectedFilterName];
            [filter setDefaults];
            [filter setValue:inputImage forKey:kCIInputImageKey];
            CIImage *outputImage = [filter outputImage];

            CGImageRef cgImage = [self.ciContext createCGImage:outputImage fromRect:outputImage.extent];
            UIImage *transformedImage = [UIImage imageWithCGImage:cgImage];
            NSData *renderedJPEGData = UIImageJPEGRepresentation(transformedImage, 0.9f);

            // PHAdjustmentDataを作成する
            NSData *archivedData = [NSKeyedArchiver archivedDataWithRootObject:self.selectedFilterName];
            PHAdjustmentData *adjustmentData = [[PHAdjustmentData alloc] initWithFormatIdentifier:AdjustmentFormatIdentifier formatVersion:FormatVersion data:archivedData];

            // PHContentEditingOutputを作成、指定URLにjpegファイルを書き出す
            PHContentEditingOutput *contentEditingOutput = [[PHContentEditingOutput alloc] initWithContentEditingInput:self.input];
            [renderedJPEGData writeToURL:[contentEditingOutput renderedContentURL] atomically:YES];
            [contentEditingOutput setAdjustmentData:adjustmentData];

            completionHandler(contentEditingOutput);
        }
    });
}
「shouldShowCancelConfirmation」メソッドの実装
ユーザーがExtensionの画面上部の「キャンセル」ボタンをタップした際に確認を求めるかどうかを返却します。
フィルタ名が変更されていたら、YESを返すようにしています。
- (BOOL)shouldShowCancelConfirmation
{
    BOOL shouldShowCancelConfirmation = NO;

    if (self.selectedFilterName != self.initialFilterName) {
        shouldShowCancelConfirmation = YES;
    }

    return shouldShowCancelConfirmation;
}
UISegmentedControlのアクションハンドラの実装
UISegmentedControlのアクションハンドラである「changedSegmentedControlValue:」メソッドはStoryboard上のUISegmentedControlから、アクションを接続します。
#pragma mark - Action methods

/**
 *  UISegmentedControlのアクションハンドラ
 *
 *  @param sender UISegmentedControl
 */
- (IBAction)changedSegmentedControlValue:(id)sender
{
    UISegmentedControl *segmentedControl = (UISegmentedControl *)sender;
    self.selectedFilterName = self.filterNames[segmentedControl.selectedSegmentIndex];
}
プライベートメソッドの実装
フィルタが変更された時に使用するメソッドを実装します。
#pragma mark - private methods

/**
 *  selectedFilterNameプロパティのセッター
 *
 *  @param selectedFilterName フィルタ名
 */
- (void)setSelectedFilterName:(NSString *)selectedFilterName
{
    _selectedFilterName = selectedFilterName;
    self.imageView.image = [self transformedImage:self.input.displaySizeImage];
}

/**
 *  UIImageにフィルタをかけて返却する
 *
 *  @param image  フィルタを適用対象のUIImage
 *
 *  @return フィルタ適用後のUIImage
 */
- (UIImage *)transformedImage:(UIImage *)image
{
    CIFilter *filter = [CIFilter filterWithName:self.selectedFilterName];

    CIImage *inputImage = [CIImage imageWithCGImage:image.CGImage];
    int orientation = [self orientationFromImageOrientation:image.imageOrientation];
    inputImage = [inputImage imageByApplyingOrientation:orientation];

    [filter setValue:inputImage forKey:kCIInputImageKey];
    CIImage *outputImage = filter.outputImage;

    CGImageRef cgImage = [self.ciContext createCGImage:outputImage fromRect:outputImage.extent];
    UIImage *transformedImage = [UIImage imageWithCGImage:cgImage];
    CGImageRelease(cgImage);

    return transformedImage;
}

/**
 *  UIImageOrientationからint型へ変換する
 *
 *  @param imageOrientation UIImageOrientation
 *
 *  @return int型のOrientation value
 */
- (int)orientationFromImageOrientation:(UIImageOrientation)imageOrientation
{
    int orientation = 0;
    switch (imageOrientation) {
        case UIImageOrientationUp:            orientation = 1; break;
        case UIImageOrientationDown:          orientation = 3; break;
        case UIImageOrientationLeft:          orientation = 8; break;
        case UIImageOrientationRight:         orientation = 6; break;
        case UIImageOrientationUpMirrored:    orientation = 2; break;
        case UIImageOrientationDownMirrored:  orientation = 4; break;
        case UIImageOrientationLeftMirrored:  orientation = 5; break;
        case UIImageOrientationRightMirrored: orientation = 7; break;
        default: break;
    }
    return orientation;
}
動作確認
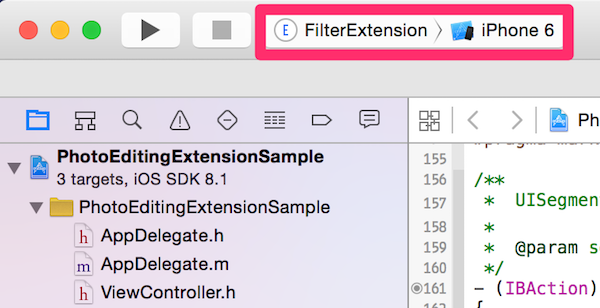
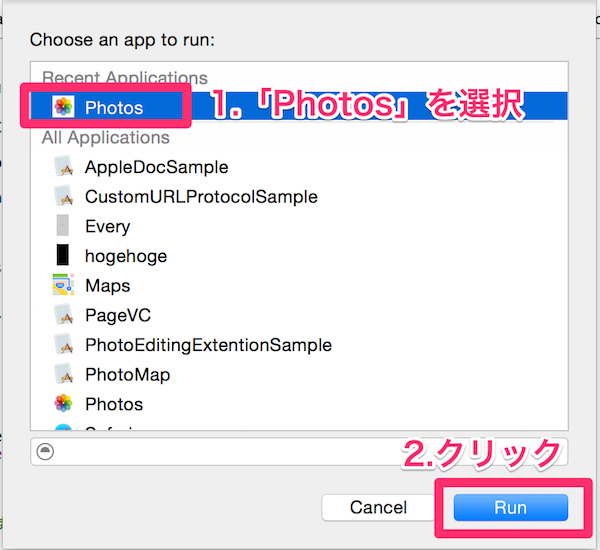
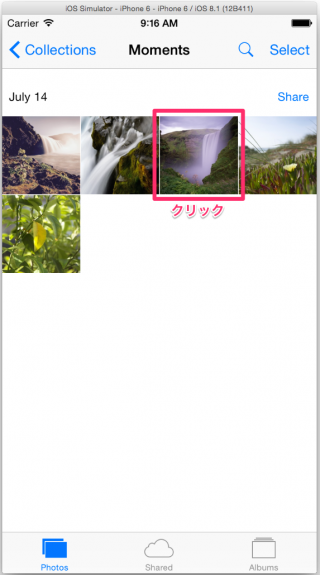
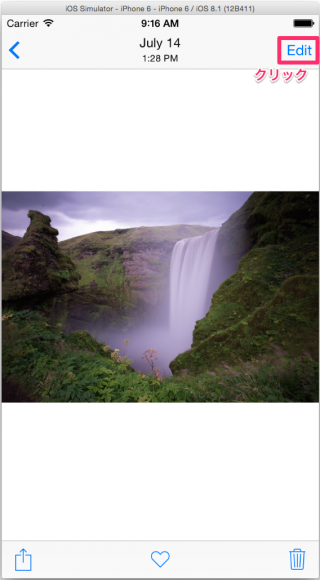
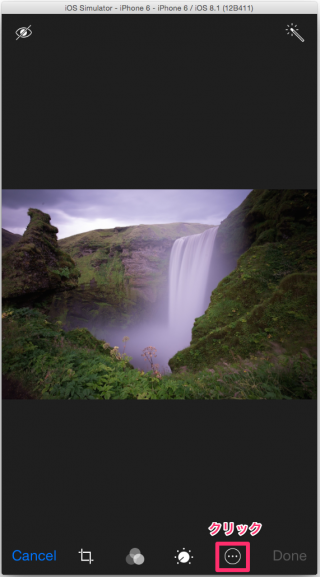
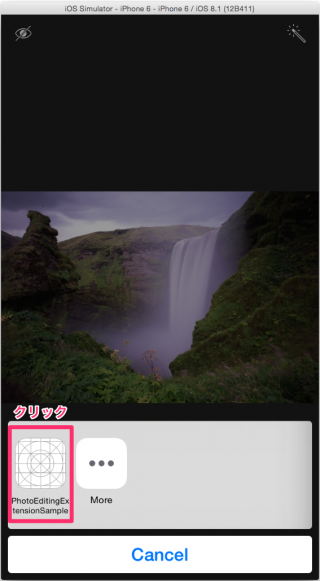
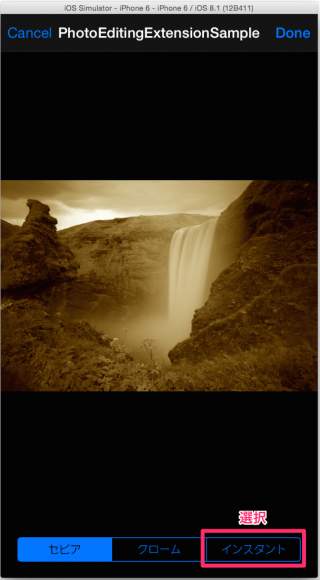
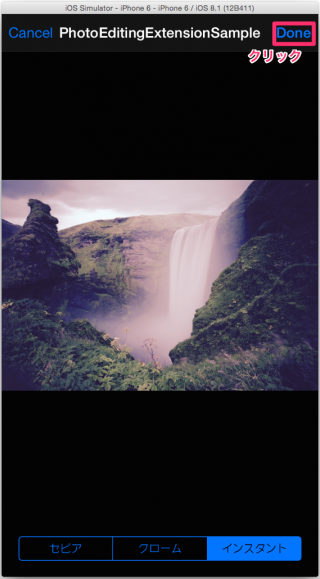
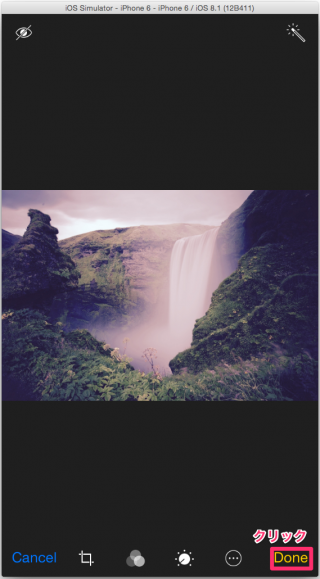
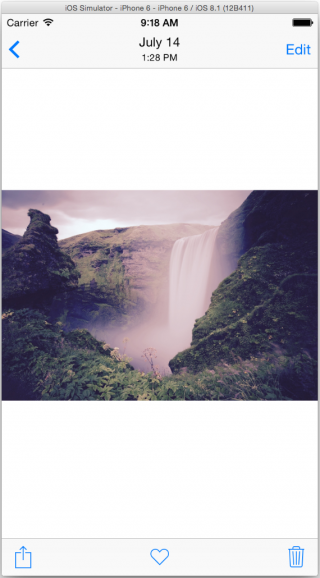
Photo Editing Extensionのschemeを選択し、実行します。
まとめ
前回の記事に引き続き、Photo Editing Extensionの実装について説明しました。
写真の編集自体は、[iOS 8] PhotoKit 4 – Photos Framework – モデルオブジェクトのコンテンツの編集 で解説した内容と同様の手順になっています。
また、「Embedded Framework」を使用すれば、「containing app」(Extensionを含む本体アプリ) と「Extension」との間で共通で利用したいコード(例えば、フィルタの処理など)を共有することができます。 「Embedded Framework」についてはこちらの記事などを参考にしてみてください。
なお、作成したサンプルプロジェクトはこちらのリポジトリで公開しています。
本シリーズの記事一覧
- [iOS 8] PhotoKit 1 – Photos Frameworkの概要
- [iOS 8] PhotoKit 2 – Photos Framework – モデルオブジェクトの取得
- [iOS 8] PhotoKit 3 – Photos Framework – モデルオブジェクトのプロパティの編集
- [iOS 8] PhotoKit 4 – Photos Framework – モデルオブジェクトのコンテンツの編集
- [iOS 8] PhotoKit 5 – Photos Framework – モデルオブジェクトの削除
- [iOS 8] PhotoKit 6 – Photos Framework – モデルの変更のハンドリングとコンテンツ編集のrevert
- [iOS 8] PhotoKit 7 – Photos Framework – フォトライブラリへのアクセス許可を得る
- [iOS 8] PhotoKit 8 - UIImagePickerControllerとPhotos Frameworkを組み合わせて使う
- [iOS 8] PhotoKit 9 – Photo Editing Extensionの概要
- [iOS 8] PhotoKit 10 – Photo Editing Extensionの実装 (前篇)
- [iOS 8] PhotoKit 11 – Photo Editing Extensionの実装 (後篇)

