![[For Beginners] I Created My Own Chrome Extension](https://images.ctfassets.net/ct0aopd36mqt/wp-thumbnail-6e9043acb4514ba835f6b6b4928b08b1/1c83d176a530c4b24d730e56d1d7f6d2/google-chrome-eyecatch.jpg?w=3840&fm=webp)
[For Beginners] I Created My Own Chrome Extension
This page has been translated by machine translation. View original
Introduction
Hello, I am Shota Yamamoto.
I was curious about how difficult it would be to create a Chrome extension that we use casually every day, so I decided to make one by referring to the tutorial below.
For this simple test, I created a basic extension that only opens a configured link.
1. Creating Files
First, let's create the files.
To create an extension, we need the following 3 files:
project/
├─ manifest.json
├─ view.html
└─ icon.png
- manifest.json
A file to configure the extension name, icon, and other settings - HTML for display (view.html)
HTML displayed when the extension is clicked - Icon image (icon.png)
128px × 128px image
File names in parentheses can be changed freely, but manifest.json is fixed.
Note that the icon image is not mandatory; if not specified, Chrome's default icon will be displayed.
It's recommended to prepare icons in 16px, 32px, 48px, and 128px sizes depending on the usage, but for this simple test, I'll use only one image.
2. Creating the Code
I created the code for each file as follows. If you're using different file names for the HTML display or icon image, please adjust accordingly.
manifest.json
{
  "name": "Test Extension",
  "description": "DevelopersIO link",
  "version": "1.0",
  "manifest_version": 3,
  "action": {
    "default_popup": "view.html",
    "default_icon": "icon.png"
  }
}
The contents of the file are as follows.
| Property | Description |
|---|---|
| name | Extension name |
| description | Extension description |
| action/default_popup | File to display when the icon is clicked |
| action/default_icon | Icon to display |
I wrote the HTML to display as follows:
view.html
<html>
  <body>
    <a href="https://dev.classmethod.jp/" target="_blank">DevelopersIO</a>
  </body>
</html>
Clicking the link will open the DevelopersIO link in a new tab.
As a note, make sure to set target="_blank" for the link. Without this setting, the page will try to open within the extension popup, and it won't open properly.
3. Loading into Chrome
Finally, let's load the extension into Chrome.
- Access chrome://extensions/ and enable Developer mode in the top right corner
- Click the "Load unpacked extension" button that appears, and select the folder you created
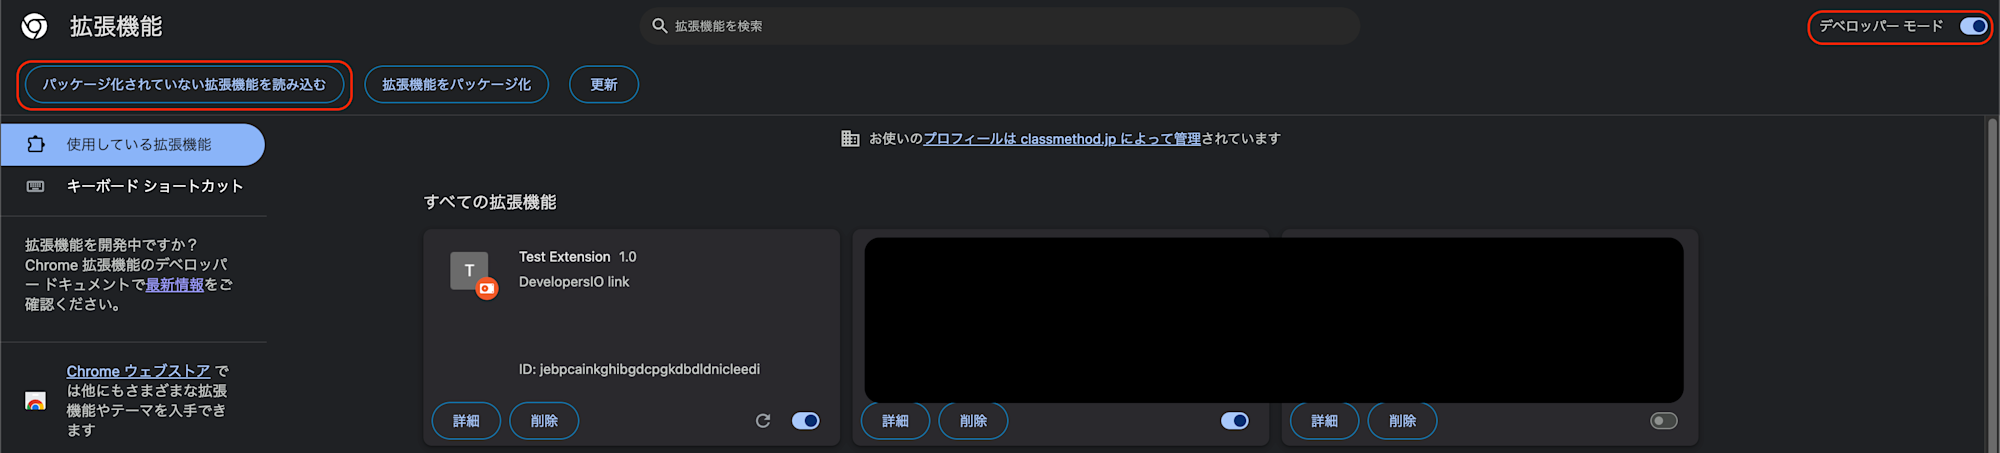
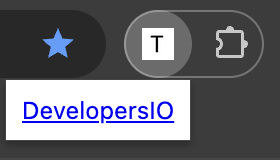
- Once the extension is loaded, click its icon in the extension list to display the configured link
Note that during development, HTML or CSS changes will be reflected just by reopening the popup, but JavaScript changes or manifest.json changes require reloading the extension from chrome://extensions/.
Conclusion
In this article, I created a simple Chrome extension.
I initially thought it might be difficult, but it turned out to be quite easy to create.
Since what I created is just a simple extension that opens a link, feel free to customize it and try it out.
References
The following articles were not mentioned in the main text but might be helpful:
About Classmethod Operations Inc.
We are an operations company of the Classmethod Group.
Our specialized teams in operations, maintenance development, support, information systems, and back office provide services from business outsourcing to problem solving and high value-added services through mechanisms that fully utilize IT and AI.
We are recruiting members for various positions.
If you're interested in our culture, mechanisms, and work style that together realize "Operational Excellence" and "Work and live authentically," please visit Classmethod Operations Inc. Corporate Site. *We changed our company name from Annotation Inc. in January 2026.