I want to use the latest OpenCV in my iOS app! Building opencv2.xcframework yourself (January 2024 version)
This article was published more than one year ago. Please be aware that the information may be outdated.
This page has been translated by machine translation. View original
OpenCV is a powerful open-source library for image processing and computer vision. By integrating OpenCV into iOS apps, you can implement advanced image processing and analysis.
Recently, I wrote an article about installing OpenCV using CocoaPods, but later realized that the version available through this method was the outdated 4.3.0.
As of January 4, 2024, the latest version of OpenCV is 4.9.0. When installing via CocoaPods, you get OpenCV version 4.3.0. Since support for "Obj-C / Swift bindings" that allow handling OpenCV from Swift code is available from 4.4.0 onwards, I wanted to use the latest OpenCV in iOS apps.
In this article, I'll explain how to build opencv2.xcframework on MacBook Pro (M1 Pro) and how to convert images to grayscale using the latest OpenCV in iOS apps.
Testing Environment
- MacBook Pro (16-inch, 2021)
- Apple M1 Pro
- CMake 3.81
- Python 3.8.10
- Xcode 15.1
- macOS 14.1
- OpenCV 4.9.0
Note that the combination of OpenCV, macOS, and Xcode versions seems important, and different combinations might not build successfully.
Why opencv2.xcframework is Necessary
OpenCV officially distributes opencv2.framework on their GitHub release page but does not provide XCFramework (opencv2.xcframework).
XCFramework is a framework format provided by Apple that packages binaries for different Apple platforms and architectures (iOS, macOS, watchOS, tvOS) into a single package, making it easier to support multiple architectures and different targets.
When using opencv2.framework, you'll see the following warning when debugging on a MacBook Pro (M1 Pro):
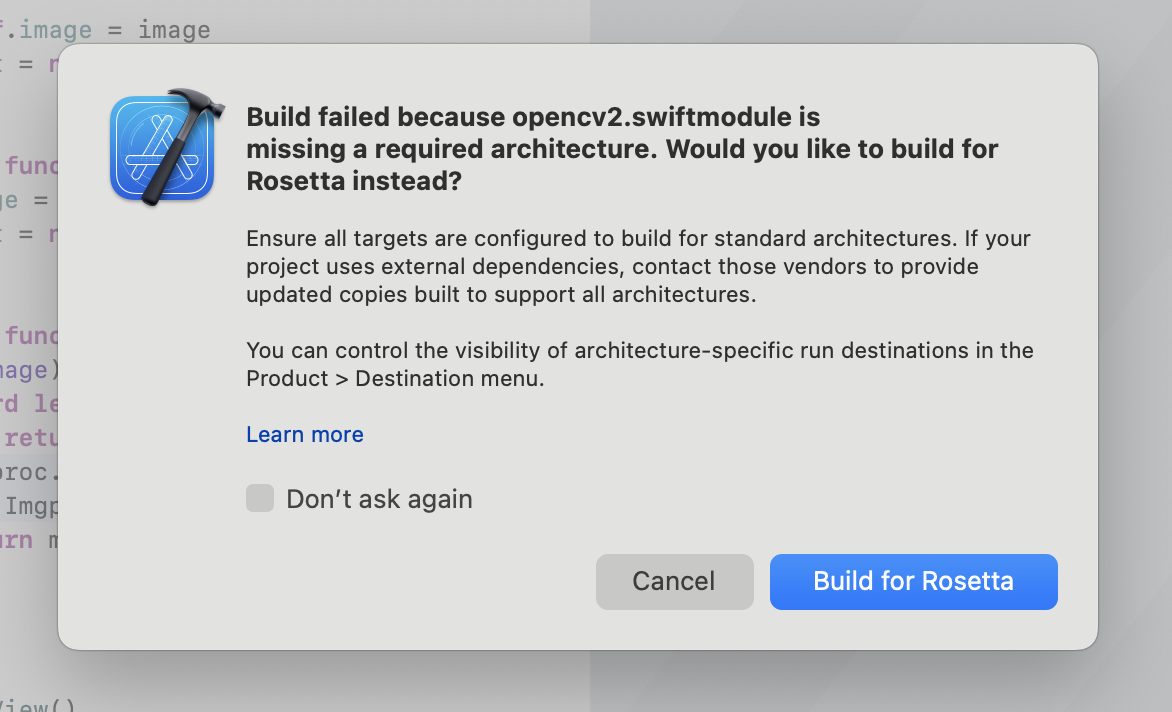
Build failed because opencv2.swiftmodule is missing a required architecture. Would you like to build for Rosetta instead?
Ensure all targets are configured to build for standard architectures. If your project uses external dependencies, contact those vendors to provide updated copies built to support all architectures.
You can control the visibility of architecture-specific run destinations in the Product > Destination menu.
opencv2.framework includes binaries for iOS simulators (i386, x86_64) and iPhone devices (armv7, arm64), but it doesn't include arm64 binaries for iOS simulators. Therefore, you can't run it directly on iOS simulators on Apple Silicon MacBooks.
You need to either run the iOS simulator with Rosetta or build an XCFramework. I chose the latter option to handle OpenCV with XCFramework.
Building the Latest OpenCV xcframework
The steps to build OpenCV XCFramework are as follows:
- Install Xcode command line tools
- Download OpenCV source code from GitHub and run the
build_xcframework.pyscript
This build_xcframework.py script builds for iOS devices, iOS simulators, and Mac Catalyst, then combines them into a single XCFramework. The created opencv2.xcframework supports different architectures.
This article explains how to create and use opencv2.xcframework, but please refer to the official OpenCV pages for detailed information on creating XCFramework:
- OpenCV: Installation in iOS
- Building for Apple Platforms (must read!)
1. Install Xcode Command Line Tools
Ensure that Xcode command line tools are installed.
xcode-select --install
2. Build OpenCV and Generate opencv2.xcframework
If you have the same environment as mine, you can generate XCFramework by running the following script. This script generates opencv2.xcframework containing arm64 binaries for iOS devices and simulators. WORKSPACE_DIR specifies the path to my working directory. Please adjust it accordingly.
You can also exclude unnecessary modules with the --without parameter. By excluding unnecessary modules, you can reduce build time and keep the generated file size compact. Adjust the included modules according to the features you need.
OPENCV_VERSION=4.9.0
SOURCE_URL=https://github.com/opencv/opencv/archive/refs/tags/$OPENCV_VERSION.zip
WORKSPACE_DIR=~/works/opencv

mkdir -p "$WORKSPACE_DIR/opencv-$OPENCV_VERSION"

curl -L $SOURCE_URL -o "$WORKSPACE_DIR/$OPENCV_VERSION.zip"
unzip "$WORKSPACE_DIR/$OPENCV_VERSION.zip" -d "$WORKSPACE_DIR"

cd "$WORKSPACE_DIR/opencv-$OPENCV_VERSION"

python ./platforms/apple/build_xcframework.py --out ./build --iphoneos_archs arm64 --iphonesimulator_archs arm64 --iphoneos_deployment_target 14 --build_only_specified_archs --without videoio --without video --without ts --without stitching --without photo --without ml --without highgui --without gapi
As mentioned earlier, the build_xcframework.py script builds multiple frameworks and then combines them into a single xcframework. Building each framework takes considerable time; it took 20 minutes even on a MacBook Pro with Apple M1 Pro.
============================================================
Building ./build/opencv2.xcframework
============================================================
Executing: ['xcodebuild', '-create-xcframework', '-output', './build/opencv2.xcframework', '-framework', './build/iphoneos/opencv2.framework', '-framework', './build/iphonesimulator/opencv2.framework', '-framework', './build/macos/opencv2.framework', '-framework', './build/catalyst/opencv2.framework'] in /Users/ch3cooh/works/opencv/opencv-4.9.0
Executing: xcodebuild -create-xcframework -output ./build/opencv2.xcframework -framework ./build/iphoneos/opencv2.framework -framework ./build/iphonesimulator/opencv2.framework -framework ./build/macos/opencv2.framework -framework ./build/catalyst/opencv2.framework
xcframework successfully written out to: /Users/ch3cooh/works/opencv/opencv-4.9.0/build/opencv2.xcframework

============================================================
Finished building ./build/opencv2.xcframework
============================================================
If you see this log, you have successfully generated the XCFramework. Let's now integrate it into an iOS project and implement simple image processing (grayscale conversion).
Creating an Image Processing Class Using OpenCV
In iOS apps, images are handled as UIImage objects, but OpenCV cannot directly handle UIImage objects. To process images with OpenCV, you need to convert from UIImage to Mat, perform image processing, and then convert back from Mat to UIImage. Follow the conversion process shown in the figure below.

The steps to perform grayscale conversion using OpenCV are as follows:
- Add sample image to Assets.xcassets
- Add opencv2.xcframework
- Implement image grayscale conversion process
- Execute the image processing function in SwiftUI (UI)
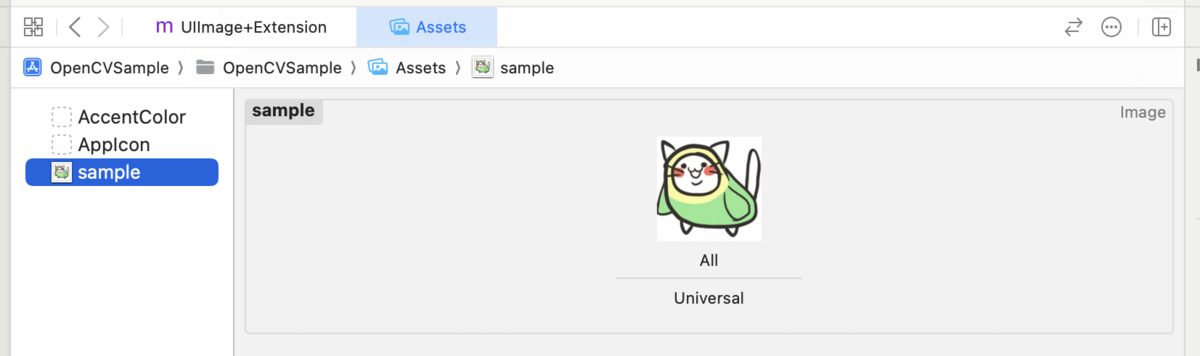
1. Add Sample Image to Assets.xcassets
I added a sample image to Assets.xcassets. Here I named it sample.
2. Add opencv2.xcframework
Drag and drop the generated opencv2.xcframework into your iOS project. Add the following frameworks:
- libc++.tbd
- CoreMedia
- CoreImage
- CoreGraphics
The Frameworks group display should look like the image below, showing the added frameworks.

Also, add -all_load to Other Linker Flags.
3. Implement Image Grayscale Conversion Process
I added an ImageProcessor class and implemented a grayscale function. This function converts a UIImage object to a grayscale image and returns it.
import opencv2
import UIKit

enum ImageProcessor {
    static func grayscale(image: UIImage?) -> UIImage? {
        guard let image = image else {
            return nil
        }

        let mat = Mat(uiImage: image)
        Imgproc.cvtColor(
            src: mat,
            dst: mat,
            code: ColorConversionCodes.COLOR_RGB2GRAY
        )
        return mat.toUIImage()
    }
}
In the previously introduced article "Introducing OpenCV to iOS Apps Using CocoaPods", I implemented grayscale conversion in Objective-C++, but since we're using OpenCV 4.9.0, we can use the Obj-C / Swift bindings feature.
This implementation uses only Swift code, which is simpler compared to the mixed Obj-C/Swift code.
4. Execute Image Processing in the UI
In this sample, the UI is implemented with SwiftUI. When the "to grayscale" button is tapped, it executes ImageProcessor#convertToGrayscale and displays the processed image.
import SwiftUI

struct ContentView: View {
    @State private var image = UIImage(named: "sample")
    @State private var text: String?

    var body: some View {
        VStack {
            if let image = image {
                Image(uiImage: image)
                    .resizable()
                    .frame(width: 200, height: 200)
                    .scaledToFit()
            }
            if let text = text {
                Text(text)
            }
            Button("to grayscale") {
                action()
            }
            Button("clear") {
                image = UIImage(named: "sample")
                text = nil
            }
        }
        .padding()
    }

    private func action() {
        guard let source = UIImage(named: "sample") else {
            text = "画像の取得に失敗"
            return
        }
        guard let image = ImageProcessor.grayscale(image: source) else {
            text = "画像の変換に失敗"
            return
        }

        self.image = image
        text = nil
    }
}
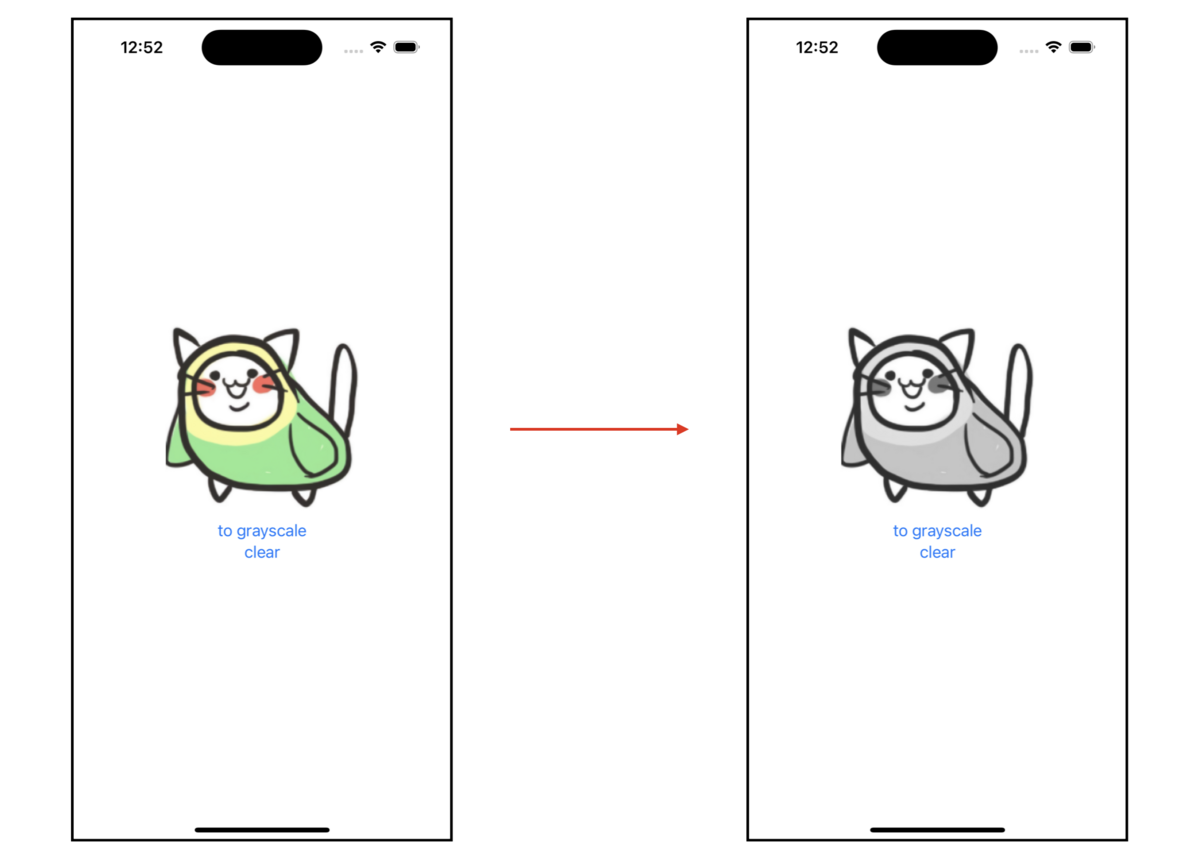
Verification
When you run the sample app and tap the "to grayscale" button, it changes as shown in the image below.
Summary
In this article, I explained how to build opencv2.xcframework, integrate OpenCV into iOS apps, and convert images to grayscale. Based on this code, you can develop more advanced image processing and analysis features.
The sample code explained in this article is available in the following repository:
Reference Links
I went through trial and error, such as getting an opencv2.xcframework that couldn't run on iOS simulators depending on build parameters. To improve reproducibility, I wrote shell scripts. Later I found out that my final approach was similar to the method introduced in Sansan Tech Blog's article "Adding Swift Package Manager Support to Internal Libraries Part 2: Libraries Dependent on OpenCV". Their script is more refined than mine, so I recommend reading their article as well.