
Claude/Claude Code Series for Non-Engineers: I Set Up an Environment to Run Claude Code
This page has been translated by machine translation. View original
About This Series
I'm Jinno from the Account Sales Department at Classmethod. I currently work as an account executive for public cloud services such as AWS and cloud services like Claude.
Recently, Claude has been attracting a lot of attention, and within our company, we've also been advancing the use of Claude individually. While it's showing great power in design and development processes by engineers, it's also producing efficiency and productivity improvements through use by non-engineers, which makes me feel there's enormous potential.
Therefore, with the hope of being helpful to non-engineers using Claude, I'd like to write a blog series called "Claude/Claude Code Series for Non-Engineers." This series will be written by various non-engineer members at Classmethod taking turns, so we plan to share experiences from members in various roles. We hope this will be helpful to many people.
Why Claude Code for Non-Engineers?
If you thought "Claude Code is for engineers, right?" - I initially thought so too.
However, after actually trying it, my perception changed. Claude Code isn't just "a tool for writing code," but rather "an agent that autonomously performs file operations and data processing when you communicate what you want to do in natural language."
Here are some things I've actually been able to do as a salesperson:
- Automatic generation of sales materials (PowerPoint, Word)
- Integration with Google Calendar
- Automation of attendance management (KING OF TIME) operations
- Automation of customer research
If you thought, "Can't you do this with Claude's chat as well?" that's a good point. In fact, looking at individual tasks, many can be accomplished using Claude.ai's chat or Cowork features.
So why specifically Claude Code? From my experience, there are two decisive differences.
The first is "autonomy." Chat basically provides "one response to one instruction," but Claude Code thinks through multiple steps on its own and executes them autonomously. For example, if you tell it to "summarize last week's sales activities in PowerPoint," it will find the necessary files itself, organize the data, structure the slides, and save it as a file. It will proceed through this entire sequence without requiring multiple instructions along the way.
The second is "context accumulation." Claude Code automatically reads files in the working folder and the CLAUDE.md (which I'll explain later). In other words, you don't have to repeatedly explain "I'm in sales" or "use this format" - it can understand the situation from past files and settings. The more you use it, the more context accumulates in the folder, allowing you to work with fewer instructions.
It feels like having an extremely competent secretary, and I believe it's actually having that effect. (Although I've never actually worked with a personal secretary...) Moreover, this secretary understands context from materials on your desk and past interactions without explicit instructions, thinking "This is what you want, right?" That's Claude Code's greatest strength in my opinion.
I hope that regardless of job responsibilities or position, more people can benefit from utilizing Claude Code in their work!
How to Use Claude Code
Before getting into the steps, there's one important thing to mention.
When you hear "Claude Code," you might imagine typing claude commands in a terminal. That's how engineers actually use it.
However, for non-engineers, the "Code" tab in the Claude Desktop app is recommended.
| Method | Difficulty | Target User |
|---|---|---|
| Claude Desktop "Code" tab | ★☆☆ | For non-engineers |
claude command in terminal |
★★☆ | For engineers |
Using the "Code" tab:
- No terminal required. No need to memorize commands
- Access Claude Code features directly from the chat interface
- Directory (folder) selection via GUI
Honestly, I initially thought "Claude Code is something you use in a terminal," but I found it can be used normally from the "Code" tab in the Claude Desktop app. If you're uncomfortable with terminals, start here.
In this series, we'll proceed assuming you're using the "Code" tab in Claude Desktop.
Installation Steps
Here, we'll go through the steps to start using Claude Code, in order.
Just follow these steps from top to bottom. I've included considerations for each step, so please don't skip reading them.
I personally use a Mac, so the screenshots will be from Mac, but I've also included information for Windows based on official documentation.
Step 1: Install Claude Desktop
First, let's install the Claude Desktop app.
1. Access the download page
Open the download page from the following URL.

2. Download the installer for your OS
| OS | Supported Versions |
|---|---|
| macOS | macOS 11 (Big Sur) or later |
| Windows | Windows 10 or later |
Mac users click "macOS" and Windows users click "Windows" to download.
3. Install
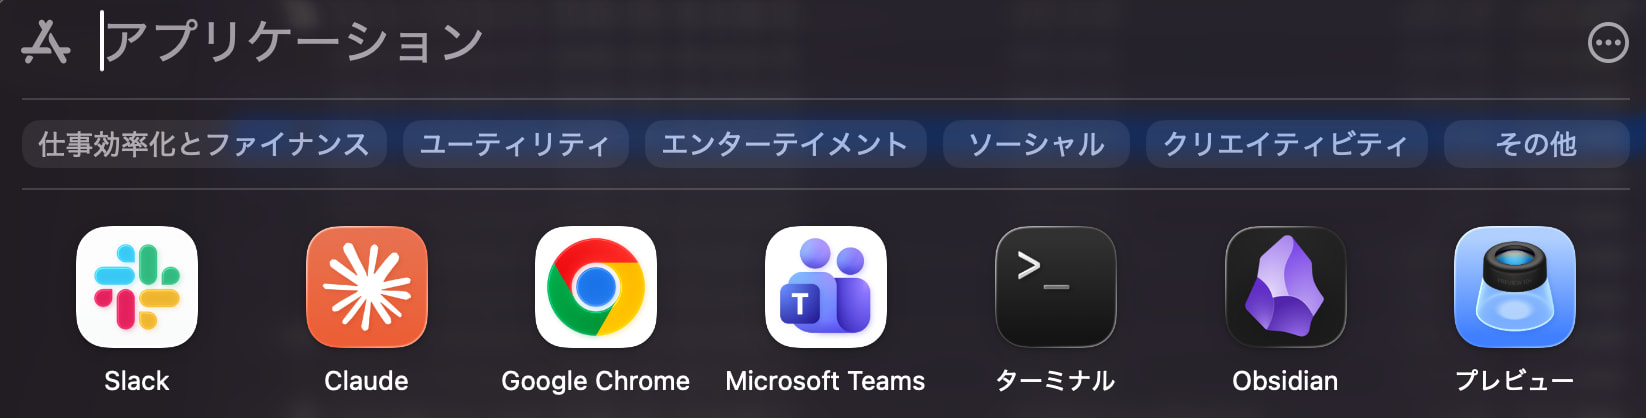
- Mac: Open the downloaded file and follow the instructions to install. When complete, Claude will be added to your Applications folder
- Windows: Run the downloaded file and follow the instructions to install. Claude will be added to your Start menu
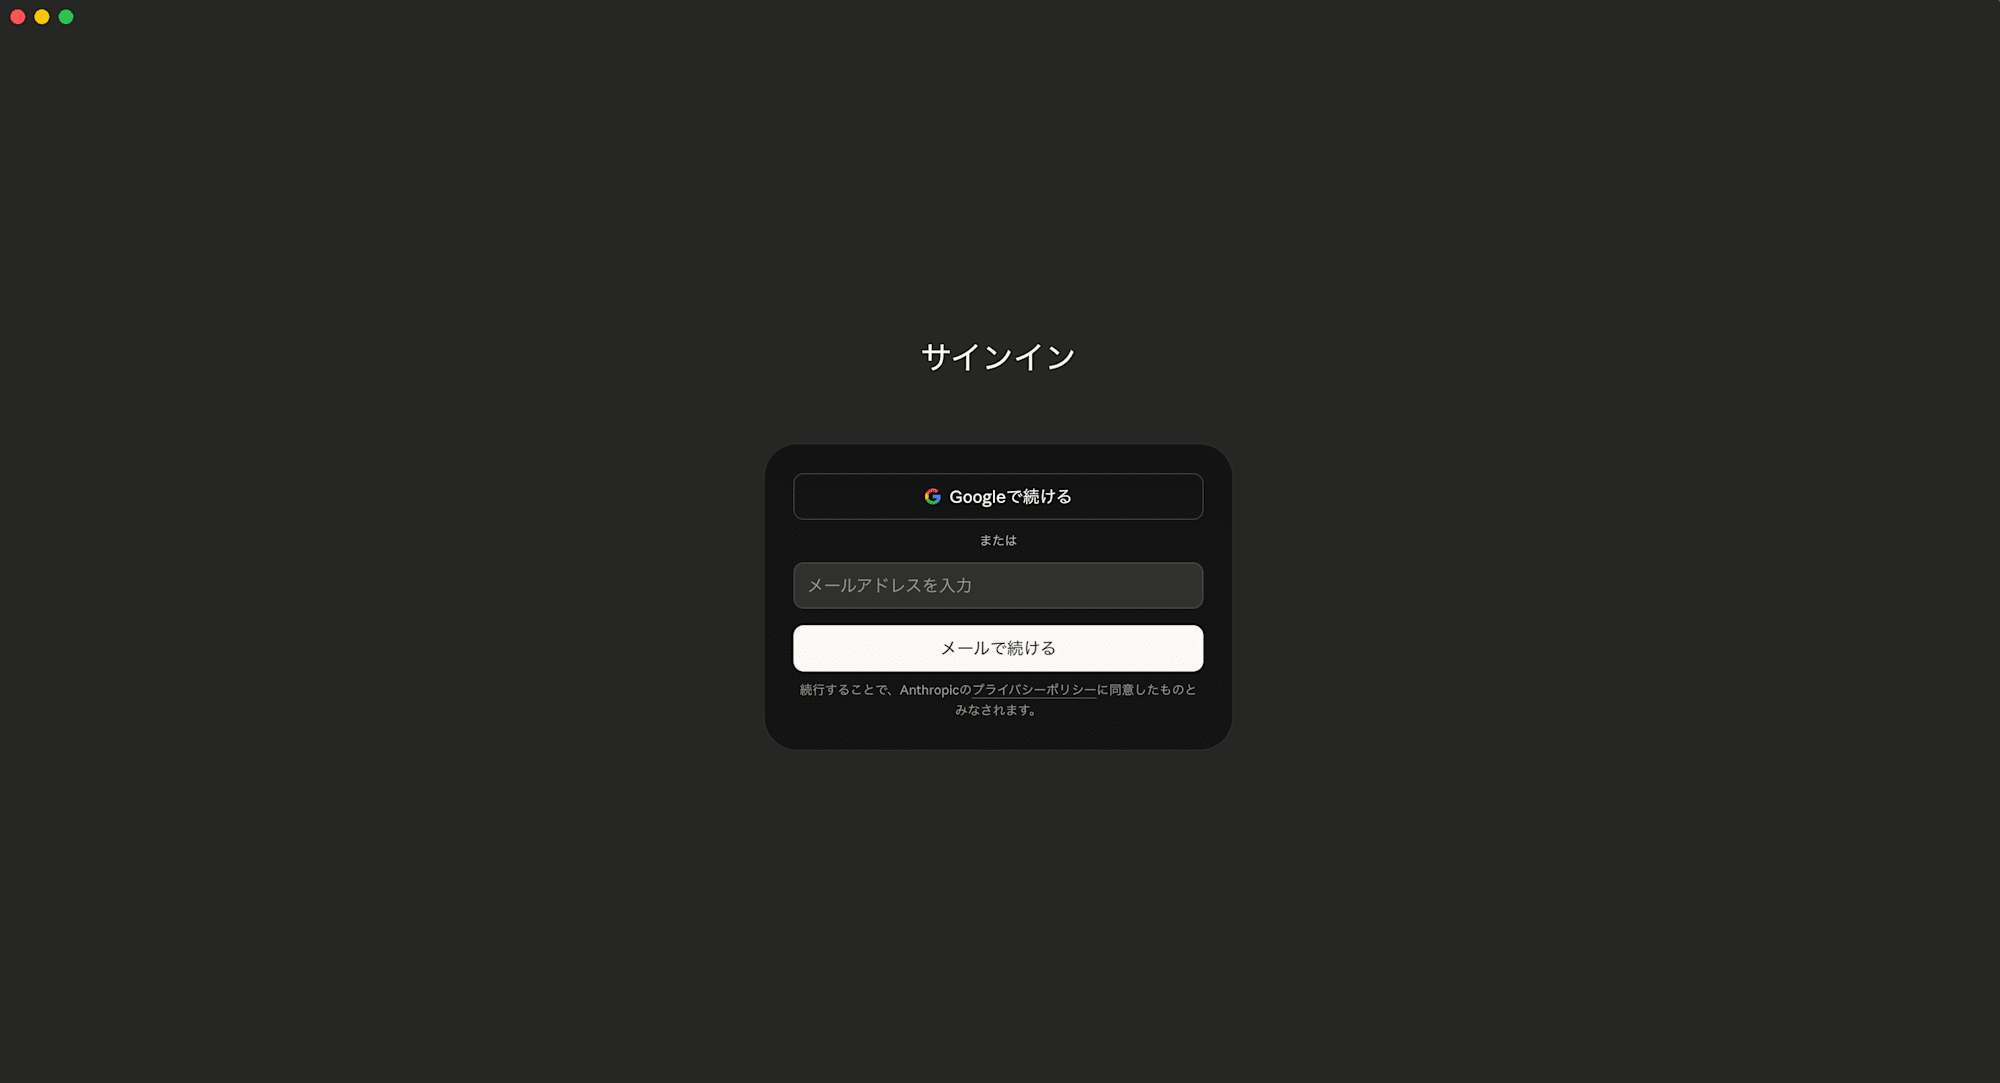
4. Launch and sign in
Launch the Claude app and sign in with your account. If you don't have an account yet, create one at claude.ai.
This completes the Claude Desktop installation. However, you cannot use Claude Code (the "Code" tab) with the free plan. The next step is to subscribe to a paid plan.
Step 2: Subscribe to a Paid Plan
To use Claude Code, you need to join a paid plan. The free plan only allows chat functionality, and the "Code" tab is not displayed.
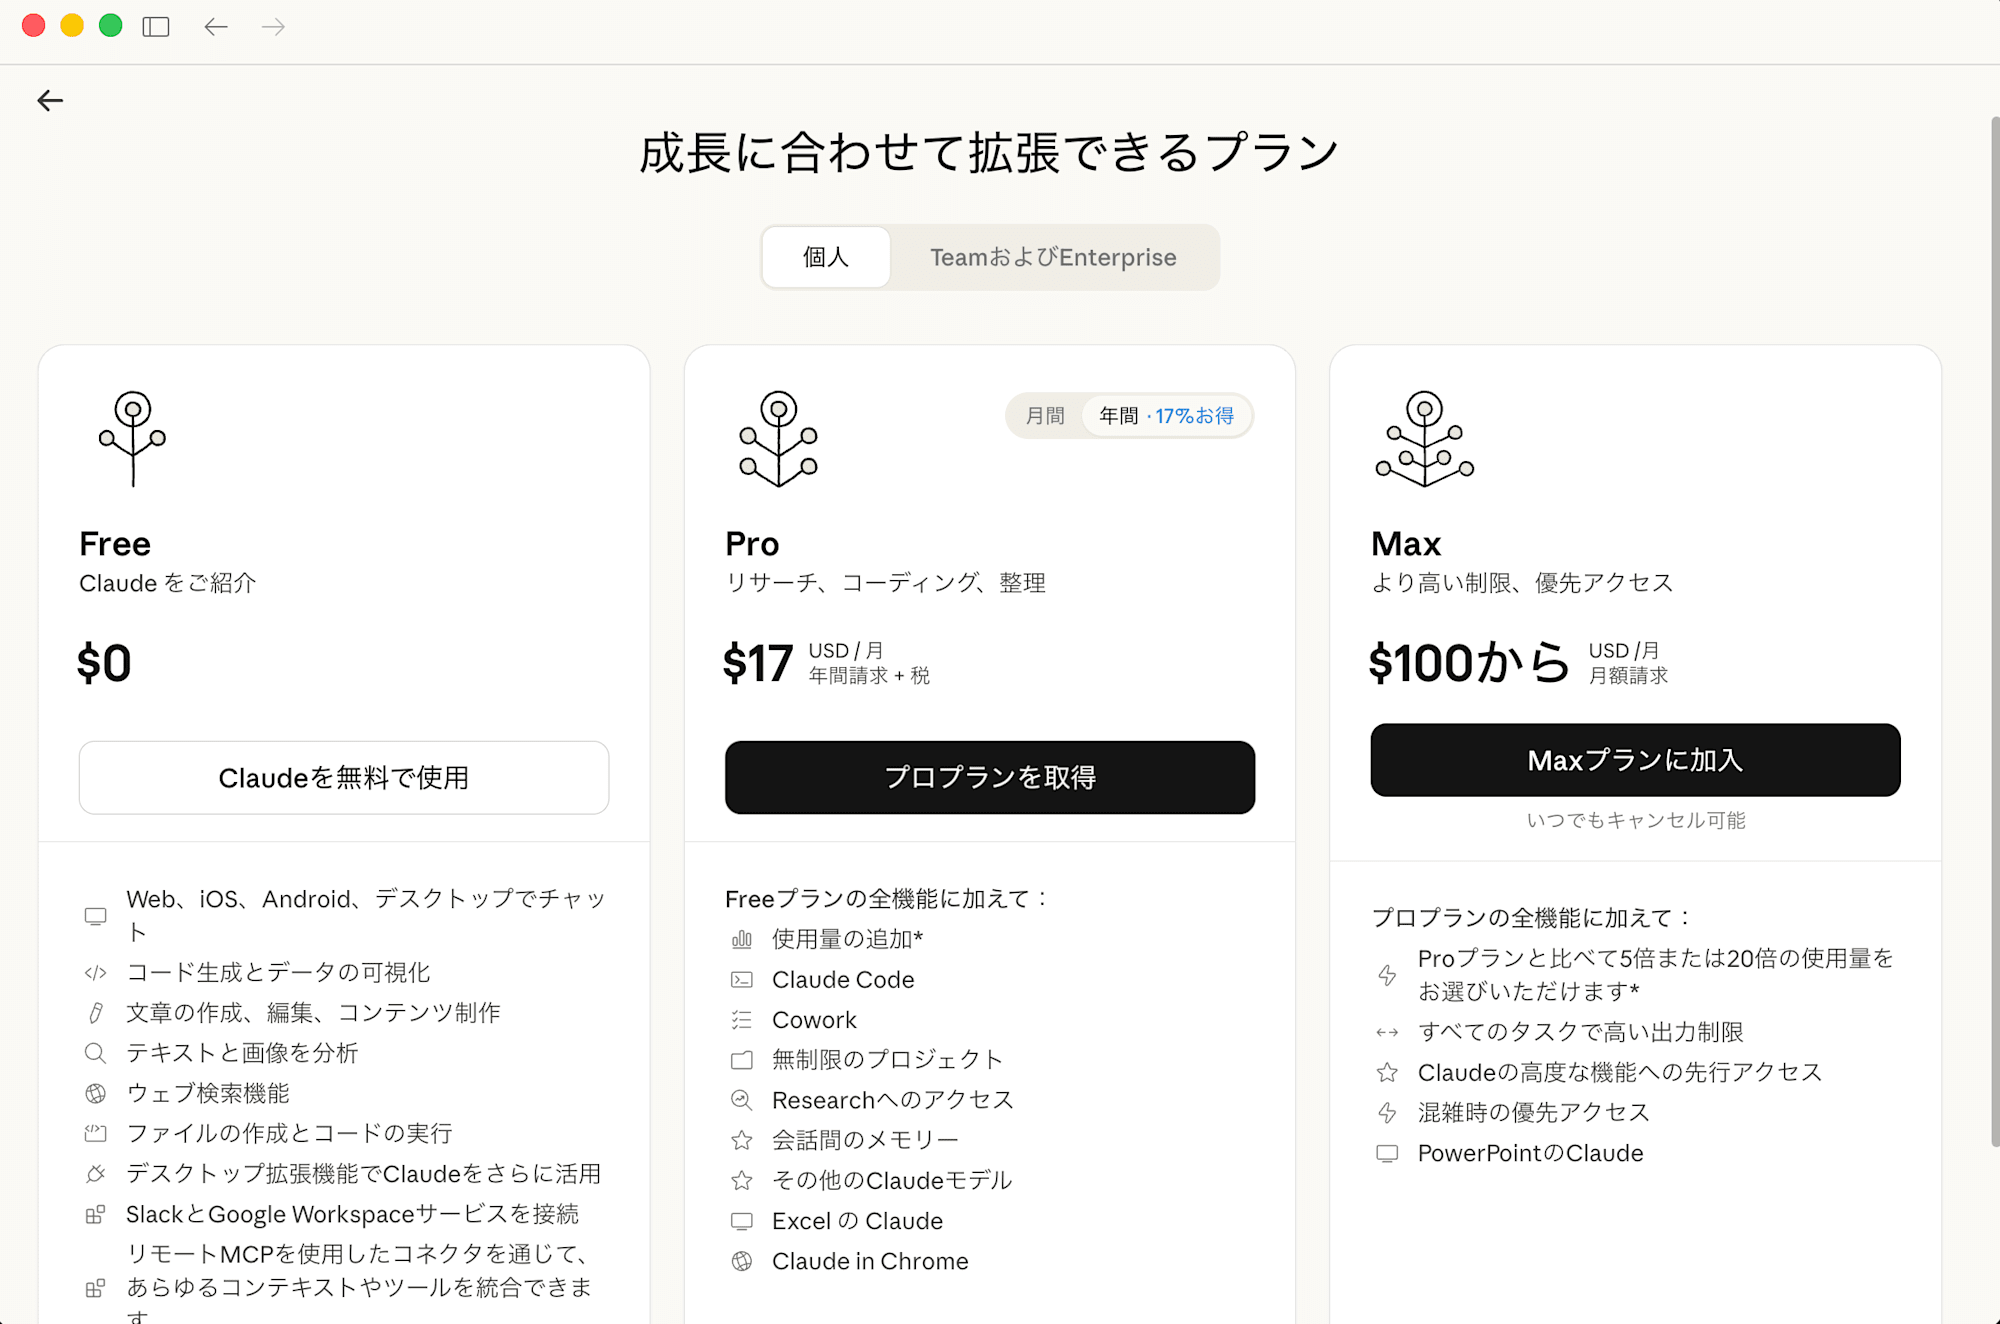
Plan Selection Criteria
Since "Which plan should I choose?" is likely the first hurdle, I'll explain how to choose from a non-engineer's perspective. This information is current as of today, so please check Claude's official page for the latest information.
| Plan | Monthly | Claude Code | Recommended for |
|---|---|---|---|
| Free | $0 | ❌ Not available | Those who just want to try chat |
| Pro | $20 | ✅ Available | Start here if you want to try it first |
| Max 5x | $100 | ✅ Available | Those who use it intensively daily |
| Max 20x | $200 | ✅ Available | Those who use it all day |
| Team (Standard seat) | $25/person~ | ✅ Available | Organizations (5+ people) |
| Team (Premium seat) | $150/person~ | ✅ Available | Organizations with high-frequency usage |
Recommendation for non-engineers: Start with the Pro plan ($20/month).
The reason is simple: you won't know how much usage you need until you try it. If Pro isn't enough, you can upgrade to Max, and if you're implementing it across an organization, you can switch to the Team plan. There's no need to start with a higher-tier plan.
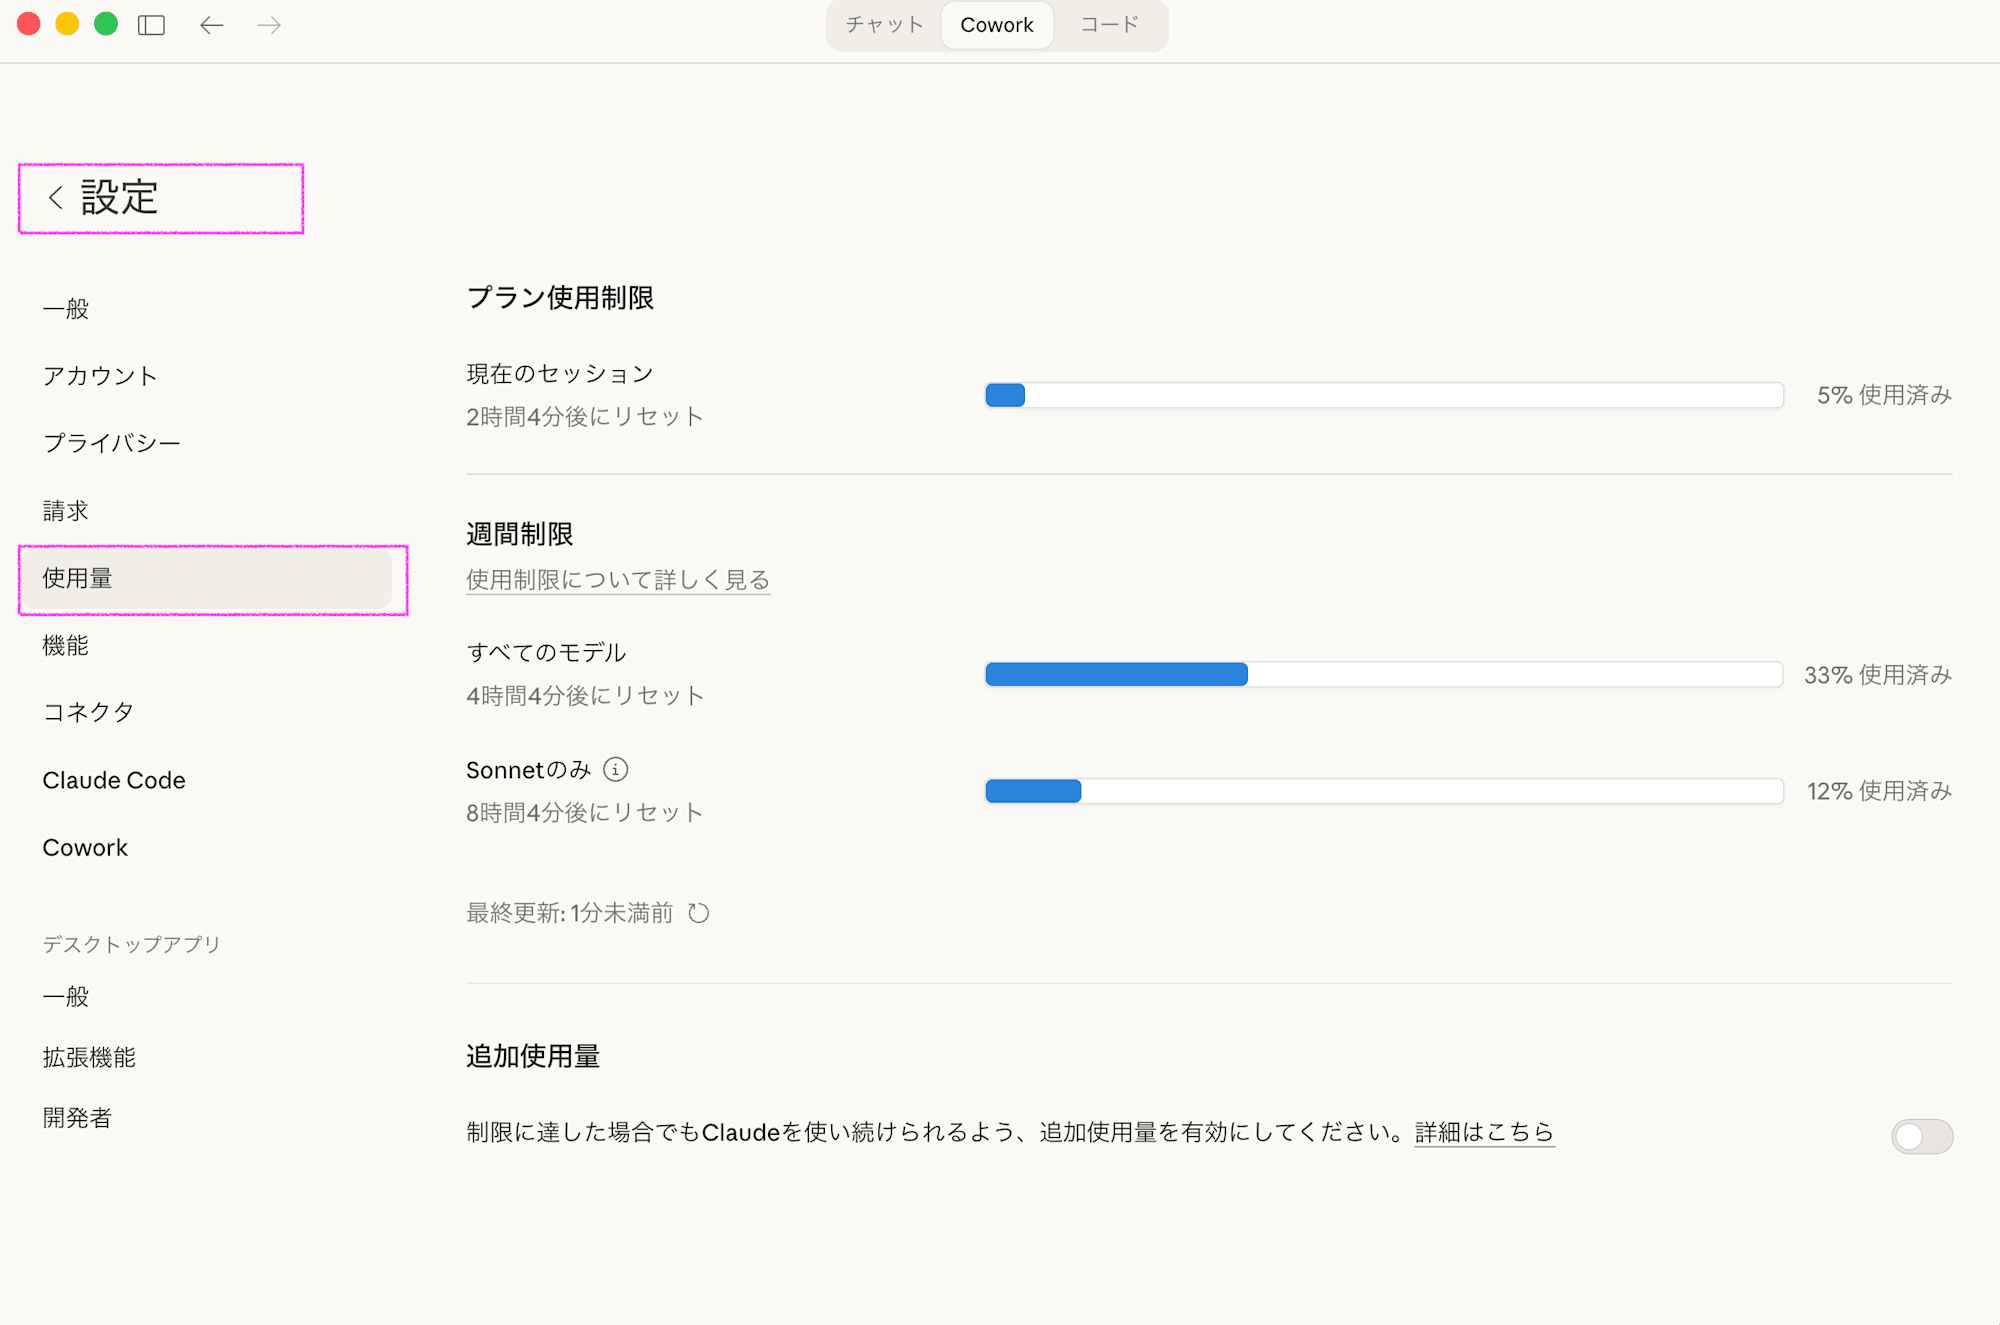
💡 About usage limits: Claude's paid plans have "usage limits." When you reach the limit, you temporarily can't use it, but it resets after some time. In my experience, the Pro plan is sufficient for general sales work. If you find yourself "hitting the limits often," consider Max at that point. You can check your usage from the Claude Desktop settings -> Usage page.
Subscription Procedure
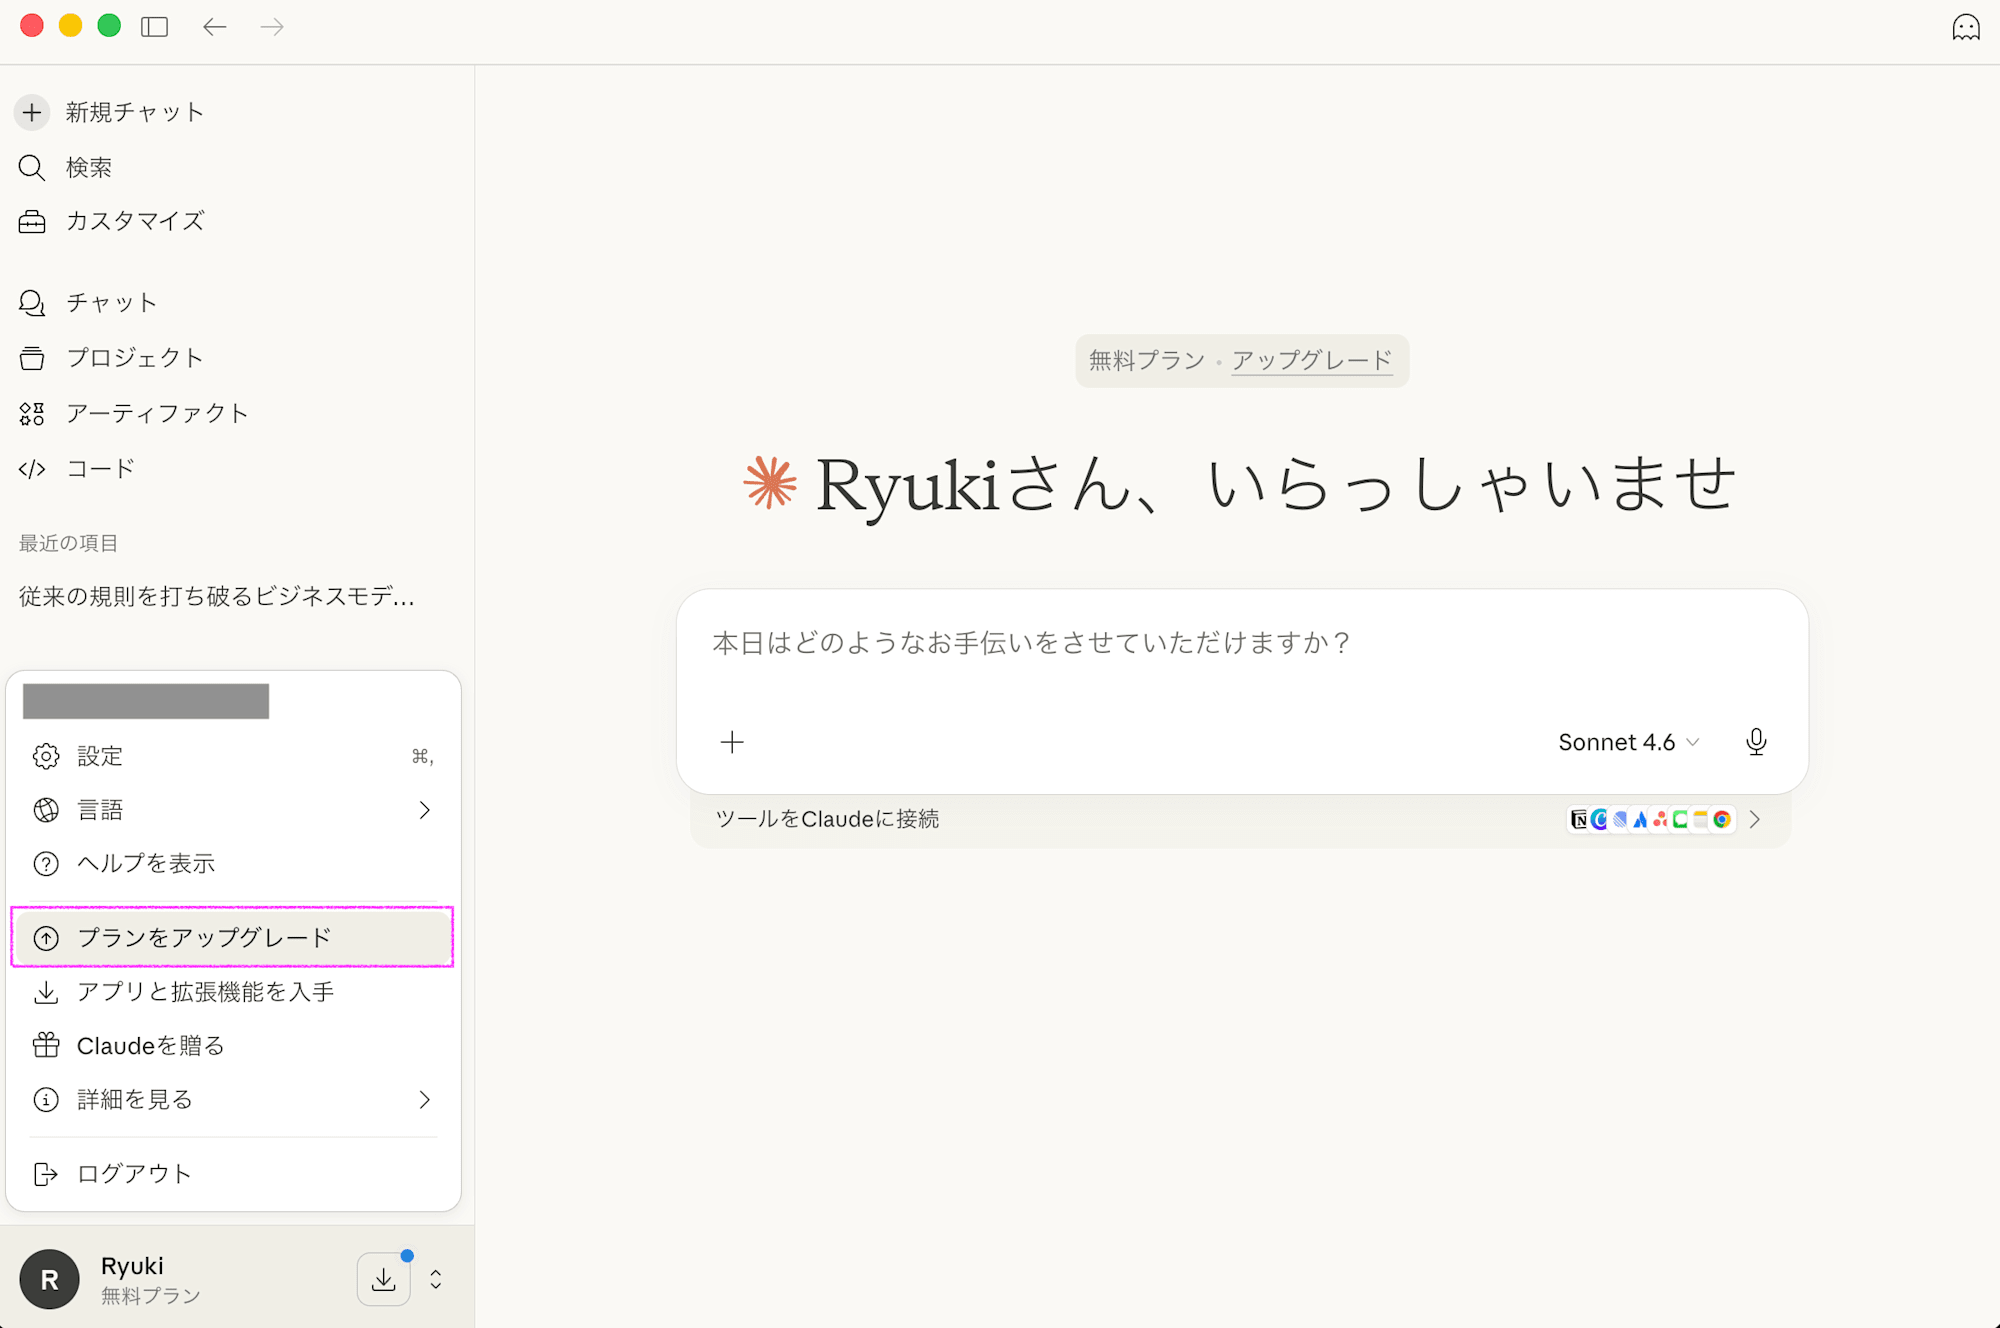
1. Open the Claude Desktop app or claude.ai in a browser
2. Select a plan from the settings screen
In the Claude Desktop app, you can navigate from this screen.
3. Select the Pro plan and enter payment information
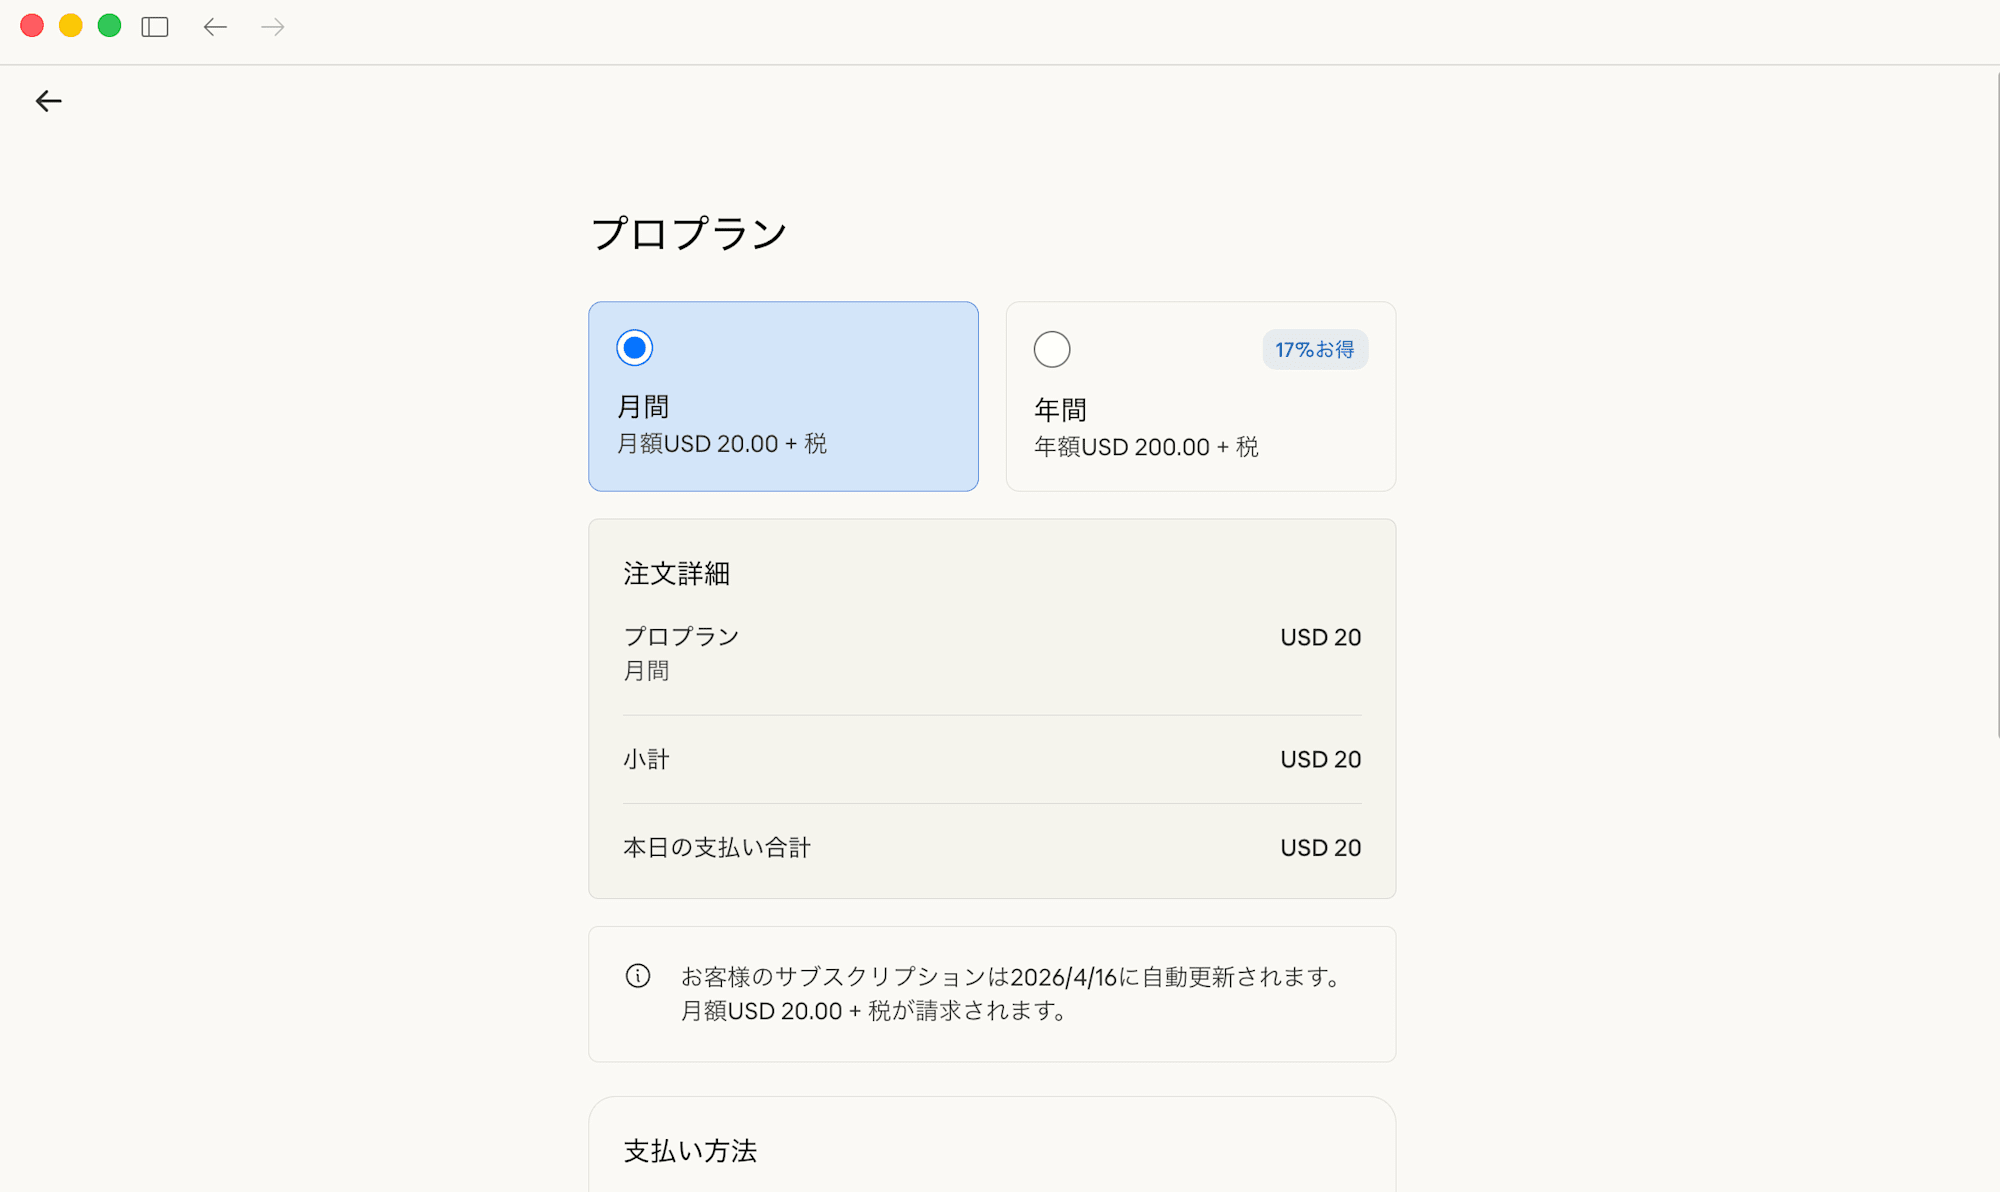
You can choose between monthly and annual billing, but personally, since you don't know how much you'll use it, I think starting with monthly is better.
4. After completing the subscription, restart the Claude Desktop app
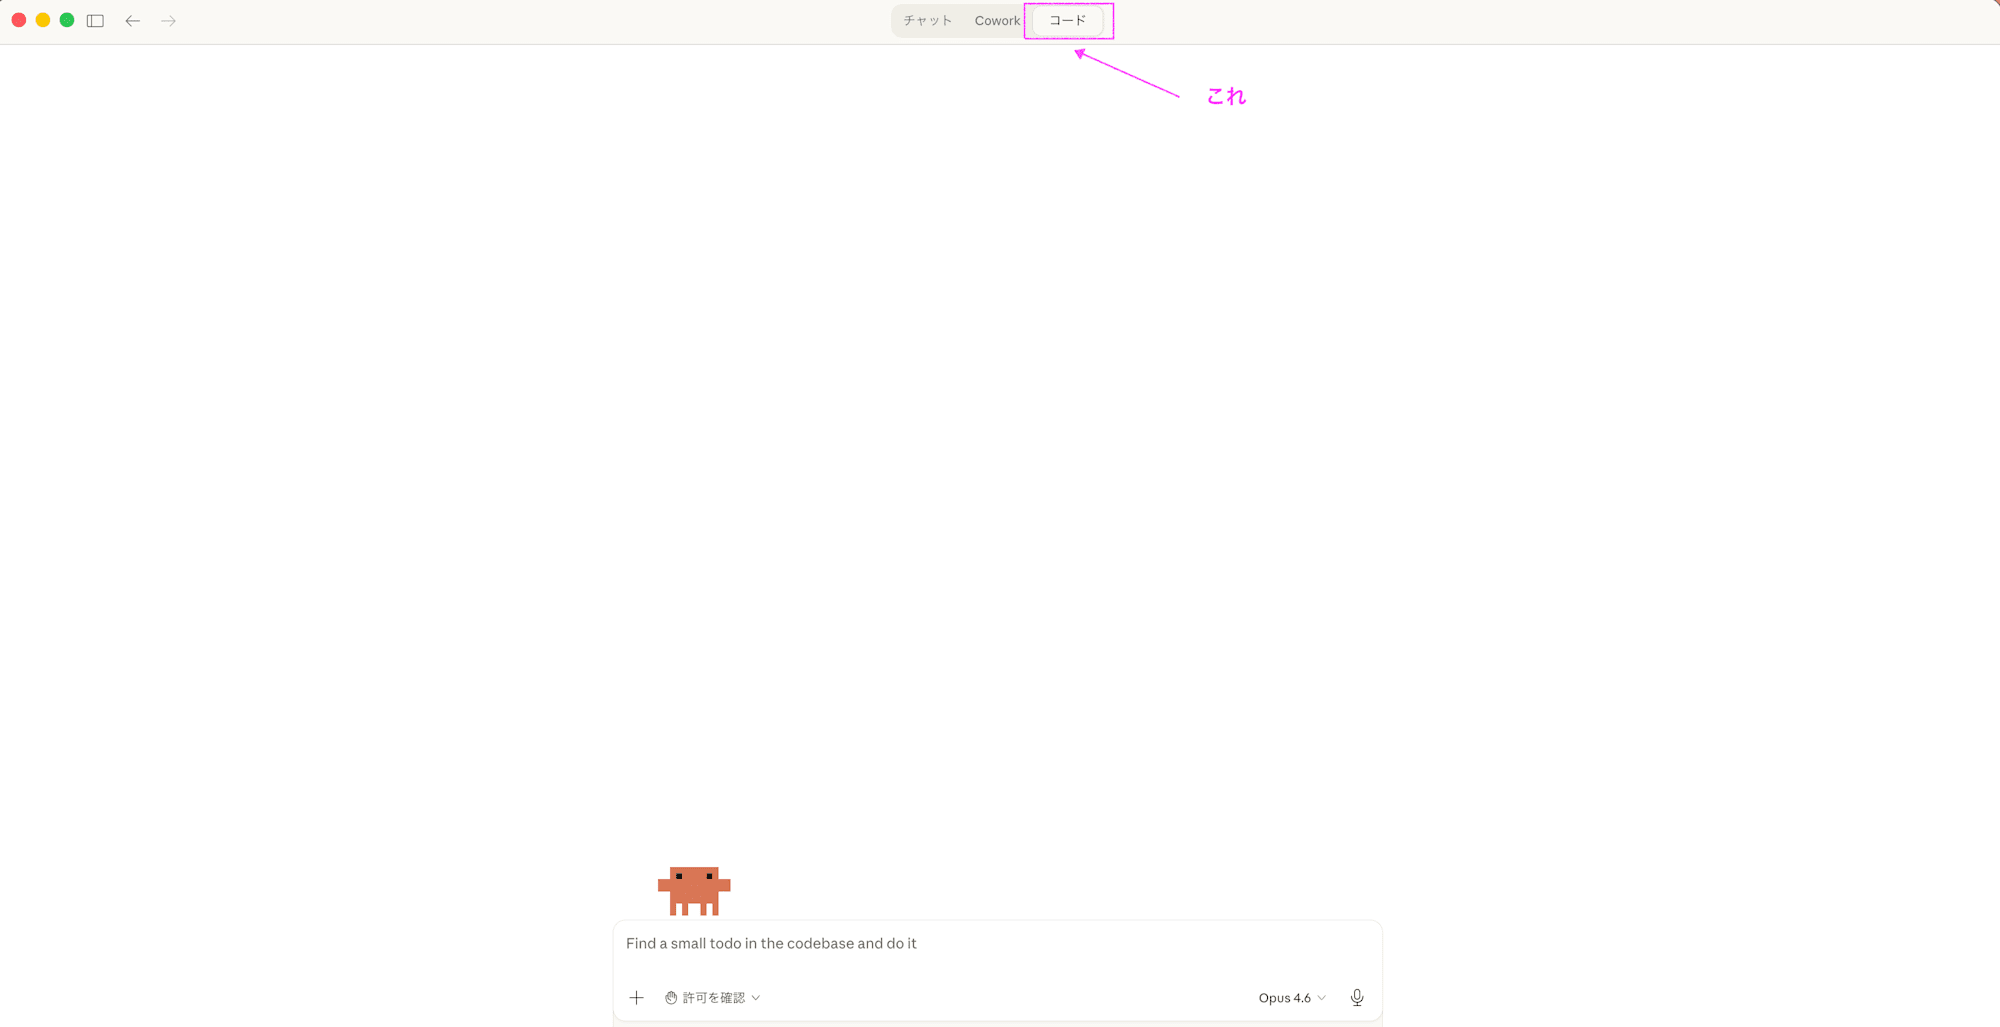
When you switch to a paid plan, the "Code" tab will appear at the top of the app. This is the entrance to Claude Code.
Step 3: Create a Working Directory (Folder)
After installing Claude Desktop and subscribing to a paid plan, you'll probably want to launch Claude Code immediately. But there's something to do first. Prepare a working folder.
Why Create a Folder First?
Claude Code operates from the specified folder. It reads files in that folder and creates new files there.
So if you launch it from the Desktop, all files on your Desktop will be accessible to Claude Code. This risks having unrelated files being manipulated.
By creating a dedicated folder and launching from there, you can limit Claude Code's scope of operation.
Actual Procedure
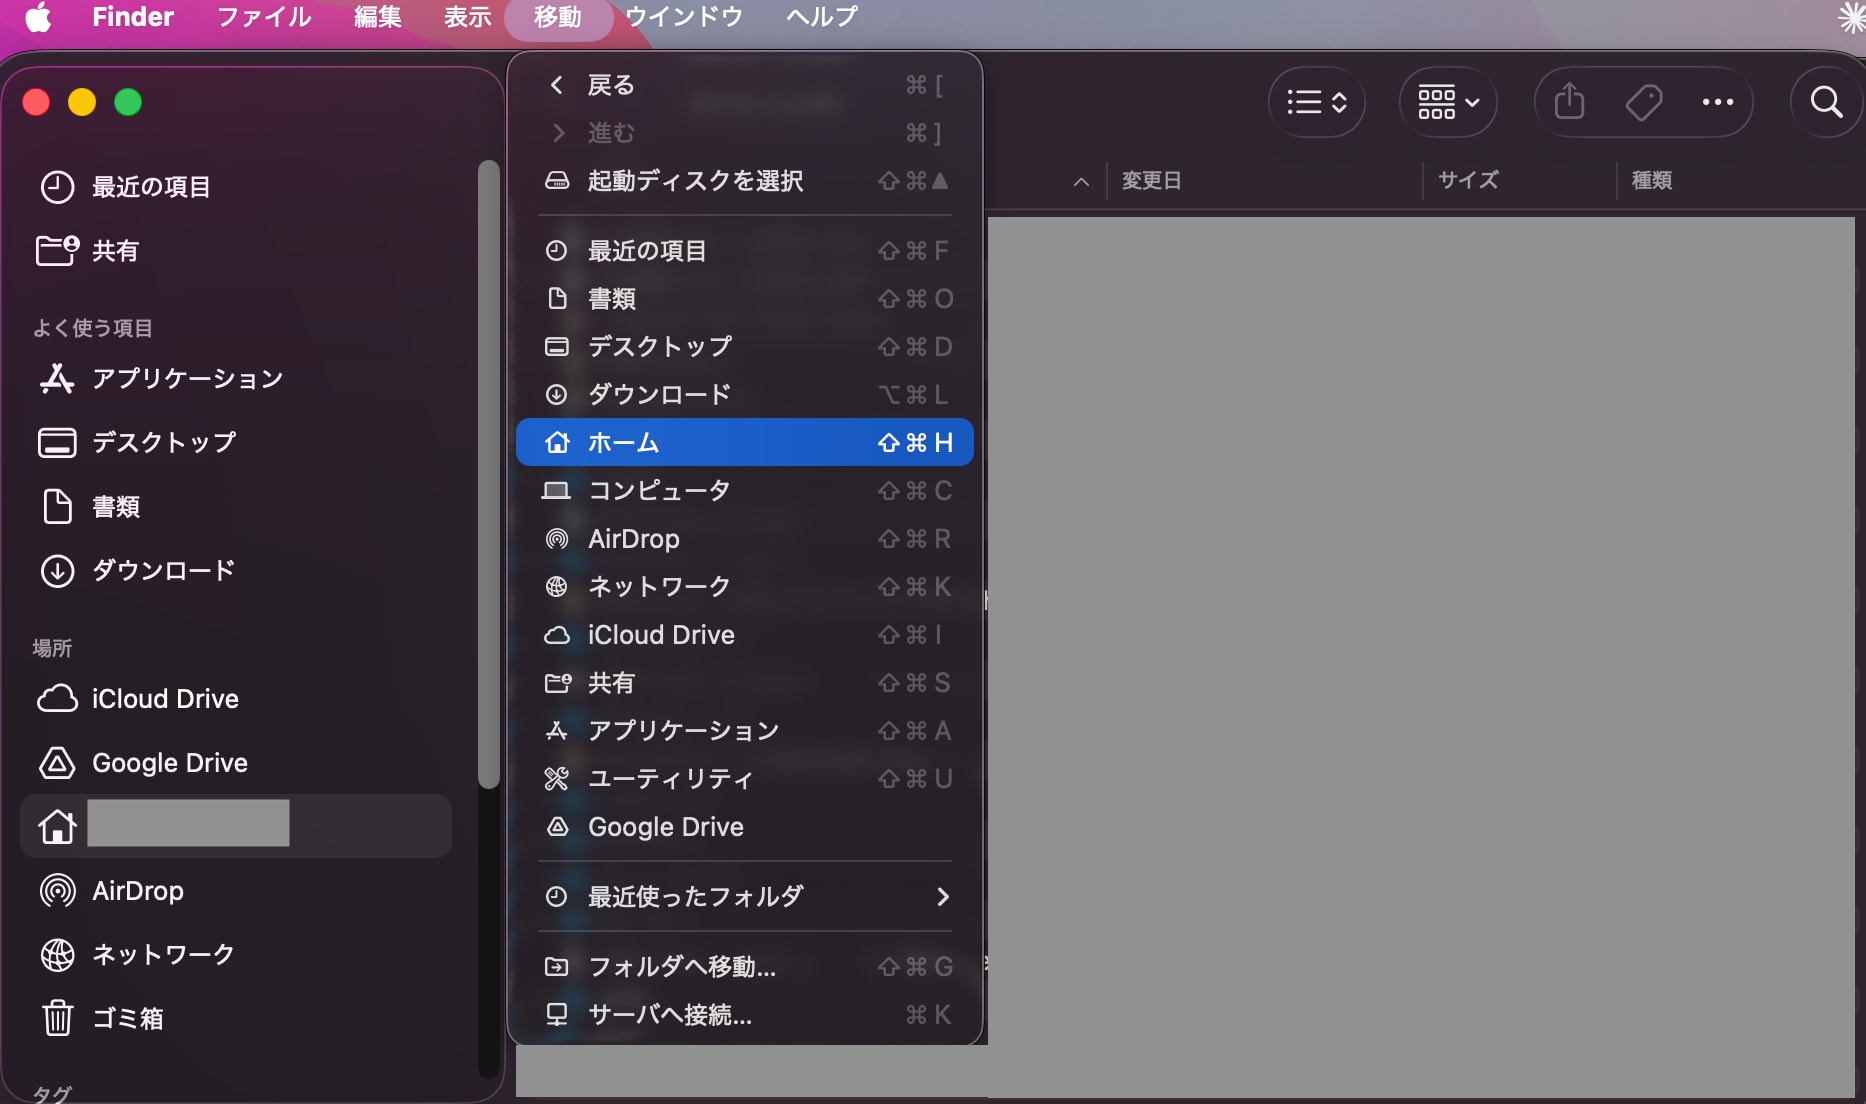
1. Open Finder and navigate to your home directory
The home directory is your user folder. In Finder, you can access it from the menu bar by selecting "Go" → "Home".
2. Create a working folder
Right-click in your home directory → "New Folder" to create a folder. We'll name it claude-work.
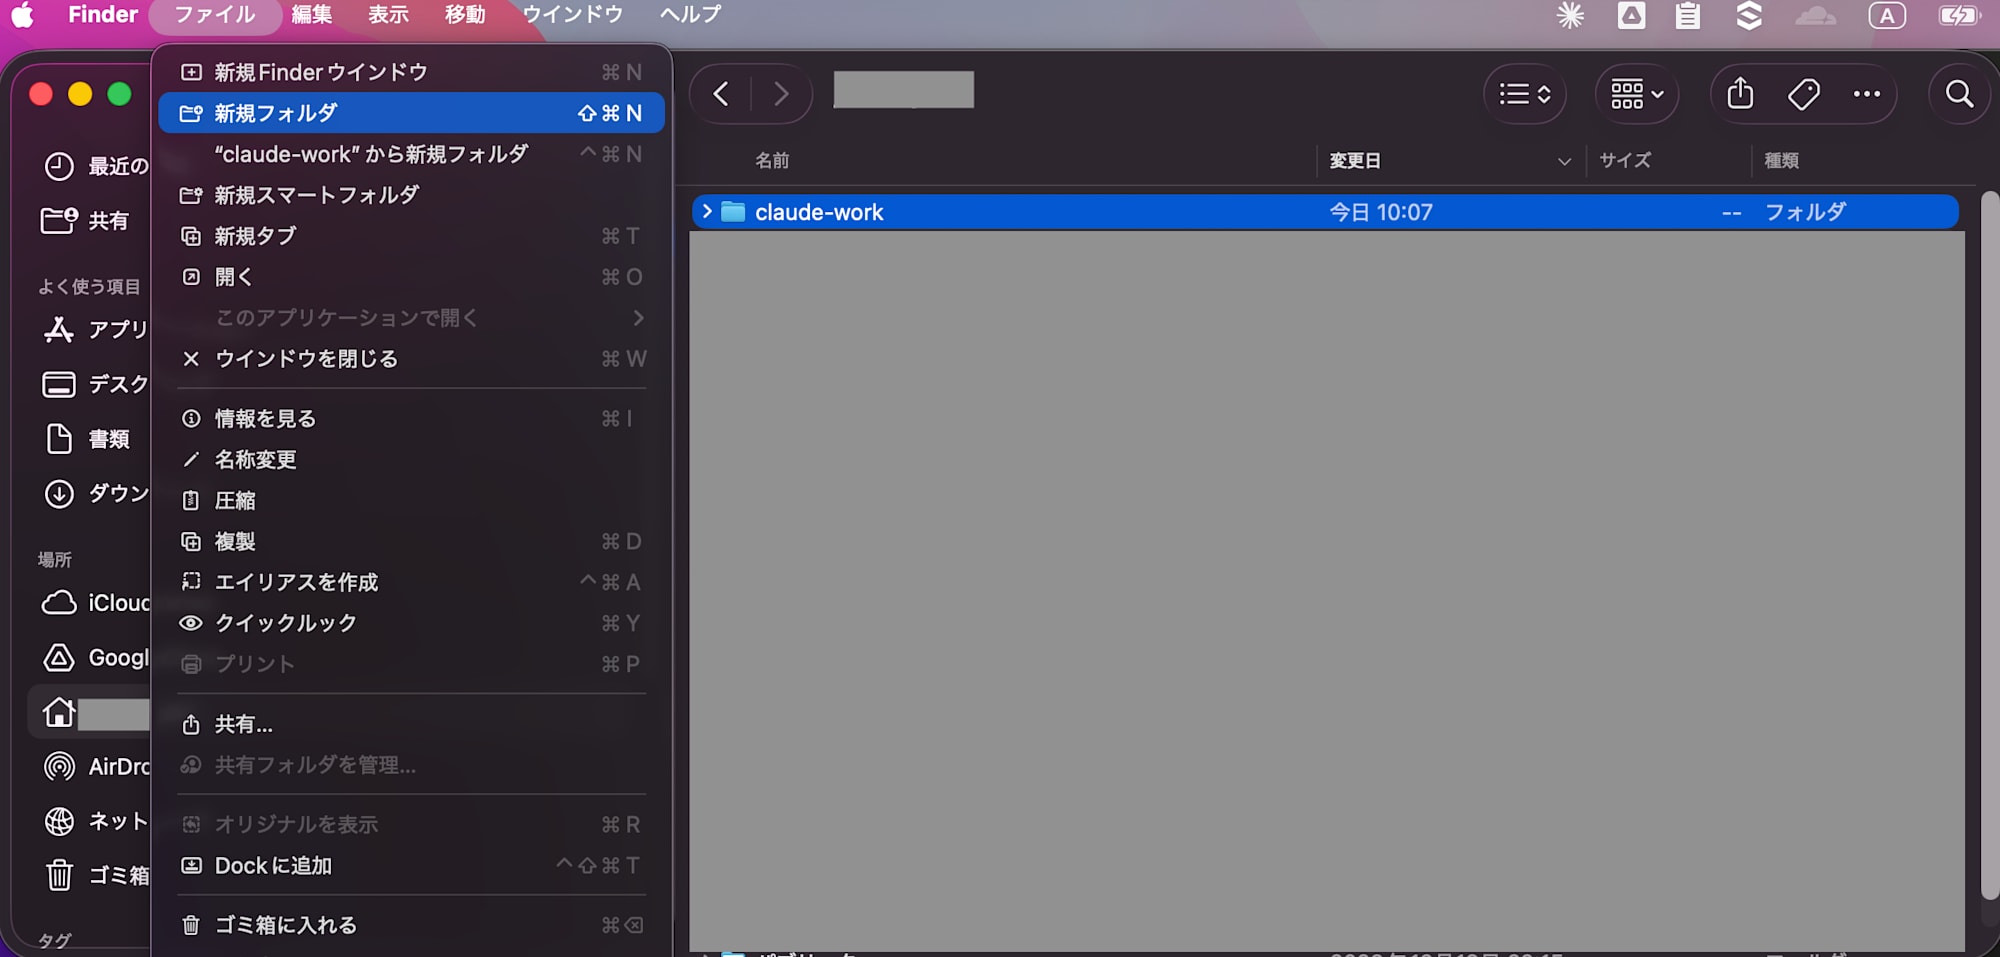
~/claude-work/ ← This will be your home base for future Claude Code work
Considerations: Avoiding Folder Design Mistakes
This may seem trivial but it's important for future use. I'll include lessons from my own mistakes.
Places to avoid
| ❌ Location | Reason |
|---|---|
| Directly on the Desktop | Has many existing files; Claude Code might access unrelated files |
| Directly in the Documents folder | Same as above |
| Directly in the home directory (without creating a folder) | Can access system-related files |
Be explicit about specifying Claude's operating environment by creating a dedicated folder.
I initially deployed it without explicit specification, creating a situation where Claude could reference unintended areas, which wasn't good from a security perspective. I've fixed it now, but making corrections after extensive use can be difficult, so it's better to specify the operating environment from the start.
Create subfolders for each project
As you use Claude Code for multiple tasks, files will accumulate. Dividing them into project-based folders from the beginning will save future headaches.
~/claude-work/
├── CLAUDE.md              ← We'll create this in the next step
├── projects/
│   ├── sales-report/      ← For creating sales reports
│   ├── kintone-agent/     ← For kintone integration automation
│   ├── blog-drafts/       ← For blog drafts
│   └── sandbox/           ← For testing (a folder where breaking things doesn't matter)
├── scripts/               ← Repository for scripts created by Claude Code
└── archive/               ← For storing completed projects
You don't need to create this entire structure at the beginning. The claude-work folder is sufficient. Subfolders will naturally increase as you use it.
Step 4: Create CLAUDE.md
After creating the folder, the next step is creating CLAUDE.md. This might be the most important step for non-engineers.
What is CLAUDE.md?
CLAUDE.md is a configuration file that Claude Code automatically reads at startup. You can write it in plain Japanese/English.
Think of it as a "handover document" for a new team member.
- What your job role is
- What you want to do
- What tools you usually use
- How you want Claude to respond
If you write this down, Claude Code will automatically read it every time, so you don't have to give the same explanation each time you start a new conversation.
Conversely, without CLAUDE.md, Claude Code starts with a blank slate every time.
- It doesn't know you're a non-engineer → Explains using technical terms
- It doesn't know what tools you use → Makes irrelevant suggestions
- It doesn't know what you want it to check before creating files → Immediately generates files
If you assign work to a new subordinate without a handover, they'll ask the same questions every time. It's the same principle.
Actual Creation Process
There are 3 ways to create CLAUDE.md, but having Claude Code create it is the easiest.
| Method | Procedure | Recommendation Level |
|---|---|---|
| Have Claude Code create it | Type "Create CLAUDE.md" immediately after launch | ★★★ |
| Create an empty file and ask for content | Create a new text file in Finder → Rename to CLAUDE.md → Ask Claude Code to "add to it" |
★★☆ |
| Manual creation with text editor | Copy-paste the template below and save | ★☆☆ |
Let's try the recommended method.
1. Open the "Code" tab in Claude Desktop
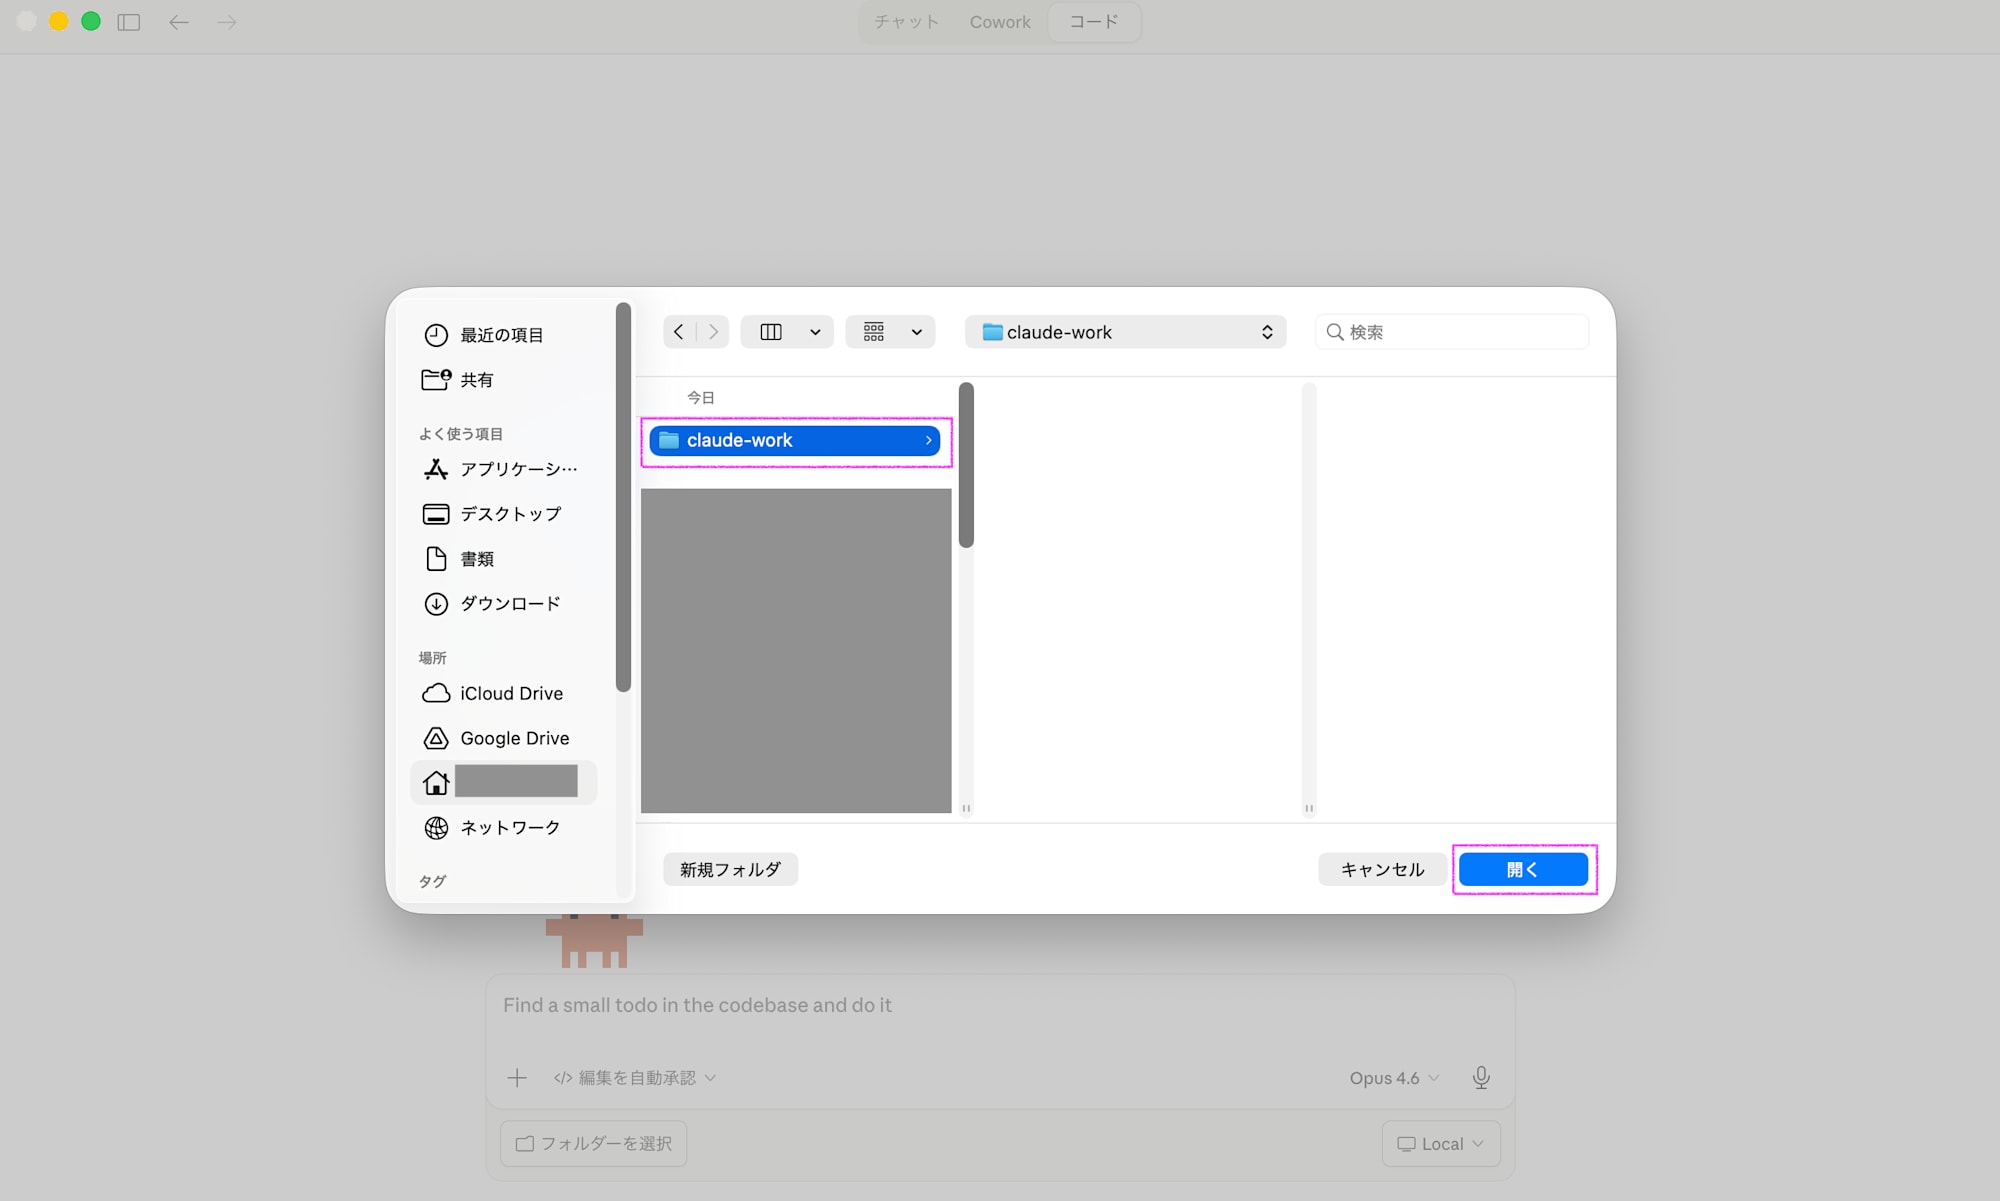
2. Specify the claude-work folder we created earlier as the project directory
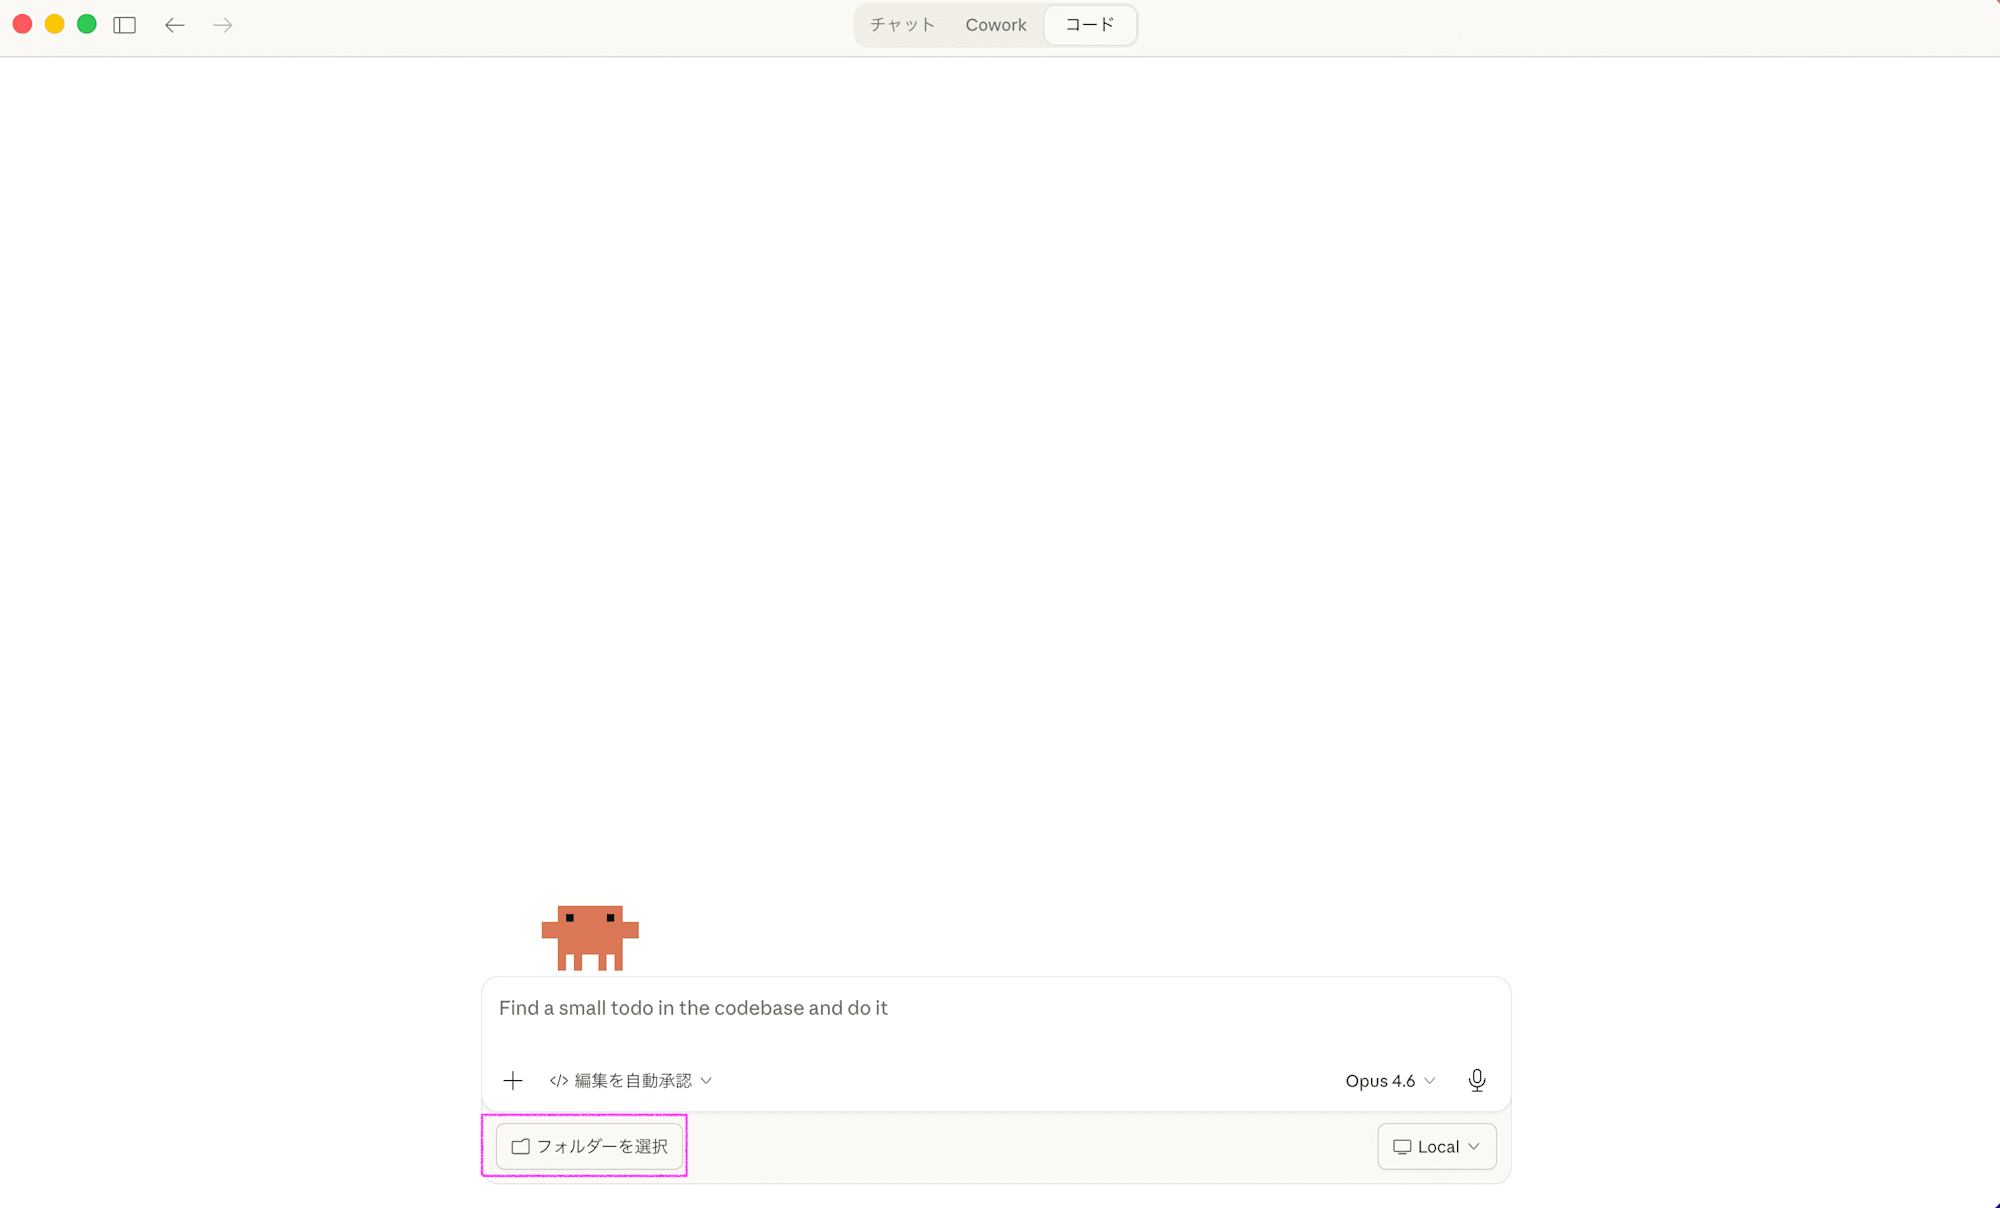
3. Enter the following as your first message
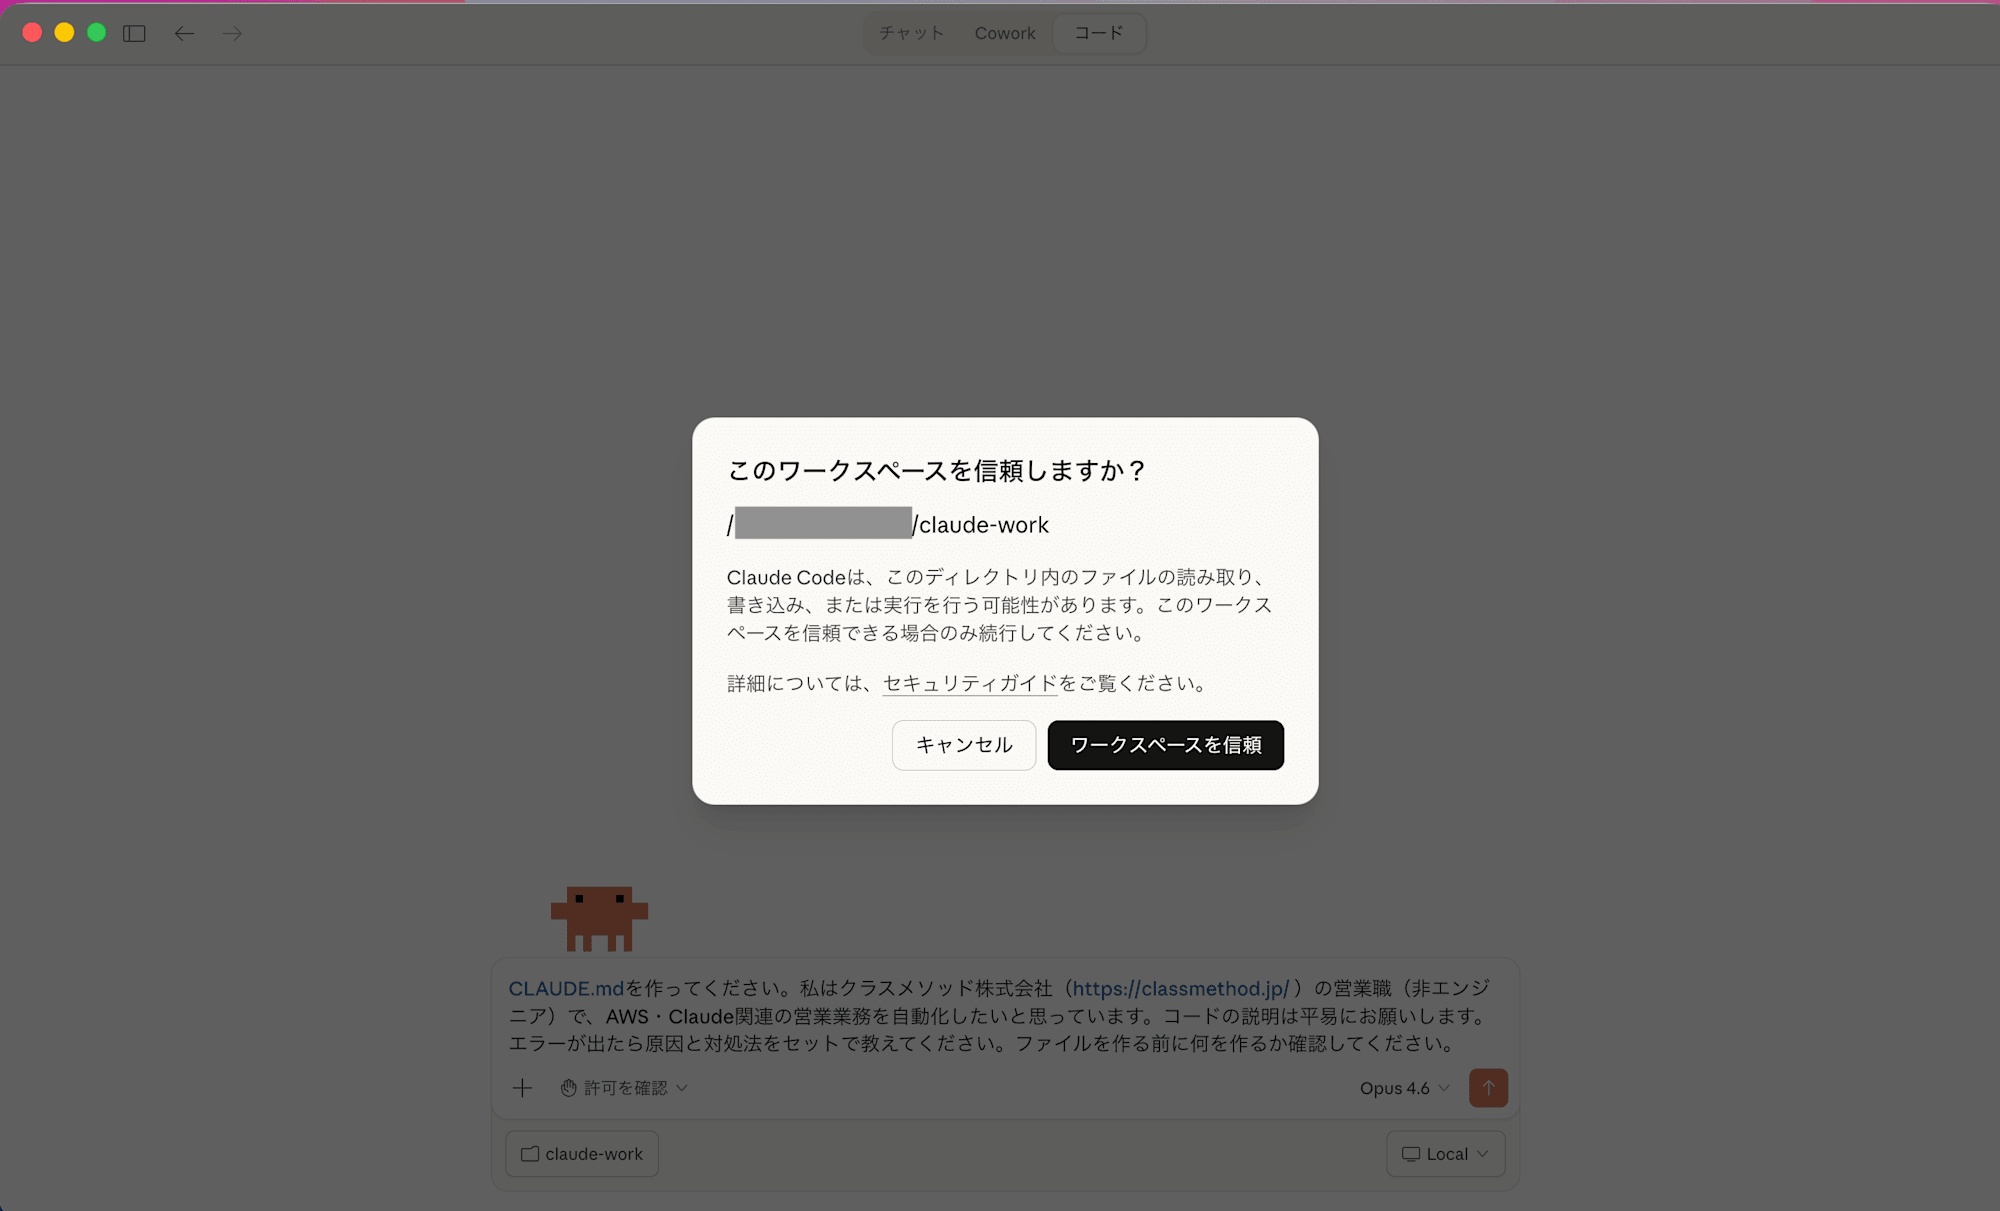
Please create CLAUDE.md. I am a sales professional (non-engineer) at Classmethod Inc. (https://classmethod.jp/), and I want to automate AWS and Claude-related sales operations. Please explain code in simple terms. If errors occur, tell me the cause and solution together. Please confirm what you'll create before making any files.
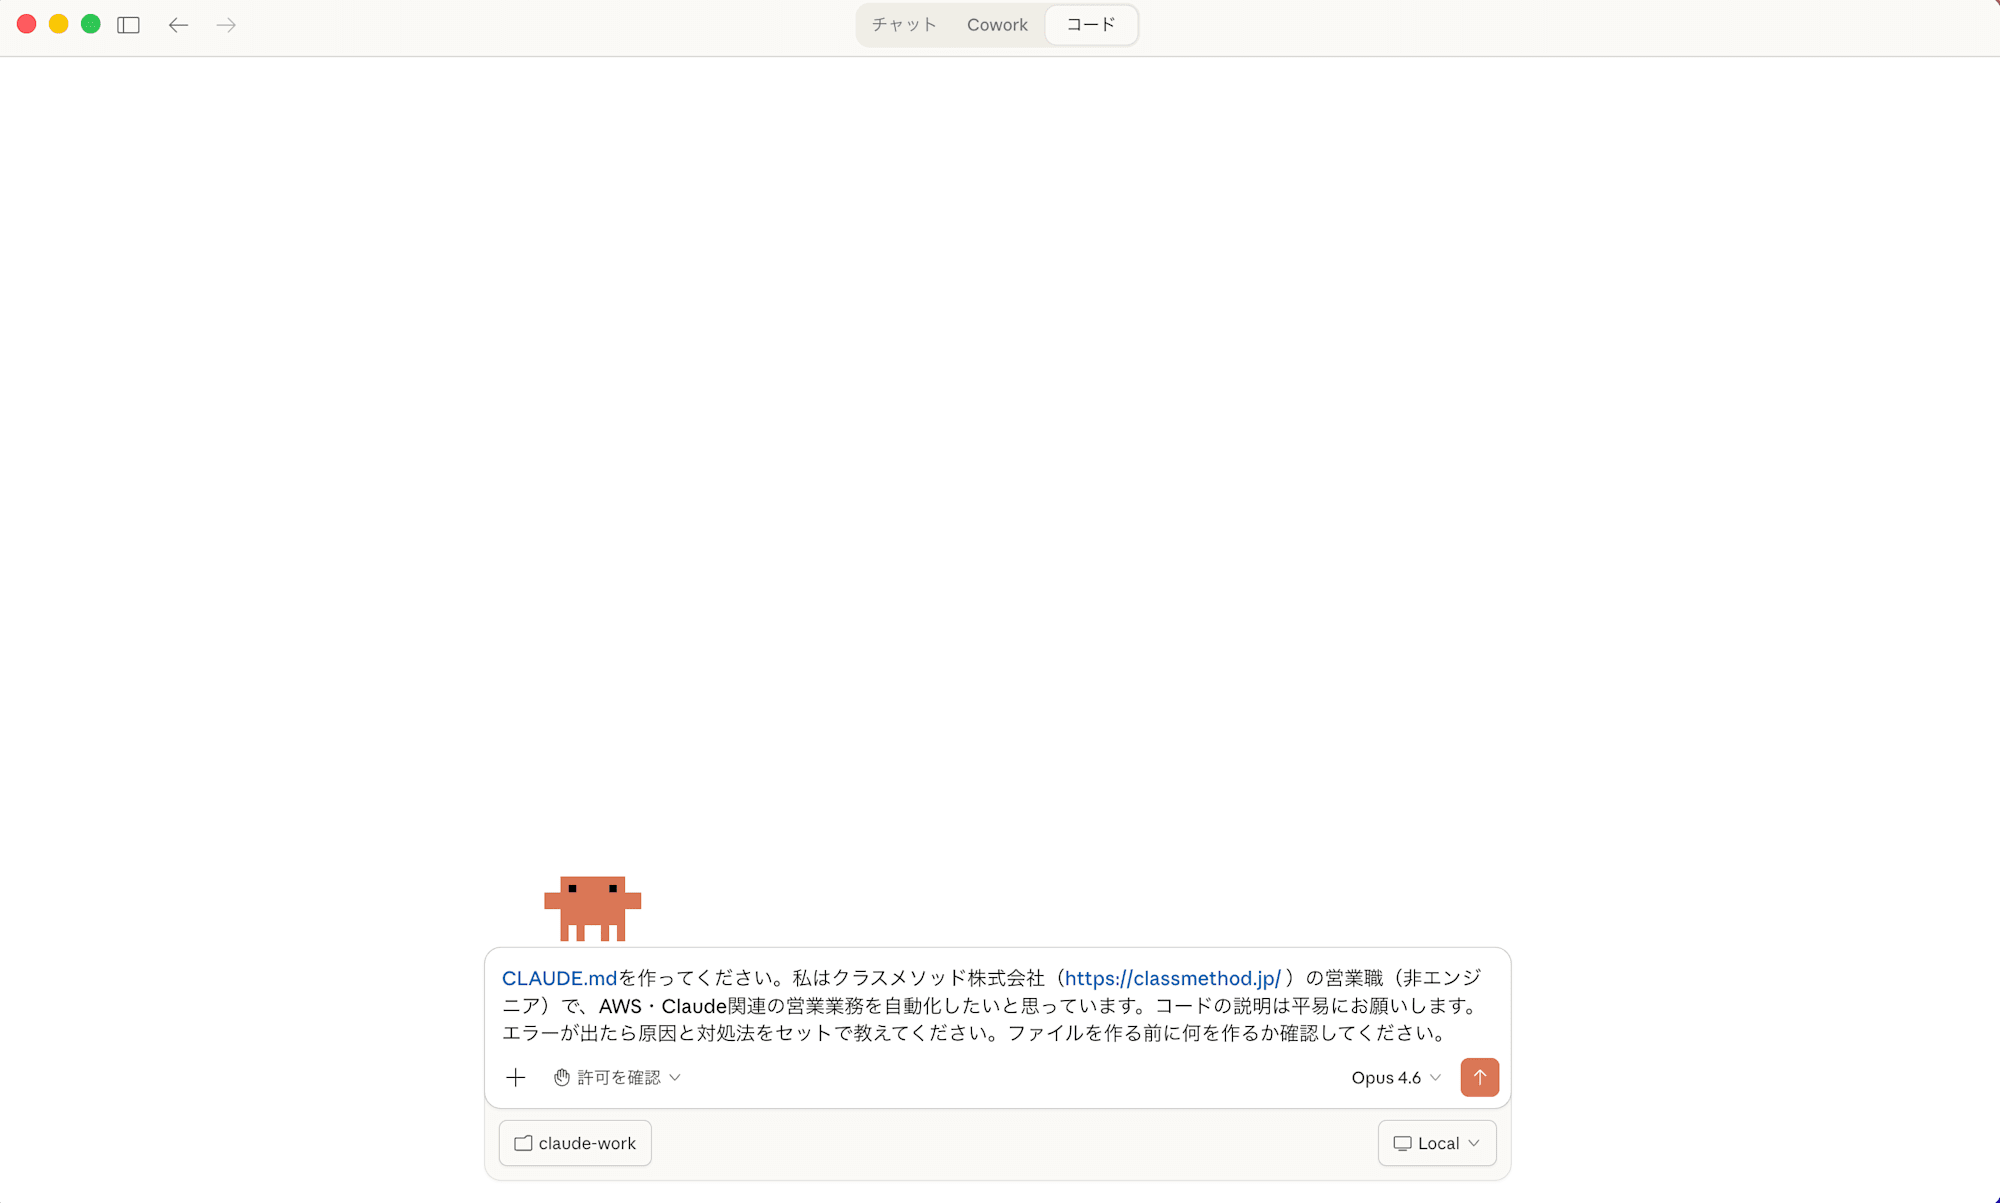
You'll be asked if you trust the workspace. Since we created this folder specifically as Claude's operating environment, there's no problem proceeding with "Trust workspace".
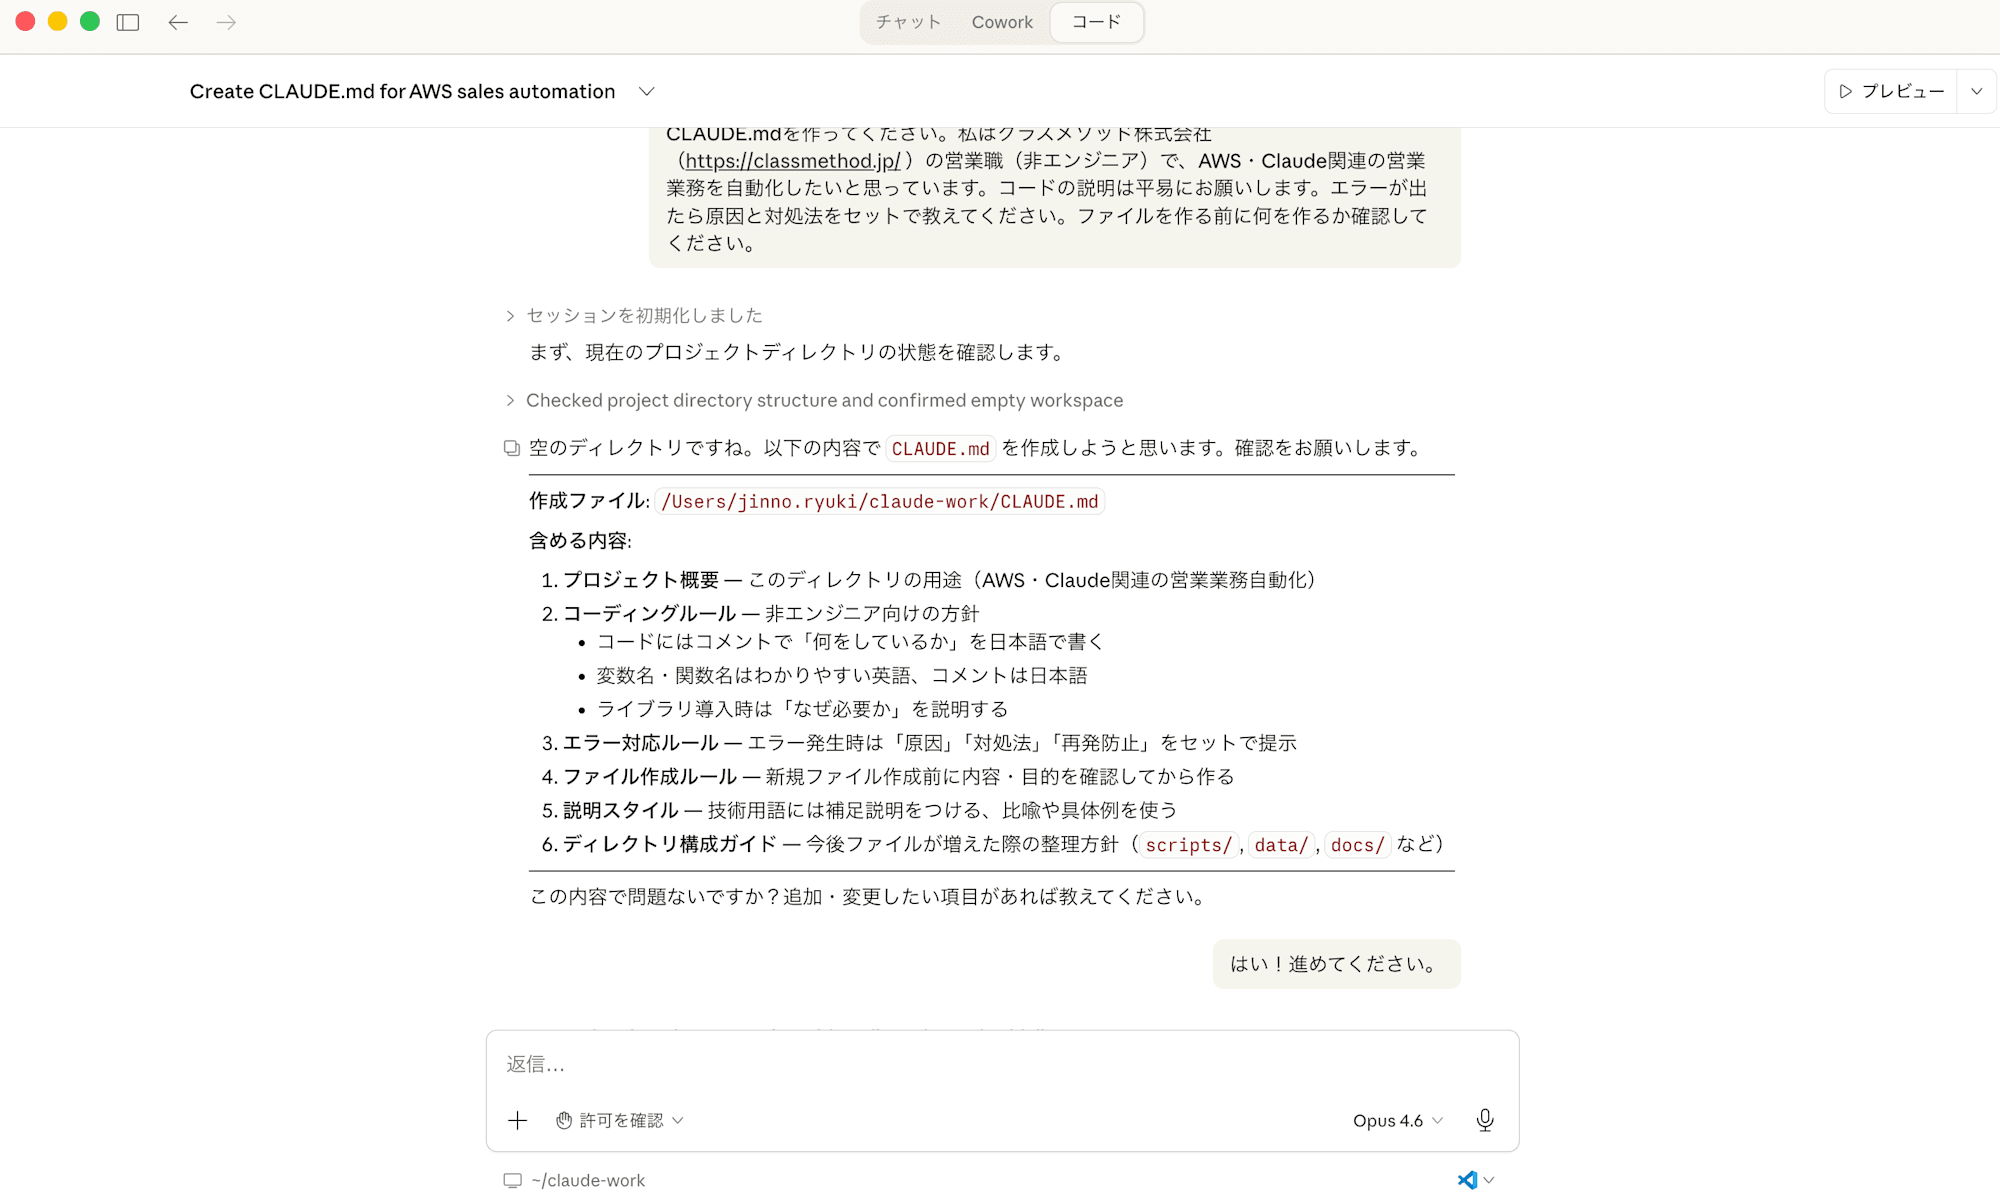
4. Claude Code will generate CLAUDE.md for you
It will ask if this is good, so tell it to proceed.
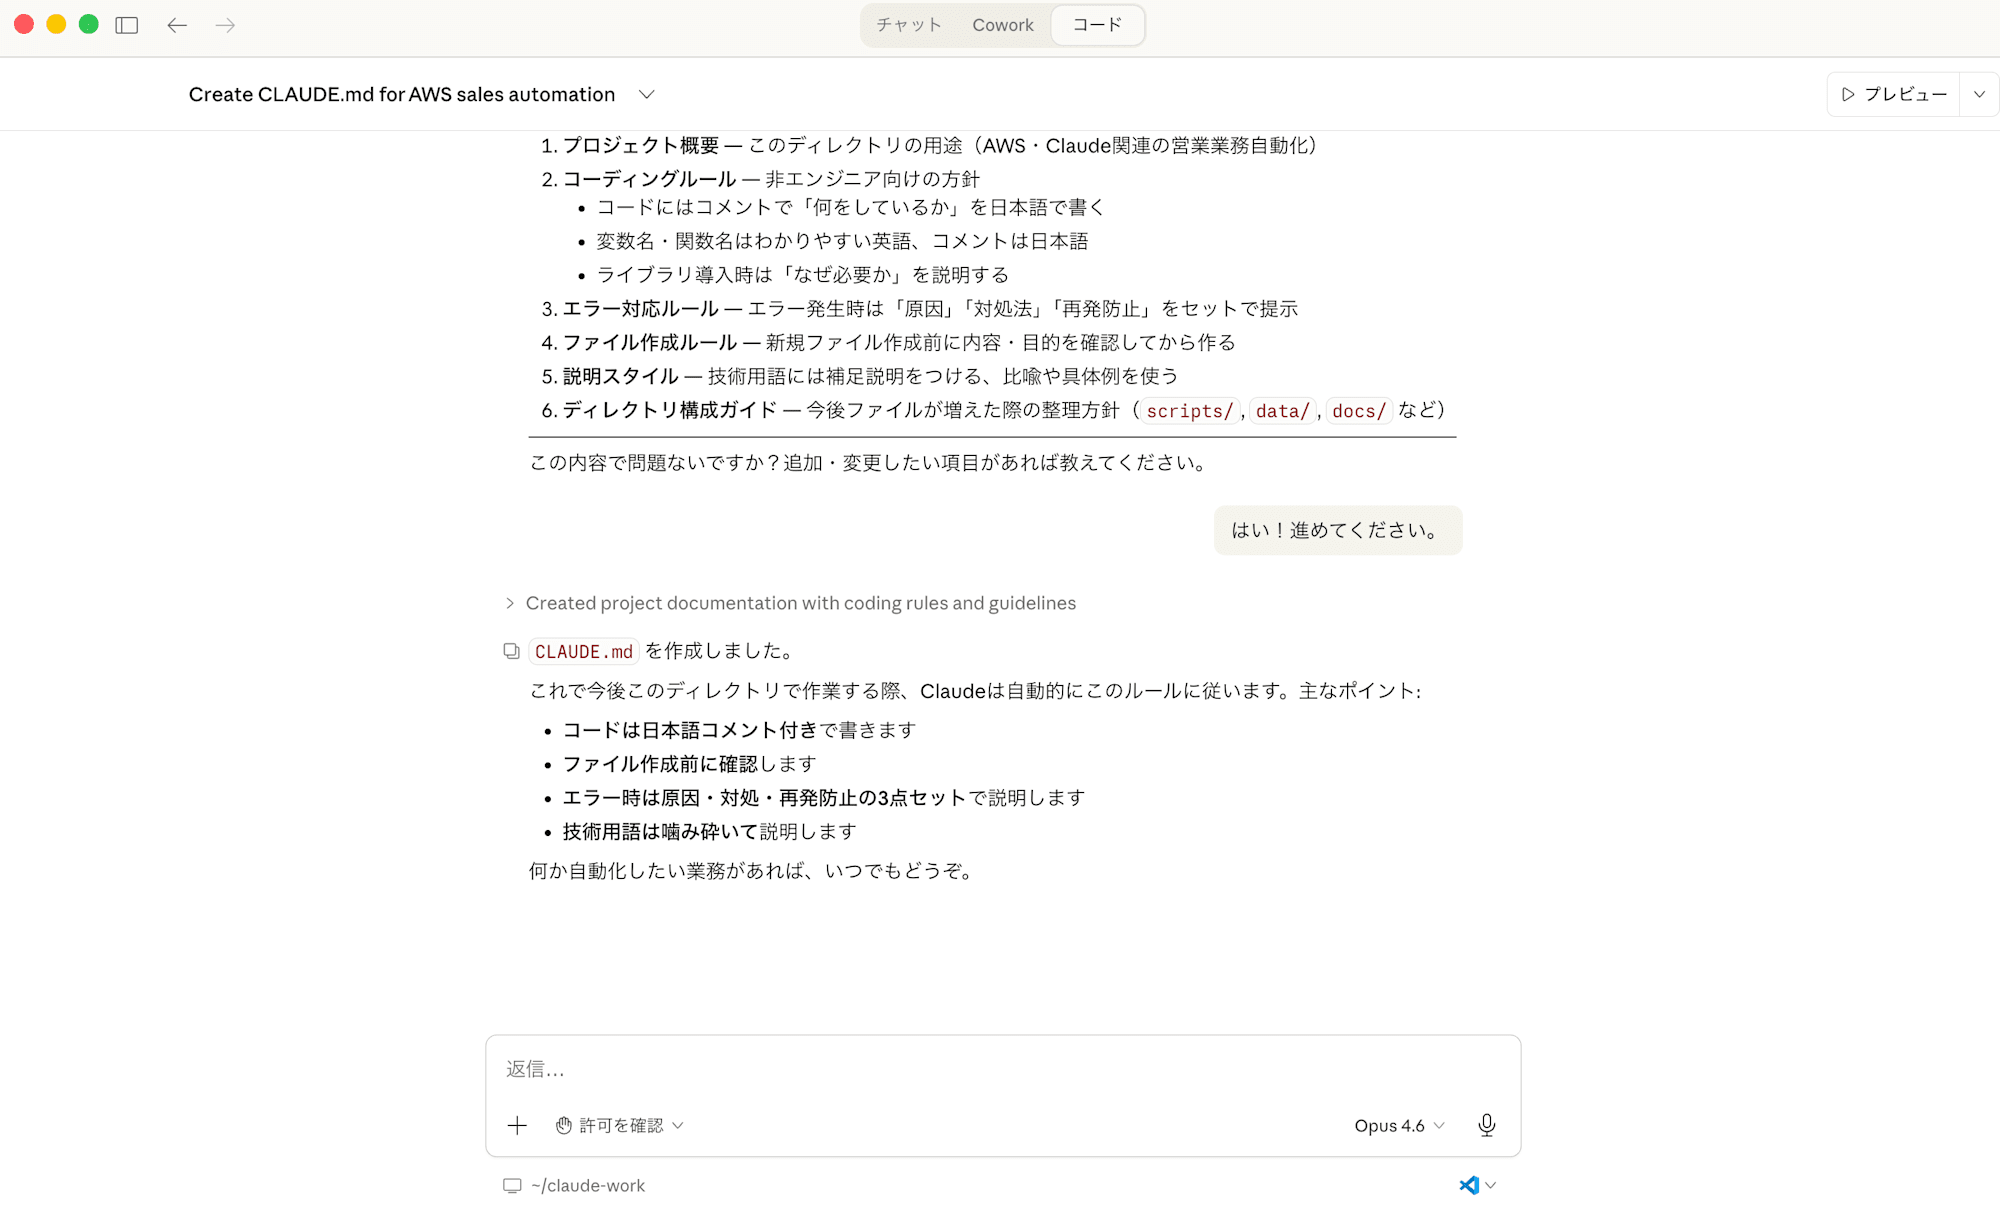
That's it. Claude Code will automatically create a CLAUDE.md tailored to your situation.
Considerations: Important Points About CLAUDE.md
Best timing is "the first interaction after launch"
CLAUDE.md is read when Claude Code starts up. So if you create it during your first conversation, you'll benefit from it starting with the second launch. If you think "I'll do it later," you might forget, so it's best to do it right away.
Start minimal and grow it later
You don't need to write a perfect CLAUDE.md from the beginning. You can add things you wish you had included as you use it. Here's the CLAUDE.md created from the prompt above:
# Project: Sales Operations Automation (AWS & Claude Related)

## Overview

Workspace for automating AWS and Claude-related sales operations at Classmethod Inc.

Design prioritizes operation and maintenance by non-engineers.

## Coding Rules

### Clarity First

- Include Japanese comments explaining "what is being done" in the code

- Each function/script should have a single responsibility

- Use meaningful English variable/function names (e.g., `customer_list`, `send_email`)

### When Introducing Libraries/Tools

- Explain why the library is necessary before introducing it

- Include installation steps

## Error Handling Rules

When errors occur, provide these three points together:

1. **Cause**: Why the error happened (technical terms explained in simple language)

2. **Solution**: Specific steps to fix it (executable at copy-paste level)

3. **Prevention**: Points to prevent the same error

## File Creation Rules

- Confirm "what to create and why" before creating new files

- Don't create new files if editing existing ones will suffice

- Don't write sensitive information (API keys, customer data, etc.) directly in code; manage them with environment variables or `.env` files

## Explanation Style

- Add supplementary explanations in parentheses for technical terms

- Use metaphors and concrete examples when necessary

- Include summaries like "In other words, ○○"

## Directory Structure
claude-work/

├── CLAUDE.md # This file (project rules)

├── scripts/ # Automation scripts

├── data/ # Input/output data (CSV, etc.)

├── docs/ # Documents and notes

└── templates/ # Email templates, etc.

※ Create directories when needed (don't create empty folders in advance)
The one I'm currently using includes much more, but you can update it through interactions with Claude, so starting with the minimum is fine.
CLAUDE.md should be placed "directly under the claude-work folder"
Claude Code reads the CLAUDE.md directly under the folder where it starts. If you put it in a subfolder, it won't be read, so be careful. With our creation method, it should automatically be created in the correct location.
~/claude-work/
├── CLAUDE.md       ← ✅ Place it here
├── projects/
│   └── CLAUDE.md   ← ❌ It won't be read at startup if it's here
└── ...
Summary
In this article, we went through the complete environment setup for non-engineers to start using Claude Code. Let's review the steps:
| Step | Task | Estimated Time |
|---|---|---|
| Step 1 | Install Claude Desktop | 5 minutes |
| Step 2 | Subscribe to a paid plan (starting with Pro) | 5 minutes |
| Step 3 | Create a working folder claude-work |
1 minute |
| Step 4 | Create CLAUDE.md | 3 minutes |
You can set up your Claude Code environment in just 15 minutes.
As mentioned earlier, steps 3 and 4 are particularly important:
- Create and launch from a dedicated folder (not directly on the Desktop)
- Create CLAUDE.md right after launch (having Claude Code create it is easiest)
These two initial steps significantly impact your experience with Claude Code. If you start using it without a proper environment, files will be scattered, you'll have to repeat explanations, and folders and files will spread unexpectedly, making it difficult to use.
On the other hand, by trying it out, you'll get ideas about potential use cases and ways to improve efficiency, and you'll start seeing real benefits!
Once your environment is set up, non-engineers can use Claude Code normally, so please use these steps to get started!
In future articles, I'll share experiences, successes, and failures from a non-engineer's perspective, which I hope will be helpful!