
I tried integrating S3 with Code Interpreter built-in tool in Strands Agents
This page has been translated by machine translation. View original
Introduction
Hello, this is Jinno from the Consulting Department, who loves supermarkets.
In my previous article, I introduced how to explicitly pass files to and retrieve files from AgentCore Code Interpreter using the built-in tool AgentCoreCodeInterpreter in Strands Agents.
While the previous article covered writing local files to a sandbox, you might want to use S3 when dealing with large datasets.
Checking the AWS official documentation, I found that you can integrate with S3 by creating a custom Code Interpreter:
You can create a custom Code Interpreter tool with an execution role to upload/download files from Amazon S3.
I've vaguely known this was possible for a while, so I'd like to try it out.
Let's create a custom Code Interpreter and implement S3 integration.
Prerequisites
I used the following versions for this verification:
| Item | Version |
|---|---|
| Python | 3.12 |
| strands-agents | 1.20.0 |
| strands-agents-tools | 0.2.18 |
| AWS CLI | 2.28.8 |
Also, I assume that you have the necessary permissions to operate AWS resources.
Let's Try It
I'll create the S3 bucket and IAM role for Code Interpreter using AWS CLI, while creating the custom Code Interpreter in the console, which seems more intuitive.
Creating an S3 Bucket
First, let's create an S3 bucket for Code Interpreter to access.
# Get account ID
ACCOUNT_ID=$(aws sts get-caller-identity --query "Account" --output text)
REGION="us-west-2"
BUCKET_NAME="code-interpreter-artifacts-${ACCOUNT_ID}"

# Create S3 bucket
aws s3 mb s3://${BUCKET_NAME} --region ${REGION}

# Place objects as prefixes
aws s3api put-object --bucket ${BUCKET_NAME} --key input/
aws s3api put-object --bucket ${BUCKET_NAME} --key output/
The plan is to store files to be passed to Code Interpreter in input/ and files generated by Code Interpreter in output/.
Creating an IAM Role
Let's create an IAM role for Code Interpreter to access S3.
First, save the trust policy to a file.
cat << 'EOF' > trust-policy.json
{
  "Version": "2012-10-17",
  "Statement": [
    {
      "Effect": "Allow",
      "Principal": {
        "Service": "bedrock-agentcore.amazonaws.com"
      },
      "Action": "sts:AssumeRole"
    }
  ]
}
EOF
Next, create a permission policy for S3 access.
We're using the BUCKET_NAME environment variable set earlier so that the account ID is automatically inserted.
cat << EOF > s3-access-policy.json
{
  "Version": "2012-10-17",
  "Statement": [
    {
      "Sid": "S3Access",
      "Effect": "Allow",
      "Action": [
        "s3:GetObject",
        "s3:PutObject",
        "s3:ListBucket"
      ],
      "Resource": [
        "arn:aws:s3:::${BUCKET_NAME}",
        "arn:aws:s3:::${BUCKET_NAME}/*"
      ]
    }
  ]
}
EOF
We're continuing to use the BUCKET_NAME environment variable set when creating the S3 bucket. If your terminal session has closed, please set it again before running.
Create the IAM role and attach the policy:
# Create IAM role
aws iam create-role \
  --role-name CodeInterpreterS3Role \
  --assume-role-policy-document file://trust-policy.json

# Attach inline policy
aws iam put-role-policy \
  --role-name CodeInterpreterS3Role \
  --policy-name S3AccessPolicy \
  --policy-document file://s3-access-policy.json

# Check role ARN
aws iam get-role --role-name CodeInterpreterS3Role --query "Role.Arn" --output text
If the role ARN is displayed, you're good to go. We'll use the role name later.
Creating a Custom Code Interpreter
Let's create a custom Code Interpreter from the AWS console.
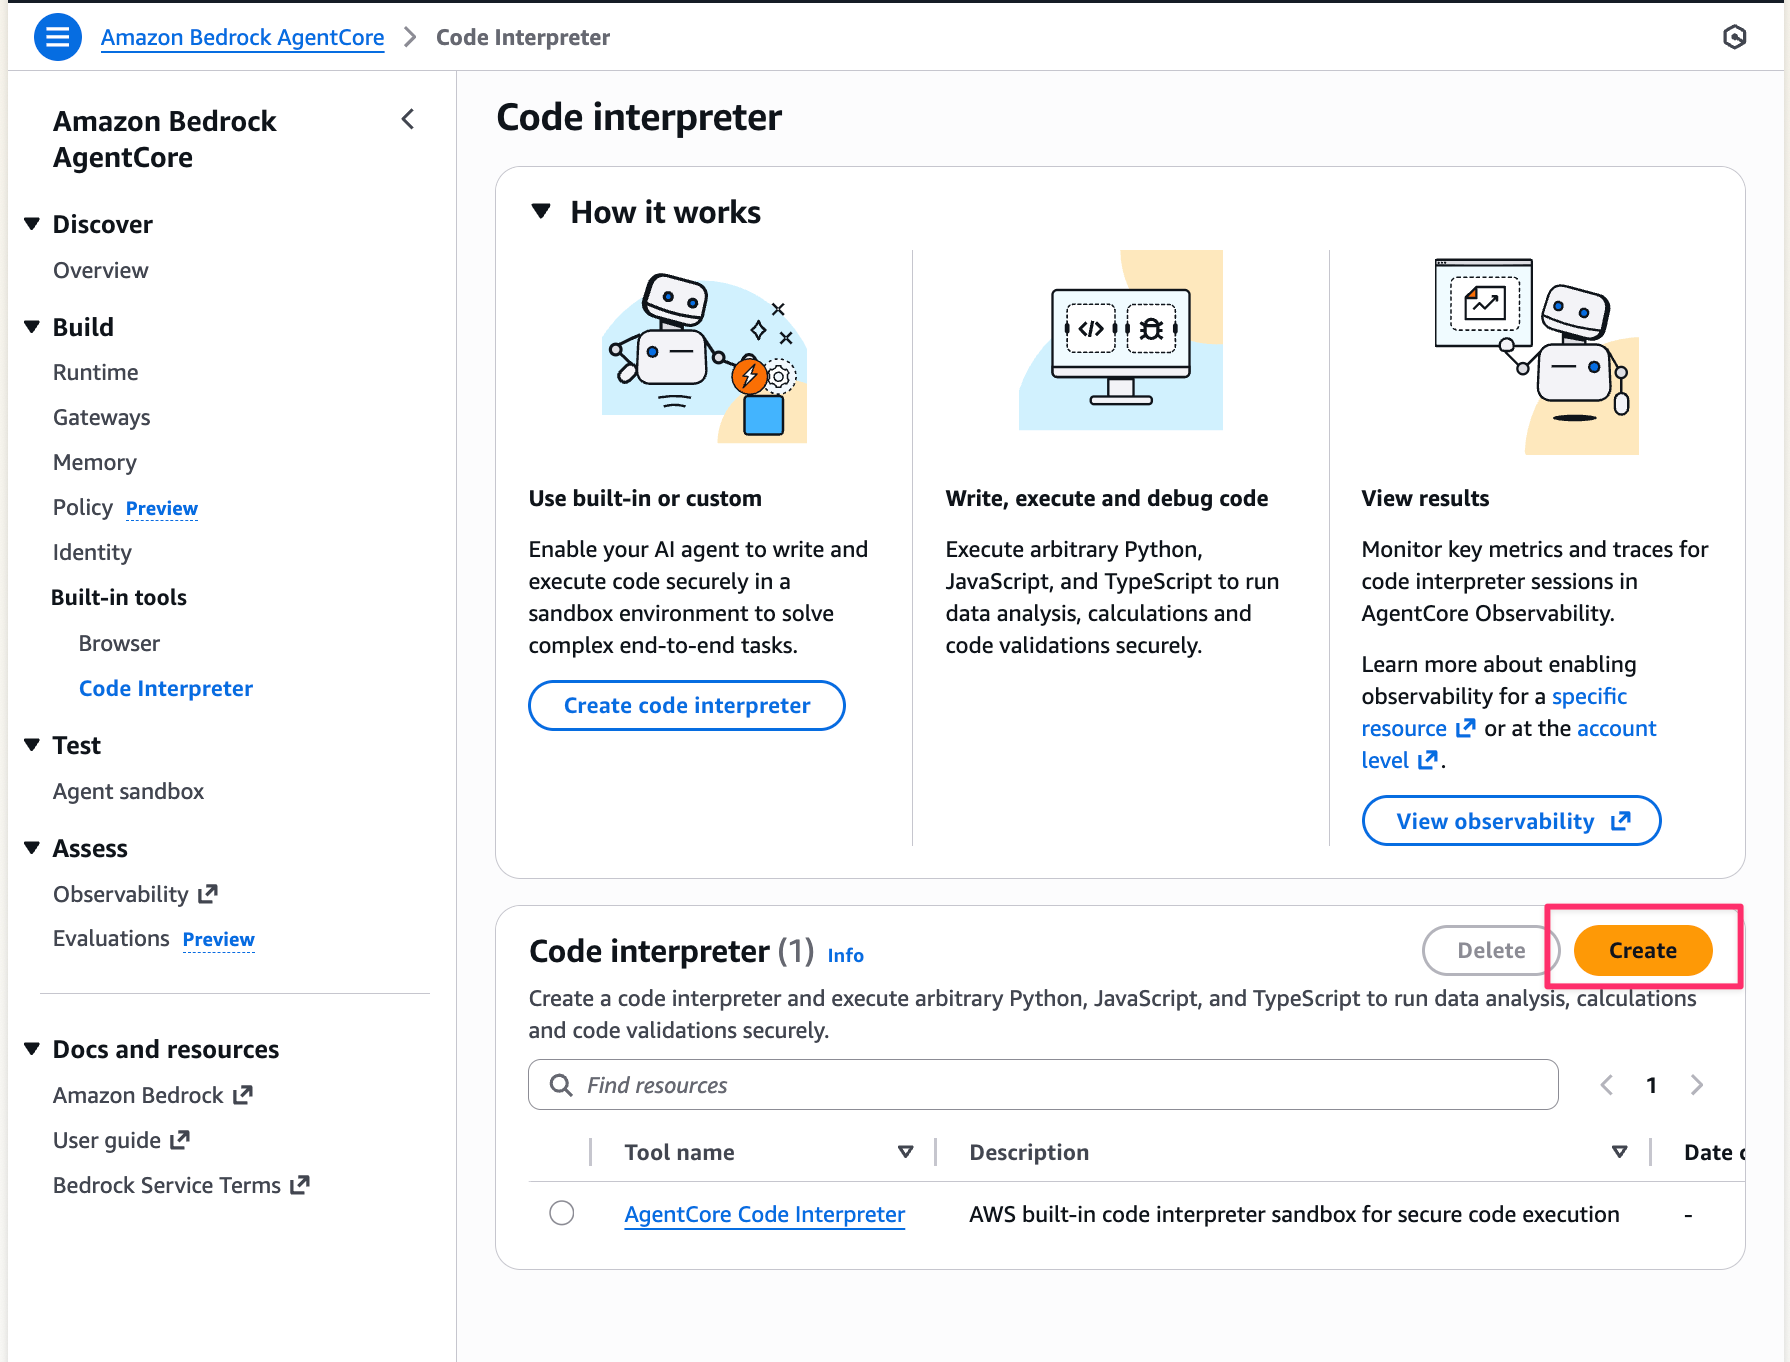
- Open the Amazon Bedrock AgentCore console, and select
Built-in tools→Code Interpreterfrom the left menu - Click the
Createbutton
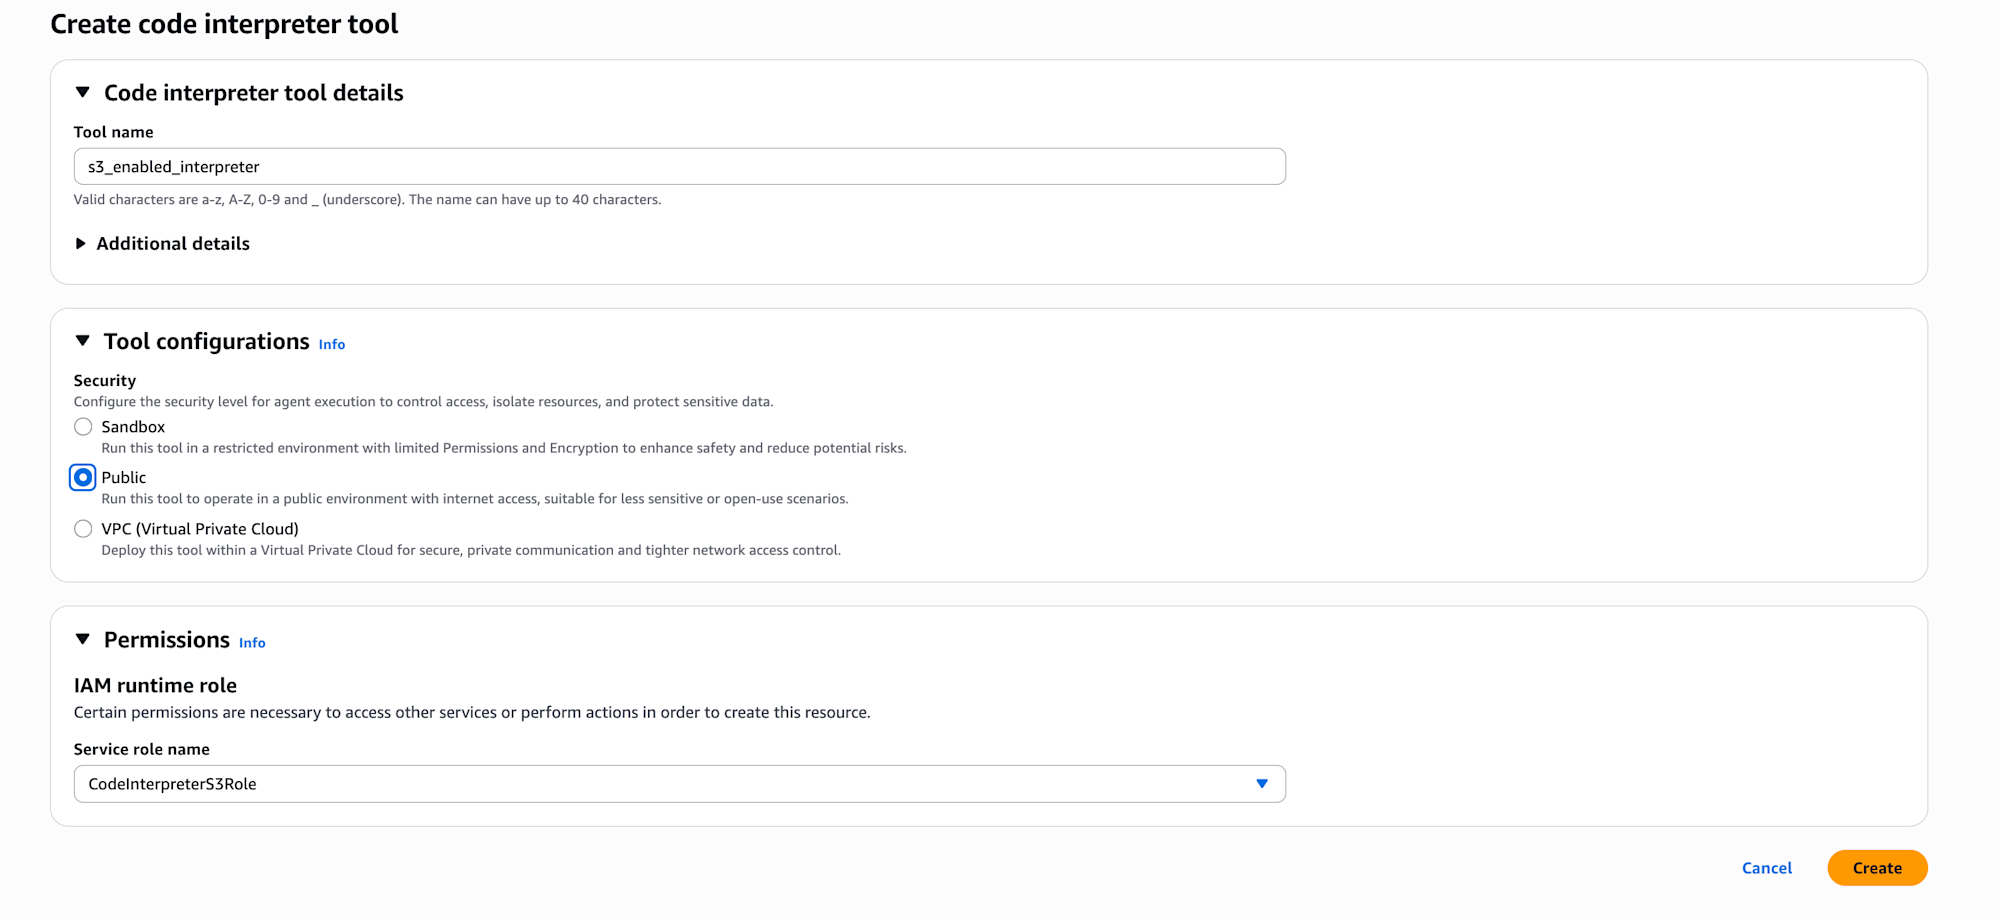
- Enter the following information and select the
Createbutton:- Tool name:
s3-enabled-interpreter(or any name you prefer) - Security: Select
Public - Service Role Name: Select the
CodeInterpreterS3Rolewe created earlier
- Tool name:
Until now I had only used the default AgentCore Code Interpreter, so I discovered that you can create custom ones and configure network settings and IAM roles here.
About Network Mode
According to the official documentation, here's information about Network mode.
You need to select a mode based on security requirements and services you want to integrate with.
| Mode | Description | Use Case |
|---|---|---|
| Public | Allows access to the public internet | For external API integration, when pip install is needed |
| Sandbox | Access to external networks is restricted | When security requirements are strict |
| VPC | Allows access to private resources within VPC (DB, internal APIs, etc.) | When you need to access resources in a private subnet |
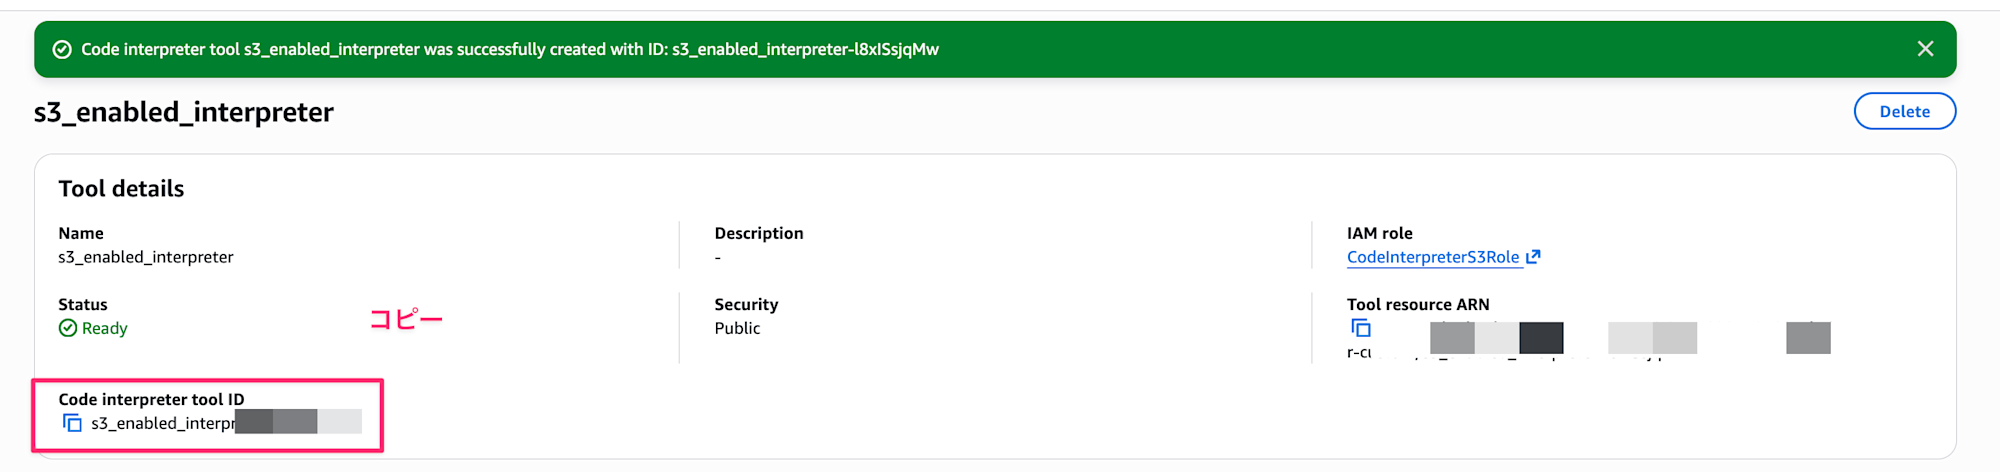
After creation, take note of the Code Interpreter tool ID. We'll use it later.
Preparing a Test Dataset
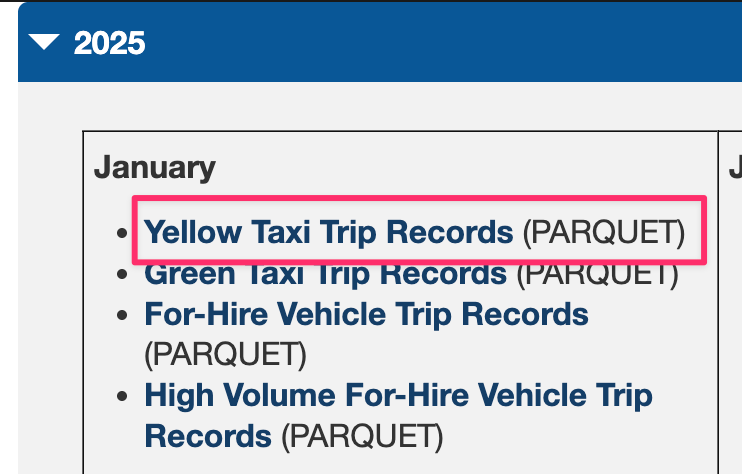
For this test, we'll use the NYC Taxi Trip data published by New York City. This dataset contains taxi ride records in New York City.
Please download the Yellow Taxi Trip Records for January 2025 (Parquet file) from the link above.
After downloading, upload it to S3 with the following command:
# Upload to bucket
aws s3 cp yellow_tripdata_2025-01.parquet s3://${BUCKET_NAME}/input/
Using Custom Code Interpreter with Strands Agents Built-in Tools
Let's try S3 integration by specifying the custom Code Interpreter ID in the identifier parameter of the AgentCoreCodeInterpreter built-in tool in Strands Agents.
from strands import Agent
from strands.models import BedrockModel
from strands_tools.code_interpreter import AgentCoreCodeInterpreter
import os

# Custom Code Interpreter ID
CODE_INTERPRETER_ID = "XXXXXXXXXXXX"  # Replace with your created ID
ACCOUNT_ID = os.popen("aws sts get-caller-identity --query Account --output text").read().strip()
BUCKET_NAME = f"code-interpreter-artifacts-{ACCOUNT_ID}"

model = BedrockModel(
    model_id="us.anthropic.claude-sonnet-4-5-20250929-v1:0",
    region_name="us-west-2"
)

# Specify custom Code Interpreter ID
code_interpreter = AgentCoreCodeInterpreter(
    region="us-west-2",
    identifier=CODE_INTERPRETER_ID  # This is the key point!
)

agent = Agent(
    model=model,
    tools=[code_interpreter.code_interpreter],
    system_prompt=f"""You are a data analyst.
Code Interpreter has access permissions to S3.
You can use the aws s3 cp command with executeCommand to download and upload files.
Bucket name: {BUCKET_NAME}
"""
)

response = agent(f"""
Download s3://{BUCKET_NAME}/input/yellow_tripdata_2025-01.parquet
and analyze the NYC taxi data.

Please perform the following analysis:
1. Basic statistics of the data (record count, time period, etc.)
2. Trends in ride counts by time of day
3. Average fare and average trip distance

Summarize the analysis results in CSV files and upload them to s3://{BUCKET_NAME}/output/
""")
You can use it by specifying the custom Code Interpreter ID in the identifier parameter!
Conversely, if you don't specify anything for identifier, aws.codeinterpreter.v1 is used by default.
Since the default aws.codeinterpreter.v1 doesn't have an IAM role attached, it doesn't have permission to access S3. Therefore, if you want to integrate with S3, you need to create a custom Code Interpreter and attach an IAM role - that's what we've just done.
In the system prompt, I mentioned that S3 access is available and that the executeCommand can use the aws cli, and asked for NYC Taxi data analysis with results to be uploaded to S3.
When executed, it produced the following output:
NYCタクシーデータの分析を行います。まずS3からデータをダウンロードして、分析を実施します。
Tool #1: code_interpreter
データのダウンロードが完了しました。次に、データを読み込んで分析を行います。
Tool #2: code_interpreter
良いですね!データが正常に読み込まれました。次に、詳細な分析を行います。
Tool #3: code_interpreter
Tool #4: code_interpreter
Tool #5: code_interpreter
素晴らしい!次に、これらの分析結果をCSVファイルにまとめます。
Tool #6: code_interpreter
Tool #7: code_interpreter
Tool #8: code_interpreter
Tool #9: code_interpreter
Tool #10: code_interpreter
Tool #11: code_interpreter
完璧です!次にこれらのファイルをS3にアップロードします。
Tool #12: code_interpreter
Tool #13: code_interpreter
Tool #14: code_interpreter
Tool #15: code_interpreter
Tool #16: code_interpreter
Tool #17: code_interpreter
完璧です!最後に分析結果のサマリーを作成します。
Tool #18: code_interpreter
## 分析完了しました!🎉
NYCタクシーデータ(2025年1月)の分析が完了しました。以下が主な結果です:
### 📊 主要な発見
**1. データ概要**
- 総レコード数:**3,475,226回**の乗車
- 分析期間:32日間(2024/12/31 ~ 2025/02/01)
- 有効データ率:93.63%
**2. 時間帯別の傾向**
- **ピーク時間帯**:18時(夕方6時)に267,951回で最多
- **オフピーク**:早朝4時が最少(20,033回)
- ピークとオフピークの差は約**13.4倍**
**3. 運賃と乗車距離**
- 平均運賃:**$17.95**(中央値:$12.80)
- 平均合計金額:**$26.81**(中央値:$20.35)
- 平均乗車距離:**3.17マイル**(中央値:1.70マイル)
- 平均乗車時間:**15.11分**
**4. 興味深い発見**
- 早朝5時の乗車は運賃が最も高く($25.42)、距離も最長(5.78マイル)
- 木曜日が最も乗車数が多い(571,830回)
- 1人乗車が全体の**69.2%**を占める
### 📁 出力ファイル
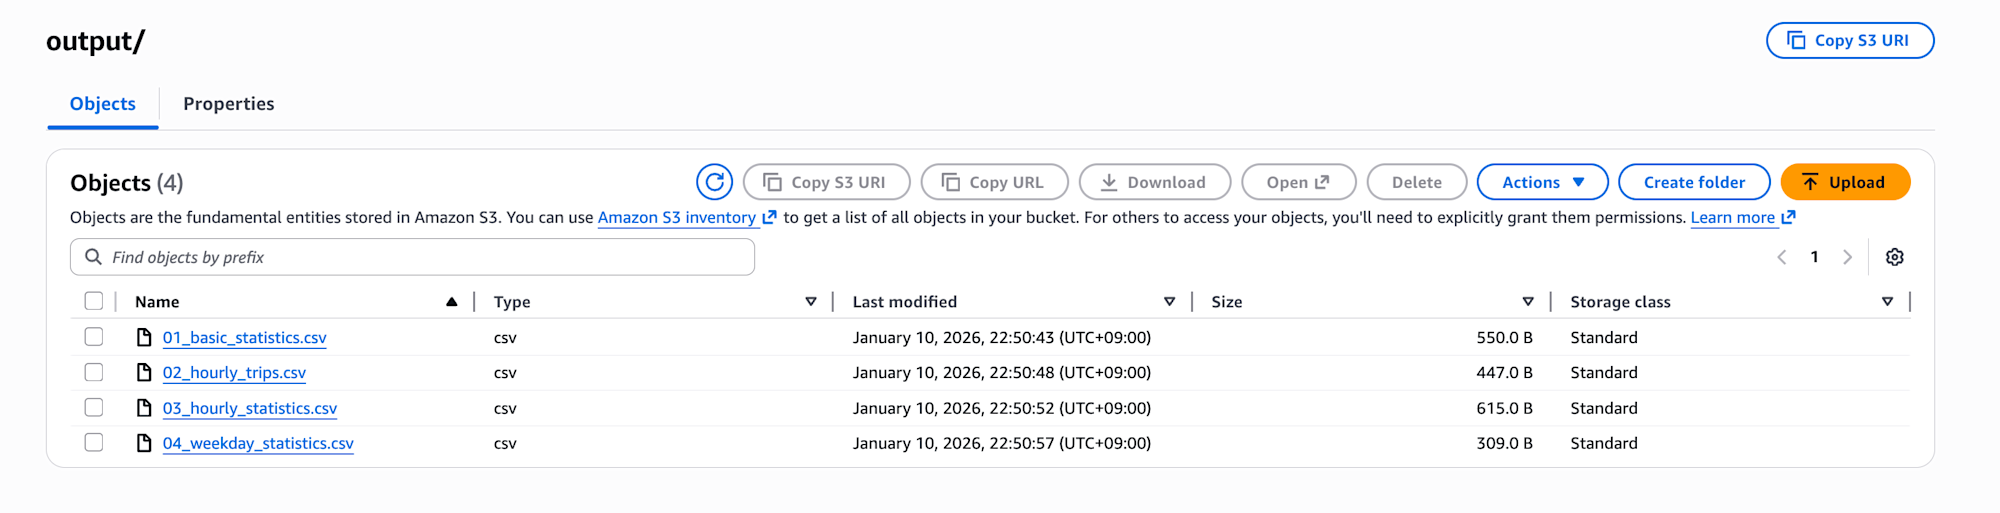
以下の5つのCSVファイルをS3にアップロードしました:
1. **01_basic_statistics.csv** - 基本統計サマリ
2. **02_hourly_trips.csv** - 時間帯別乗車数
3. **03_hourly_statistics.csv** - 時間帯別平均統計
4. **04_weekday_statistics.csv** - 曜日別統計
5. **05_passenger_statistics.csv** - 乗客数別統計
すべてのファイルは `s3://code-interpreter-artifacts-xxx/output/` に保存されています。## 分析完了しました!🎉
Looking at the S3 bucket, we can confirm that the files have been properly uploaded.
As a test, I downloaded 01_basic_statistics.csv to check, and it contains the analysis results!
項目,値
総レコード数,"3,475,226"
期間開始,2024-12-31 20:47:55
期間終了,2025-02-01 00:00:44
期間日数,32
クリーニング後データ数,"3,253,701"
クリーニング後データ率,93.63%
平均運賃(USD),$17.95
中央運賃(USD),$12.80
平均合計金額(USD),$26.81
中央合計金額(USD),$20.35
平均乗車距離(マイル),3.17
中央乗車距離(マイル),1.70
平均乗車時間(分),15.11
ピーク時間帯,18時
ピーク時乗車数,"267,951"
オフピーク時間帯,4時
オフピーク時乗車数,"20,033"
Conclusion
I tried S3 integration with the Code Interpreter built-in tool in Strands Agents!
This will be useful when dealing with large files.
While you need to create a custom Code Interpreter and specify the identifier in the built-in tool, the integration wasn't too complicated!
I hope this article has been helpful to you. Thank you for reading to the end!!