AWS CDK + TypeScript 入門
この記事は公開されてから1年以上経過しています。情報が古い可能性がありますので、ご注意ください。
AWS CDK 入門
こんにちは、データ事業本部のキタガワです。
普段AWSでのリソース作成はYAMLを使用して定義等を行なっているのですが、TypeScript + CDKでの開発体験が良いという噂を聞いたので、入門を兼ねて簡単なワークフローを作成してみました。
以下のAWS公式ガイドを参考に進めます。
やってみる
環境構築
まずは環境を構築します。
npmを使用してCDK CLIをグローバルにインストールします。
$ npm install -g aws-cdk
以下コマンドが正常に動けばインストールは成功です。
$ cdk --version
2.166.0 (build 7bb9203)
次にプロジェクト用のディレクトリを作成し、cdk initを実行します。
$ mkdir stepfunctions-rest-api
$ cd stepfunctions-rest-api
$ cdk init --language typescript
Applying project template app for typescript
# Welcome to your CDK TypeScript project

This is a blank project for CDK development with TypeScript.

The `cdk.json` file tells the CDK Toolkit how to execute your app.

## Useful commands

* `npm run build`   compile typescript to js
* `npm run watch`   watch for changes and compile
* `npm run test`    perform the jest unit tests
* `npx cdk deploy`  deploy this stack to your default AWS account/region
* `npx cdk diff`    compare deployed stack with current state
* `npx cdk synth`   emits the synthesized CloudFormation template

Initializing a new git repository...
Executing npm install...
npm warn deprecated inflight@1.0.6: This module is not supported, and leaks memory. Do not use it. Check out lru-cache if you want a good and tested way to coalesce async requests by a key value, which is much more comprehensive and powerful.
npm warn deprecated glob@7.2.3: Glob versions prior to v9 are no longer supported
✅ All done!
これでstepfunctions-rest-apiディレクトリに各種ファイルが自動的に作成されます。
この後公式のチュートリアルでは@aws-cdk/aws-stepfunctions @aws-cdk/aws-apigatewayのインストールをするように記載されていますが、CDK v2ではaws-cdk-libが標準で使用でき、追加のライブラリのインストールは必要なくなっています。[1]
ステートマシンを作成する
TypeScriptを用いたCDKでは例えばPassステートのみのステートマシンは次のように定義できます。
const machineDefinition = new stepfunctions.Pass(this, 'PassState', {
    result: {value:"Hello!"},
});

const stateMachine = new stepfunctions.StateMachine(this, 'MyStateMachine', {
    definition: machineDefinition,
    stateMachineType: stepfunctions.StateMachineType.EXPRESS,
});
API Gateway(REST API)を作成する
REST APIを使用するAPI Gatewayは次のように定義できます。
const api = new apigateway.StepFunctionsRestApi(this,
  'StepFunctionsRestApi', { stateMachine: stateMachine }
);
AWS CDKアプリをデプロイする
以上を踏まえて、cdk initで作成されたファイルを編集していきます。
編集するのは以下の1ファイルです。
- ./lib/stepfunctions-rest-api-stack.ts
./libのファイルにはリソースの具体的な定義が記述されており、これがデプロイ時にCloudFormationのテンプレートにコンパイルされます。
編集後のファイル内容は次のようになります。
import * as cdk from 'aws-cdk-lib';
import * as stepfunctions from 'aws-cdk-lib/aws-stepfunctions'
import * as apigateway from 'aws-cdk-lib/aws-apigateway';

export class StepfunctionsRestApiStack extends cdk.Stack {
    constructor(scope: cdk.App, id: string, props?: cdk.StackProps) {
        super(scope, id, props);

        const machineDefinition = new stepfunctions.Pass(this, 'PassState', {
            result: { value: "Hello!" },
        });

        const stateMachine = new stepfunctions.StateMachine(this, 'MyStateMachine', {
            definition: machineDefinition,
            stateMachineType: stepfunctions.StateMachineType.EXPRESS,
        });

        const api = new apigateway.StepFunctionsRestApi(this,
            'StepFunctionsRestApi', { stateMachine: stateMachine });
    }
}
まず先頭で必要なライブラリをインポートします。
次にexport class StepfunctionsRestApiStack extends cdk.StackでCDKのStackクラスを継承し、StepfunctionsRestApiStackといいう名前のクラスを宣言しています。
そしてStepfunctionsRestApiStackクラスのコンストラクタでCDKスタックの基本設定やリソース定義を行う流れになっています。
定義したリソースがCloudFormationのテンプレートとしてどのように出力されるかはcdk synthコマンドで確認することができます。
$ cdk synth
Resources:
  MyStateMachineRoleD59FFEBC:
    Type: AWS::IAM::Role
    Properties:
      AssumeRolePolicyDocument:
        Statement:
          - Action: sts:AssumeRole
            Effect: Allow
            Principal:
              Service: states.amazonaws.com
        Version: "2012-10-17"
    Metadata:
      aws:cdk:path: StepfunctionsRestApiStack/MyStateMachine/Role/Resource
  (...略...)
それでは実際にこのリソースをデプロイしてみます。
デプロイにはcdk deployコマンドを使用します。
AWSのプロファイルを指定する場合は通常のawsコマンドと同様にcdk deploy --profile <your_profile>やAWS_PROFILEの指定で可能です。
cdk deploy
すると次のようにIAMの変更が表示され、同意を求められるので、問題ないことを確認できればデプロイを続行してください。
IAM Statement Changes
┌───┬────────────────────────────────────┬────────┬────────────────────────────────────┬──────────────────────────────────────┬───────────┐
│   │ Resource                           │ Effect │ Action                             │ Principal                            │ Condition │
├───┼────────────────────────────────────┼────────┼────────────────────────────────────┼──────────────────────────────────────┼───────────┤
│ + │ ${MyStateMachine}                  │ Allow  │ states:StartSyncExecution          │ AWS:${StepFunctionsRestApi/Default/A │           │
│   │                                    │        │                                    │ NY/StartSyncExecutionRole}           │           │
├───┼────────────────────────────────────┼────────┼────────────────────────────────────┼──────────────────────────────────────┼───────────┤
│ + │ ${MyStateMachine/Role.Arn}         │ Allow  │ sts:AssumeRole                     │ Service:states.amazonaws.com         │           │
├───┼────────────────────────────────────┼────────┼────────────────────────────────────┼──────────────────────────────────────┼───────────┤
│ + │ ${StepFunctionsRestApi/Default/ANY │ Allow  │ sts:AssumeRole                     │ Service:apigateway.amazonaws.com     │           │
│   │ /StartSyncExecutionRole.Arn}       │        │                                    │                                      │           │
└───┴────────────────────────────────────┴────────┴────────────────────────────────────┴──────────────────────────────────────┴───────────┘
(NOTE: There may be security-related changes not in this list. See https://github.com/aws/aws-cdk/issues/1299)

Do you wish to deploy these changes (y/n)?
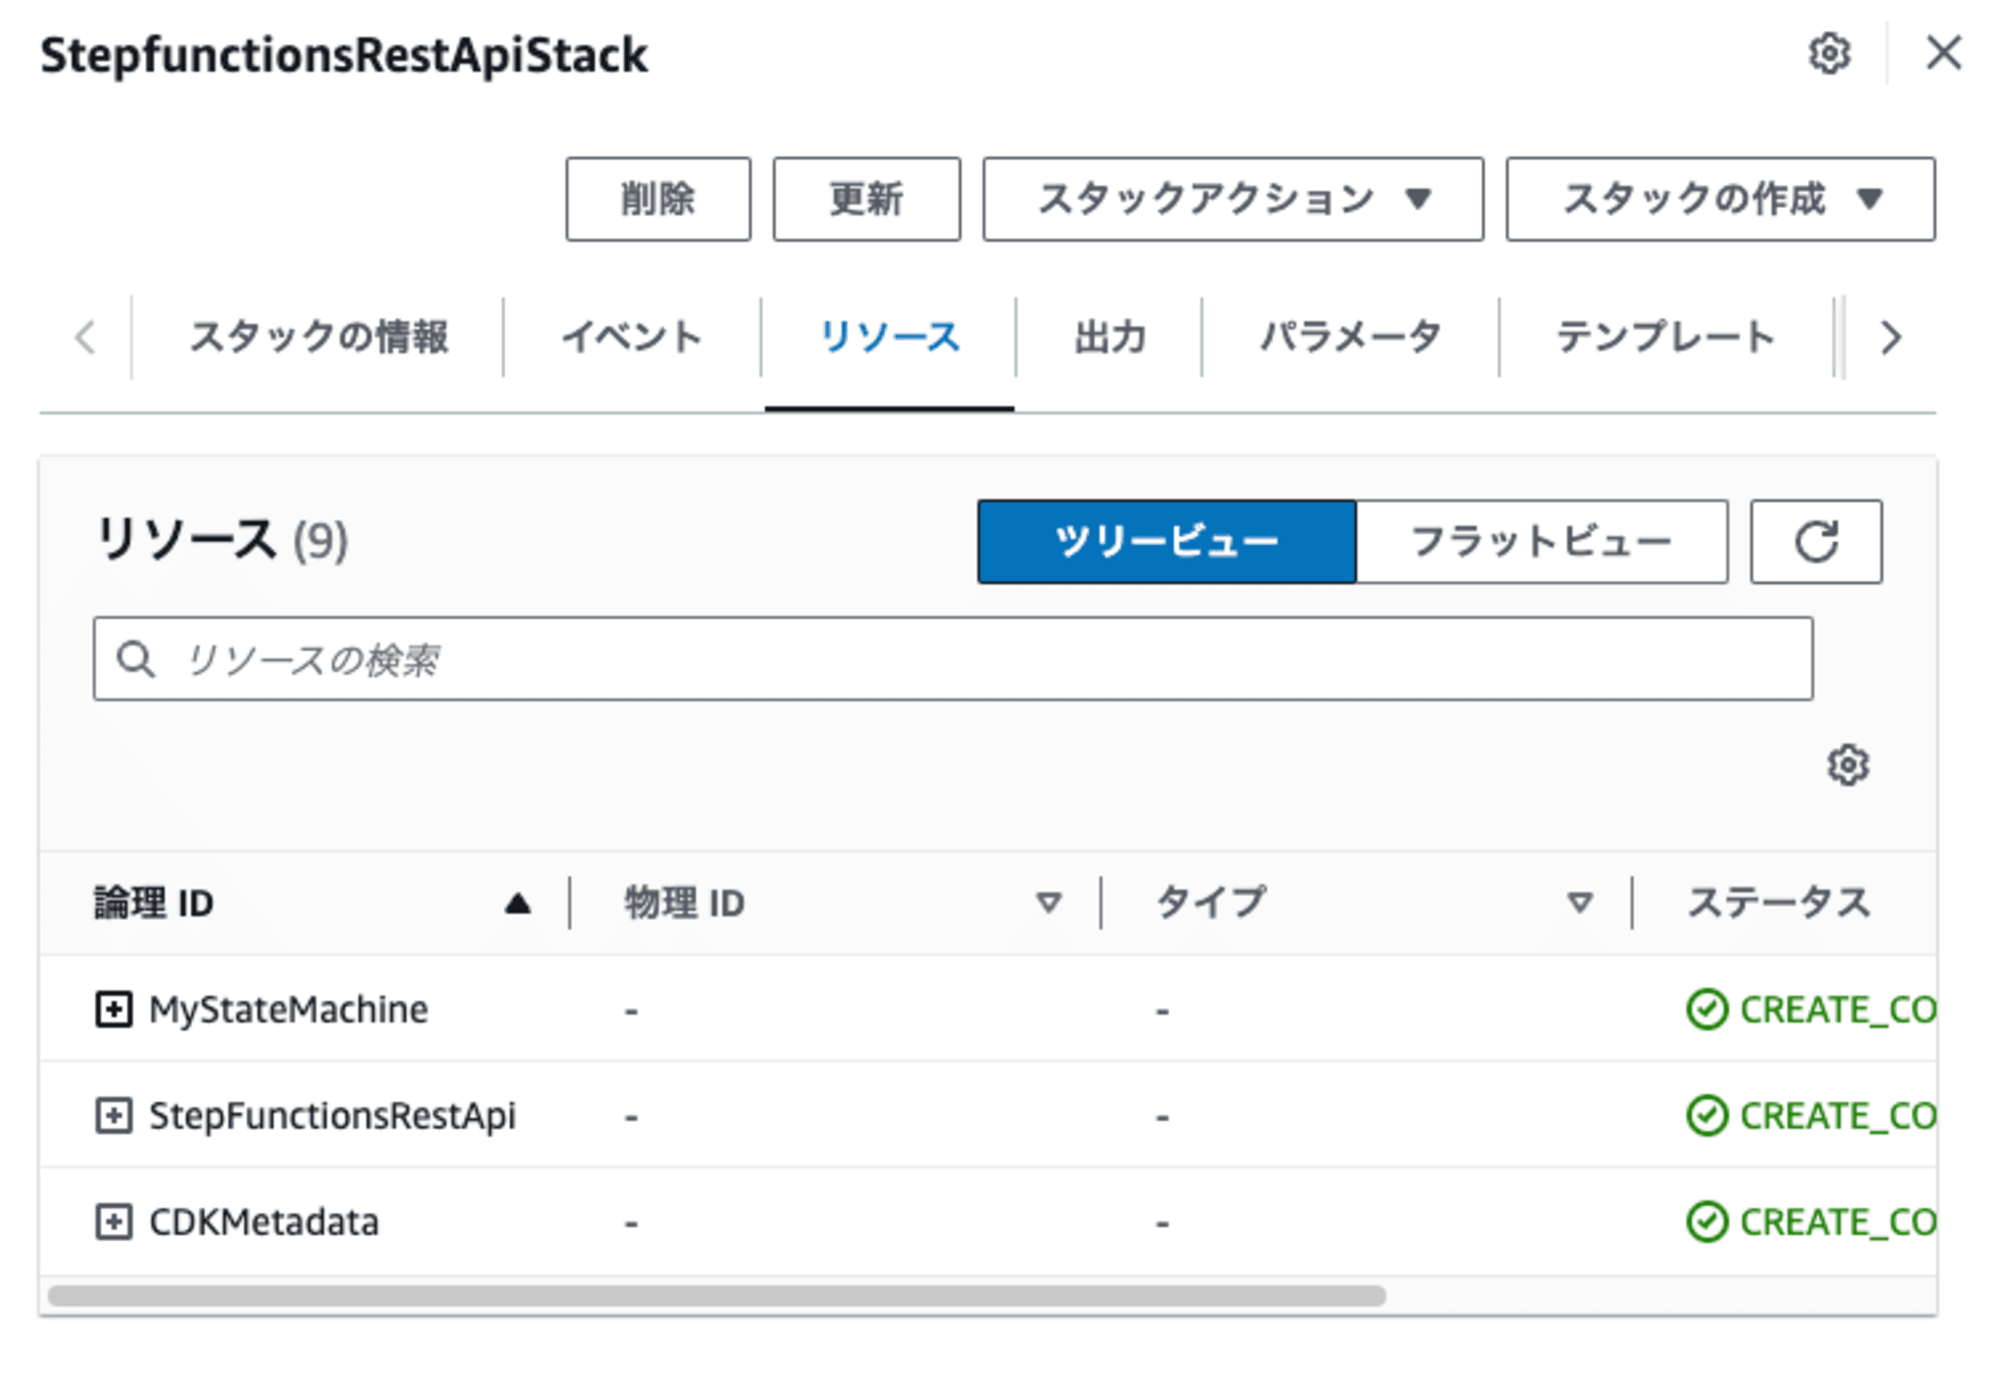
デプロイが完了したらCloudFormationのコンソール画面から実際にデプロイされたStep FunctionsやAPI Gatewayのリソースを確認してみましょう。
先ほど定義した名前で各種リソースが作成されていることが分かります。

REST APIのテスト
ではこのAPIをCLIからテストしてみましょう。
curlコマンドで作成したAPIのhttpsアドレスを指定してください。
下記のように<api-id>と<region>から組み立てることもできますし、デプロイ時のターミナル出力に表示されるので、そちらからコピーして来ることも可能です。
$ curl -X POST\
  'https://<api-id>.execute-api.<region>.amazonaws.com/prod' \
  -d '{"key":"Hello"}' \
  -H 'Content-Type: application/json'
次のようなレスポンスボディが返ってくれば成功です。
"Hello!"
作成したリソースの削除
では最後に作成したリソースを削除しておきます。
リソースの削除にはcdk destroyコマンドが用意されています。
$ cdk destroy
Are you sure you want to delete: StepfunctionsRestApiStack (y/n)? y
StepfunctionsRestApiStack: destroying... [1/1]

 ✅  StepfunctionsRestApiStack: destroyed
削除していいかの確認を求められるので、同意すると、無事スタックを削除できました。
これでこのチュートリアルは完了です。
感想
事前に聞いていた通りTypeScriptの静的型付けを利用した安全で効率的な開発の一端を体験することができました。
今後もAWS CDK + TypeScriptで何ができるのか、深掘っていこうと思いますので、どうぞお付き合いください。


