I tried creating a Business Entity using the MDM SaaS Business 360

Introduction
I'm Shiwani from the Data Analytics Business Division.
This time, I tried creating a Business Entity using the MDMSaaS GUI. Business entities represent entities with significance to an organization. Common examples include customers, suppliers, employees, products, and accounts.
In this blog, I will walk through the process of creating a Business Entity for the Customer 360 application, which helps manage customer data efficiently within Informatica MDM Business 360.
Advance preparation
- As a prerequisite, IICS Cloud, IICS Secure Agent, and VPC must be configured in advance.
- Ensure that you have enabled the Business 360 license and have access to the Business 360 Console and Customer 360 Application.
- Assign appropriate roles to users (e.g., MDM Administrator, Data Steward, Business User).
Create a Business Entity
Perform the following steps to create Business Entity in Business 360 console.
- Open the Business 360 Console.
- Click on New and Select Business Entity.
- Click on Create.
- Enter a name for your entity and Choose a location or folder.
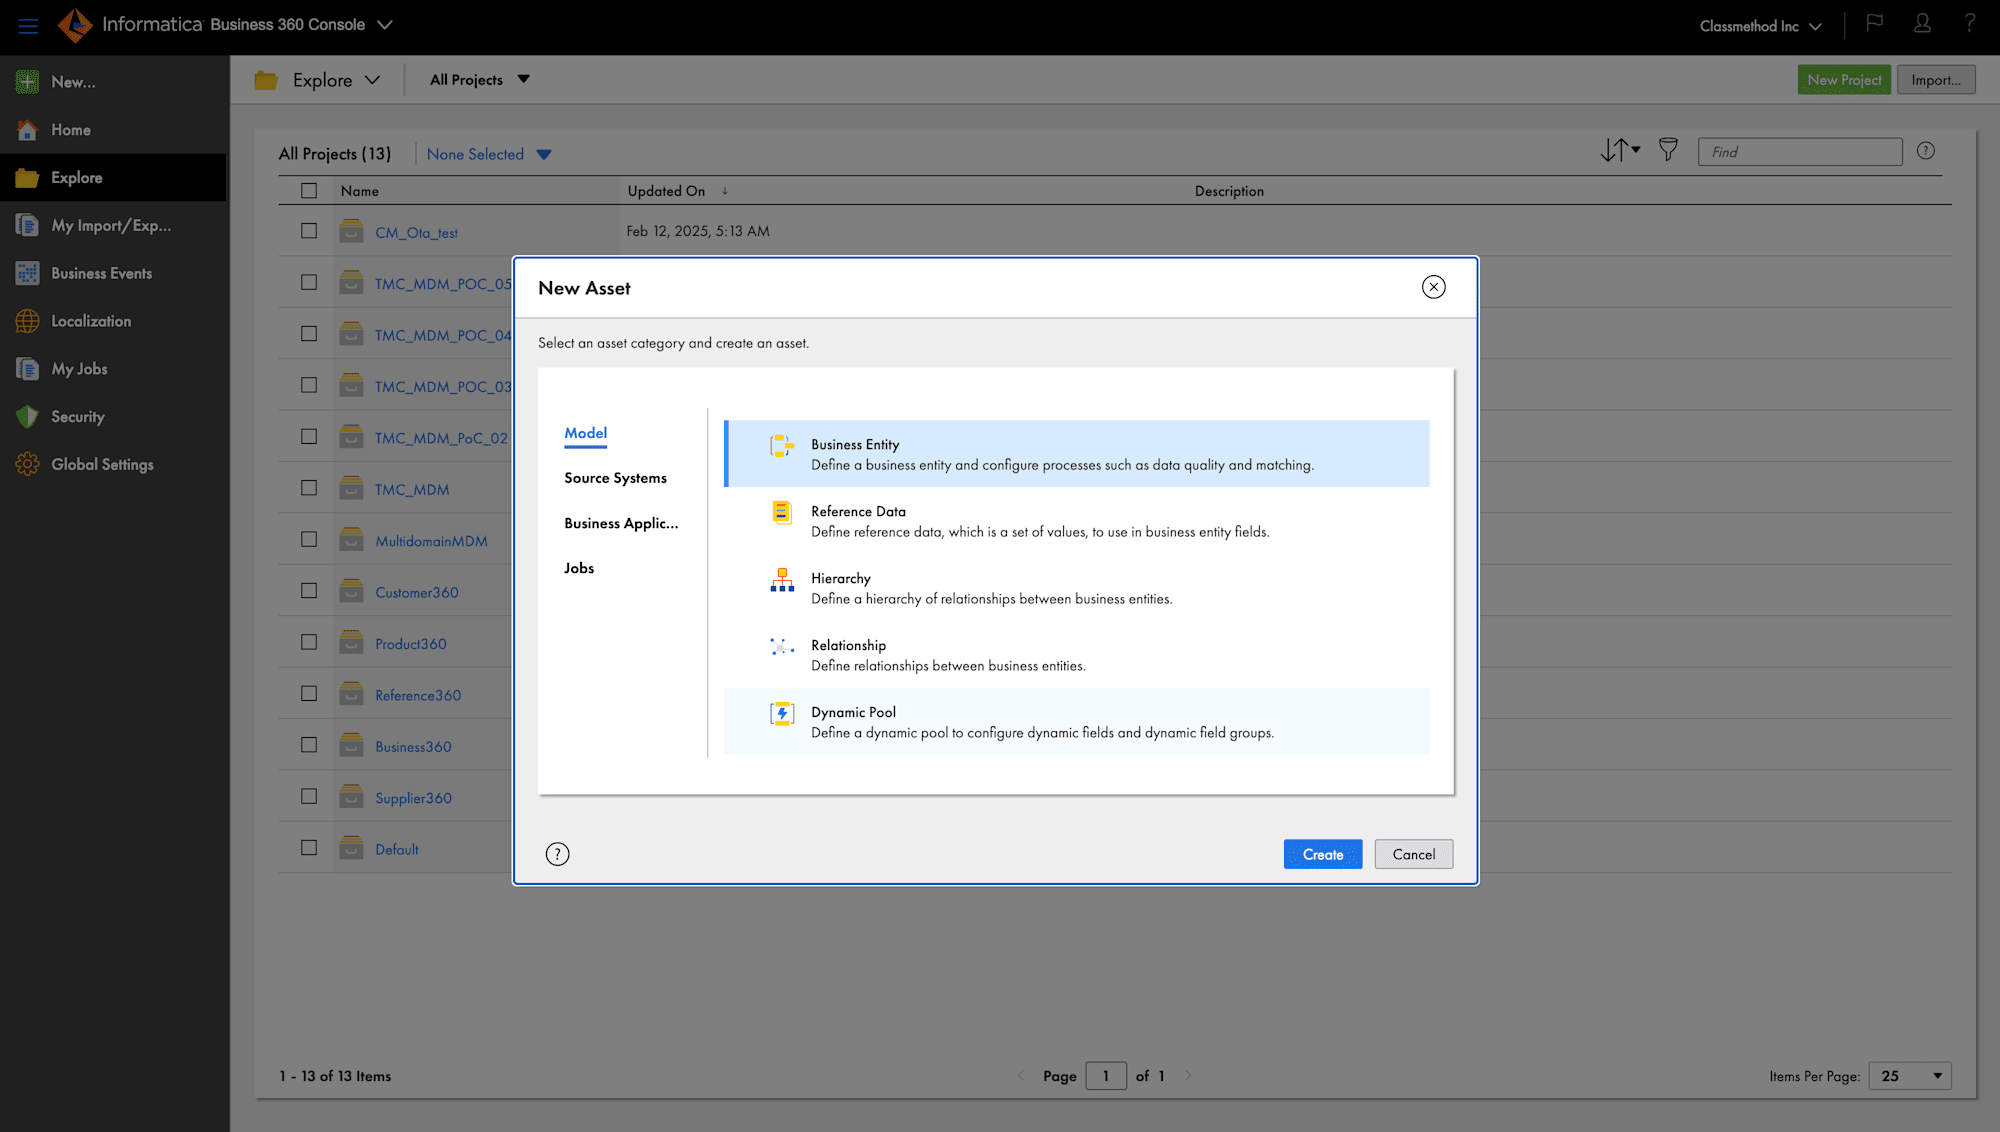
- Click on Create.
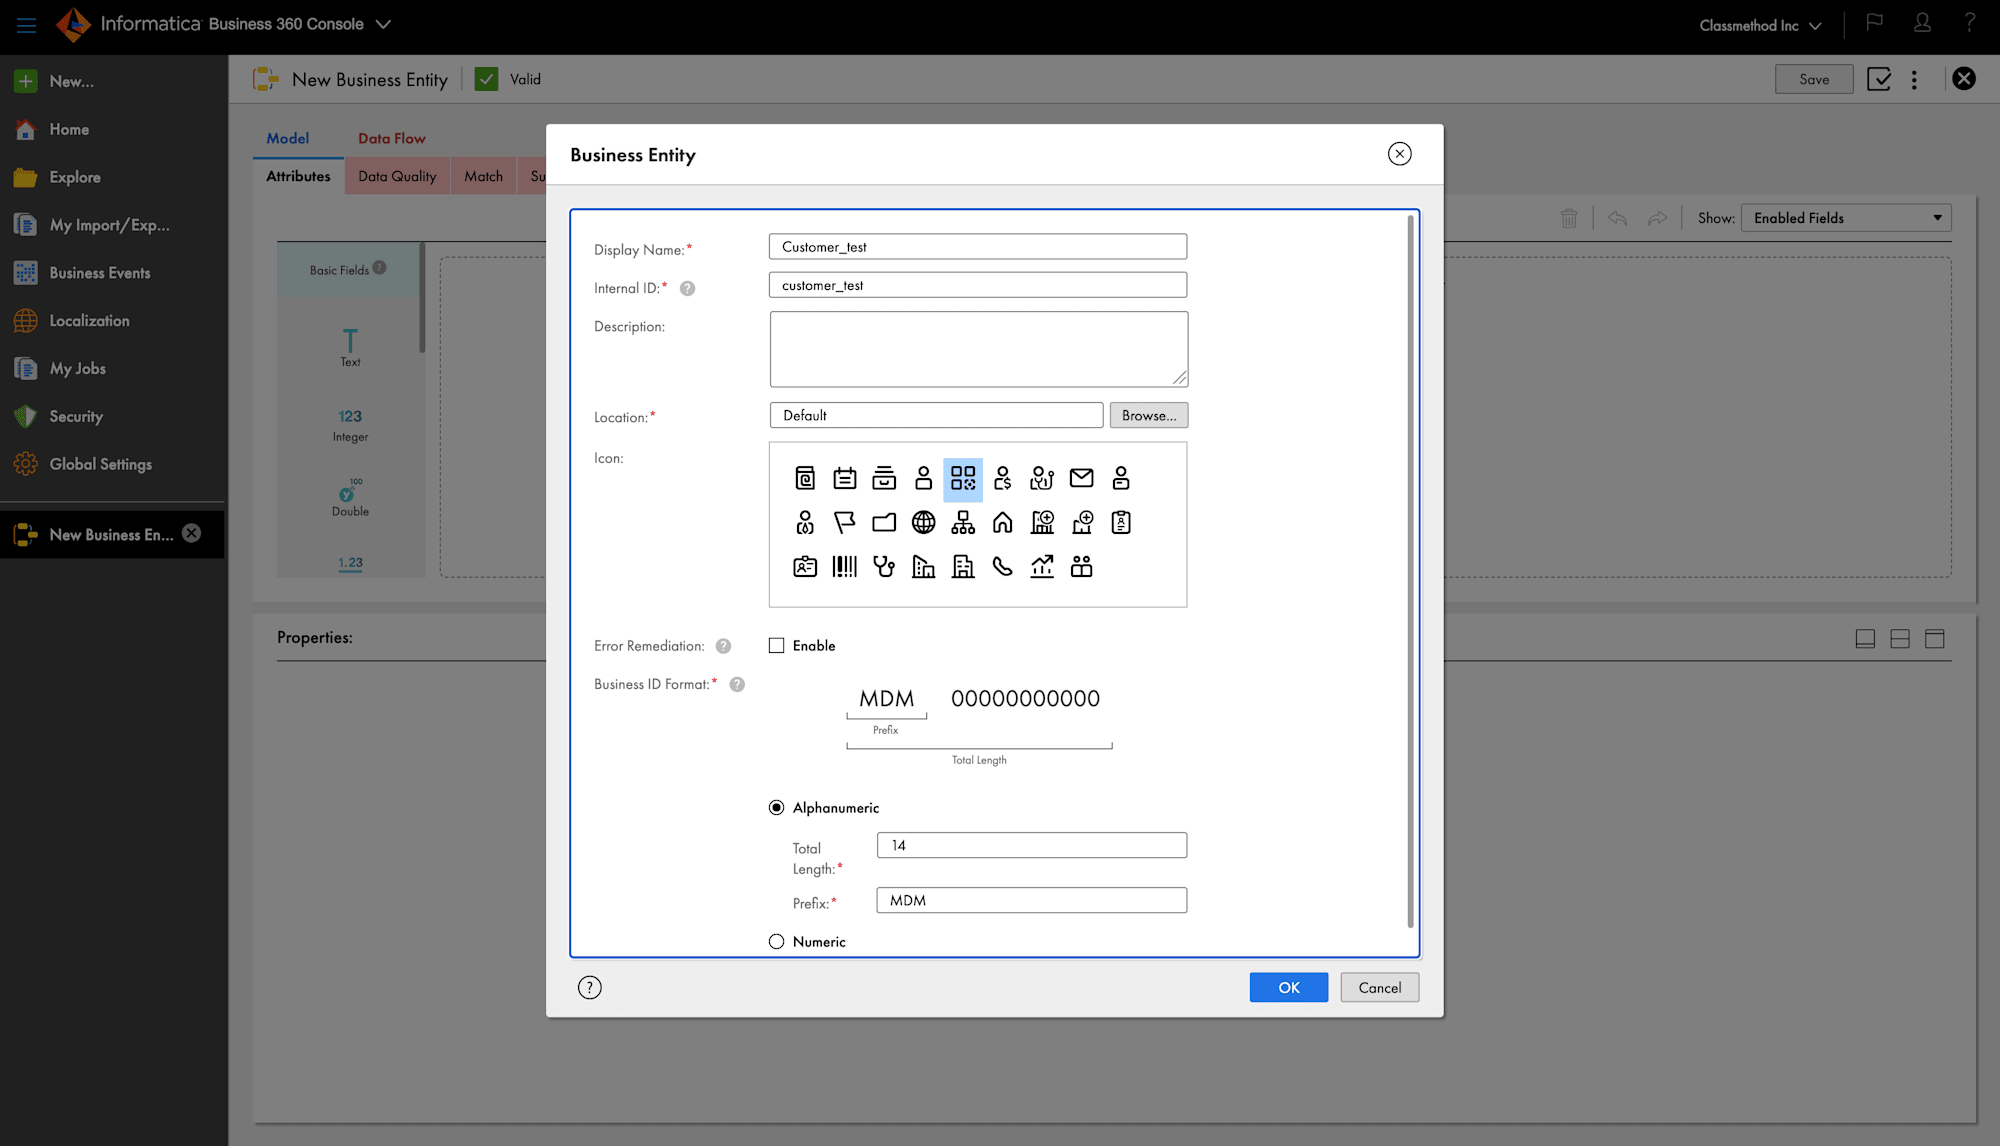
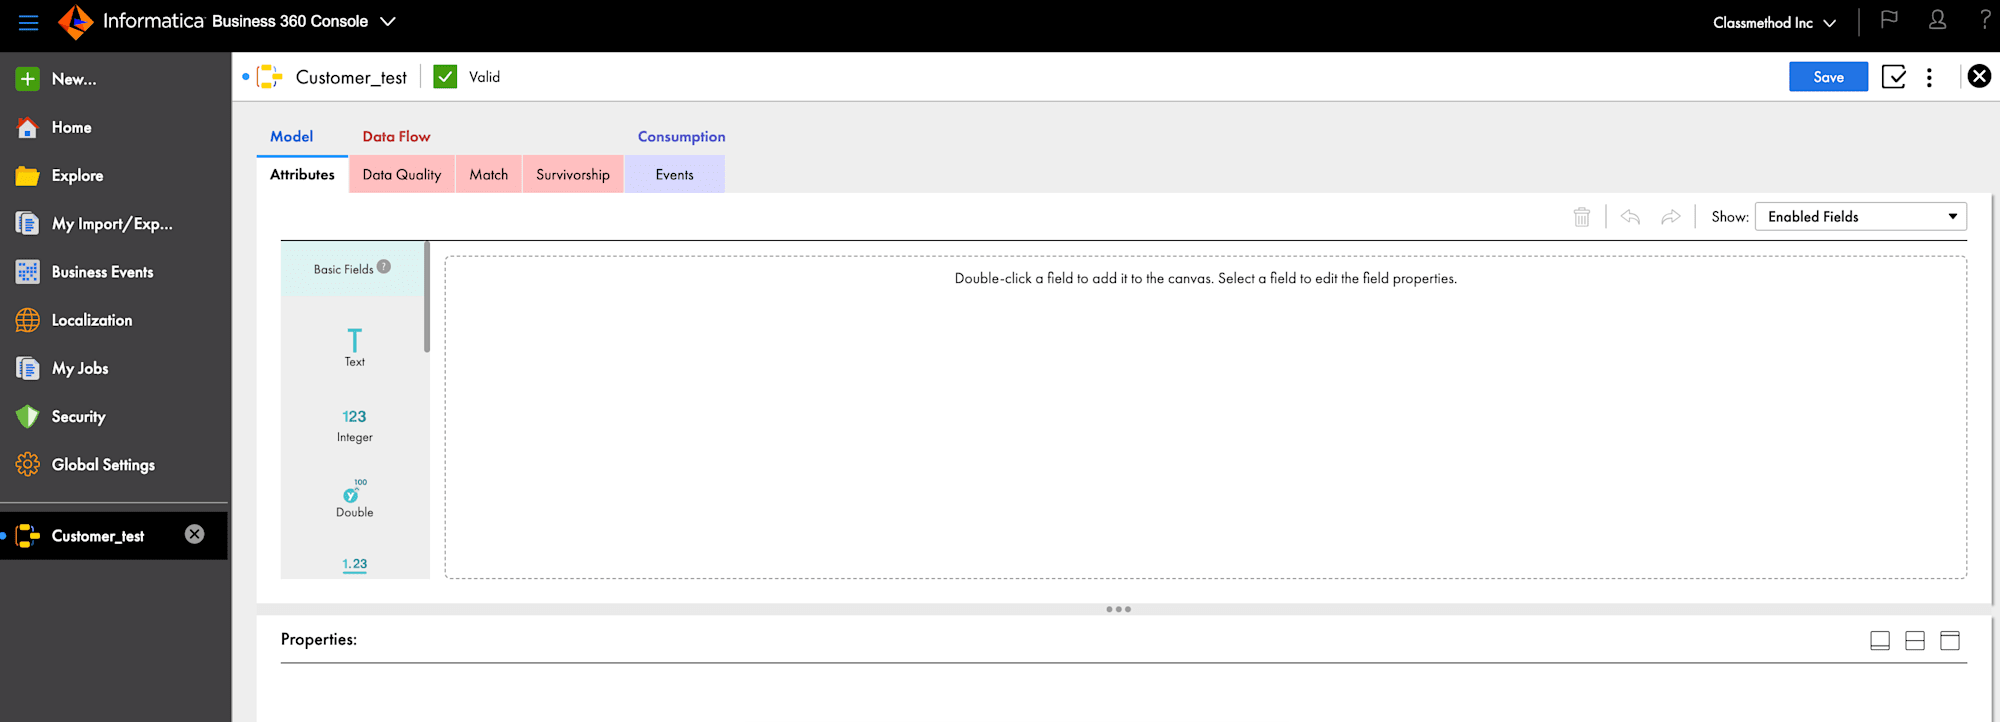
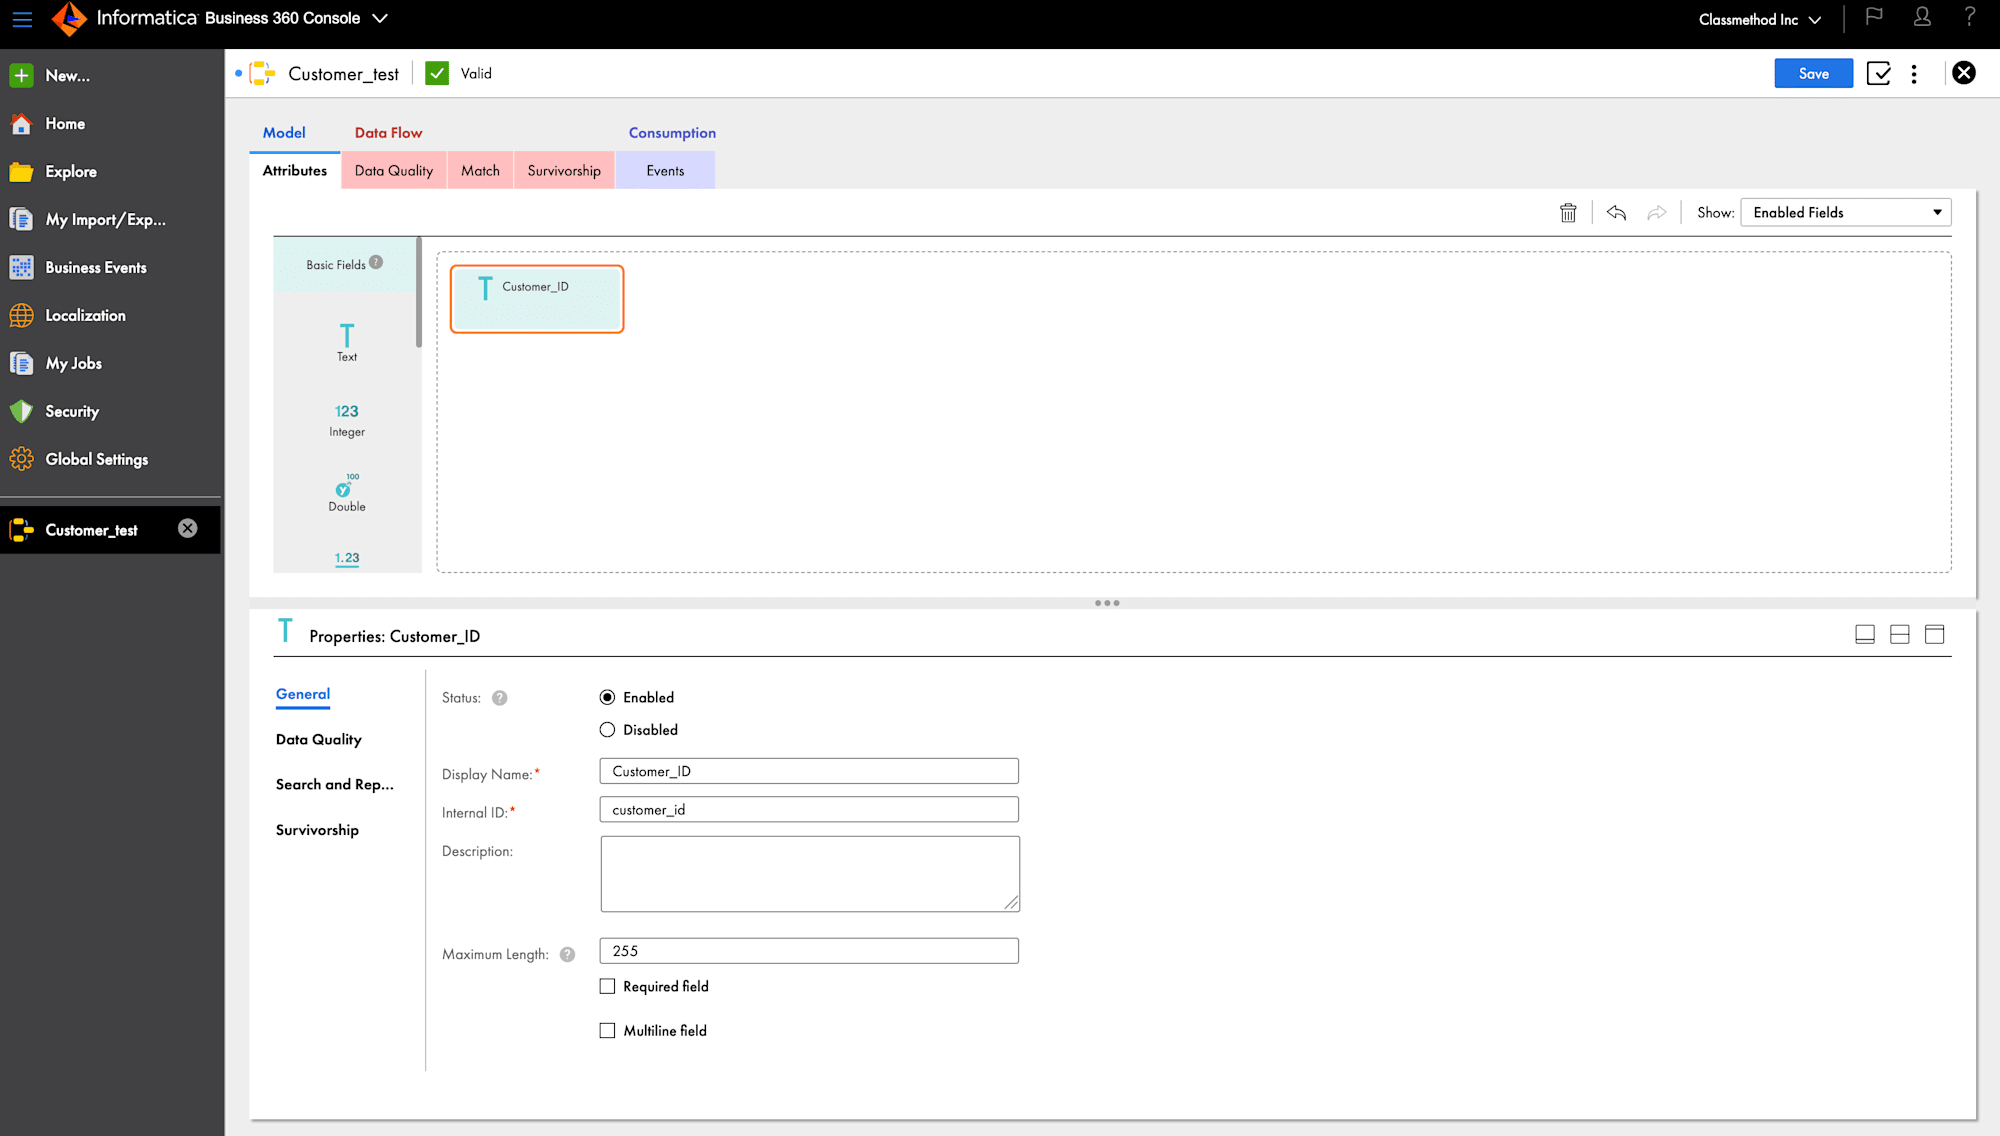
- After clicking Create, you can add attributes to define the Entity's structure. Double-click on an attribute to display it on the screen.
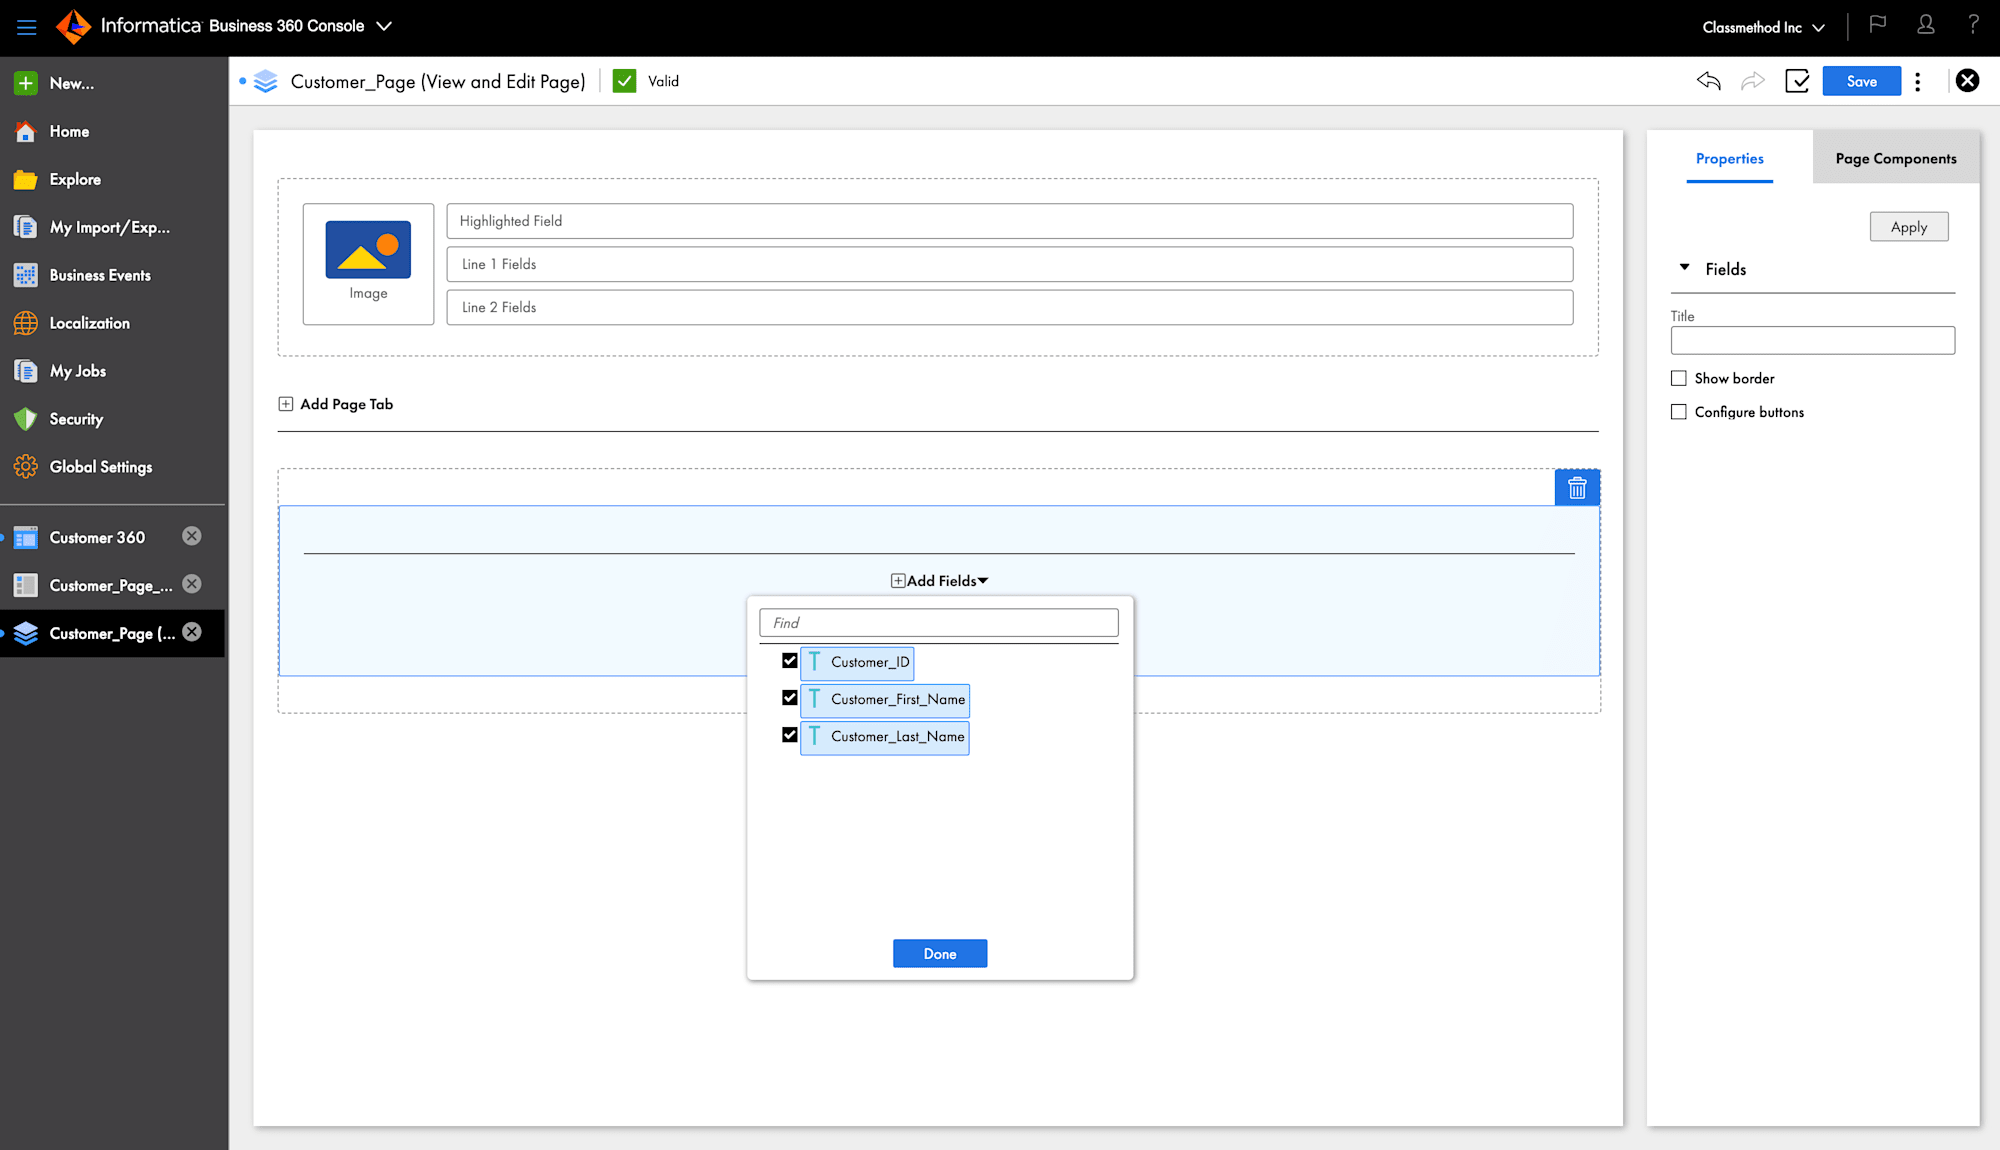
- Let's add three attributes: Customer_ID, Customer_First_Name, Customer_Last_Name.
- Finally, Save the Business Entity.
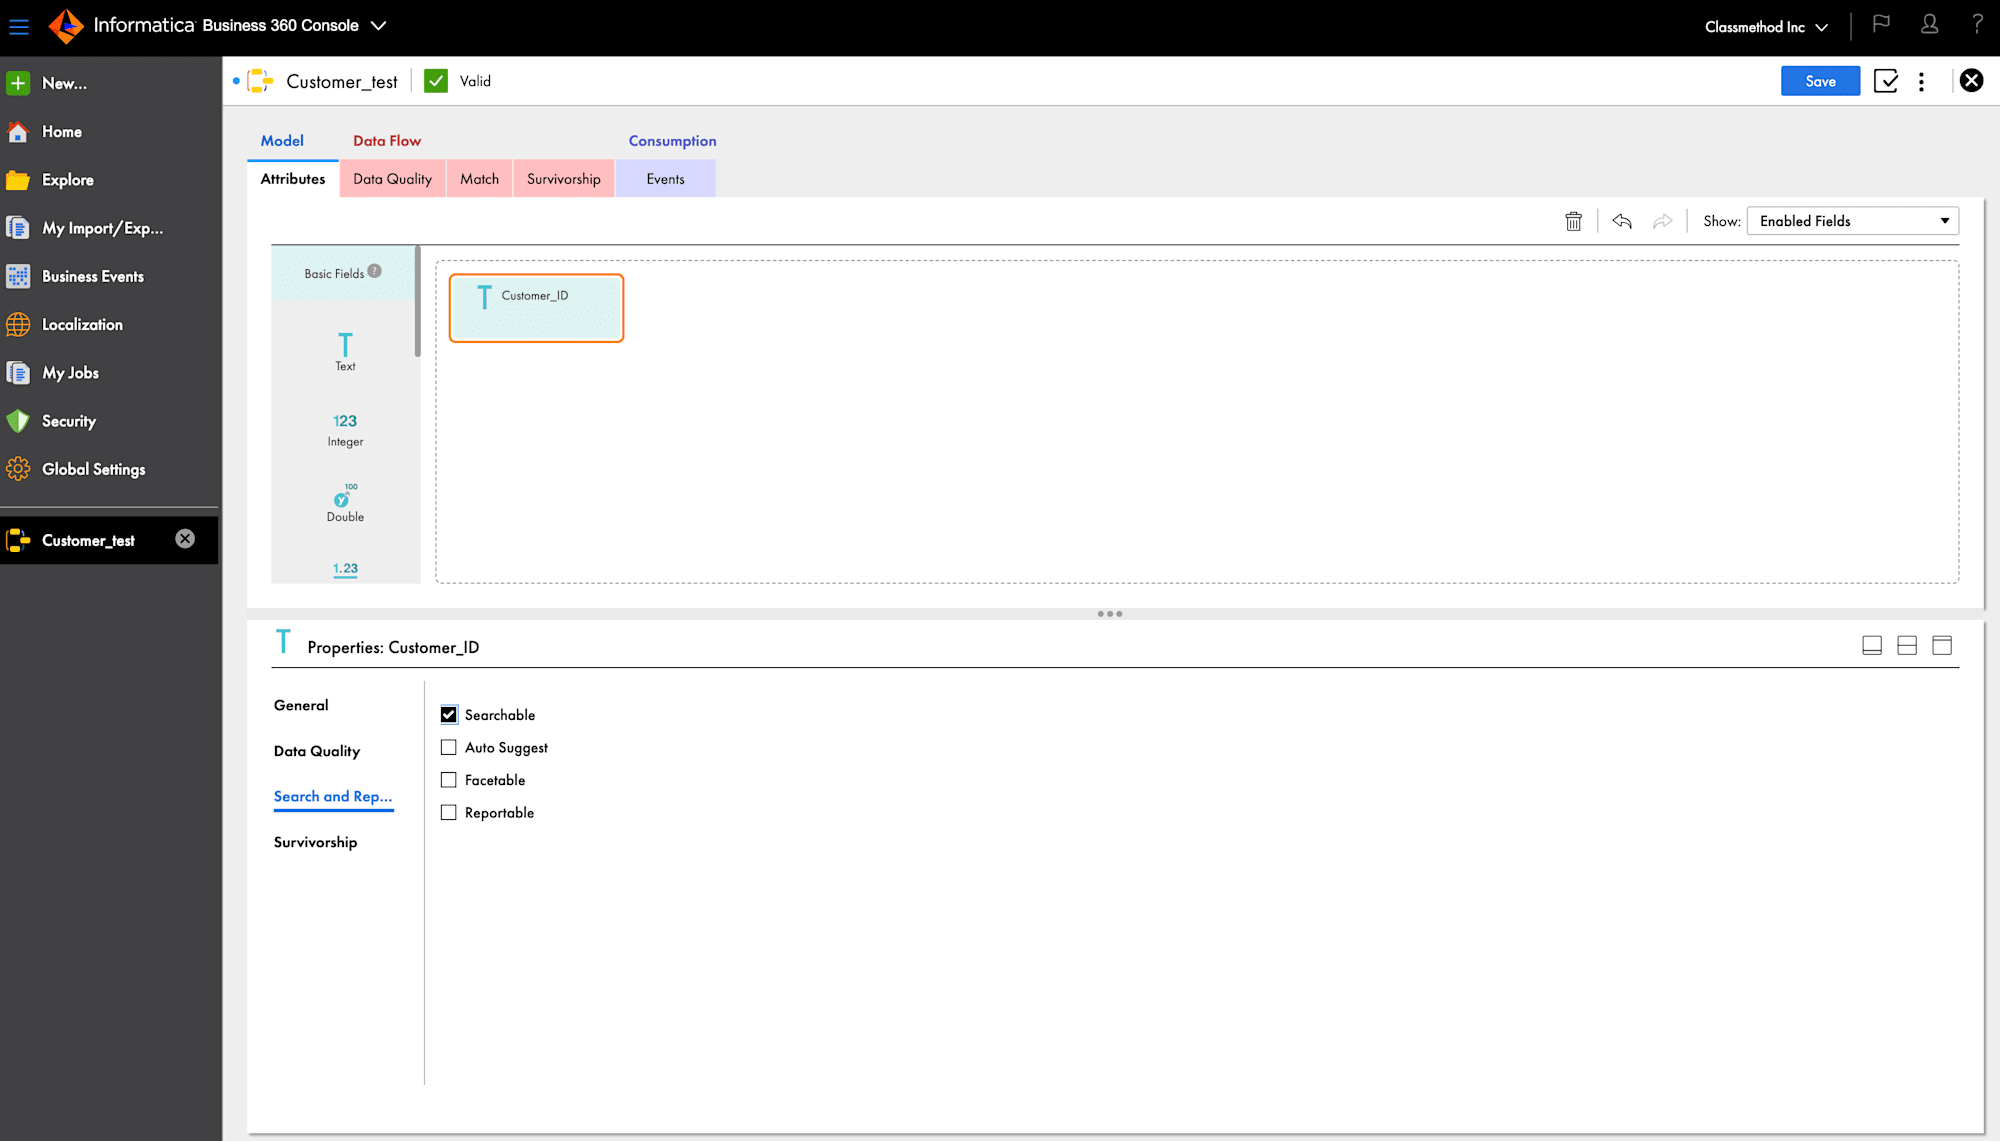
- Make at least one field searchable. Go to the Search and Reports and Tick on Searchable.

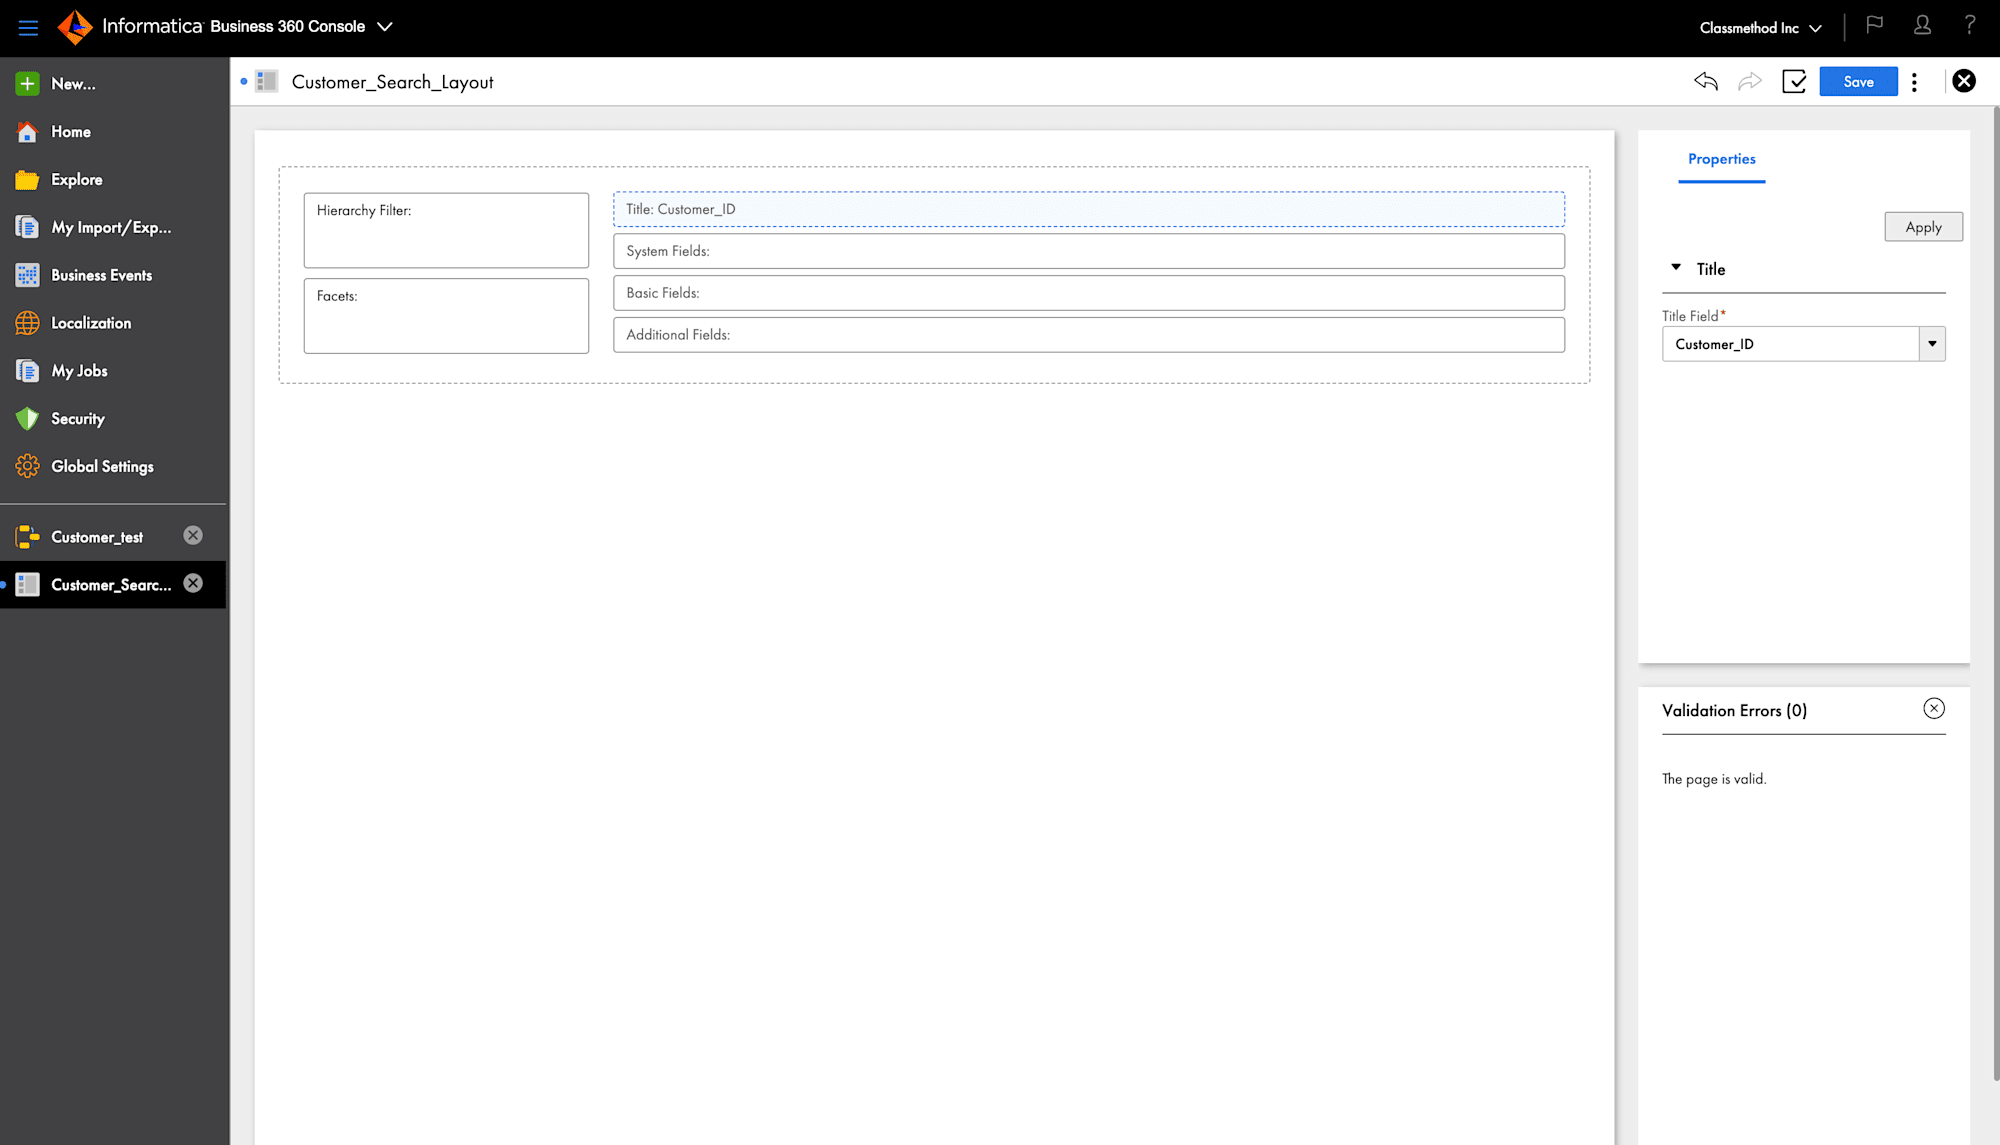
Create a Search Layout
Let's Create a Search Layout for Business Entity.
A Search Layout in Business 360 defines how search results are displayed for a business entity, allowing users to quickly find and view relevant records.
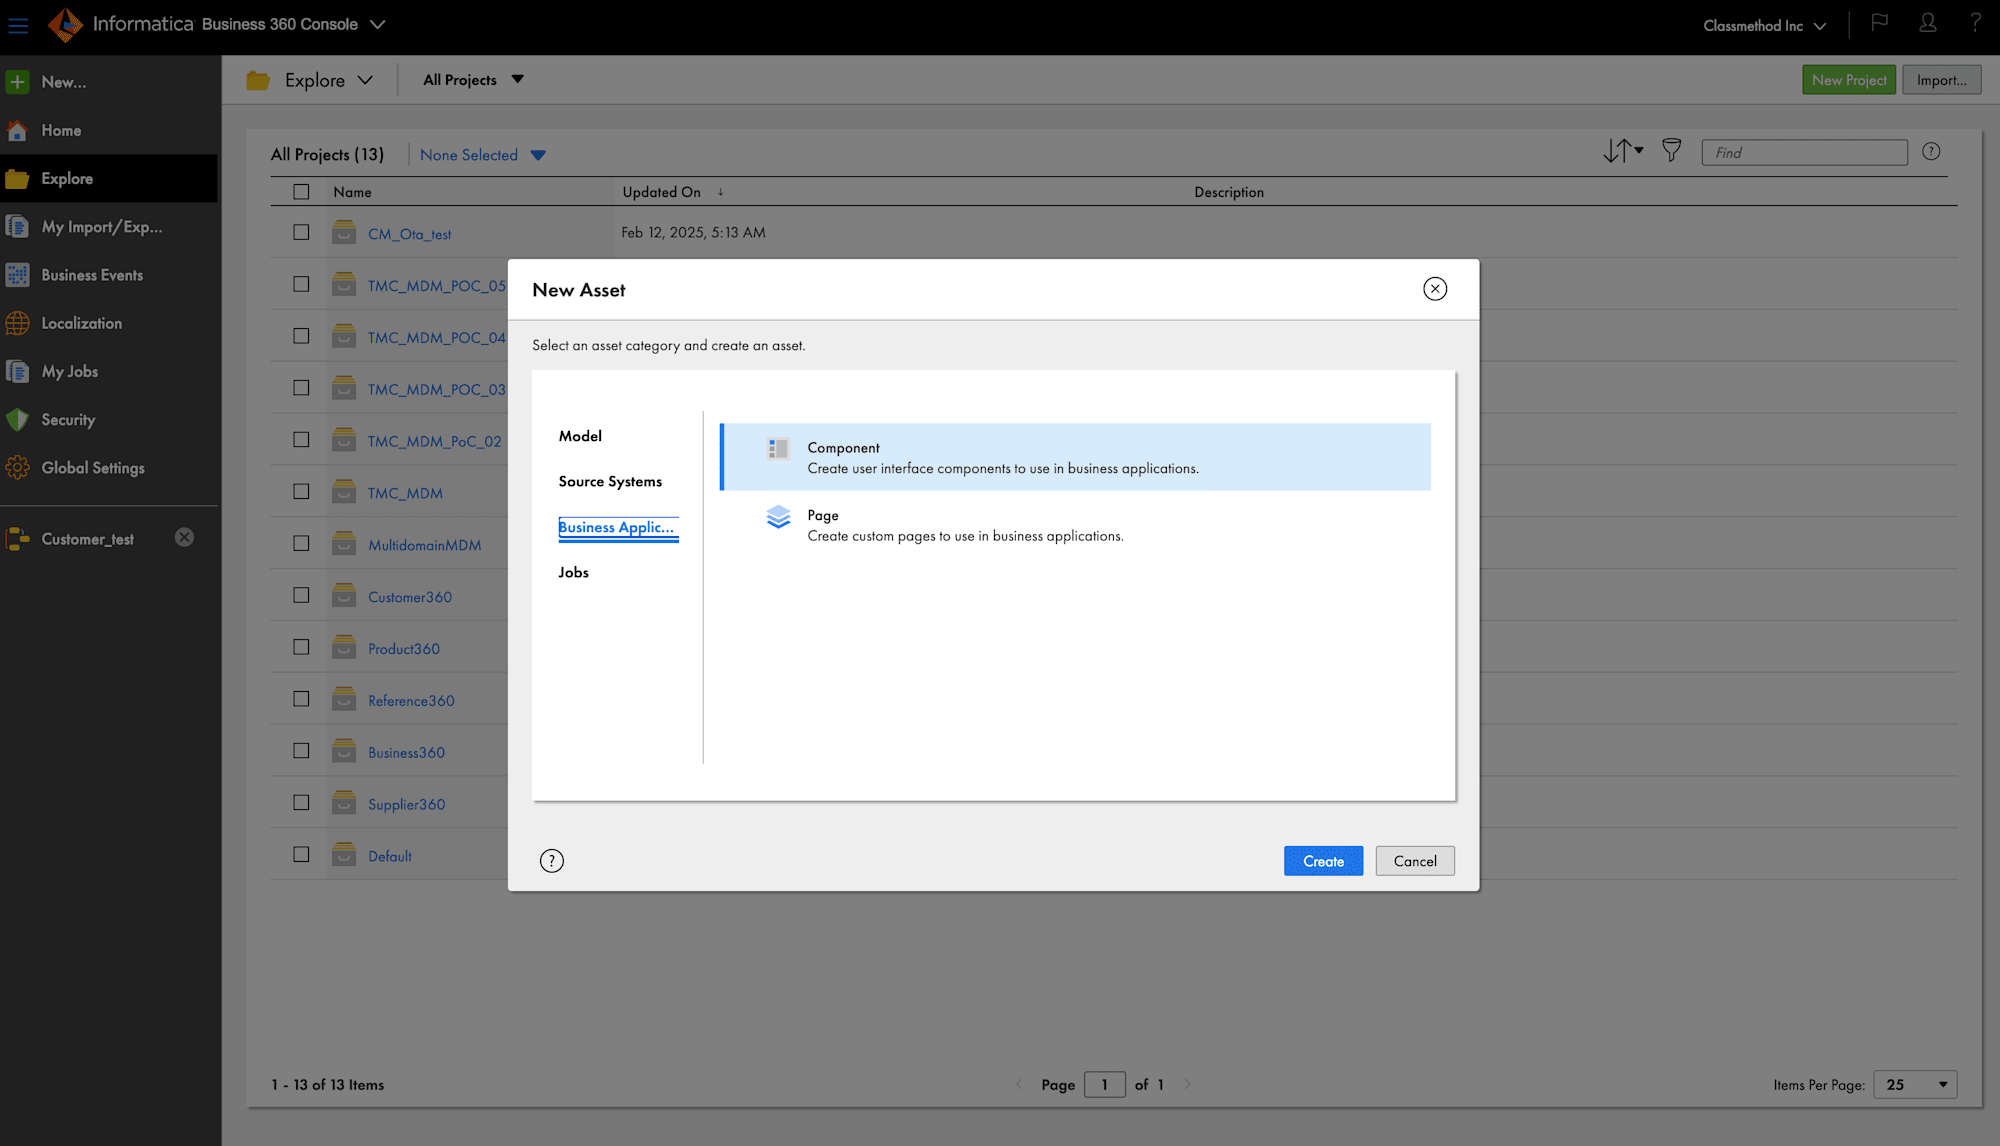
- Click On New and Go to the Business Application. Click on Component.
- Choose Search Layout.
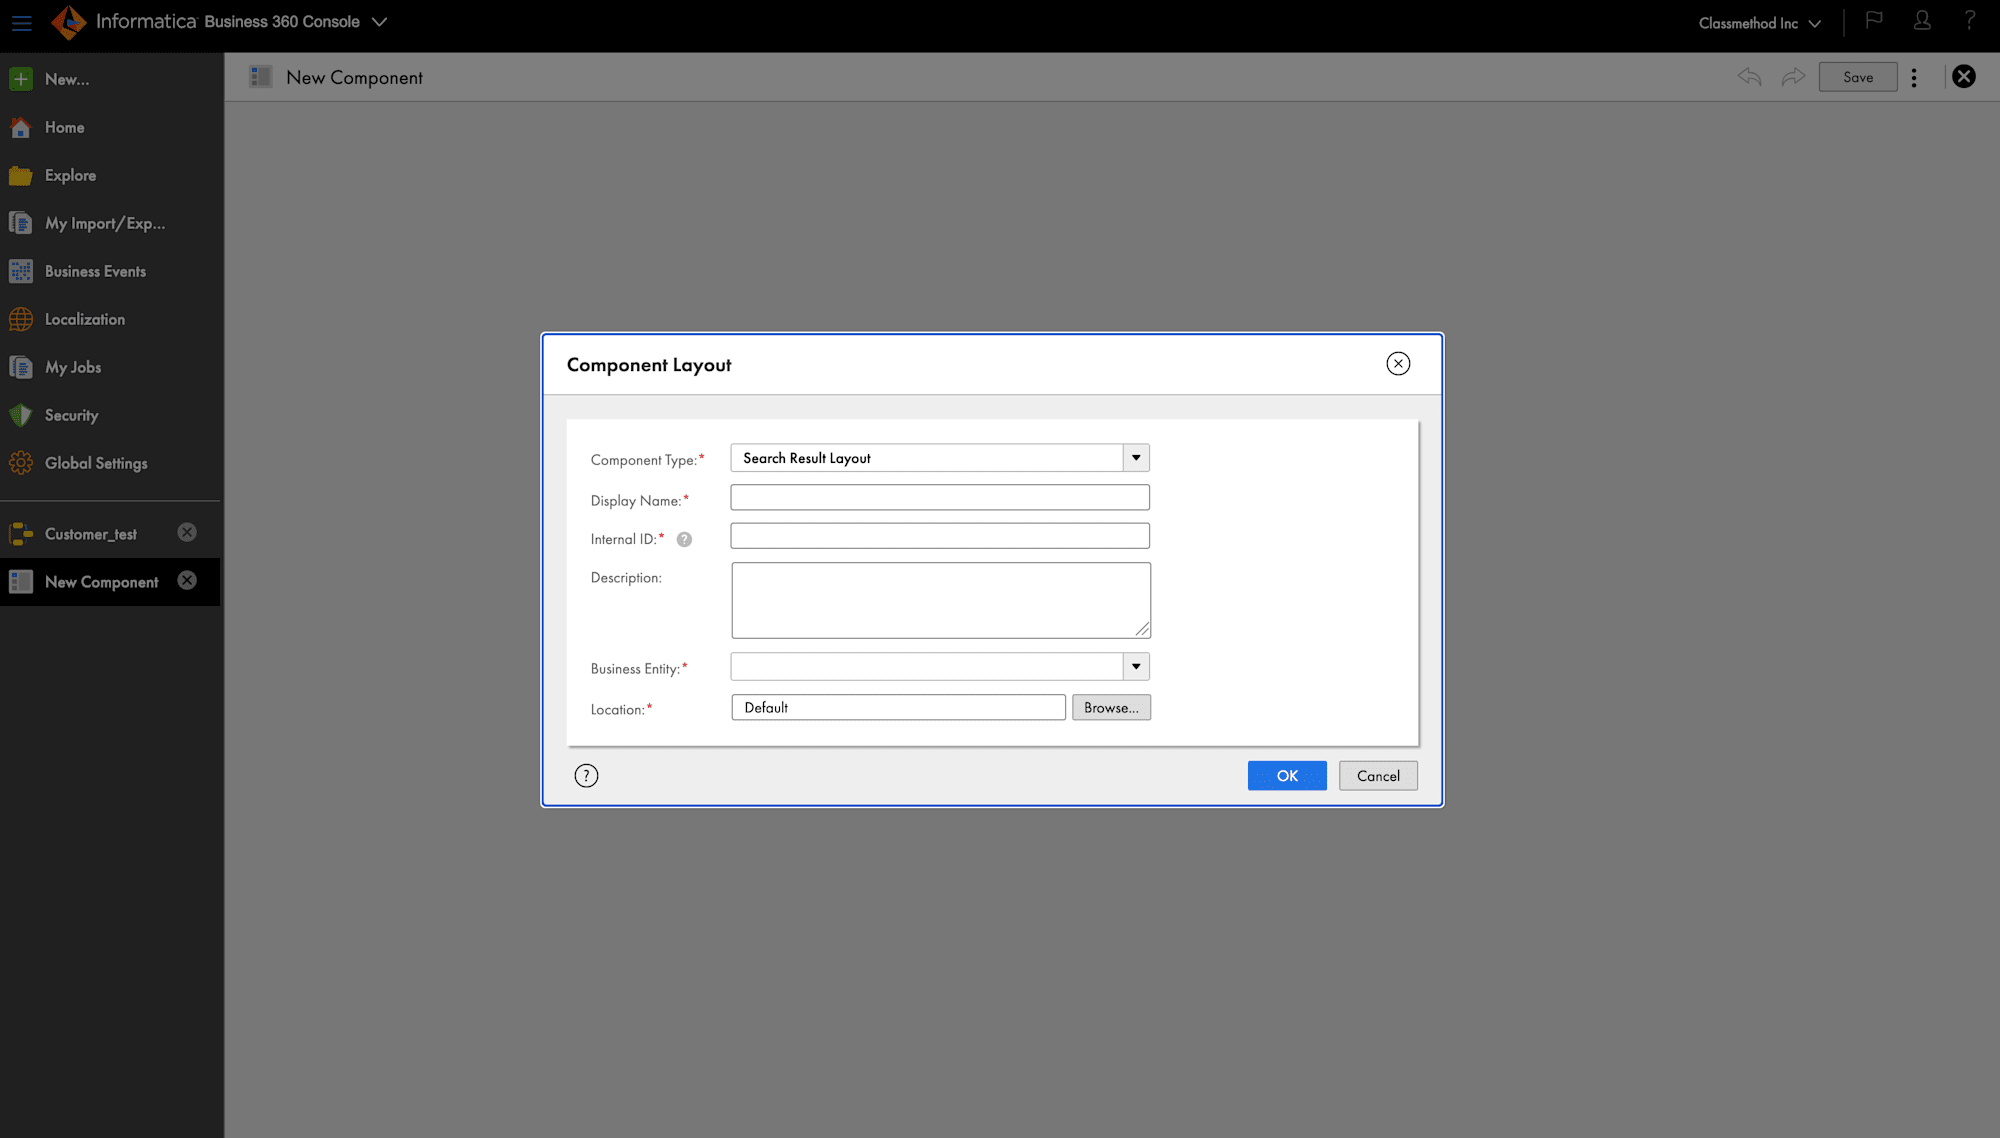
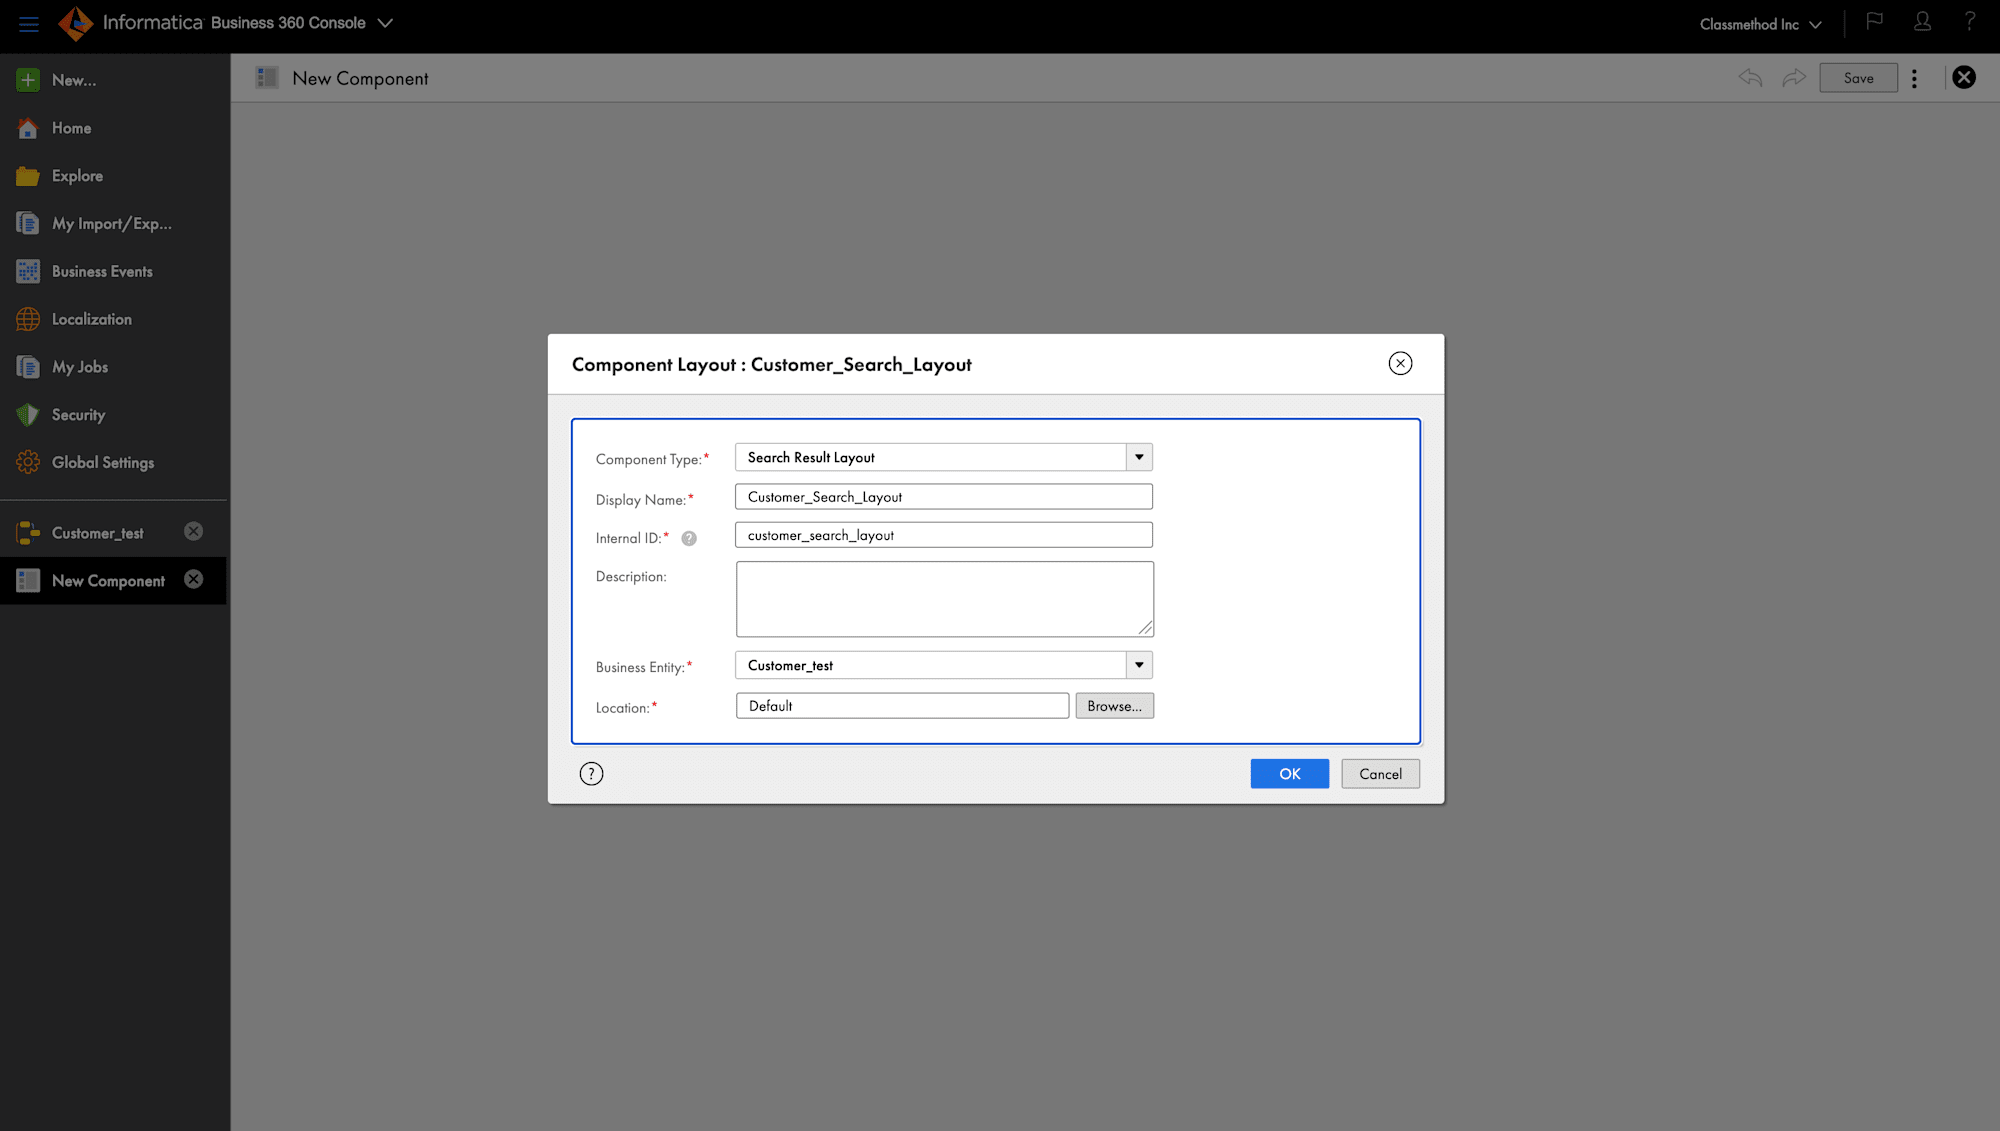
- Select the Title Field and Additional Fields.
- Save the Layout.
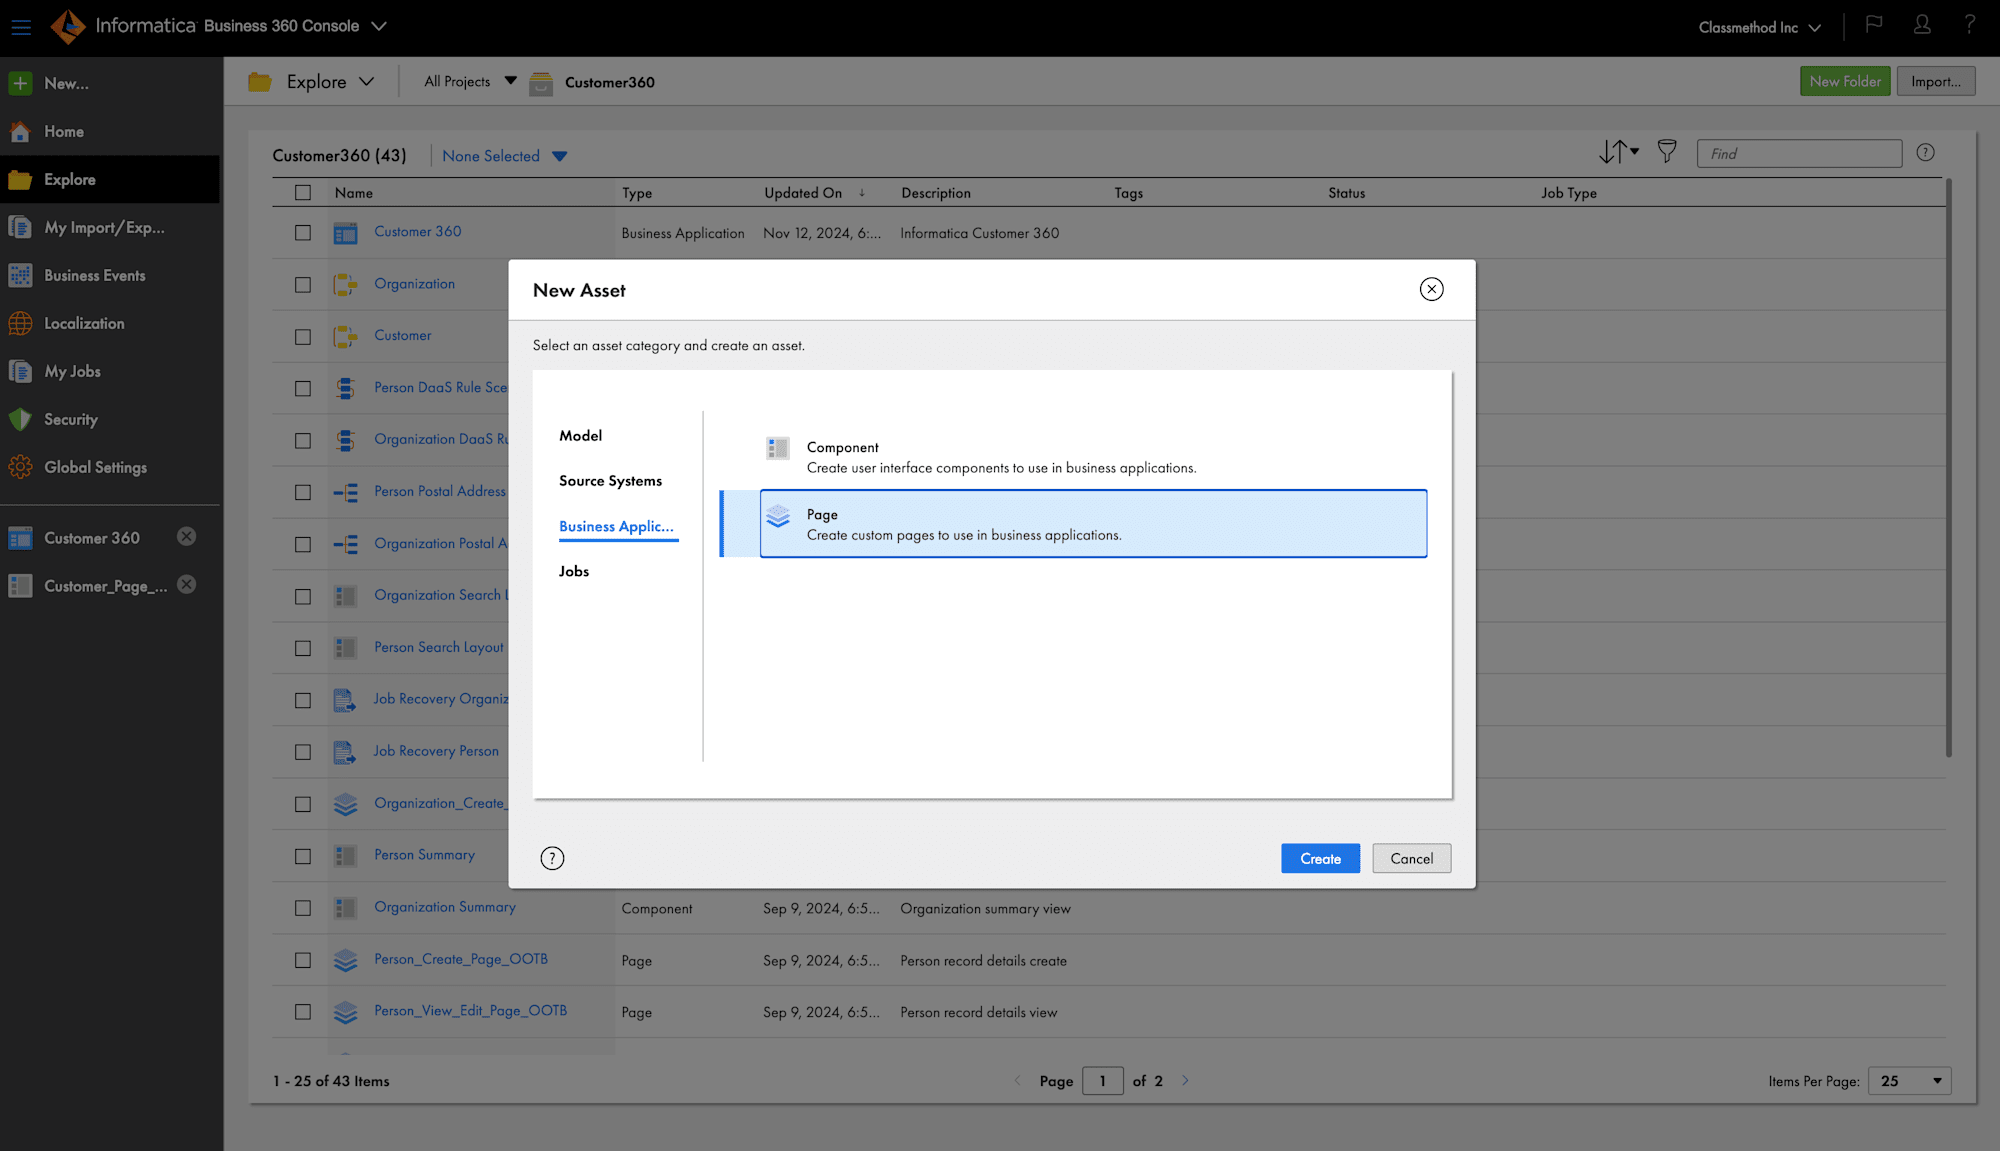
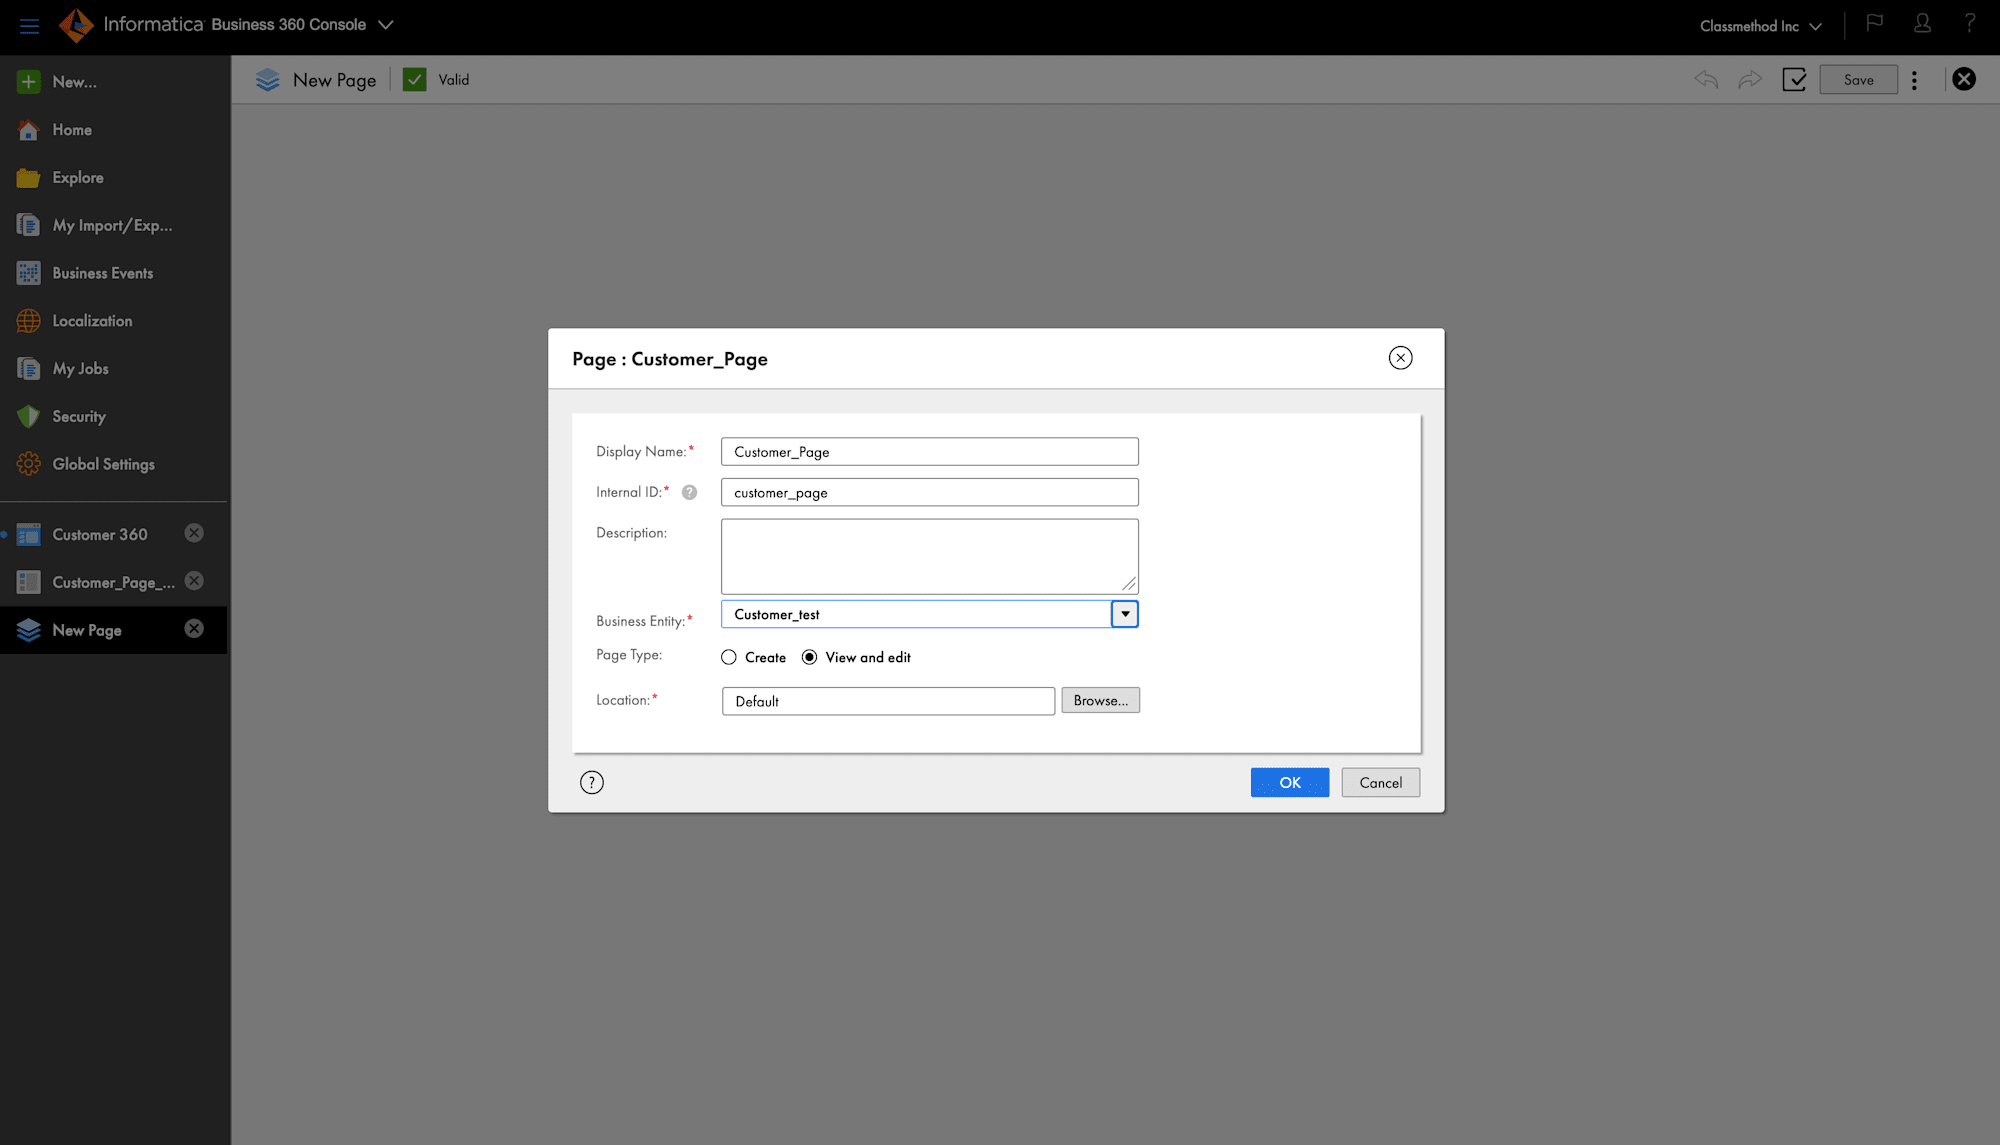
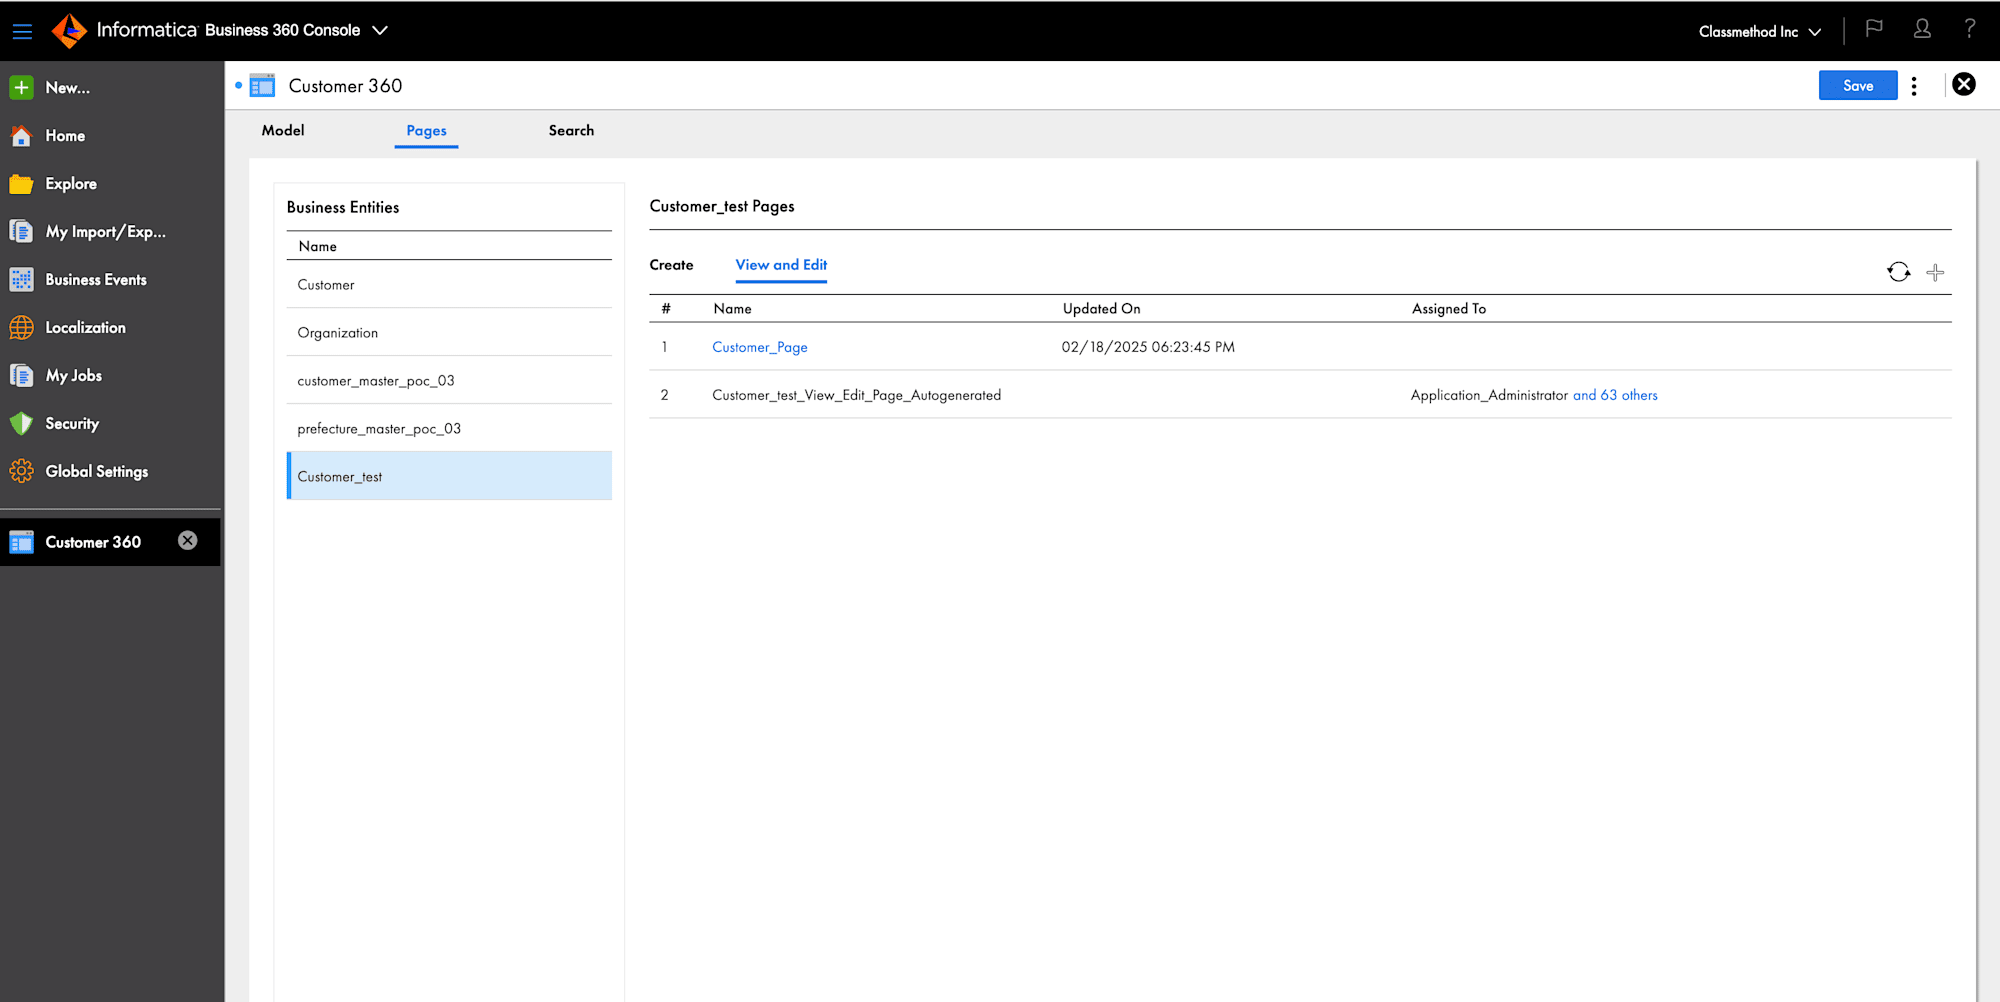
Create View and Edit Page
Let's Create View and Edit Page.
A View and Edit Page in Business 360 allow users to see and update business entity records. It provides a simple way to View and update the existing records.
- Click On New and Go to the Business Application. Click on Page.
- Give it a name and Choose your Business Entity which has been created earlier.
- Select the Location or keep it as default.
- Click OK.
- Click on Page Components.
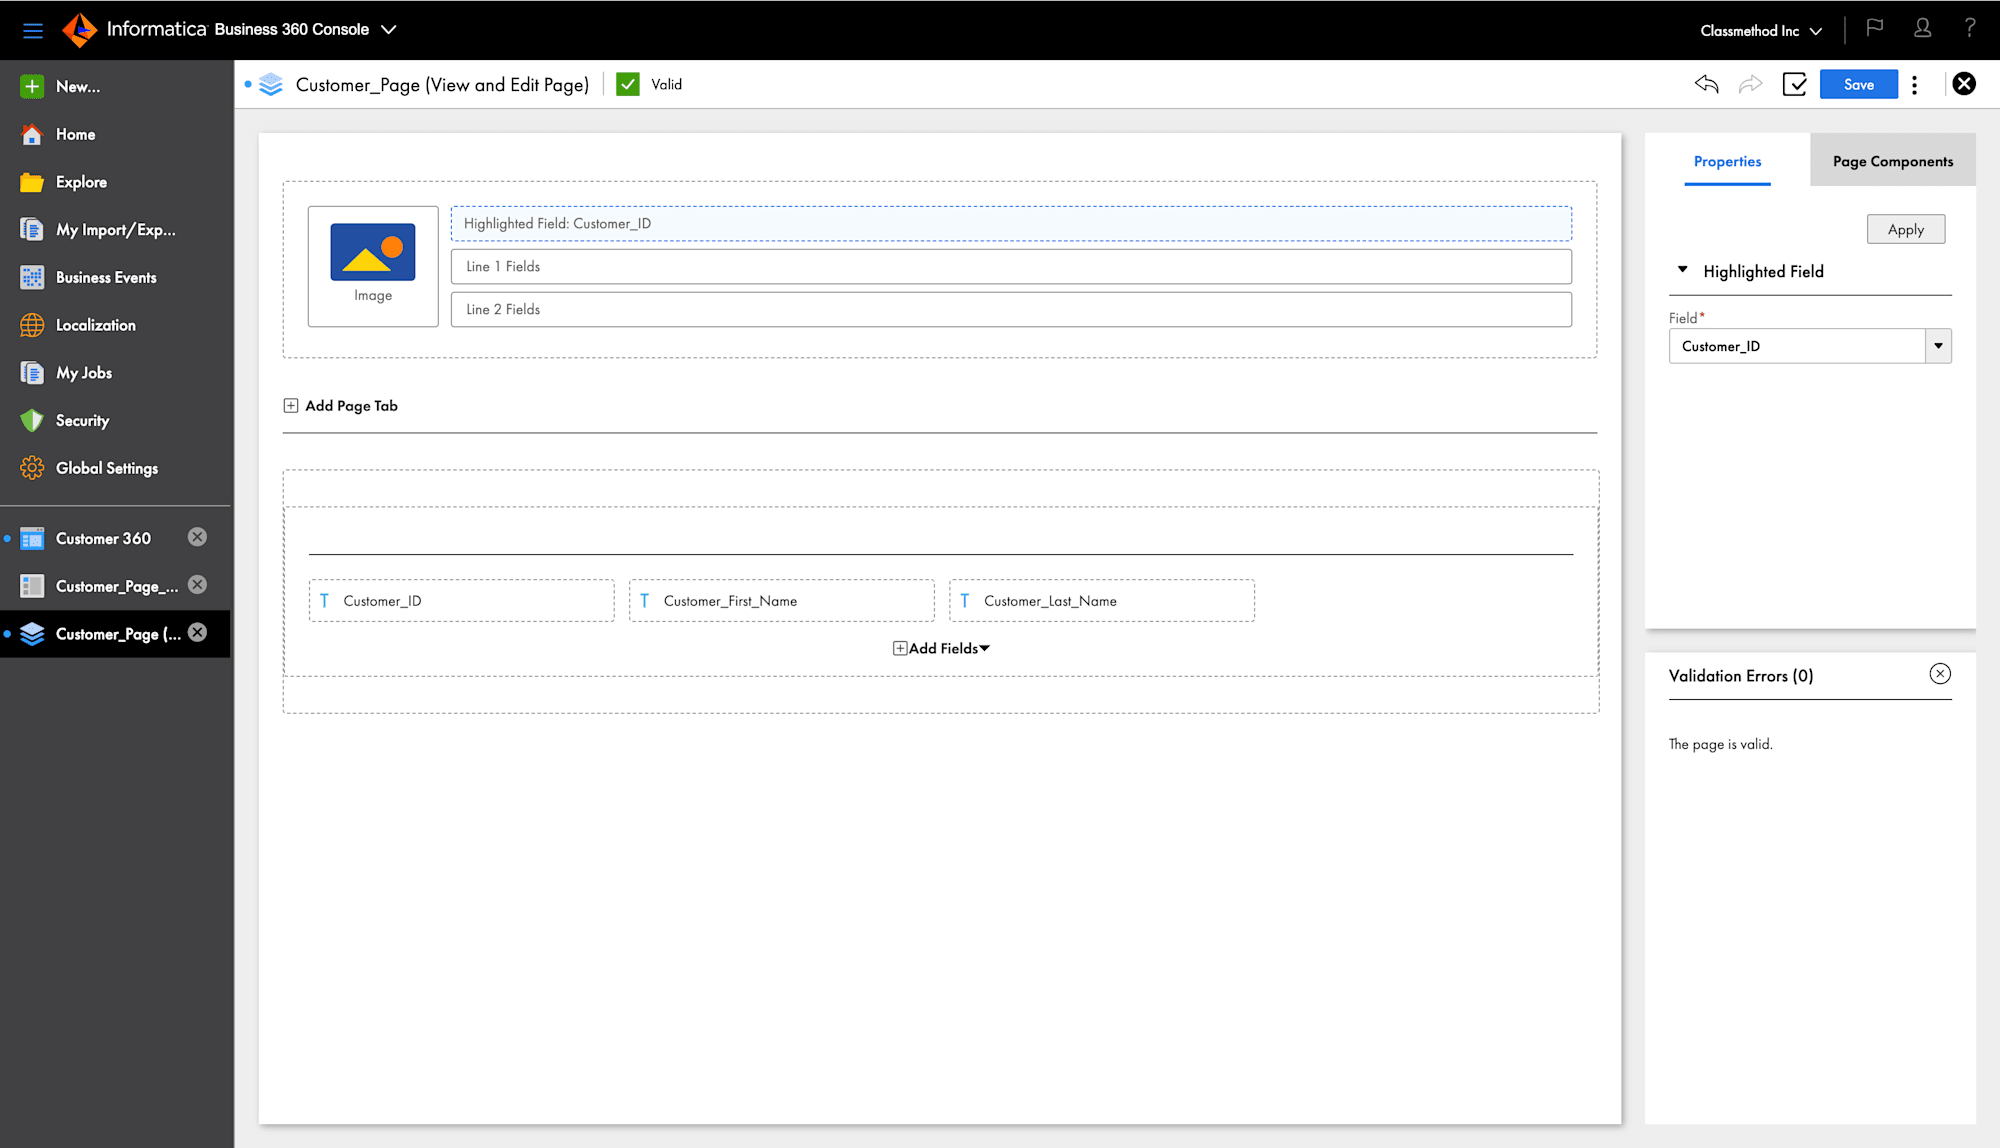
- Drag Page header to the header and select the Highlighted Field.
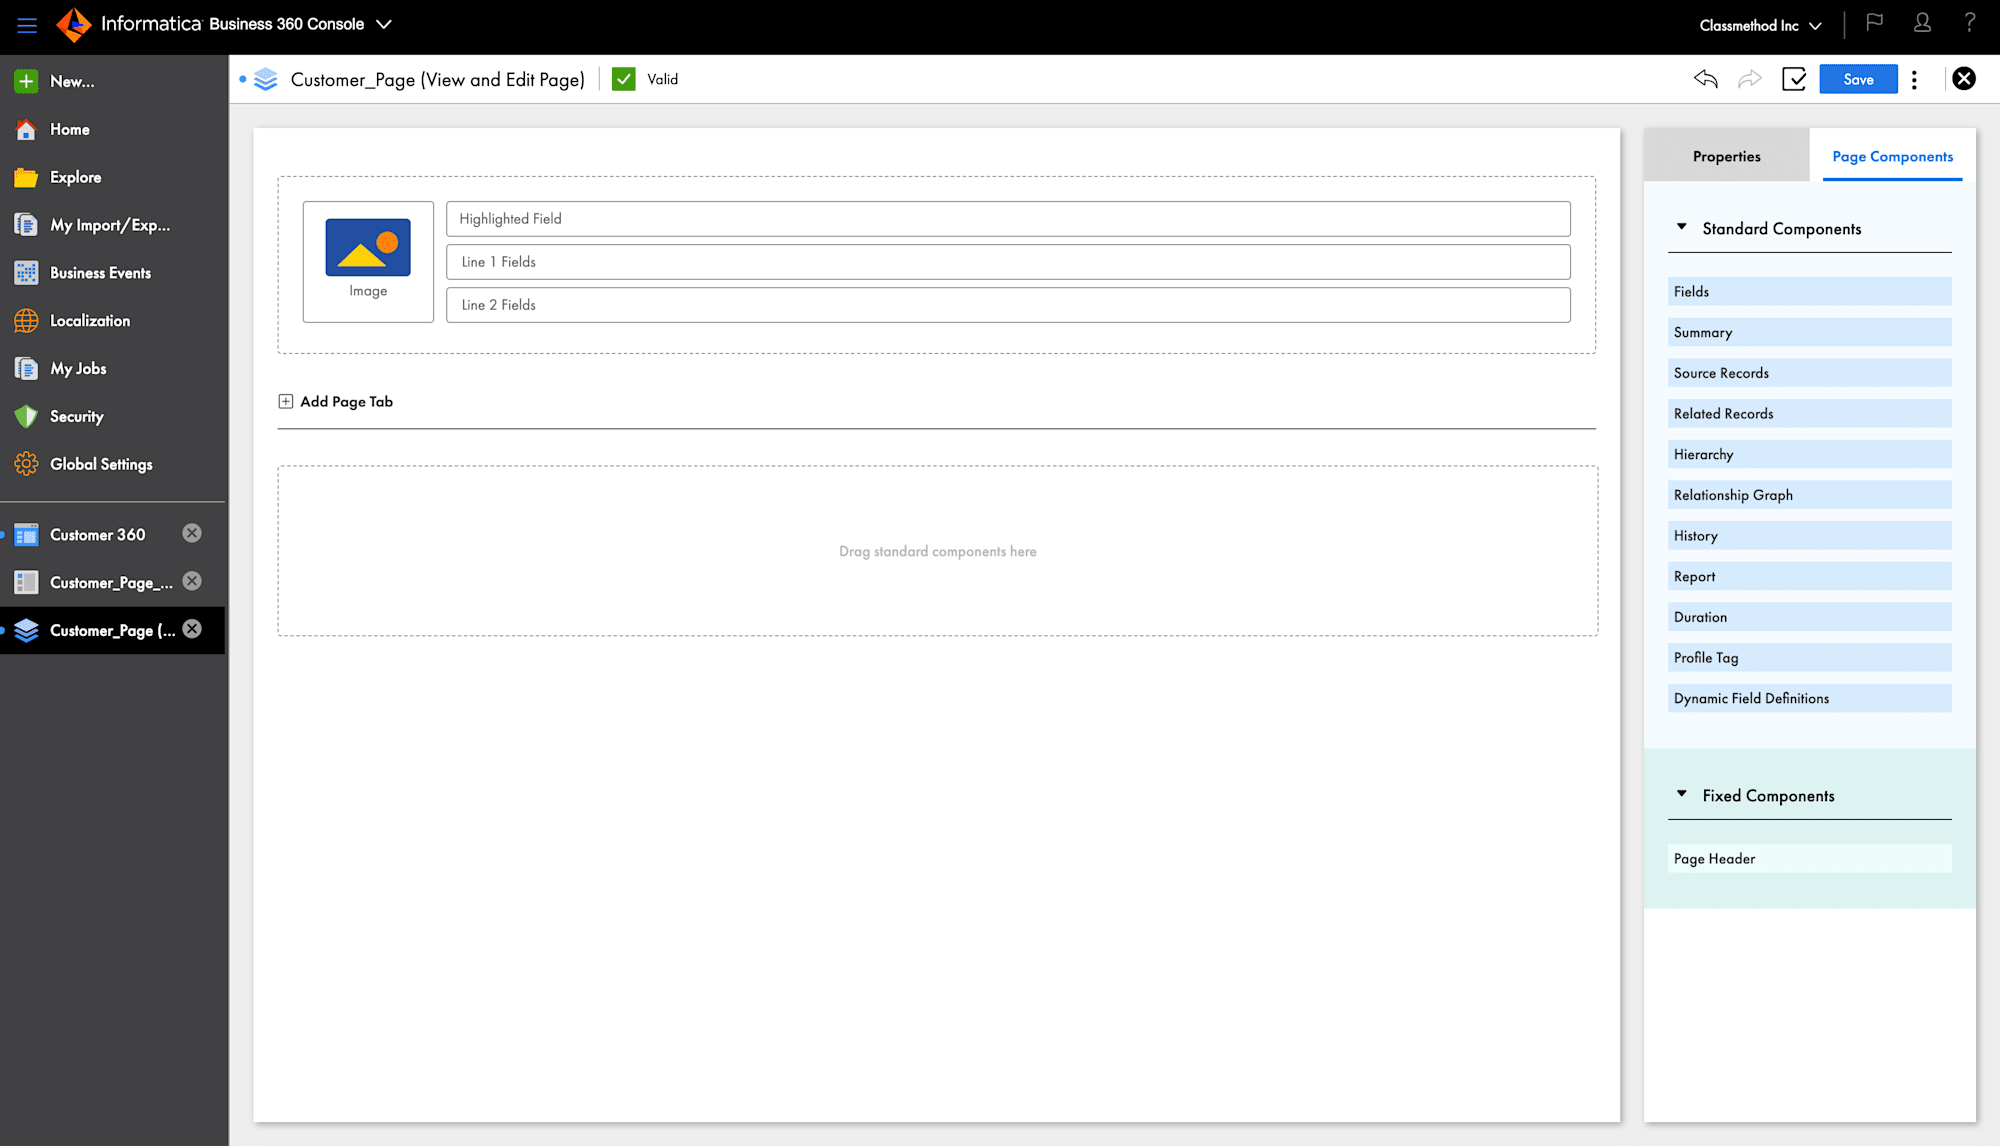
- Add fields to Page tab and select the fields.
- Add another tab if needed.
- Finally Save the Page.
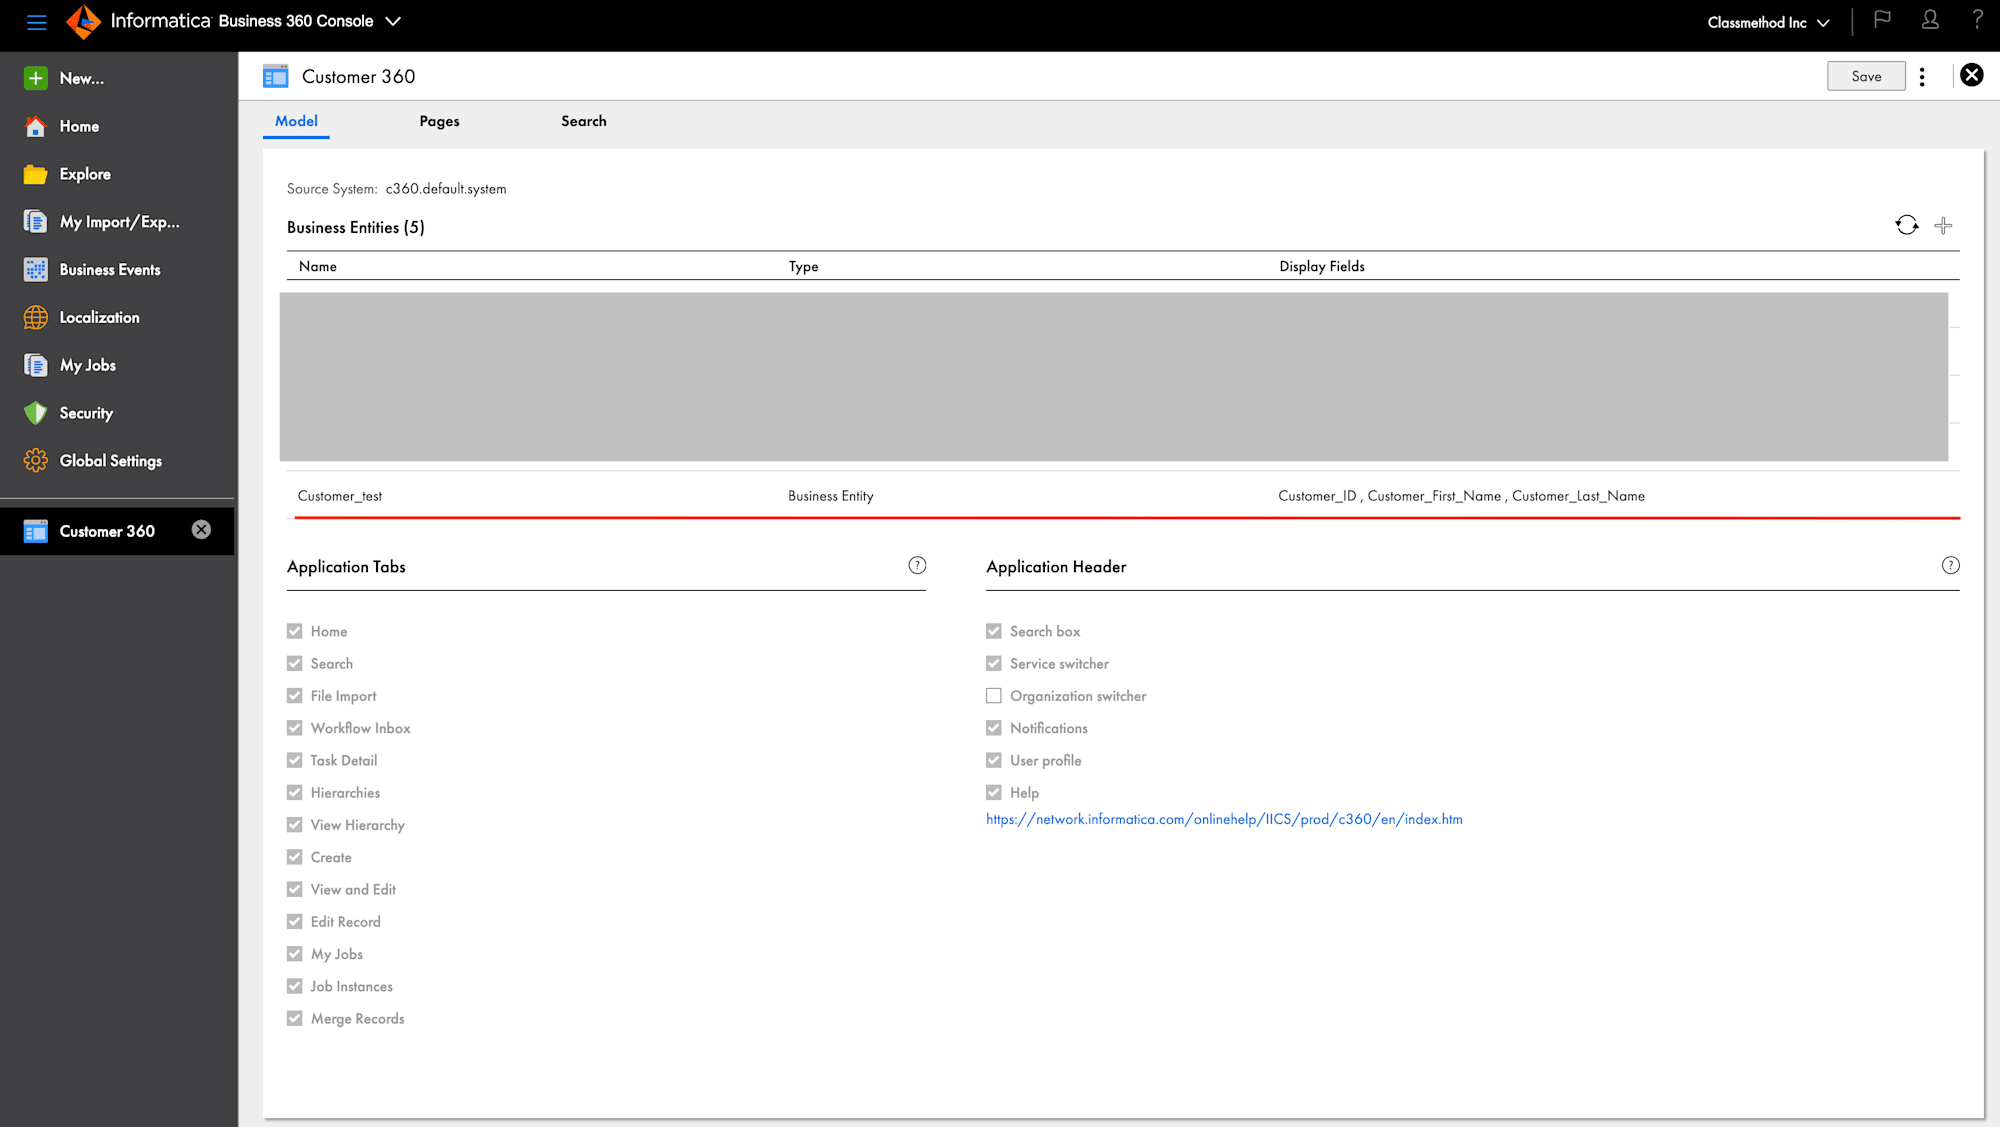
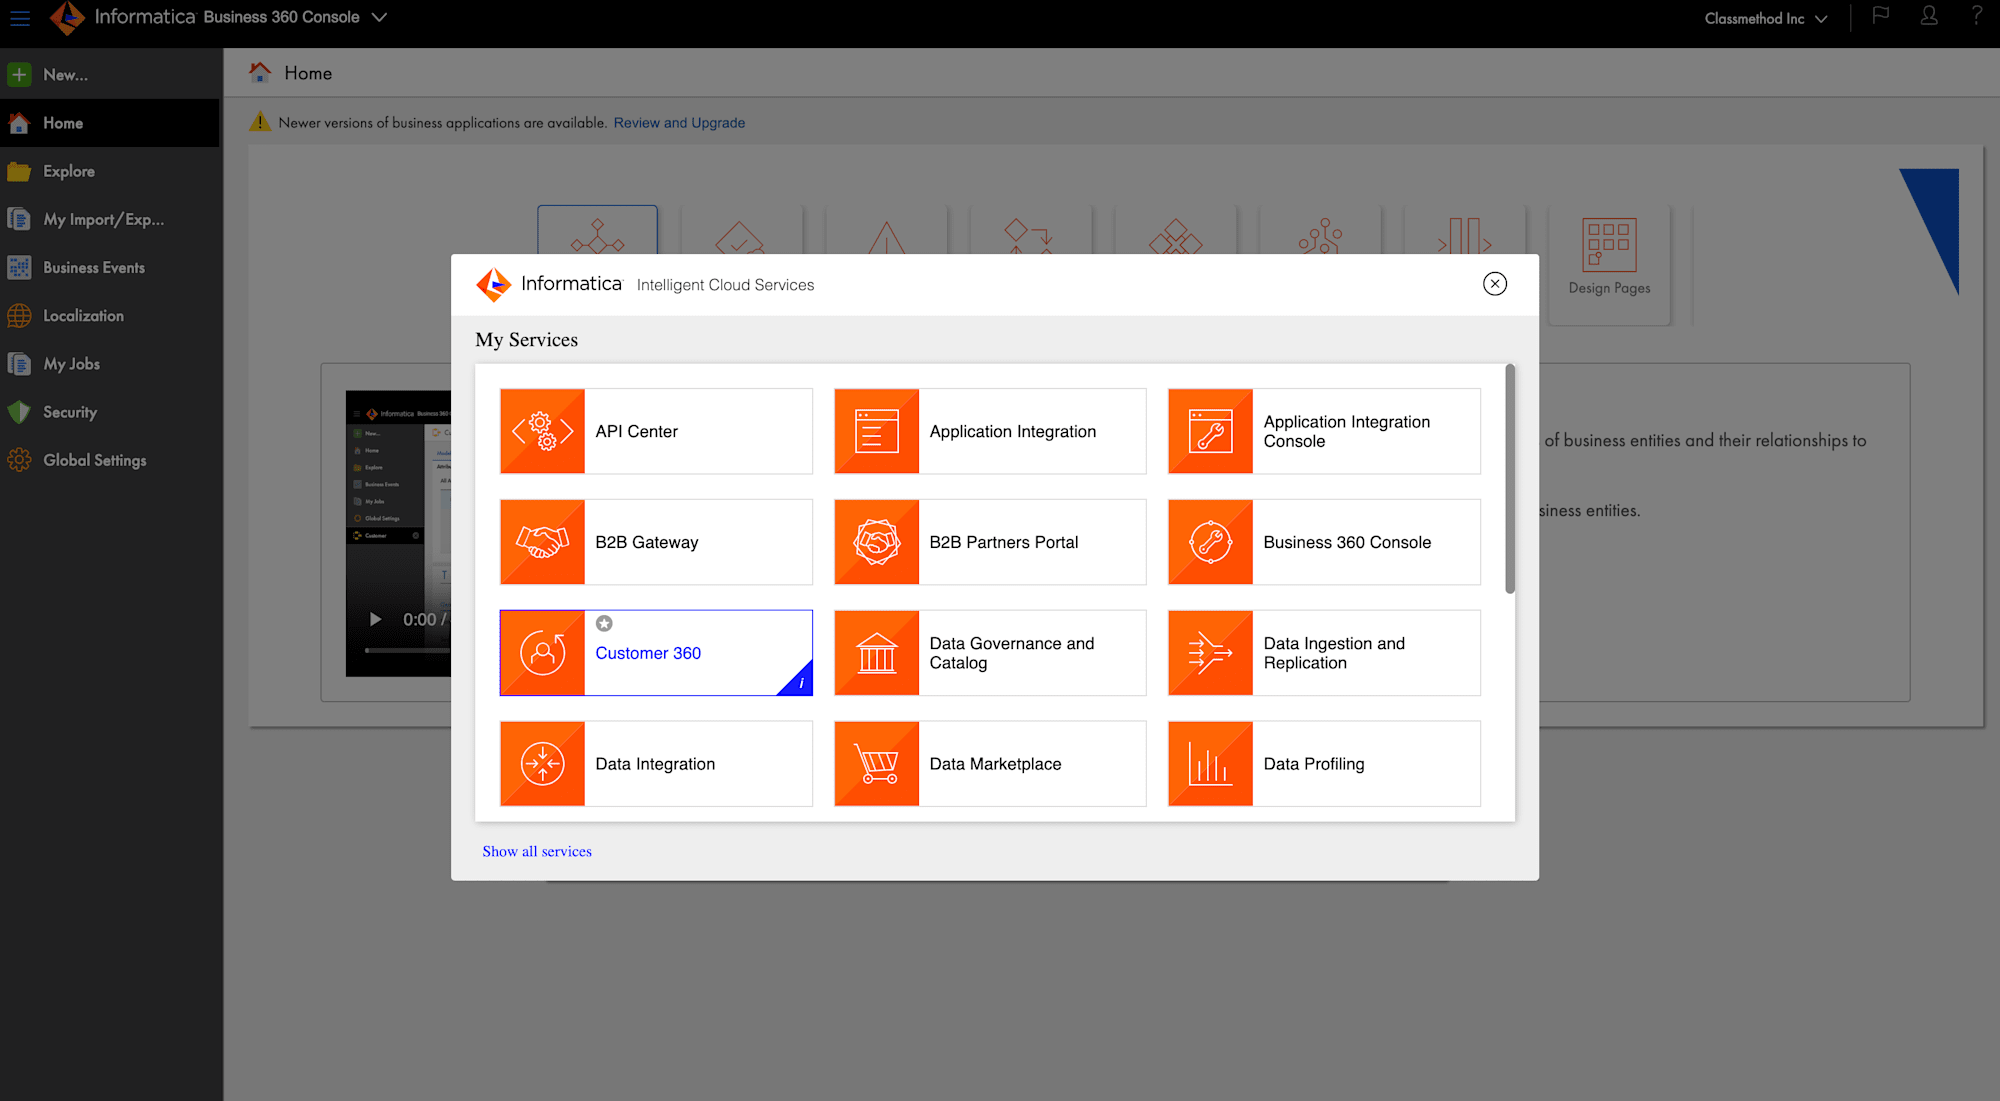
Add the Business Entity to the Customer 360 Application
Let's add Business Entity to the Customer 360 Application.
Adding the Business Entity to the Customer 360 Application makes the entity available in Customer 360 for users to view, search, and manage data. This step connects the entity to the application's UI and workflows.
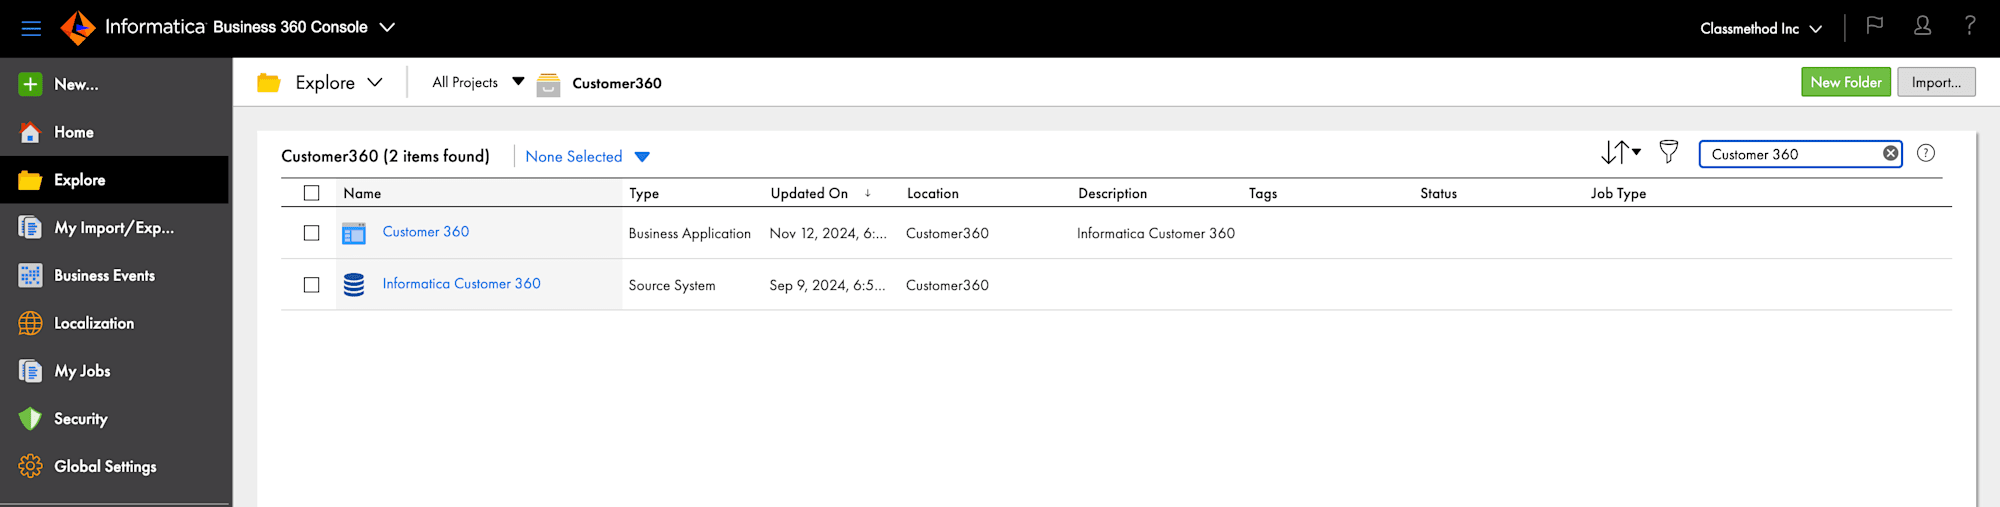
- Open Customer 360 Business Application from Business 360 Console.
- To Add the Business Entity, In Model Click + and Select your new Business Entity which has been created earlier..
- Choose a display field to show.
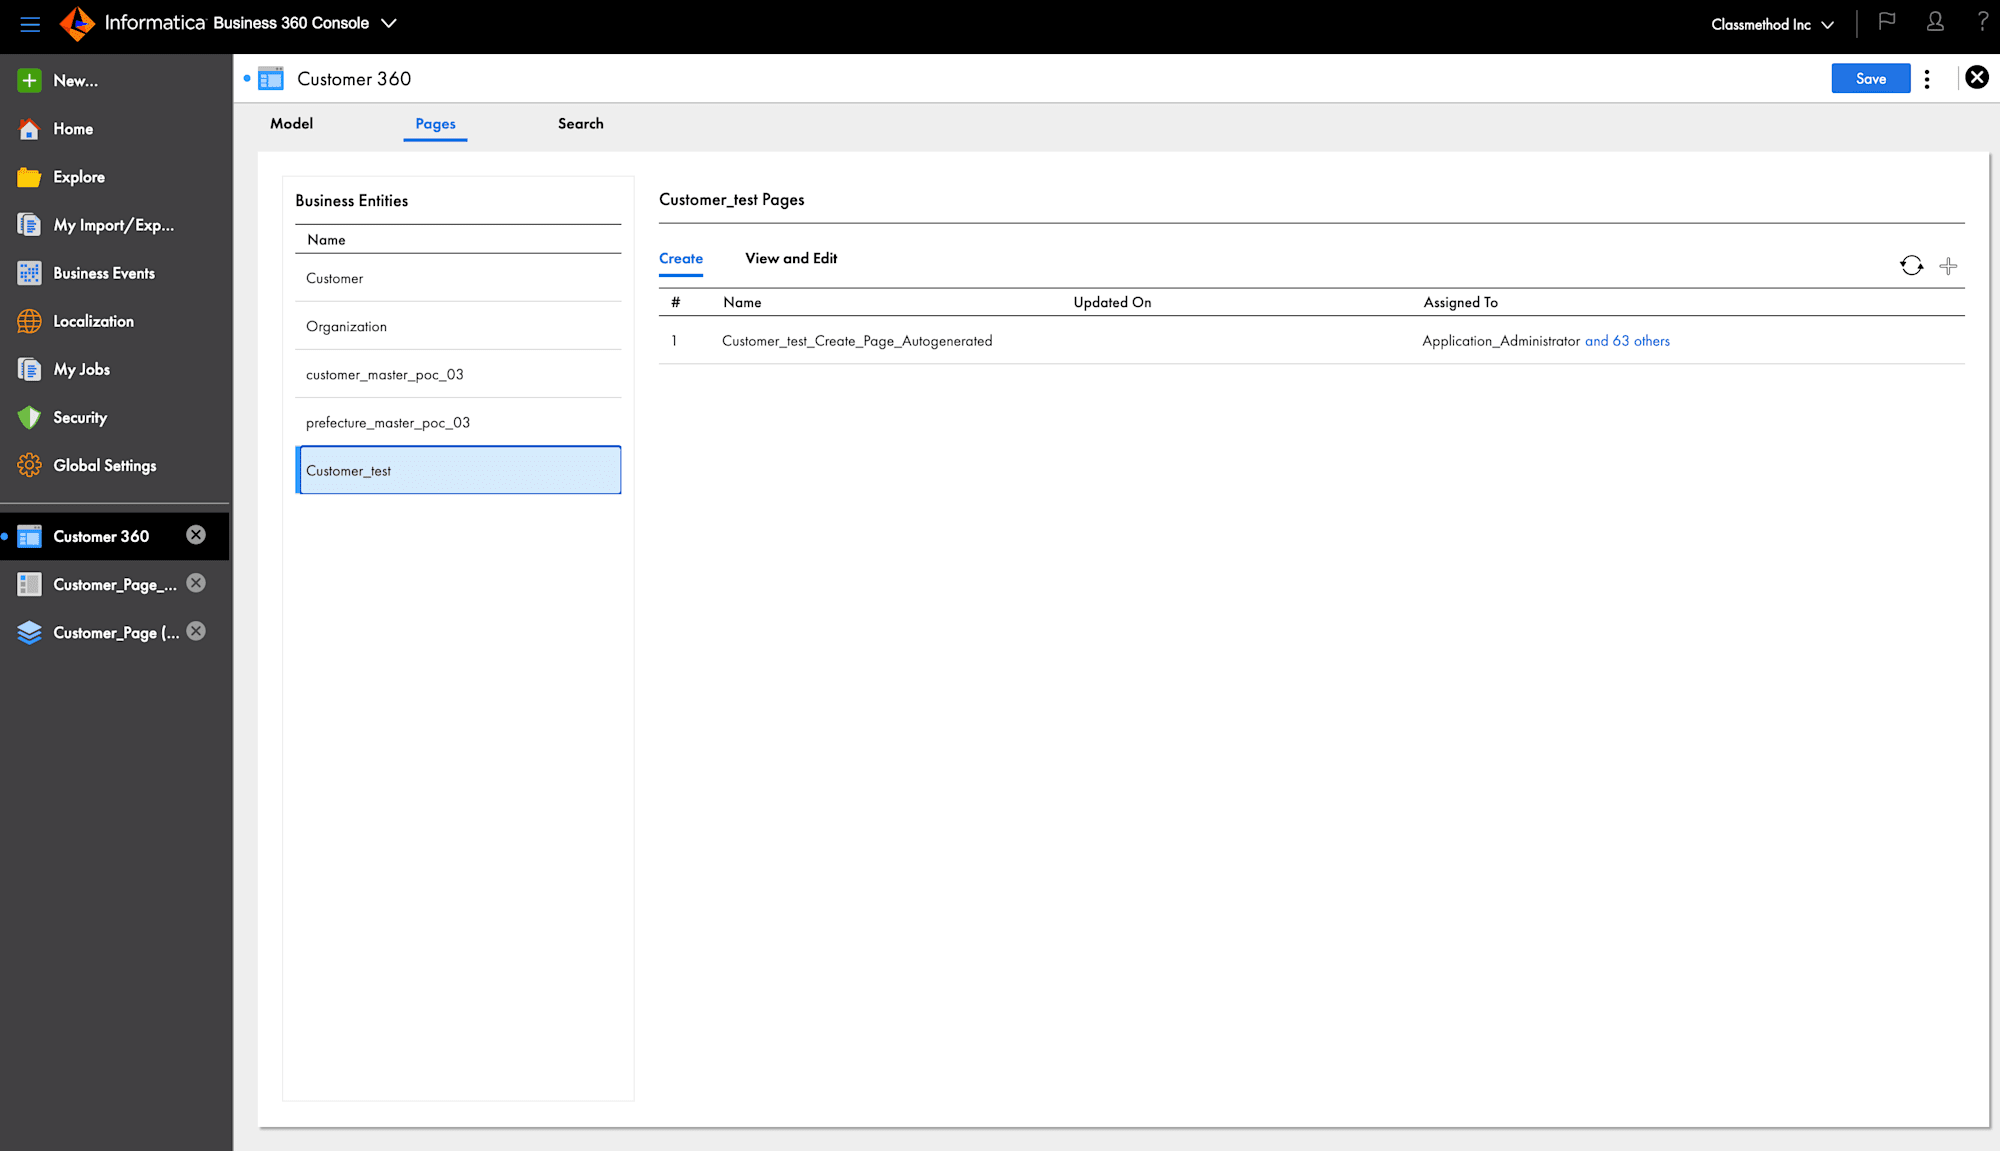
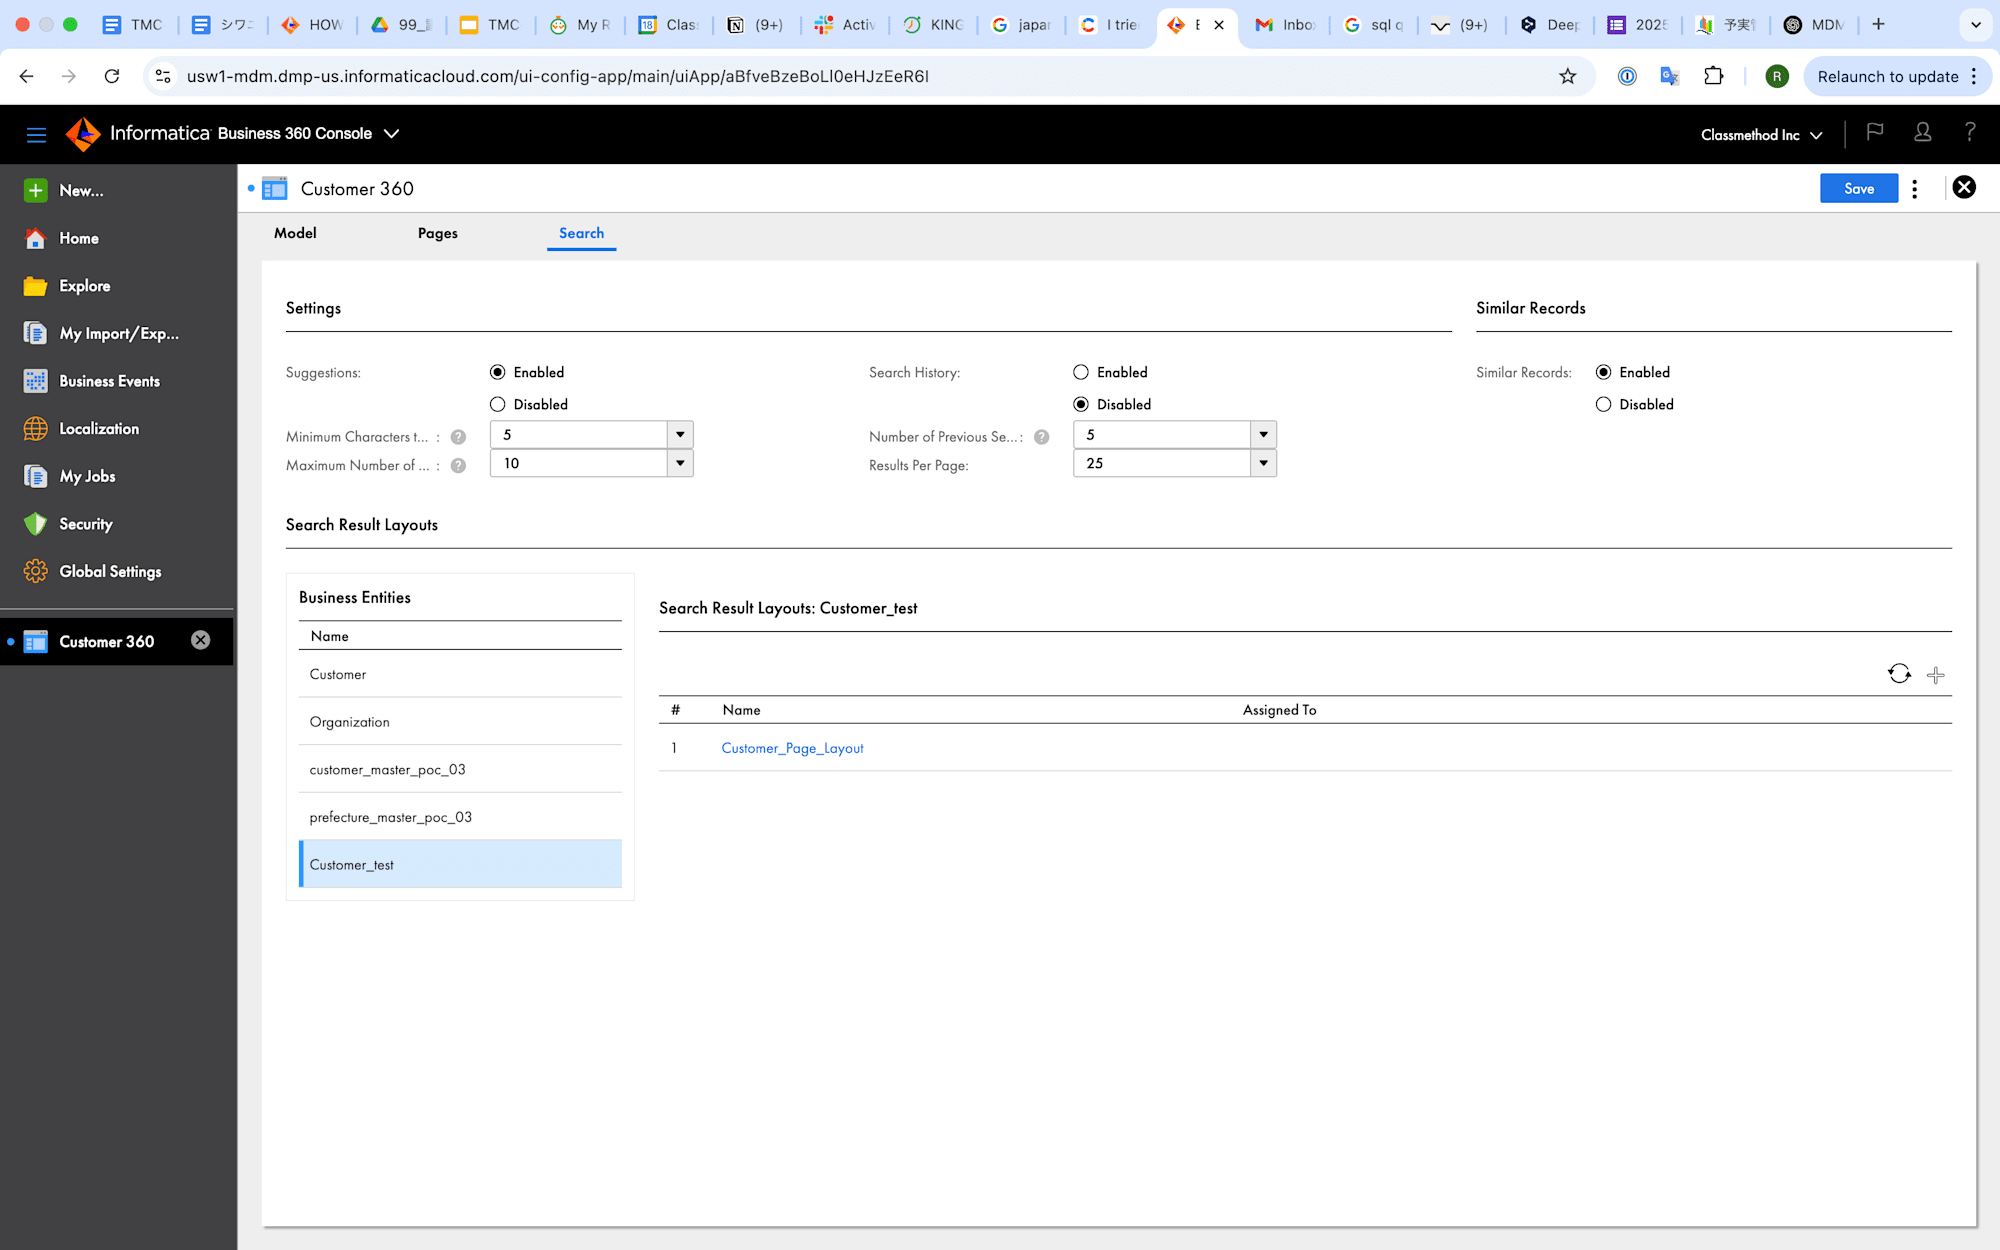
- Click on Search tab and Click on your New Business Entity.
- Add the Search Layout for that Business Entity
- Pick your Search Layout.
- Click on Page and Select your new Business Entity.
- Click On view and Edit page.
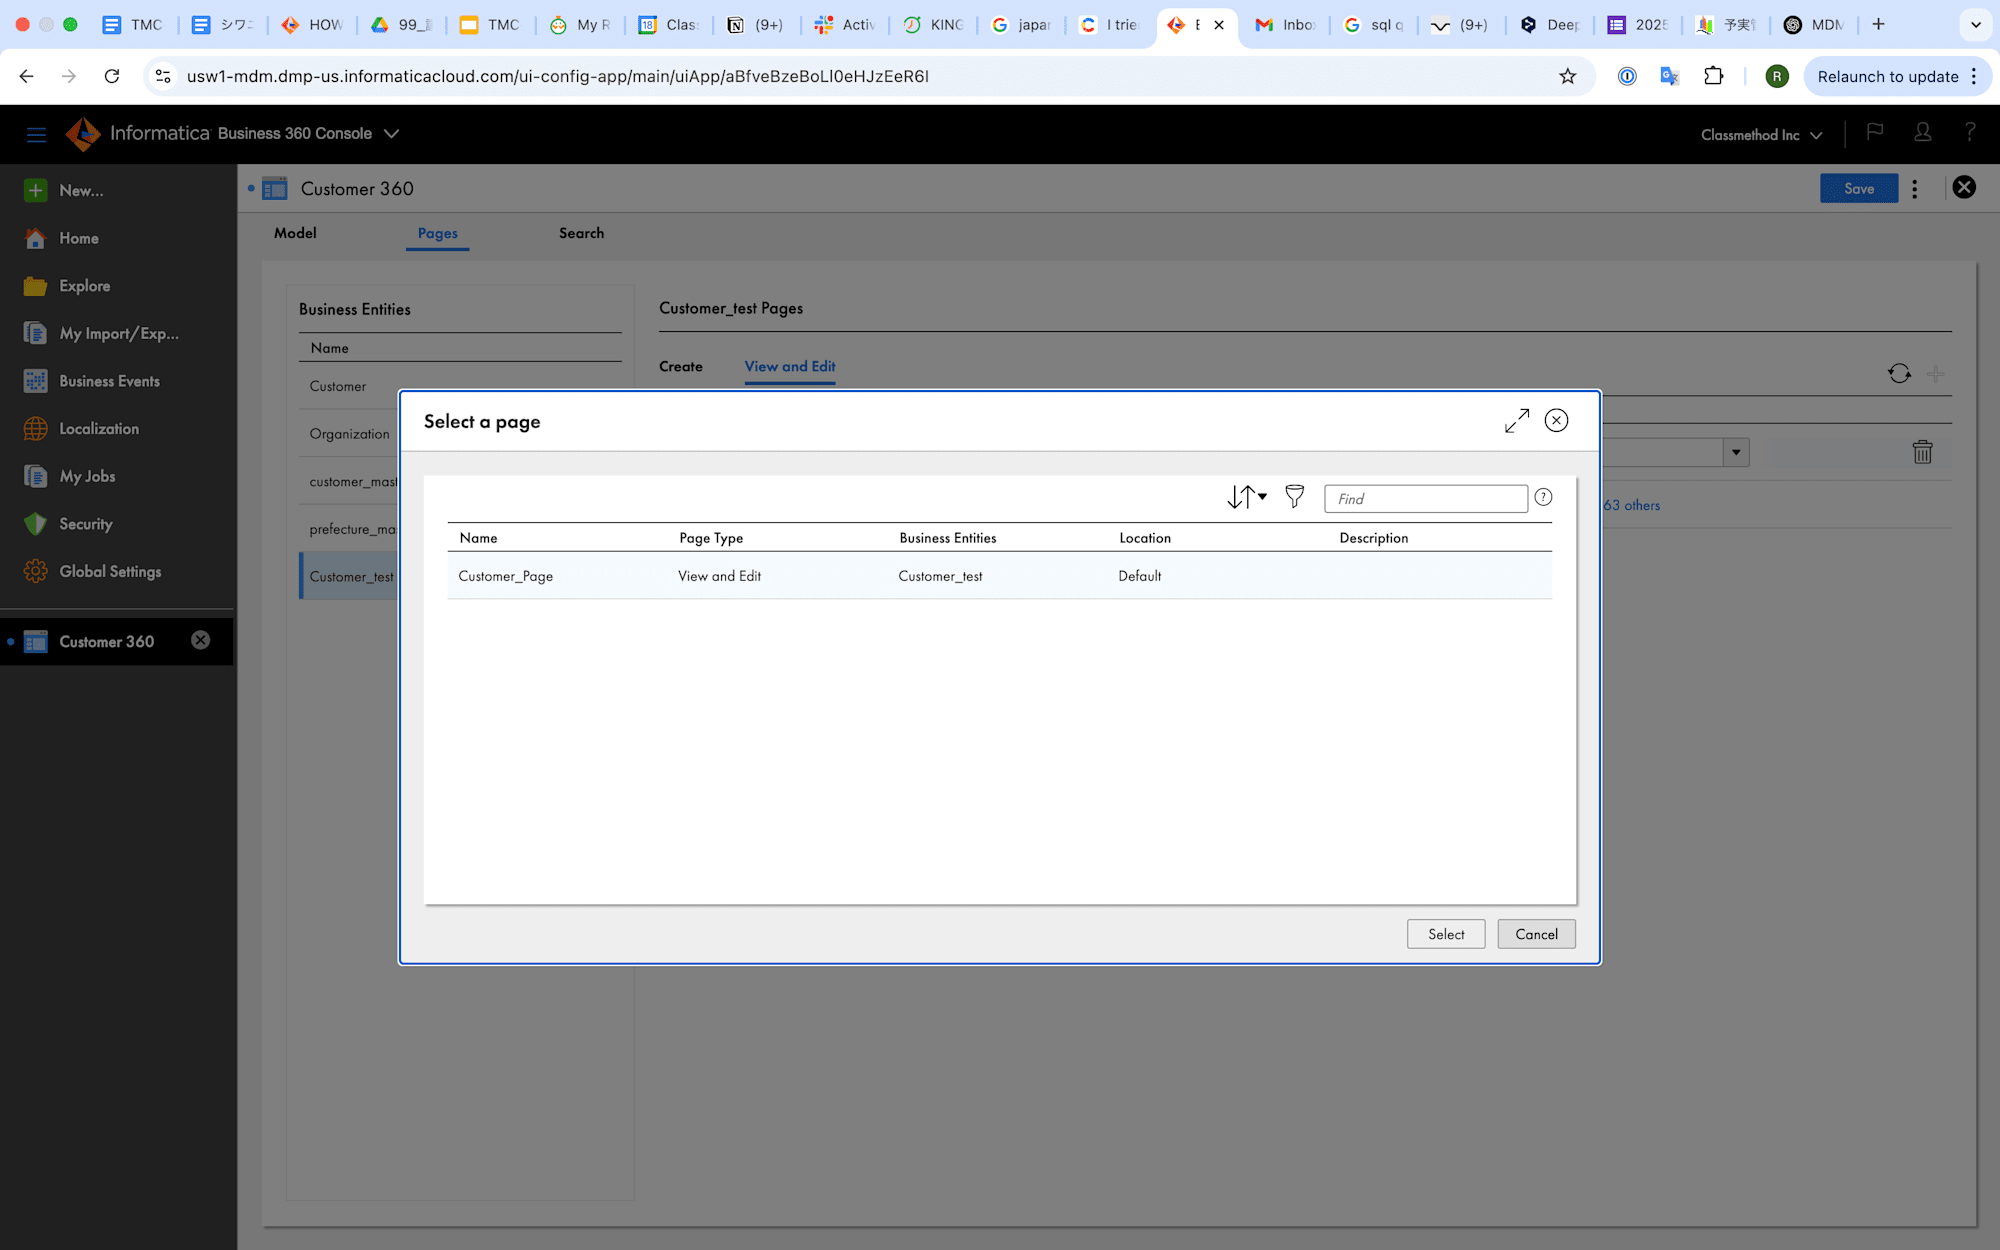
- Add the Page for that Business Entity.
- Finally, Save the Customer 360 Business Application.
Here we have successfully created the Business entity, Page layout and View and Edit page for the Business entity.
Execution and Test
- Let's Test the Business entity in Customer360 Application.
- Open the Customer 360 Application.
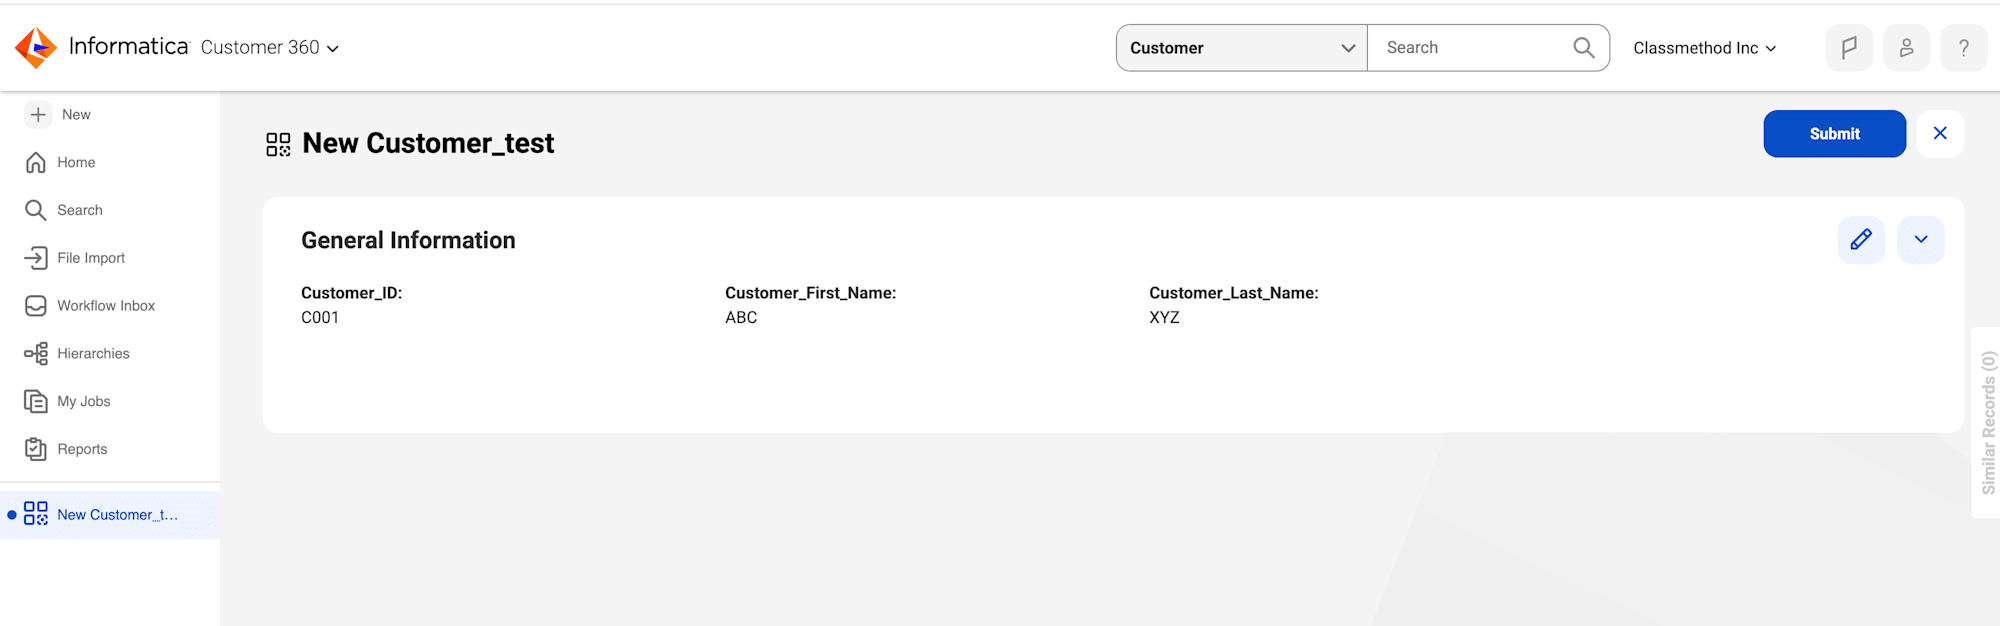
- Click On New and Select the New Business Entity which has been created earlier.
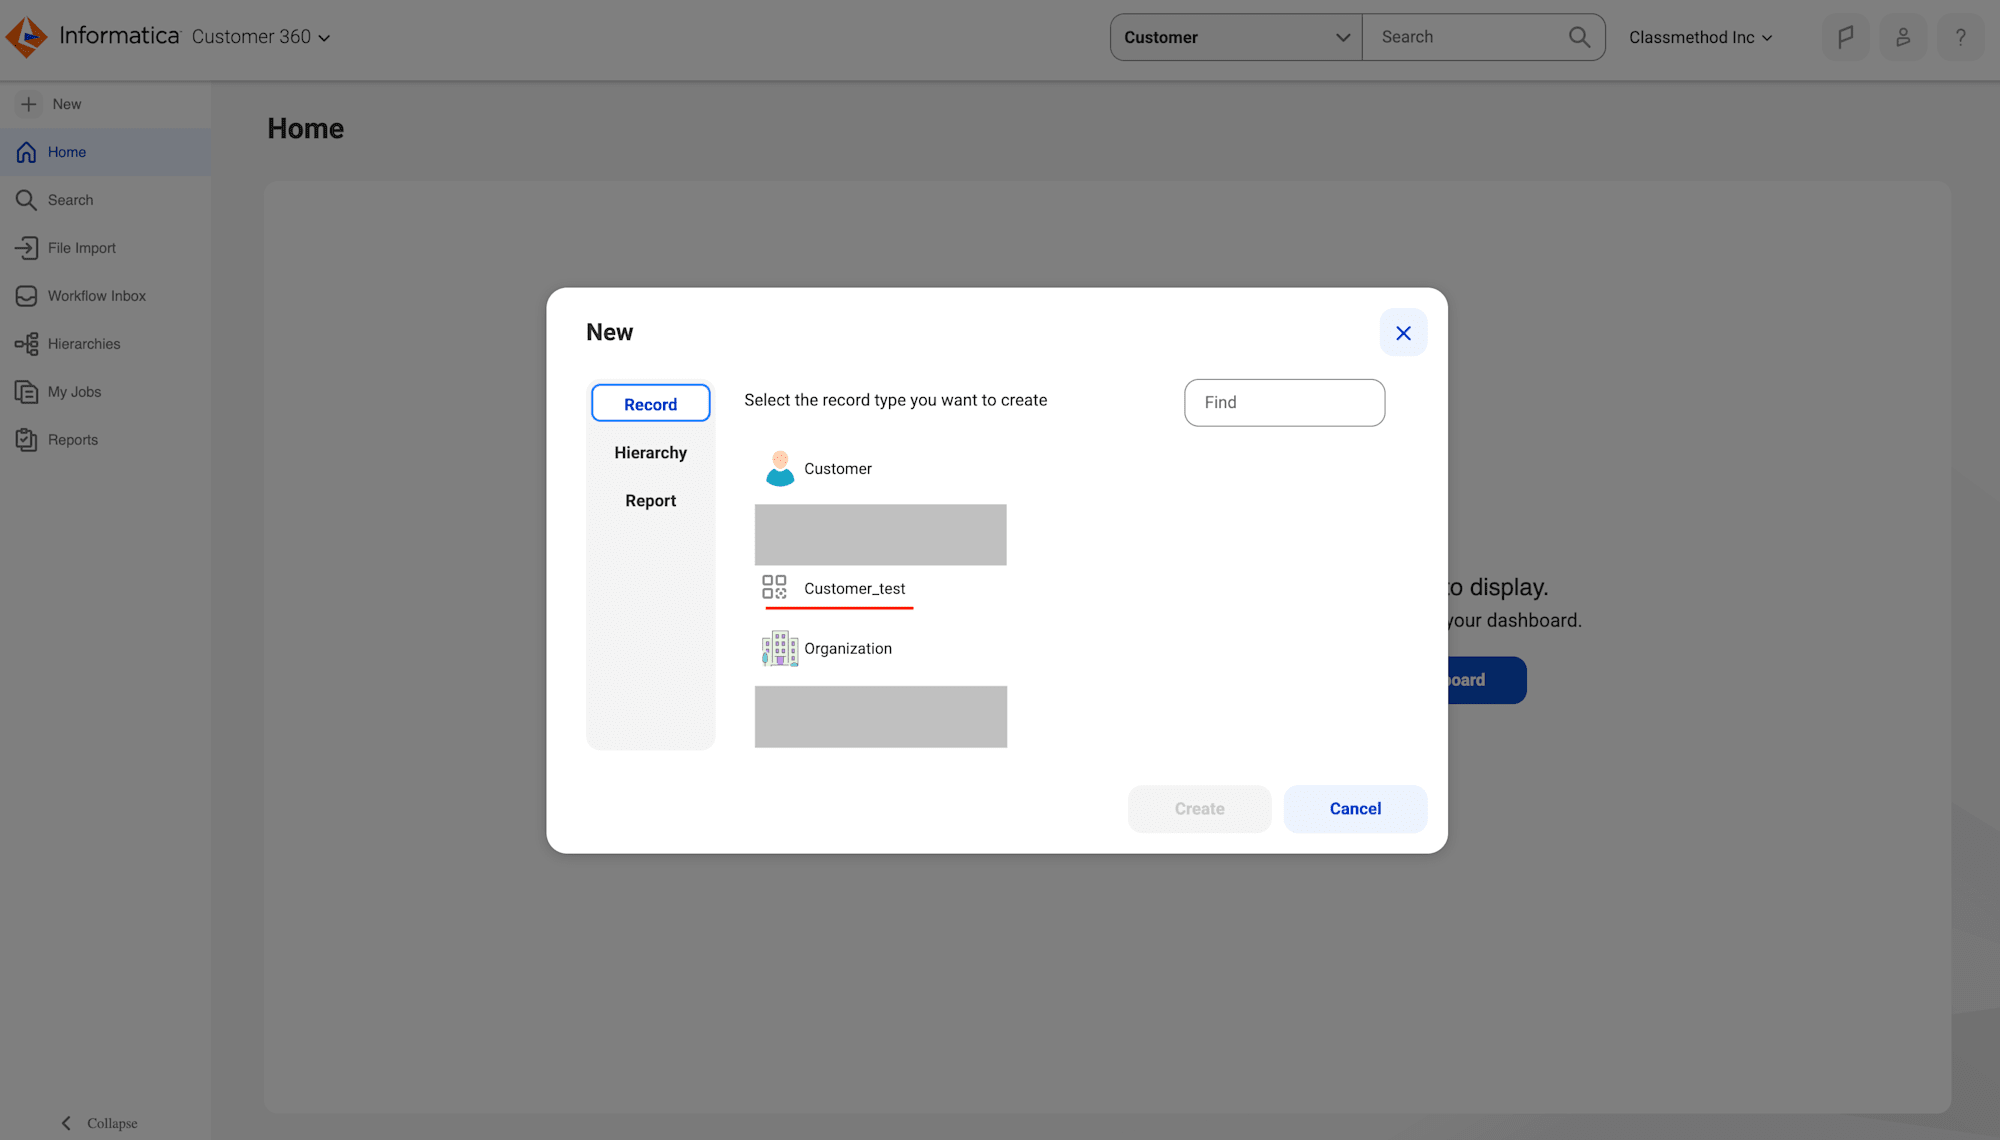
- Here you can see the Business Entity with the filed which has been added in Business Entity.

- Let's test the Business Entity by entering some dummy records.
- Save the records by clicking on the box with check mark sign.
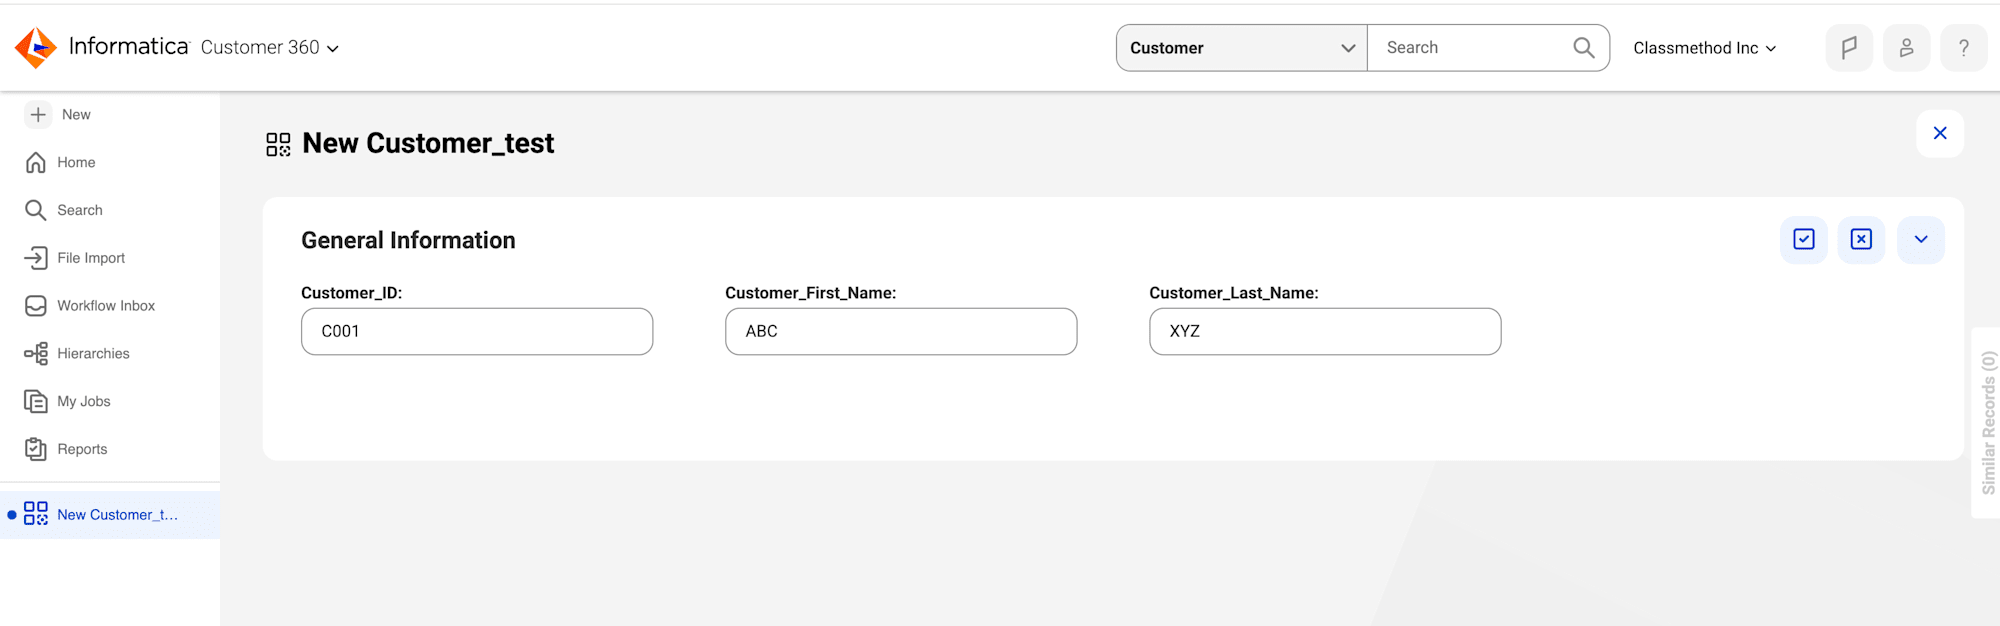
- Records has been registered successfully.
- Now, Let's try to search the records in Business Entity.
- Go to the Search console.
- Select the New Business Entity.
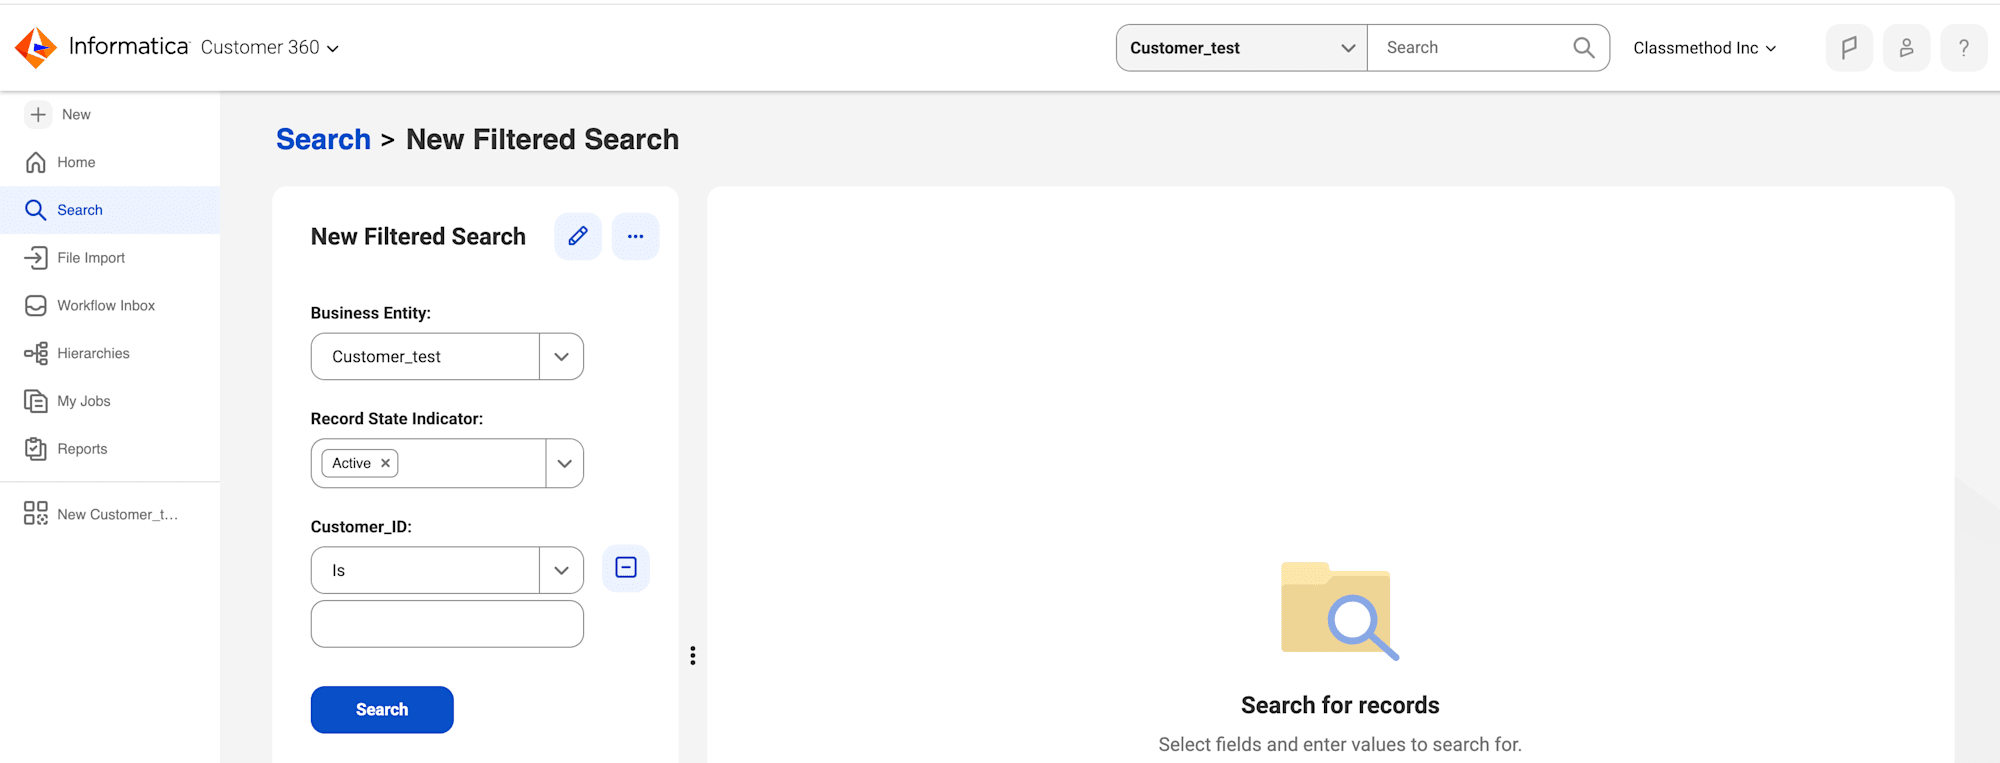
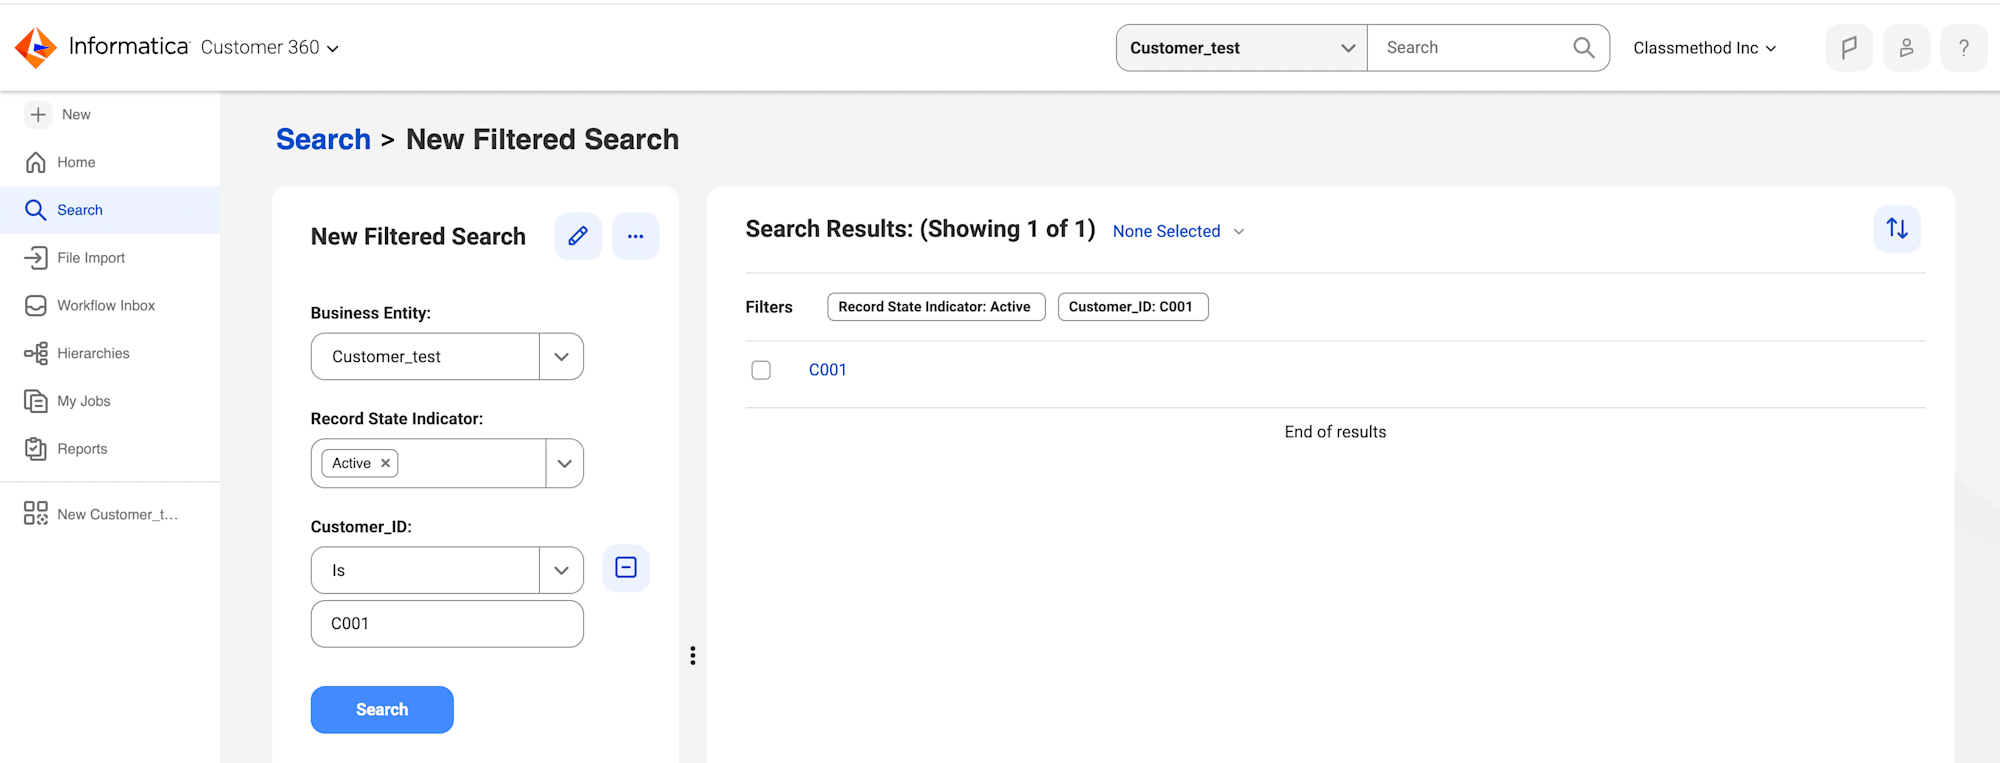
- Enter the Customer_ID and Click on Search.
- Click on the Customer_ID (C001) in Search Results and you can see the records of that Customer_ID.
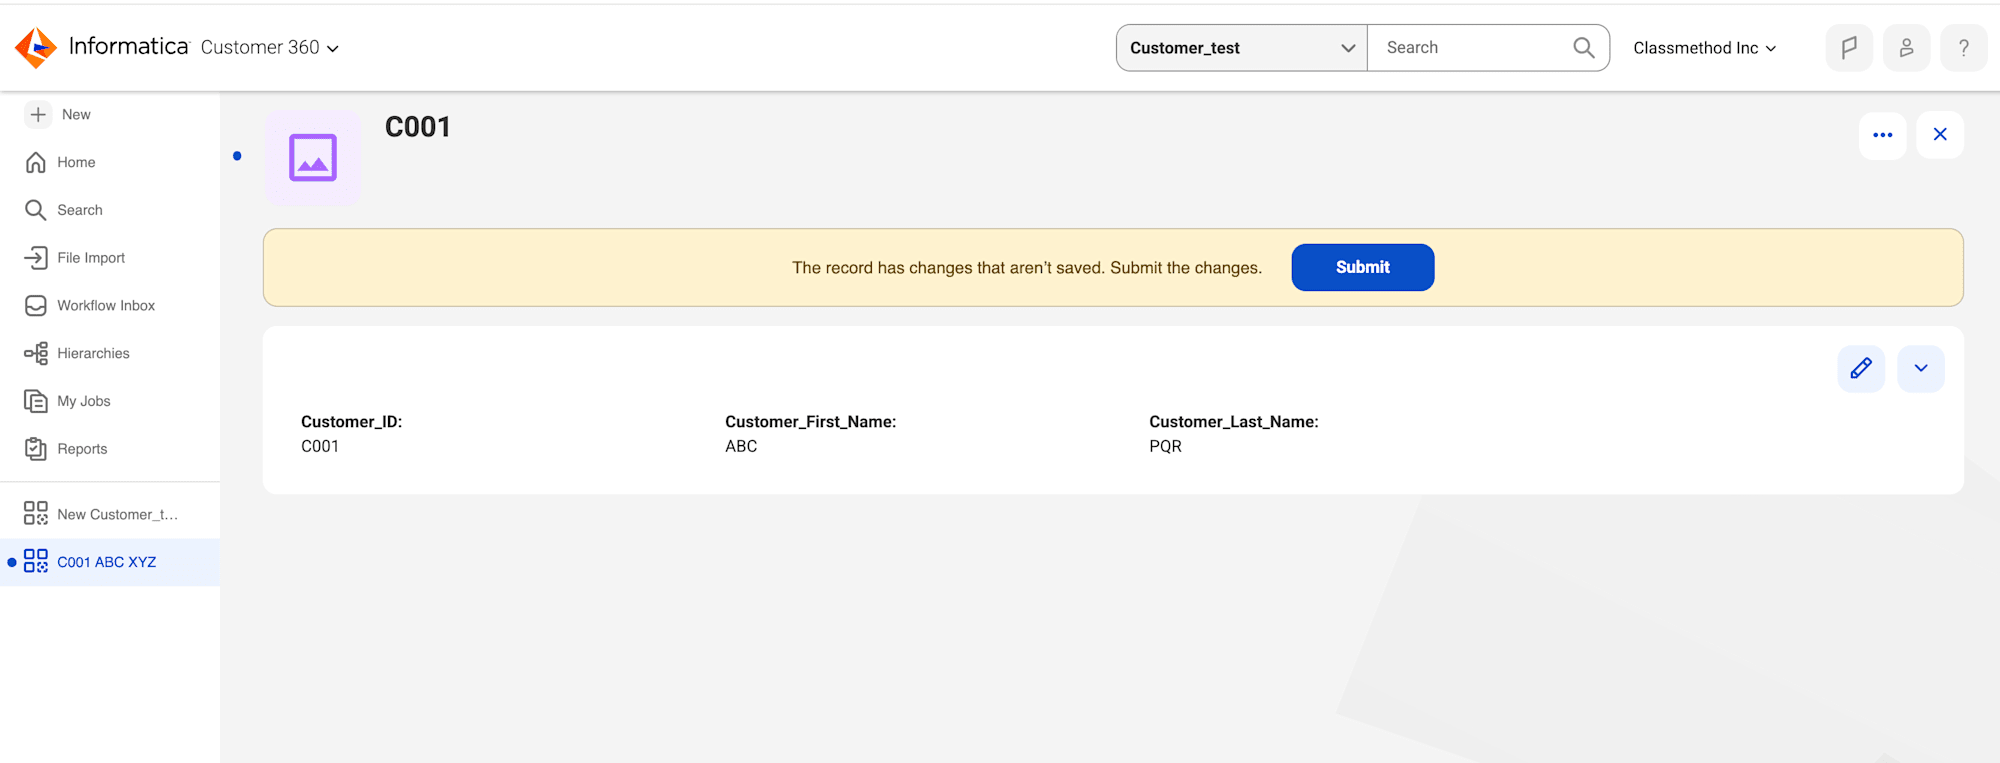
- Similarly, You can also update the existing record by simply clicking the pencil icon.

- Let's try updating the Customer_Last_Name field to PQR to see how the changes are applied.
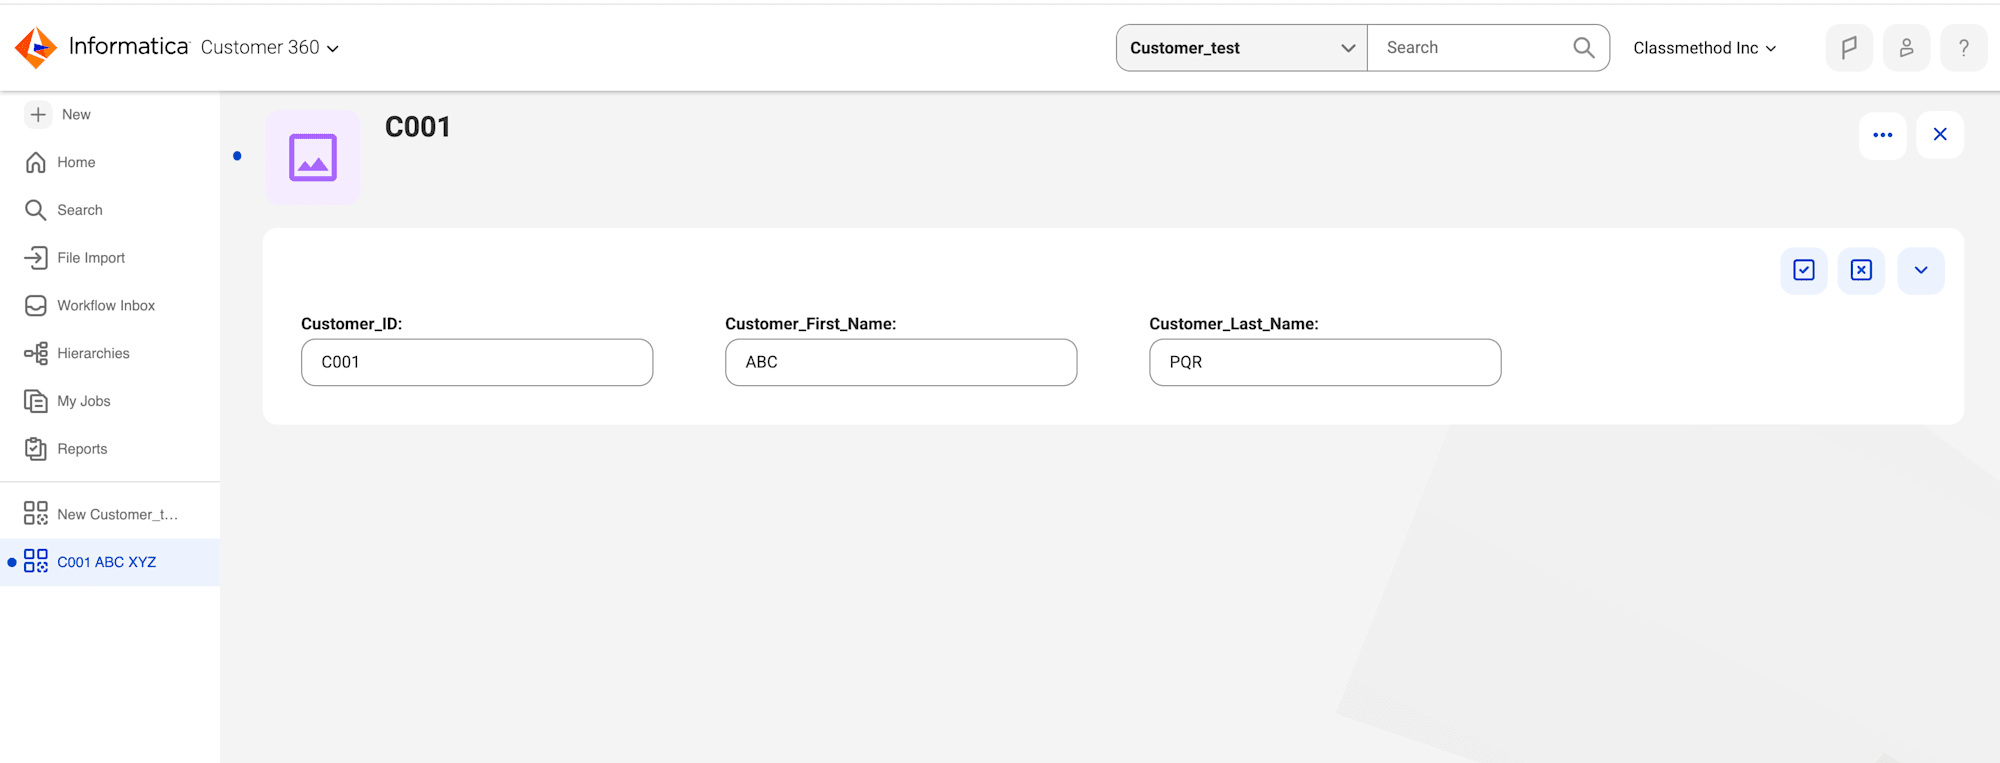
- Click on Submit to submit/save the changes.
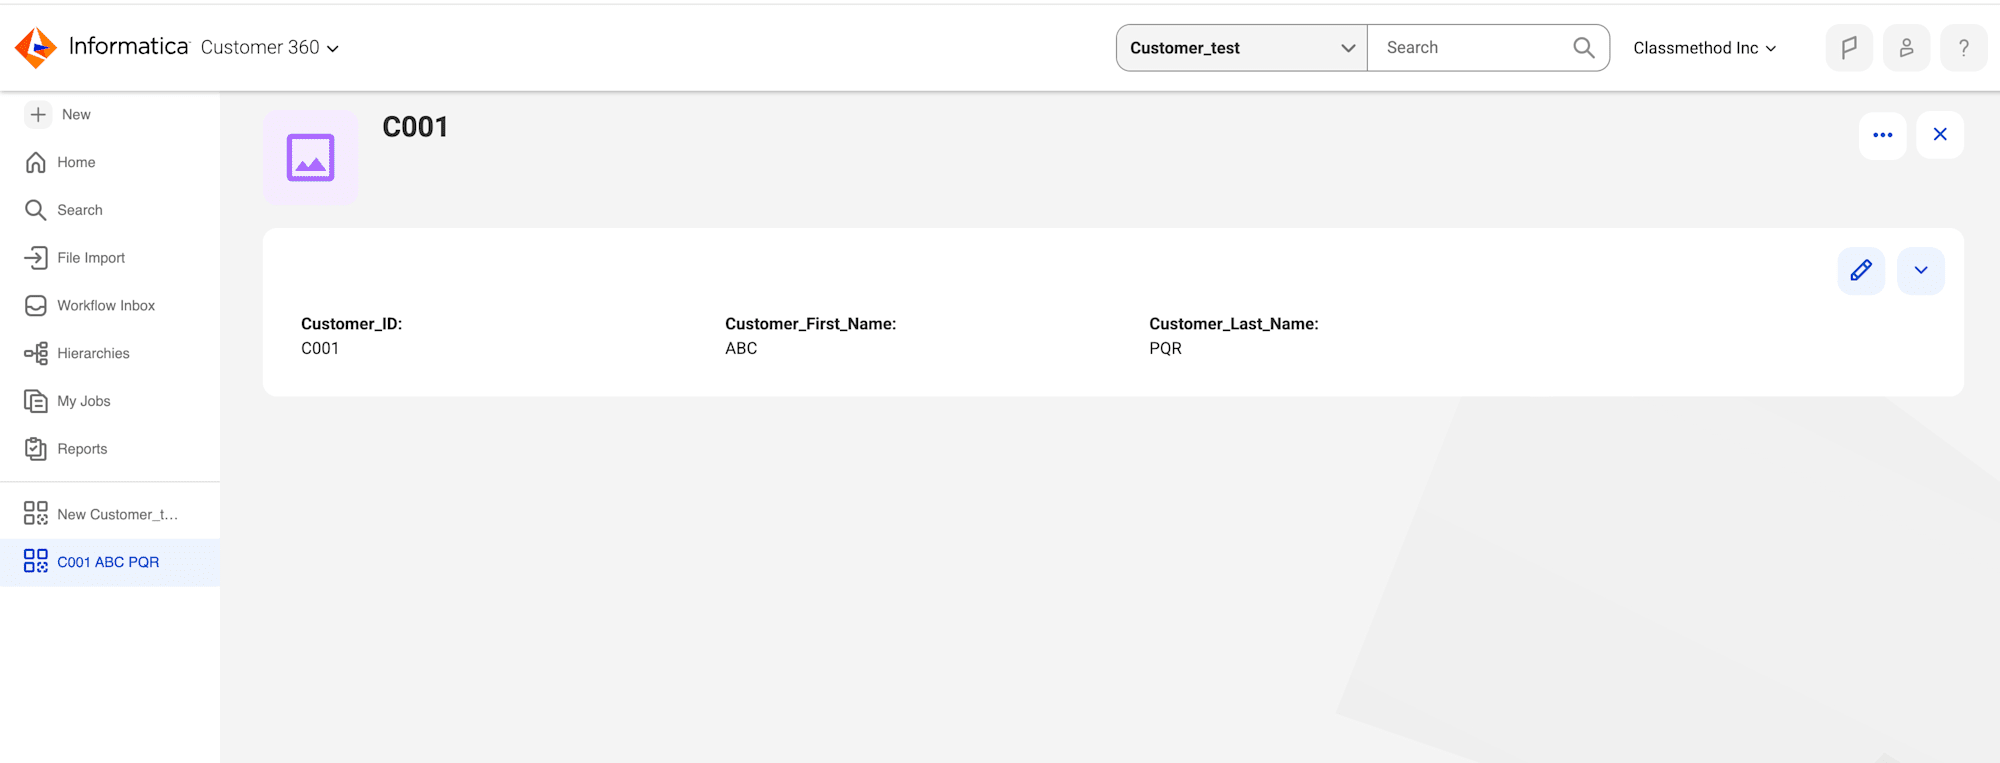
- Here, we can see that the changes have been successfully applied to the records and Customer_Last_Name has been updated to PQR.
Conclusion
I have successfully created and tested a Business Entity in the Customer 360 application. I performed record insertion, editing, and verified that the changes were reflected correctly. This process ensures that customer data is structured, manageable, and easily accessible within Informatica MDM Saas Business 360.

