![[iOS 8] AVFoundationのAVAudioPlayerNodeで音楽ファイルを再生してみる](https://devio2023-media.developers.io/wp-content/uploads/2014/11/ios8.png)
[iOS 8] AVFoundationのAVAudioPlayerNodeで音楽ファイルを再生してみる
この記事は公開されてから1年以上経過しています。情報が古い可能性がありますので、ご注意ください。
はじめに
前回の記事では、iOS 8のオーディオ関連フレームワークの新機能について大まかに解説しました。今回は、iOS 8でAVFoundationフレームワークに新規追加されたAVAudioEngineやAVAudioPlayerNodeを使用した実装を解説していきます。(AVAudioEngineなどについての説明は前回の記事を御覧ください。)
目次
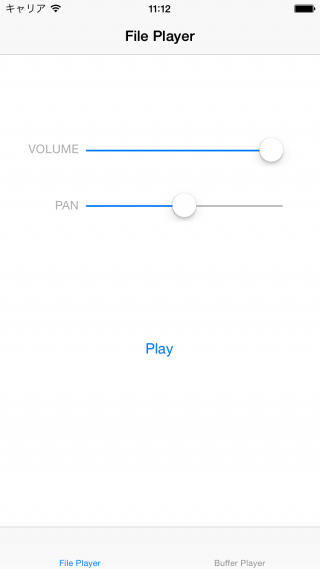
今回作るアプリについて


実装 (ファイルから再生する)
以下が実装例です。
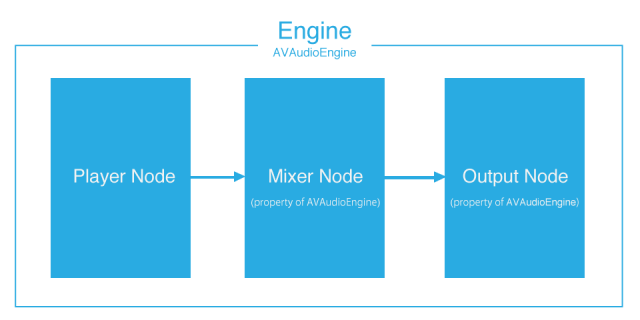
「Nodeを作成して、Engineに装着し、Engineをスタートさせる」という流れになります。
@import AVFoundation;

@interface FilePlayerViewController ()

@property (nonatomic, strong) AVAudioEngine *engine;
@property (nonatomic, strong) AVAudioPlayerNode *audioPlayerNode;
@property (nonatomic, strong) AVAudioFile *audioFile;

@end

@implementation FilePlayerViewController

- (void)viewDidLoad
{
    [super viewDidLoad];

    self.engine = [AVAudioEngine new];

    // [1] AVAudioFile オブジェクトを準備する
    NSString *path = [[NSBundle mainBundle] pathForResource:@"loop.m4a" ofType:nil];
    self.audioFile = [[AVAudioFile alloc] initForReading:[NSURL fileURLWithPath:path]
                                                   error:nil];

    // [2] AVAudioPlayerNode オブジェクトを準備する
    self.audioPlayerNode = [AVAudioPlayerNode new];
    [self.engine attachNode:self.audioPlayerNode];

    // [3] Node 同士を繋ぐ
    AVAudioMixerNode *mixerNode = [self.engine mainMixerNode];
    [self.engine connect:self.audioPlayerNode
                      to:mixerNode
                  format:self.audioFile.processingFormat];

    // [4] Engine の処理を開始する
    NSError *error;
    [self.engine startAndReturnError:&error];
    if (error) {
        NSLog(@"error:%@", error);
    }
}

#pragma mark - private methods

- (void)play
{
    // [5] オーディオファイルの再生をスケジュールする
    [self.audioPlayerNode scheduleFile:self.audioFile
                                atTime:nil
                     completionHandler:nil];

    // [6] 再生する
    [self.audioPlayerNode play];
}

- (IBAction)didTapPlayButton:(id)sender
{
    if (self.audioPlayerNode.isPlaying) {
        [self.audioPlayerNode stop];
    } else {
        [self play];
    }
}

- (IBAction)didChangeVolumeSliderValue:(id)sender
{
    float value = ((UISlider *)sender).value;

    // [7] ボリュームを操作する
    self.audioPlayerNode.volume = value;
}

- (IBAction)didChangePanSliderValue:(id)sender
{
    float value = ((UISlider *)sender).value;

    // [8] パンを操作する
    self.audioPlayerNode.pan = value;
}

@end
[1] AVAudioFileオブジェクトを準備する
まずは、AVAudioFileを作成します。これはオーディオファイルを表すオブジェクトであり、ファイルのフォーマット情報などももっています。
[2] AVAudioPlayerNode オブジェクトを準備する
AVAudioPlayerNodeを作成して、AVAudioEngineに装着します。AVAudioPlayerNodeはファイルやバッファからのオーディオ再生を行うためのNodeです。
[3] Node 同士を繋ぐ
[2]で作成したAVAudioPlayerNodeとAVAudioEngineが内部に持つミキサーNodeを接続します。これでファイルを再生するためのNodeは全て接続完了になります。
[4] Engine の処理を開始する
Audio Engine の処理を開始します。Nodeの接続等に問題がなければこれで準備完了です。
[5] オーディオファイルの再生をスケジュールする
AVAudioPlayerNodeのscheduleFile:atTime:completionHandler:メソッドを使用してオーディオファイルの再生をスケジュールします。
- (void)scheduleFile:(AVAudioFile *)file
              atTime:(AVAudioTime *)when
   completionHandler:(AVAudioNodeCompletionHandler)completionHandler
今回は引数whenにnilを指定しているので(また、他に再生がスケジュールされてもいないので)、「すぐに再生する」という処理がスケジュールされます。時間を指定することで指定時間後に再生することもできます。
[6] 再生する
[5]でスケジュールされた処理が実行されます。
[7] ボリュームを操作する
AVAudioPlayerNodeのvolumeプロパティの値を変更することでボリュームを操作します。
[8] パンを操作する
AVAudioPlayerNodeのpanプロパティの値を変更することでパン(音の定位)を操作します。
実装 (バッファから再生する)

変更する部分は以下の通りです。
[9] オーディオバッファを用意する
viewDidLoadメソッドの12〜15行目にコードを追加します。オーディオファイルからAVAudioPCMBufferオブジェクトを作成しています。作成したAVAudioPCMBufferオブジェクトはplayメソッドのほうで使用します。
- (void)viewDidLoad
{
    [super viewDidLoad];

    self.engine = [AVAudioEngine new];

    NSString *path = [[NSBundle mainBundle] pathForResource:@"loop.m4a" ofType:nil];
    self.audioFile = [[AVAudioFile alloc] initForReading:[NSURL fileURLWithPath:path]
                                                   error:nil];

    // [9] オーディオバッファを用意する
    AVAudioFormat *audioFormat = self.audioFile.processingFormat;
    AVAudioFrameCount length = (AVAudioFrameCount)self.audioFile.length;
    self.audioPCMBuffer = [[AVAudioPCMBuffer alloc]initWithPCMFormat:audioFormat frameCapacity:length];
    [self.audioFile readIntoBuffer:self.audioPCMBuffer error:nil];
    //

    self.audioPlayerNode = [AVAudioPlayerNode new];
    [self.engine attachNode:self.audioPlayerNode];

    AVAudioMixerNode *mixerNode = [self.engine mainMixerNode];
    [self.engine connect:self.audioPlayerNode
                      to:mixerNode
                  format:self.audioFile.processingFormat];

    NSError *error;
    [self.engine startAndReturnError:&error];
    if (error) {
        NSLog(@"error:%@", error);
    }
}
[10] オーディオバッファの再生をスケジュールする
オーディオバッファからの再生なので、AVAudioPlayerNodeのscheduleBuffer:atTime:options:completionHandler:メソッドを使用して再生をスケジュールします。
- (void)scheduleBuffer:(AVAudioPCMBuffer *)buffer
                atTime:(AVAudioTime *)when
               options:(AVAudioPlayerNodeBufferOptions)options
     completionHandler:(AVAudioNodeCompletionHandler)completionHandler
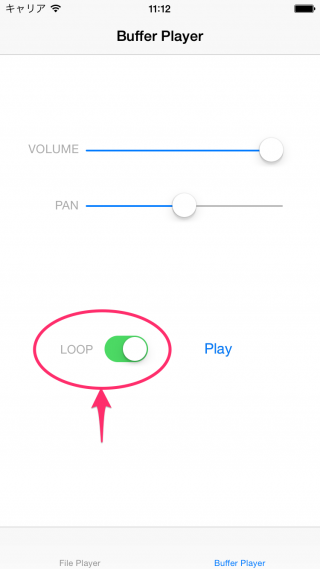
画面上のスイッチのON/OFFによって、AVAudioPlayerNodeBufferOptions型のoptions引数の値だけ異なるものを指定しています。
| 内容 | |
|---|---|
| AVAudioPlayerNodeBufferLoops | バッファを無限にループ |
| AVAudioPlayerNodeBufferInterrupts | 再生中のバッファを中断させる |
| AVAudioPlayerNodeBufferInterruptsAtLoop | 再生中のバッファの1ループが終了するまで待つ |
- (void)play
{
    // [10] オーディオバッファの再生をスケジュールする
    if (self.loopSwitch.isOn) {
        [self.audioPlayerNode scheduleBuffer:self.audioPCMBuffer
                                      atTime:nil
                                     options:AVAudioPlayerNodeBufferLoops
                           completionHandler:nil];
    } else {
        [self.audioPlayerNode scheduleBuffer:self.audioPCMBuffer
                                      atTime:nil
                                     options:AVAudioPlayerNodeBufferInterrupts
                           completionHandler:nil];
    }

    // Start playback
    [self.audioPlayerNode play];
}
まとめ
本記事では、AVFoundationのAVAudioEngineやAVAudioPlayerNodeを使用して簡易的な音楽再生アプリを実装してみました。 今回作成したサンプルプロジェクトは以下のリポジトリで公開していますので動かしてみてください。


