Restore EC2 from AWS Backup recovery point to a different AZ with a specified private IP

This page has been translated by machine translation. View original
Hello, this is Hayashi.
When restoring an EC2 instance with AWS Backup, there are times when you want to restore to a different AZ than the original.
For example, in the event of an AZ failure, you may want to rebuild with the same configuration in a subnet of a different AZ.
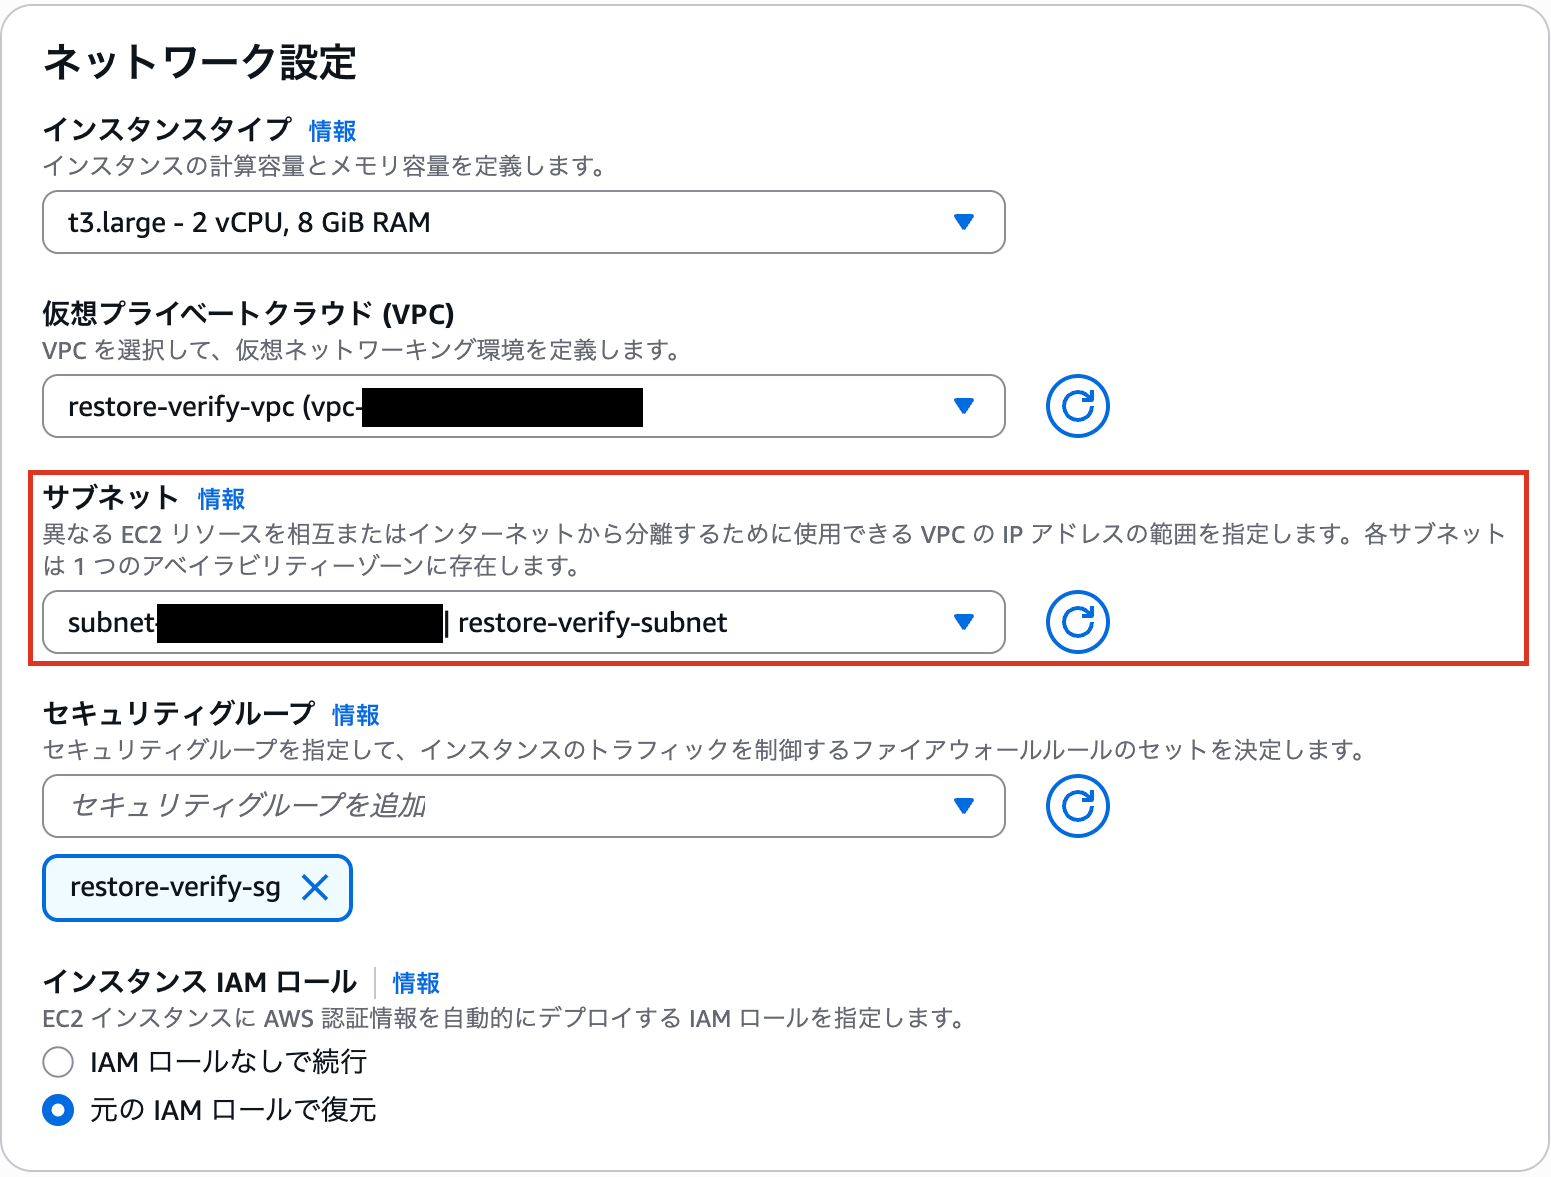
In the console's restore screen, you can select a subnet, so restoring to a different AZ is possible.
However, you cannot specify a private IP.
With the AWS CLI start-restore-job, you can specify both the destination AZ and the private IP. This article introduces the steps for doing so.
Prerequisites
This article uses the following configuration as an example. We will restore an instance in ap-northeast-1a to a subnet in ap-northeast-1c with a different private IP.
| Item | Source | Restore Destination |
|---|---|---|
| AZ | ap-northeast-1a | ap-northeast-1c |
| Subnet | subnet-0axxxxxxxxxxxxxxx | subnet-09xxxxxxxxxxxxxxx |
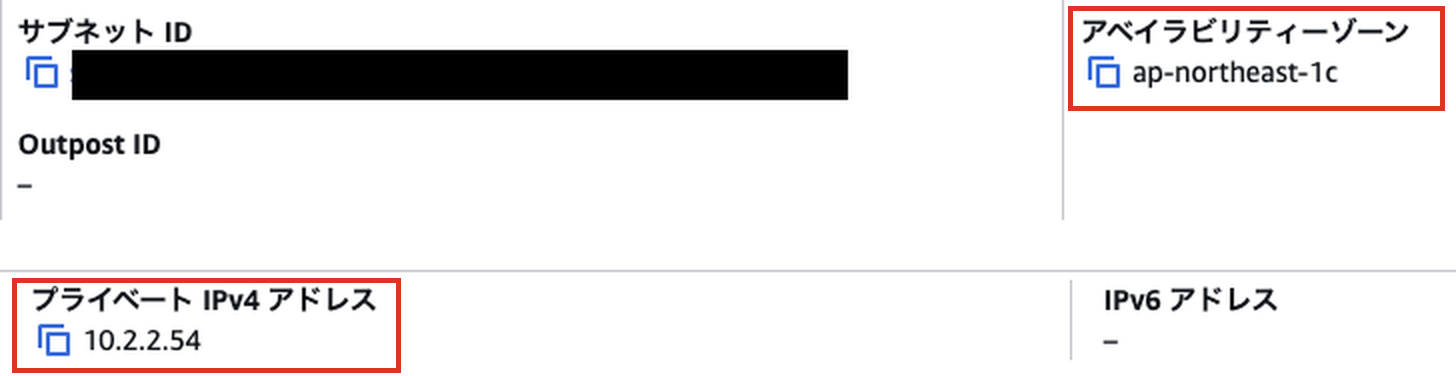
| Private IP | 10.2.1.54 | 10.2.2.54 |
| Security Group | sg-0cxxxxxxxxxxxxxxx | No change |
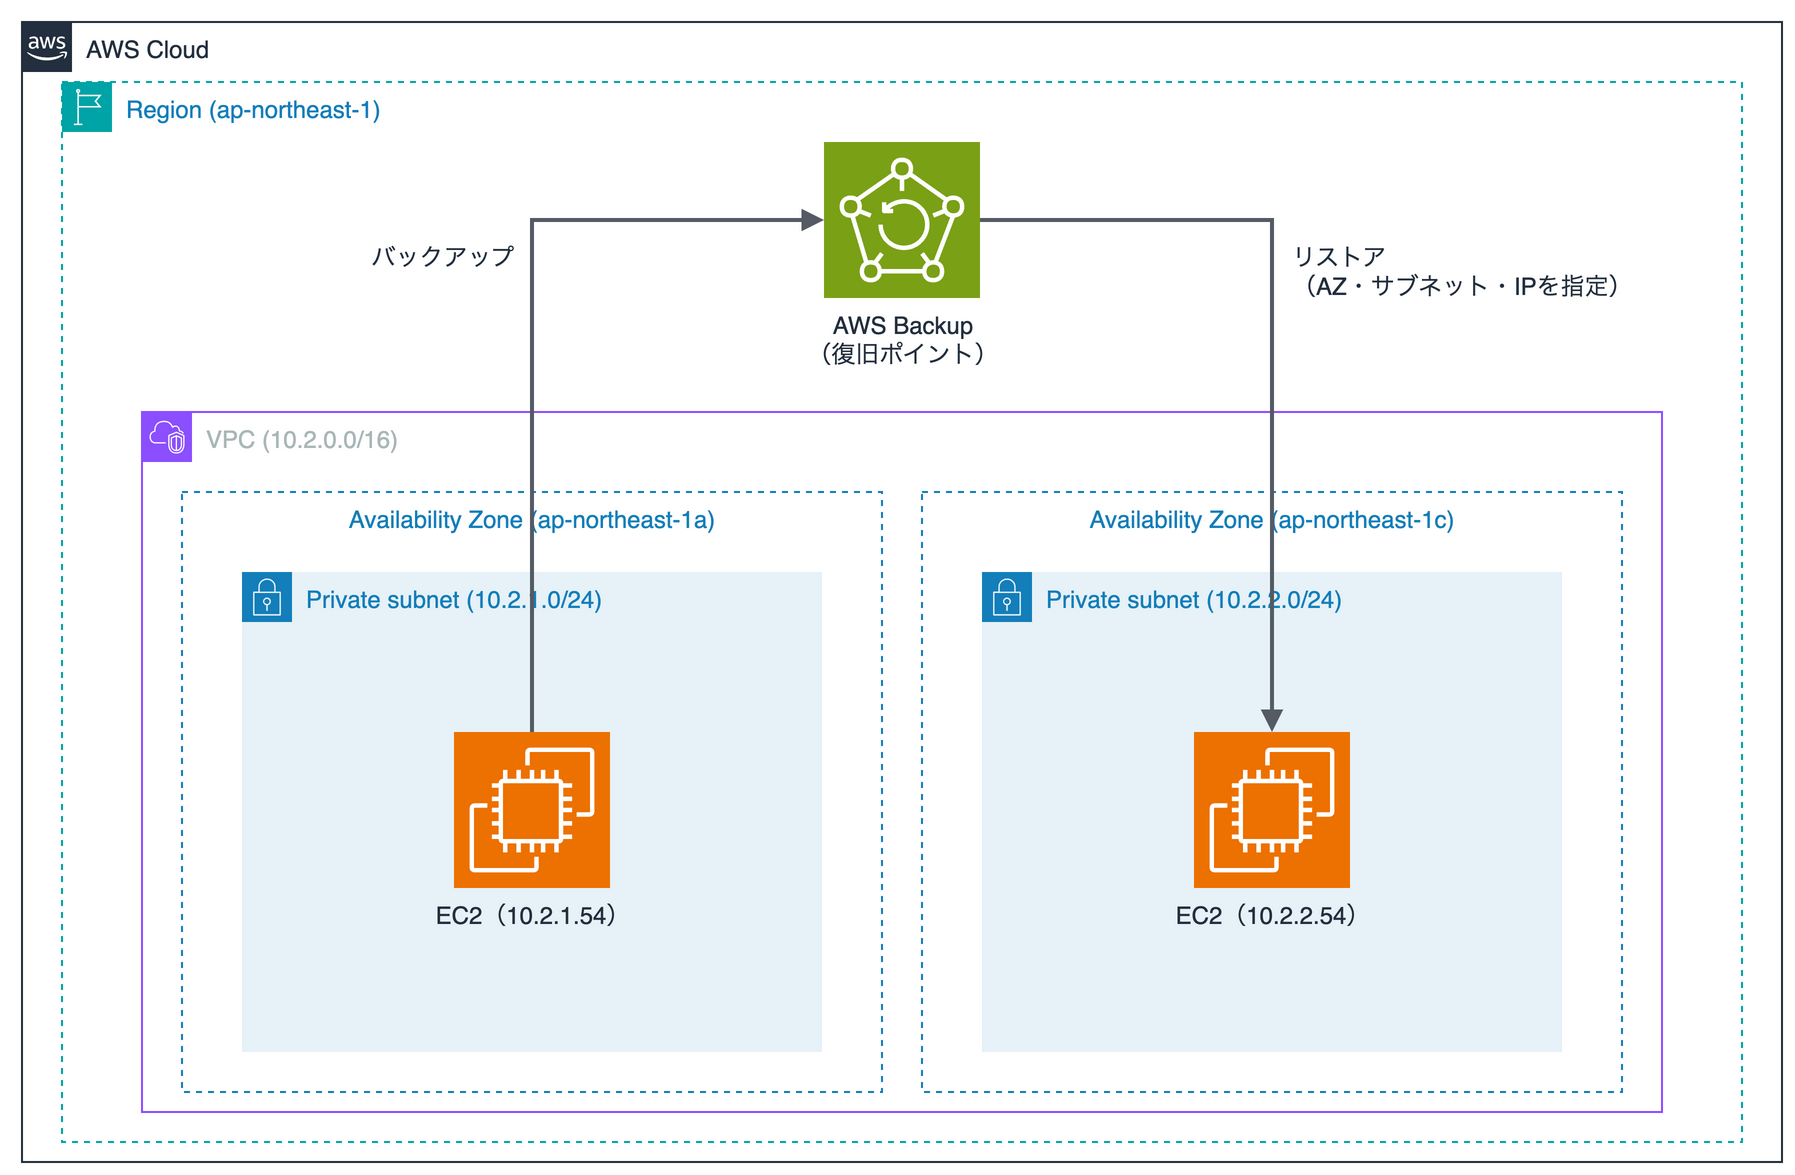
Before restoring, you need to decide on two things: the destination subnet and the private IP.
For the subnet, choose one that is in the same VPC as the original instance but in a different AZ. For the private IP, select an unused address from that subnet's CIDR.
The execution environment assumes AWS CloudShell with jq installed.
Replace < > with the values noted in the previous steps.
The AZ, subnet ID, and private IP are the example values, so please replace these with values matching your environment as well.
Steps
1. Check the recovery point ARN
aws backup list-recovery-points-by-backup-vault \
  --backup-vault-name sample-backup-vault \
  --query 'RecoveryPoints[].[CreationDate,Status,RecoveryPointArn]' --output table
Note the RecoveryPointArn of the recovery point you want to use. CreationDate is displayed in UTC.
2. Create metadata with the restore destination rewritten
Extract the configuration values (metadata) of the original instance recorded in the recovery point, and rewrite them to match the restore destination.
2-1. Extract the metadata
aws backup get-recovery-point-restore-metadata \
  --backup-vault-name sample-backup-vault \
  --recovery-point-arn <RecoveryPointArn from Step 1> \
  | jq '.RestoreMetadata' > restore.json
2-2. Rewrite the AZ to the restore destination
# The Placement value is a JSON string, so expand it with fromjson, rewrite it, and convert it back to a string with @json
# Replace "ap-northeast-1c" with the destination AZ
jq '.Placement = (.Placement | fromjson | .AvailabilityZone = "ap-northeast-1c" | @json)' \
  restore.json > tmp.json && mv tmp.json restore.json
2-3. Rewrite the subnet and private IP to the restore destination
# Delete the original instance's NetworkInterfaceId and PrivateIpAddress, and the outer SubnetId and SecurityGroupIds
# Replace "subnet-09xxxxxxxxxxxxxxx" with the destination subnet ID, and "10.2.2.54" with the post-restore private IP
jq '.NetworkInterfaces = (.NetworkInterfaces | fromjson
      | map(del(.NetworkInterfaceId, .PrivateIpAddress, .SecondaryPrivateIpAddressCount, .Ipv6AddressCount)
            | .SubnetId = "subnet-09xxxxxxxxxxxxxxx"
            | .PrivateIpAddresses = [{Primary: true, PrivateIpAddress: "10.2.2.54"}])
      | @json)
    | del(.SubnetId, .SecurityGroupIds)' \
  restore.json > tmp.json && mv tmp.json restore.json
2-4. Verify the content
jq '.Placement | fromjson' restore.json
{
  "AvailabilityZone": "ap-northeast-1c",
  "GroupName": "",
  "Tenancy": "default"
}
jq '.NetworkInterfaces | fromjson' restore.json
[
  {
    "AssociatePublicIpAddress": true,
    "DeleteOnTermination": true,
    "Description": "",
    "DeviceIndex": 0,
    "Groups": [
      "sg-0cxxxxxxxxxxxxxxx"
    ],
    "Ipv6Addresses": [],
    "PrivateIpAddresses": [
      {
        "Primary": true,
        "PrivateIpAddress": "10.2.2.54"
      }
    ],
    "SubnetId": "subnet-09xxxxxxxxxxxxxxx",
    "InterfaceType": "interface",
    "Ipv4Prefixes": [],
    "Ipv6Prefixes": []
  }
]
If AvailabilityZone, SubnetId, and PrivateIpAddress show the destination values and NetworkInterfaceId is gone, the rewrite is complete.
3. Execute the restore
aws backup start-restore-job \
  --recovery-point-arn <RecoveryPointArn from Step 1> \
  --iam-role-arn arn:aws:iam::123456789012:role/sample-backup-role \
  --idempotency-token restore-<execution date and time YYYYMMDDhhmm> \
  --metadata file://restore.json
Note the output RestoreJobId.
When re-running, use a different value for --idempotency-token. Using the same value will not start a new restore.
4. Wait for the restore job to complete
aws backup describe-restore-job --restore-job-id <RestoreJobId from Step 3> \
  --query '{Status:Status,PercentDone:PercentDone,StatusMessage:StatusMessage,CreatedResourceArn:CreatedResourceArn}'
{
    "Status": "COMPLETED",
    "PercentDone": "100.00%",
    "StatusMessage": null,
    "CreatedResourceArn": "arn:aws:ec2:ap-northeast-1:123456789012:instance/i-0bxxxxxxxxxxxxxxx"
}
Run repeatedly until Status becomes COMPLETED. PENDING / RUNNING means processing is in progress, and FAILED means the error details are shown in StatusMessage.
The string starting with i- at the end of CreatedResourceArn is the new instance ID.
5. Verify the restore destination
aws ec2 describe-instances --instance-ids <new instance ID> \
  --query 'Reservations[].Instances[].{AZ:Placement.AvailabilityZone,SubnetId:SubnetId,PrivateIp:PrivateIpAddress}'
[
    {
        "AZ": "ap-northeast-1c",
        "SubnetId": "subnet-09xxxxxxxxxxxxxxx",
        "PrivateIp": "10.2.2.54"
    }
]
aws ec2 describe-volumes --filters Name=attachment.instance-id,Values=<new instance ID> \
  --query 'Volumes[].{Device:Attachments[0].Device,VolumeId:VolumeId,AZ:AvailabilityZone}'
[
    {
        "Device": "/dev/sda1",
        "VolumeId": "vol-0fxxxxxxxxxxxxxxx",
        "AZ": "ap-northeast-1c"
    },
    {
        "Device": "/dev/sdb",
        "VolumeId": "vol-0axxxxxxxxxxxxxxx",
        "AZ": "ap-northeast-1c"
    }
]
Both the instance and volumes are created in the destination AZ, and the private IP is the specified value. The volumes are created in the destination AZ even without explicitly specifying an AZ.
Summary
Using the AWS CLI, we restored an EC2 instance from an AWS Backup recovery point to a different AZ with a specified private IP. The three key points are:
- Restoring to a different AZ is possible in the console as well, but use the AWS CLI if you also need to specify the private IP
- In the metadata, rewrite the AZ in
Placementand the subnet and private IP inNetworkInterfaces - Volumes are created in the destination AZ even without specifying an AZ
After restoring, as with a normal restore, you will need to reconfigure items that are not carried over, such as termination protection, auto recovery, and tags. The settings that are not carried over are summarized in this article.
I hope this article is helpful to someone. Thank you for reading to the end!
References