![[Update] I tried out the new feature where zero-ETL integrations and S3 event integrations are automatically maintained when restoring from snapshots in Amazon Redshift Serverless](https://images.ctfassets.net/ct0aopd36mqt/wp-thumbnail-63f1274931b942e9a92e601c1127ad73/cfe87ec6d62fa2fc3c474ed4cb2f6c2e/amazon-redshift?w=3840&fm=webp)
[Update] I tried out the new feature where zero-ETL integrations and S3 event integrations are automatically maintained when restoring from snapshots in Amazon Redshift Serverless

This page has been translated by machine translation. View original
This is Ishikawa from the Cloud Business Division. Amazon Redshift Serverless now automatically preserves zero-ETL integrations and Amazon S3 event integrations when restoring from a snapshot, so I tried it out.
Previously, in Amazon Redshift Serverless, when restoring a namespace from a snapshot or recovery point, the associated zero-ETL integrations and S3 event integrations would be marked as FAILED, requiring manual recreation after the restore was complete. This not only took time to reconfigure data pipelines, but also risked creating data ingestion gaps during the rebuild.
With this update, when restoring to the same serverless namespace, these integrations are automatically preserved and resume operation as-is after the restore is complete. This behavior is enabled by default in Amazon Redshift Patch 202 and later.
In this article, I verify how integrations are handled before and after a restore using S3 event integration (auto-copy).
What are S3 Event Integration and auto-copy?
S3 event integration (Amazon S3 event integration) is the foundation for establishing a connection between an Amazon S3 bucket and Amazon Redshift and detecting file creation events. Auto-copy is a feature that uses this integration — by defining a COPY JOB with the JOB CREATE clause in a COPY command, it detects new files added to S3 and automatically loads them into a table. This enables continuous file ingestion from S3 without separately building an ETL pipeline.
Note that zero-ETL integrations (fully managed data connectivity from Amazon Aurora, Amazon RDS, Amazon DynamoDB, etc.) are also covered by this update, but in this article I verify using S3 event integration, which has a simpler configuration. The behavior regarding integration preservation during restore is common to both.
Let's Try It
Prerequisites
- AWS CLI v2 (version at time of testing: 2.36.2)
- Test environment: ap-northeast-1 (Tokyo)
- Amazon Redshift Serverless (base capacity 8 RPU)
- The testing flow is as follows. Files are added before and after the snapshot, and before and after the restore, to verify how integrations and data are handled.
Preparing the S3 Bucket for Auto-copy
Create an S3 bucket as the data source and configure the bucket policy required as a prerequisite for S3 event integration. The bucket policy grants the redshift.amazonaws.com service principal permissions related to event notifications.
% aws s3 mb s3://cm-blog-tryit-autocopy --region ap-northeast-1
make_bucket: cm-blog-tryit-autocopy

% aws s3api put-bucket-policy --bucket cm-blog-tryit-autocopy \
  --policy '{
  "Version": "2012-10-17",
  "Statement": [
    {
      "Sid": "AutoCopyPolicy01",
      "Effect": "Allow",
      "Principal": {"Service": "redshift.amazonaws.com"},
      "Action": [
        "s3:GetBucketNotification",
        "s3:PutBucketNotification",
        "s3:GetBucketLocation"
      ],
      "Resource": "arn:aws:s3:::cm-blog-tryit-autocopy",
      "Condition": {
        "ArnLike": {"aws:SourceArn": "arn:aws:redshift:ap-northeast-1:123456789012:integration:*"},
        "StringEquals": {"aws:SourceAccount": "123456789012"}
      }
    }
  ]
}'
Additionally, prepare an IAM role for the COPY JOB to read data from S3. In this case, I used the AmazonRedshift-CommandsAccessRole that was already created from the management console. If creating a new one, create a role that allows redshift.amazonaws.com in the trust policy and grants s3:GetObject and s3:ListBucket on the target bucket.
Creating the Namespace and Workgroup
Create a namespace with the created IAM role associated as the default IAM role, and a workgroup with a minimal configuration (8 RPU).
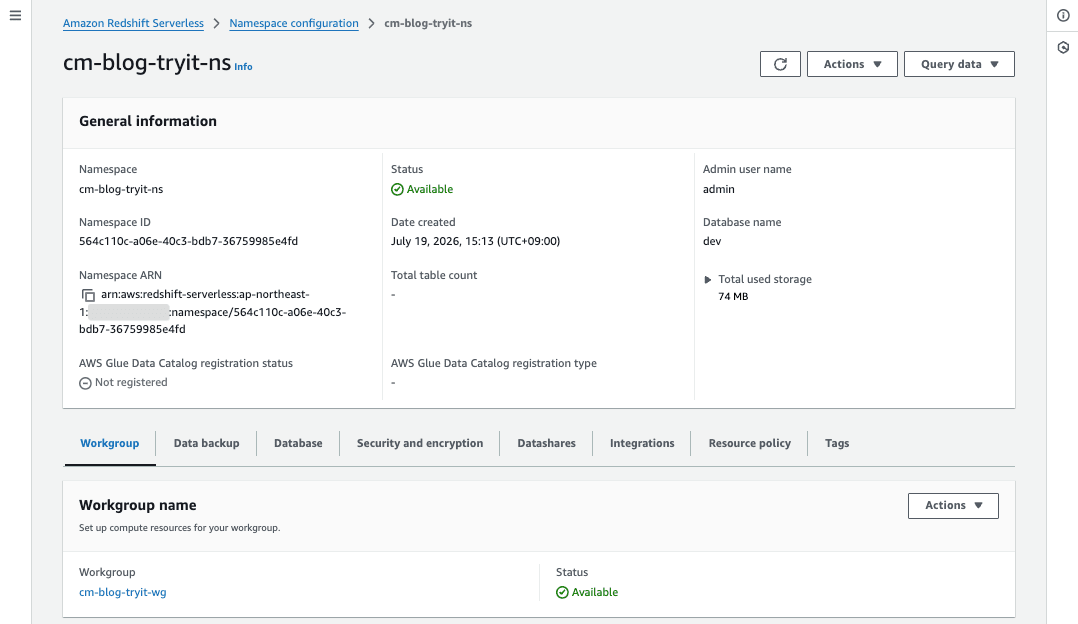
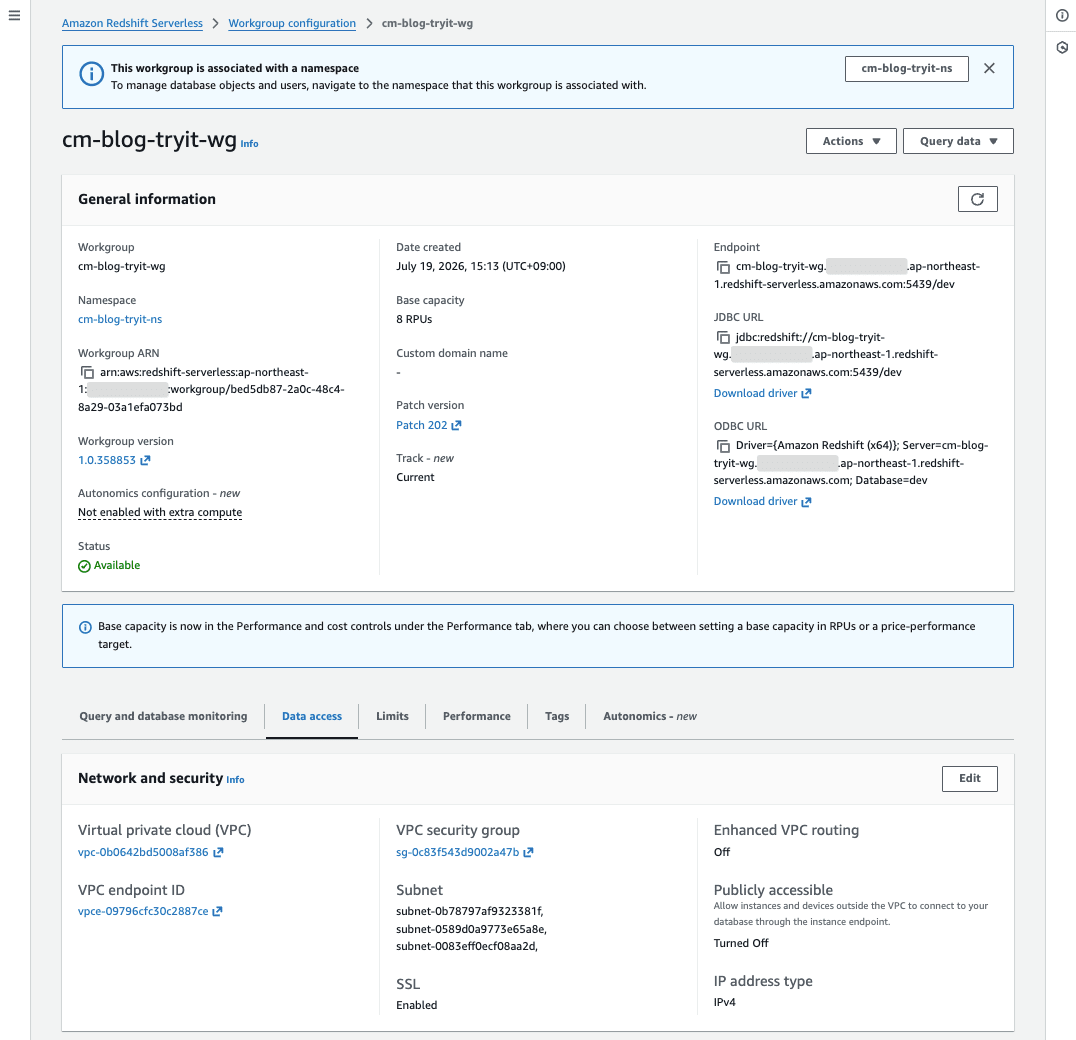
The workgroup became AVAILABLE in about 4 minutes.
Creating the S3 Event Integration
Set a resource policy on the namespace to accept integrations, then create the S3 event integration. When creating via the management console, the resource policy can be configured automatically using the wizard's "Fix it for me" option, but with the CLI, it must be set explicitly using put-resource-policy.
% aws redshift put-resource-policy \
  --resource-arn "arn:aws:redshift-serverless:ap-northeast-1:123456789012:namespace/564c110c-a06e-40c3-bdb7-36759985e4fd" \
  --policy '{
  "Version": "2012-10-17",
  "Statement": [
    {
      "Effect": "Allow",
      "Principal": {"Service": "redshift.amazonaws.com"},
      "Action": "redshift:AuthorizeInboundIntegration",
      "Resource": "arn:aws:redshift-serverless:ap-northeast-1:123456789012:namespace/564c110c-a06e-40c3-bdb7-36759985e4fd",
      "Condition": {
        "StringEquals": {"aws:SourceArn": "arn:aws:s3:::cm-blog-tryit-autocopy"}
      }
    },
    {
      "Effect": "Allow",
      "Principal": {"AWS": "arn:aws:iam::123456789012:root"},
      "Action": "redshift:CreateInboundIntegration",
      "Resource": "arn:aws:redshift-serverless:ap-northeast-1:123456789012:namespace/564c110c-a06e-40c3-bdb7-36759985e4fd"
    }
  ]
}'

{
    "ResourcePolicy": {
        "ResourceArn": "arn:aws:redshift-serverless:ap-northeast-1:123456789012:namespace/564c110c-a06e-40c3-bdb7-36759985e4fd",
        "Policy": "{\n  \"Version\" : \"2012-10-17\",\n  \"Statement\" : [ {\n    \"Effect\" : \"Allow\",\n    \"Principal\" : {\n      \"Service\" : \"redshift.amazonaws.com\"\n    },\n    \"Action\" : \"redshift:AuthorizeInboundIntegration\",\n    \"Resource\" : \"arn:aws:redshift-serverless:ap-northeast-1:123456789012:namespace/564c110c-a06e-40c3-bdb7-36759985e4fd\",\n    \"Condition\" : {\n      \"StringEquals\" : {\n        \"aws:SourceArn\" : \"arn:aws:s3:::cm-blog-tryit-autocopy\"\n      }\n    }\n  }, {\n    \"Effect\" : \"Allow\",\n    \"Principal\" : {\n      \"AWS\" : \"arn:aws:iam::123456789012:root\"\n    },\n    \"Action\" : \"redshift:CreateInboundIntegration\",\n    \"Resource\" : \"arn:aws:redshift-serverless:ap-northeast-1:123456789012:namespace/564c110c-a06e-40c3-bdb7-36759985e4fd\"\n  } ]\n}"
    }
}

% aws redshift create-integration \
  --integration-name cm-blog-tryit-s3int \
  --source-arn "arn:aws:s3:::cm-blog-tryit-autocopy" \
  --target-arn "arn:aws:redshift-serverless:ap-northeast-1:123456789012:namespace/564c110c-a06e-40c3-bdb7-36759985e4fd"
{
    "IntegrationArn": "arn:aws:redshift:ap-northeast-1:123456789012:integration:2b946f12-6648-47c0-b8dc-392b763063da",
    "IntegrationName": "cm-blog-tryit-s3int",
    "SourceArn": "arn:aws:s3:::cm-blog-tryit-autocopy",
    "TargetArn": "arn:aws:redshift-serverless:ap-northeast-1:123456789012:namespace/564c110c-a06e-40c3-bdb7-36759985e4fd",
    "Status": "creating",
    "Errors": [],
    "CreateTime": "2026-07-19T06:25:29.590000+00:00",
    "Tags": []
}
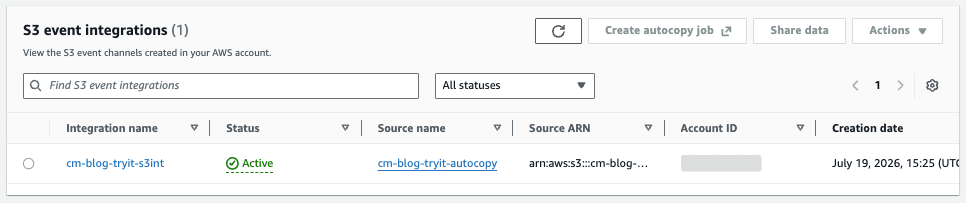
The integration became Active in about 30 seconds.
Creating the Test Table and COPY JOB
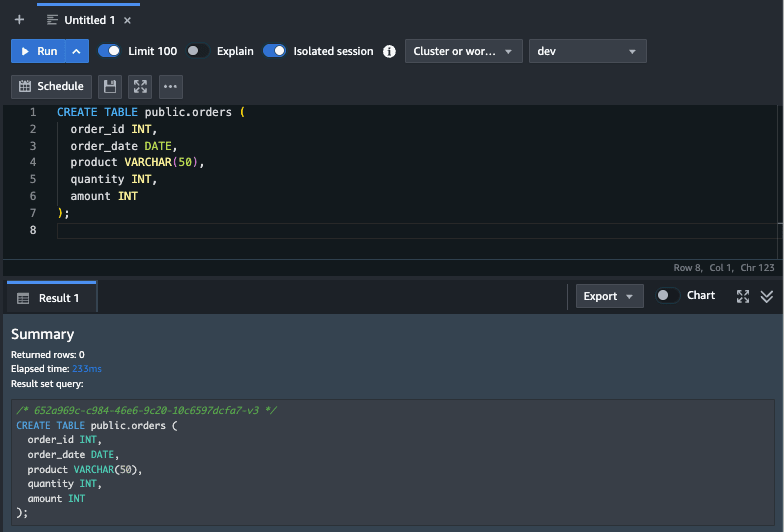
Create a test table.
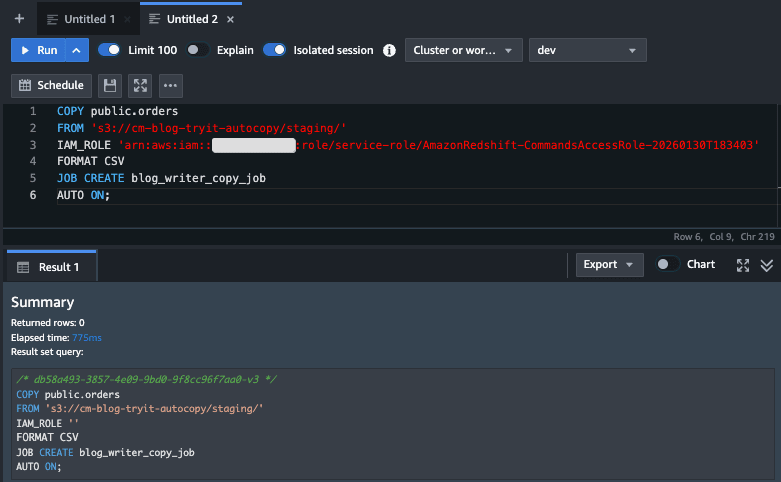
Define a COPY JOB with AUTO ON specified for the test table.
Verifying the Initial Load
Creating test CSV files
#!/usr/bin/env bash
set -euo pipefail

cat > orders_batch1.csv <<'EOF'
1,2026-07-16,Monitor,2,45000
2,2026-07-16,Keyboard,5,12500
3,2026-07-16,Mouse,3,6000
4,2026-07-16,USB Hub,1,3500
5,2026-07-16,Webcam,2,16000
EOF

cat > orders_batch2.csv <<'EOF'
6,2026-07-16,Headset,4,22000
7,2026-07-16,Docking Station,1,18000
8,2026-07-16,HDMI Cable,6,7200
EOF

cat > orders_batch3.csv <<'EOF'
9,2026-07-16,Laptop Stand,2,9800
10,2026-07-16,Desk Mat,3,5400
EOF

echo "created: orders_batch1.csv (5 rows), orders_batch2.csv (3 rows), orders_batch3.csv (2 rows)"
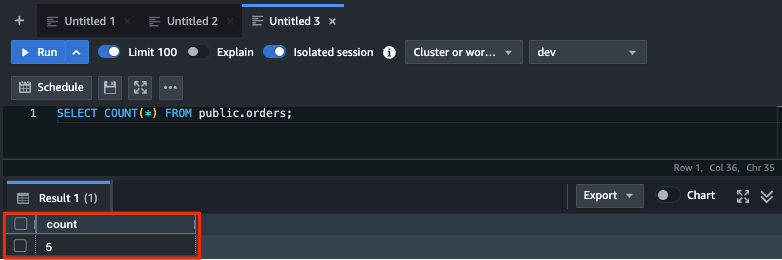
Place the first test file (orders_batch1.csv: 5 rows) in S3.
% aws s3 cp orders_batch1.csv s3://cm-blog-tryit-autocopy/staging/
upload: ./orders_batch1.csv to s3://cm-blog-tryit-autocopy/staging/orders_batch1.csv
The file was automatically loaded in about 30 seconds after being placed.
Creating a Snapshot and Adding Data After the Snapshot
Create a manual snapshot at this point (5 rows).
% aws redshift-serverless create-snapshot \
  --namespace-name cm-blog-tryit-ns \
  --snapshot-name cm-blog-tryit-snap
{
    "snapshot": {
        "actualIncrementalBackupSizeInMegaBytes": 0.0,
        "adminUsername": "admin",
        "backupProgressInMegaBytes": 0.0,
        "currentBackupRateInMegaBytesPerSecond": 0.0,
        "elapsedTimeInSeconds": 0,
        "estimatedSecondsToCompletion": -1,
        "kmsKeyId": "AWS_OWNED_KMS_KEY",
        "namespaceArn": "arn:aws:redshift-serverless:ap-northeast-1:123456789012:namespace/564c110c-a06e-40c3-bdb7-36759985e4fd",
        "namespaceName": "cm-blog-tryit-ns",
        "ownerAccount": "123456789012",
        "snapshotArn": "arn:aws:redshift-serverless:ap-northeast-1:123456789012:snapshot/f53a60d8-634a-4e67-82d8-0c425cba4063",
        "snapshotCreateTime": "2026-07-19T06:48:07.359000+00:00",
        "snapshotName": "cm-blog-tryit-snap",
        "snapshotRemainingDays": 0,
        "snapshotRetentionPeriod": -1,
        "snapshotRetentionStartTime": "2026-07-19T06:48:07.359000+00:00",
        "status": "CREATING",
        "totalBackupSizeInMegaBytes": 0.0
    }
}
After the snapshot becomes AVAILABLE, place the second file (orders_batch2.csv: 3 rows) in S3.
% aws s3 cp orders_batch2.csv s3://cm-blog-tryit-autocopy/staging/
upload: ./orders_batch2.csv to s3://cm-blog-tryit-autocopy/staging/orders_batch2.csv
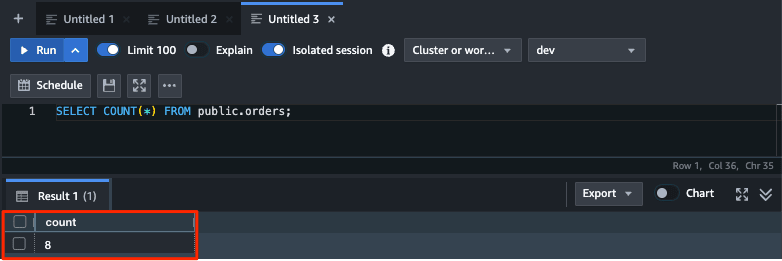
The active integration automatically loads this file, bringing the table to 8 rows. In other words, we have intentionally created a state where "the snapshot has 5 rows, and S3 has files for 8 rows."
Restoring to the Same Namespace
Restore from the snapshot to the same namespace.
% aws redshift-serverless restore-from-snapshot \
  --namespace-name cm-blog-tryit-ns \
  --workgroup-name cm-blog-tryit-wg \
  --snapshot-name cm-blog-tryit-snap
{
    "namespace": {
        "adminUsername": "admin",
        "creationDate": "2026-07-19T06:13:14.203000+00:00",
        "dbName": "dev",
        "defaultIamRoleArn": "arn:aws:iam::123456789012:role/service-role/AmazonRedshift-CommandsAccessRole-20260130T183403",
        "iamRoles": [
            "IamRole(applyStatus=in-sync, iamRoleArn=arn:aws:iam::123456789012:role/service-role/AmazonRedshift-CommandsAccessRole-20260130T183403)"
        ],
        "kmsKeyId": "AWS_OWNED_KMS_KEY",
        "lakehouseRegistrationStatus": "NOT_REGISTERED",
        "logExports": [],
        "namespaceArn": "arn:aws:redshift-serverless:ap-northeast-1:123456789012:namespace/564c110c-a06e-40c3-bdb7-36759985e4fd",
        "namespaceId": "564c110c-a06e-40c3-bdb7-36759985e4fd",
        "namespaceName": "cm-blog-tryit-ns",
        "status": "MODIFYING"
    },
    "ownerAccount": "123456789012",
    "snapshotName": "cm-blog-tryit-snap"
}
Note that restore-from-snapshot has a --maintain-integration | --no-maintain-integration parameter to control integration preservation (AWS CLI 2.36.2). The default is true (preserve), so if the parameter is not specified, the integration is preserved.
Also, when I executed this while the namespace was in MODIFYING state due to the immediately preceding auto-copy load, the following error was returned. I waited for AVAILABLE and re-executed.
An error occurred (ConflictException) when calling the RestoreFromSnapshot operation:
Redshift serverless is not in available state for this operation.
The restore (phase 1) completed in about 5.5 minutes, and the namespace and workgroup returned to AVAILABLE.
Checking the Integration Status After Restore
Check the integration status after the restore is complete.
% aws redshift describe-integrations \
  --integration-arn "arn:aws:redshift:ap-northeast-1:123456789012:integration:2b946f12-6648-47c0-b8dc-392b763063da" \
  --query 'Integrations[0].{IntegrationName:IntegrationName,Status:Status,Errors:Errors}'
{
    "IntegrationName": "cm-blog-tryit-s3int",
    "Status": "active",
    "Errors": []
}
The integration remains active without becoming FAILED. When I ran the same command during the restore process (MODIFYING), it was also still active. Let's also check the COPY JOB.
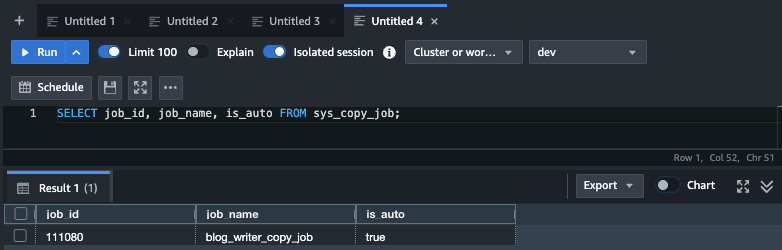
The COPY JOB was also preserved as-is, requiring no manual recreation.
Verifying Automatic Reloading of Files Added After the Snapshot
The restore should bring the table back to 5 rows as of the snapshot, but when I checked immediately after the restore completed, it already showed 8 rows. Let's check the load history.
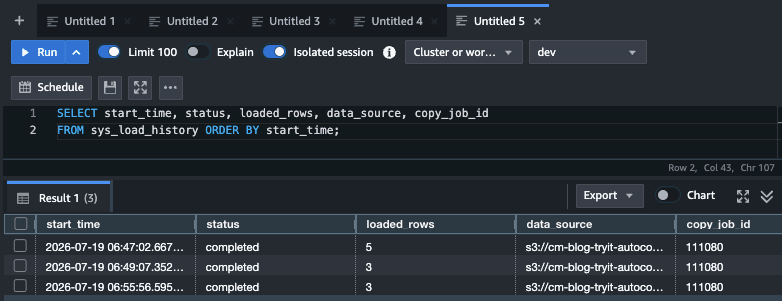
Please note the third row. During the restore process (started around 10:26, completed at 10:32), at 10:29, the 3 rows from batch2 — which was added after the snapshot — were automatically reloaded by the same COPY JOB. This confirms that, as stated in the official documentation, files that were not loaded at the time of the snapshot are automatically ingested (caught up) after the restore. This means that data ingestion gaps caused by the restore are automatically filled.
Verifying Automatic Loading of New Files After Restore
Finally, place the third file (batch3: 2 rows) in S3 after the restore.
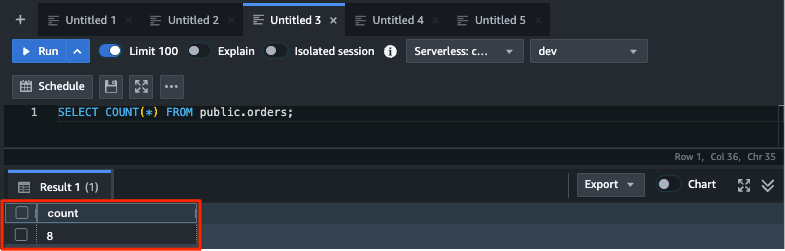
Even after the restore, the integration and COPY JOB continued to operate without any intervention, and the new file was automatically loaded.
Discussion
Here is a summary of what was confirmed through the testing, along with notes to keep in mind.
- When restoring a snapshot to the same namespace, the S3 event integration and COPY JOB were automatically preserved, and the integration status remained active without any change even during the restore process (MODIFYING)
- Files added to S3 after the snapshot was taken were automatically reloaded during the restore process. The data ingestion gap during the rebuild — which was an issue with the previous behavior (integration becoming FAILED and requiring manual recreation) — has been resolved
- New files after the restore completed were also automatically loaded as before, with no additional operational work required
The following are notes to keep in mind when using this feature.
- This feature only applies to restoring to the same namespace in Amazon Redshift Serverless. Integrations are not preserved when restoring to a different namespace or when restoring snapshots of provisioned clusters
- This is enabled by default in Patch 202 and later. If you do not want integrations to be preserved, you can opt out by unchecking "Maintain Integrations" on the restore screen in the console, or by specifying --no-maintain-integration in the CLI (when opting out, integrations will become FAILED as before). Since this parameter was added relatively recently (confirmed implemented in AWS CLI 2.36.2, not yet implemented in 2.35.21), please check your CLI version if you plan to opt out via CLI
- Files that were uploaded after the snapshot was taken but deleted before the restore completes will not be ingested
- Integrations created after the snapshot was taken will be in NEEDS_ATTENTION state after the restore. Address this by restoring from a more recent snapshot or by deleting the integration
- Integrations deleted after the snapshot was taken will not be restored, and the corresponding COPY JOBs will be in PENDING state
Details on edge cases are summarized in the official documentation under "Considerations when restoring an S3 event integration target."
Closing
Amazon Redshift Serverless snapshot restores now automatically preserve zero-ETL integrations and S3 event integrations. When I tried it out, I found that not only were the integration and COPY JOB preserved, but files added to S3 after the snapshot was taken were also automatically reloaded during the restore process. This update genuinely reduces the operational burden of disaster recovery and restore testing.
For those who have incorporated snapshot restores into operations in environments using zero-ETL integrations or Auto-copy, you should be able to simply remove the "recreate integrations" step from your restore runbooks. I hope this article is helpful to someone.