I tried migrating data from Amazon Aurora (MySQL) to TiDB Cloud Dedicated

Hello, I'm sora from the Game Solutions department.
In this post, I'll write about my experience migrating data from Amazon Aurora (MySQL) to TiDB Cloud Dedicated.
Introduction
I'll proceed in the following order:
- Registering test data
- Creating an S3 bucket for migration data
- Creating an IAM role
- Exporting from Aurora to S3 using TiUP Dumpling
- Importing from S3 to TiDB Cloud using TiDB Cloud's Import feature
- Verification
For the Aurora export, I'll use TiUP Dumpling, and for the TiDB Cloud import, I'll use TiDB Cloud's Import feature.
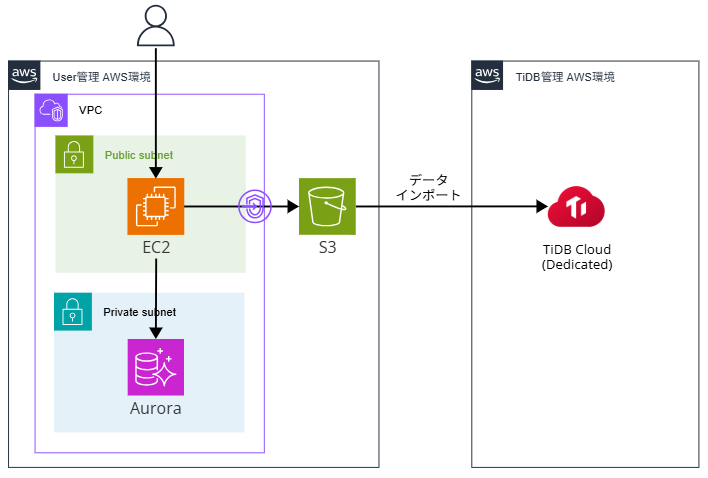
The AWS configuration for this project is as follows.
I'll be using pre-created AWS EC2, Aurora, VPC endpoint, and TiDB Cloud Dedicated cluster.
 ## Registering Test Data
We will register test data in Aurora.
			CREATE DATABASE japan_prefecture_db;

USE japan_prefecture_db;

CREATE TABLE prefectures (
    id INT AUTO_INCREMENT PRIMARY KEY,
    prefecture VARCHAR(255),
    prefectural_capital VARCHAR(255)
);

INSERT INTO prefectures (prefecture, prefectural_capital) VALUES
('Hokkaido', 'Sapporo'),
('Aomori Prefecture', 'Aomori'),
('Iwate Prefecture', 'Morioka'),
('Miyagi Prefecture', 'Sendai'),
('Akita Prefecture', 'Akita'),
('Yamagata Prefecture', 'Yamagata'),
('Fukushima Prefecture', 'Fukushima'),
('Ibaraki Prefecture', 'Mito'),
('Tochigi Prefecture', 'Utsunomiya'),
('Gunma Prefecture', 'Maebashi'),
('Saitama Prefecture', 'Saitama'),
('Chiba Prefecture', 'Chiba'),
('Tokyo Metropolis', 'Shinjuku'),
('Kanagawa Prefecture', 'Yokohama'),
('Niigata Prefecture', 'Niigata'),
('Toyama Prefecture', 'Toyama'),
('Ishikawa Prefecture', 'Kanazawa'),
('Fukui Prefecture', 'Fukui'),
('Yamanashi Prefecture', 'Kofu'),
('Nagano Prefecture', 'Nagano'),
('Gifu Prefecture', 'Gifu'),
('Shizuoka Prefecture', 'Shizuoka'),
('Aichi Prefecture', 'Nagoya'),
('Mie Prefecture', 'Tsu'),
('Shiga Prefecture', 'Otsu'),
('Kyoto Prefecture', 'Kyoto'),
('Osaka Prefecture', 'Osaka'),
('Hyogo Prefecture', 'Kobe');

SELECT * FROM prefectures;
+----+----------------------+---------------------+
| id | prefecture           | prefectural_capital |
+----+----------------------+---------------------+
|  1 | Hokkaido             | Sapporo             |
|  2 | Aomori Prefecture    | Aomori              |
|  3 | Iwate Prefecture     | Morioka             |
|  4 | Miyagi Prefecture    | Sendai              |
|  5 | Akita Prefecture     | Akita               |
|  6 | Yamagata Prefecture  | Yamagata            |
|  7 | Fukushima Prefecture | Fukushima           |
|  8 | Ibaraki Prefecture   | Mito                |
|  9 | Tochigi Prefecture   | Utsunomiya          |
| 10 | Gunma Prefecture     | Maebashi            |
| 11 | Saitama Prefecture   | Saitama             |
| 12 | Chiba Prefecture     | Chiba               |
| 13 | Tokyo Metropolis     | Shinjuku            |
| 14 | Kanagawa Prefecture  | Yokohama            |
| 15 | Niigata Prefecture   | Niigata             |
| 16 | Toyama Prefecture    | Toyama              |
| 17 | Ishikawa Prefecture  | Kanazawa            |
| 18 | Fukui Prefecture     | Fukui               |
| 19 | Yamanashi Prefecture | Kofu                |
| 20 | Nagano Prefecture    | Nagano              |
| 21 | Gifu Prefecture      | Gifu                |
| 22 | Shizuoka Prefecture  | Shizuoka            |
| 23 | Aichi Prefecture     | Nagoya              |
| 24 | Mie Prefecture       | Tsu                 |
| 25 | Shiga Prefecture     | Otsu                |
| 26 | Kyoto Prefecture     | Kyoto               |
| 27 | Osaka Prefecture     | Osaka               |
| 28 | Hyogo Prefecture     | Kobe                |
+----+----------------------+---------------------+
28 rows in set (0.00 sec)
```## Create S3 Bucket for Migration Data
We'll create a bucket in S3 for migration data.
Just set the name and proceed with the default settings to create it.

## Create IAM Role
Since we need to access S3 from EC2, we'll create an instance profile.

First, create an IAM policy with the following JSON.
Replace `{bucket-name}` with the name of the S3 bucket you just created.

```json
{
  "Version": "2012-10-17",
  "Statement": [
    {
      "Effect": "Allow",
      "Action": [
        "s3:PutObject",
        "s3:PutObjectAcl",
        "s3:GetObject",
        "s3:ListBucket"
      ],
      "Resource": [
        "arn:aws:s3:::{bucket-name}",
        "arn:aws:s3:::{bucket-name}/*"
      ]
    }
  ]
}
Create an IAM role with this policy attached.
Then, attach the created IAM role to the EC2 instance.
Export from Aurora to S3 using TiUP Dumpling
Install TiUP on the EC2 instance and run TiUP Dumpling.
The output destination is set to the S3 bucket we created earlier.
			# Install TiUP
curl \
  --proto '=https' \
  --tlsv1.2 \
  -sSf \
  https://tiup-mirrors.pingcap.com/install.sh \
| sh

# Reload bash_profile
source /home/ec2-user/.bash_profile

# Run TiUP Dumpling (export to S3)
tiup dumpling \
  --host {Aurora endpoint} \
  --port 3306 \
  --user admin \
  --password '{Aurora password}' \
  --consistency none \
  --output 's3://{bucket-name}/tiup-dumpling'
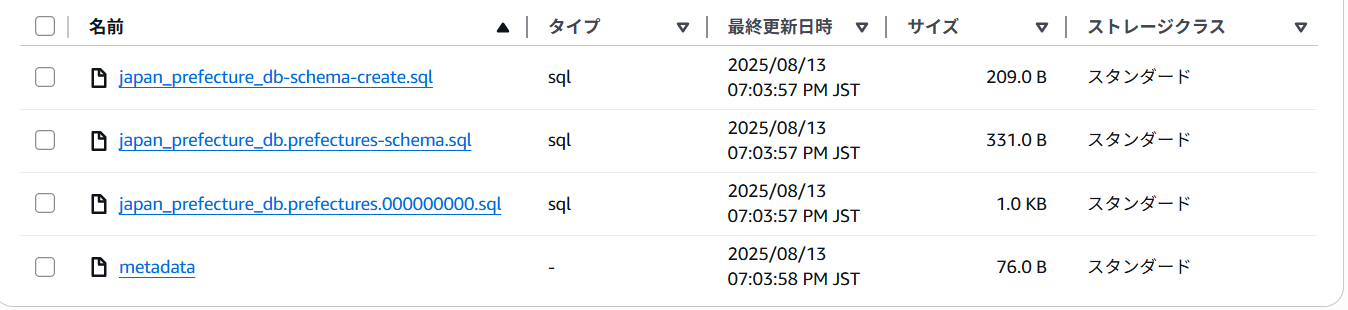
After execution, check the S3 bucket and you'll see that data including schema files has been stored as shown below.
 ## Import from S3 to TiDB Cloud using the Import feature
Next, we will import from the S3 bucket to TiDB Cloud using the TiDB Cloud Import feature.
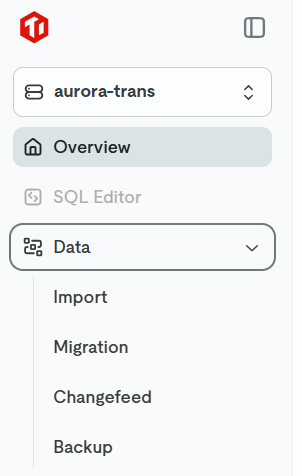
In TiDB Cloud, select the destination cluster and click Import.
Since we are importing data from S3, select Import data from Cloud Storage.

Before importing, we need to create an IAM role to allow TiDB Cloud to connect to S3.
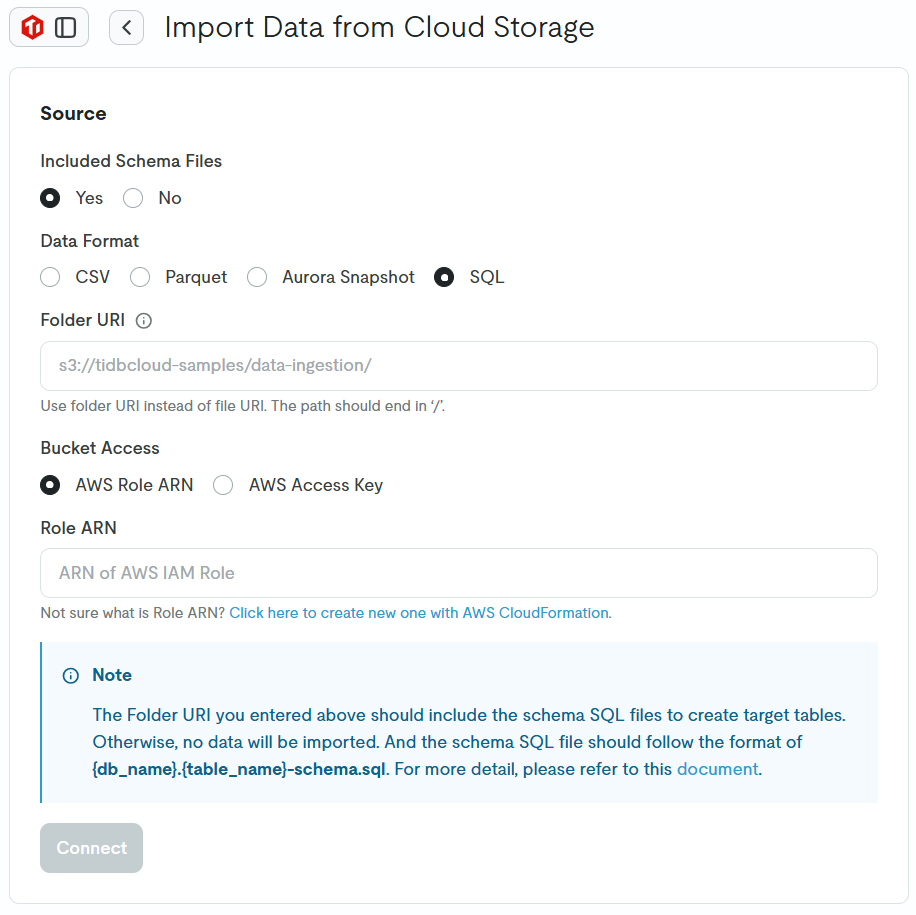
Enter the URI of the S3 bucket you created earlier in the Folder URI field. Under Role ARN, it says Not sure what is Role ARN? Click here to create new one with AWS CloudFormation. Click on this to create an IAM role using CloudFormation.
Once clicked, instructions will appear. Click on AWS Console with CloudFormation Template to proceed with creating an IAM role using the CloudFormation template.
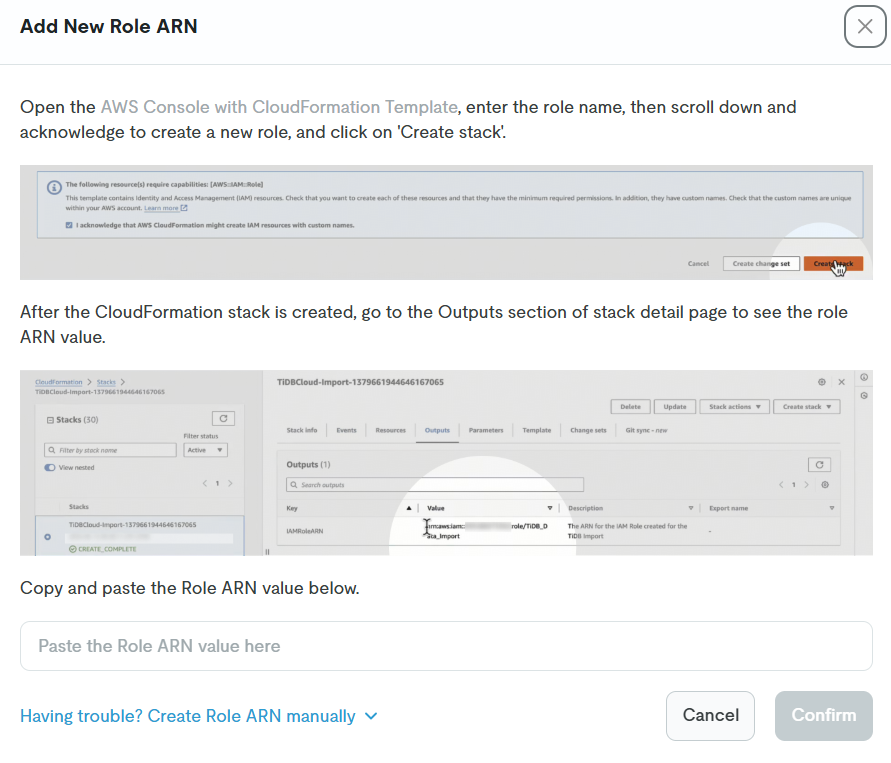
You will be directed to the stack creation screen. Enter only the Role Name, check the checkbox, and click the Create stack button to execute.
(When I was redirected, the region was set to Oregon, so I changed it to Tokyo before proceeding.)
After the IAM role is created using the above steps, copy the ARN of the created IAM role and return to the TiDB Cloud screen.
On the TiDB Cloud screen, enter the IAM Role ARN and click the Confirm button.
The created IAM role ARN will be entered in the Role ARN field, then click the Connect button to start importing.
The final configuration is as follows:
- Included Schema Files: Yes
- Data Format: SQL
- Folder URI: {S3 bucket URI}
- Bucket Access: AWS Role ARN
- Role ARN: {IAM role ARN}
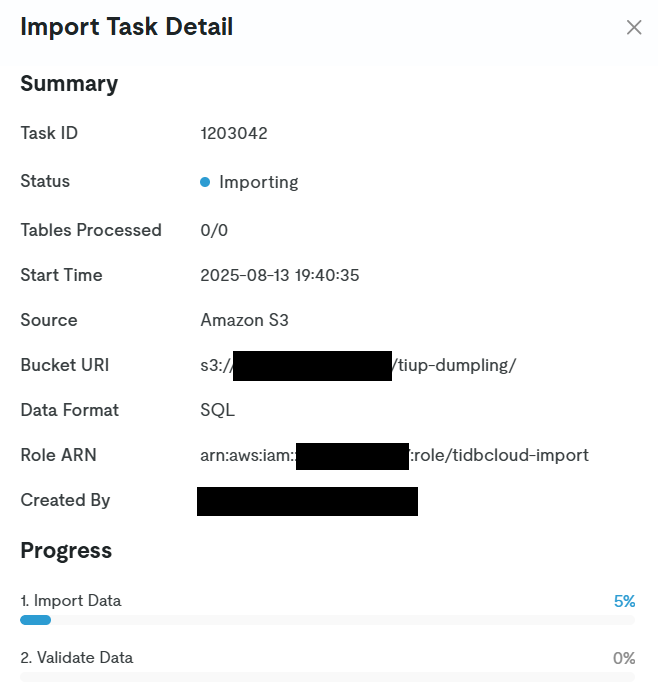
After that, the screen will transition, so click the Start Import button.

The Import Task Detail will be displayed, so wait for the task to complete.
When the task is completed, it will be displayed as follows.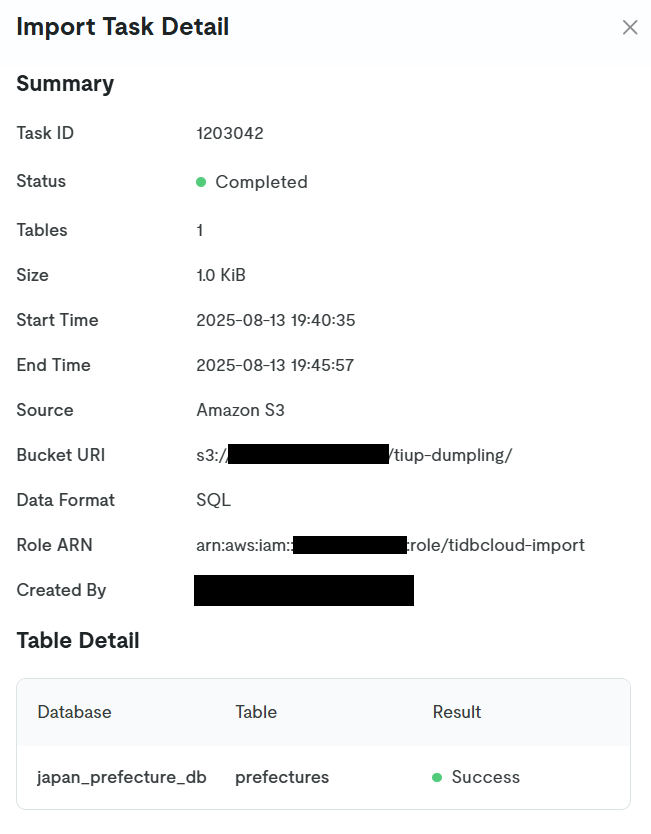
Now the data migration is complete.
Verification
Let's verify the migrated data in the TiDB Cloud Dedicated cluster.
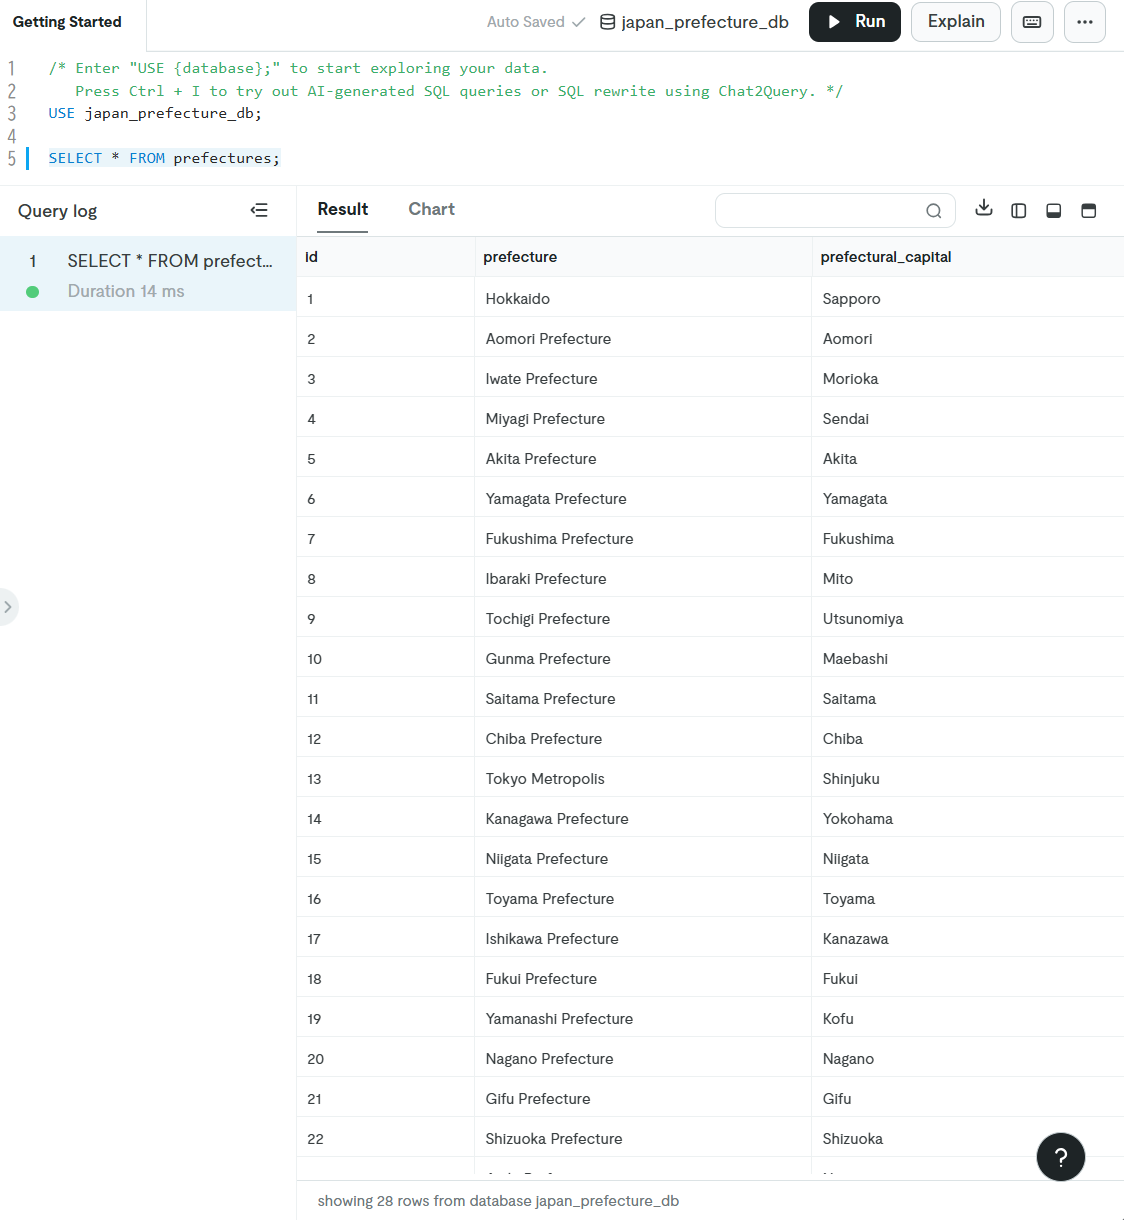
When executing the following query from the TiDB Cloud SQL Editor, we can confirm that the data has been successfully migrated.
			USE japan_prefecture_db;
SELECT * FROM prefectures;
Conclusion
In this article, I wrote about migrating data from Amazon Aurora (MySQL) to TiDB Cloud Dedicated.
I hope this will be helpful to some of you.