
AWS DMS Serverless consumes DCUs for 48 hours even after stopping a task
This page has been translated by machine translation. View original
Introduction
I'm kasama from the Big Data Team in the Data Business Division.
In this article, I'd like to share what I've learned about AWS DMS Serverless through my testing, focusing on the topic mentioned in the title.
Conclusion
As stated in the official documentation, even if you stop DMS Serverless, it remains in the Provisioning state for 48 hours, meaning you continue to be charged for DCU (DMS Capacity Units) consumption. After 48 hours, it becomes Deprovisioned and billing stops.
Therefore, if you set up a daily batch schedule using EventBridge Scheduler to Start and Stop DMS Serverless, be aware that costs will continue to accrue during the 48-hour Provisioning state.
You cannot restart a replication that has not started in 48 hours as AWS DMS deprovisions the resources.
Prerequisites
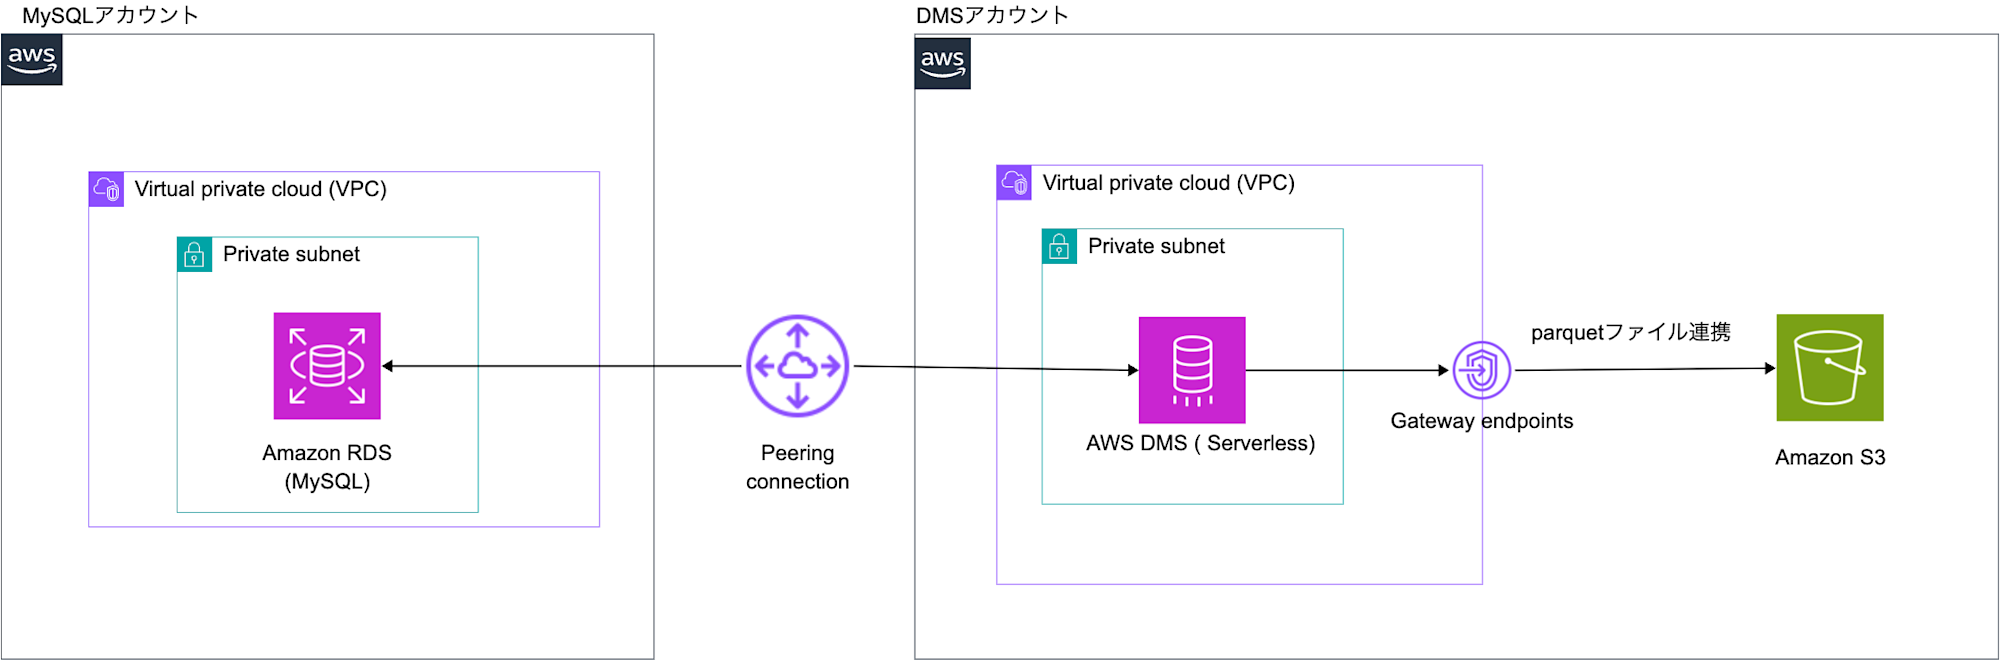
I'll be testing with the architecture shown in the diagram. The MySQL account and DMS account are connected via VPC Peering, retrieving data from MySQL and transferring it to S3.
Implementation
The implementation code for this test is stored on Github, so please check there for details. Since the goal is to verify operation, I'll skip explaining the code.
@54_dms_serverless % tree
.
├── cdk
│   ├── bin
│   │   └── app.ts
│   ├── cdk.context.json
│   ├── cdk.json
│   ├── jest.config.js
│   ├── lib
│   │   └── dms-serverless-stack.ts
│   ├── package-lock.json
│   ├── package.json
│   └── tsconfig.json
├── cloudformation
│   ├── dms_account_iam.yml
│   ├── dms_account_vpc.yml
│   ├── mysql_account_rds.yml
│   └── mysql_account_vpc.yml
└── README.md

6 directories, 18 files
Deployment
Now let's deploy the implemented resources.
Deploying Foundation Resources
First, in the MySQL account, deploy the VPC and RDS using the following yml files through CloudFormation.
- mysql_account_vpc.yml
- mysql_account_rds.yml

Next, in the DMS account, deploy the VPC and IAM Role for DMS using the following yml files through CloudFormation.
- dms_account_vpc.yml
- dms_account_iam.yml

Database Preparation
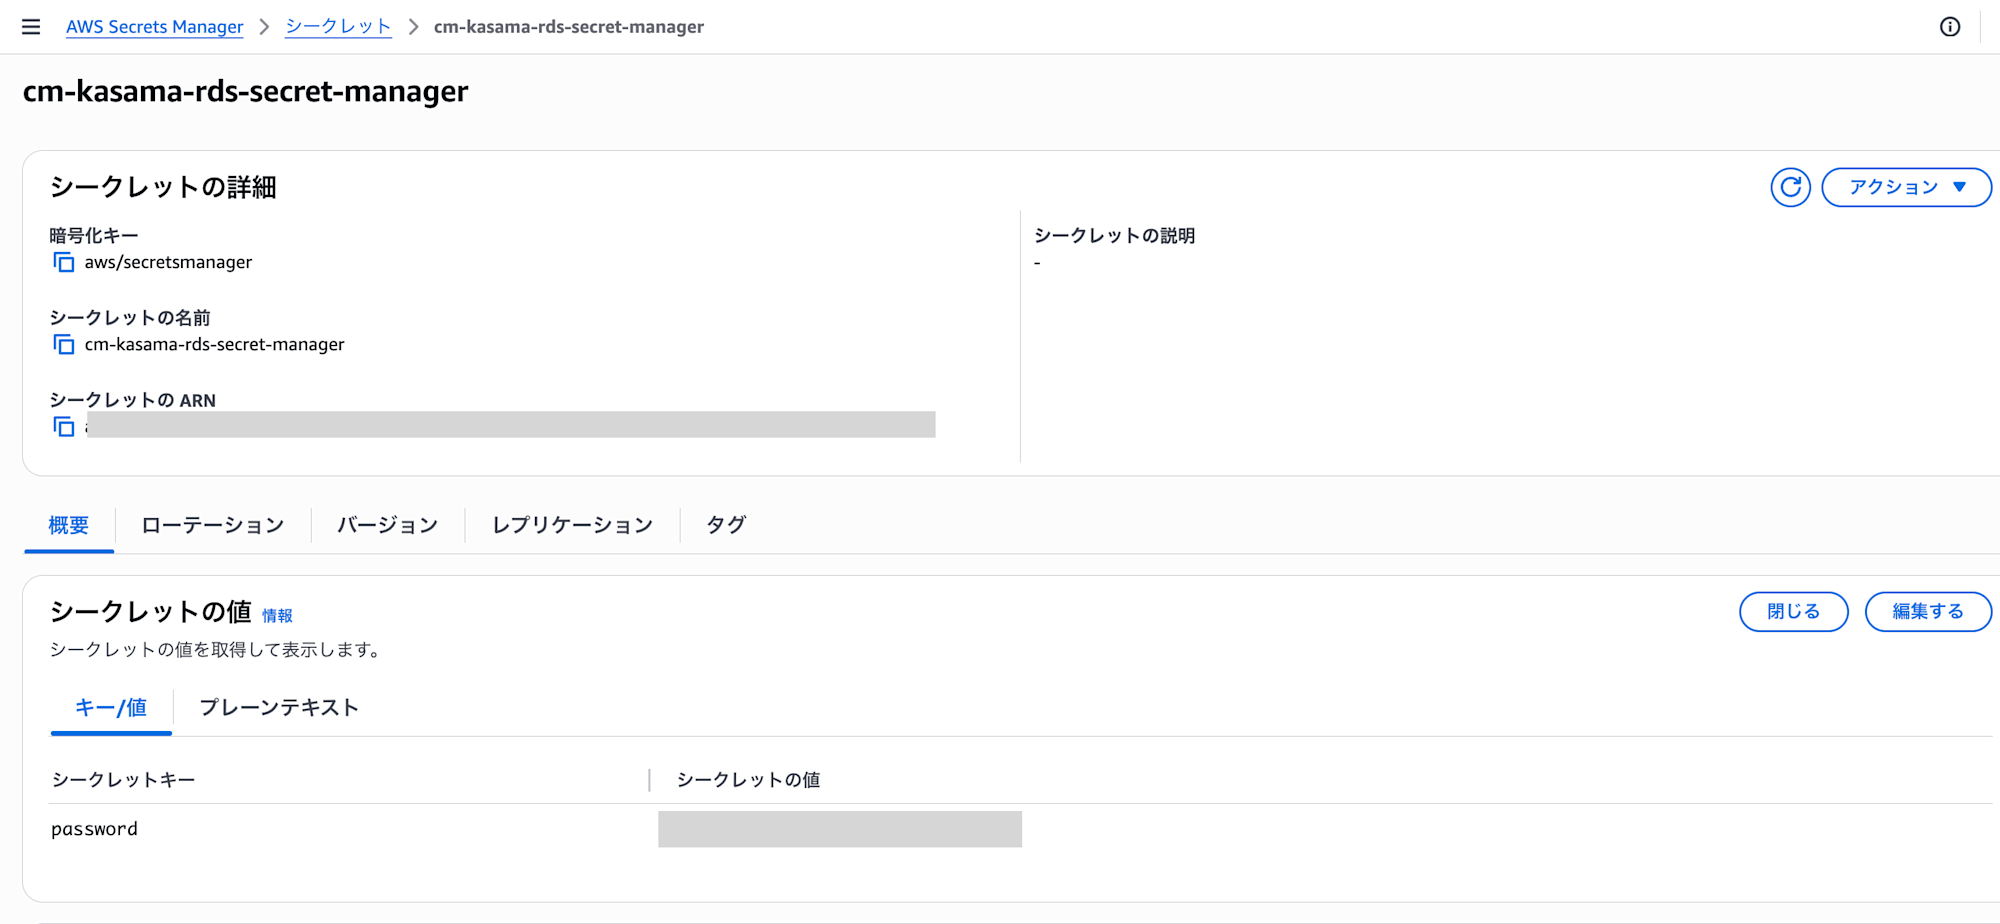
Next, connect to RDS from CloudShell and create data. You can find the RDS endpoint in the "Connectivity & security" section of RDS, and retrieve the username and password from Secret Manager where we stored them.
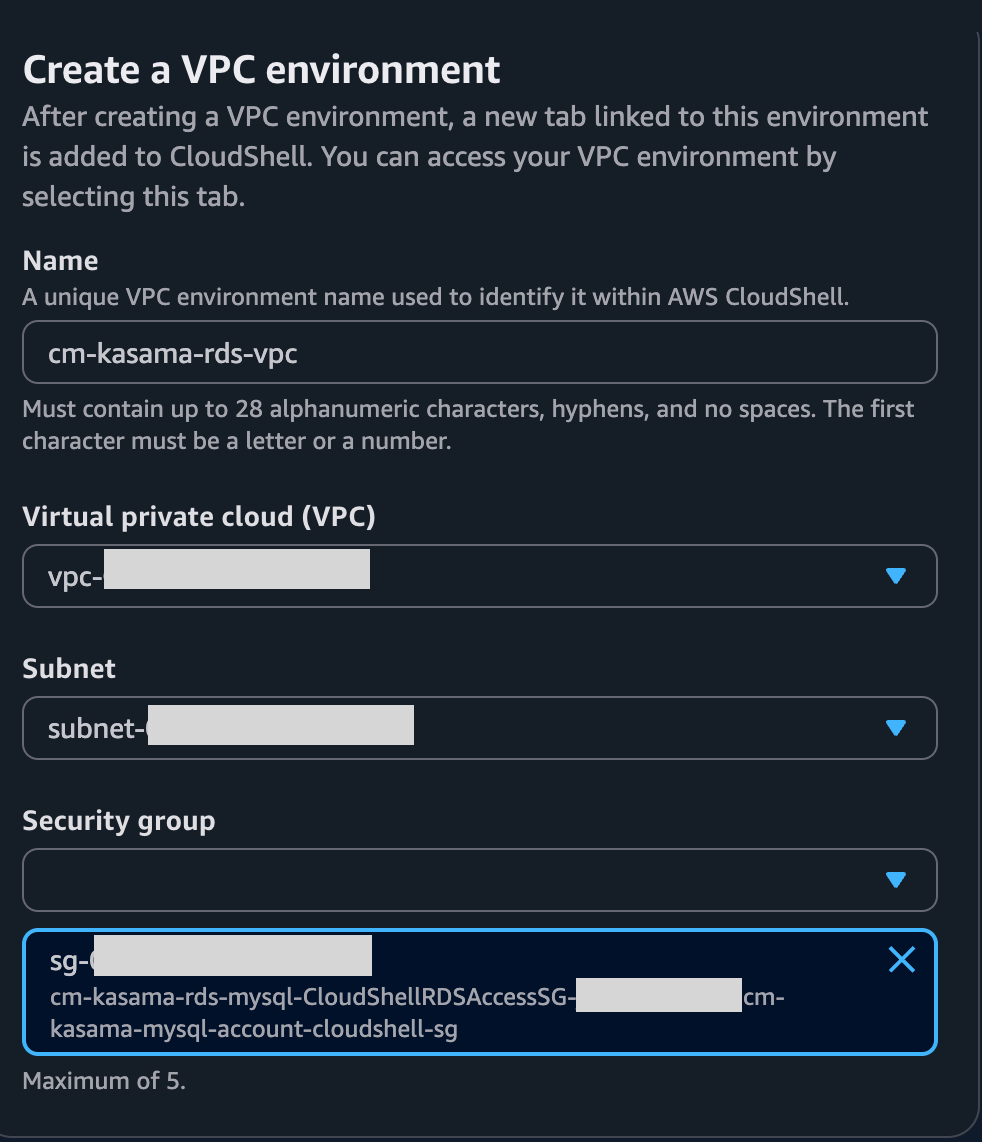
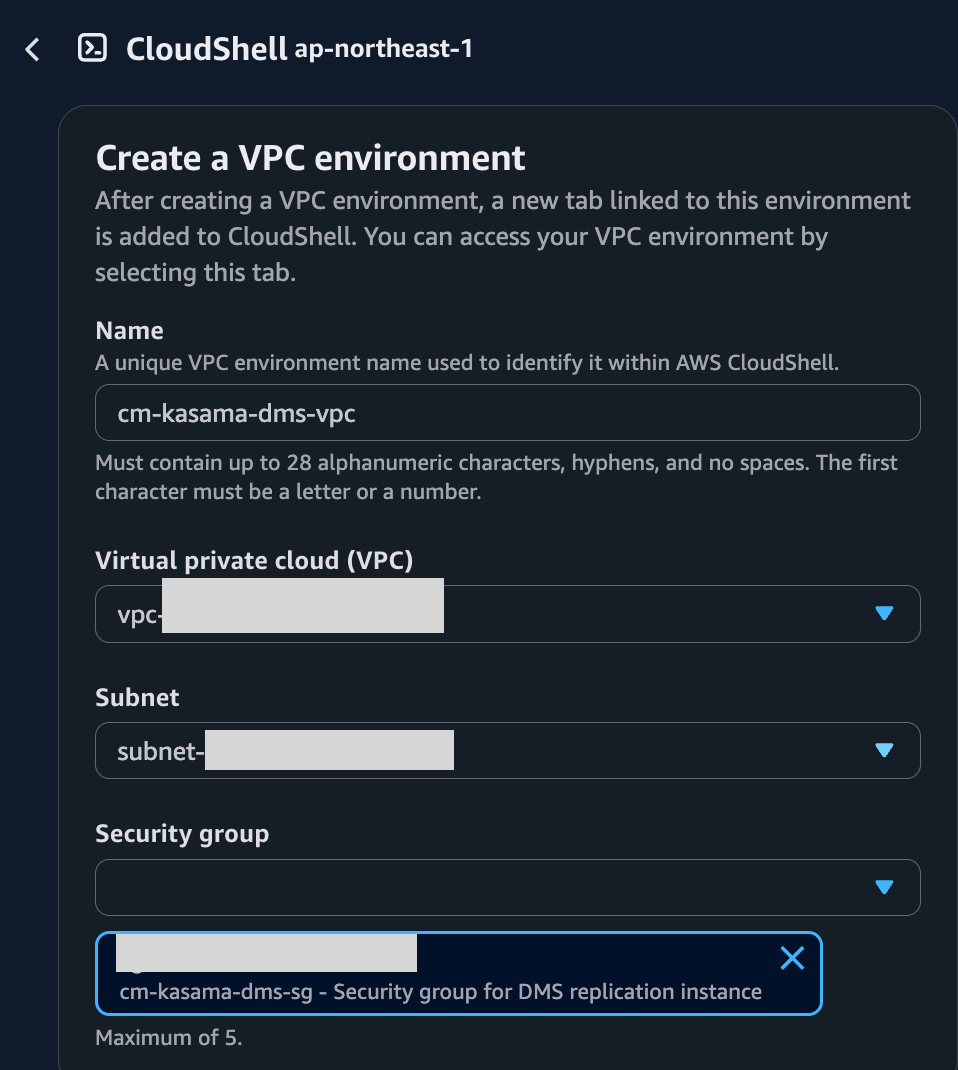
Create CloudShell in the VPC, Subnet, and with the CloudShell SG you created.
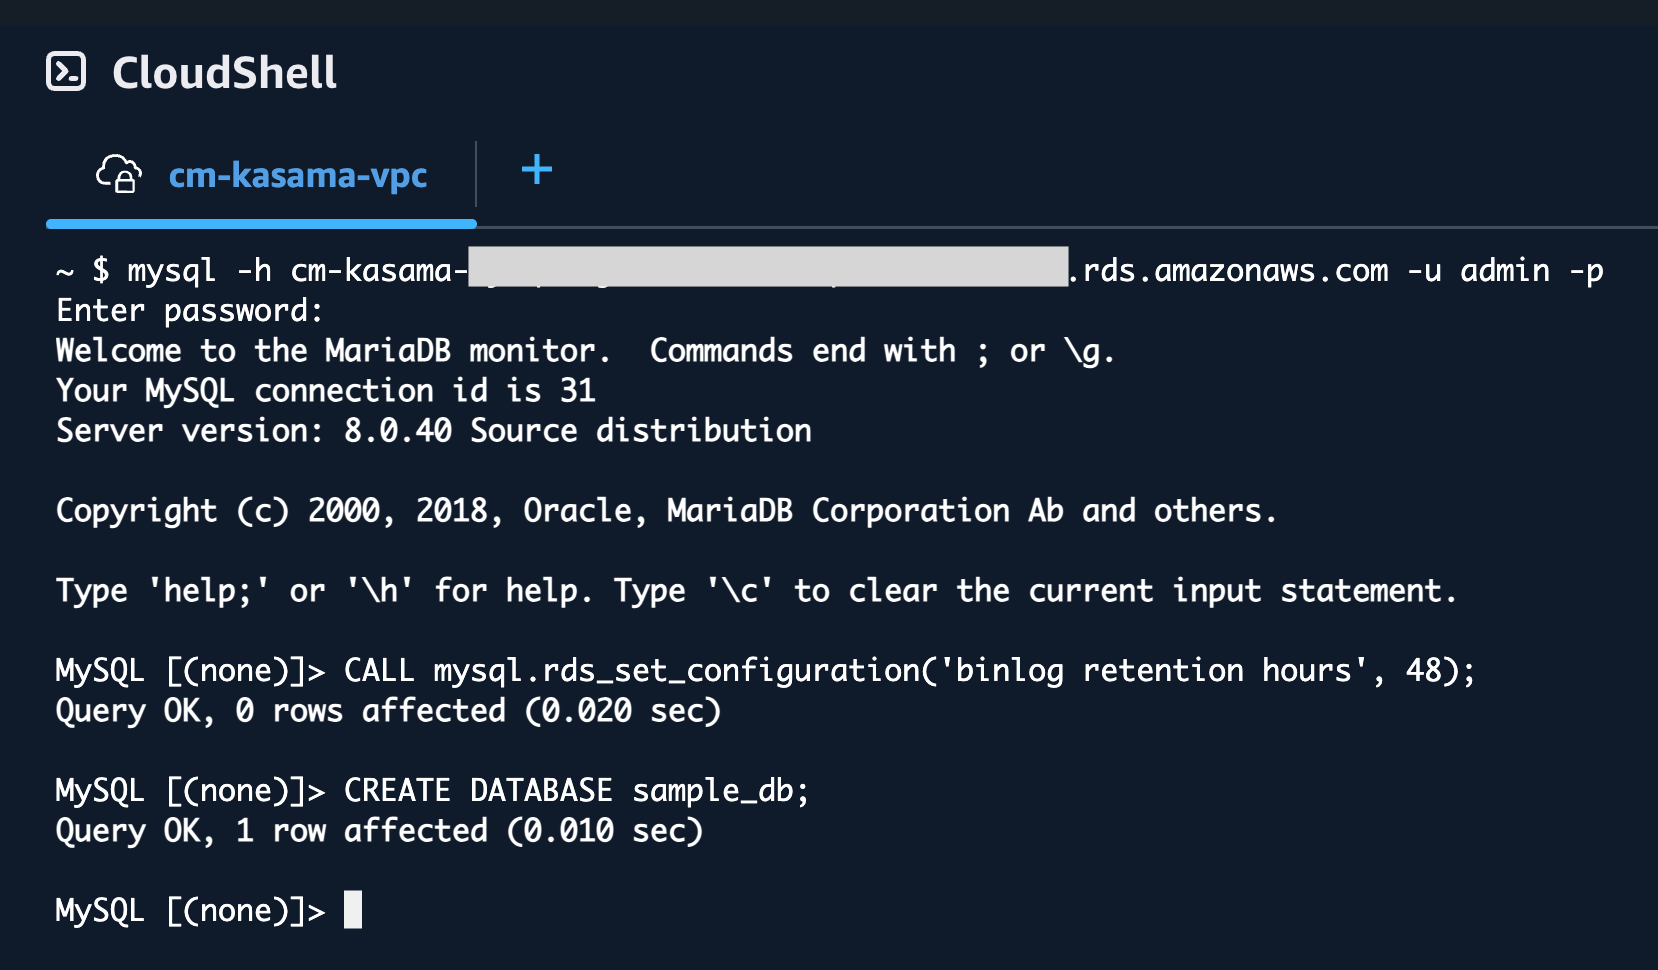
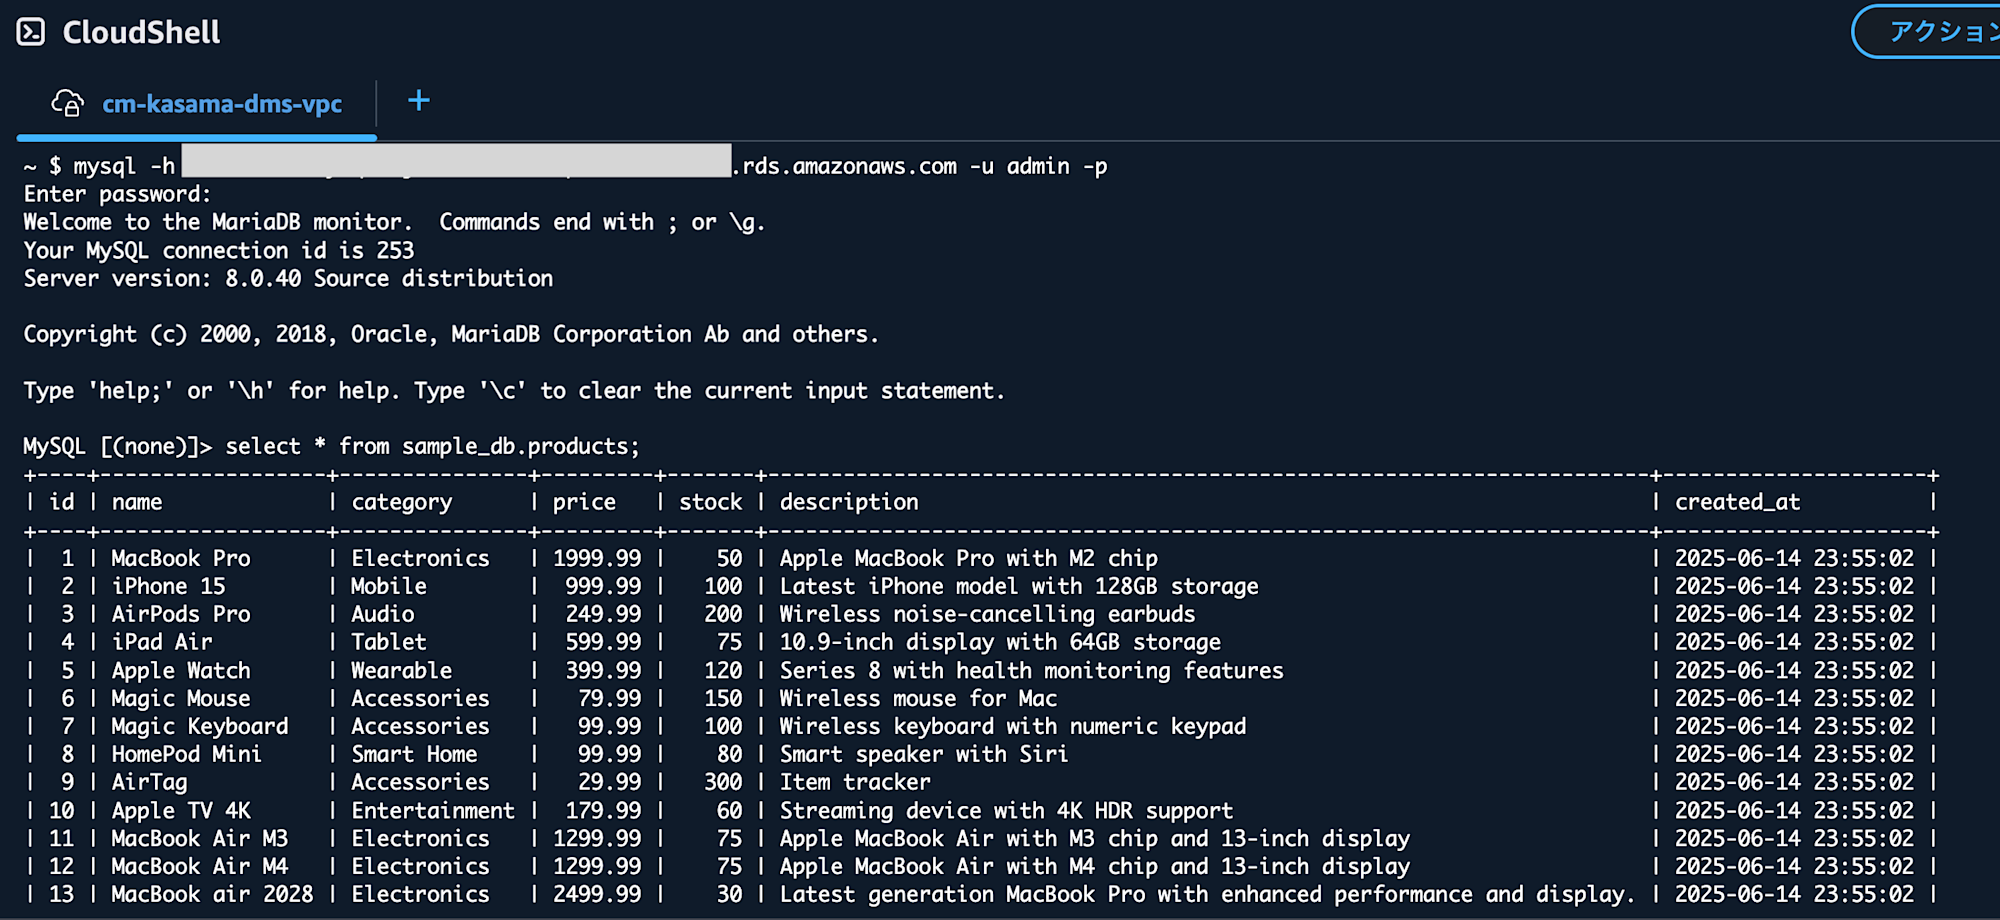
Next, connect to MySQL and create a database. This might not be necessary for this test, but I've set the binlog retention period to 48 hours, as CDC operations may fail if the interval between executions is long and the binlog retention period is short.
mysql -h <RDS instance endpoint> -u admin -p
CALL mysql.rds_set_configuration('binlog retention hours', 48);
CREATE DATABASE sample_db;
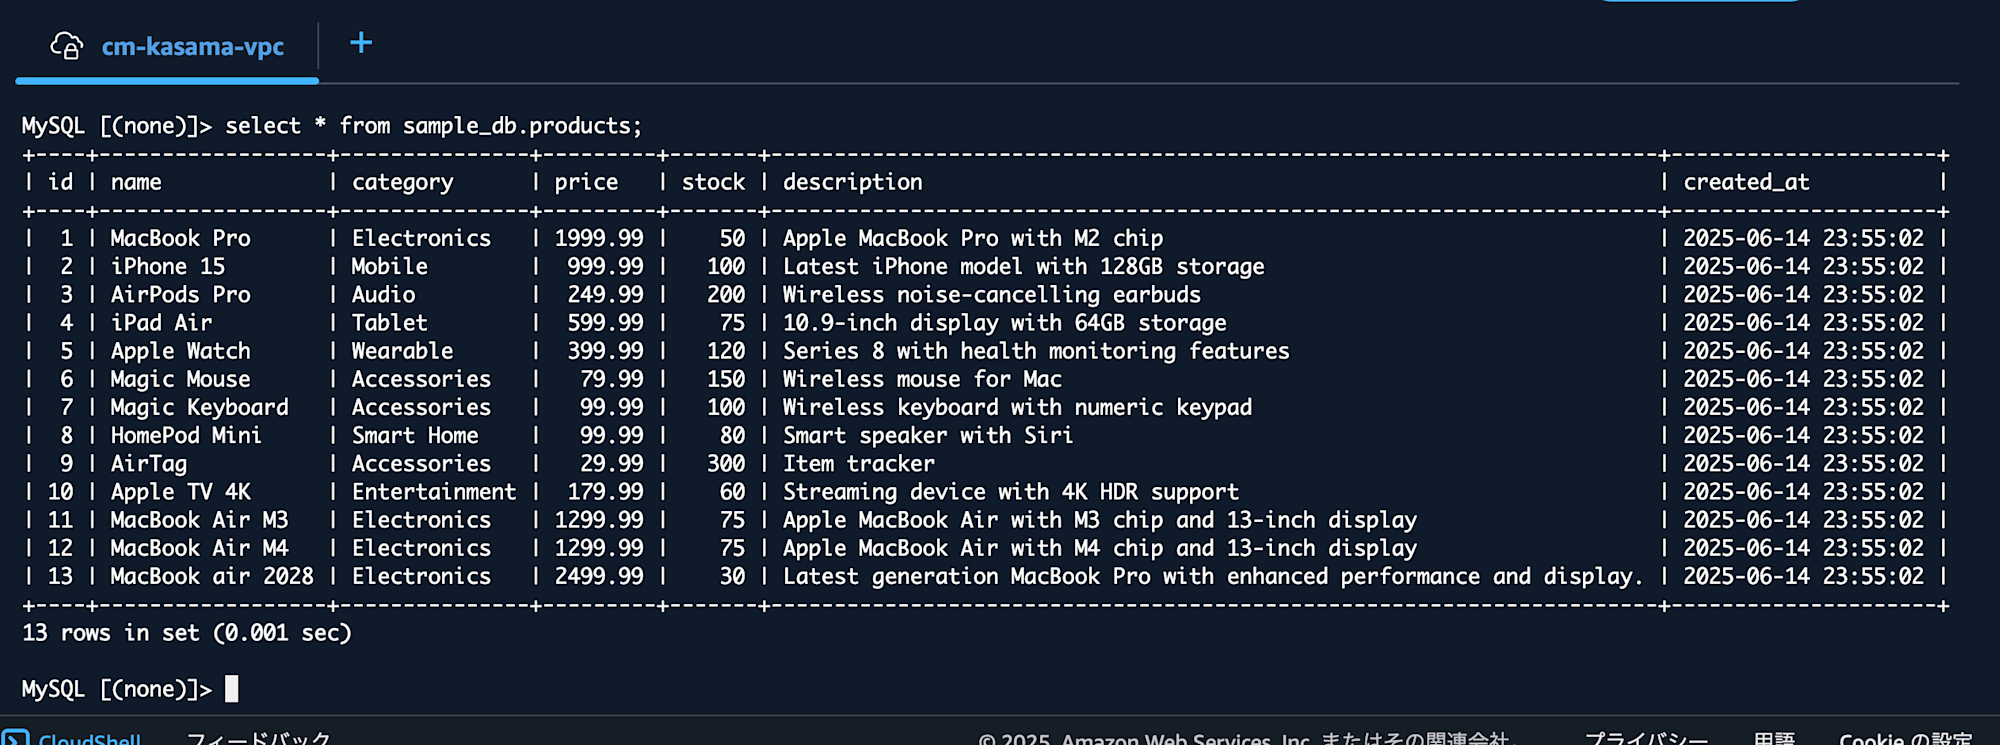
Insert data with the following SQL and verify it using a Select statement.
CREATE TABLE sample_db.products (
  `id` int NOT NULL AUTO_INCREMENT,
  `name` varchar(100) NOT NULL,
  `category` varchar(50) DEFAULT NULL,
  `price` decimal(10,2) NOT NULL,
  `stock` int NOT NULL DEFAULT '0',
  `description` text,
  `created_at` timestamp NULL DEFAULT CURRENT_TIMESTAMP,
  PRIMARY KEY (`id`)
);

INSERT INTO sample_db.products (name, category, price, stock, description) VALUES
('MacBook Pro', 'Electronics', 1999.99, 50, 'Apple MacBook Pro with M2 chip'),
('iPhone 15', 'Mobile', 999.99, 100, 'Latest iPhone model with 128GB storage'),
('AirPods Pro', 'Audio', 249.99, 200, 'Wireless noise-cancelling earbuds'),
('iPad Air', 'Tablet', 599.99, 75, '10.9-inch display with 64GB storage'),
('Apple Watch', 'Wearable', 399.99, 120, 'Series 8 with health monitoring features'),
('Magic Mouse', 'Accessories', 79.99, 150, 'Wireless mouse for Mac'),
('Magic Keyboard', 'Accessories', 99.99, 100, 'Wireless keyboard with numeric keypad'),
('HomePod Mini', 'Smart Home', 99.99, 80, 'Smart speaker with Siri'),
('AirTag', 'Accessories', 29.99, 300, 'Item tracker'),
('Apple TV 4K', 'Entertainment', 179.99, 60, 'Streaming device with 4K HDR support'),
('MacBook Air M3', 'Electronics', 1299.99, 75, 'Apple MacBook Air with M3 chip and 13-inch display'),
('MacBook Air M4', 'Electronics', 1299.99, 75, 'Apple MacBook Air with M4 chip and 13-inch display'),
('MacBook air 2028', 'Electronics', 2499.99, 30, 'Latest generation MacBook Pro with enhanced performance and display.');
Network Connection Configuration
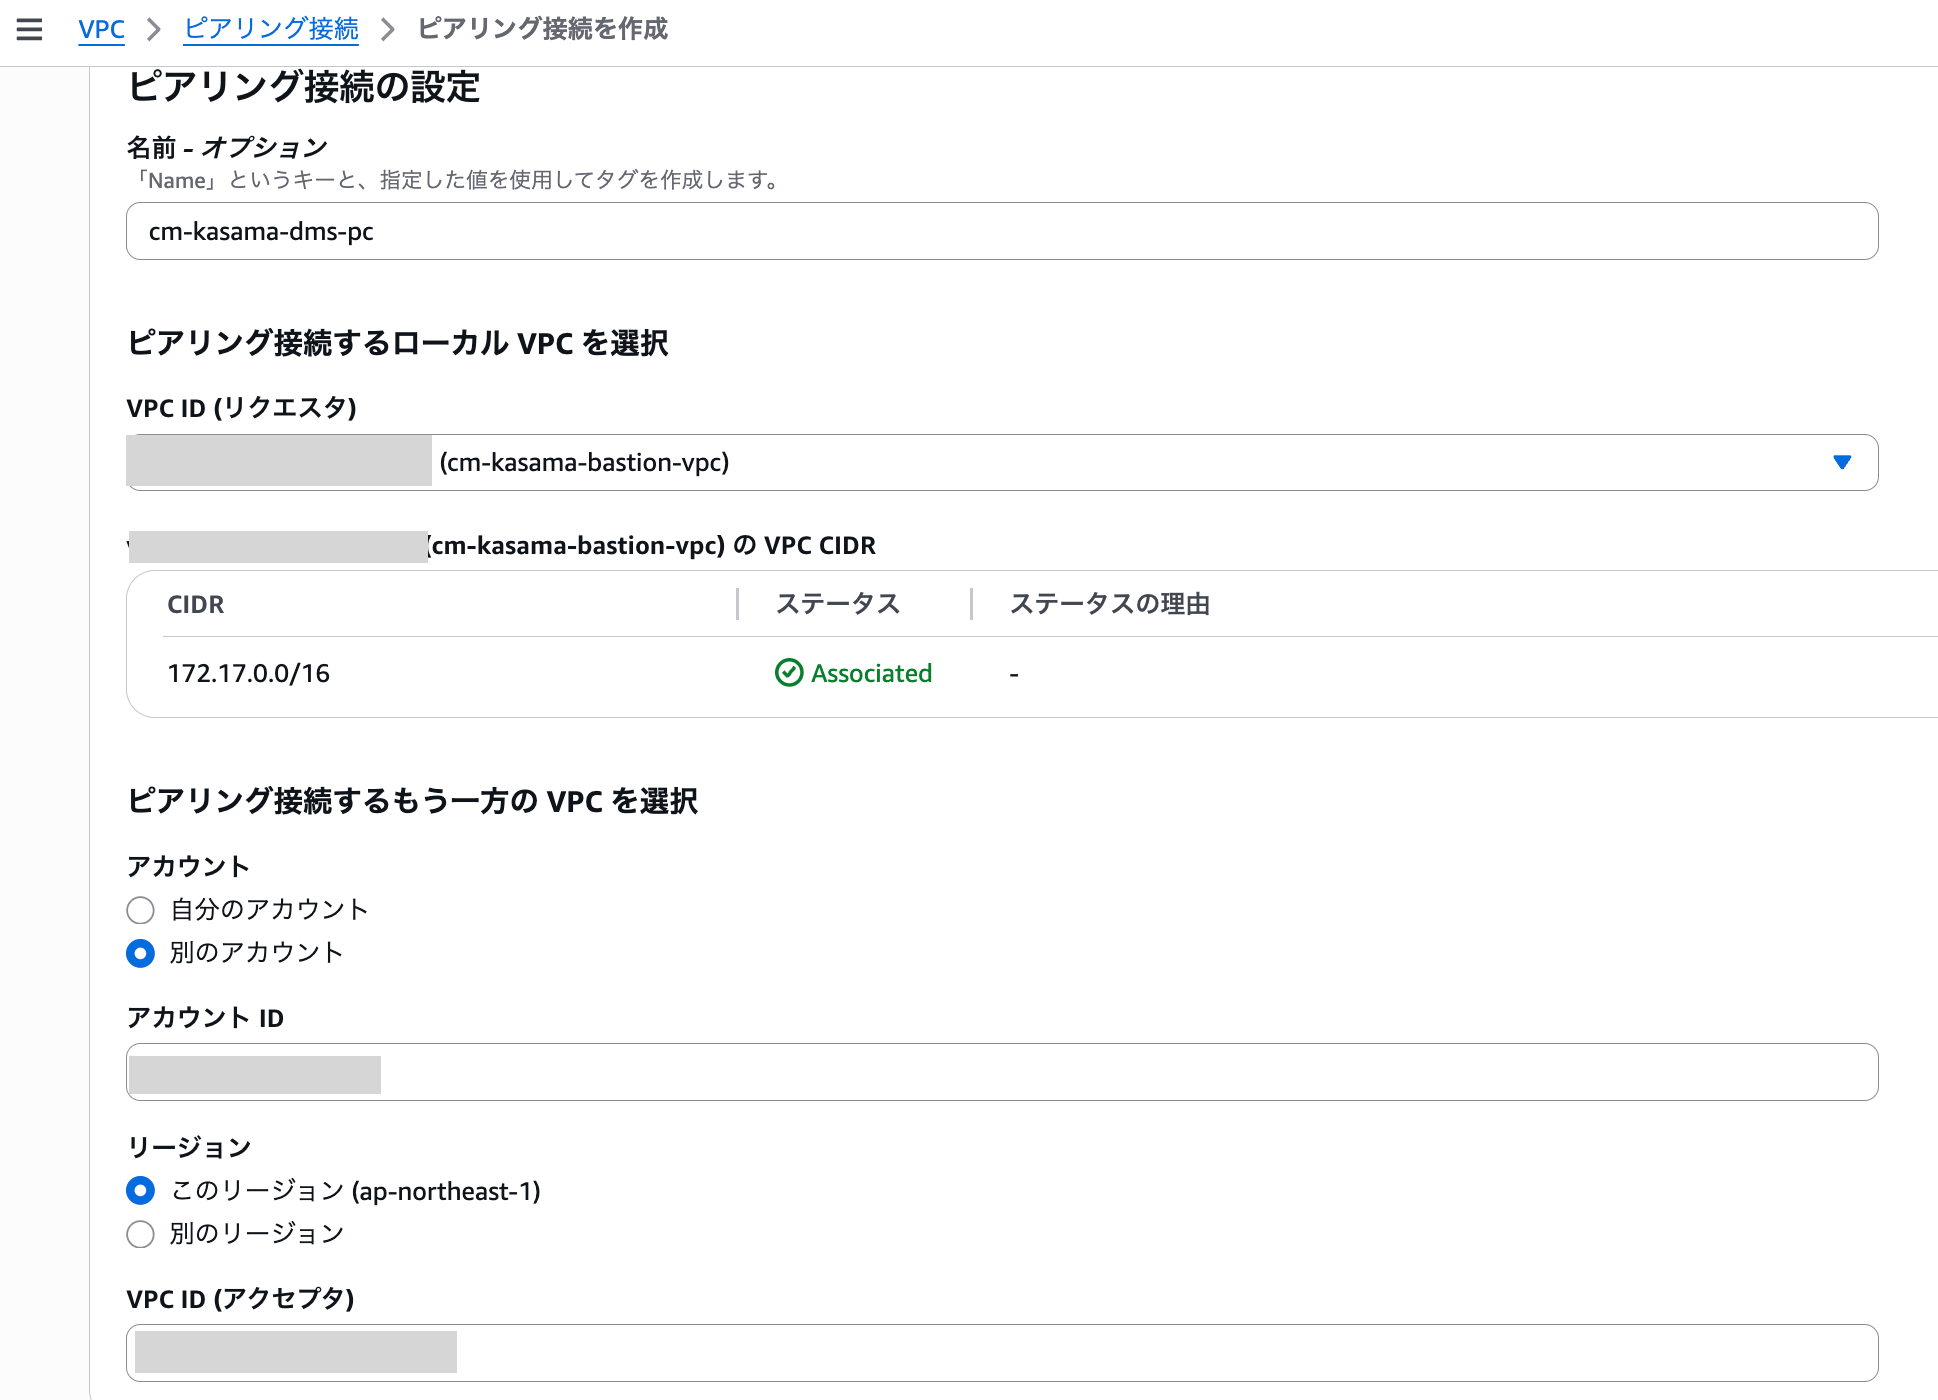
Next, set up VPC Peering from the DMS account interface. I followed the official procedures for VPC Peering configuration.
Specify the DMS account's VPC ID as the requester and the MySQL account's VPC ID as the accepter.
The peering connection will be in a pending acceptance state in the MySQL account, so accept the request.

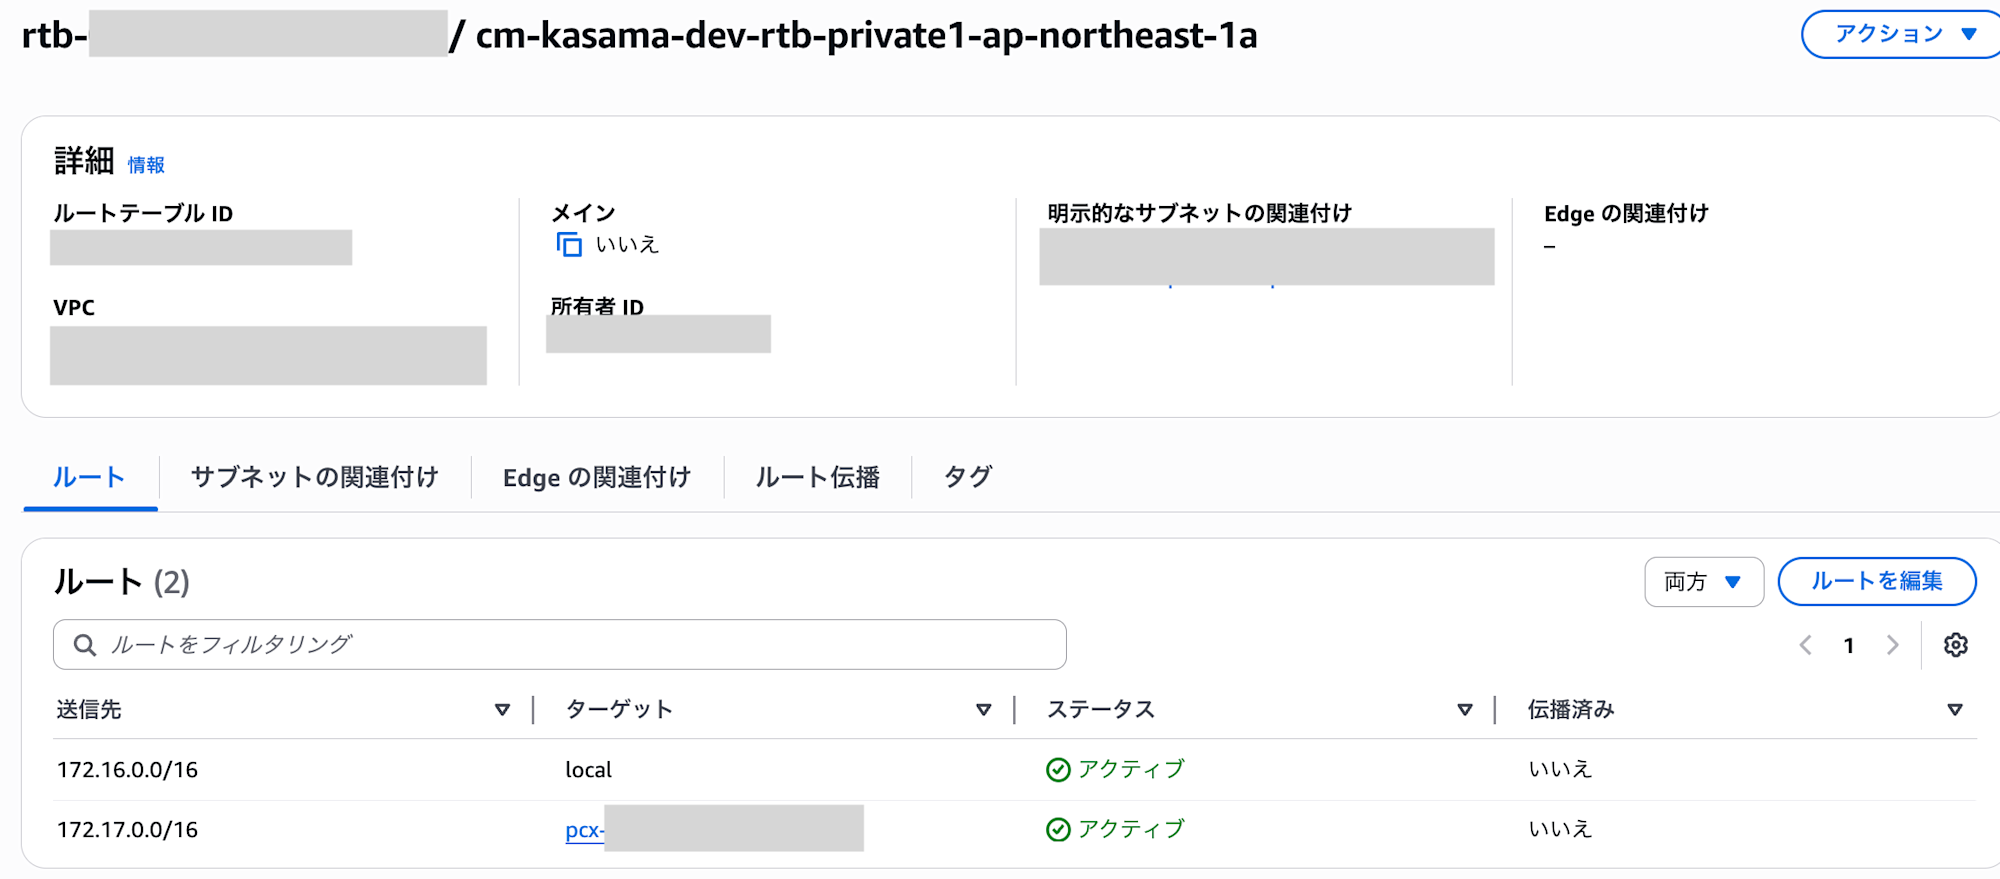
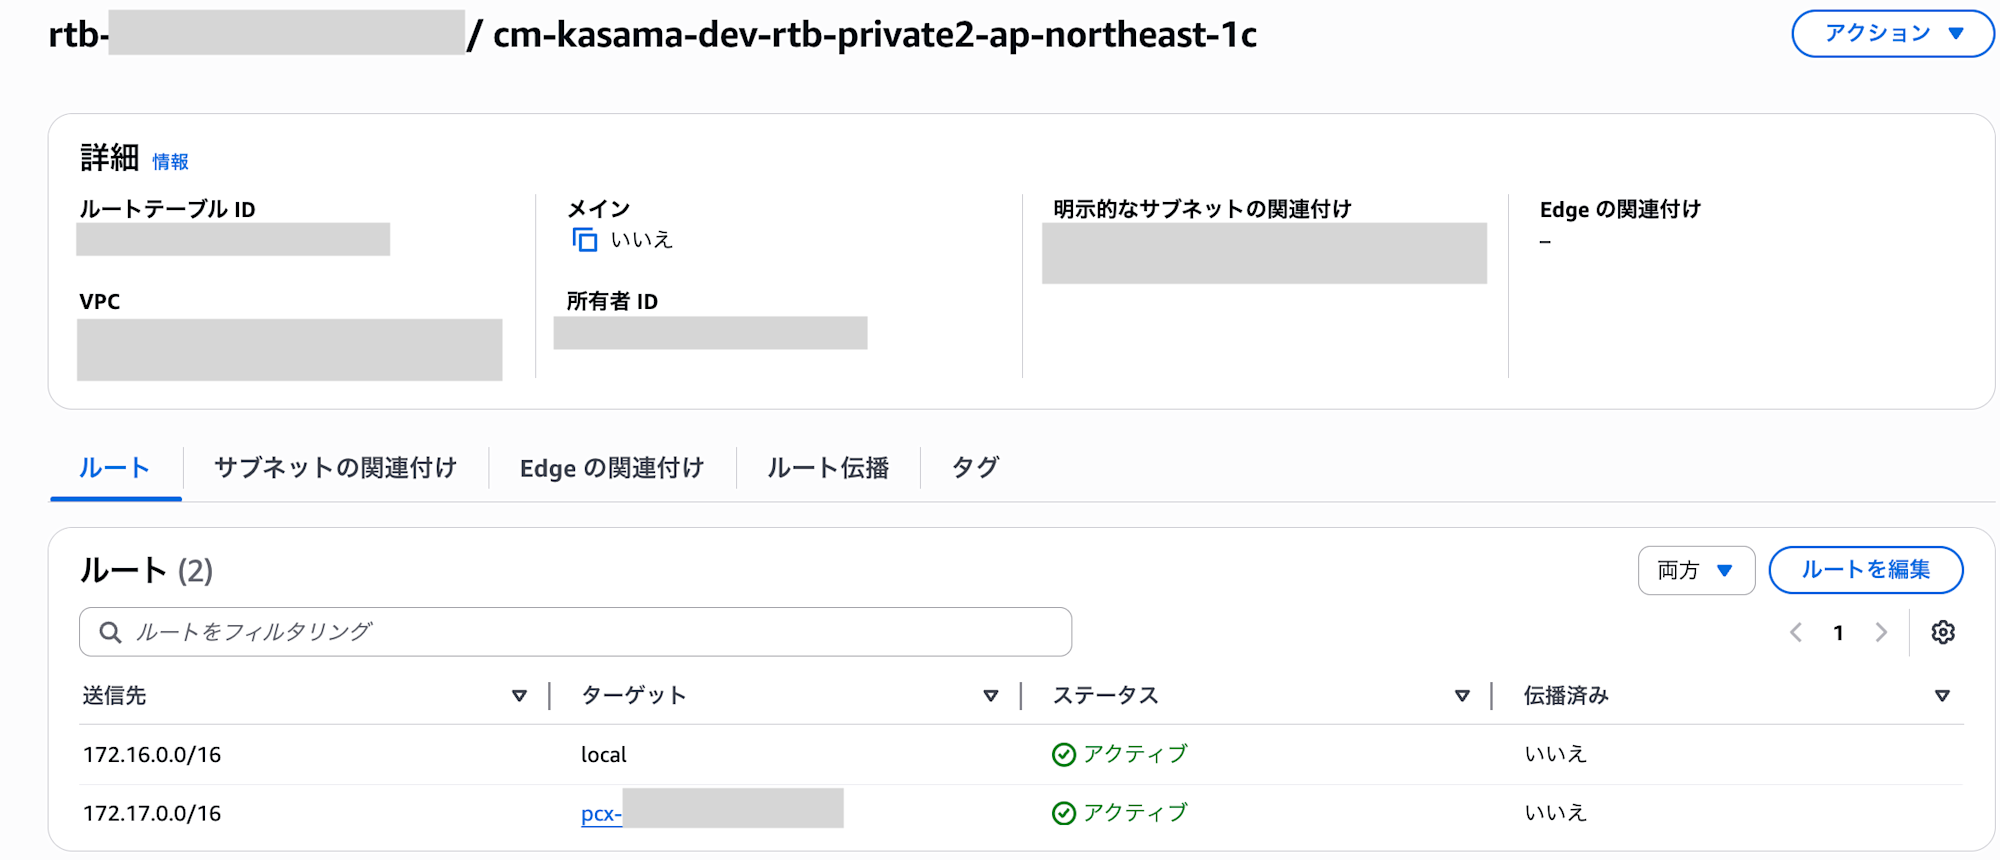
Next, add a route to the route tables of the subnets associated with RDS in the MySQL account.
- Destination: DMS account CIDR
- Target: VPC peering ID
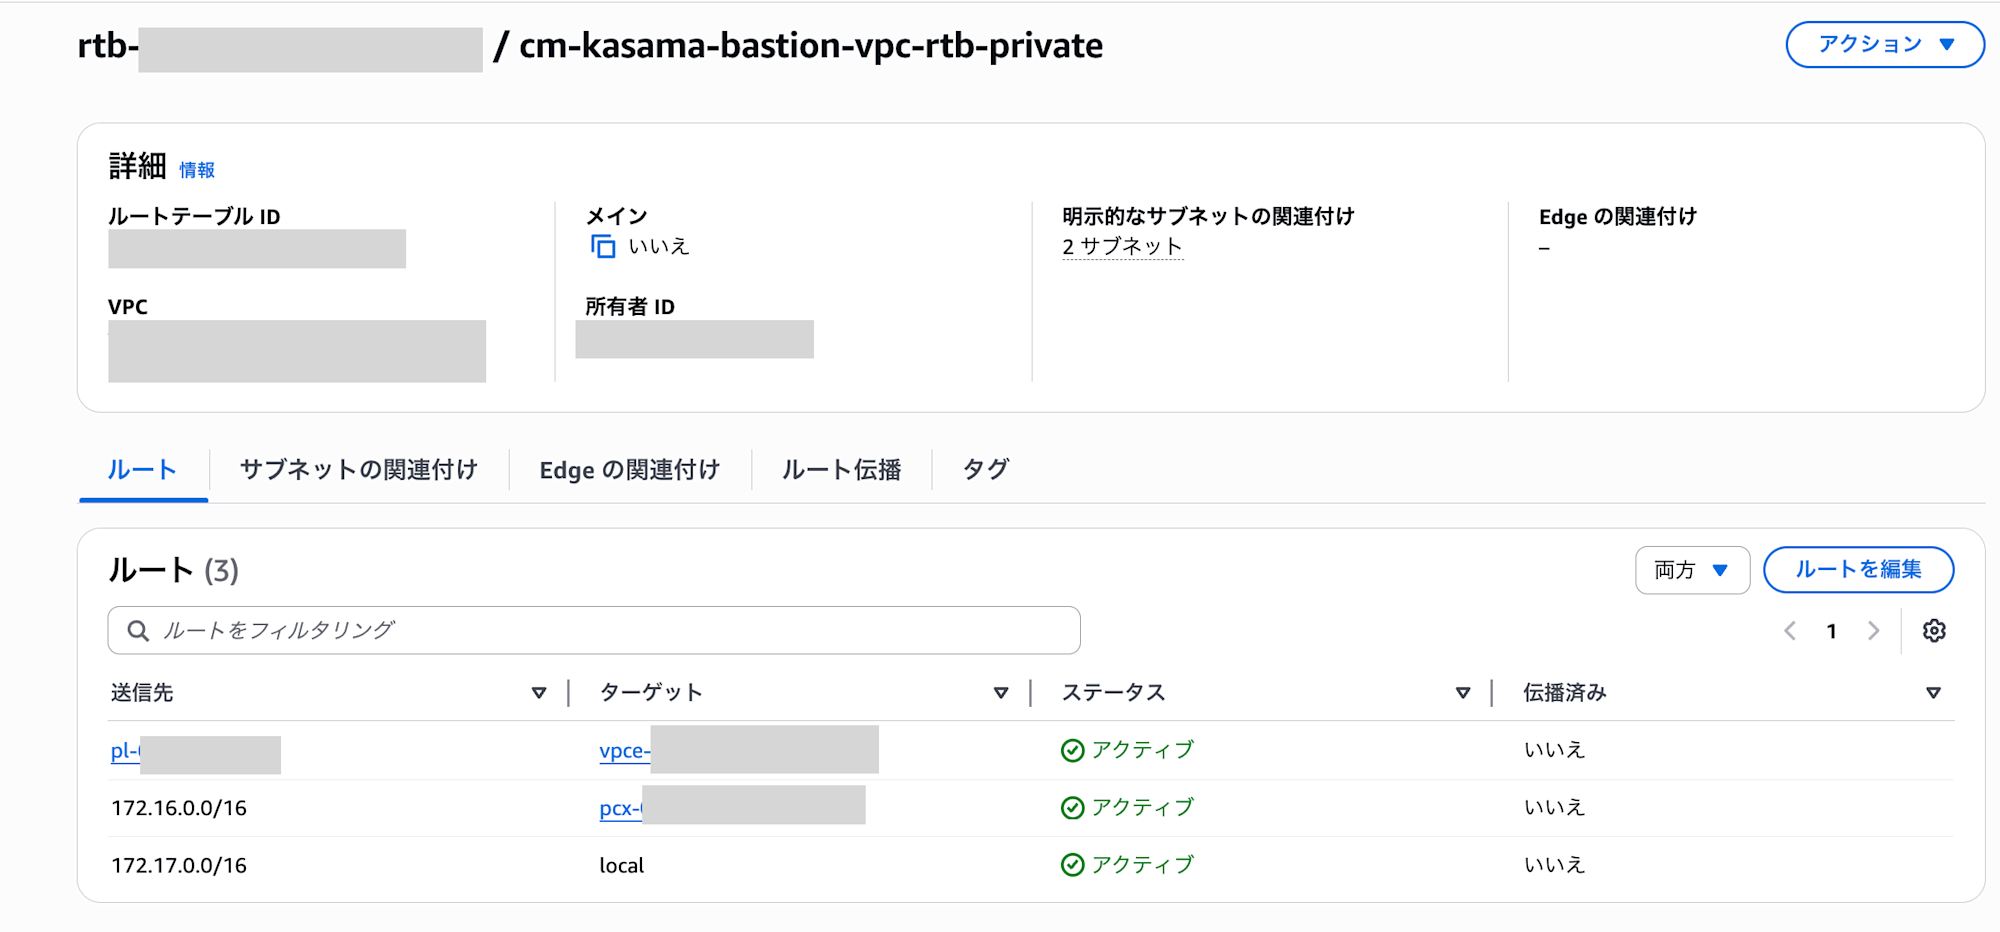
Similarly, in the DMS account, add a route to the route tables of the subnets associated with DMS.
- Destination: MySQL account CIDR
- Target: VPC peering ID
Authentication Configuration
Next, create and store the RDS password in Secret Manager in the DMS account.
Deploy DMS Resources
Before deploying, configure the following section in 54_dms_serverless/cdk/lib/dms-serverless-stack.ts for your environment:
// Values that need to be specified before deployment are managed here
const SUBNET_IDS = [
	"subnet-xxxxxxxxxxxxxxxxx", // First DMS subnet ID
	"subnet-yyyyyyyyyyyyyyyyy", // Second DMS subnet ID
];
const S3_BUCKET_NAME = "S3-Bucket-Name"; // S3 bucket name for DMS target
const SECRET_ARN =
	"arn:aws:secretsmanager:ap-northeast-1:xxxxxxxxxxxx:secret:ID"; // ARN of RDS secret in the DMS account
const DMS_SECURITY_GROUP_PREFIX_LIST_ID = "pl-"; // Prefix List ID of S3 VPC endpoint
const RDS_SERVER_NAME = "rds-arn"; // RDS endpoint name
Install dependencies in the directory containing package.json.
npm install
In the directory containing cdk.json, run the process to synthesize (convert) the CDK-defined resource code into an AWS CloudFormation template.
npx cdk synth --profile <YOUR_AWS_PROFILE>
In the same directory with cdk.json, run the deploy command. The --all option deploys all stacks included in the CDK application, and --require-approval never completely skips the approval dialog for deployments containing security-sensitive changes or IAM resource changes. "never" means deploying any changes without prior confirmation. I'm using this option for testing purposes, but it might not be necessary if you want to deploy carefully.
npx cdk deploy --all --require-approval never --profile <YOUR_AWS_PROFILE>
Final Configuration and Connection Test
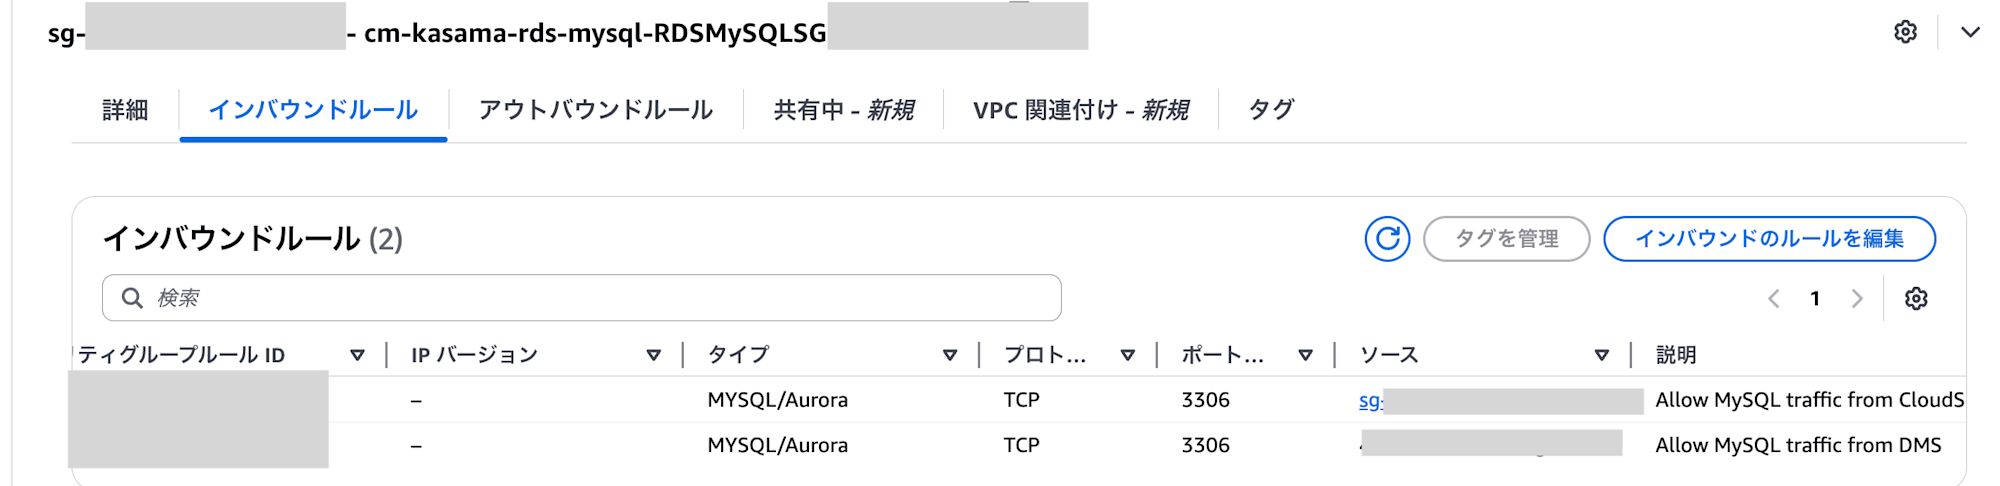
After successful deployment, add an inbound rule to the MySQL Security Group.
- Type: MYSQL
- Port: 3306
- Source: DMS SG ID
- Description: Allow MySQL traffic from DMS
I also manually created the S3 Bucket with the name specified in the CDK.
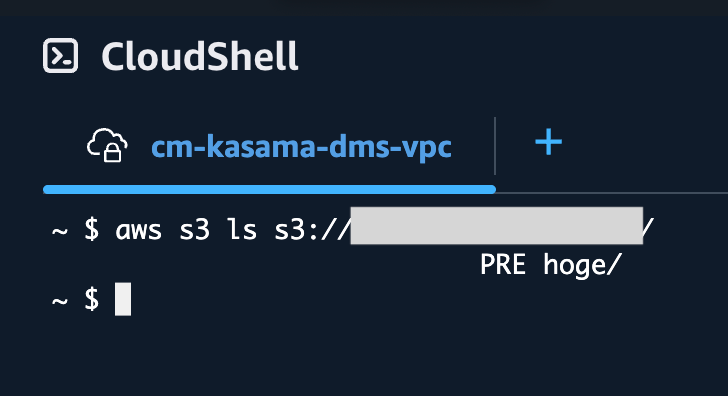
In the DMS account, I verified the connection using CloudShell with the created VPC, Subnet, and DMS SG.
The connection from the VPC endpoint to S3 is also working fine.
This completes the deployment work!
Testing
Now let's run DMS and check the cost consumption.
Running DMS
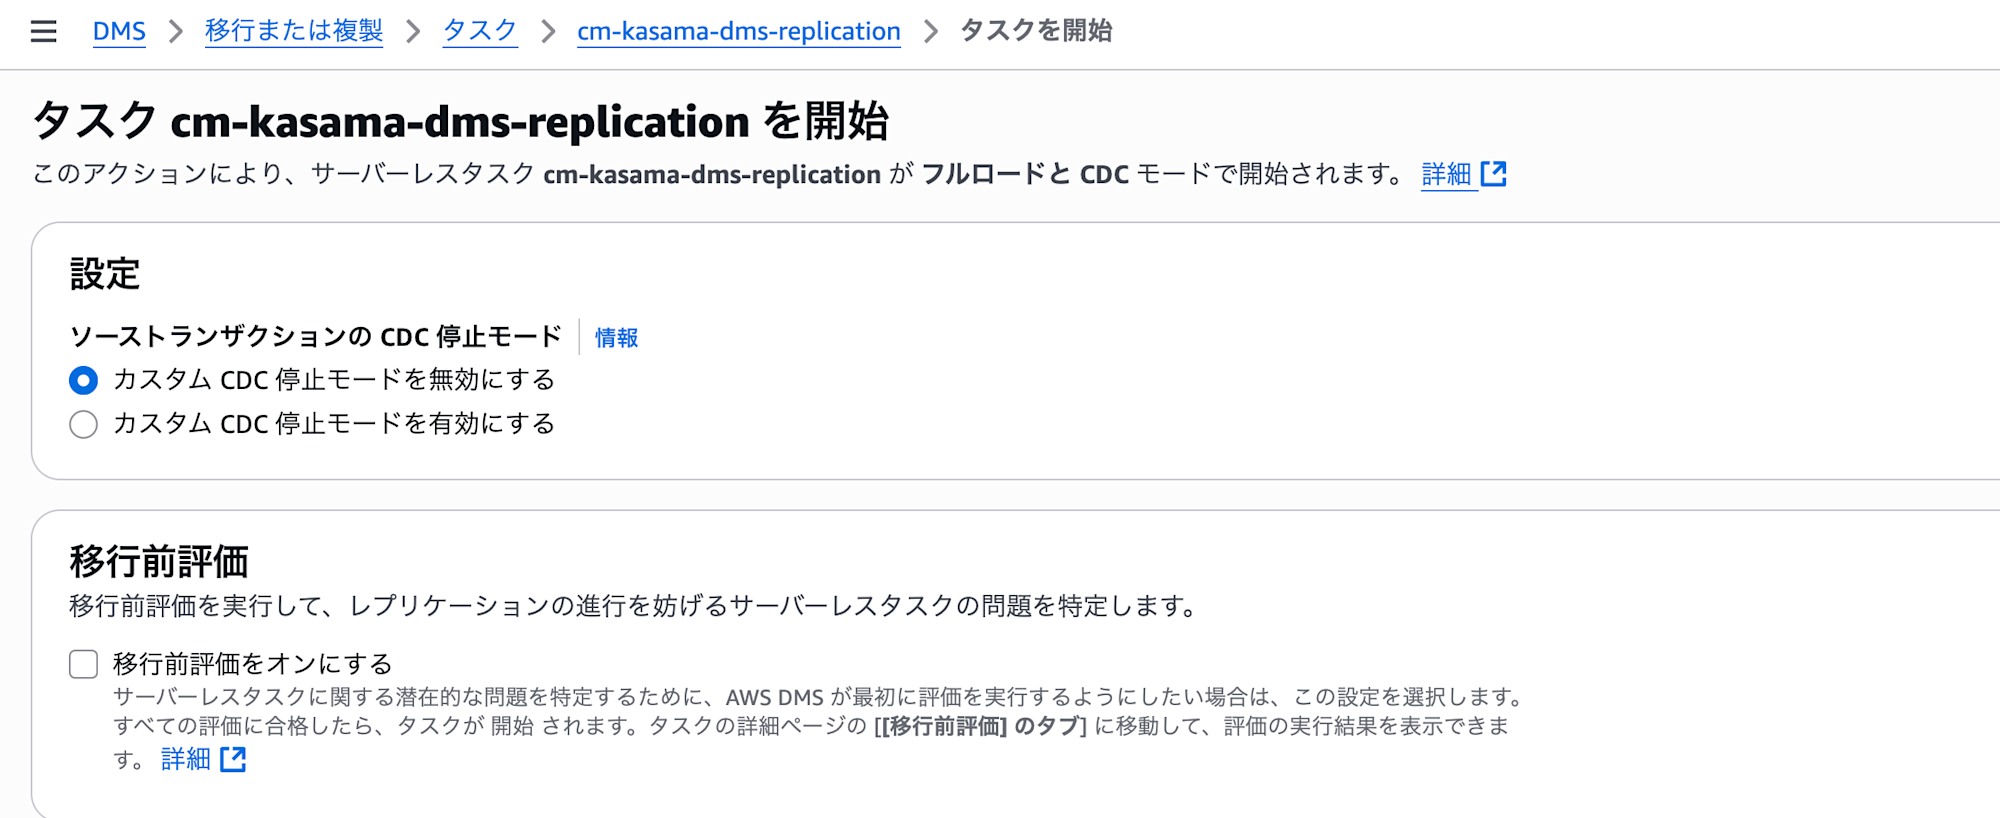
I ran DMS Serverless from the interface at 21:00 on 2025/06/15.
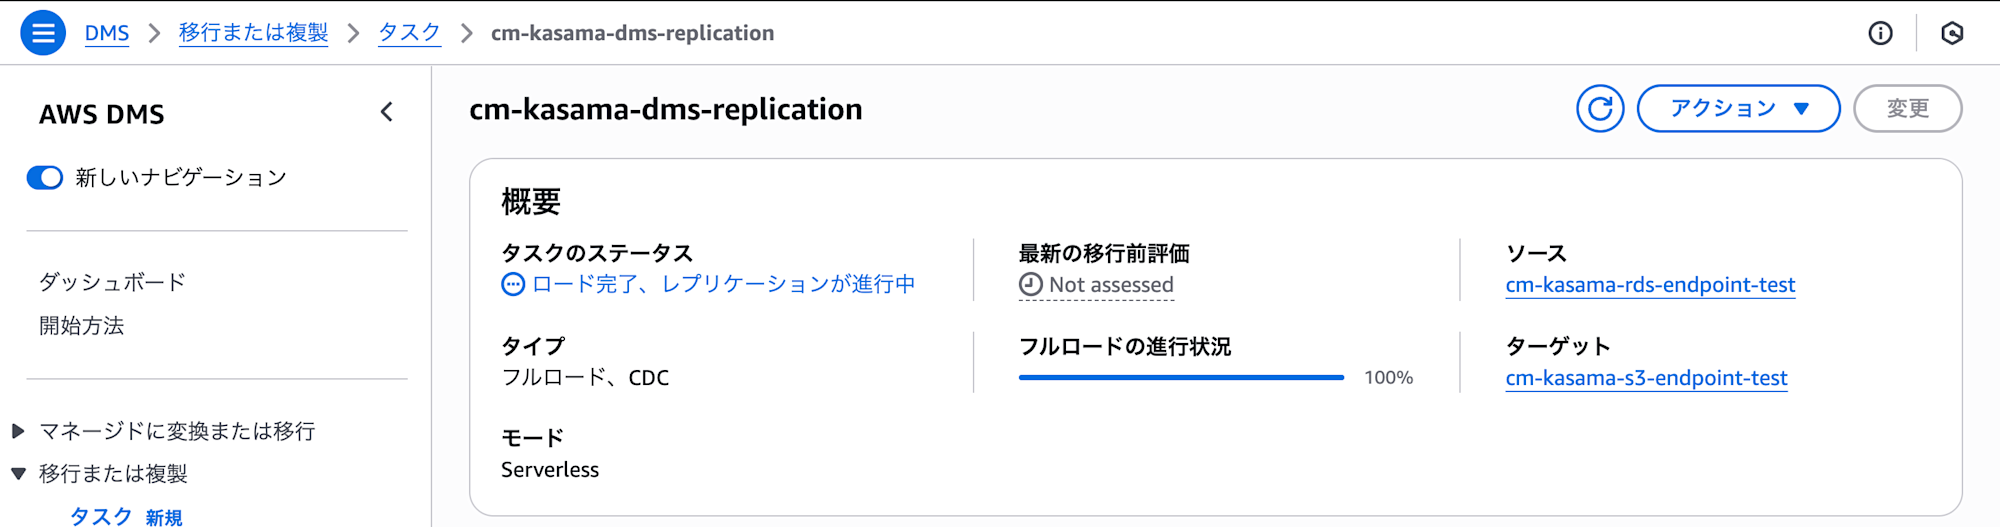
The load process completed successfully.
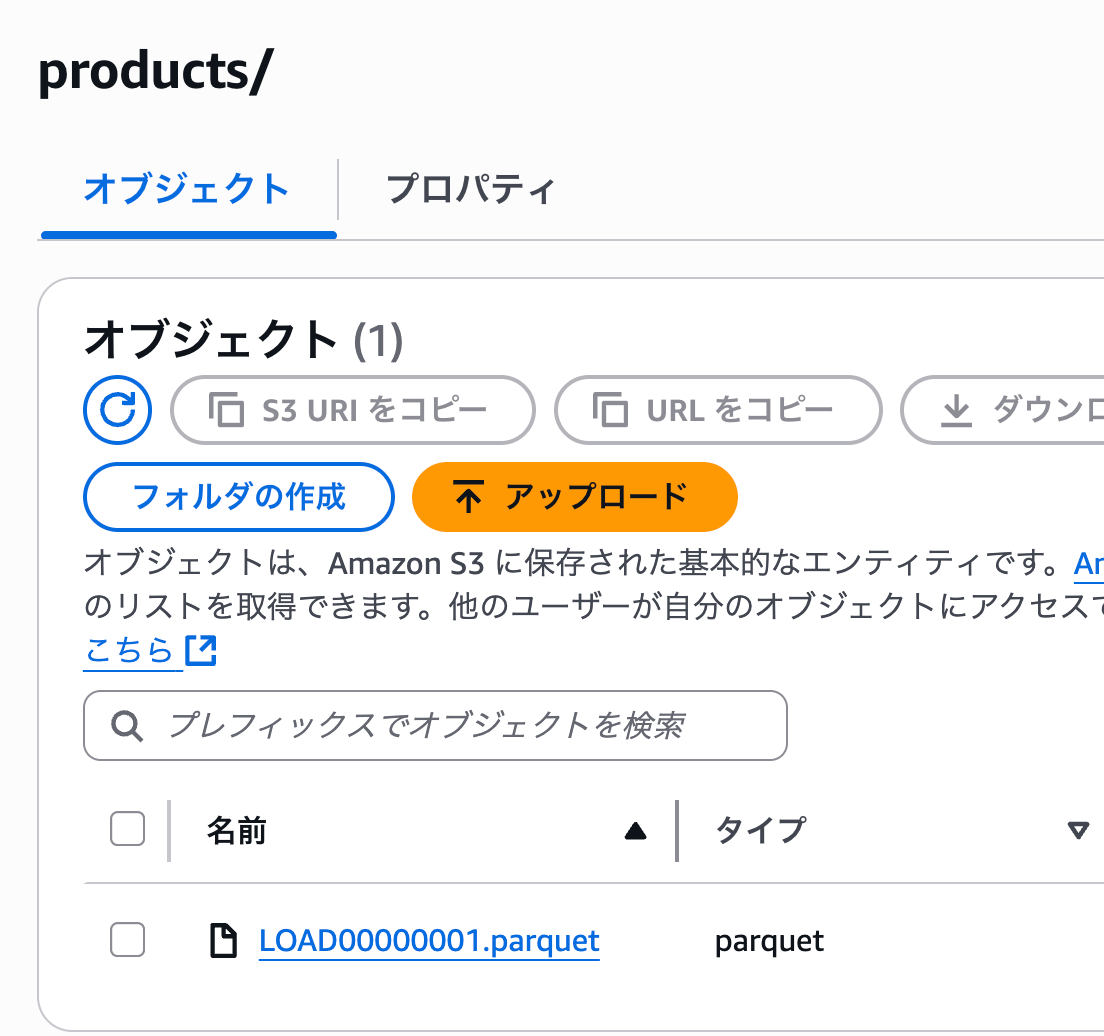
I confirmed that the data was loaded to S3.
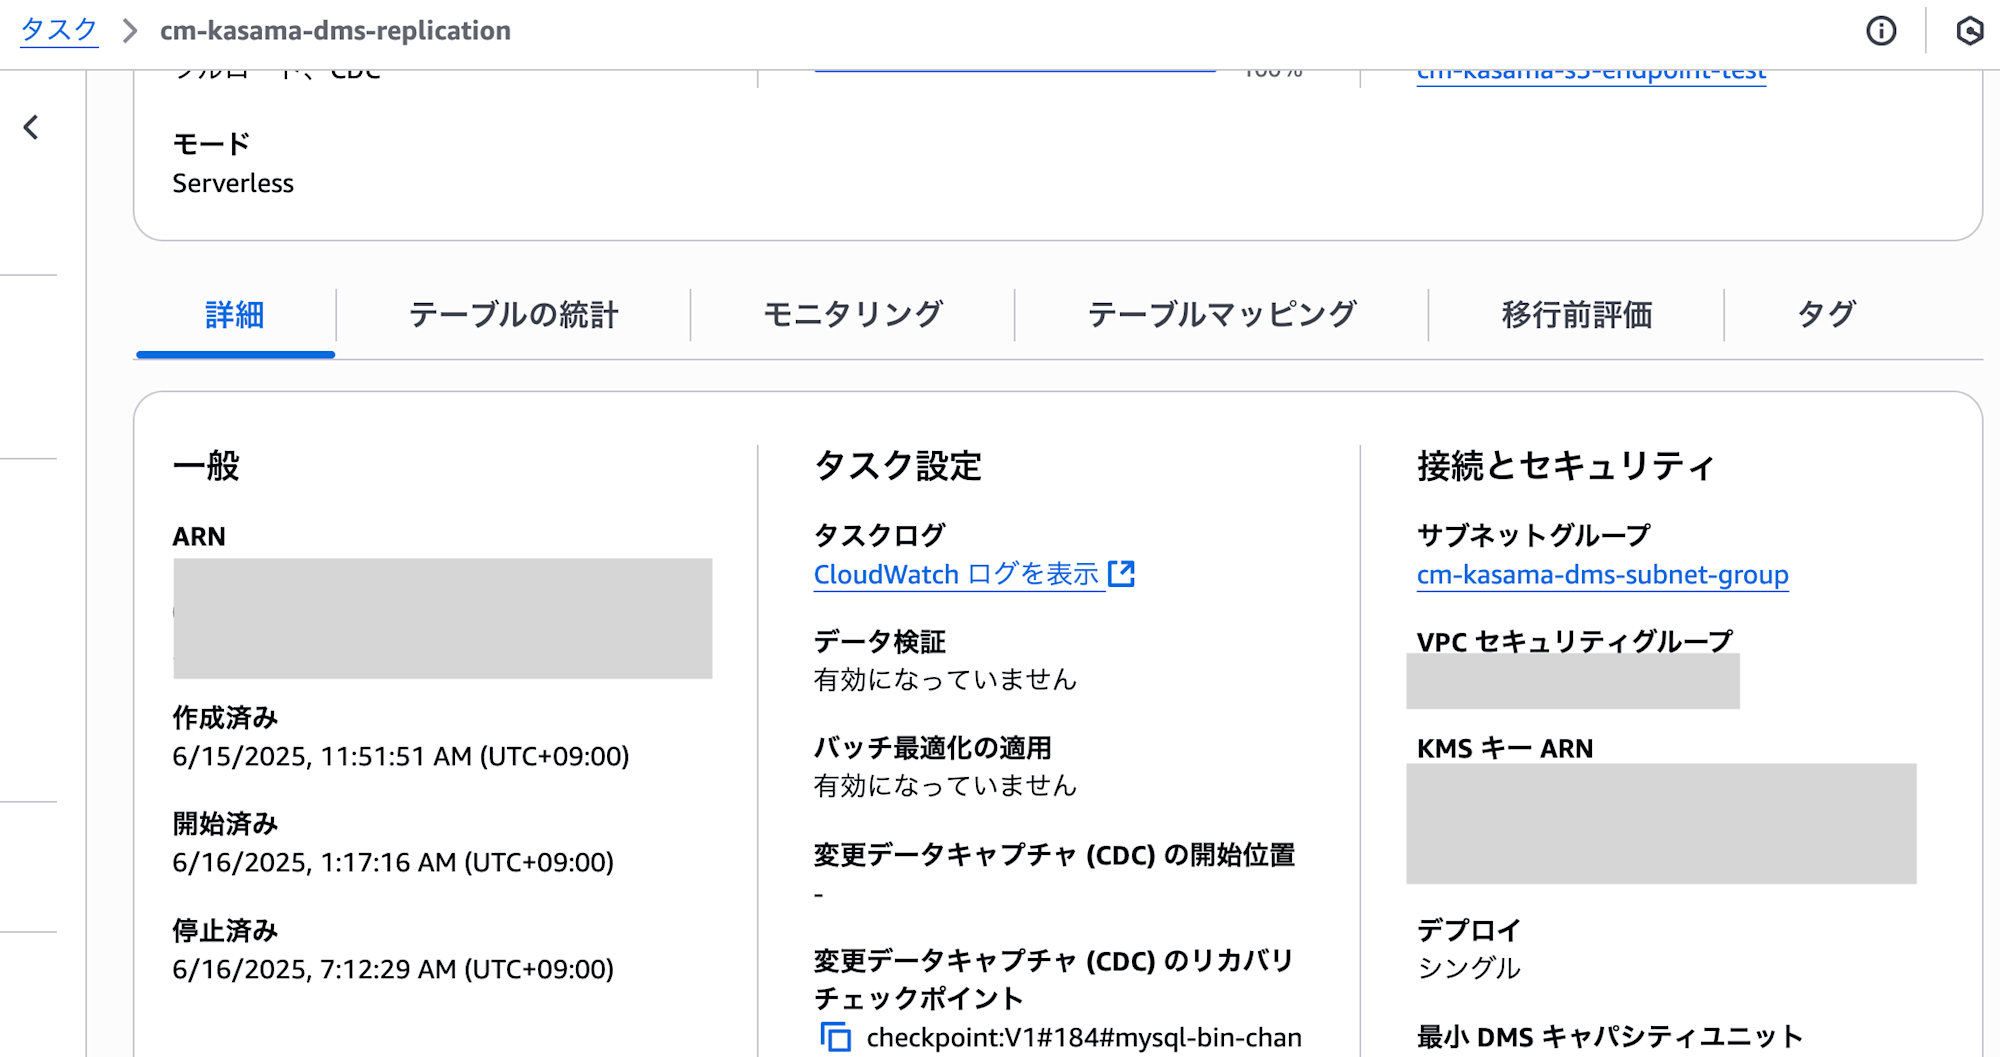
I also confirmed in CloudWatch Logs that it was in full load and CDC mode.
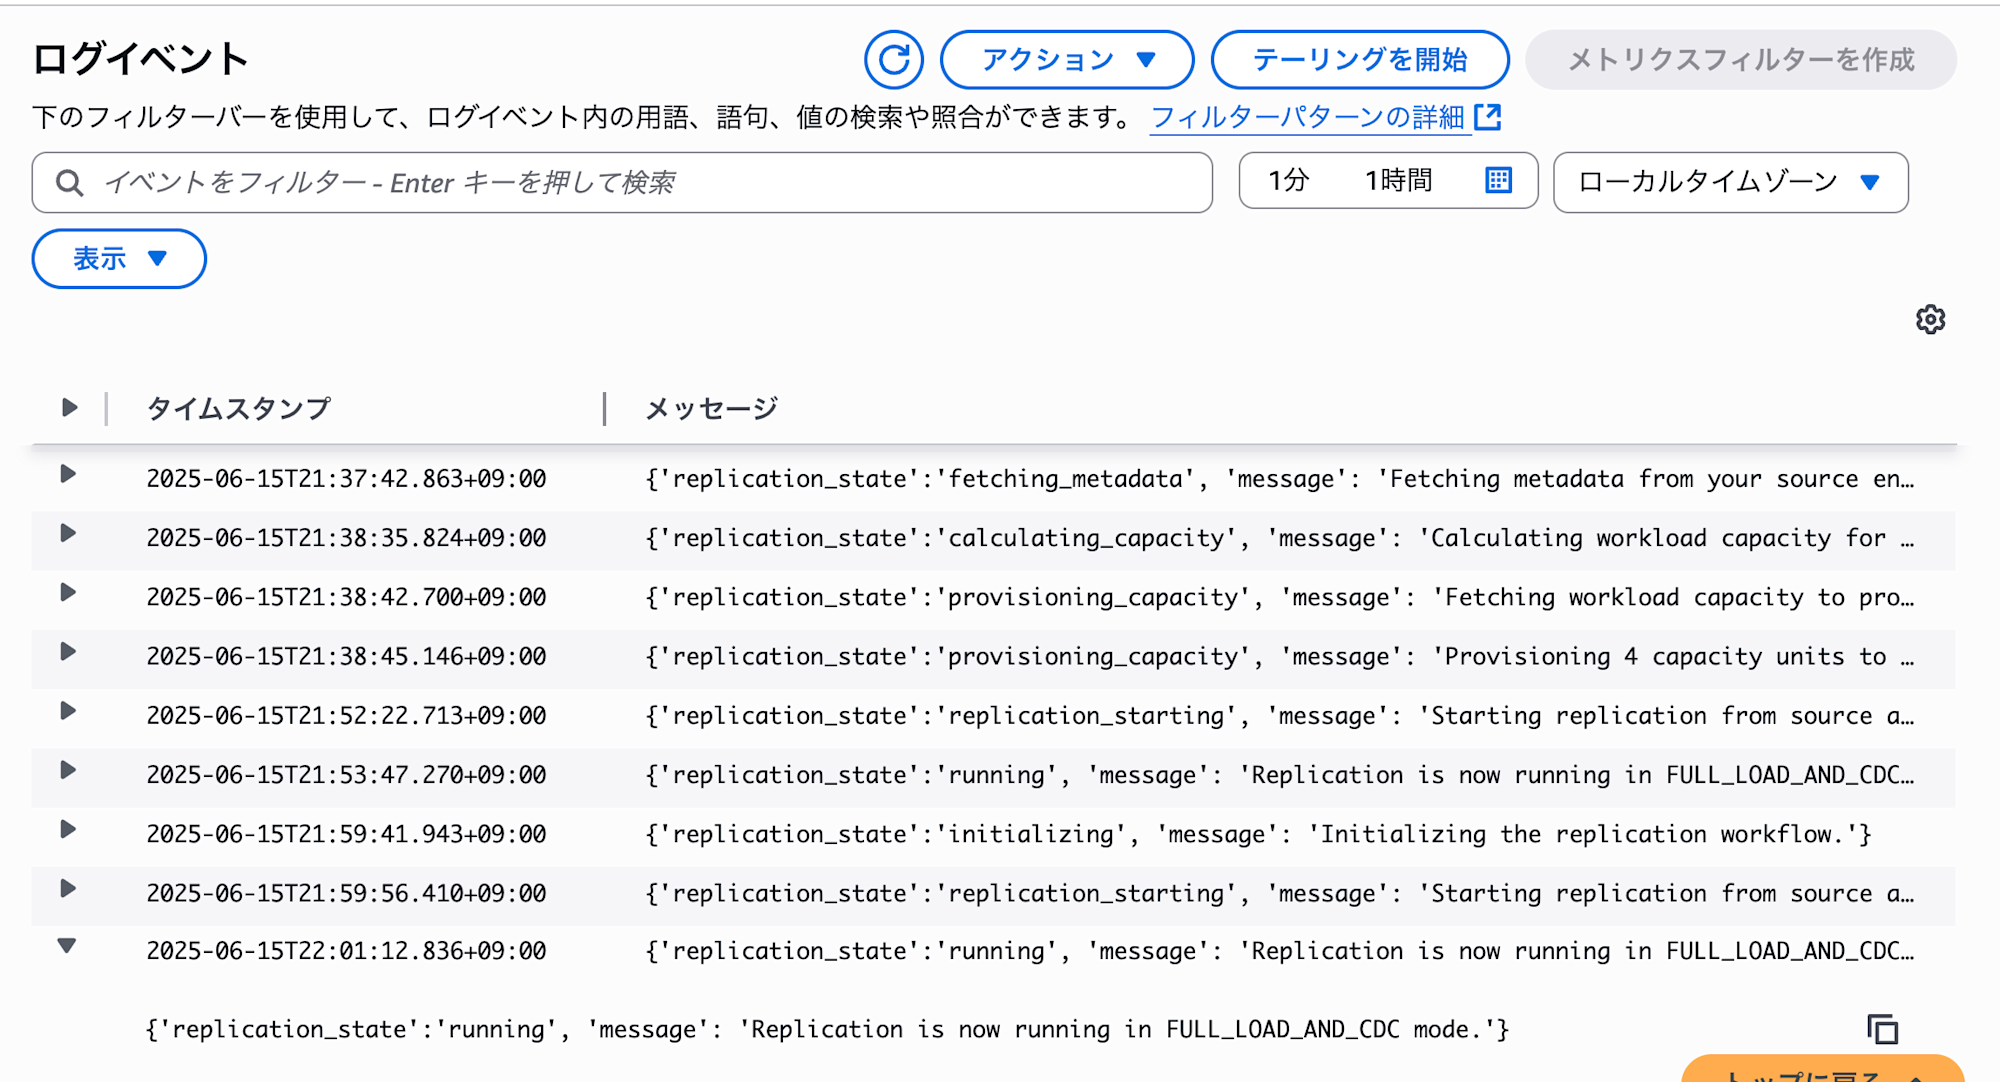
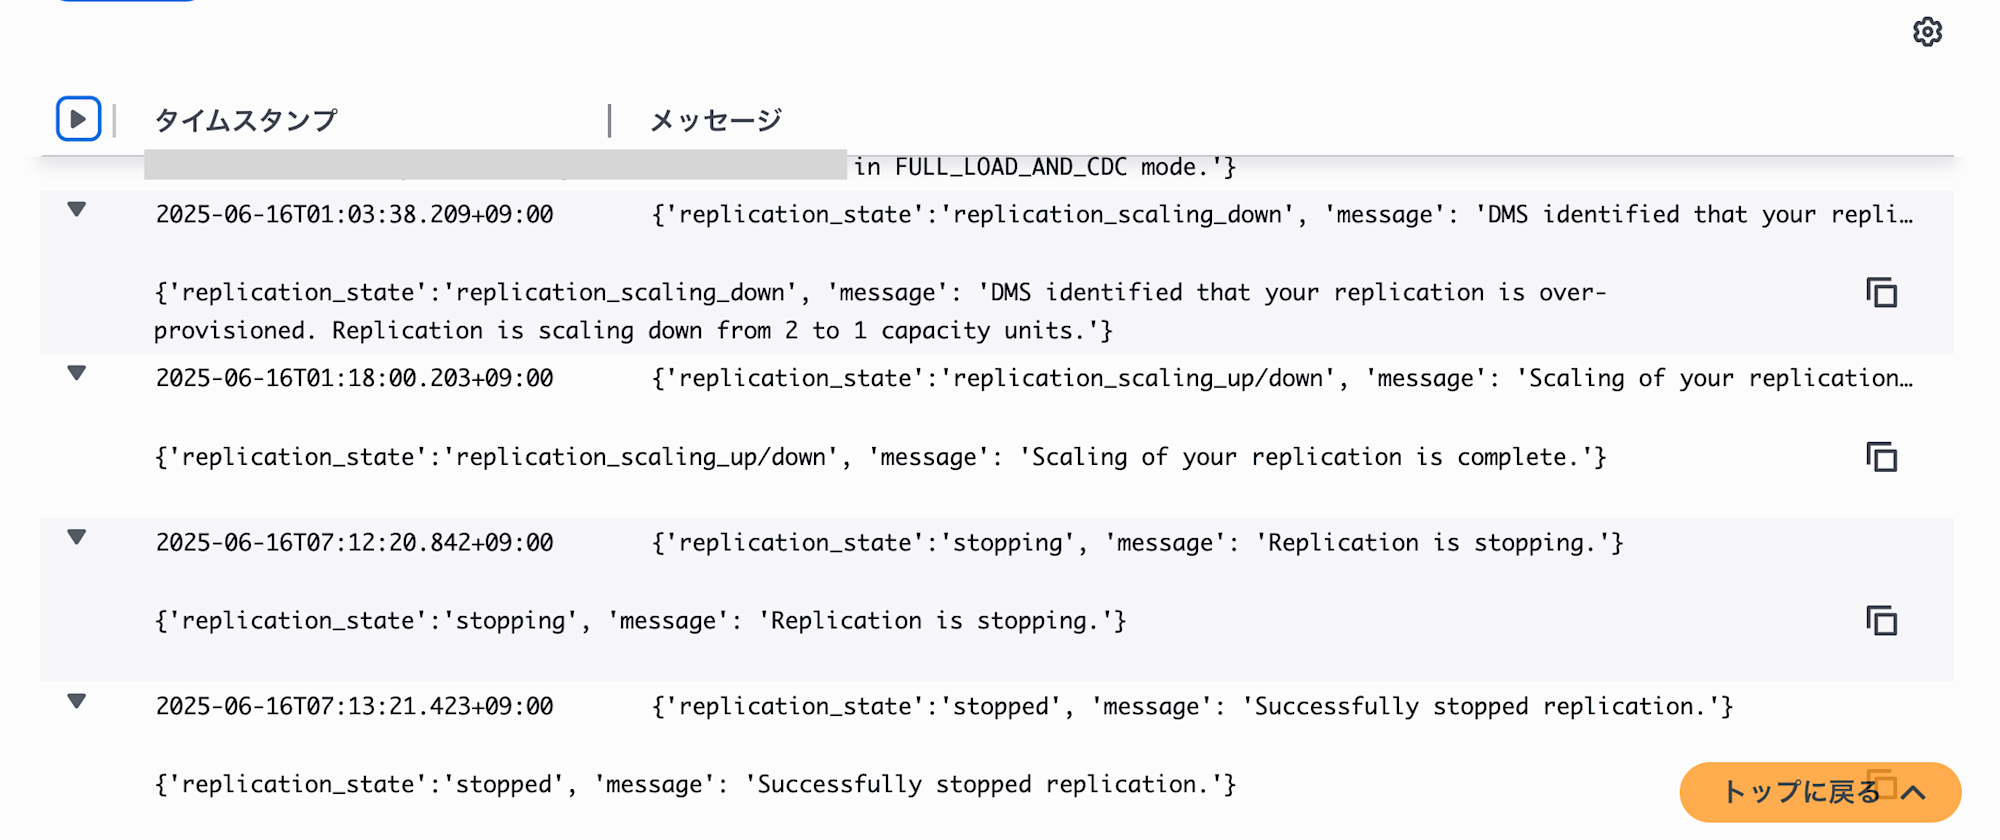
I manually stopped DMS at 07:12 on 2025/06/16.
Due to DMS Serverless's automatic scale-down, the DCU is at 1. I'd like to see how the cost evolves over several days in this state.
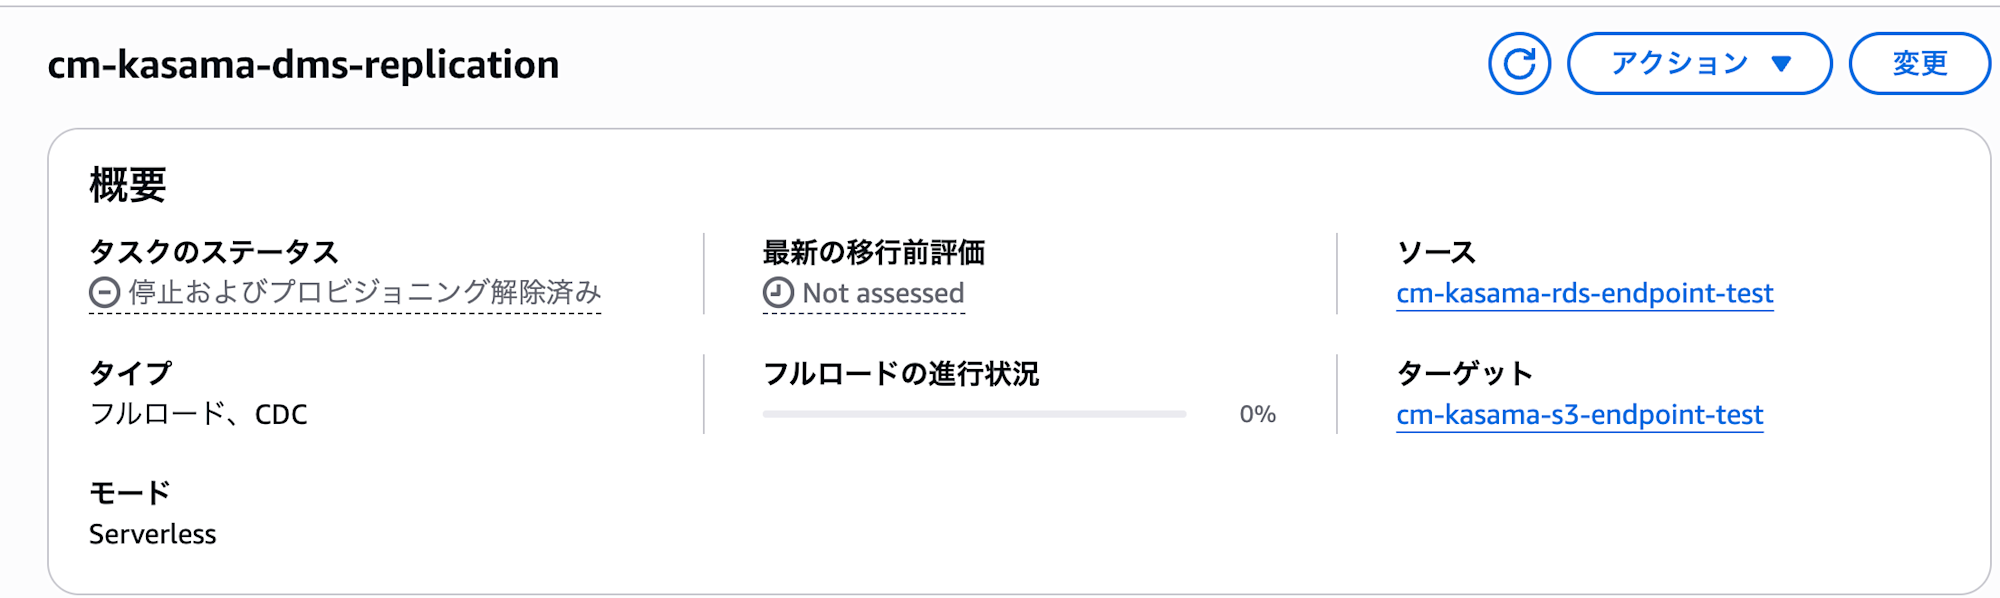
Verification
I checked again on 2025/6/21. The DMS Serverless provisioning has been released.
I checked the monthly costs. Costs were incurred between 6/15 - 6/17.
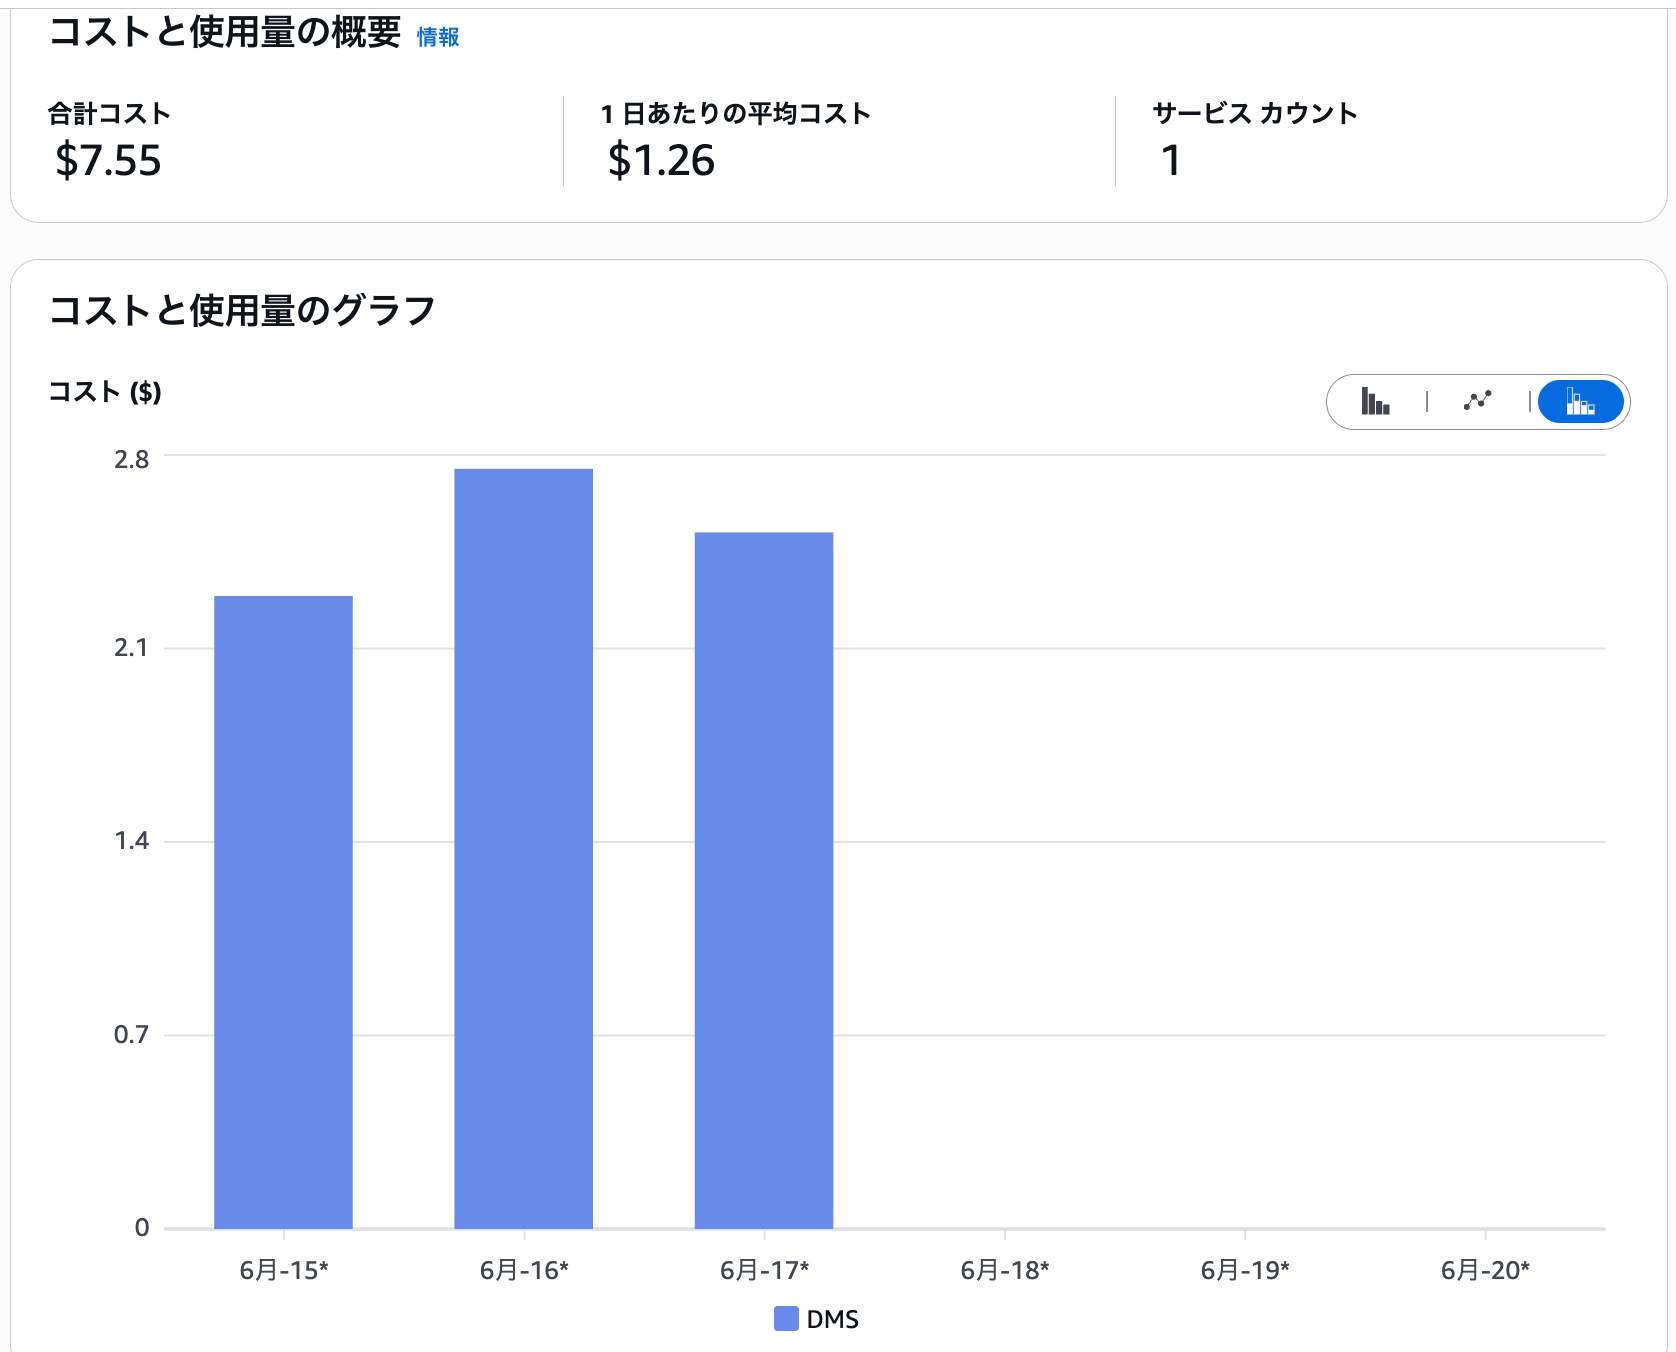
I checked the hourly display to see detailed trends.
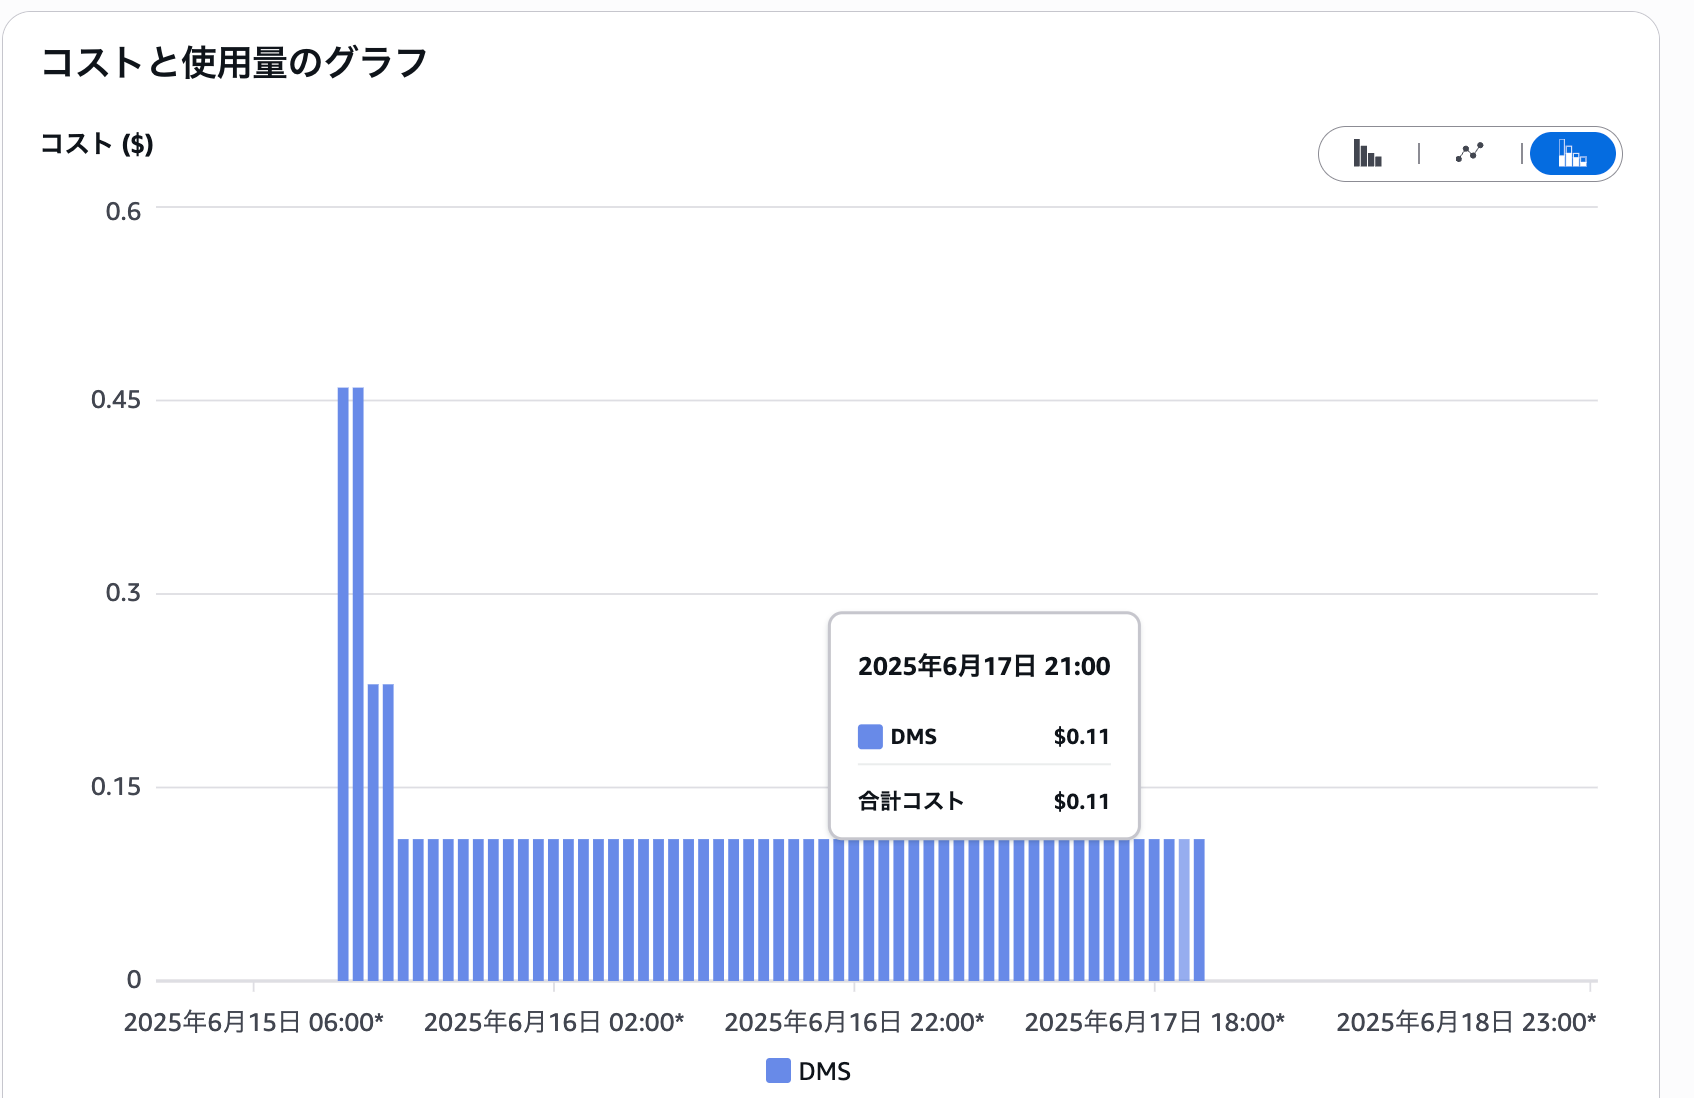
Since Cost Explorer shows UTC time, I created a table with JST times.
| Date/Time (JST) | Hourly Rate | Duration | DCU |
|---|---|---|---|
| 2025/6/15 21:00 - 23:00 | $0.46/h | 2 hours | 4 DCU |
| 2025/6/15 23:00 - 2025/6/16 01:00 | $0.23/h | 2 hours | 2 DCU |
| 2025/6/16 01:00 - 2025/6/18 08:00 | $0.11/h | 55 hours | 1 DCU |
I referred to the official page for hourly rates and DCU mapping in the Tokyo region.
| DCU | Hourly Rate |
|---|---|
| 1 | $0.114 |
| 2 | $0.229 |
| 4 | $0.458 |
DMS stop time 2025/6/16 07:12 (JST) - Billing end time 2025/6/18 08:00 (JST) = approximately 48 hours and 48 minutes, which is close to the official "48 hours". Since Cost Explorer doesn't show minute-by-minute cost consumption, this is an approximate calculation.
Conclusion
I thought that with "Serverless" in the name, there would be no charges when stopped, but I learned that billing continues even when the Status is stopped if it remains in a Provisioned state.