
I tried the full stack template "FAST" for Amazon Bedrock AgentCore
This page has been translated by machine translation. View original
Introduction
Hello, I'm Jinno from the Consulting Department, a big fan of supermarkets.
Recently, AWS released FAST (Fullstack AgentCore Solution Template), which is a fullstack starter template. It allows you to deploy an agent application with a user interface, combining Amplify, AgentCore Runtime, Gateway, Memory, and Code Interpreter, all leveraging CDK.
In this article, I'd like to actually deploy FAST and try it out!
FAST
FAST is a starter template for quickly building fullstack agent applications using Amazon Bedrock AgentCore.
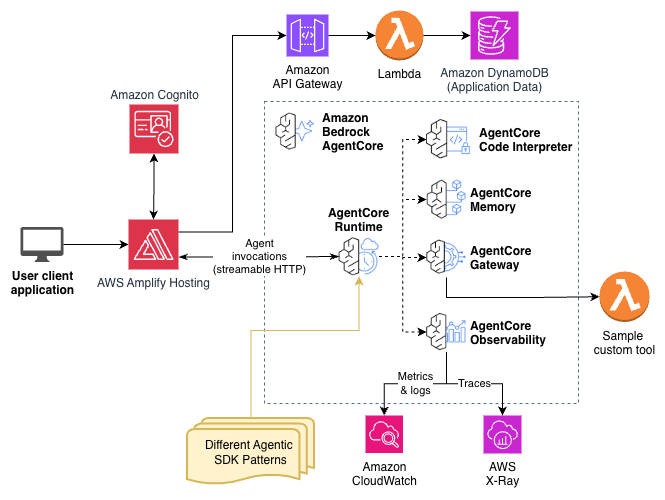
Looking at the architecture diagram, it seems to have a serverless-focused front and backend with the full set of AgentCore, ready to use right away. It's a good configuration where maintenance costs will be minimal when not in use.
It could also serve as a reference when creating a similar configuration yourself. You could also consider customizing based on this architecture.
Architecture
The backend is deployed as a single stack using CDK, which creates Cognito User Pool, AgentCore Runtime / Gateway / Memory, ECR, DynamoDB, API Gateway, and more in one go. The frontend is configured to be deployed separately to Amplify Hosting.
For authentication, there's a configuration where one Cognito User Pool contains two clients: one for user login (Authorization Code Flow) and one for M2M authentication (Client Credentials Flow).
It's nice not having to implement all of this yourself.
Difference from Starter Toolkit create Command
While the Starter Toolkit's create command can also create an environment including IaC code, the main difference is the presence of a UI. With FAST, it's great to be able to actually see the agent's behavior in Amplify.
For more information about the environment created with the create command, please refer to the blog post I wrote:
Prerequisites
Here's the environment I used for this verification:
| Item | Version / Value |
|---|---|
| OS | macOS 15.7 |
| Node.js | v25.5.0 |
| Python | 3.13.11 |
| AWS CDK CLI | 2.1105.0 |
| Docker | 29.1.5 |
| AWS Region | us-west-2 |
| Agent Pattern | strands-single-agent |
Setup
Clone the Repository
First, let's clone the repository.
git clone https://github.com/awslabs/fullstack-solution-template-for-agentcore.git
cd fullstack-solution-template-for-agentcore
Check Project Structure
The cloned repository has the following structure:
fullstack-solution-template-for-agentcore/
├── frontend/              # React frontend
├── infra-cdk/             # CDK infrastructure code
├── patterns/              # Agent implementation patterns
│   ├── strands-single-agent/
│   └── langgraph-single-agent/
├── tools/                 # Reusable tools (Lambda functions, etc.)
├── gateway/               # Gateway utilities
├── scripts/               # Deployment and test scripts
├── docs/                  # Documentation
├── tests/                 # Test suite
└── vibe-context/          # Context for AI assistants
The patterns/ directory contains agent implementation patterns, with strands-single-agent and langgraph-single-agent provided. We'll use the default strands-single-agent for this article.
Edit Configuration File
Let's edit infra-cdk/config.yaml.
stack_name_base: FAST-stack

# Optional: Set to automatically create an admin user and email credentials
# If not provided, you'll need to manually create users via AWS Console
admin_user_email: null # Example: admin@example.com

backend:
  pattern: strands-single-agent # Available patterns: strands-single-agent, langgraph-single-agent
  deployment_type: docker # Available deployment types: docker (default), zip
The key points are:
| Configuration Item | Value | Description |
|---|---|---|
| stack_name_base | FAST-stack | Prefix for CloudFormation stack name |
| admin_user_email | null | Admin user email. If set, a Cognito user is automatically created |
| backend.pattern | strands-single-agent | Agent pattern to use |
| backend.deployment_type | docker | Deployment type. Choose docker or zip |
Setting admin_user_email will automatically create a Cognito user during deployment and send a temporary password by email. I set my own email address for this article.
Deployment
Install CDK Dependencies
cd infra-cdk
pnpm install
CDK Bootstrap (First Time Only)
If you're using CDK for the first time in the target account/region, run bootstrap:
cdk bootstrap
Deploy Backend
Deploy the backend stack with CDK:
pnpm dlx cdk deploy
This command creates the following resources:
- Cognito User Pool (user authentication)
- Pushing the agent container image to an ECR repository
- AgentCore Runtime configuration
- AgentCore Gateway configuration
- AgentCore Memory
- CloudFront distribution settings
- Lambda functions (for Gateway tools)
- DynamoDB tables
The deployment took about 5 and a half minutes.
FAST-stack: deploying... [1/1]
FAST-stack: creating CloudFormation changeset...

 ✅  FAST-stack

✨  Deployment time: 329.11s

Outputs:
FAST-stack.AmplifyAppId = dXXXXXXXXXXX
FAST-stack.AmplifyConsoleUrl = https://console.aws.amazon.com/amplify/apps/dXXXXXXXXXXX
FAST-stack.AmplifyUrl = https://main.dXXXXXXXXXXX.amplifyapp.com
FAST-stack.CognitoClientId = XXXXXXXXXXXXXXXXXXXXXXXXXX
FAST-stack.CognitoDomain = fast-stack-xxxxxxxxxxxx-us-west-2.auth.us-west-2.amazoncognito.com
FAST-stack.CognitoUserPoolId = us-west-2_XXXXXXXXX
FAST-stack.FeedbackApiUrl = https://xxxxxxxxxx.execute-api.us-west-2.amazonaws.com/prod/
FAST-stack.MemoryArn = arn:aws:bedrock-agentcore:us-west-2:xxxxxxxxxxxx:memory/XXXXXXXXXXXXX
FAST-stack.RuntimeArn = arn:aws:bedrock-agentcore:us-west-2:xxxxxxxxxxxx:runtime/XXXXXXXXXXXXX
FAST-stack.StagingBucketName = fast-stack-xxxxx-stagingbucket-xxxxxxxxxxxx
Stack ARN:
arn:aws:cloudformation:us-west-2:xxxxxxxxxxxx:stack/FAST-stack/xxxxxxxx-xxxx-xxxx-xxxx-xxxxxxxxxxxx

✨  Total time: 335.69s
Deploy Frontend
After deploying the backend, deploy the frontend:
cd ..
python scripts/deploy-frontend.py
This script automatically:
- Generates
aws-exports.json(Cognito authentication settings) from CDK outputs - Installs npm packages
- Builds the frontend
- Packages the build artifacts into a zip and uploads to the S3 staging bucket
- Triggers Amplify deployment with
aws amplify start-deployment
Since the Amplify app and staging bucket were already created by CDK, this script only handles building and deploying the source code.
When deployment completes, the Amplify URL is output:
ℹ S3 Package: s3://fast-stack-xxxxx-stagingbucket-xxxxxxxxxxxx/amplify-deploy-XXXXXXXXXX.zip
ℹ Console: https://console.aws.amazon.com/amplify/apps
ℹ App URL: https://main.dXXXXXXXXXXX.amplifyapp.com
ℹ Cleaned up /path/to/fullstack-solution-template-for-agentcore/frontend/amplify-deploy.zip
You can access the application at this URL!
Testing
Login
When you access the Amplify URL, the Cognito login screen appears.

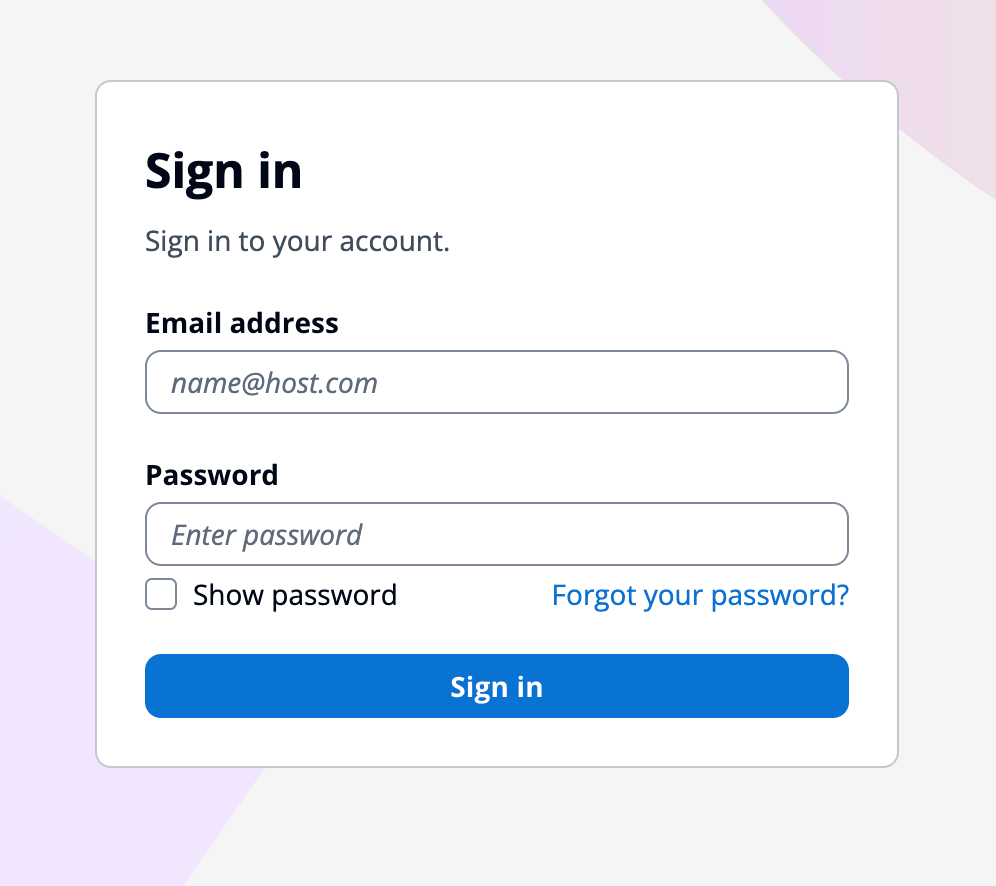
Log in with the email address you entered in the yaml and the initial password you received during deployment.
You'll be prompted to change your password on the first login, so set a new password.
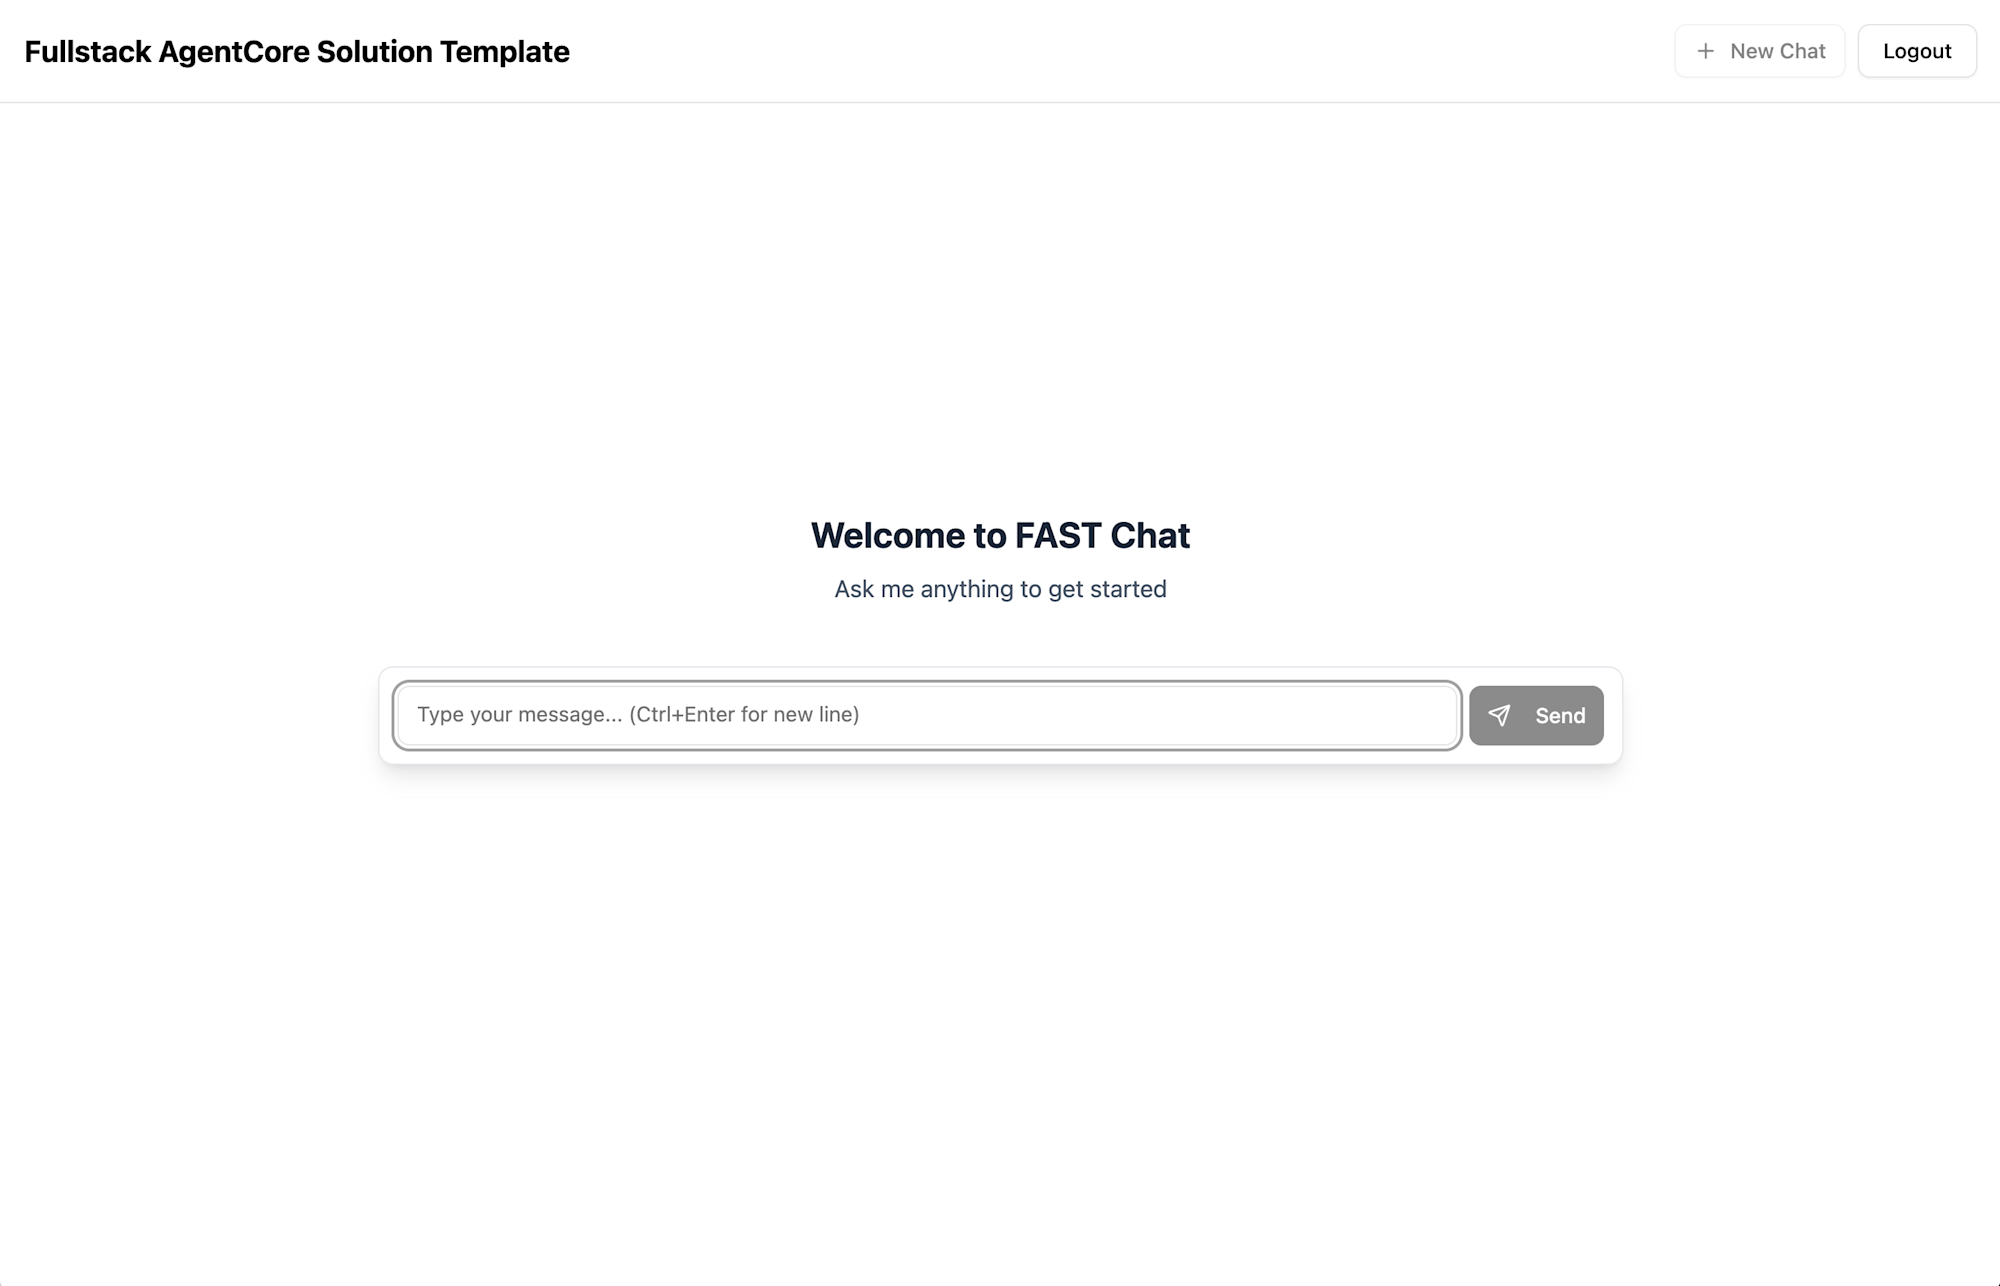
Once logged in, the chat UI appears! It's a simple interface.
Conversation with the Agent
When you send a message in the chat interface, the Strands agent running on AgentCore Runtime responds.
Let's start with a greeting. I'll say "hello."

The agent returned a greeting, explained its role, and mentioned the tools it has available:
- MCP tools via AgentCore Gateway (text analysis tool)
- Code Interpreter (safe execution of Python code)
The text analysis tool is a demo tool implemented as a Lambda function called via AgentCore Gateway, which counts words and analyzes character frequency in input text. Let's try this first.
I'll simply ask:
Please analyze the sentence "The quick brown fox jumps over the lazy dog".
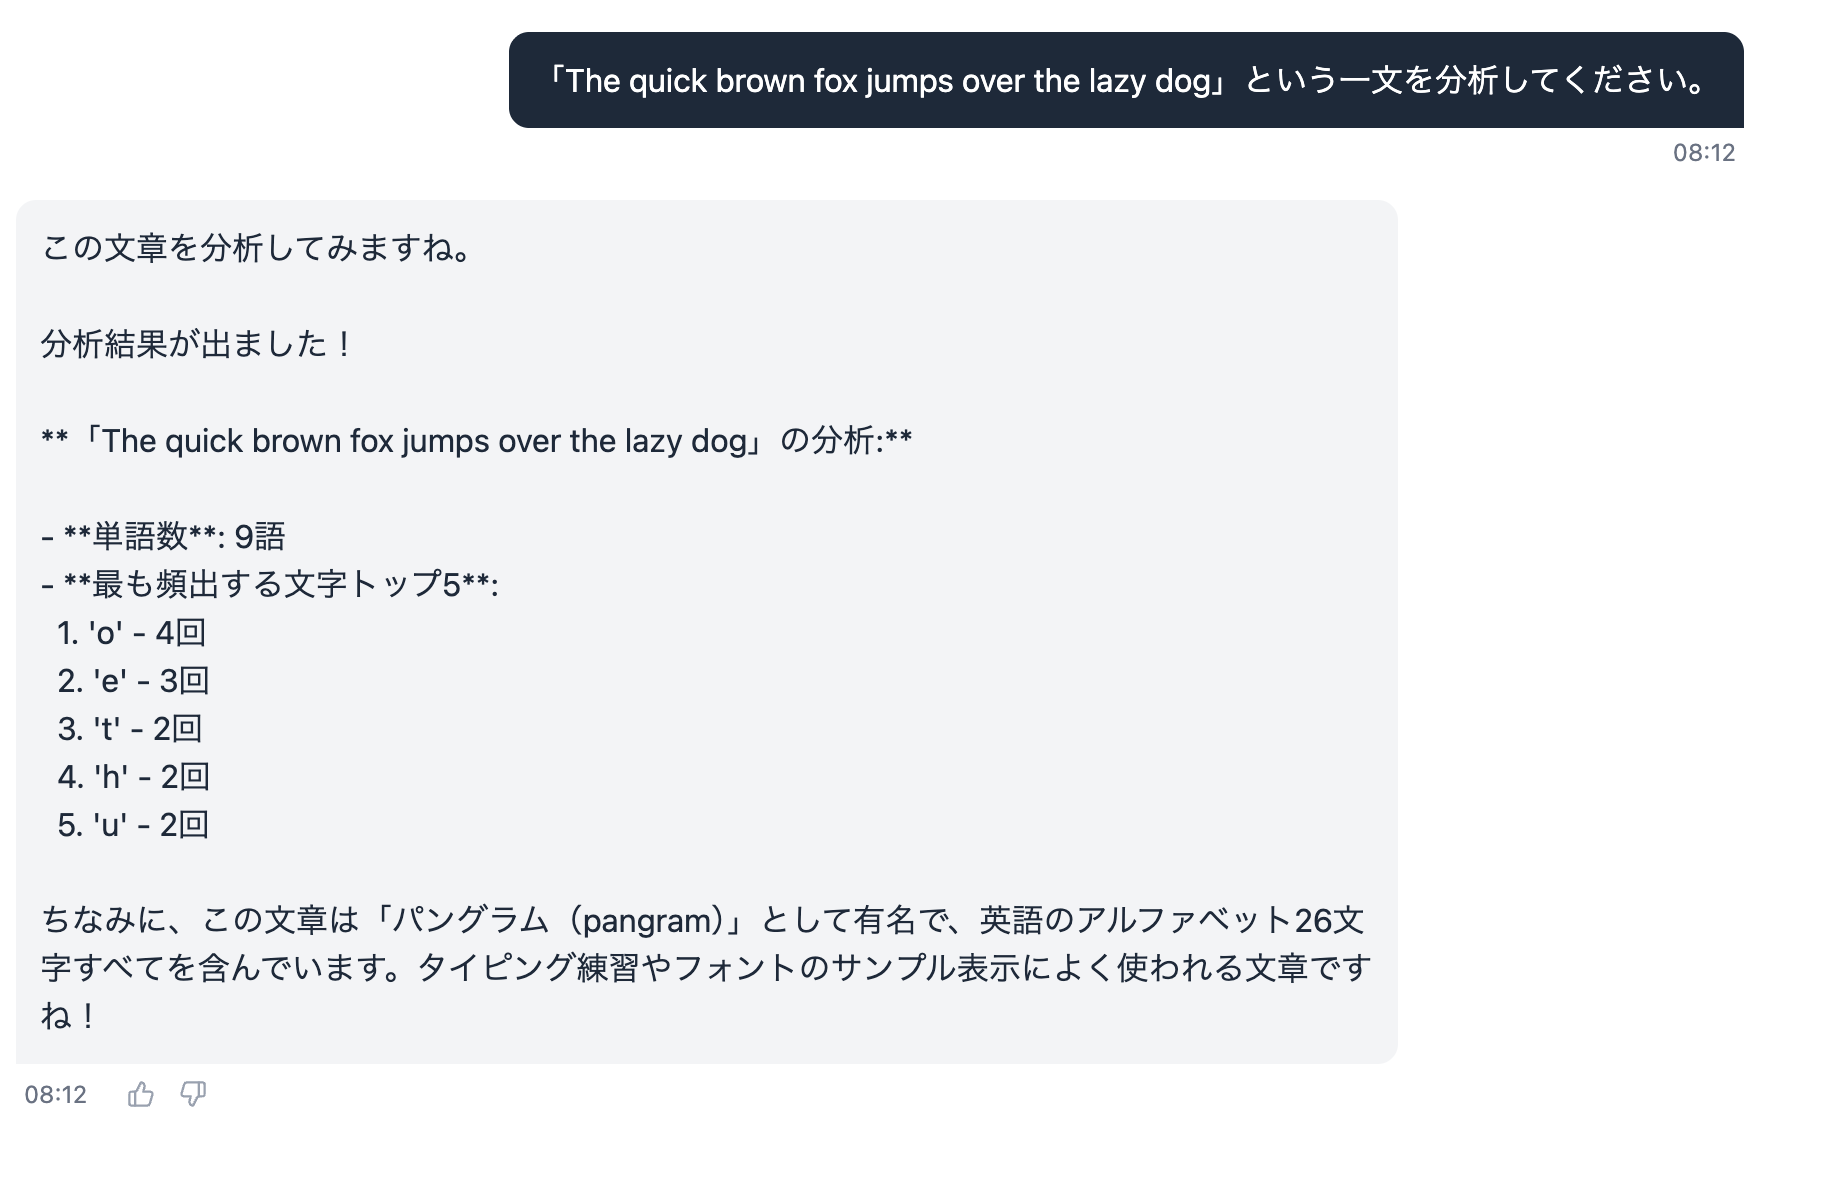
It analyzed it! Let's check in Observability if the Gateway was used.

It looks like the tool was used. Just to be sure, let's also check the logs of the Lambda function specified as the Gateway target.

It's working properly!
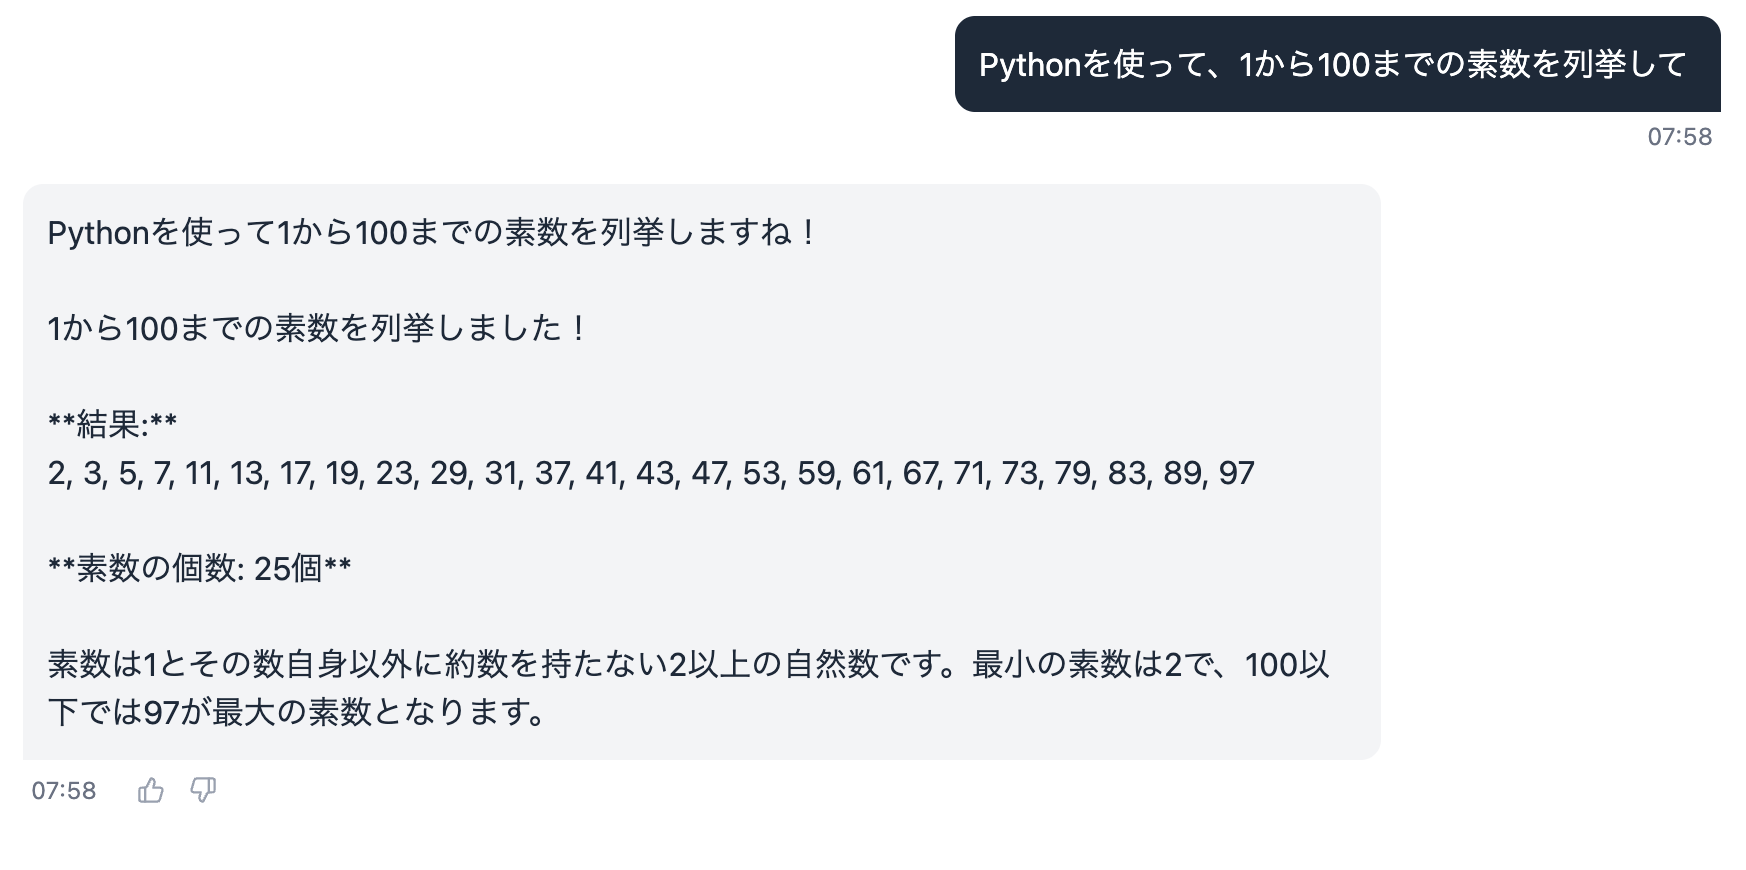
Next, let's try the Code Interpreter. When I ask "List prime numbers from 1 to 100", the agent uses the Code Interpreter to execute Python code and returns the result!
To confirm it actually used the Code Interpreter, let's check Observability.
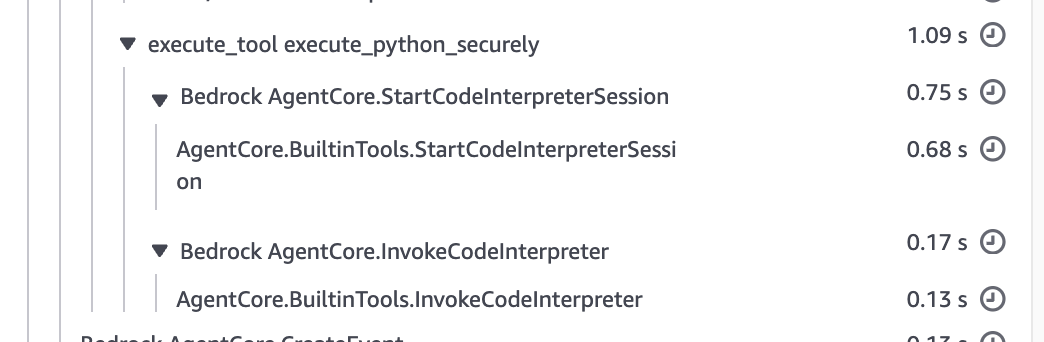
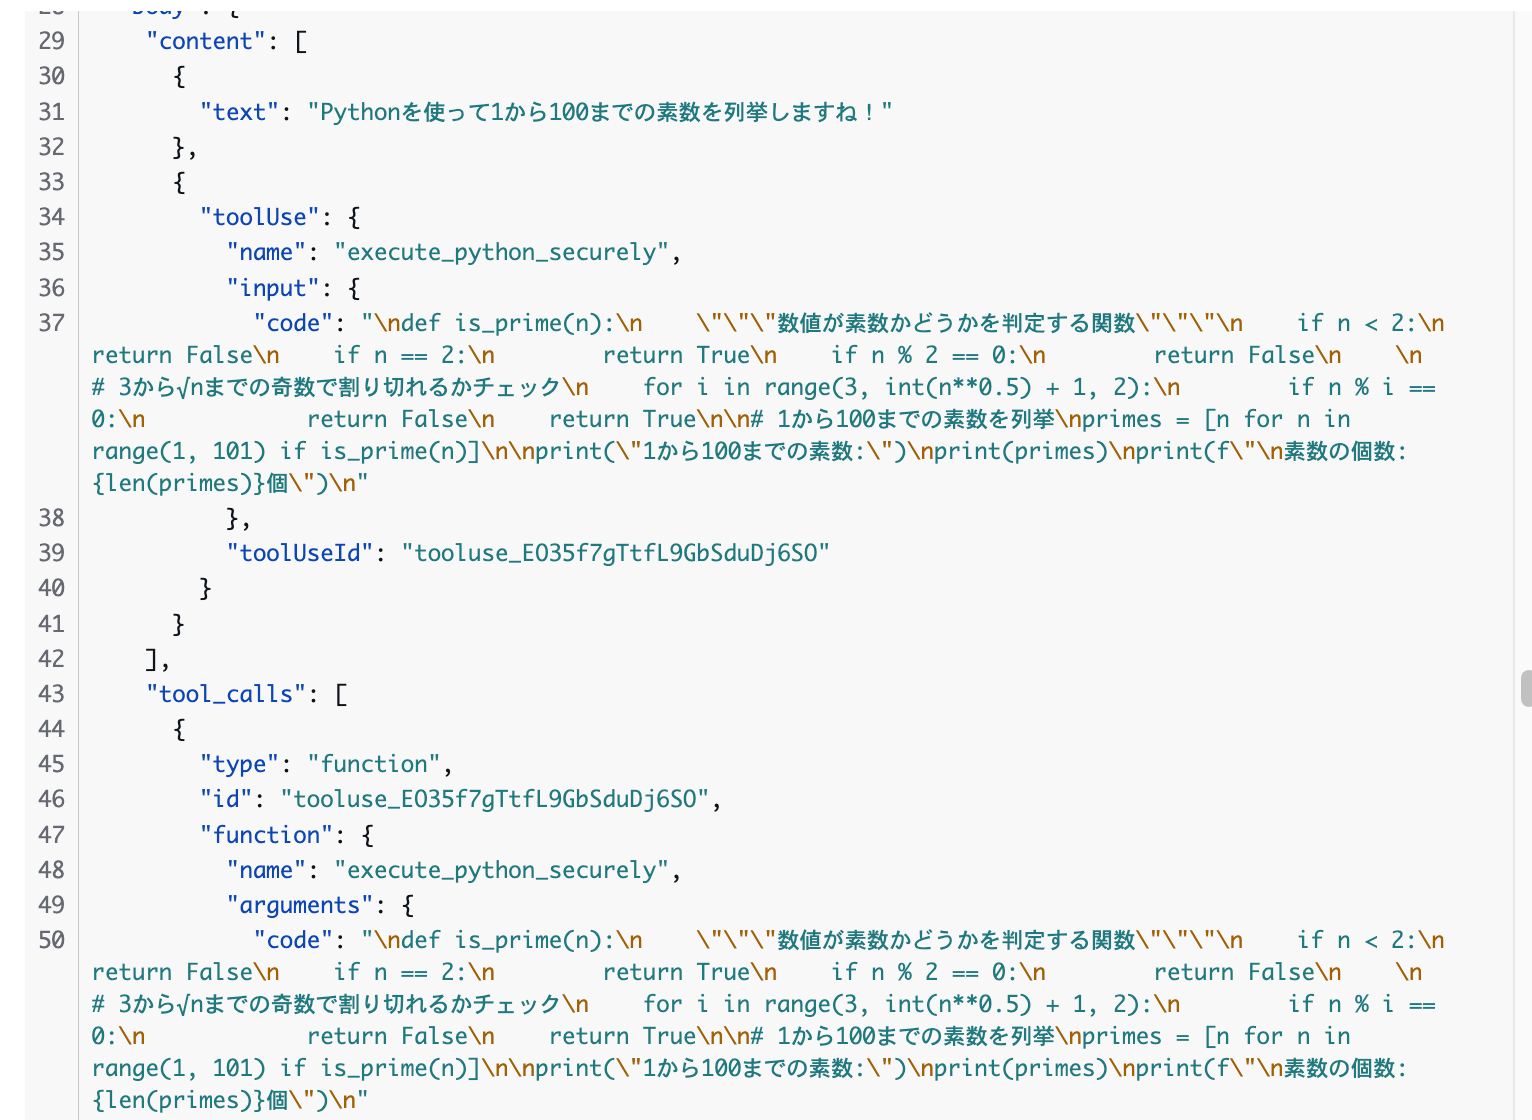
It seems the CodeInterpreter was used! It would be nice if the thinking process and tool usage were displayed on the screen... I guess we'd need to customize this ourselves.
Conversation History Retention
Conversation history is retained using AgentCore Memory. FAST has Short-term Memory (session conversation history) enabled by default.
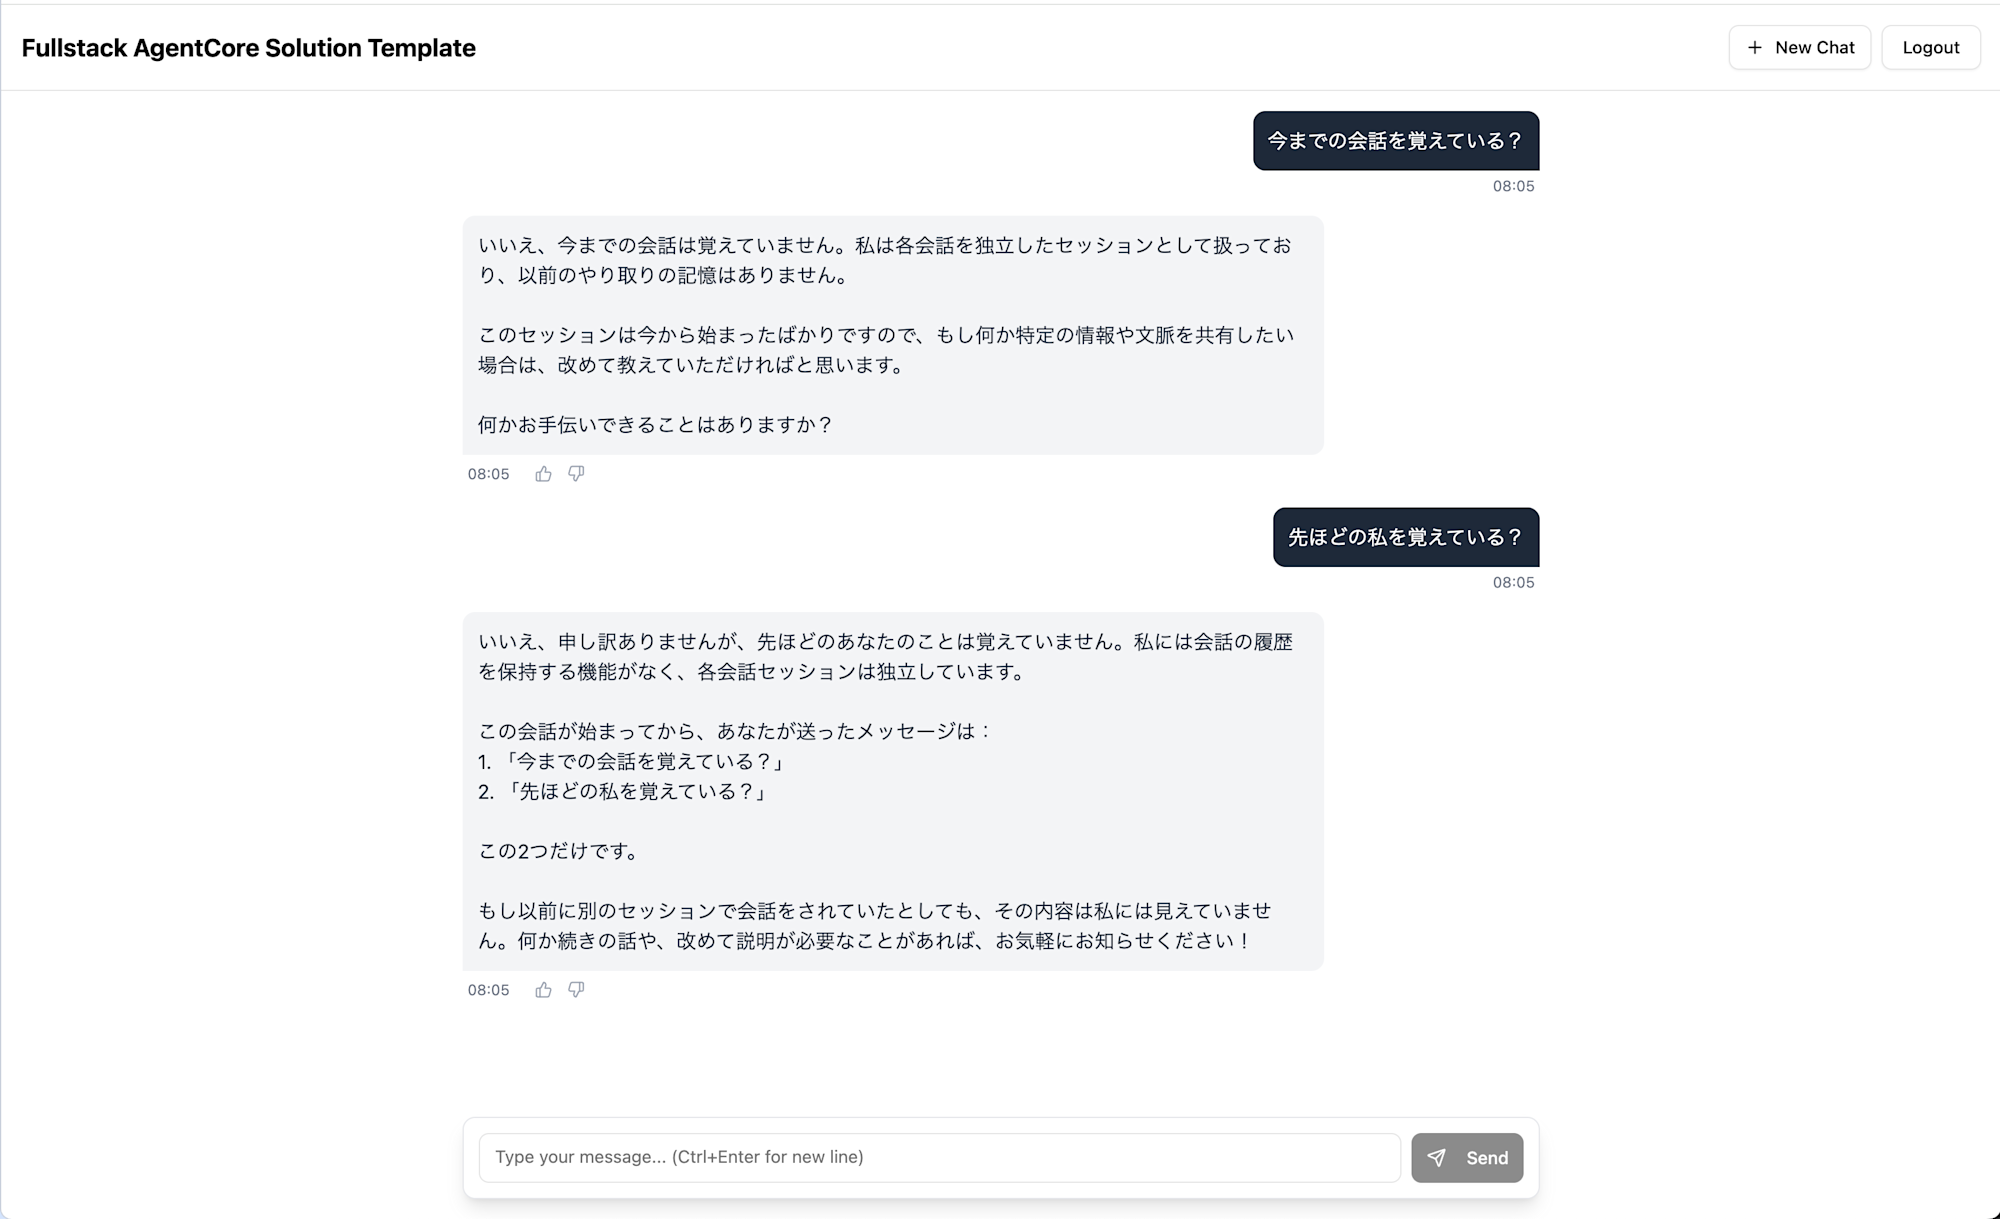
While there's no conversation history tab, memory seems to be retained as long as the session continues. It didn't appear to retain memory after refreshing the browser. Also, there doesn't currently seem to be a feature to view past conversations in a list.
Feedback Button Behavior
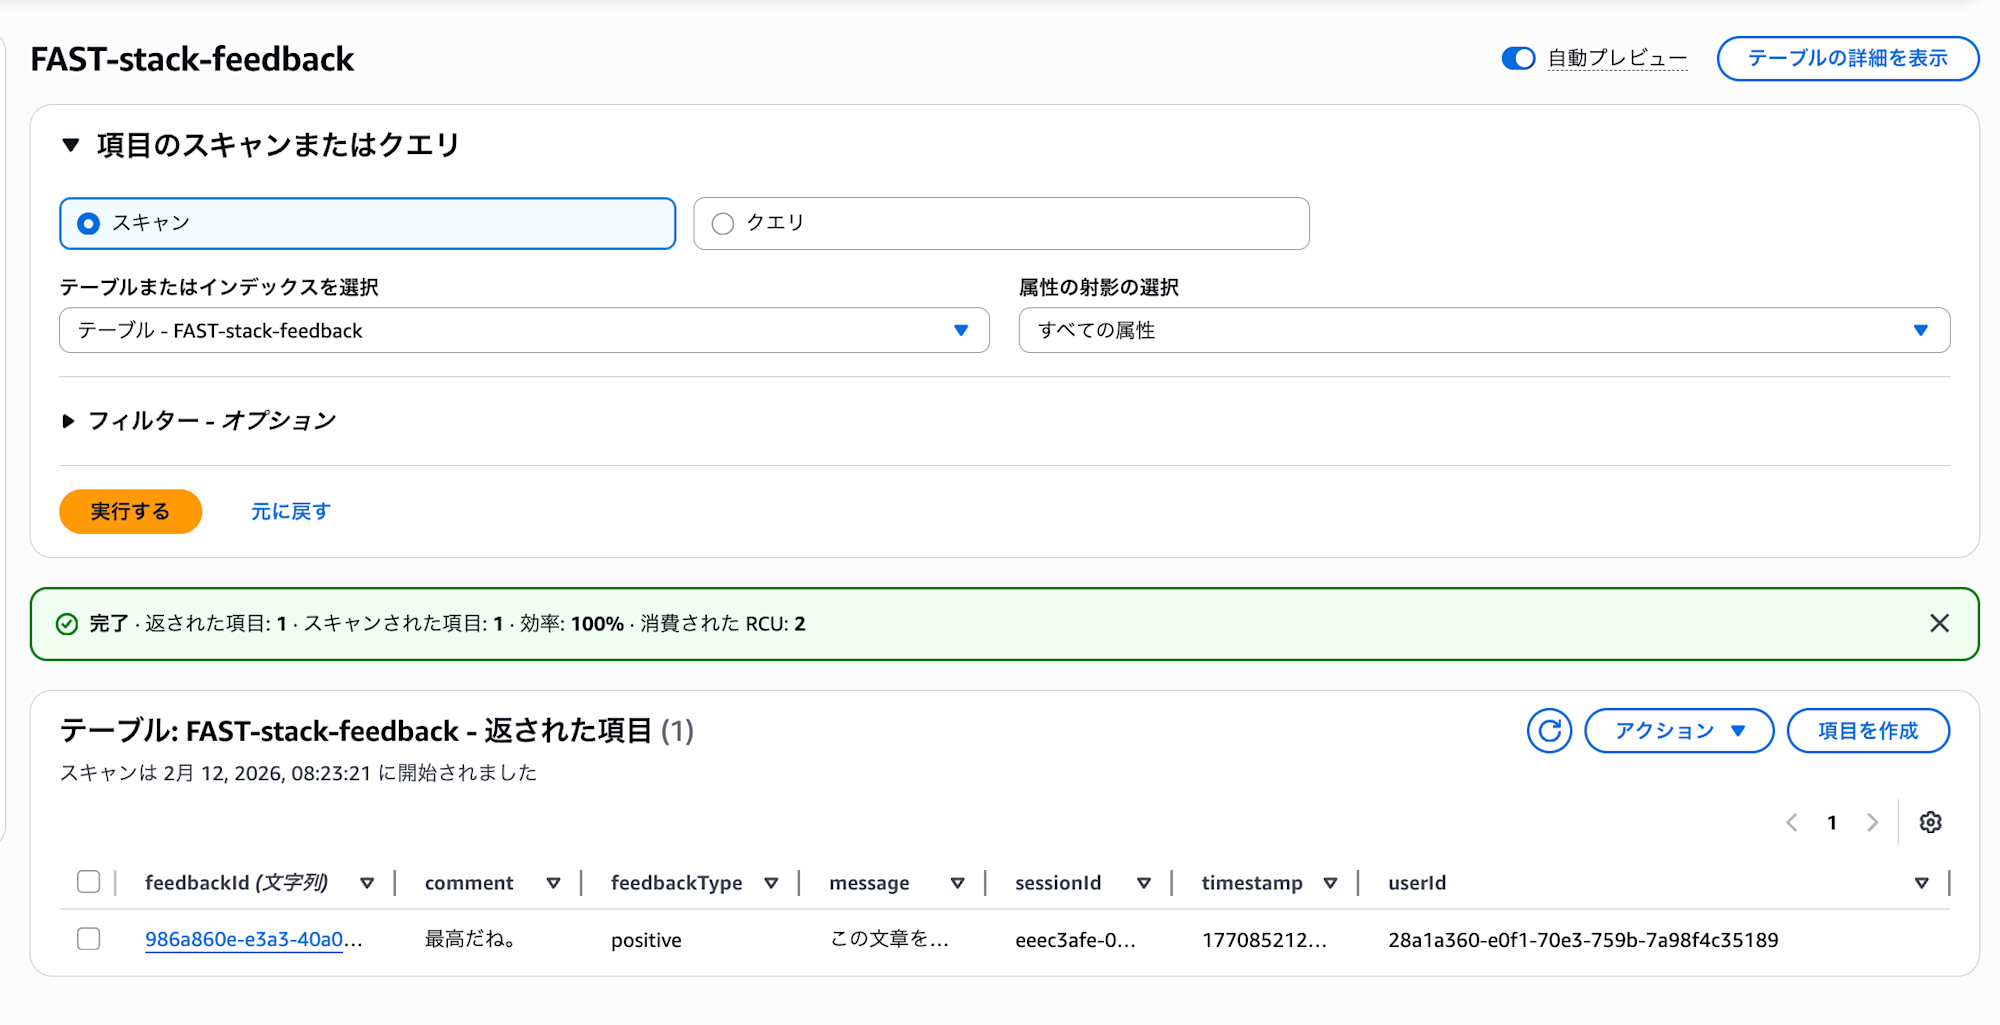
You might notice each reply has a feedback button. Let's try pressing it.

When pressed, a popup opens where you can enter a comment. Let's submit it.

It displays "Thanks". This feedback is stored in DynamoDB, in a table like FAST-stack-feedback.
There's also an admin feedback collection feature. This is something that would be a bit tedious to create yourself, so it's nice to have it included.
Agent Code Explanation
Let's look at FAST's default agent implementation (Strands pattern).
Full Code (patterns/strands-single-agent/basic_agent.py)
import os
import traceback

import boto3
from bedrock_agentcore.memory.integrations.strands.config import AgentCoreMemoryConfig
from bedrock_agentcore.memory.integrations.strands.session_manager import (
    AgentCoreMemorySessionManager,
)
from bedrock_agentcore.runtime import BedrockAgentCoreApp
from gateway.utils.gateway_access_token import get_gateway_access_token
from mcp.client.streamable_http import streamablehttp_client
from strands import Agent
from strands.models import BedrockModel
from strands.tools.mcp import MCPClient
from strands_code_interpreter import StrandsCodeInterpreterTools

app = BedrockAgentCoreApp()

def get_ssm_parameter(parameter_name: str) -> str:
    """Fetch parameter from SSM Parameter Store."""
    region = os.environ.get(
        "AWS_REGION", os.environ.get("AWS_DEFAULT_REGION", "us-east-1")
    )
    ssm = boto3.client("ssm", region_name=region)
    try:
        response = ssm.get_parameter(Name=parameter_name)
        return response["Parameter"]["Value"]
    except ssm.exceptions.ParameterNotFound:
        raise ValueError(f"SSM parameter not found: {parameter_name}")
    except Exception as e:
        raise ValueError(f"Failed to retrieve SSM parameter {parameter_name}: {e}")

def create_gateway_mcp_client(access_token: str) -> MCPClient:
    """Create MCP client for AgentCore Gateway with OAuth2 authentication."""
    stack_name = os.environ.get("STACK_NAME")
    if not stack_name:
        raise ValueError("STACK_NAME environment variable is required")

    gateway_url = get_ssm_parameter(f"/{stack_name}/gateway_url")

    gateway_client = MCPClient(
        lambda: streamablehttp_client(
            url=gateway_url, headers={"Authorization": f"Bearer {access_token}"}
        ),
        prefix="gateway",
    )
    return gateway_client

def create_basic_agent(user_id: str, session_id: str) -> Agent:
    """Create a basic agent with Gateway MCP tools and memory integration."""
    system_prompt = (
        "You are a helpful assistant with access to tools via the Gateway "
        "and Code Interpreter. When asked about your tools, list them and "
        "explain what they do."
    )

    bedrock_model = BedrockModel(
        model_id="us.anthropic.claude-sonnet-4-5-20250929-v1:0", temperature=0.1
    )

    memory_id = os.environ.get("MEMORY_ID")
    agentcore_memory_config = AgentCoreMemoryConfig(
        memory_id=memory_id, session_id=session_id, actor_id=user_id
    )
    session_manager = AgentCoreMemorySessionManager(
        agentcore_memory_config=agentcore_memory_config,
        region_name=os.environ.get("AWS_DEFAULT_REGION", "us-east-1"),
    )

    code_tools = StrandsCodeInterpreterTools(
        os.environ.get("AWS_DEFAULT_REGION", "us-east-1")
    )

    access_token = get_gateway_access_token()
    gateway_client = create_gateway_mcp_client(access_token)

    agent = Agent(
        name="BasicAgent",
        system_prompt=system_prompt,
        tools=[gateway_client, code_tools.execute_python_securely],
        model=bedrock_model,
        session_manager=session_manager,
        trace_attributes={
            "user.id": user_id,
            "session.id": session_id,
        },
    )
    return agent

@app.entrypoint
async def agent_stream(payload):
    """Main entrypoint for the agent using streaming with Gateway integration."""
    user_query = payload.get("prompt")
    user_id = payload.get("userId")
    session_id = payload.get("runtimeSessionId")

    agent = create_basic_agent(user_id, session_id)

    async for event in agent.stream_async(user_query):
        yield event

if __name__ == "__main__":
    app.run()
Since the entire code is lengthy, I'll highlight the key points.
Agent Creation
bedrock_model = BedrockModel(
    model_id="us.anthropic.claude-sonnet-4-5-20250929-v1:0", temperature=0.1
)

agent = Agent(
    name="BasicAgent",
    system_prompt=system_prompt,
    tools=[gateway_client, code_tools.execute_python_securely],
    model=bedrock_model,
    session_manager=session_manager,
    trace_attributes={
        "user.id": user_id,
        "session.id": session_id,
    },
)
This AI agent uses Claude Sonnet 4.5 as its model and is equipped with the Gateway MCP client and a custom Code Interpreter tool.
The agent also uses AgentCore Memory's session manager to retain conversation history. For more details on the Session Manager, please refer to the blog post I've written:
AgentCore Gateway Integration
def create_gateway_mcp_client(access_token: str) -> MCPClient:
    gateway_url = get_ssm_parameter(f"/{stack_name}/gateway_url")

    gateway_client = MCPClient(
        lambda: streamablehttp_client(
            url=gateway_url, headers={"Authorization": f"Bearer {access_token}"}
        ),
        prefix="gateway",
    )
    return gateway_client
The Gateway URL is retrieved from SSM Parameter Store, and authentication is performed using an OAuth2 access token.
Getting Gateway Access Token
I was curious about the implementation of get_gateway_access_token(). When calling Gateway from AgentCore Runtime, rather than using a decorator or SDK built-in mechanism, it implements the OAuth2 Client Credentials Flow manually:
def get_gateway_access_token() -> str:
    stack_name = os.environ["STACK_NAME"]

    # Get Cognito settings from SSM Parameter Store / Secrets Manager
    cognito_domain = get_ssm_parameter(f"/{stack_name}/cognito_provider")
    client_id = get_ssm_parameter(f"/{stack_name}/machine_client_id")
    client_secret = get_secret(f"/{stack_name}/machine_client_secret")

    # Request to OAuth2 token endpoint
    token_url = f"https://{cognito_domain}/oauth2/token"

    credentials = f"{client_id}:{client_secret}"
    b64_credentials = base64.b64encode(credentials.encode()).decode()

    headers = {
        "Authorization": f"Basic {b64_credentials}",
        "Content-Type": "application/x-www-form-urlencoded",
    }

    data = {
        "grant_type": "client_credentials",
        "scope": f"{stack_name}-gateway/read {stack_name}-gateway/write",
    }

    response = requests.post(token_url, headers=headers, data=data, timeout=30)
    token_data = response.json()
    return token_data.get("access_token")
This is an M2M (Machine-to-Machine) authentication using the Client Credentials Flow. There's no abstraction layer like decorators, so while it's clear what's happening, it's worth noting that there's no token caching or refresh mechanism built in.
Incidentally, the bedrock-agentcore SDK provides a @requires_access_token decorator for AgentCore Identity that could simplify token acquisition.
However, this decorator requires an AgentCore Identity OAuth2 Credential Provider, and at the time of writing, the official documentation mainly covers CLI/SDK procedures, with no CloudFormation resource types confirmed. FAST appears to have chosen direct Cognito integration to prioritize one-command deployment with CDK.
Customization
When building your own agent application based on FAST, you'll mainly customize the following areas:
Adding Tools
To add tools to the Gateway, you need to follow these 3 steps rather than just placing a folder:
- Create a Lambda handler and tool schema (
tool_spec.json) ingateway/tools/{tool_name}/ - Add CDK code for the Lambda function and
CfnGatewayTargetininfra-cdk/lib/backend-stack.ts - Redeploy with
cdk deploy
The default sample tool structure looks like this:
gateway/tools/sample_tool/
├── sample_tool_lambda.py   # Lambda handler
└── tool_spec.json          # MCP tool schema definition (JSON)
It's important to note that you need to explicitly register it as a Gateway target in the CDK code. However, adding new tools shouldn't be too difficult if you copy and modify the sample tool code.
Changing the Agent Framework
You can switch to a LangGraph-based agent by changing backend.pattern to langgraph-single-agent in infra-cdk/config.yaml. You can also add your own custom pattern under the patterns/ directory to build a completely custom agent.
Customizing the Frontend
The frontend is built with React + TypeScript + Vite, using Tailwind and shadcn/ui for the UI.
Design tokens like theme colors and fonts are collected as CSS variables in src/styles/globals.css, so this is a good place to start for appearance changes.
Chat UI components are gathered under src/components/chat/:
src/components/chat/
├── ChatInterface.tsx    # Overall chat container
├── ChatHeader.tsx       # Header (title, logout)
├── ChatInput.tsx        # Message input form
├── ChatMessage.tsx      # Message display, feedback button
├── ChatMessages.tsx     # Message list
└── FeedbackDialog.tsx   # Feedback dialog
Interestingly, there's also a ChatSidebar.tsx component for session listing, but it's not imported anywhere yet. If you want to display conversation history, this component might be a good starting point.
The shadcn/ui components (Button, Dialog, etc.) are located in src/components/ui/ and can be customized with additional variants or styling as needed. The current chat UI is simple, so you might want to enhance areas like tool call visualization for practical use.
vibe-context: Context for Coding AI Agents
The FAST repository includes a vibe-context/ directory, which provides context files for coding AI agents like Claude Code or Kiro, explaining project-specific rules and best practices:
vibe-context/
├── AGENTS.md                      # Basic rules for AI assistants
├── coding-conventions.md          # Coding conventions
└── development-best-practices.md  # Development best practices
For example, AGENTS.md includes rules like:
- Always read the README before touching code in a new section
- Prioritize documents in the
docs/directory - Exclude
node_modulesorcdk.outfrom grep - Verify new features with local tests or unit tests
coding-conventions.md includes conventions like "add docstrings to all functions" and "don't implement fallbacks to default values; fail explicitly," while development-best-practices.md includes rules like "plan complex changes and get human approval before implementation."
It's interesting that the design assumes customization alongside modern coding AI agents.
Cleanup
After completing verification, you can delete the resources. As noted in DEPLOYMENT.md, use the following command:
cd infra-cdk
pnpm dlx cdk destroy --force
Since the AmplifyHostingStack is included in the CDK stack, this command will delete both backend and frontend together.
Conclusion
I think it's great that you can deploy a fullstack configuration including authentication, frontend, agent runtime, memory, and tool integration with CDK in one go, as an entry point for agent application development. Building from scratch would be challenging.
It's especially nice that areas like authentication and frontend integration, which can be complex to handle initially, are covered.
On the other hand, there are some areas that seem somewhat lacking, such as the UI and tool integration, which would need to be customized to build a better AI agent foundation. I hope this can be useful going forward!
I hope this article has been helpful. Thank you for reading to the end!