I tried creating a flyer with Claude Design and deploying it internally

This page has been translated by machine translation. View original
Introduction
This is Kent from the AI Business Division. I've been using Claude Design to create mockups lately, and I wrote this article as part of that effort.
Claude Design is Anthropic's design tool that can generate designs, prototypes, slides, and more simply by giving instructions in chat. As of the time of writing, it is available in beta for Pro / Max / Team / Enterprise plans, and even non-designers can create visual materials for internal use.
In this article, using an "internal AI competition announcement flyer" as the subject, I will walk through the entire process from creating a flyer in Claude Design to deploying and sharing it internally using Claude Cowork's live artifact feature.
The steps are broadly the following two:
- Create and refine a flyer in Claude Design
- Hand the exported file to Claude Cowork and deploy it as a live artifact
Creating a Flyer with Claude Design
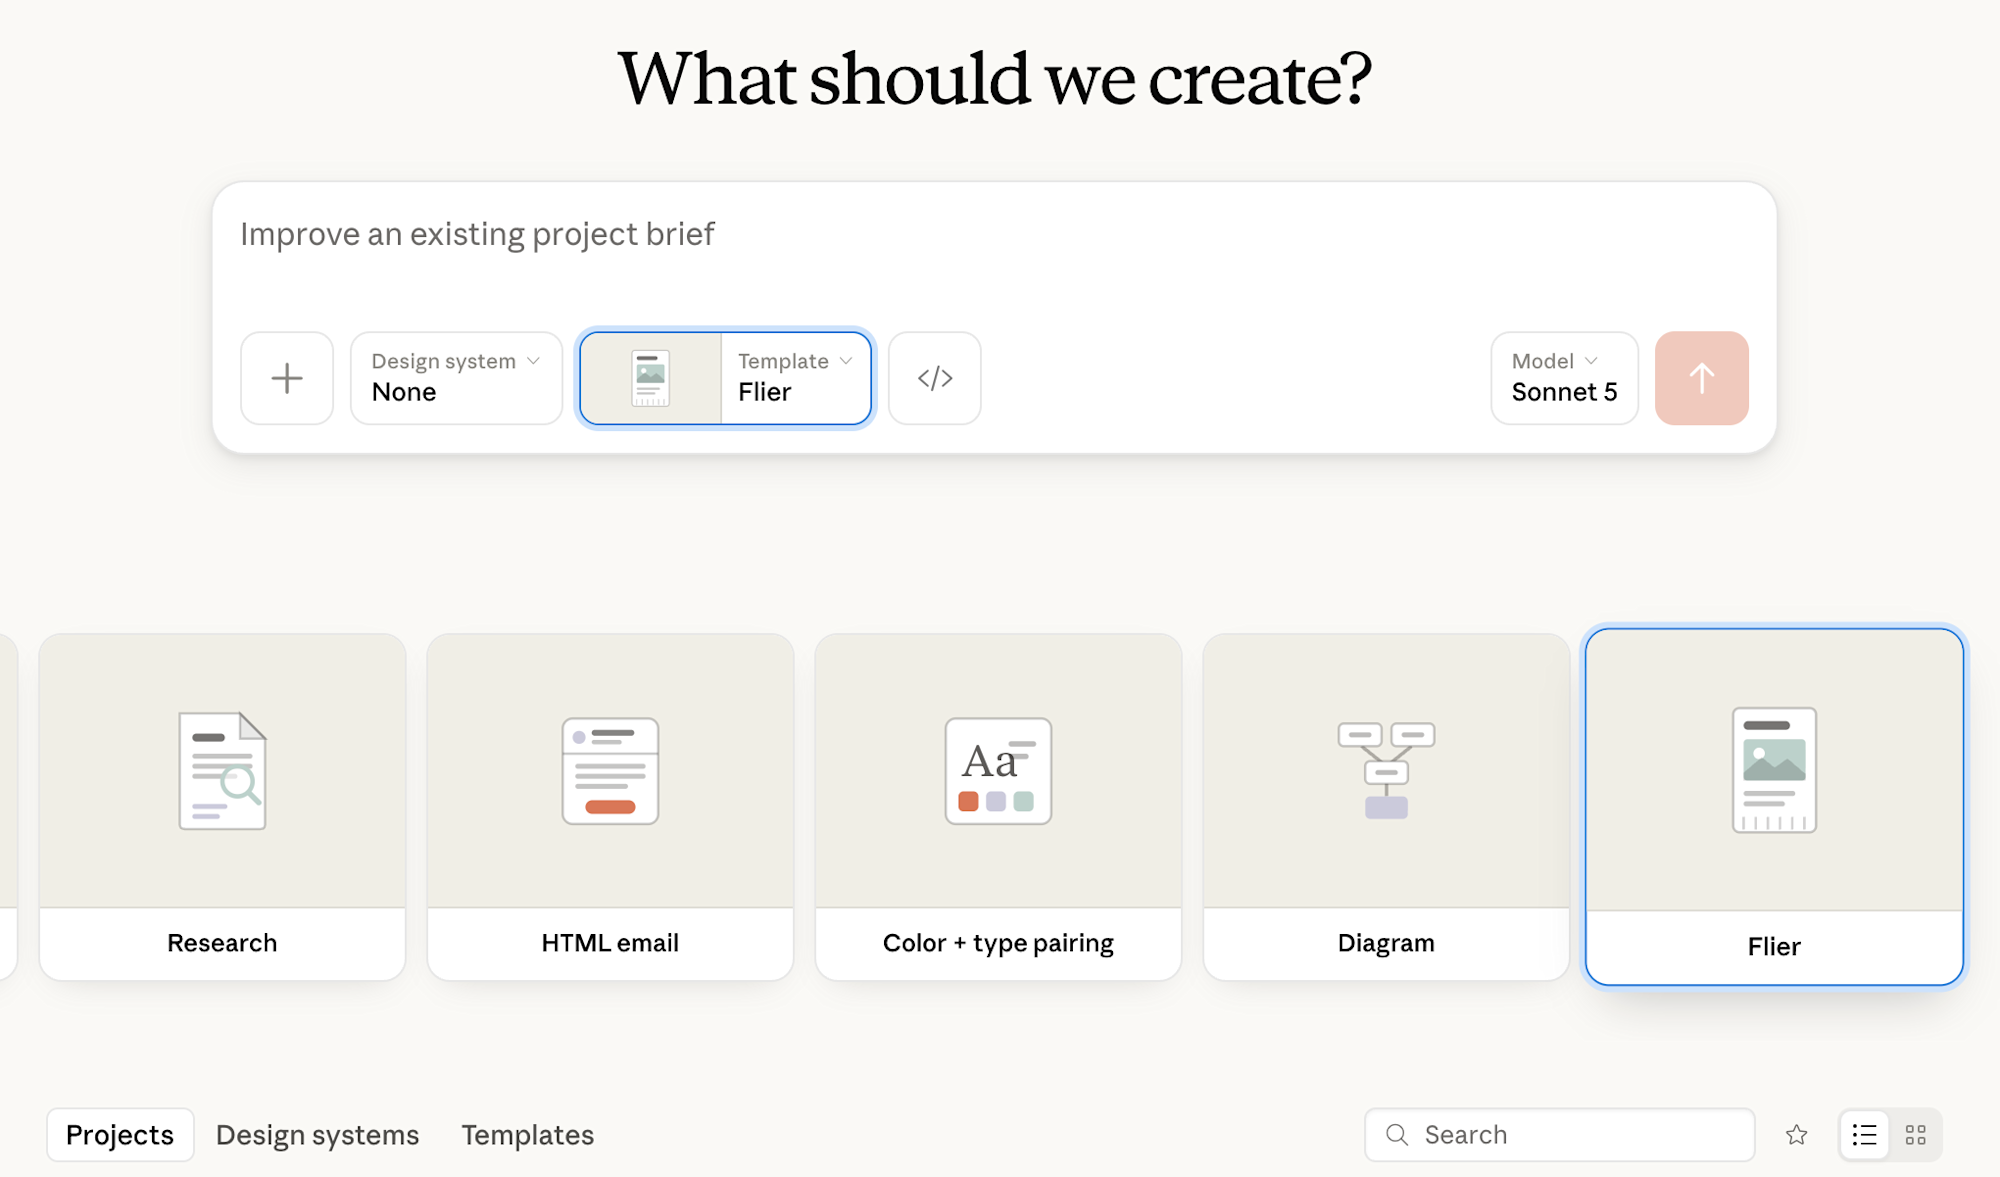
Since we are creating a flyer for submissions this time, we select Flier for the Template.
In addition to the prompt, I created a background image using Gemini's image generation and provided it as a design element.
Example Prompt
Please create an announcement flyer for an internal AI competition.

## Deliverable
- A4 portrait, single page. To be used both on internal Slack and for office posting

## Information to Include
- Event name: AI Challenge 2026
- Schedule: Entry deadline 8/15, Presentation event 9/10 (Fri) 15:00-18:00
- Location: Main headquarters hall + online streaming
- Target audience: All employees (team participation allowed, max 4 members per team)
- Theme: "AI Prototypes That Transform Work"
- Prizes: Best Award - 1kg of Omi beef, Special Jury Award - Classmethod novelty goods
- How to apply: Form in the #ai-competition channel, or via QR code
- Organizer: AI Promotion Department

## Design Policy
- Tone: Playful yet professional enough to make non-engineers want to participate
- Color scheme: Corporate color #1A73E8 as the main color, light tone based
- Visual guidance: Event name and deadline should be the first things to catch the eye
- Avoid: Typical brain or robot icons, information overload
- Background: Place the attached image as a faint background
- Line breaks: Avoid breaking in the middle of words; break at punctuation or symbol positions as much as possible

## Priorities
Prioritize calls to action for "deadline" and "how to apply" over the amount of information
The key points of the prompt are to clearly separate "deliverable (what to create and for which medium)," "information to include (content to display)," "design policy (tone and things to avoid)," and "priorities." In particular, writing "things to avoid" helps suppress the template-like feel that tends to appear in AI designs.
Refining the Design with the Screen, Comments, and Tweaks
It is necessary to treat the first generation result as a prototype. Where Claude Design is truly effective is in the iterative refinement from this point, and three main methods are provided for making revisions: "chat," "Comment (inline comments)," and "Tweaks." Since each has different strengths, knowing when to use which one greatly affects the speed and quality of the final result.
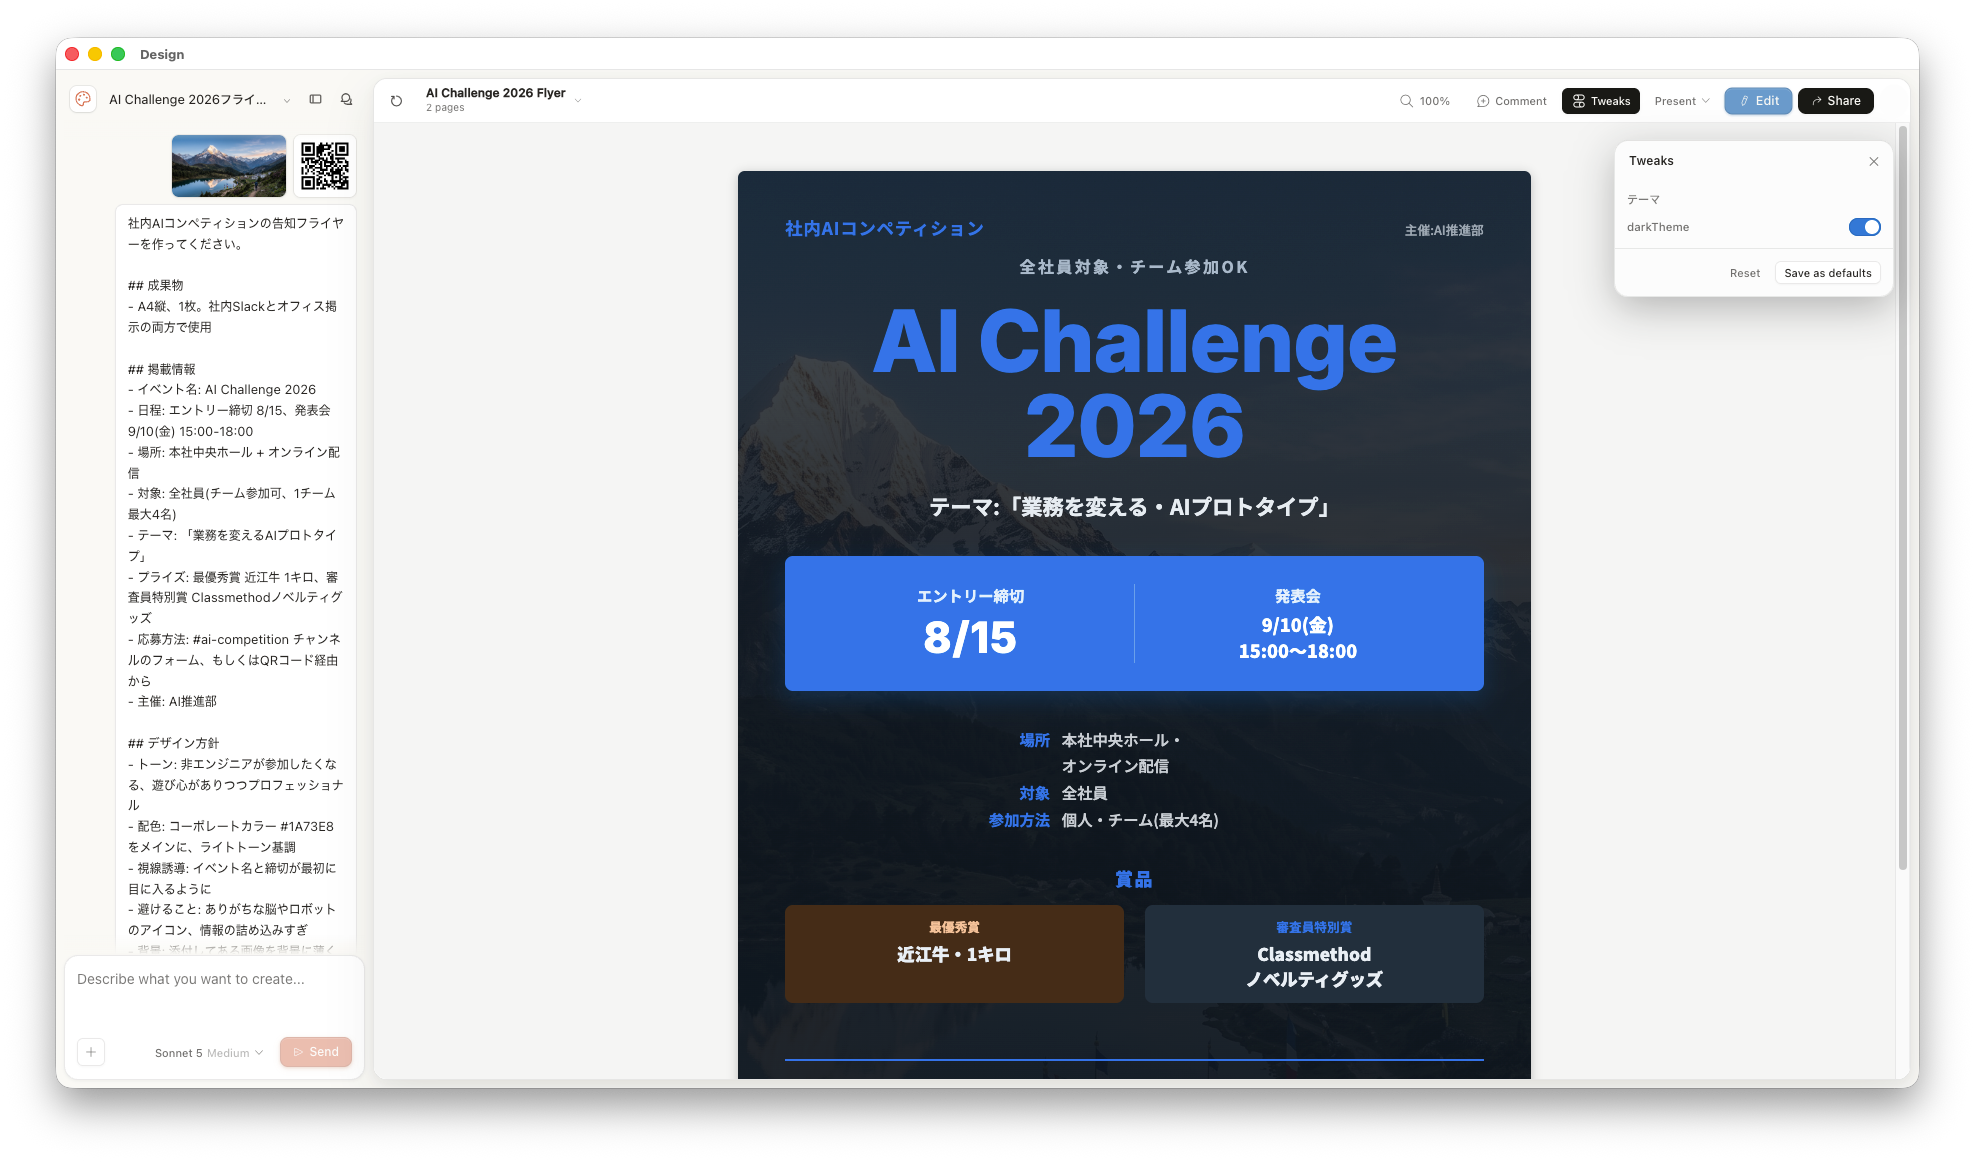
The actual operation screen is shown below, with chat on the left and Comment and Tweaks in the upper right. This screen already shows a dark theme pattern created using Tweaks.
Chat: Large Changes Affecting the Whole Design
The chat panel on the left side of the screen is suited for changes related to the overall structure and tone of the design.
- "Make the color scheme a bit darker and more minimal"
- "Move the deadline and QR code to the top"
- "Show me 2-3 layout patterns"
Instructions that span multiple elements, or comparing and examining alternatives, are most efficiently handled through chat. I was able to request explanations of design intent and reviews from an accessibility perspective.
Comment: Pinpoint Corrections for Specific Elements
Comment is a feature that lets you directly click on the element you want to modify on the canvas, leave a comment, and request revisions focused on that specific area. Since there is no need to explain in text "which part you are referring to," it is faster than explaining the location in chat, and less likely to result in misunderstandings.
For this flyer, I used it in the following ways, for example:
- Selected the deadline date and wrote "Make this larger and in a more prominent color"
- Selected the area around the QR code and wrote "Add more whitespace and place the application instructions alongside it"
- Selected the title and wrote "The word is being broken mid-word, please adjust"
When writing comments, the more specific you are—such as "reduce the padding by about 8px" rather than "this is wrong"—the more the revisions will match your intent.
Tweaks: Adjust with Sliders Without Writing Prompts
Tweaks is a feature that lets you adjust properties such as color, spacing, border radius, and theme in real time using controls like sliders and toggles on the generated design. Since there is no need to rewrite the prompt and wait for regeneration, it is ideal for trial-and-error fine-tuning like "just a bit darker" or "just a bit tighter."
What's even more interesting is that you can have Claude add controls for you. For example, if you ask "add a dark theme toggle switch" or "let me switch the font between sans-serif and serif," dedicated controls will appear in the Tweaks panel. For a flyer like this one, you can compare variations—such as switching between the tone for posting (print) and the tone for Slack posting (screen)—entirely from your own hands-on operation.
Guidelines for Choosing Which to Use
In summary, use chat for large changes like structural or section additions, Comment for pinpoint corrections to specific elements, and Tweaks for fine adjustments to color and spacing or for comparing variations—keeping these in mind will eliminate any hesitation. Additionally, direct editing by dragging and resizing elements directly on the canvas is also possible, so for minor positioning adjustments, fixing things yourself is the fastest approach.
Deploying the Flyer with Claude Cowork
As of now (2026/07/21), while Claude Design has become able to integrate with Claude Code, direct integration with Claude Cowork is not yet available.
However, since this is intended for non-engineers, we will deploy and share the flyer for internal use using Claude Cowork as the foundation. Since Cowork's live artifacts are maintained as HTML pages across sessions, they can be used as internal pages that can be opened at any time, rather than being a "create and done" situation.
First, download the design project created in Design.
Click Share at the top of the window, then select Project HTML > Project archive and click Export to download it.
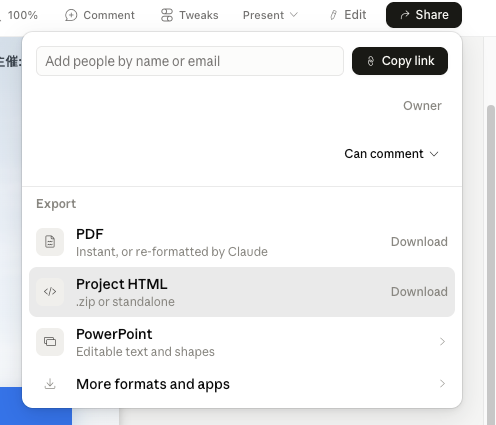
After that, hand the downloaded ZIP file to Claude Cowork, and providing a prompt like the following will initiate deployment using a live artifact.
The attached zip file contains flyer files created using Claude Design.
Please create Artifacts based on this zip file.
After creation, please verify that the original design and content match appropriately, and repeat the cycle of making corrections as needed.
The key point is that the instruction includes "after creation, verify that it matches the original design and repeat the correction cycle." Since fonts and background image references may break during conversion from a ZIP file, including this one sentence allows Claude to perform autonomous adjustments stably. Currently, there is an issue where online fonts cannot be loaded, so Claude will assign fonts that are usable within the Artifact.
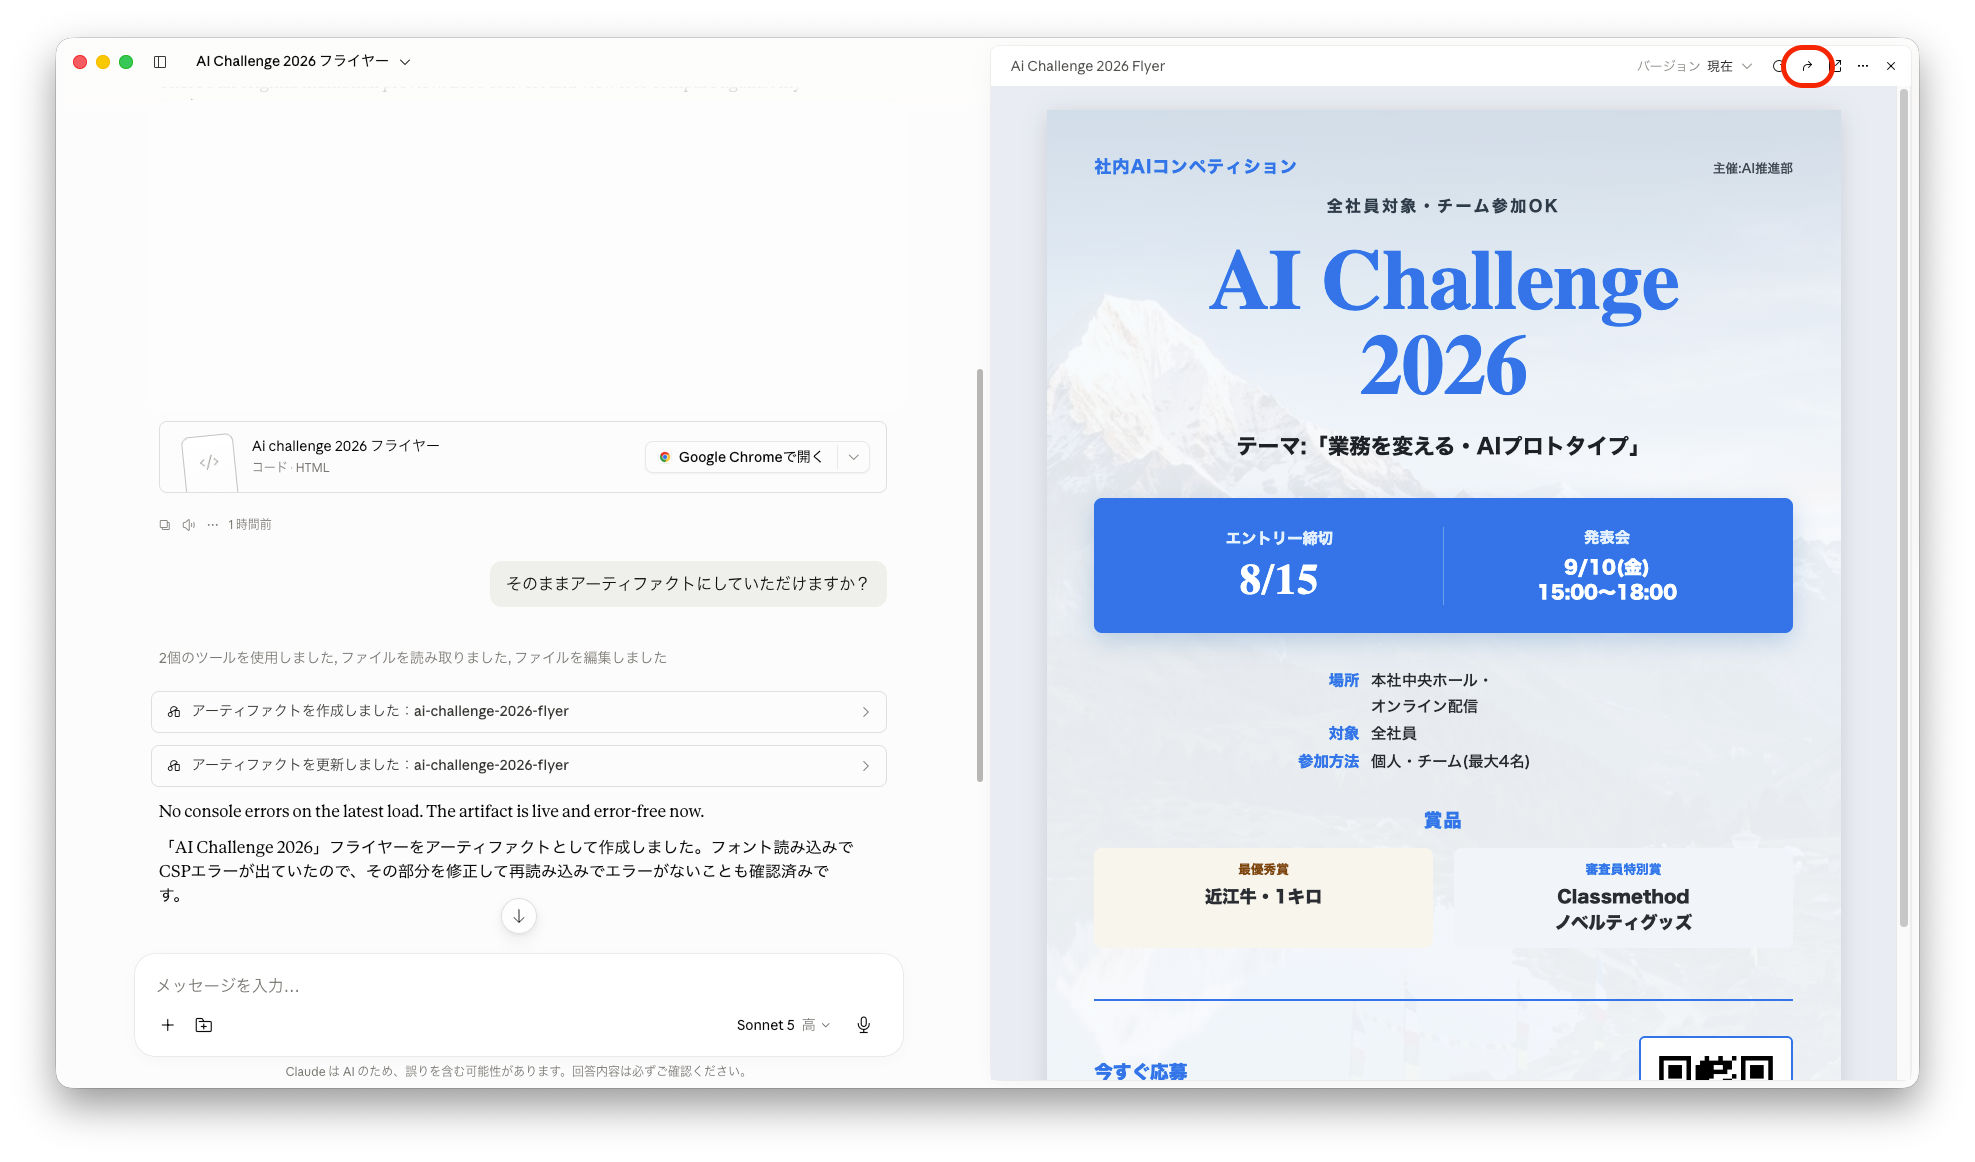
Once the work is complete, it should appear as a live artifact. If Claude does not transition to creating an Artifact, asking something like "Could you please deploy it as an artifact?" will prompt the transition. Sharing can be done via the arrow inside the red box in the upper right.
Summary
Through the flow of generating in Claude Design → refining with Comment and Tweaks → deploying in Claude Cowork, I was able to complete everything from flyer creation to internal publication without writing any code. I learned that keeping the following three points in mind when creating allows you to produce and deploy a good design.
- Treat the first generation as a prototype. Use chat / Comment / Tweaks appropriately to improve quality
- Direct integration from Design to Cowork is not yet supported, but live artifact conversion is possible via ZIP export
- When deploying, instructing the process to include "verification of match with the original design and a correction cycle" improves the reproduction accuracy
If direct integration between Design and Cowork becomes available, this procedure should become even shorter, but even at this point I found it sufficiently practical as a means for non-engineers to distribute design materials internally.