
I tried setting up a Contentful workflow that separates the writer and publisher to prevent accidental publication

This page has been translated by machine translation. View original
Introduction
When multiple people start operating a CMS together, concerns arise about how publishing is handled. Since anyone can press the publish button, there's the worry that an article that hasn't finished review might accidentally go live in production. On the other hand, if you overly restrict who can publish, writing and editing work gets held up.
By using Contentful's workflow feature, you can divide the process from writing to publishing into steps and only allow publishing at the final step, eliminating any path to publishing that bypasses review and structurally preventing accidental publication. In this article, we'll set up this approval flow and confirm that everything works end to end, from creating the definition to transitioning between steps and publishing.
Here is an overview of the approval flow we'll be setting up.
The writer writes the article, it goes through review, and then the publisher approves and publishes it.
What are Contentful Workflows?
Contentful Workflows is a feature that divides the process from writing to publishing into multiple steps and determines who can do what at each step. Entries progress through these steps in order, and upon reaching the final step, the workflow is completed.
Target Audience
- Leads of editorial teams who have started operating a headless CMS with multiple people and feel uneasy about a state where anyone can publish
- Operations managers who have configured Contentful roles but haven't yet used the workflow feature
- Those who want to understand through a concrete example how to set up an approval flow within a CMS
References
Problem: Roles Alone Cannot Enforce Publishing Order
In Contentful, roles determine whether people can edit or publish articles and assets. By assigning a role without publish permissions to writers and a role with publish permissions to publishers, you can restrict who can publish.
However, roles alone cannot enforce the order leading up to publication. This is because there is no mechanism to stop someone with publish permissions from publishing immediately without going through review. The question of who can publish (a matter of permissions) and the question of how to proceed to publication in a specific order (a matter of flow) are separate things. Setting up this flow aspect within the CMS is the role of workflows.
Design: Building an Approval Flow with Steps and Two Types of Permissions
Steps and Transitions
A workflow is defined as a sequence of steps such as Drafting, Under Review, and Approved. A single workflow can have up to 20 steps.
There are two modes for advancing through steps. In the default mode, you can move to any step as long as you have permission. Enabling the other mode restricts movement to one step at a time in order. If you want to strictly enforce the order of approvals, choose the latter.
Two Types of Permissions
Two types of permissions can be configured for each step. The first is a permission that determines who can advance to that step. By default, no one can advance, and you grant permission to everyone, or to specified users or teams. The second is a rule that allows or prohibits editing or publishing while at that step. For example, you can configure it so that publishing is only allowed at the Approved step.
An important point to note here is that the targets of permissions are users and teams (or everyone). Roles are not specified directly. The foundation of whether articles and assets can be edited or published is determined by roles, and workflows layer step-level controls on top of that.
Relationship with Role Permissions
Workflow permissions complement space-level role permissions. They do not override them. In particular, operations explicitly prohibited at the role level cannot be performed even if permitted at the workflow level. Prohibitions take precedence over permissions.
If either role permissions or workflow permissions prohibit an operation, that operation cannot be performed. An operation is only possible when both permit it.
Therefore, role design and workflow design must be considered together. In the context of this example, the combination would be: assigning a role without publish permissions to writers and a role with publish permissions to publishers, then using a workflow to insert an approval step in between.
Building and Running: Setting Up and Executing a Workflow
From here, we'll actually set up and run a workflow.
How to Create a Workflow in the GUI
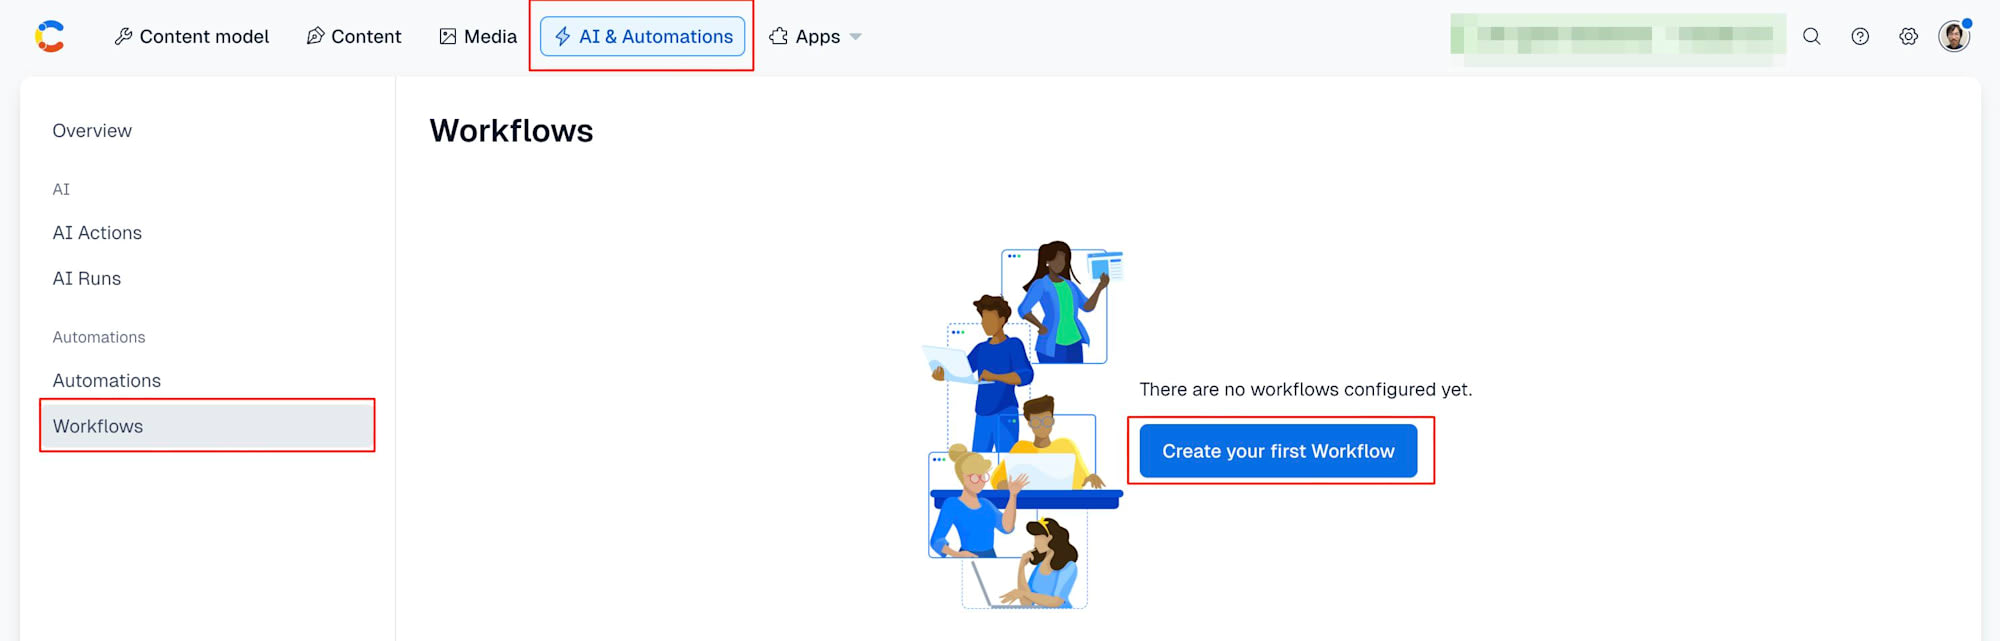
Create it from AI & Automations > Workflows.
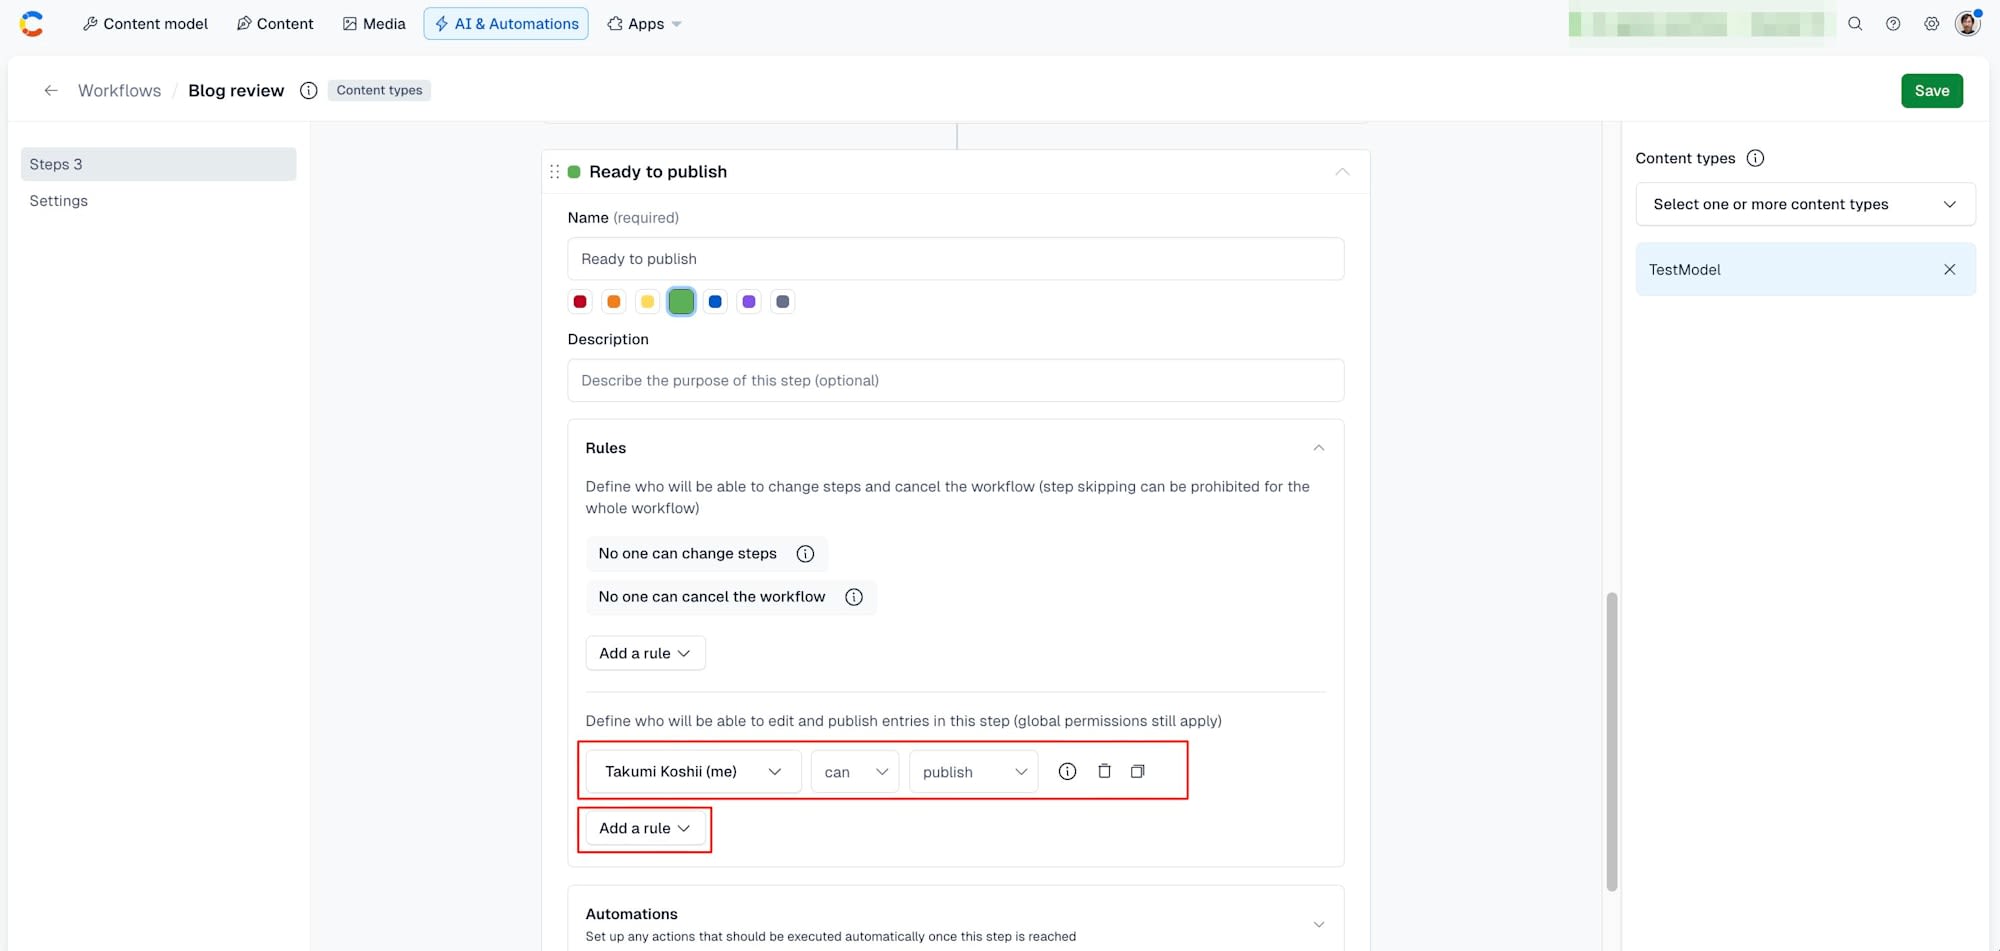
Add steps with Add Step and add rules. For example, here is a screenshot of adding a Ready to publish step and adding a rule via Add a rule that only "Takumi Koshii" can publish.
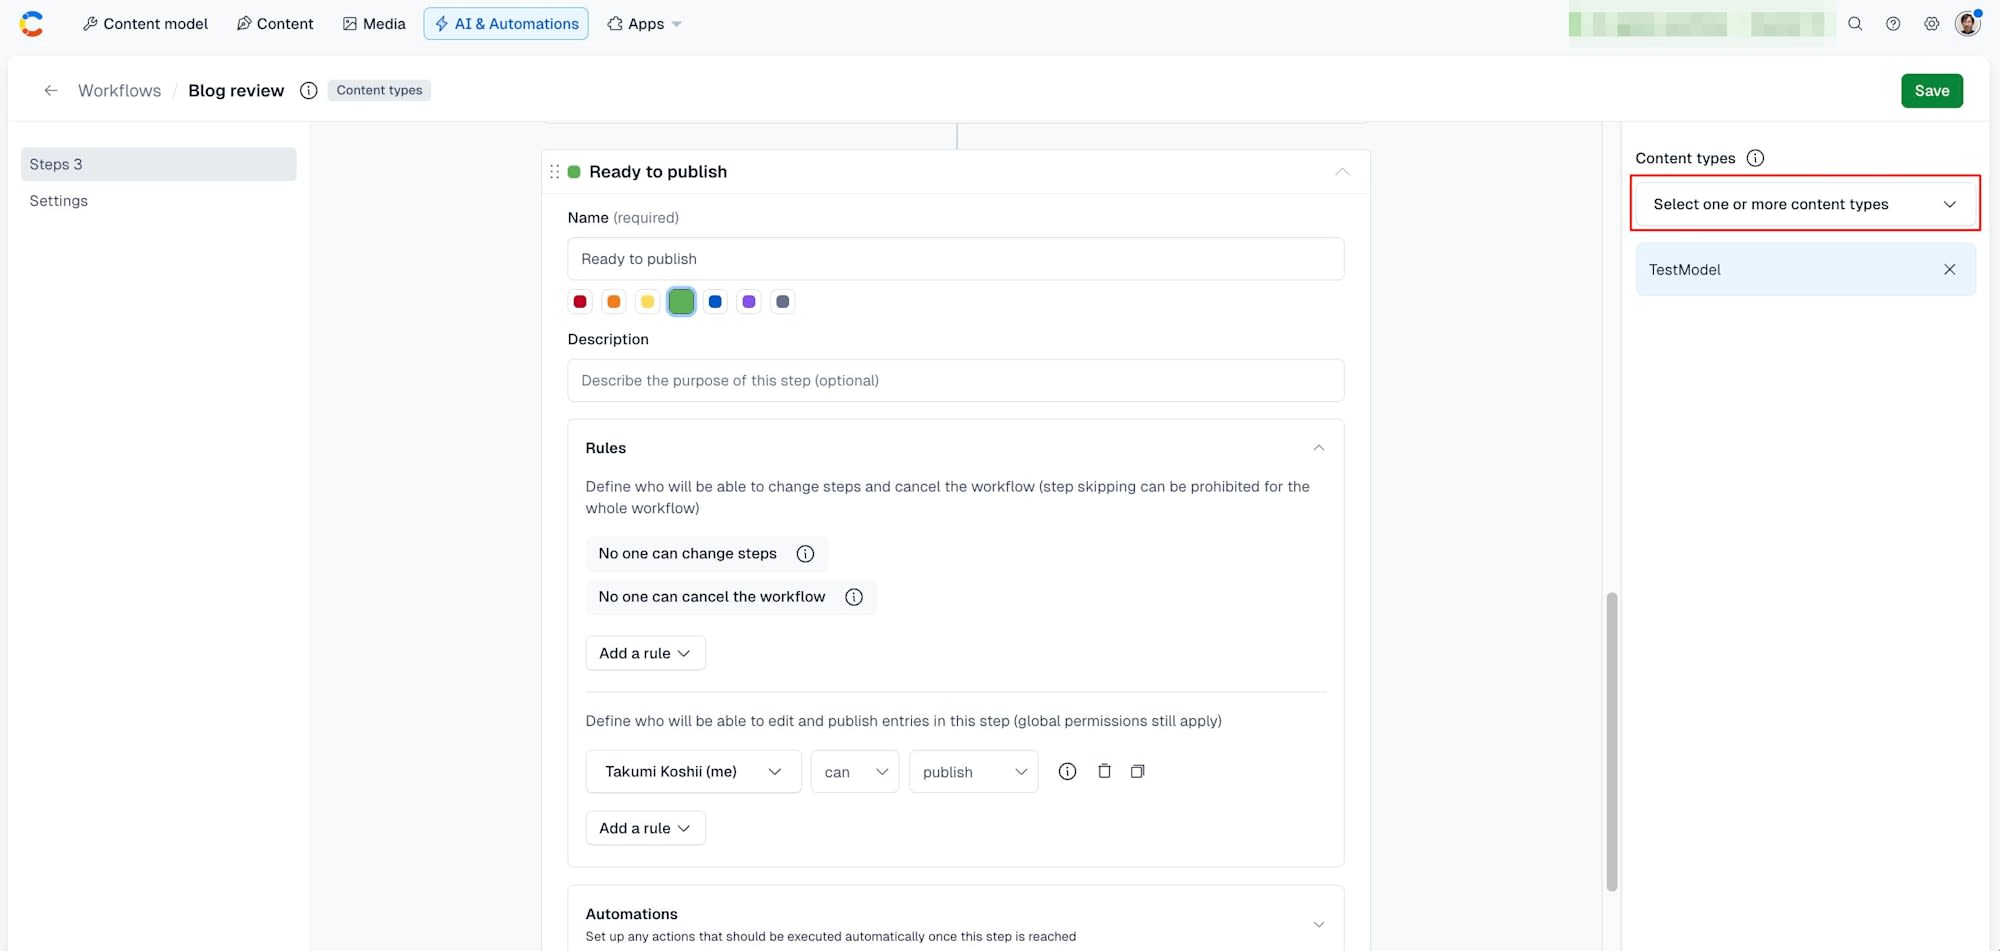
Select the target content types from the right side of the screen.
Creating a Workflow Definition
We prepared a content type called blogArticle to represent articles and created a workflow definition to apply to it. (Note: in this verification, it was created using the CMA = Content Management API.) There are three steps: Drafting, Under Review, and Approved, with publish permission attached only to the Approved step.
const wfDef = await client.workflowDefinition.create(
  { spaceId, environmentId },
  {
    name: 'Blog Review',
    description: '記事の執筆から公開までのレビューワークフロー',
    appliesTo: [
      { type: 'Link', linkType: 'Entry', validations: [{ linkContentType: ['blogArticle'] }] },
    ],
    flowType: 'no_restriction',
    steps: [
      { name: 'Draft', description: '執筆中' },
      { name: 'Review', description: 'レビュー中' },
      {
        name: 'Ready to publish',
        description: '承認済み',
        permissions: [
          {
            type: 'entity_permission',
            configuration: {
              // 公開を許可する相手。ユーザーまたはチームのリンクを指定する
              actors: [{ sys: { type: 'Link', linkType: 'User', id: 'APPROVER_USER_ID' } }],
              action: 'publish',
              effect: 'allow',
            },
          },
        ],
      },
    ],
  },
)
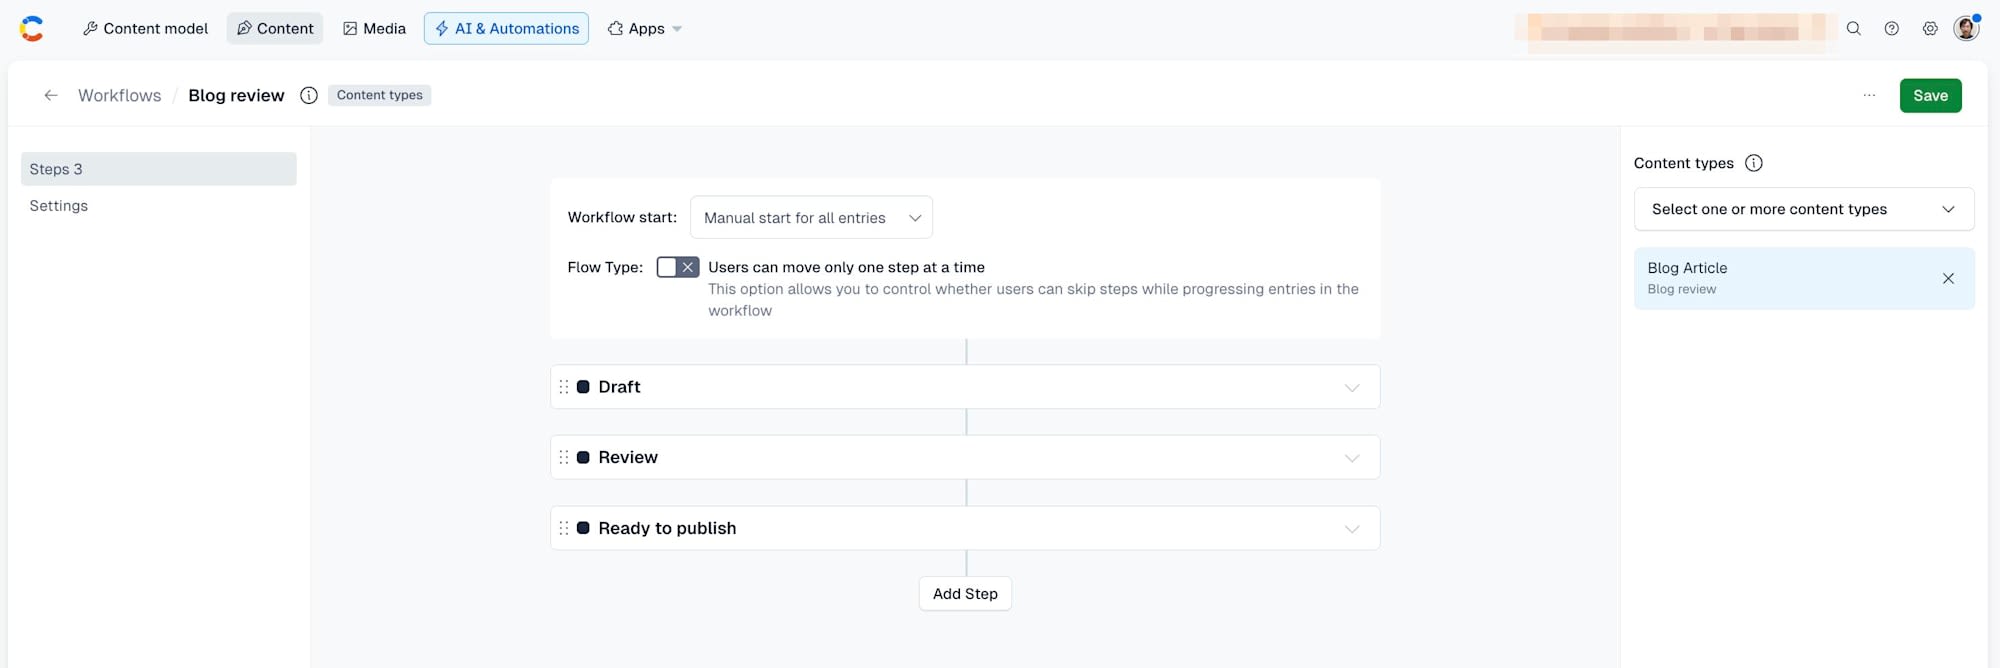
We confirmed in the GUI that the workflow has been created.
The permission attached to the Approved step is stored in the following structure. The action is one of edit, publish, or delete; the effect is allow or deny; and actors is the target to whom publishing is permitted. You can specify an array of links to specific users or teams, or you can specify all to represent everyone.
{
  "type": "entity_permission",
  "configuration": {
    "effect": "allow",
    "action": "publish",
    "actors": [{ "sys": { "type": "Link", "linkType": "User", "id": "APPROVER_USER_ID" } }]
  }
}
Creating an Entry and Advancing the Workflow
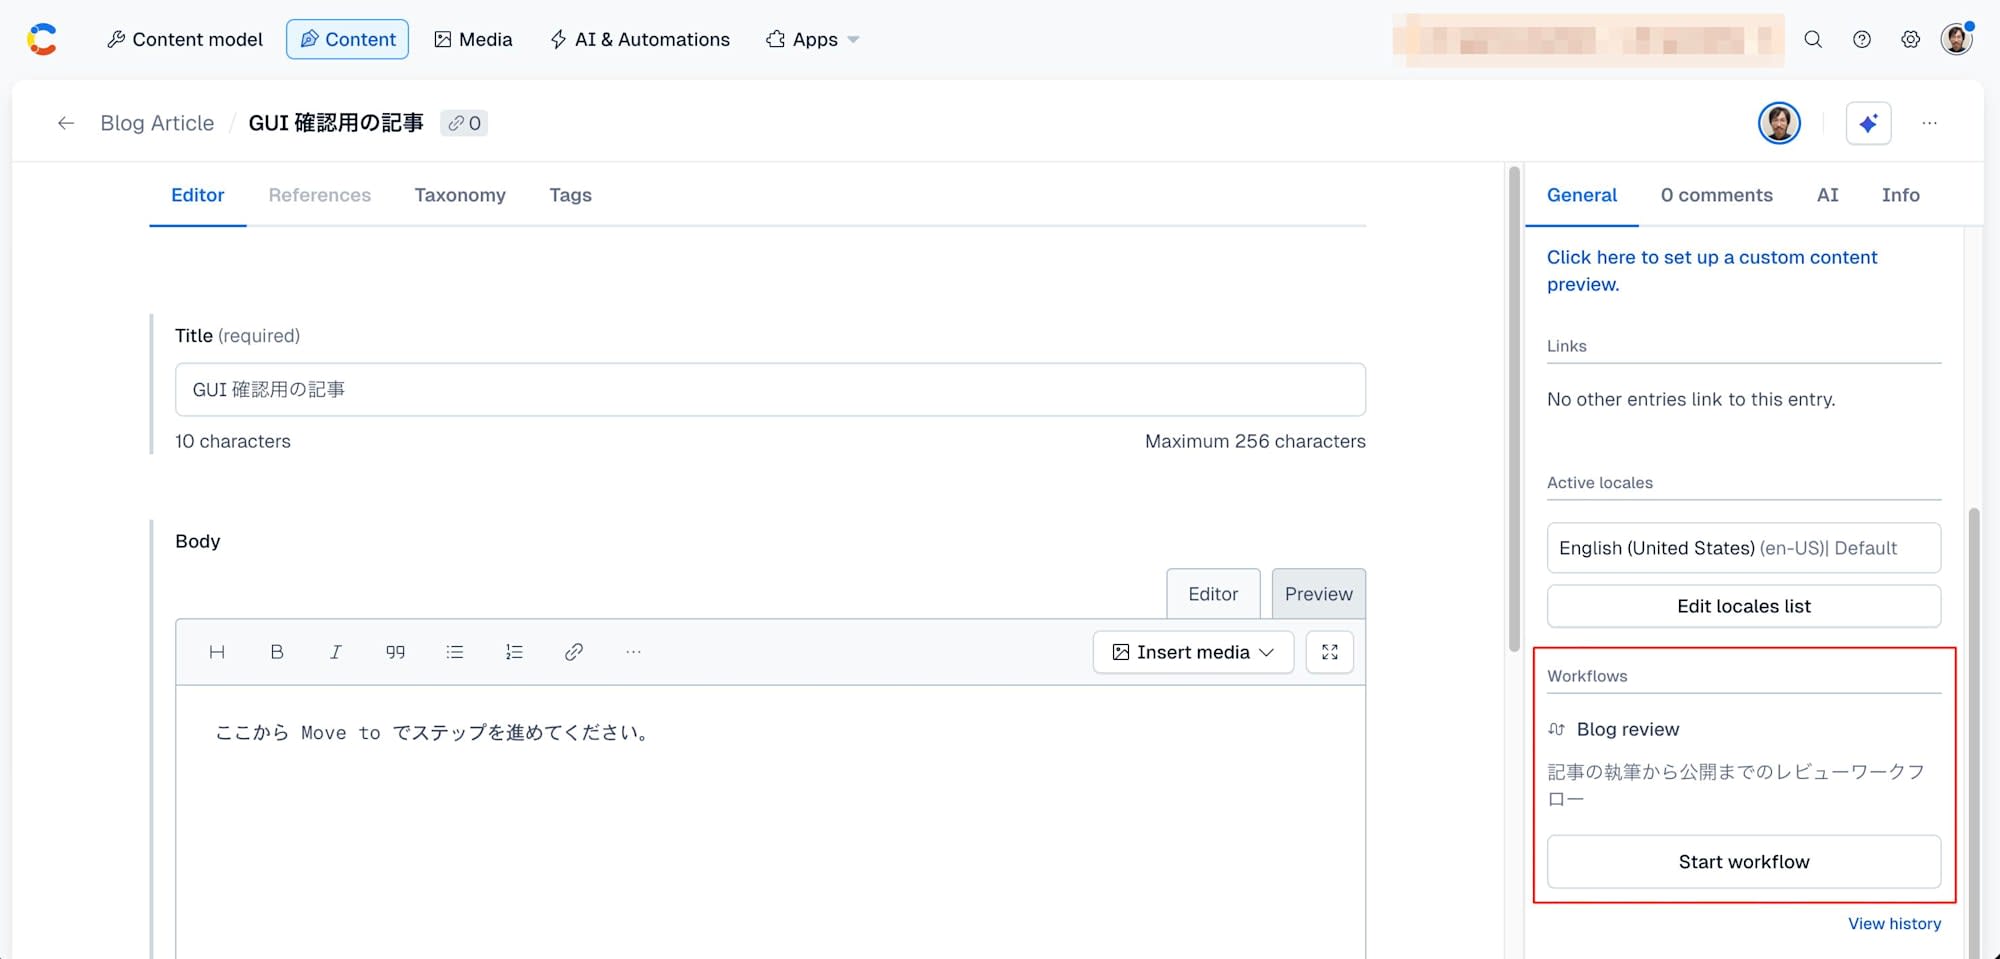
Create one blogArticle entry and open its editing screen. Click Start workflow in the workflow section on the right side of the screen.
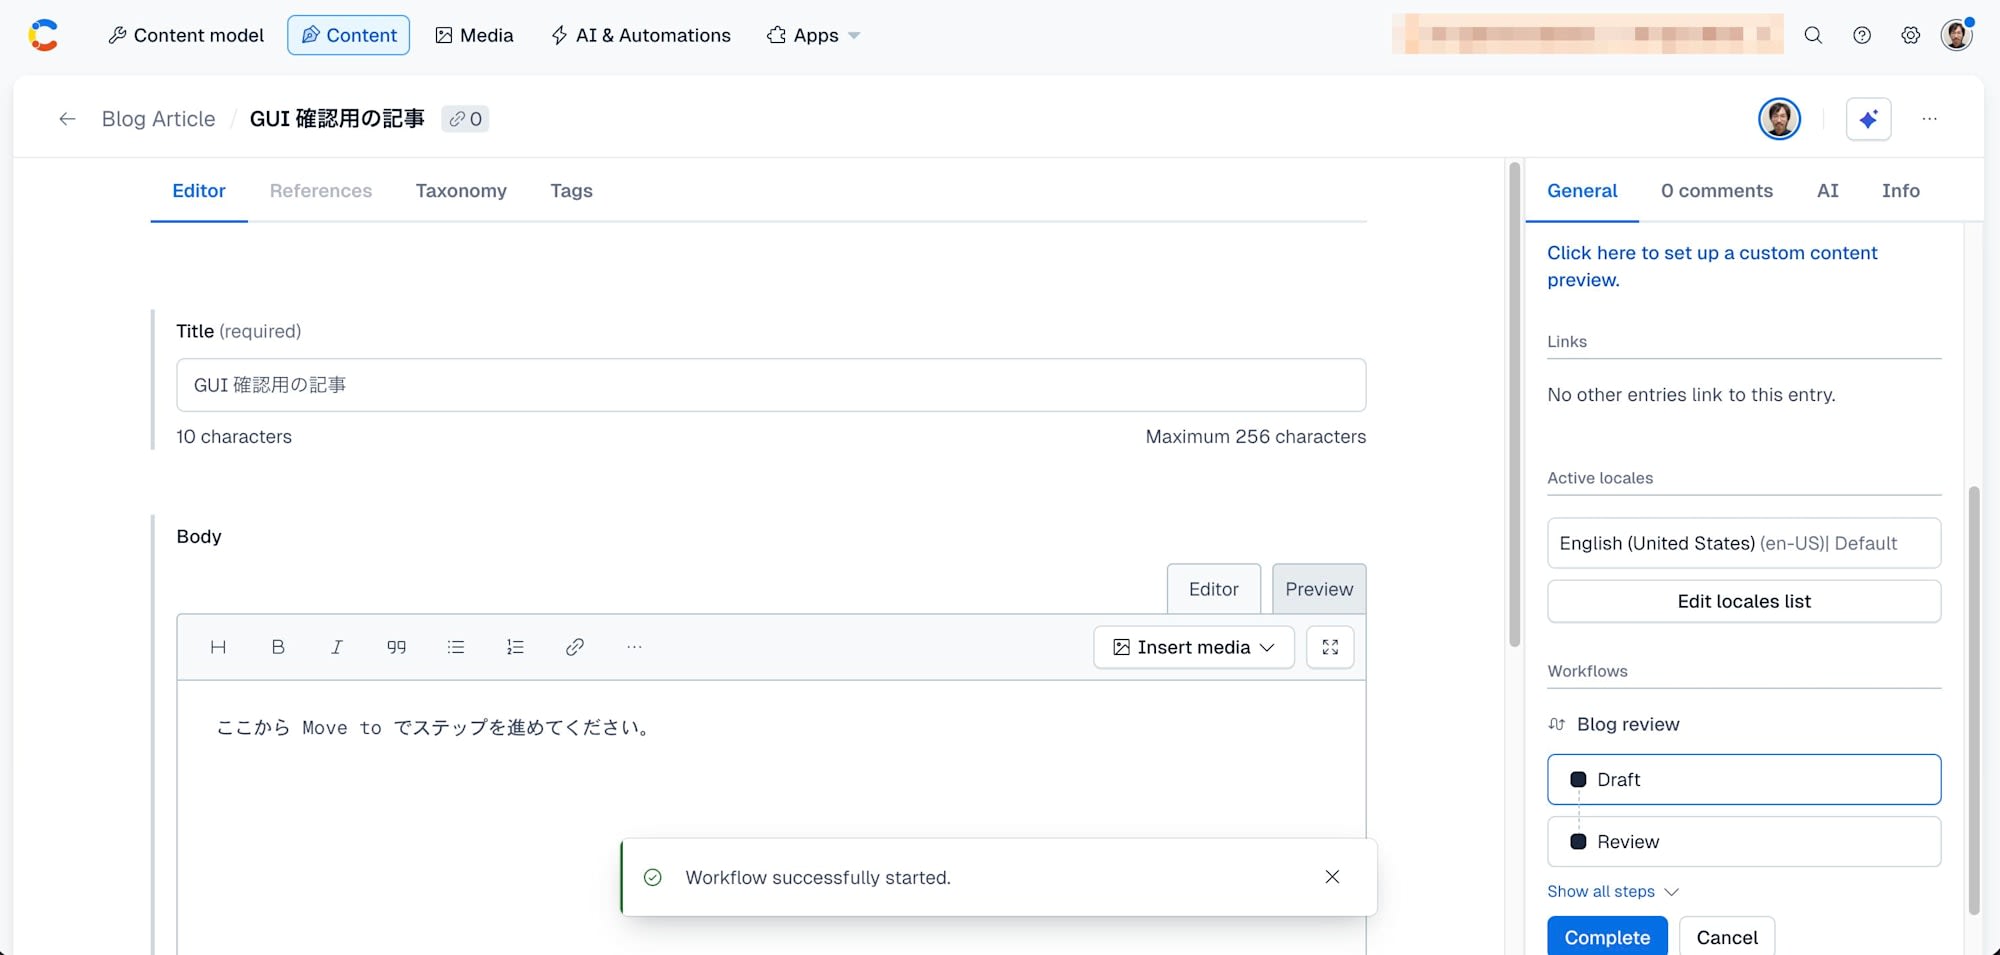
The workflow starts from the first step, Draft.
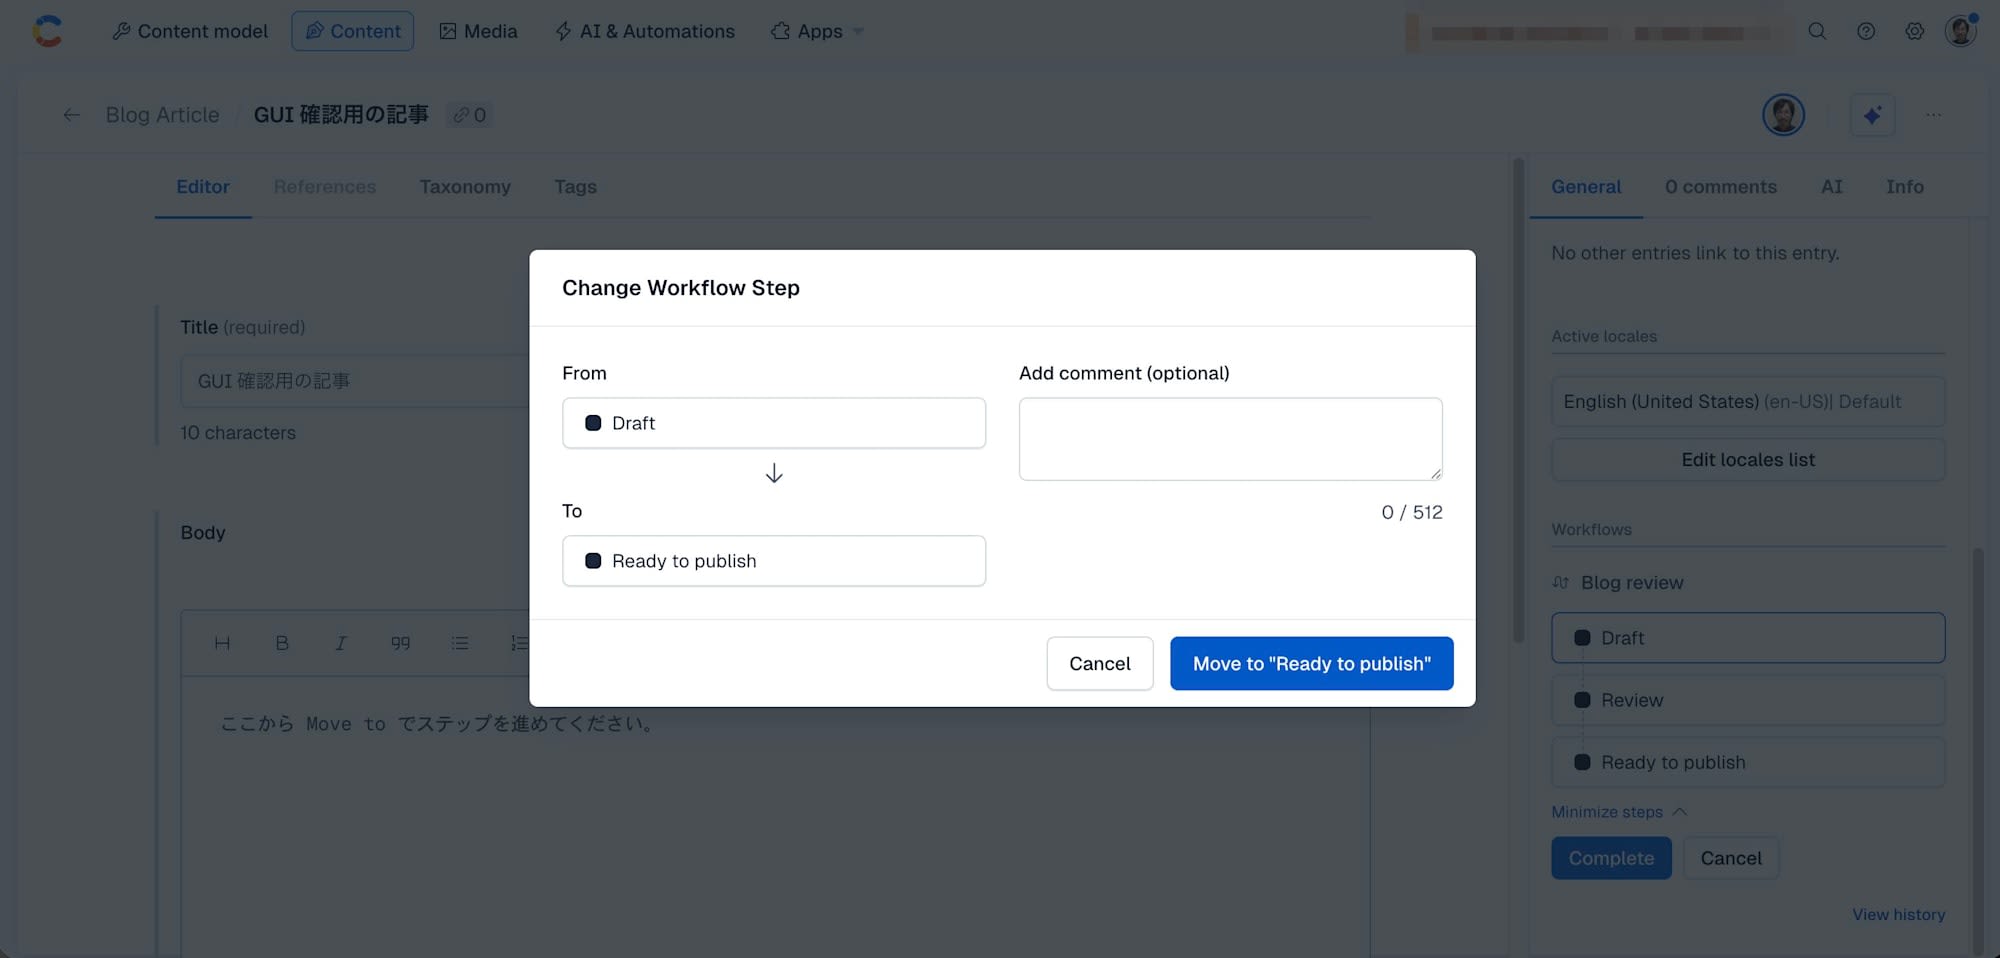
Let's try advancing to Ready to publish. Click Ready to publish to move there.
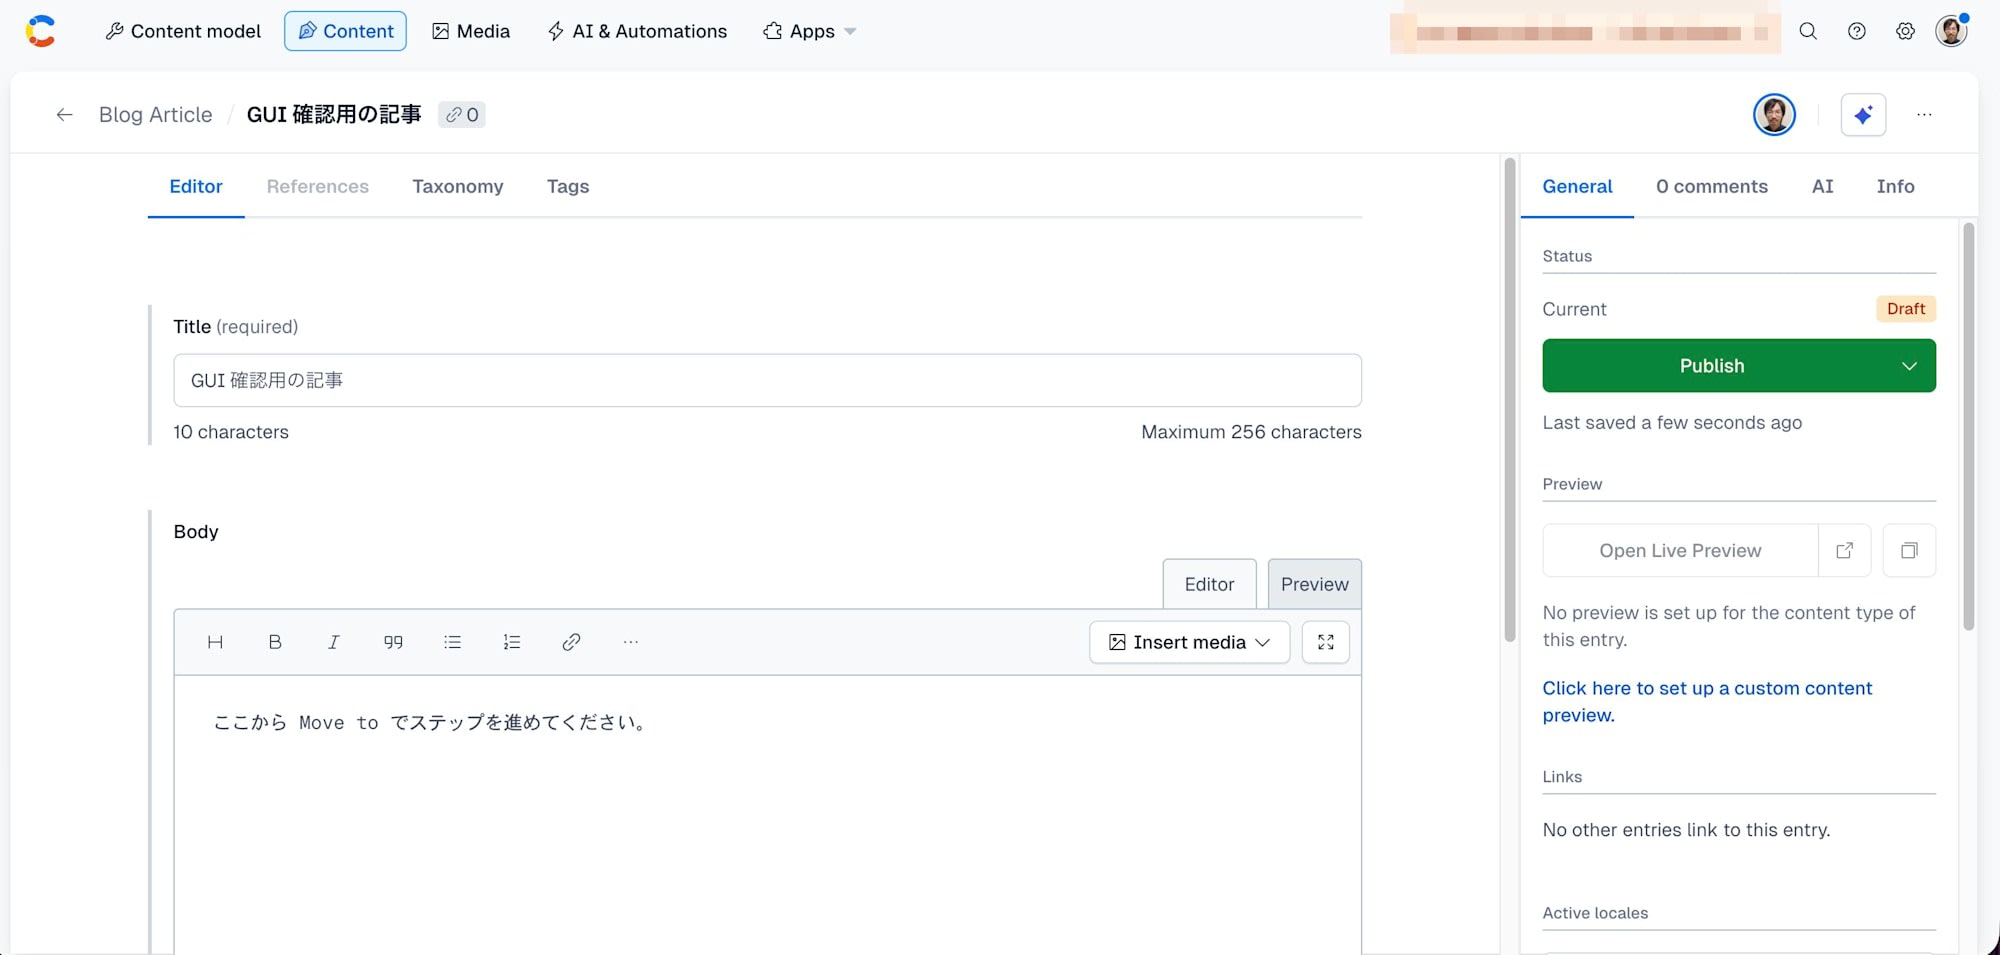
Completing and Publishing
Once you've advanced to Ready to publish, publish the entry using the Publish button.
Summary
By using Contentful's workflow feature, you can divide the process from writing to publishing into steps and set up a flow within the CMS where publishing only happens after an approval step. By separating writers from publishers and only allowing publishing at the final step, you can structurally prevent accidental publication. We hope this article serves as a useful reference when designing CMS operations for multiple people.