![[New Feature] Tried out Git CLI Commands in Databricks Git Folders Now in Public Preview](https://images.ctfassets.net/ct0aopd36mqt/1ScxpLCbLolhWoaTPQxf1b/b011669c14db746d31b917e4e4bda66d/eyecatch-databricks.png?w=3840&fm=webp)
[New Feature] Tried out Git CLI Commands in Databricks Git Folders Now in Public Preview

This page has been translated by machine translation. View original
This is Kawabata.
In Databricks Git folders, you could traditionally perform commit, push, pull, branch operations, rebase, reset, and other operations through the UI Git dialog. On the other hand, fine-grained Git operations such as git stash, git rebase -i, git commit --amend, and git push --force with arbitrary options had to be taken outside of Databricks (such as a local environment). Many of you have probably thought "I want to temporarily stash my changes" or "I want to clean up my commits before pushing" in the middle of notebook development.
On July 24, 2026, the ability to directly execute Git CLI commands within Git folders entered Public Preview. This article covers a full walkthrough of basic operations from the web terminal, how to use it alongside UI operations, and an examination of its limitations.
Feature Overview
In Git folders with Git CLI access enabled, you can run standard Git commands directly from the web terminal, notebooks, or Genie Code (also available from IDEs / terminals connected to Databricks compute via SSH tunnel). This article focuses primarily on the web terminal. The official documentation lists the following use cases:
- Running any Git command including
git stash,git push --force, andgit rebase -i - Integration of linting and code scanning via pre-commit hooks
- Operations on repositories exceeding the traditional Git folders limits (memory 2GB / disk 4GB)
- Support for Git submodules and Git LFS (Large File Storage)
- Accumulating multiple commits locally before pushing them all at once
Authentication works by determining the Git provider from the remote URL and automatically using the default Git credential configured for that provider. Therefore, you normally do not need to enter a token in the terminal. However, if multiple credentials are registered for the same provider and one cannot be uniquely identified, you will be prompted to select one. In that case, you can explicitly specify the credential name to use with the environment variable DB_GIT_CREDENTIAL_NAME, and the selected credential will be remembered per repository.
Relationship with UI Operations
The traditional Git folders UI (commit/push dialog and UI-provided rebase/hard reset) continues to be available and can be used alongside the CLI. We will examine the perspective on how to use each in the "Tried it out" section.
Prerequisites
- Databricks workspace (AWS in this article)
- Workspace administrator has enabled "Git CLI support for Git folders" on the Previews page
- Compute requirements:
- Creating a Git folder (with CLI access) and Git operations from UI: Serverless compute
- Executing CLI commands from web terminal / notebook / Genie Code: Serverless compute (serverless environment version 5 or higher) or Databricks Runtime (DBR) 17.0 or higher
- GitHub credential registered in the workspace (GitHub is used in this article)
CAN MANAGEpermission on the parent folder where the Git folder will be created- GitHub repository for testing (newly created)
Test Environment
- Test date: July 29, 2026
- Cloud: AWS
- Region:
- Compute: Serverless compute (environment version )
- Git provider: GitHub (credential: )
Preparation
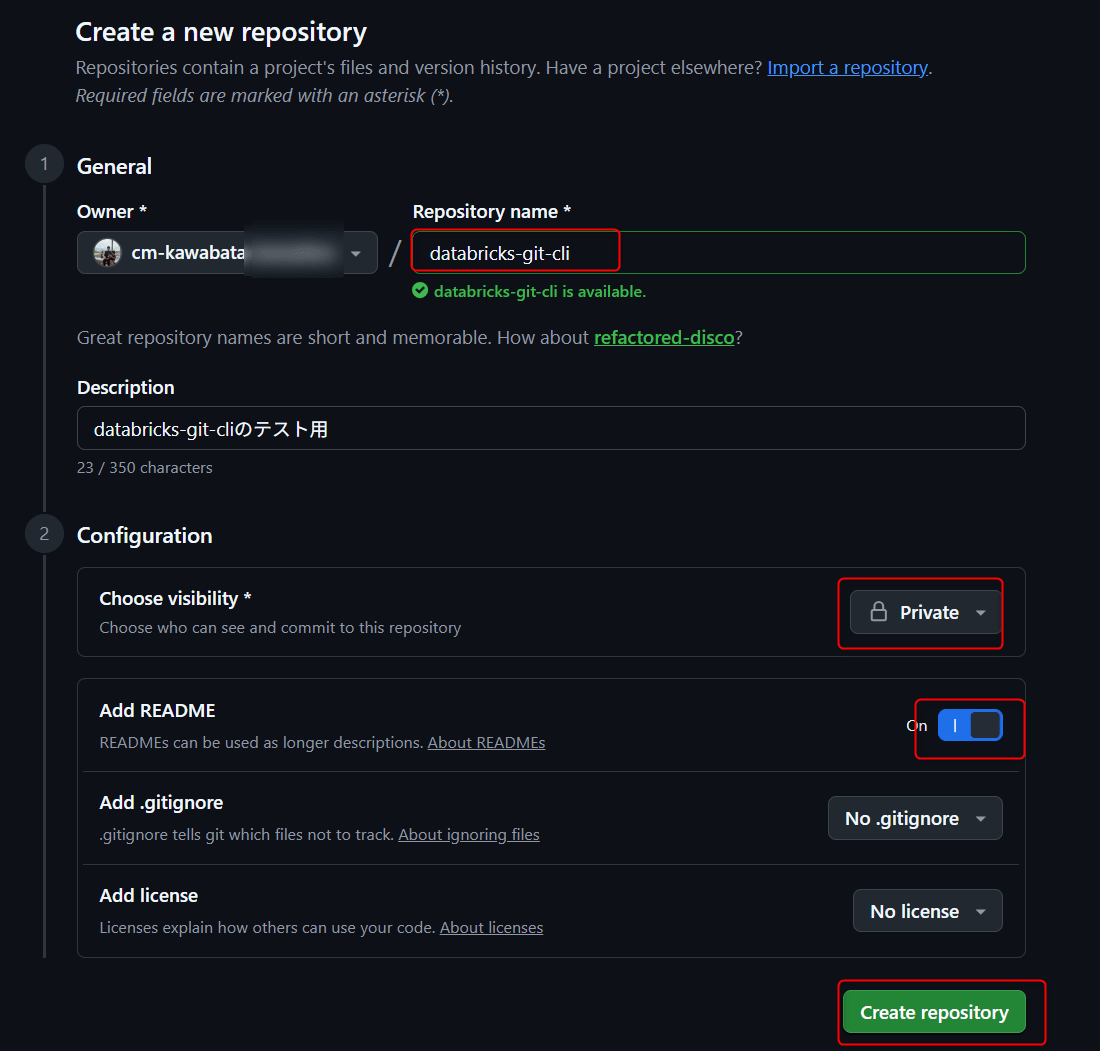
Creating a GitHub Repository for Testing
Create a new repository on the GitHub side for testing.
- Log in to GitHub and click New repository
- Enter any name in Repository name (e.g.,
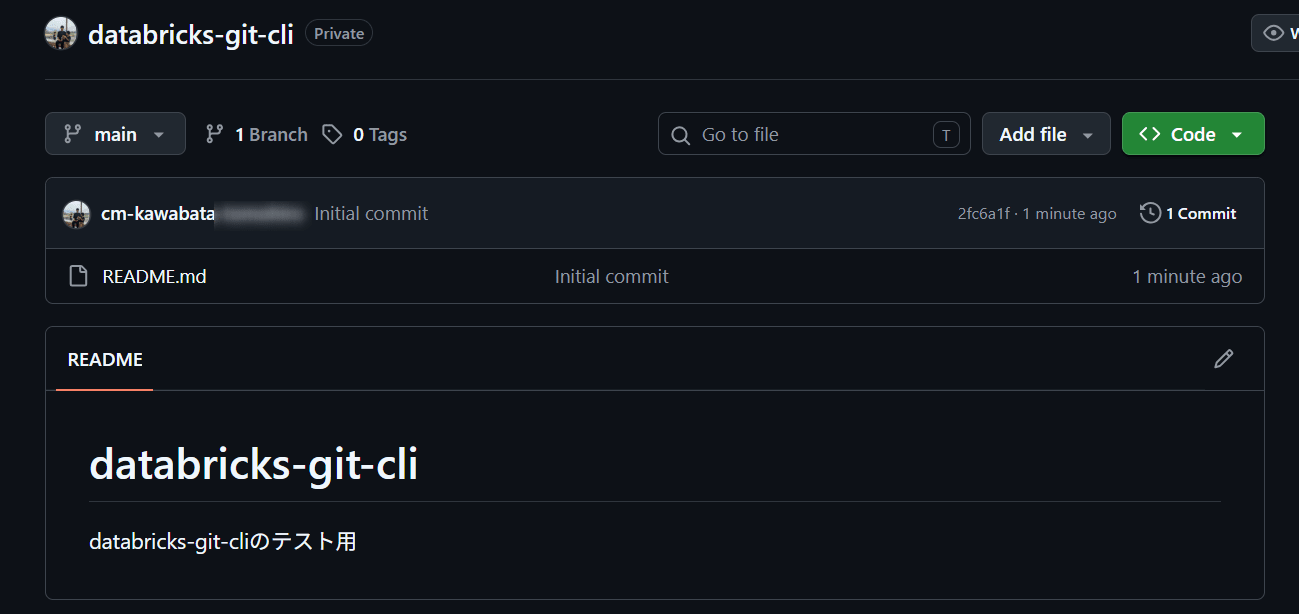
databricks-git-cli-test) - Select Private for visibility, check Add a README file, and click Create repository (adding a README creates an initial commit, making it easier to verify
git logafter cloning)
Registering Git Credentials
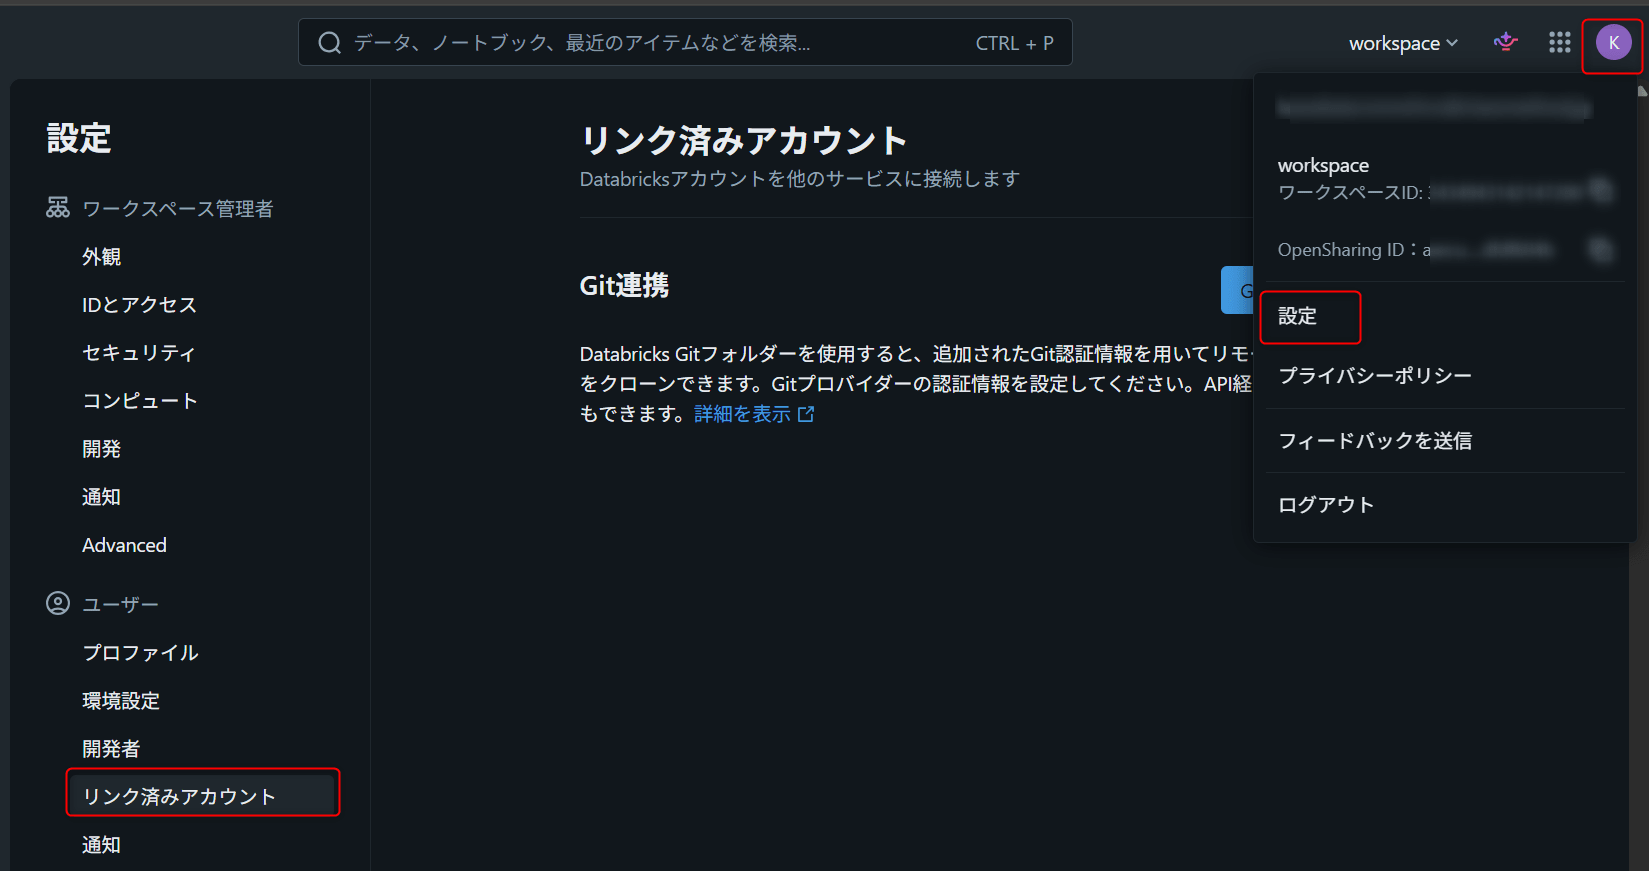
Register GitHub authentication information (credentials) in the workspace.
- Click your username in the upper right corner of the screen and select Settings
- Click Linked accounts
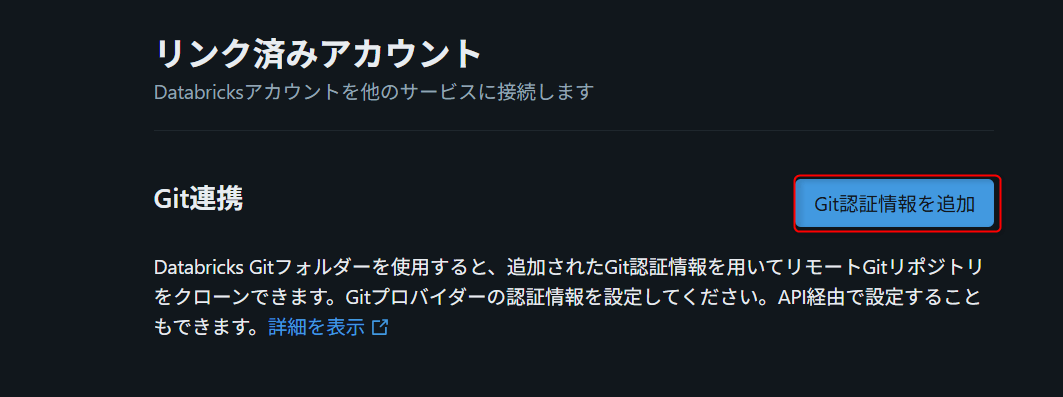
3. Select GitHub for Git provider
4. Select the authentication method. Choosing Link Git account (OAuth) will automatically link through GitHub's authorization flow. If using a personal access token (PAT), paste the token generated on the GitHub side
5. Save
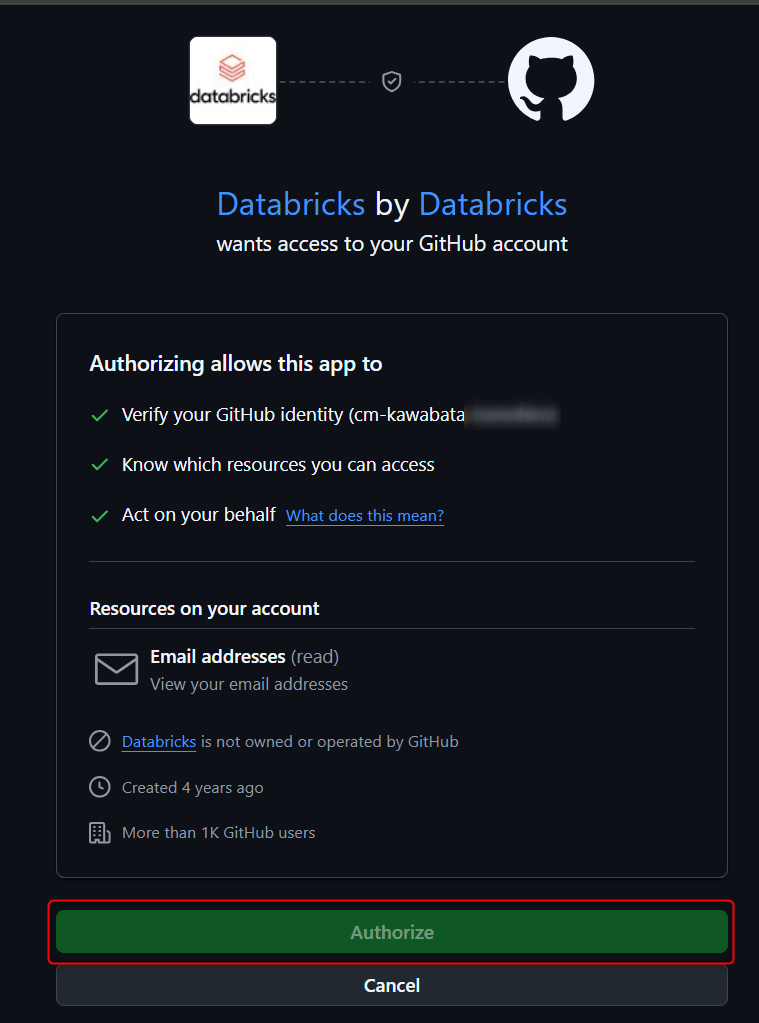
Note: If SAML SSO is enabled in your GitHub organization, PATs require SSO authorization.
Creating a Git Folder
Create a Git folder in the workspace and clone the test repository.
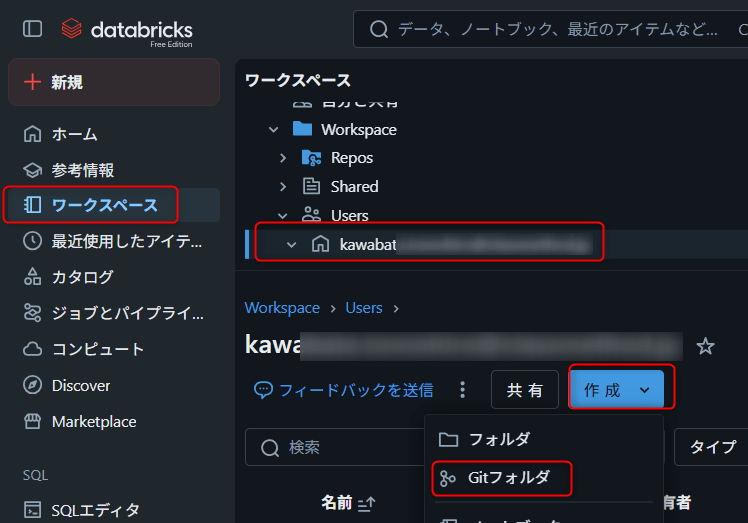
- Open Workspace in the sidebar and navigate to your user folder (
Users/<your-email>) - Click Create > Git folder
- Enter the URL of the test repository (
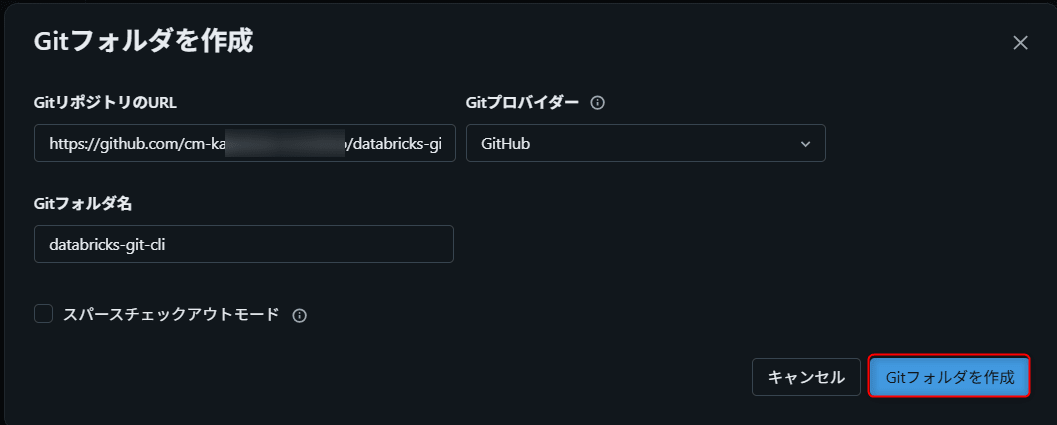
https://github.com/<your-org>/<your-repo>.git) in Git repository URL. The Git provider is automatically detected from the URL - Click Create Git folder
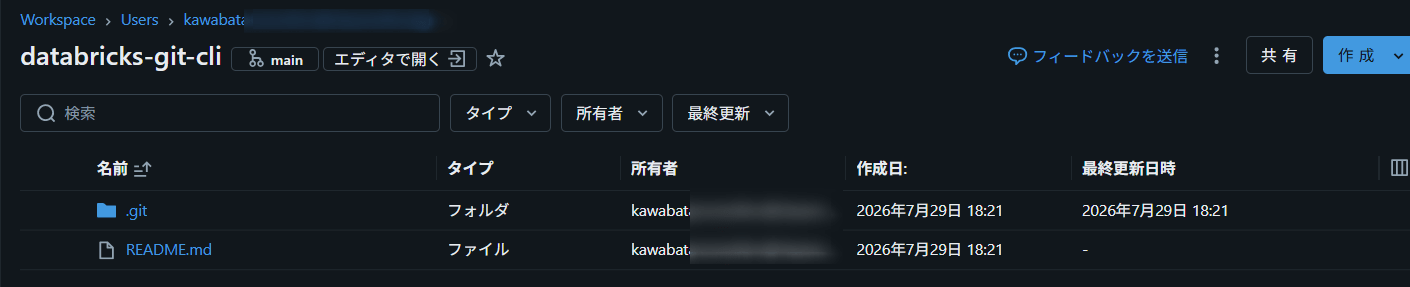
If all of the following conditions are met, Git CLI access is automatically granted to Git folders created from the UI:
- The Preview for Git CLI support for Git folders is enabled
- Serverless compute is available in the workspace
- The Git provider is accessible from serverless compute
- At the time of Public Preview, the repository has 10,000 files or fewer (repositories exceeding this are created as regular Git folders)
In addition to creation from the UI, there is also the method of using git clone under /Workspace from the web terminal. Repositories cloned this way always become Git folders with Git CLI access, and after cloning, refreshing the browser will display them in the workspace file browser.
cd /Workspace/Users/<your-email>
git clone https://github.com/<your-org>/<your-repo>.git
Opening the Web Terminal
Use the web terminal to execute Git CLI commands.
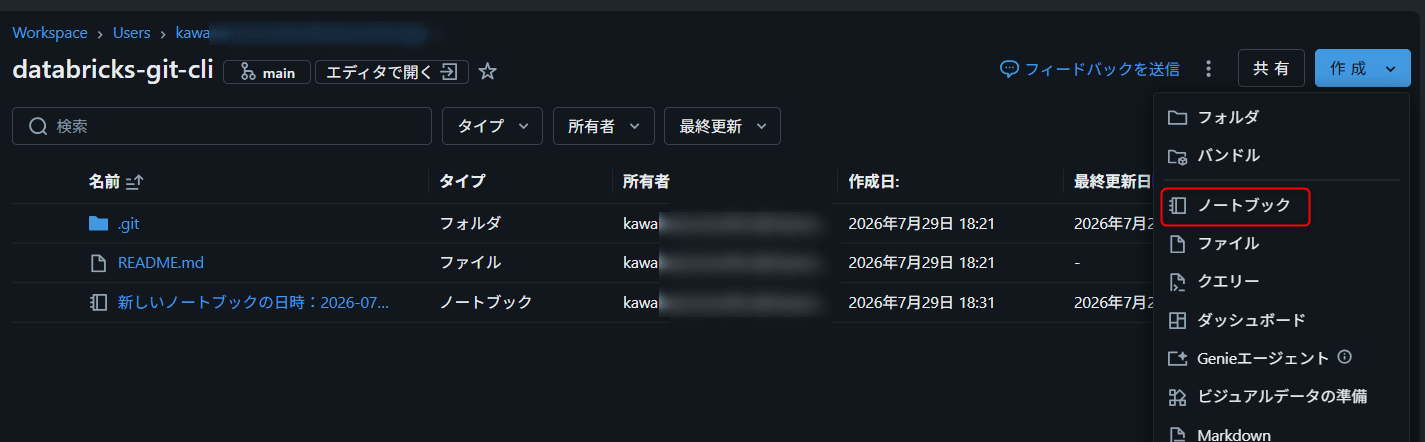
- Create a new notebook inside the Git folder (or open any existing notebook)
- Attach the notebook to serverless compute and set the serverless environment version to 5 or higher in the environment panel (for classic compute, use Databricks Runtime 17.0 or higher)

- Click the terminal icon at the bottom of the right sidebar (or select Web Terminal from the connected compute dropdown) to open a terminal at the bottom of the screen
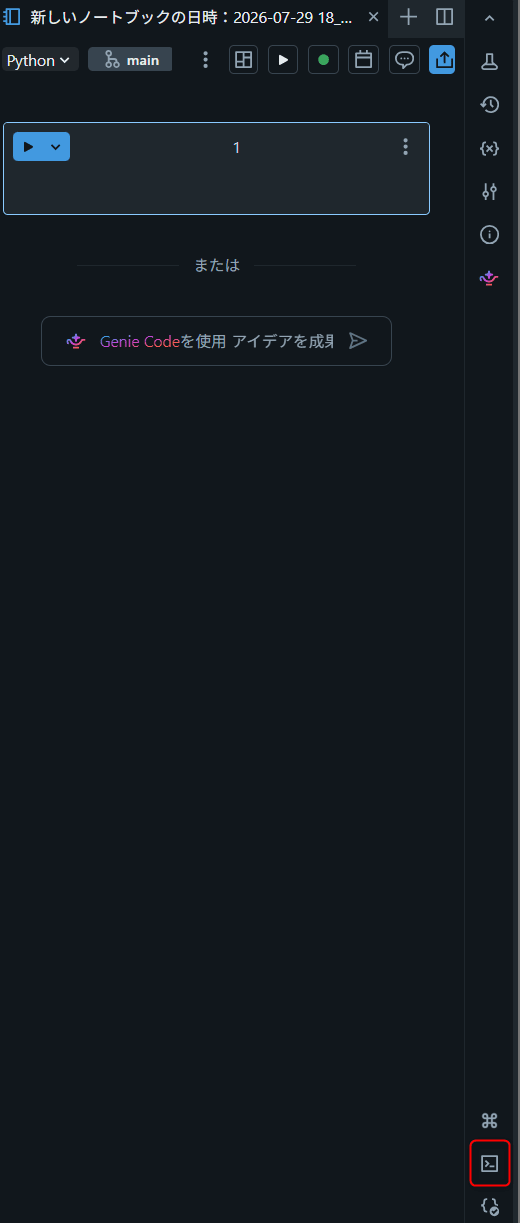
Terminal screen
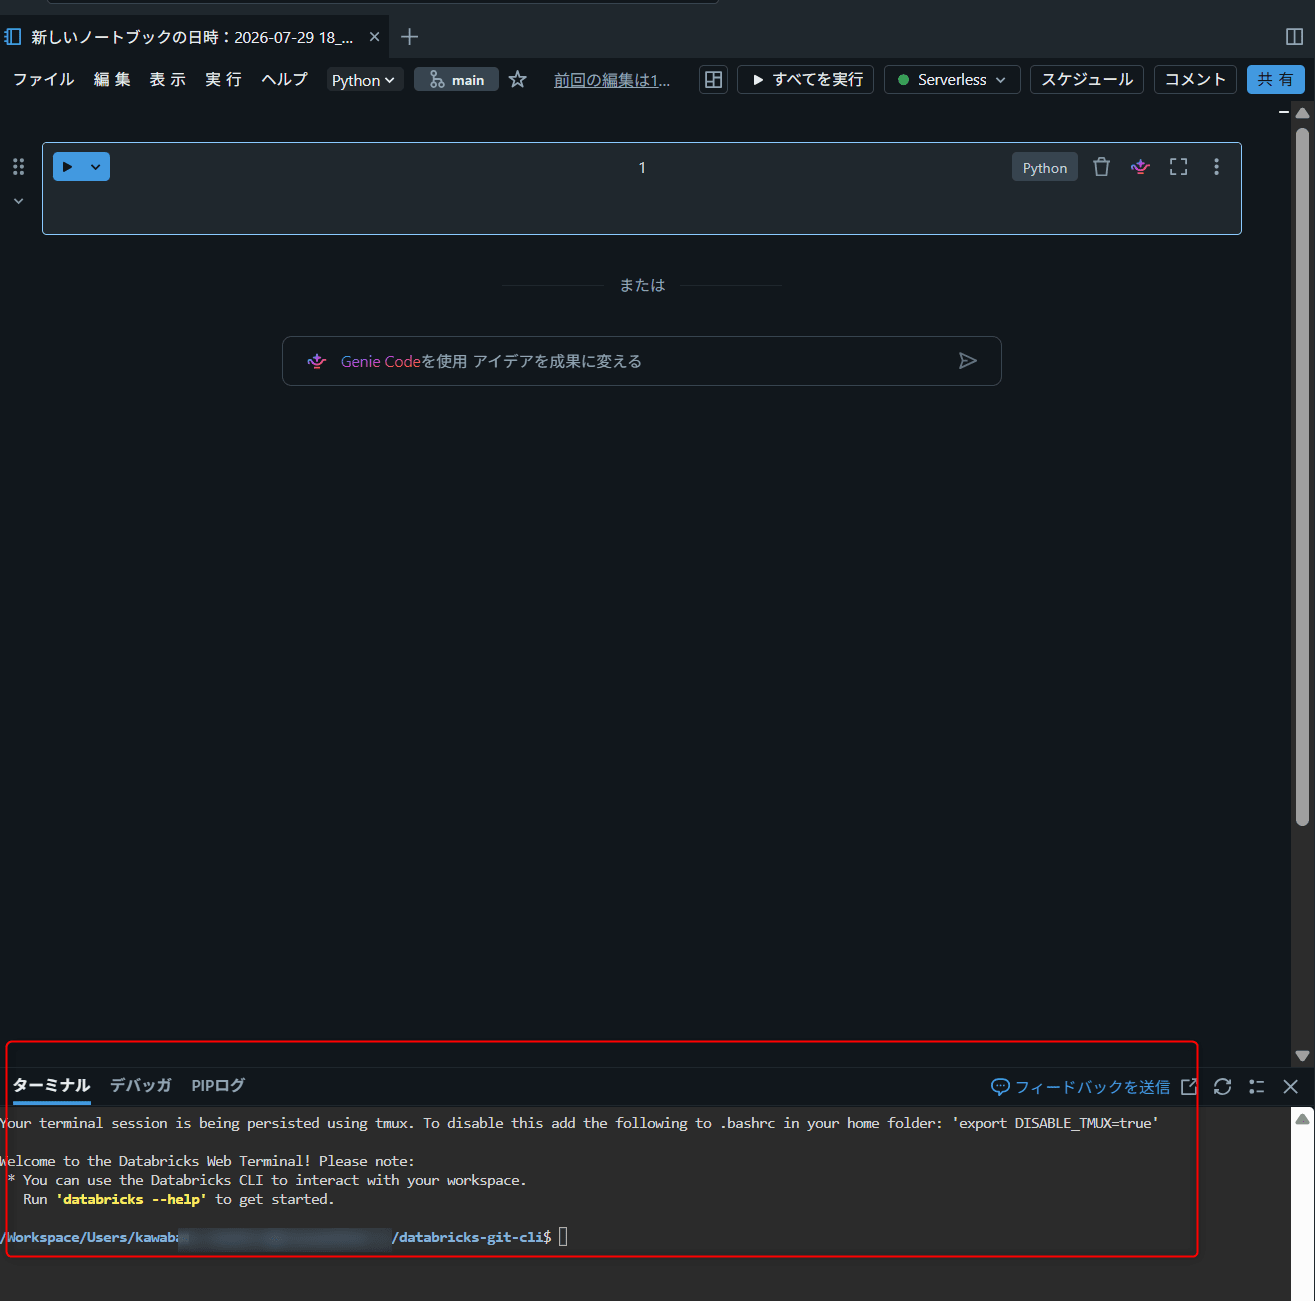
Note: The web terminal itself may also require activation by a workspace administrator. If you cannot open it, check whether the web terminal is enabled in the admin settings (Workspace admin settings).
Tried It Out
Running Through Basic Operations
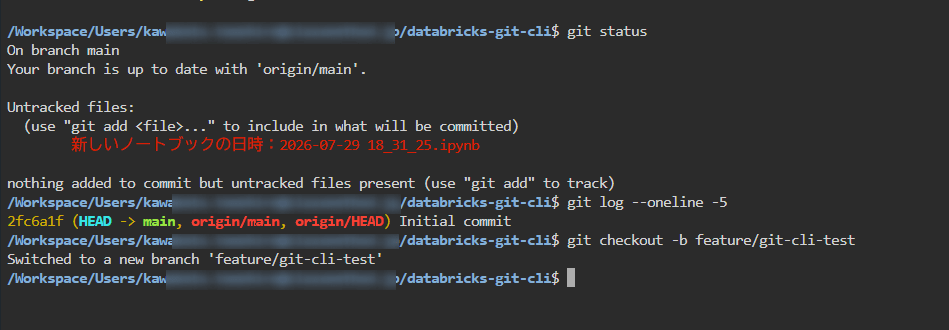
Navigate to the Git folder path in the web terminal and run through basic operations.
cd /Workspace/Users/<your-email>/<git-folder-name>

# Check status
git status
git log --oneline -5

# Create branch
git checkout -b feature/git-cli-test
Modify a file, then commit and push.
echo "# git cli test" >> README.md
git add README.md
git commit -m "Test commit from Databricks web terminal"
git push origin feature/git-cli-test
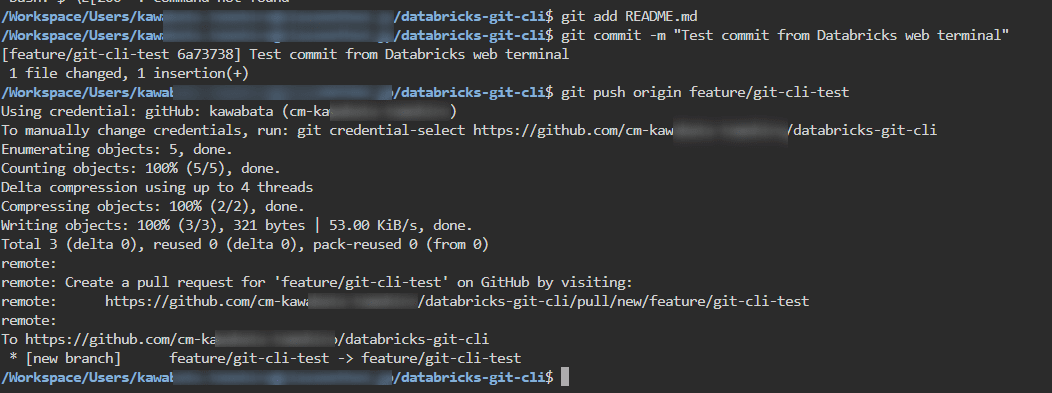
Note that if you run the first push with -u like git push -u origin feature/git-cli-test to set the upstream, you can subsequently run just git push / git pull.
Verify that the branch and commit are reflected on the GitHub side.

Trying Operations Not Available in the UI
Let's execute operations that are not provided in the UI Git dialog.
# Temporarily stash and restore changes
echo "temporary change" >> README.md
git stash
git status
git stash pop

# Modify the message of the previous commit
git commit --amend -m "Amended commit message"
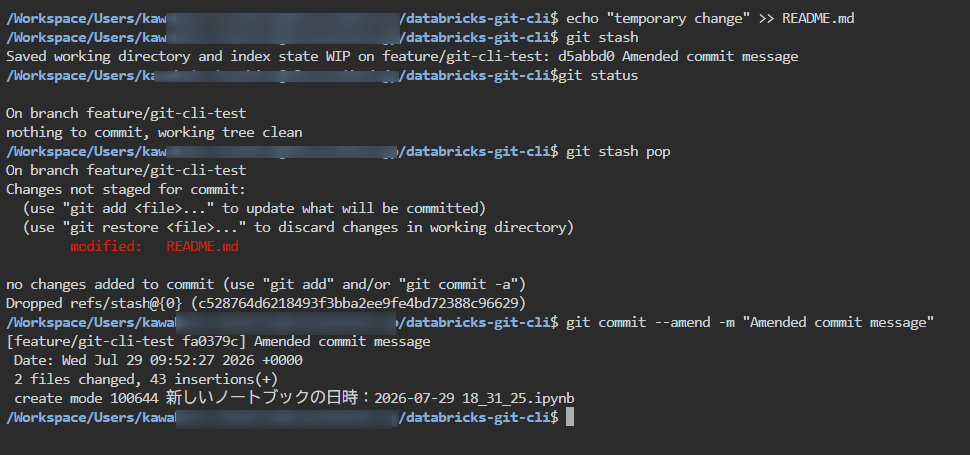
The git commit --amend here is an operation that only rewrites the message of the previous commit, because the changes restored by git stash pop have not been git added. If you want to also incorporate the restored changes into the previous commit, run git add README.md before amending.
Note: Regular
git stashdoes not stash untracked files. Usegit stash -uto include untracked files.
Next is interactive rebase. Since at least 2 commits are needed as editing targets, create 2 commits first before executing.
# Create 2 commits for rebase -i
echo "commit 1" >> README.md
git add README.md
git commit -m "Add commit 1"

echo "commit 2" >> README.md
git add README.md
git commit -m "Add commit 2"

# Interactively edit the last 2 commits (clean up commits)
git rebase -i HEAD~2
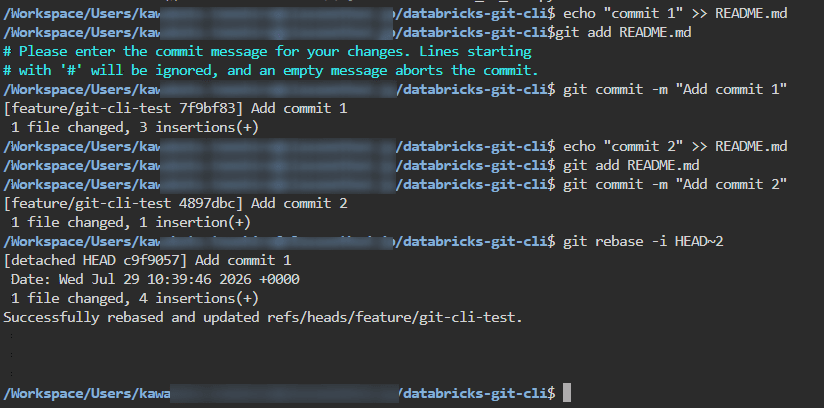
Edit mode
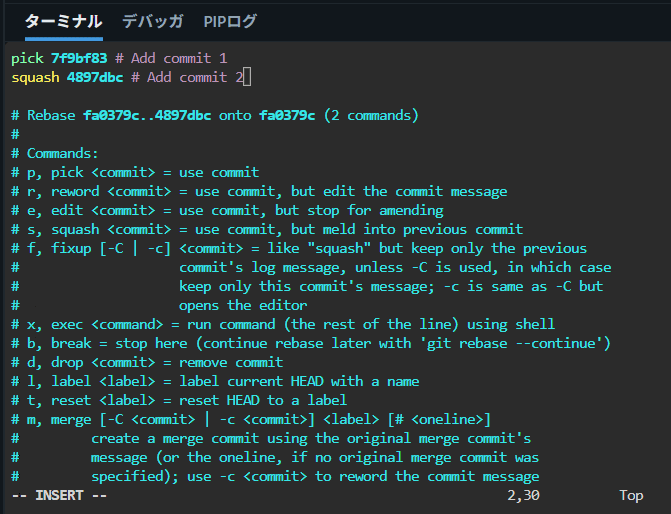
When the editor opens, change pick at the beginning of the second commit's line to squash (or s), then save and exit. This merges the 2 commits into 1.
pick <commit-1> Add commit 1
squash <commit-2> Add commit 2
A commit message editing screen will then open, so adjust the message for the combined commit, save and exit to complete the rebase. You can verify the result with git log.
git log --oneline -5
Pushing a Branch with Rewritten History
A branch whose history has been rewritten with git commit --amend or git rebase -i has diverged from the remote branch, so a regular git push will be rejected.
git push origin feature/git-cli-test
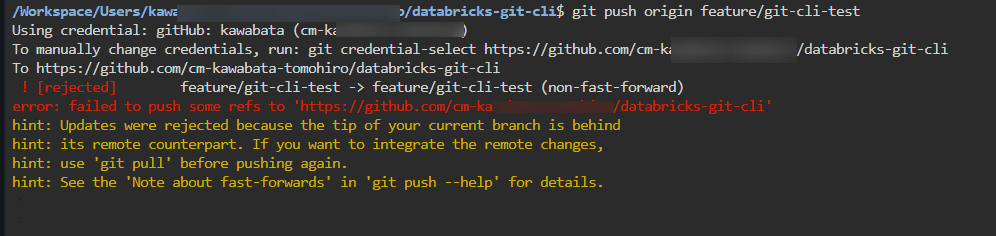
This is where force push comes in. git push --force unconditionally overwrites the remote state, but --force-with-lease will reject the push if the remote branch has been updated to a state you are not aware of, helping to prevent accidental overwrites in collaborative development.
git push --force-with-lease origin feature/git-cli-test
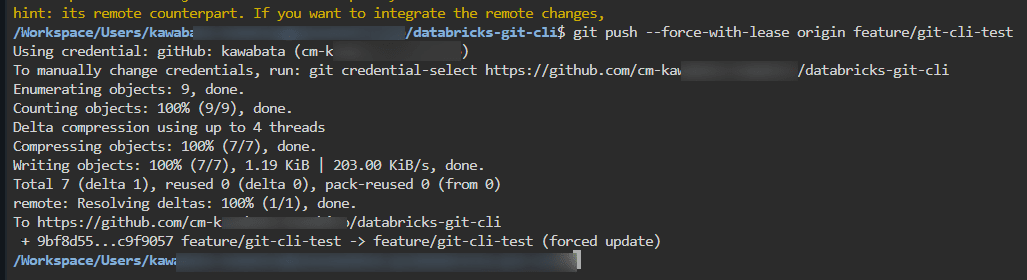
Note: If force push is prohibited by branch protection rules on the Git provider side, the push will be rejected even with
--force-with-lease. It is recommended to enable protection rules for shared branches and limit history rewriting to personal working branches.
In the UI as well, after a rebase git push --force is executed, and reset is equivalent to a combination of git reset --hard and git push --force. However, the ability to execute force push at any timing with any option is unique to Git CLI.
How to Use UI Operations and Git CLI Together
| Operation | UI (Git dialog) | Git CLI |
|---|---|---|
| Clone (create Git folder) | ○ | ○ (via git clone in web terminal) |
| Commit / push / pull | ○ | ○ |
| Create / switch branches | ○ | ○ |
| merge / rebase / hard reset | ○ (limited to operations provided by UI) | ○ |
git stash / git commit --amend |
- | ○ |
git rebase -i (interactive rebase) |
- | ○ |
Arbitrary git push --force / --force-with-lease |
- | ○ |
| pre-commit hooks / submodules / Git LFS | - | ○ |
| Accumulate multiple commits locally and push all at once | - | ○ |
| Per-individual attribution in Databricks audit logs | ○ | △ (raw Git commits are not attributed to individual users by Databricks) |
Note: UI rebase / reset rewrites history and then force pushes to the remote (reset is equivalent to
git reset --hard+git push --force). When pushing branches with CLI-rewritten history as well, prioritizegit push --force-with-leaseovergit push --force, and it is recommended to avoid pushing directly to shared branches and instead go through Pull Requests.
Limitations and Notes
Limitations and Notes
- This feature is in Public Preview as of July 24, 2026. Specifications are subject to change
- Security note: The Git URL allowlist applies to Git operations via the UI, but does not apply to commands executed directly via Git CLI. If you are using the allowlist as a connection destination control, before permitting CLI usage, verify alternative controls including network egress controls, minimizing Git credential permissions, and repository-side permissions and audit logs
- Git CLI access is automatically granted to Git folders created from the UI only when the repository has 10,000 files or fewer at the time of Public Preview. Repositories exceeding this are cloned as regular Git folders
- Git folders with Git CLI access enabled are not included in the List Repos API response
- Raw Git commits created via Git CLI are not attributed to individual users in Databricks audit logs. The author / committer displayed on the Git provider side depends on the Git configuration and the credentials used
- Executing CLI commands requires serverless compute (serverless environment version 5 or higher) or Databricks Runtime 17.0 or higher
- If a private network connection is required to connect to the Git provider, additional network configuration is necessary
- If you are prompted to select a credential, you can explicitly specify the credential to use with the environment variable
DB_GIT_CREDENTIAL_NAME
Closing
With Git CLI now available within Git folders, operations such as stash, rebase, and amend that previously had to be taken to a local environment can now be completed entirely within Databricks. On the other hand, there are characteristics that differ from UI operations in terms of governance, such as the URL allowlist not applying to CLI and the lack of raw commit attribution, so it seems best to introduce this alongside team operational guidelines.
I hope this article is helpful in some way!