
Setting up a GitLab repository in dbt Cloud and creating a project

I'm Kawabata.
I'll be setting up a GitLab repository in dbt Cloud and creating a project.
Based on my observation, while there are many articles about GitHub repository setup, I don't see many about GitLab configuration, so I'd like to summarize the setup method in this article.
For GitHub setup, the article below is very helpful, so please check it out.
Test Environment and Prerequisites
Test Environment
- dbt Cloud account
- GitLab account
※I'm using the Enterprise version of dbt Cloud and the Free Plan for GitLab.
※For this example, I'll be using Snowflake for [Set Up a Database Connection], but you can choose any warehouse you prefer.
Prerequisites
I'll explain based on the official documentation below.
As a premise, the connection methods differ between dbt Cloud's Developer/Starter plans and Enterprise/Enterprise+ plans. In this article, I'll be implementing the method for Enterprise and Enterprise+ plans.
【Official Documentation】
Creating a New Project
Create a new project in dbt. Click on your account name at the bottom left, select Account settings, open Project, and click on +New project in the upper right.

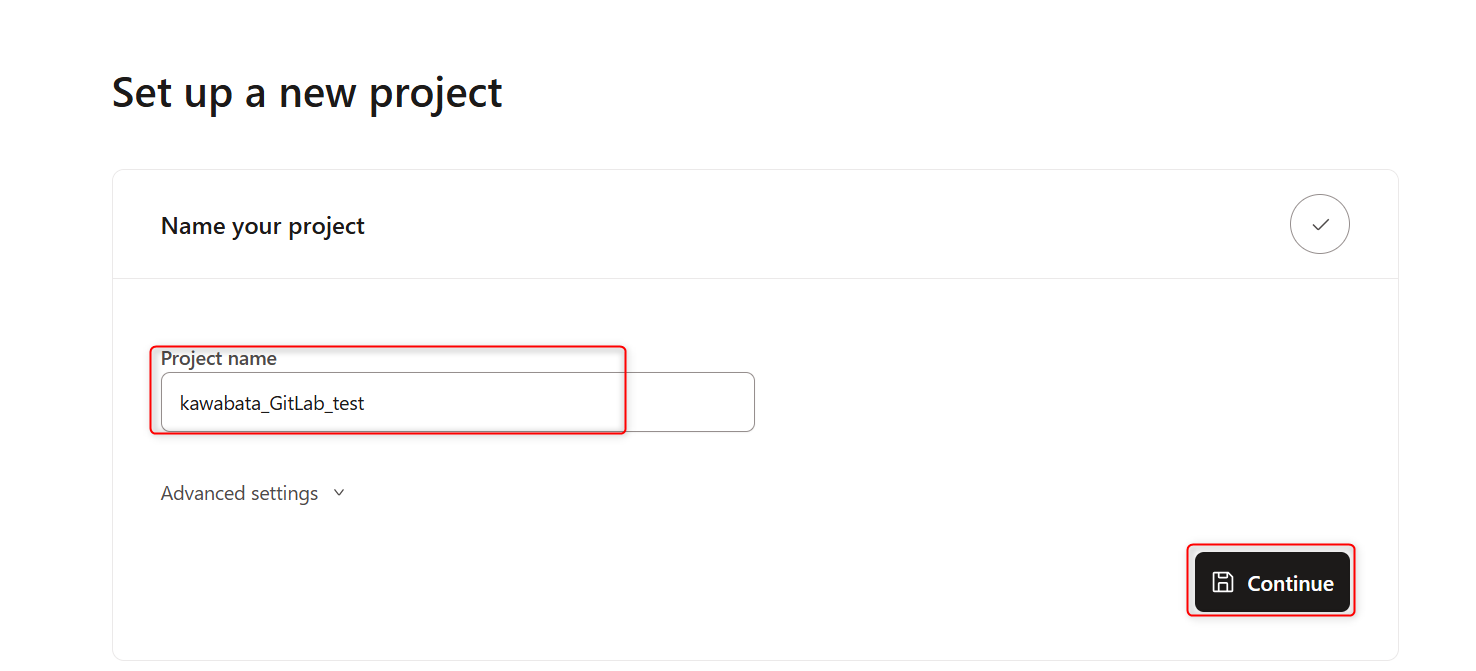
After navigating to the screen below, enter your desired project name. Once completed, press Continue.
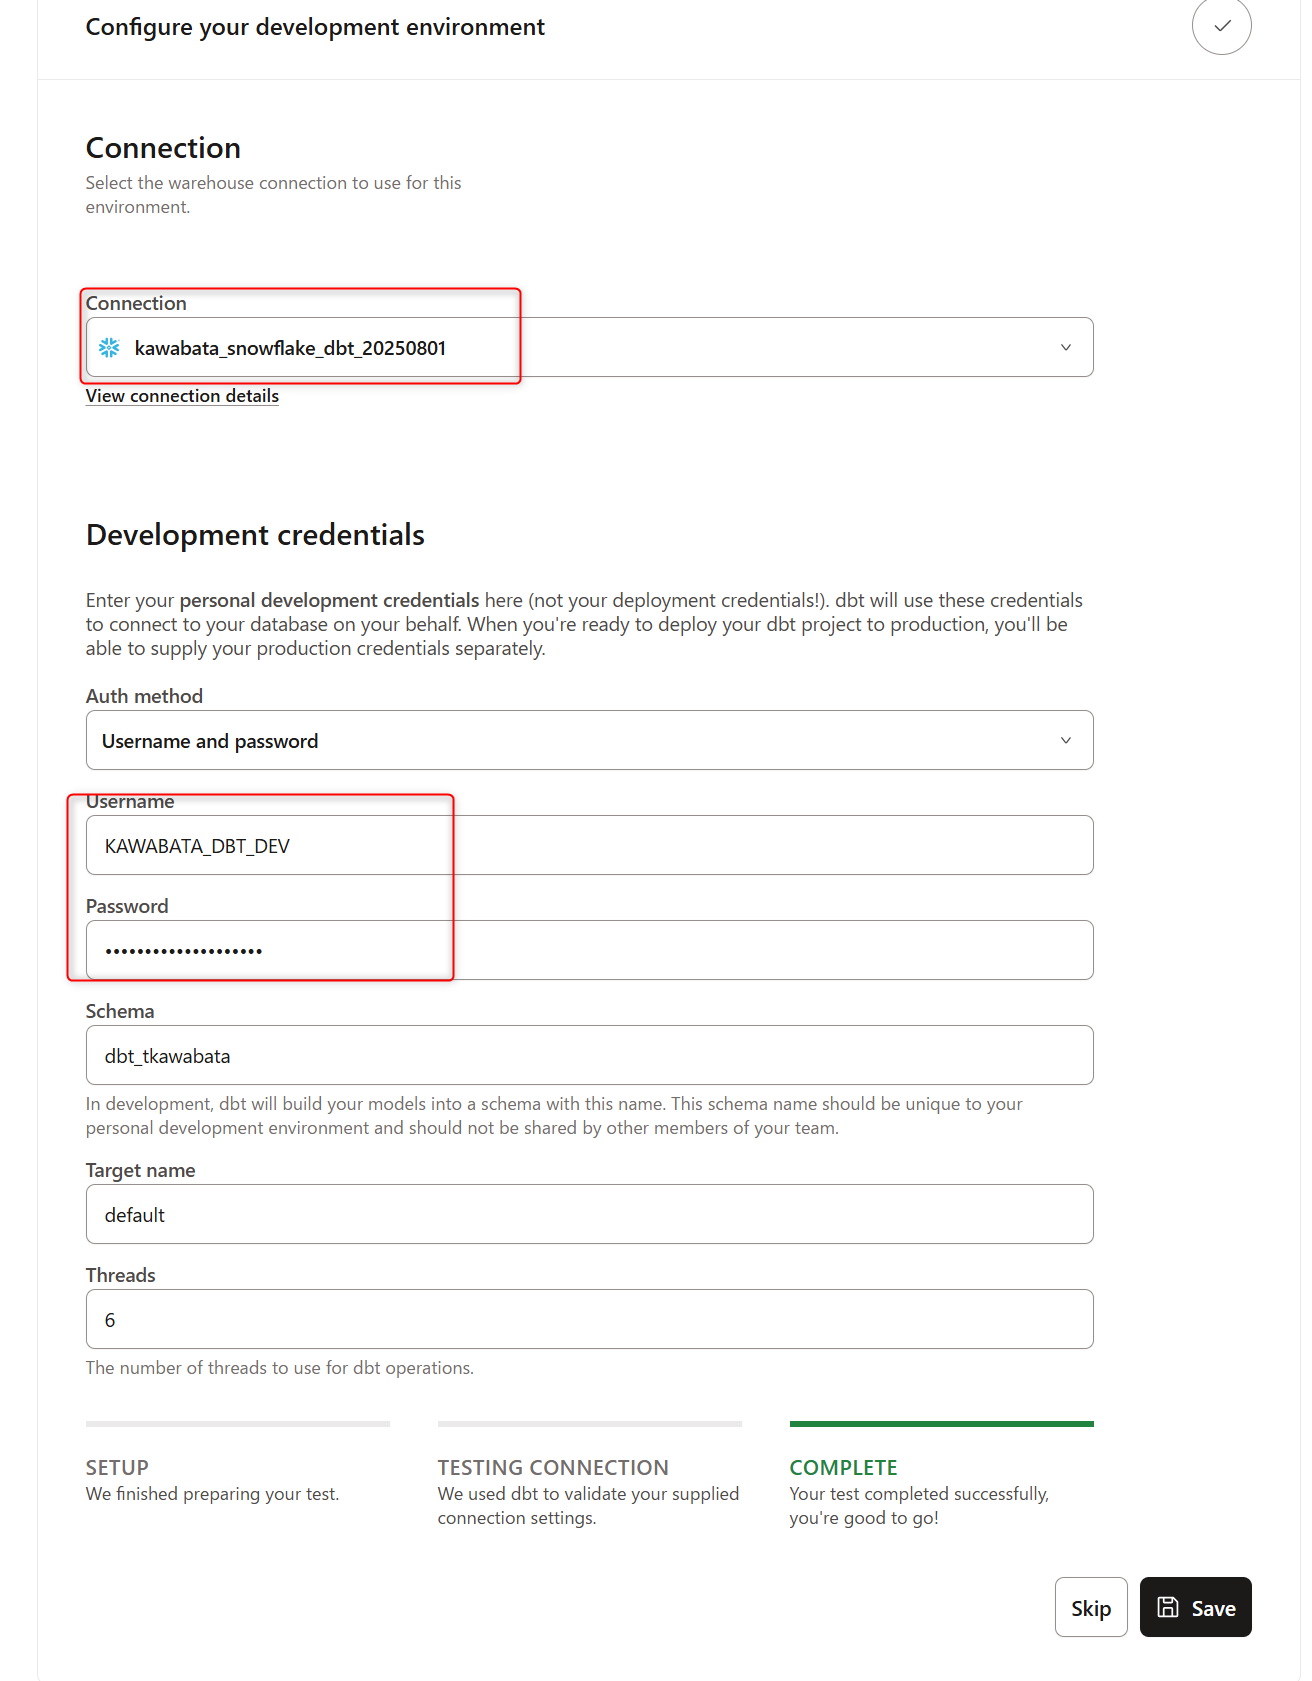
Next, set up Configure your development environment. For Connection, you can connect using existing settings from the dropdown. If you want to create a new configuration, select +Add new connection to navigate to the new connection setup screen.
Enter your Username and Password under Development credentials, then click Test Connection. When Complete appears as shown below, your connection is established, so click Save.
Connecting with GitLab
To connect GitLab, a GitLab account administrator needs to perform the following tasks:
- Set up a GitLab OAuth application.
- Add the GitLab app to dbt.
After the administrator completes the steps above, dbt developers need to:
-
Authenticate personally from dbt to GitLab.### Setting up GitLab OAuth Application
Let's configure an OAuth application in GitLab. -
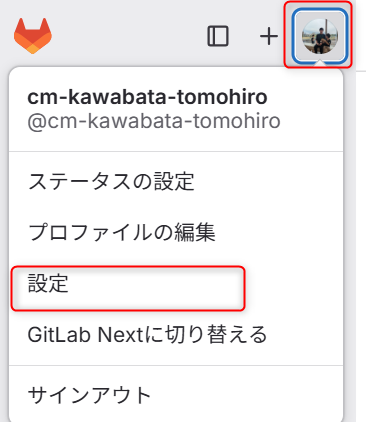
Select your icon in the upper left corner of the GitLab screen, then click on settings.
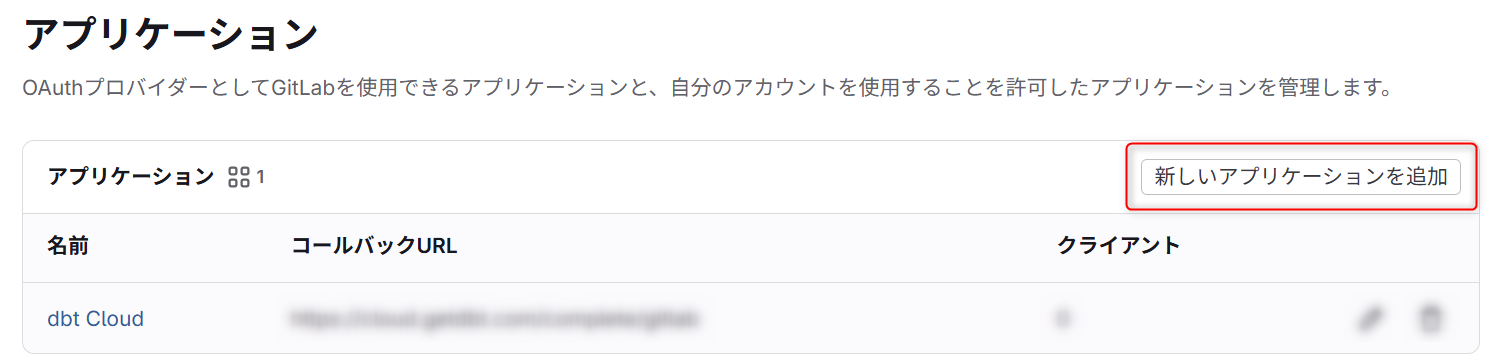
- After navigating to the user settings screen, select Applications.

-
Click on Add new application.
-
On the following screen, enter the Name and Redirect URI, check the boxes for "confidential" and "api", then save the application.
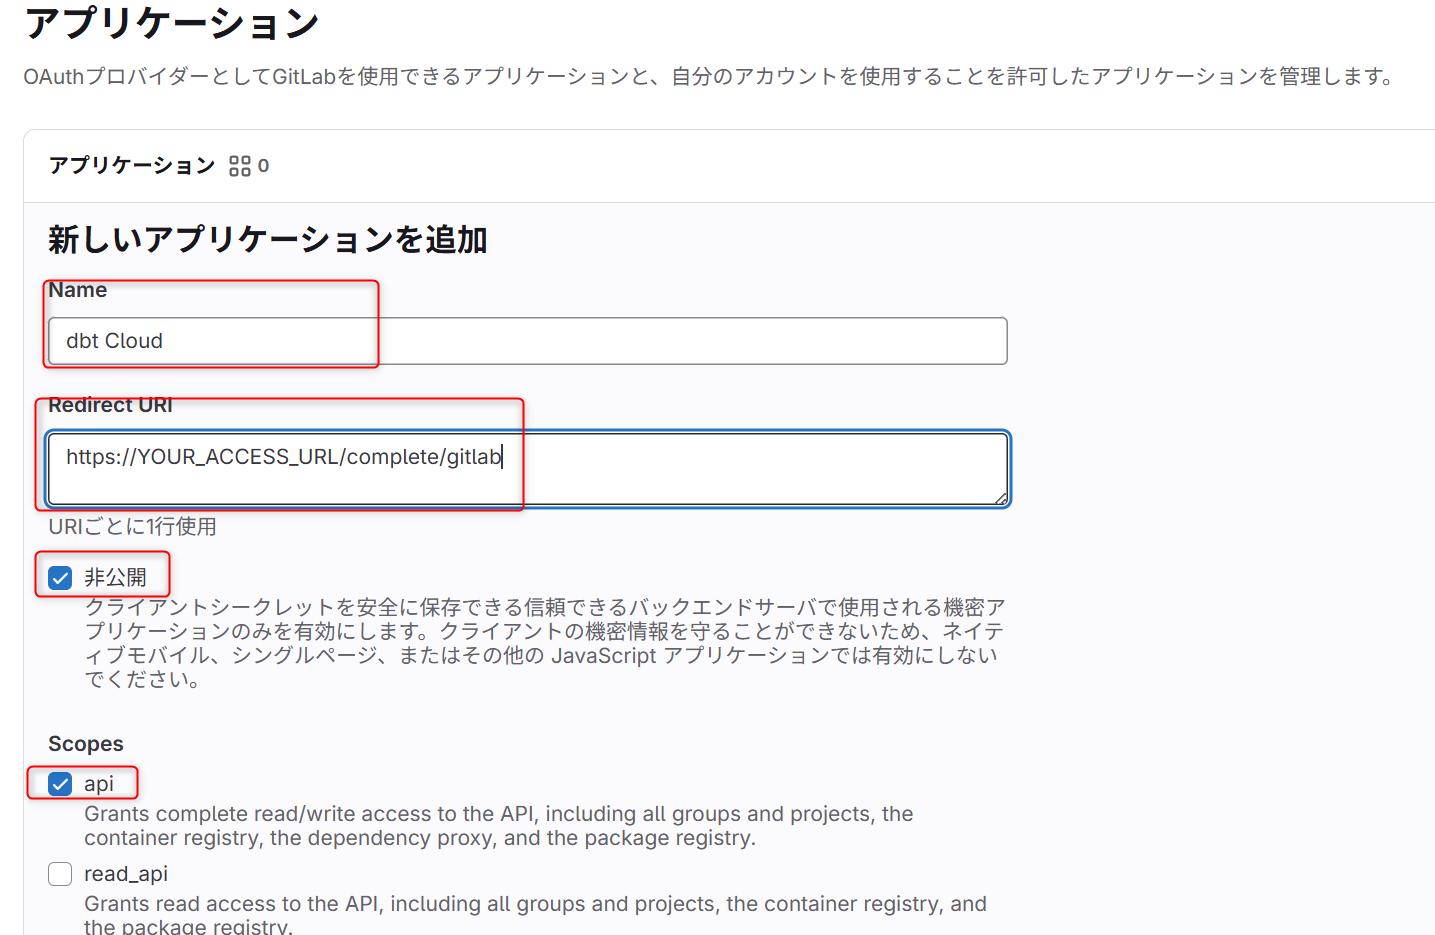
Regarding the redirect URI,
Replace the YOUR_ACCESS_URL portion of https://YOUR_ACCESS_URL/complete/gitlab with your plan and region. Please refer to the documentation below.
【Access, Region, IP Addresses】
【Group Application Settings Documentation】
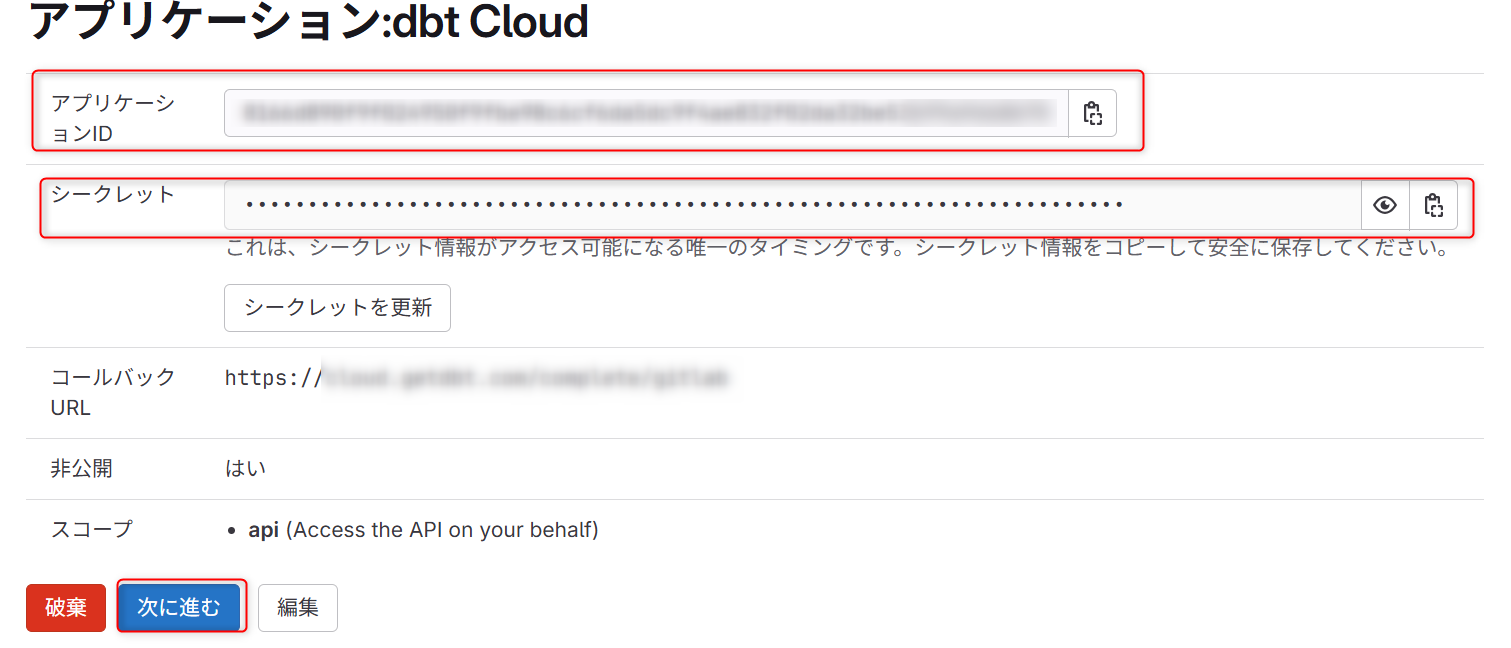
- When you reach the screen below, if everything looks good, click "Next" to complete the application creation.
You don't need to save the application ID or secret at this point as you can check them later.
*If you're using BusinessCritical with IP restrictions, please ensure you've added the appropriate GitLab CIDR to your IP restriction rules. Otherwise, GitLab connections may fail.### Connecting GitLab OAuth Application to dbt Cloud
Let's go back to the dbt Cloud screen and set up the connection.
- Click on your account name at the bottom left, select
Account settings, openIntegrationsand configure the following GitLab settings.
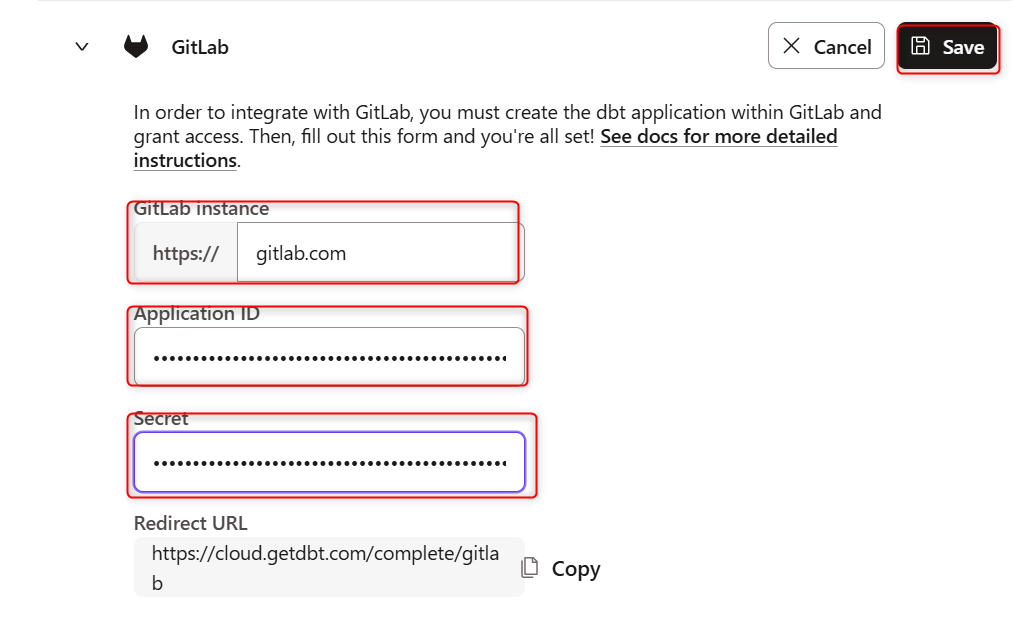
| Category | Content |
|---|---|
| GitLab instance | https://gitlab.com |
| Application ID | Quote from the application we created earlier |
| Secret | Quote from the application we created earlier |
※If you have a specially hosted version of GitLab, use the hostname provided by your organization.
Example: https://gitlab.yourgreatcompany.com/
- After confirming and saving the above, you'll be redirected to the following screen. If everything looks good, click
Authorize dbt Cloud.

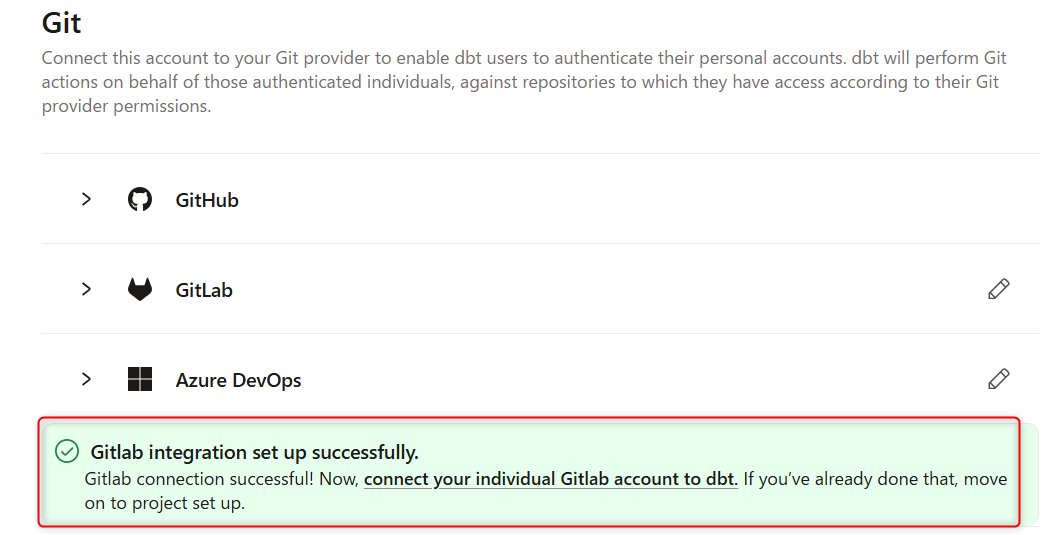
- When you see
Gitlab integration set up successfully, the setup is complete.
Project Repository Settings
Next is setting up the Git repository. Select the Project you created earlier.
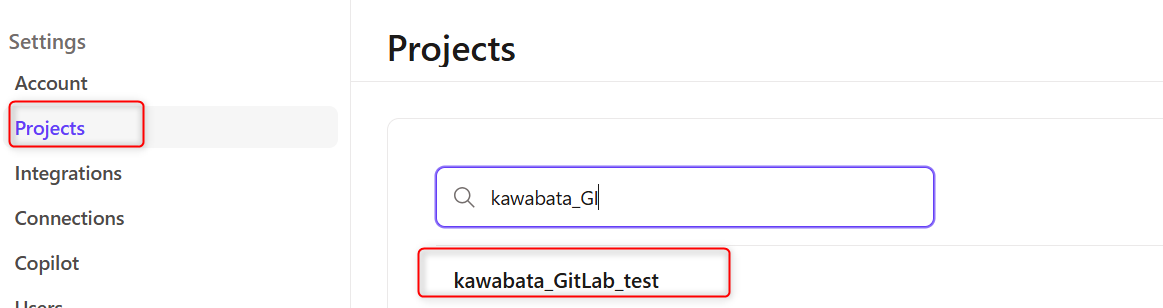
- Click on your account name at the bottom left, select
Account settings, openProject, search for the Project name you created earlier and click on it.
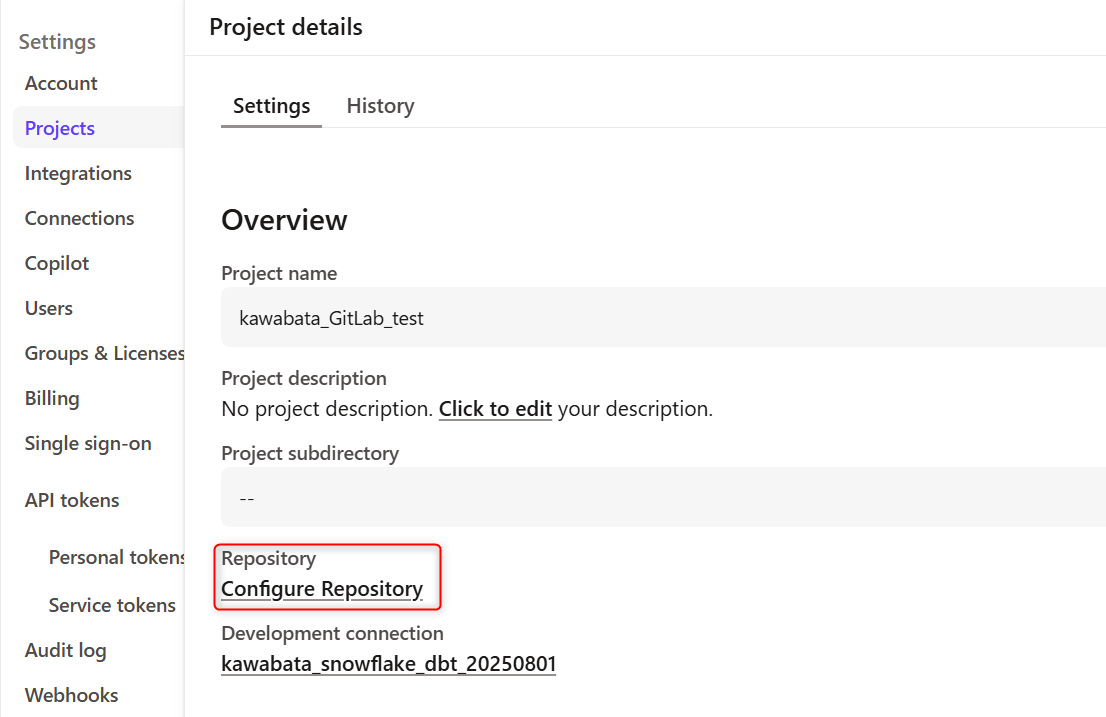
-
You'll be redirected to the screen below, select
Configure Repository.
-
Select GitLab from the screen below. The GitLab connection is displayed, so click on it.
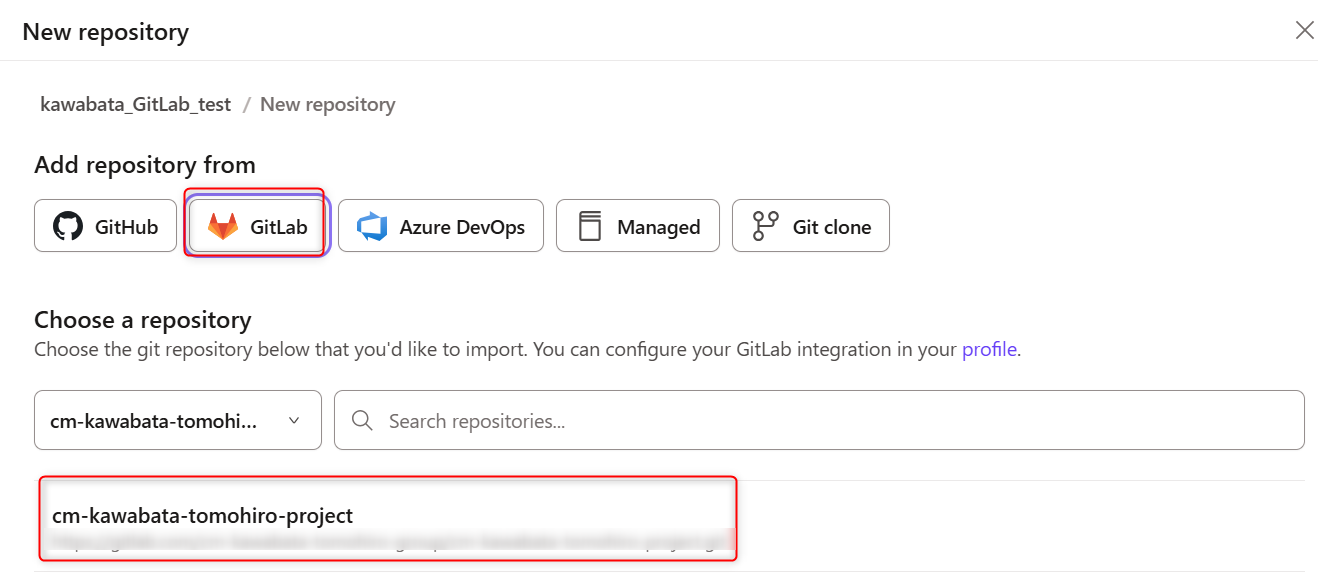
Now the linking to the Project is complete.## Check GitLab
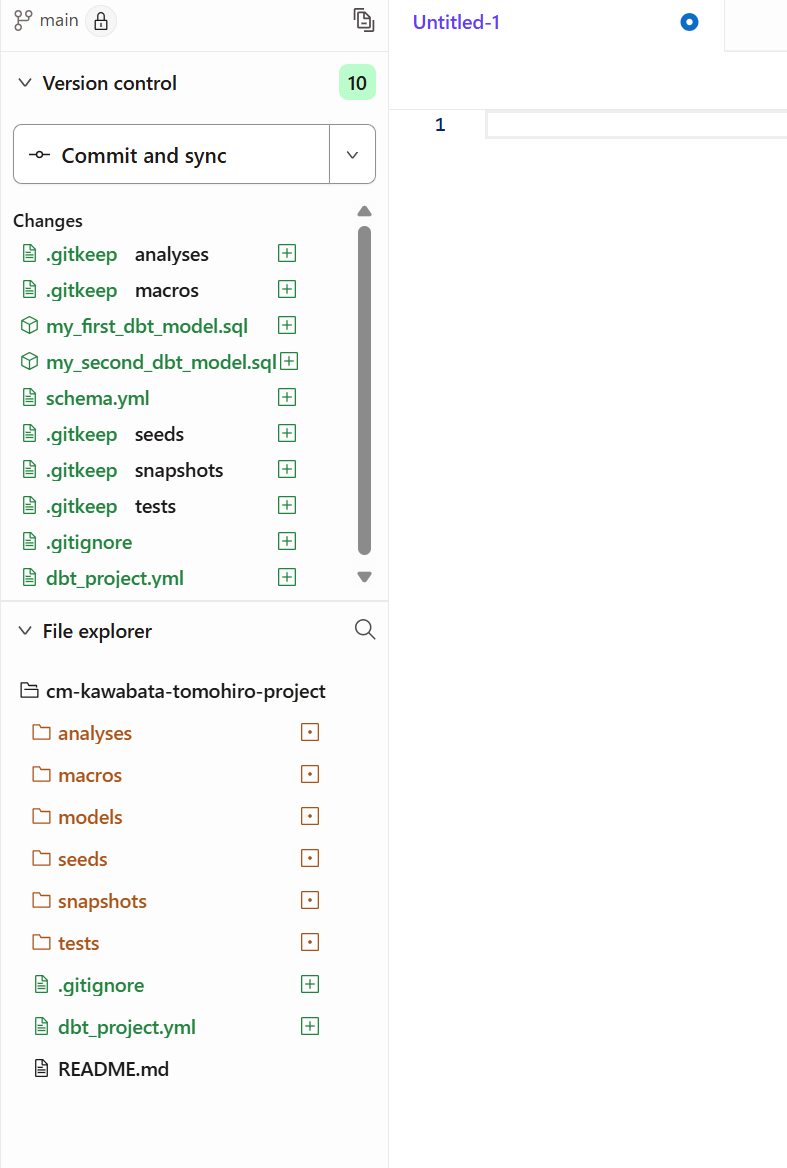
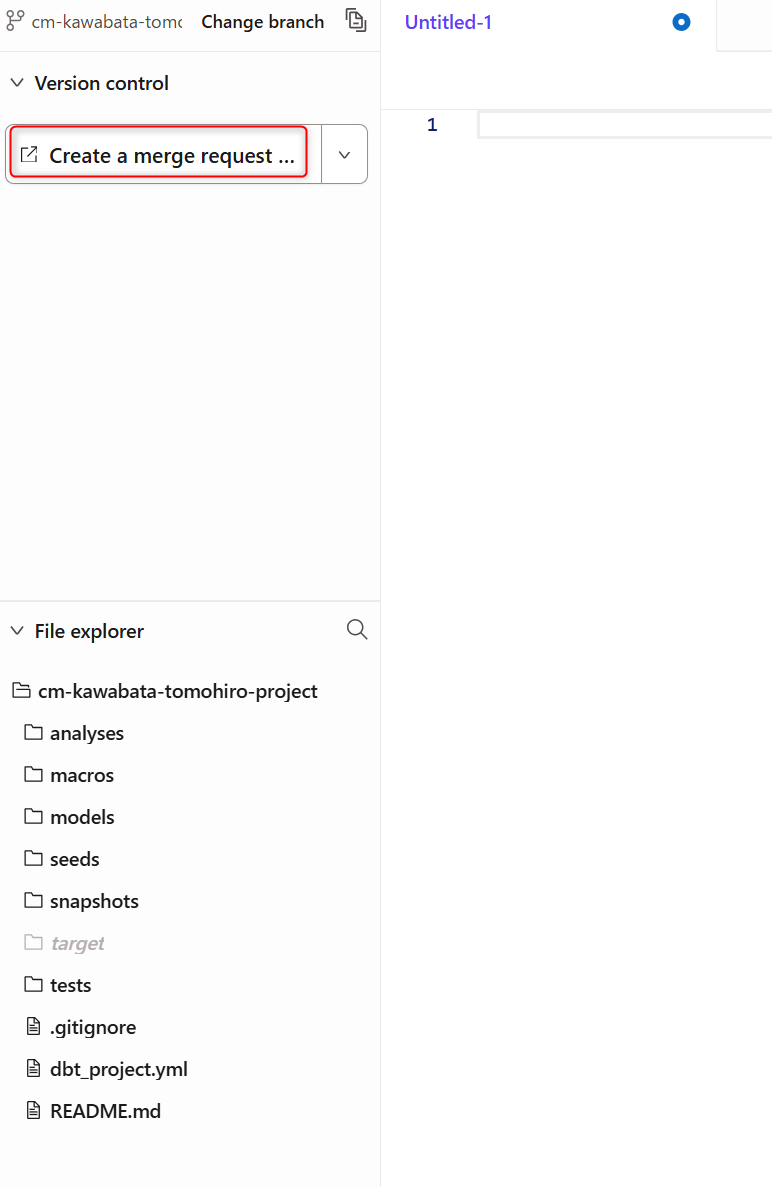
Click "Initialize your project" from Studio IDE to start your project.
We will commit the default file structure that was added as shown below.
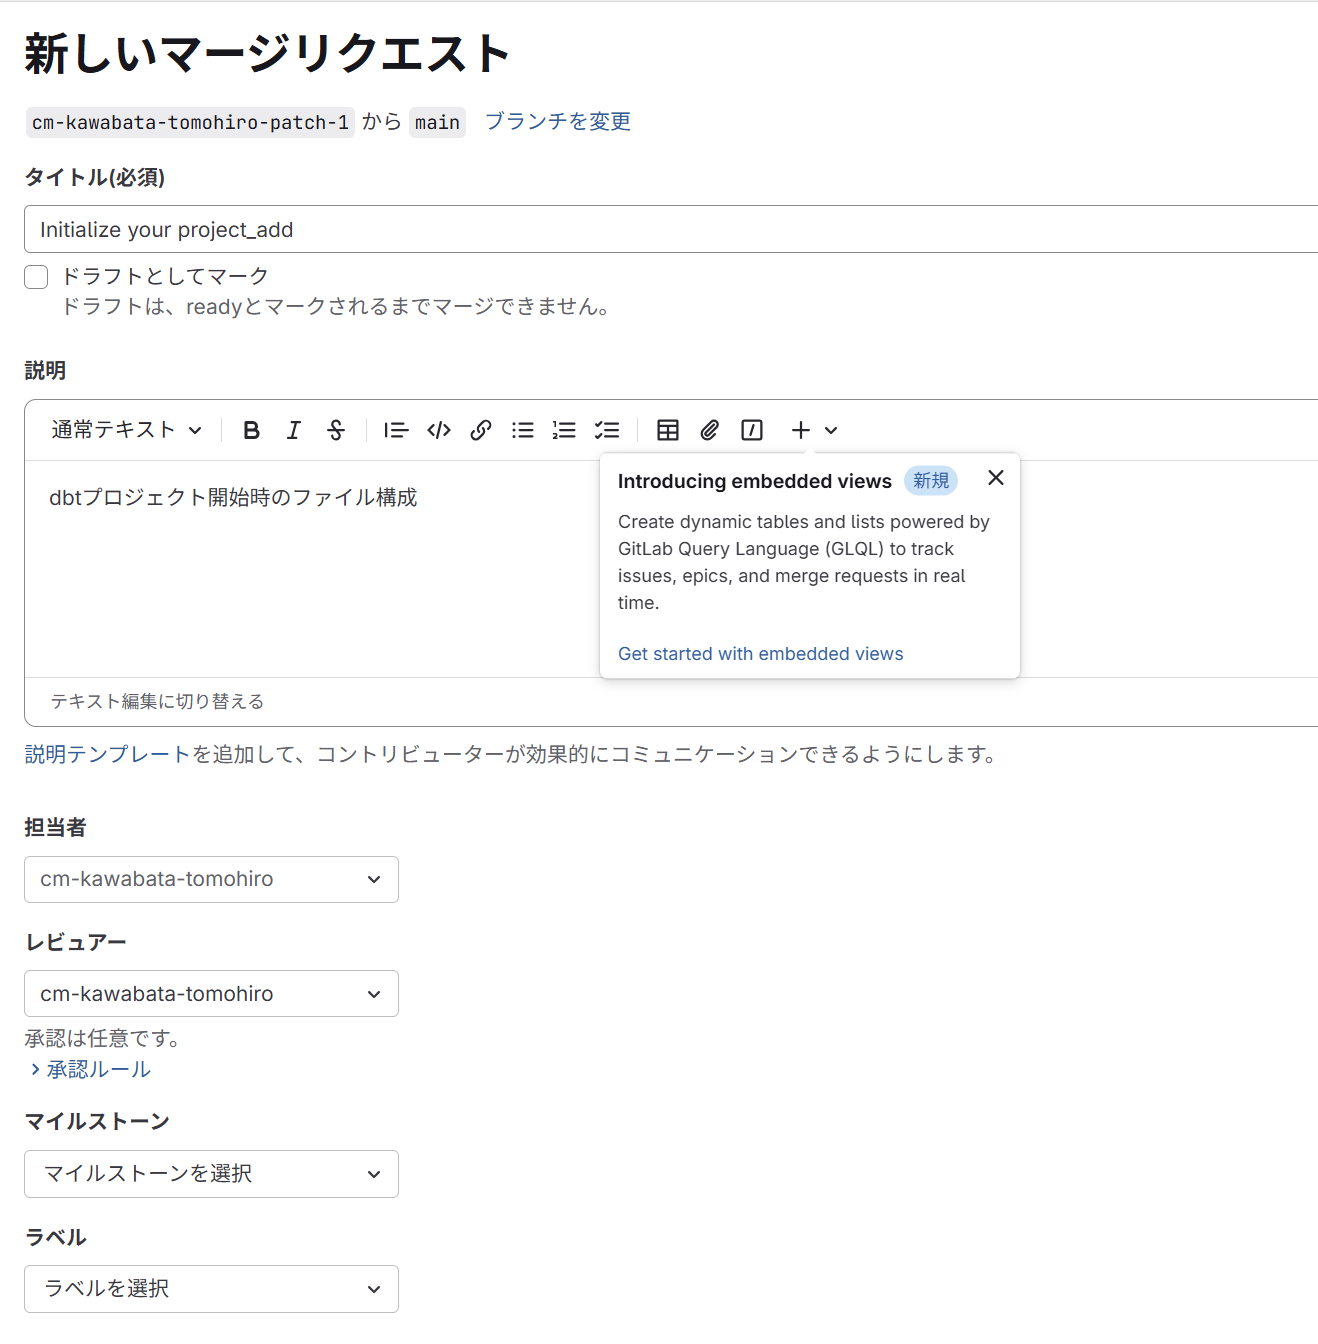
Click "Create a merge request".
You will be redirected to GitLab's merge request screen as shown below. Enter the required information and merge.
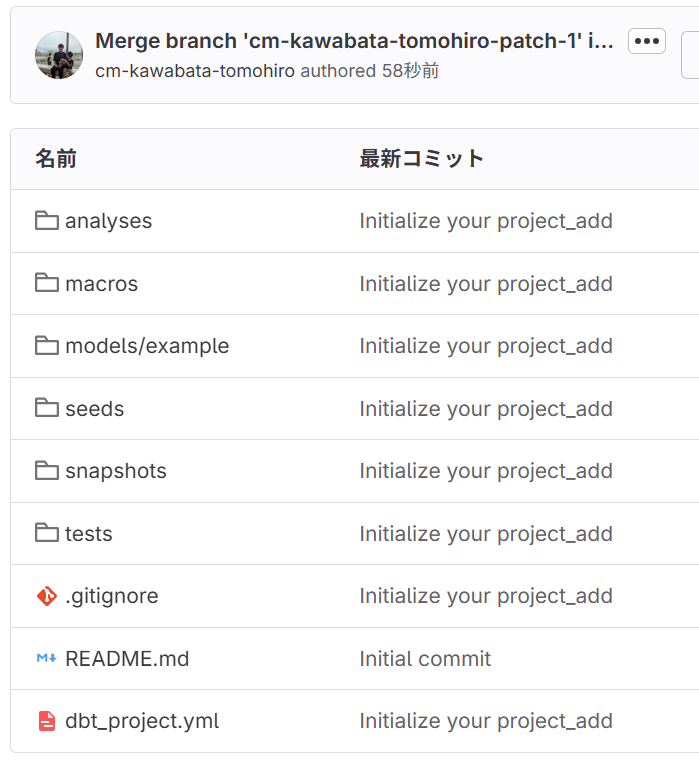
The main branch now looks like this, and we can confirm that everything is properly linked.
In Conclusion
What did you think?
GitHub and GitLab each have their own functional characteristics, so I feel it's necessary to choose between them based on your use case.
I hope this serves as a helpful reference when connecting to GitLab!
![[新機能]dbt CloudでホストされたRemote MCP Serverがパブリックベータとしてリリースされました](https://images.ctfassets.net/ct0aopd36mqt/wp-thumbnail-f846b6052d1f7b983172226c6b1ed44b/6b4729aabfb5b7a3359acc27dc6b5453/dbt-1200x630-1.jpg)
