I tried deploying an ECS app from the AWS Console using a CDK Synth template — A summary of the stumbling blocks and solutions

This page has been translated by machine translation. View original
Introduction
"I want to deploy the ECS app we're running internally to my personal AWS account as well" — motivated by this goal, I started the deployment work and encountered many stumbling points.
I'll summarize the troubles encountered and their solutions throughout the entire process: deploying directly from the CloudFormation console without CDK bootstrap, ECR cross-account access, DNS settings, and Cognito authentication configuration.
Prerequisites & Environment
- Deployment target: AI Starter
- IaC: AWS CDK (TypeScript)
- Container image: Stored in an ECR repository in a separate AWS account (source account)
- Deployment destination: Personal AWS account
- Region: ap-northeast-1
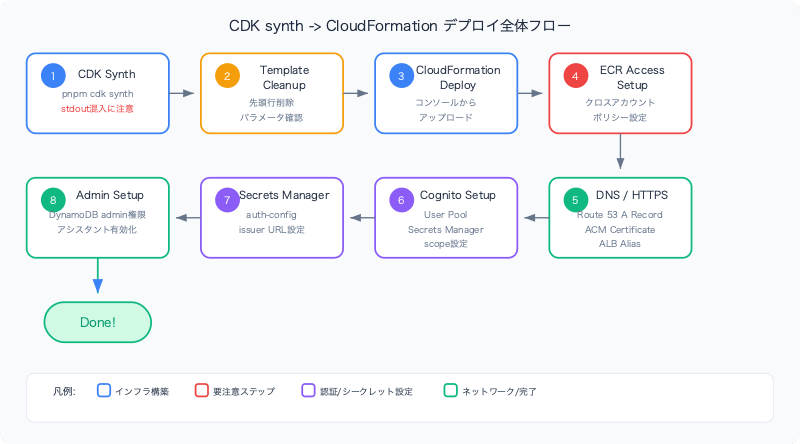
Overall Flow
Preparation: Setting Up VPC, ACM Certificate, and Domain
The CDK stack is designed not to create VPC or ACM certificates on its own, but to receive existing resource IDs as parameters. Therefore, you need to manually prepare the following resources before deploying the CloudFormation stack.
Creating a VPC
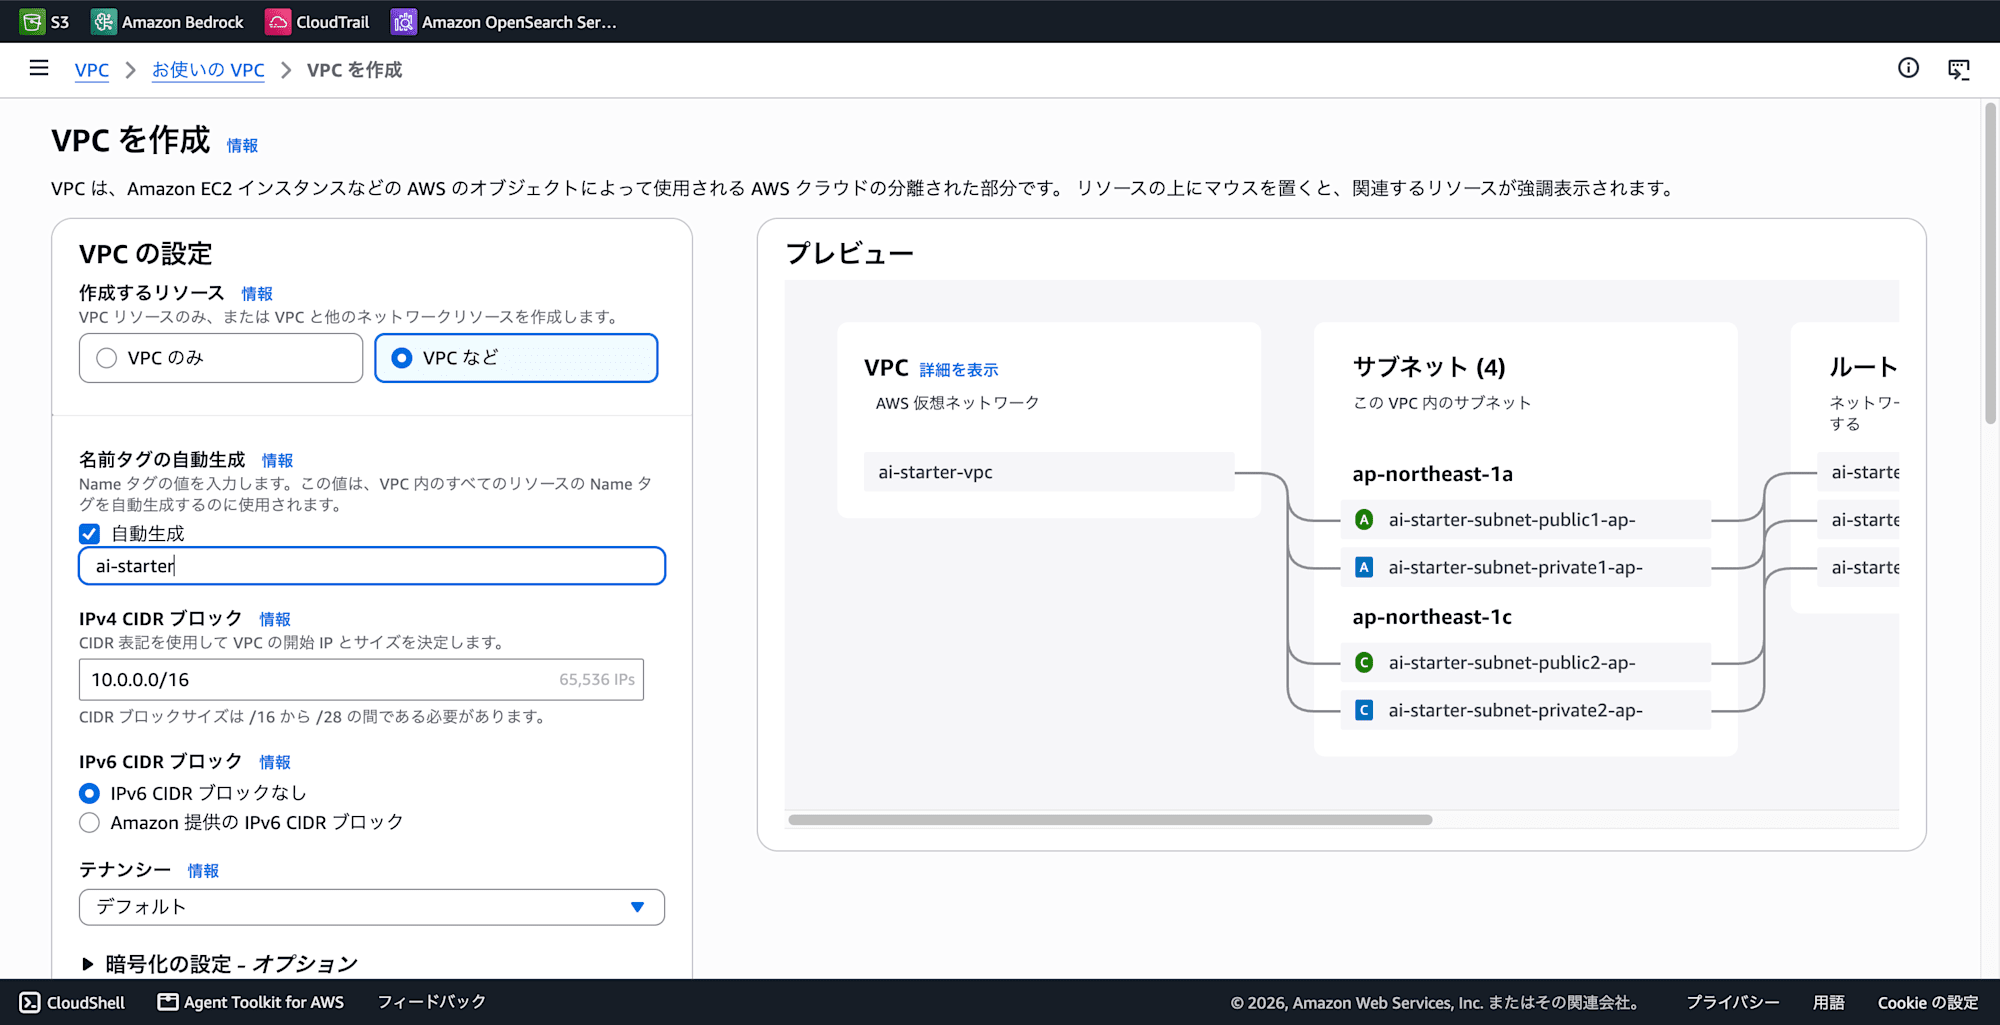
Create a new one from "VPC" in the AWS console. Since this is for testing purposes, I selected "VPC and more" and created it with the following configuration.
| Item | Setting |
|---|---|
| Name tag | Any (e.g., ai-starter) |
| IPv4 CIDR block | 10.0.0.0/16 |
| Number of Availability Zones | 2 |
| Number of public subnets | 2 |
| Number of private subnets | 2 |
| NAT gateway | None (to reduce costs, using Public mode) |
After creation, note down the following IDs to enter into the CloudFormation parameters.
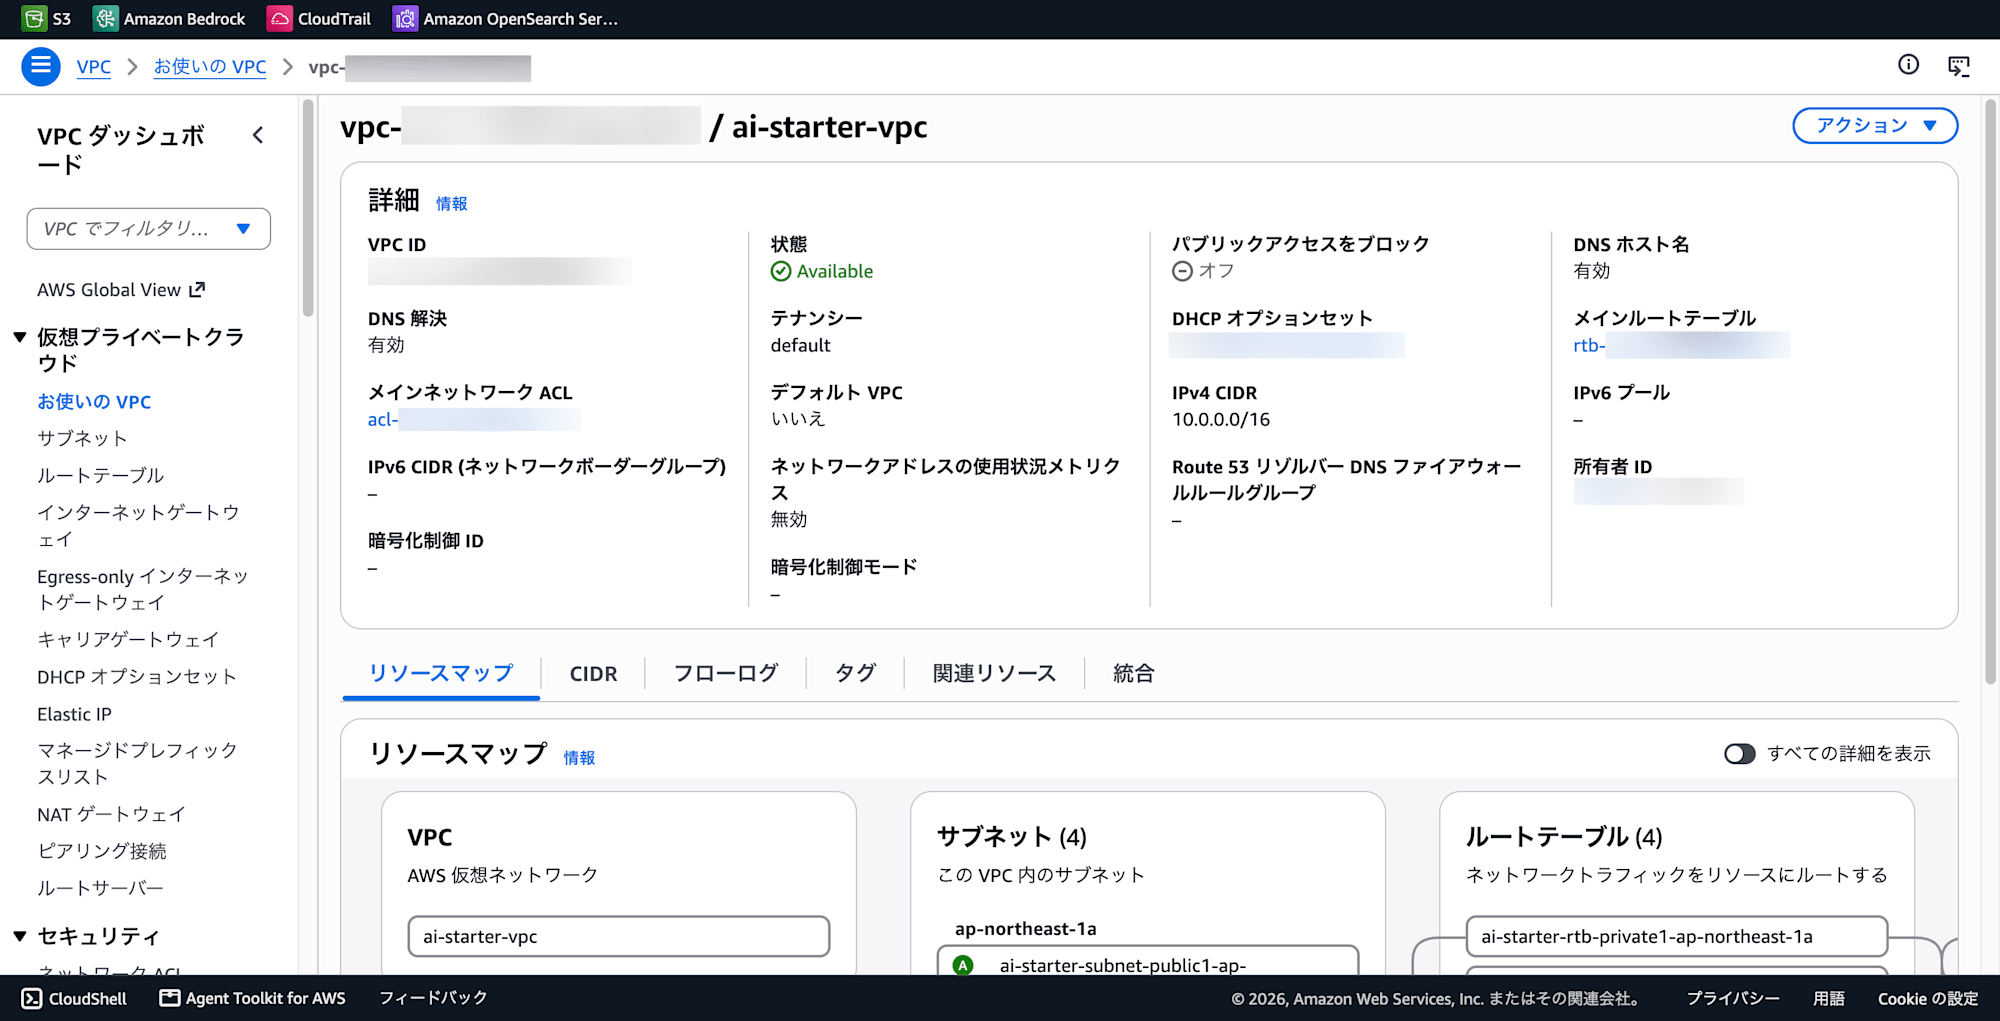
- VPC ID (e.g.,
vpc-0abc1234def56789) - Public subnet IDs × 2 (e.g.,
subnet-0abc...,subnet-0def...) - Private subnet IDs × 2 (same as above)
Acquiring a Domain
Acquire a custom domain in Route 53. If you choose an inexpensive TLD (top-level domain) such as .click, it will cost only a few dollars per year. Domain registration completes within a few minutes to tens of minutes.
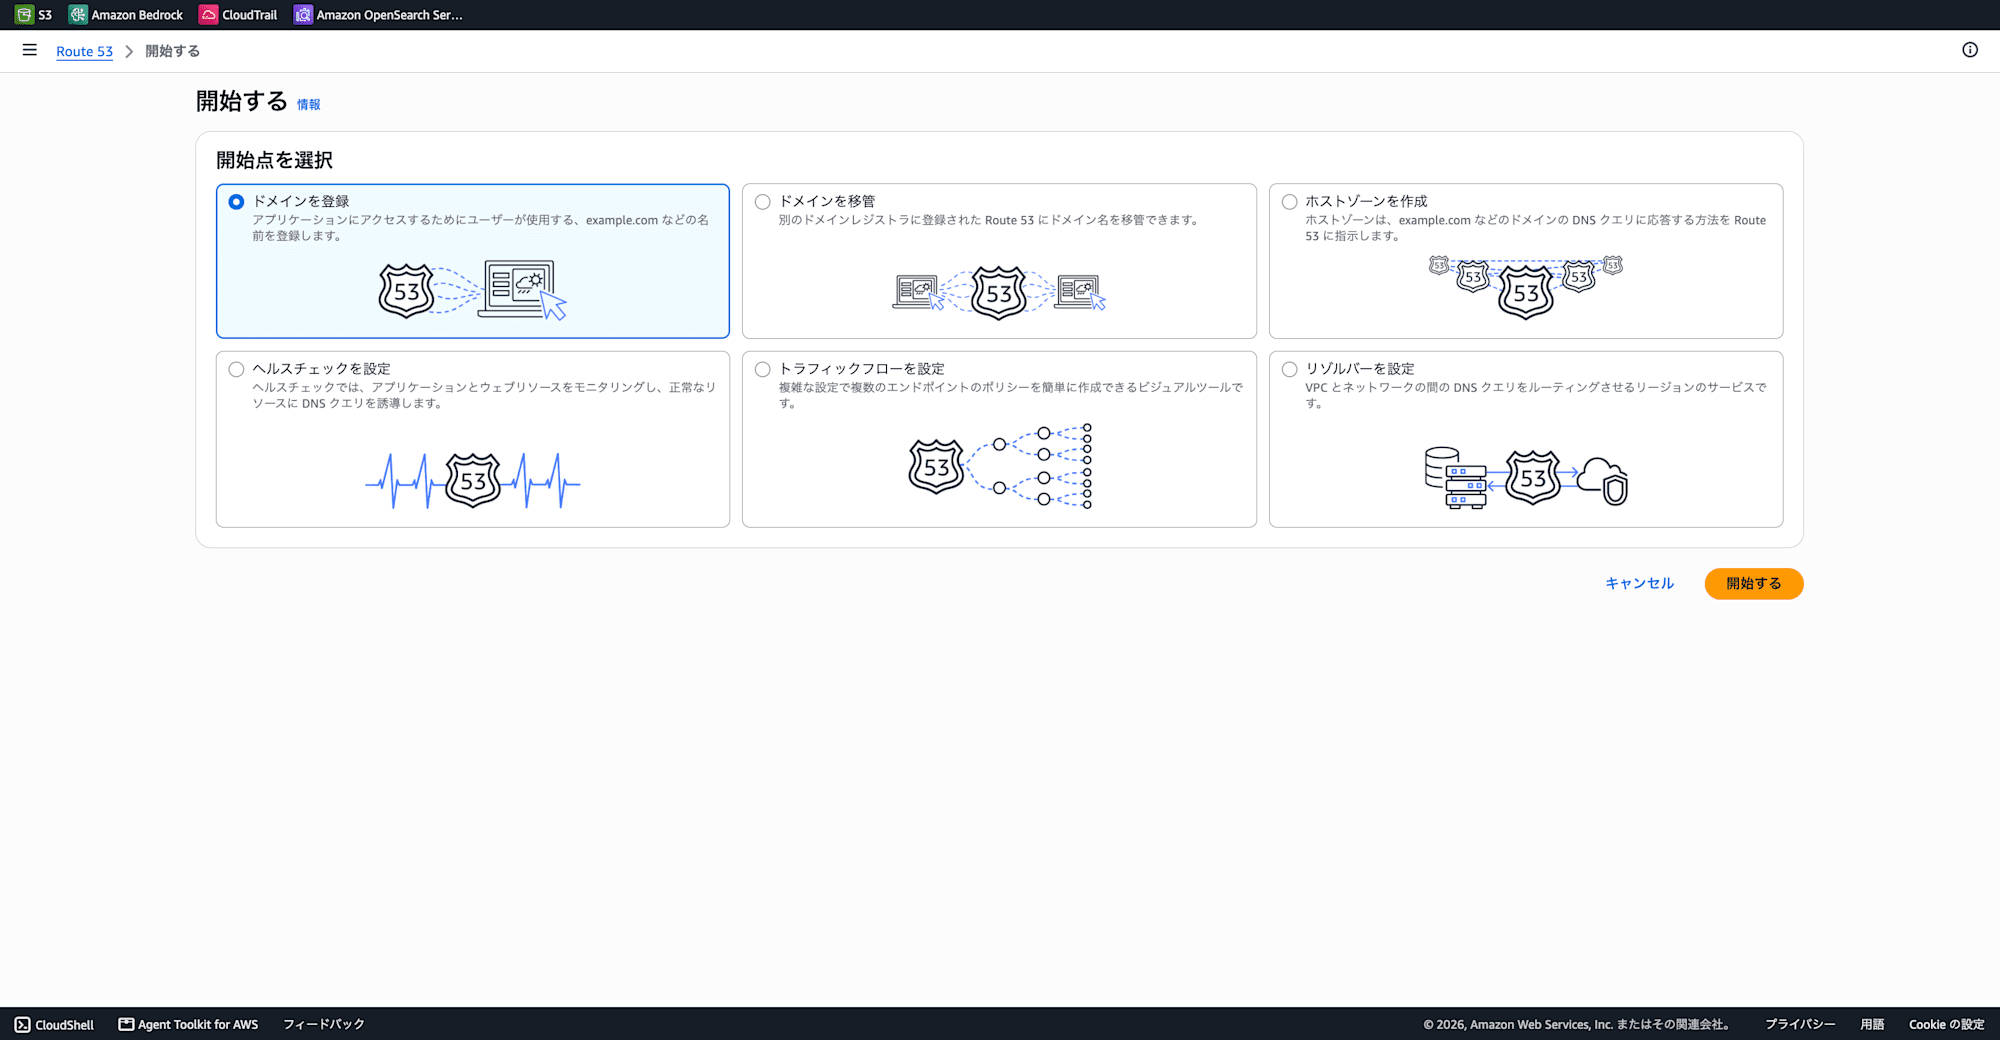
Register a domain.
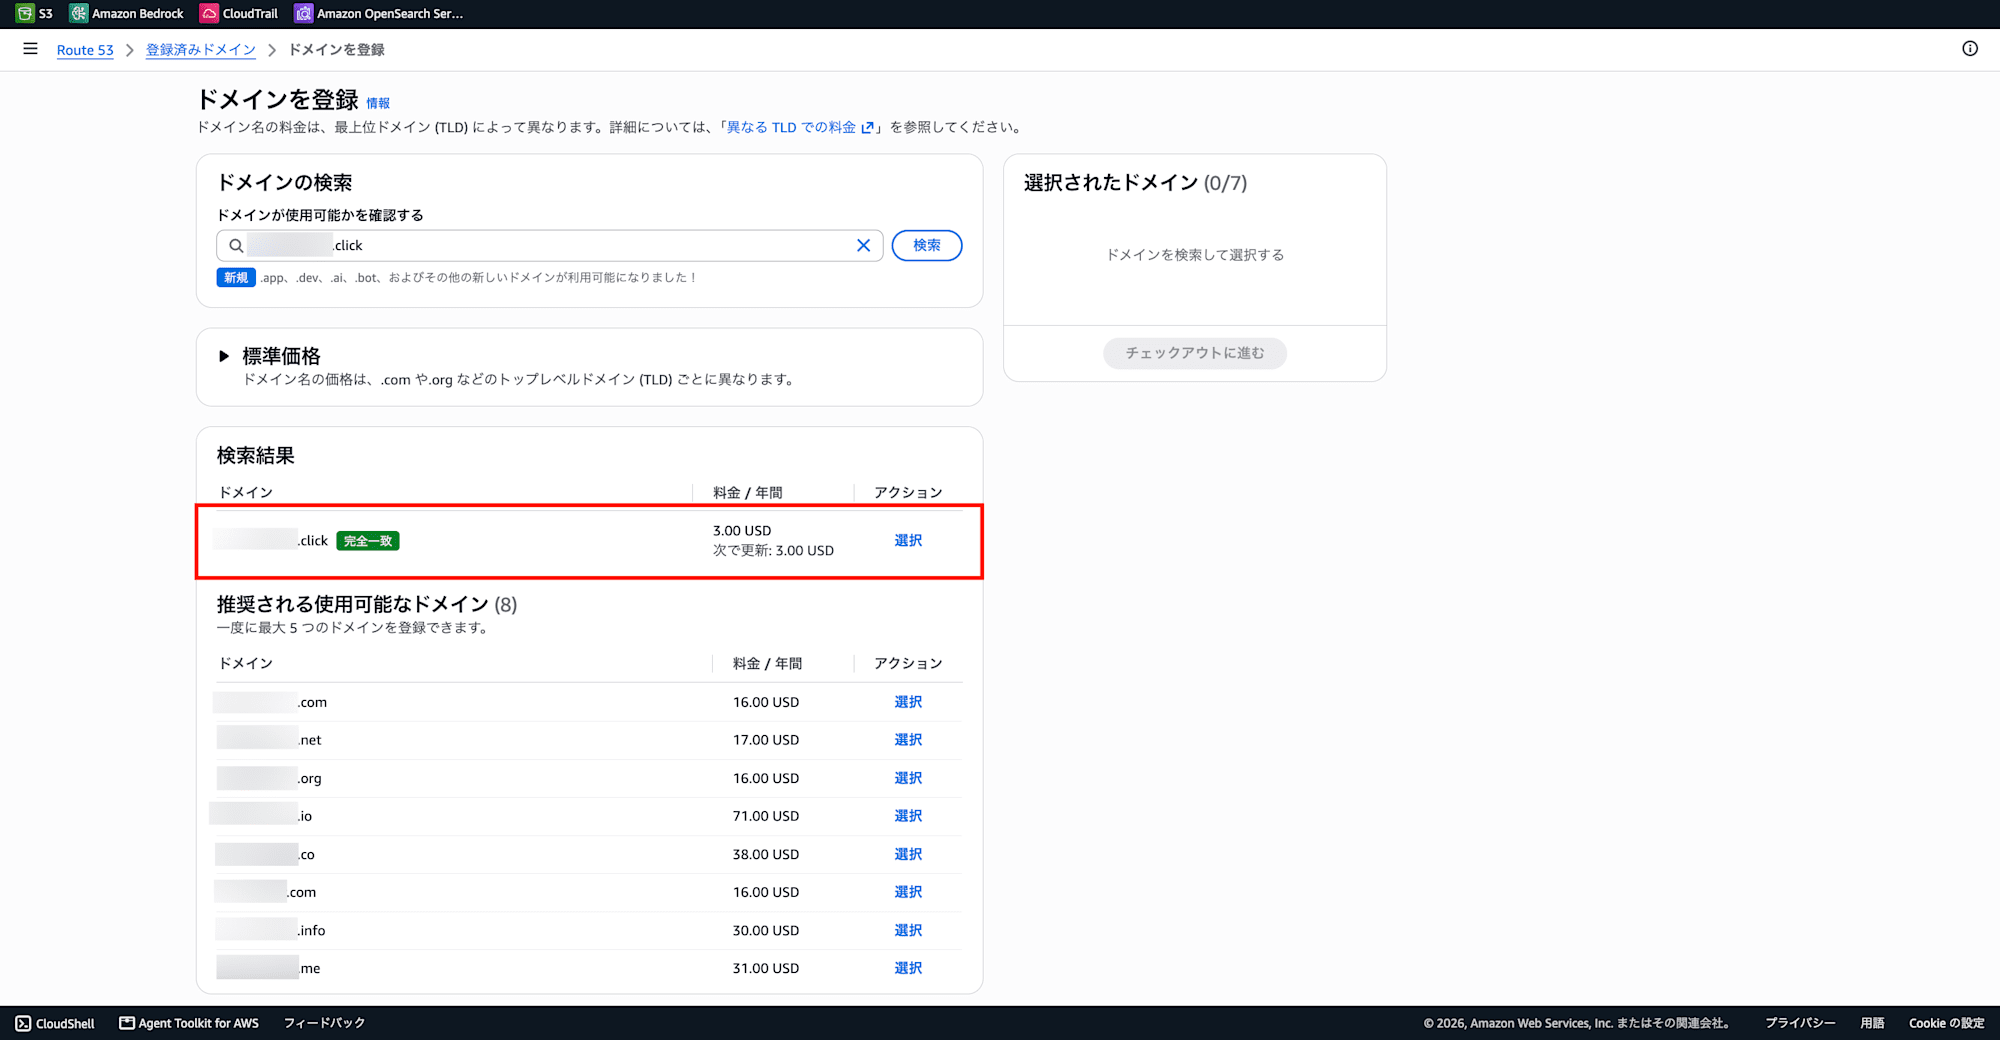
.click was the cheapest at $3/year.
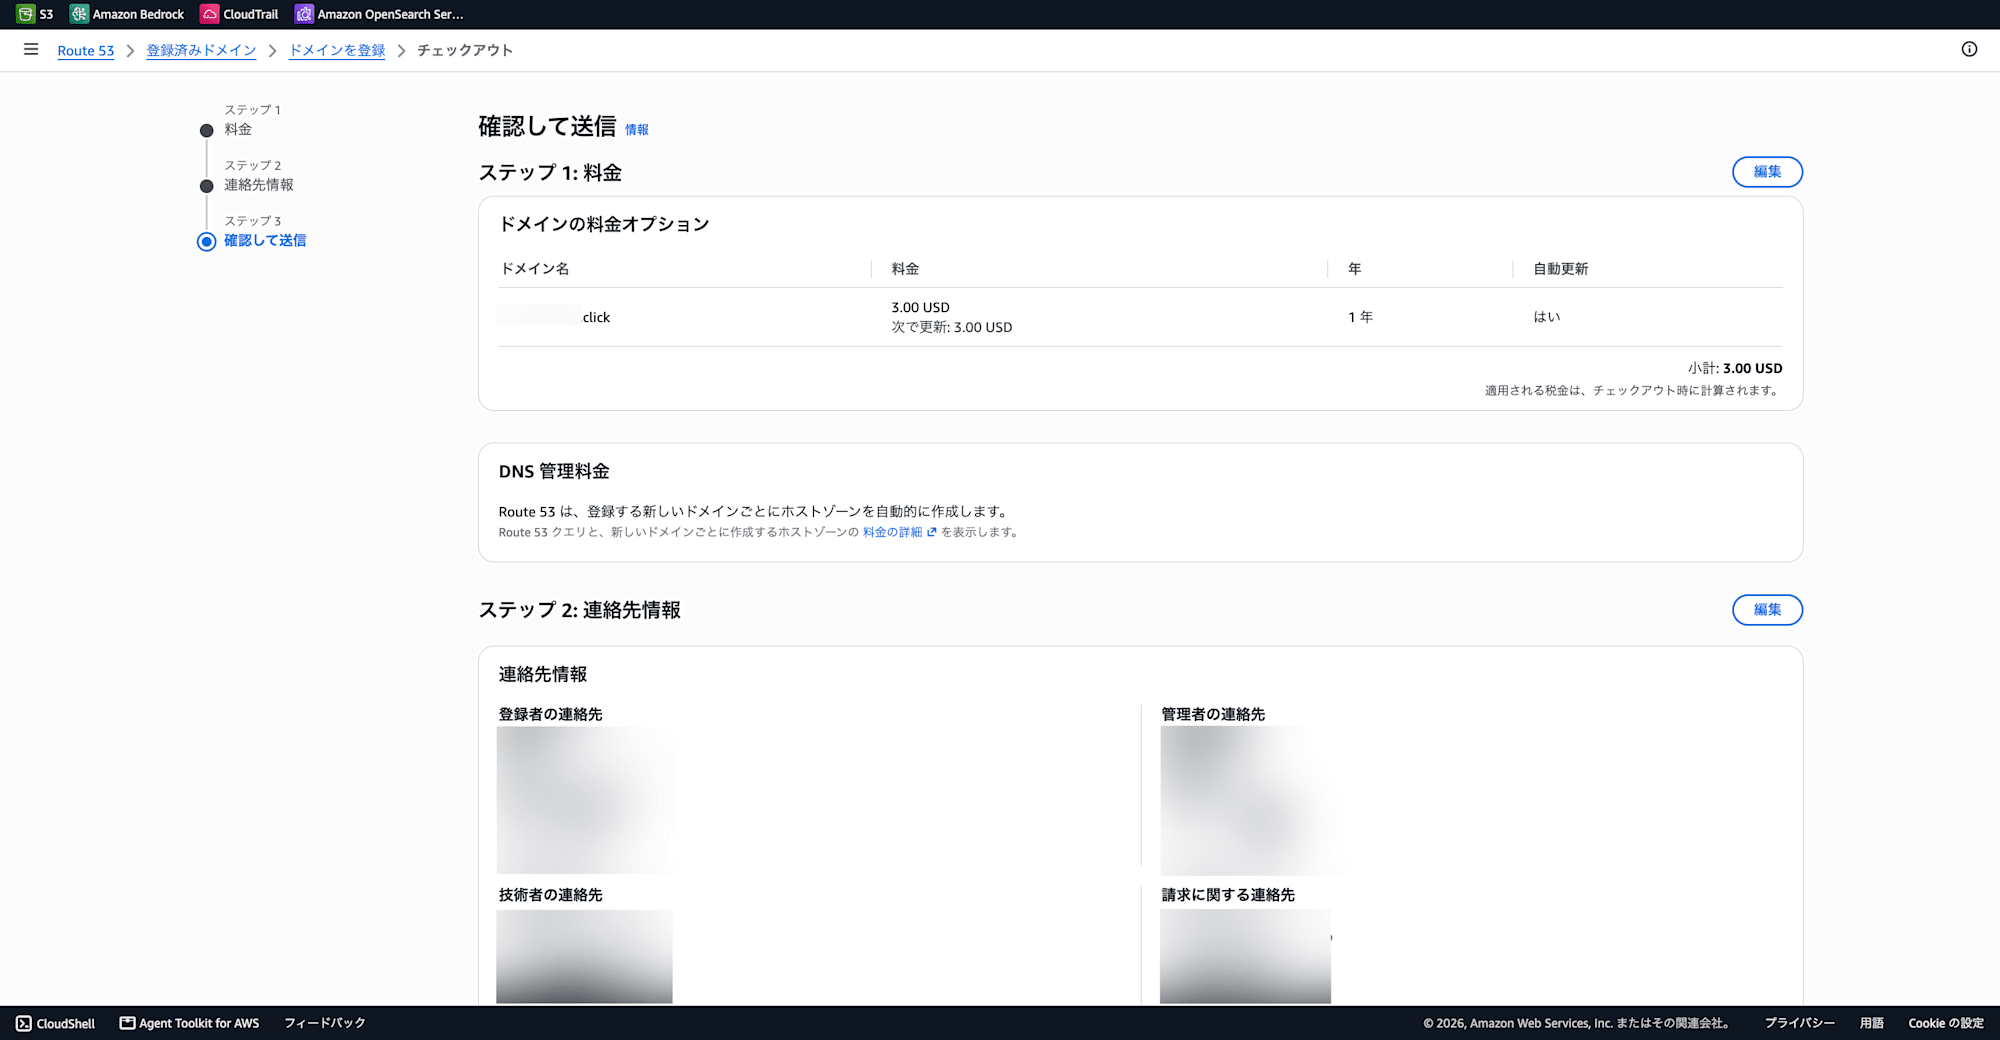
Check out.
Creating an ACM Certificate
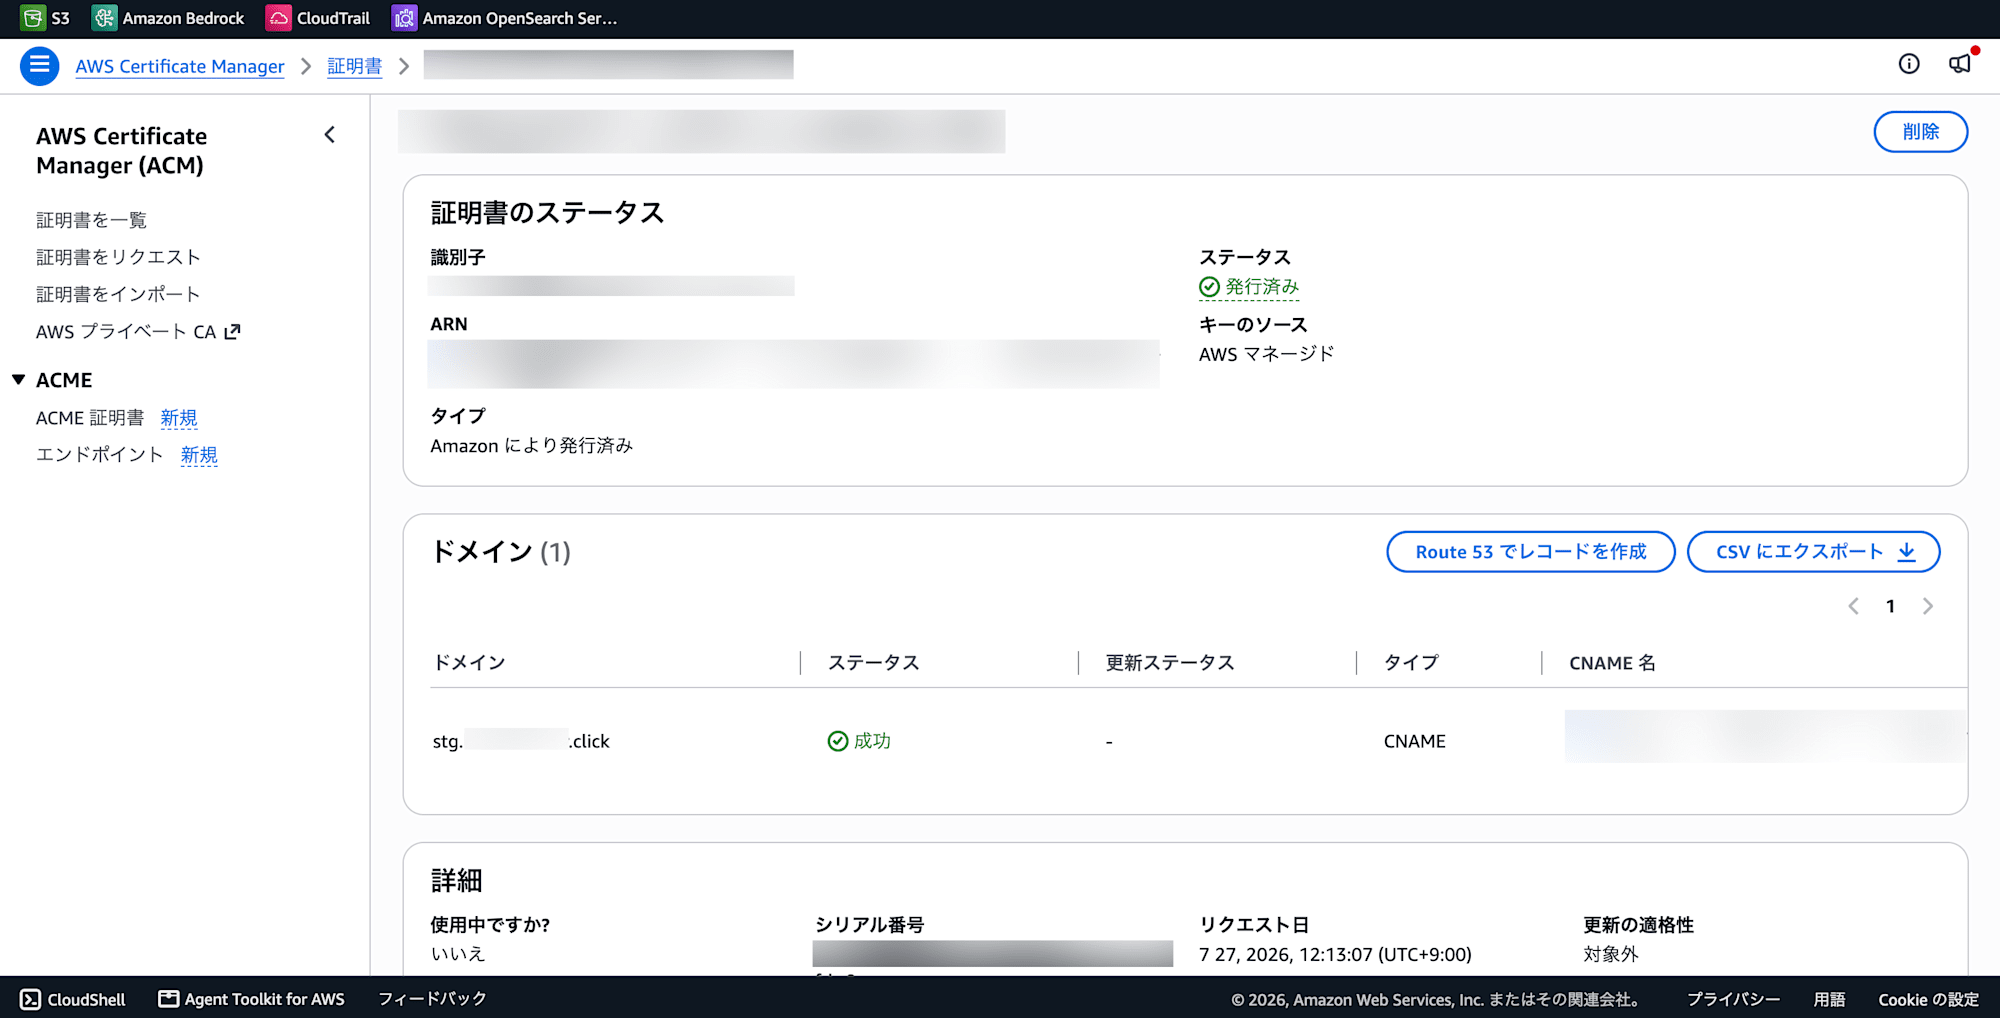
To enable HTTPS on the ALB, create a certificate in AWS Certificate Manager (ACM). If you're managing your domain in Route 53, you can complete validation simply by clicking the "Create record in Route 53" button for DNS validation, and the certificate will be issued.
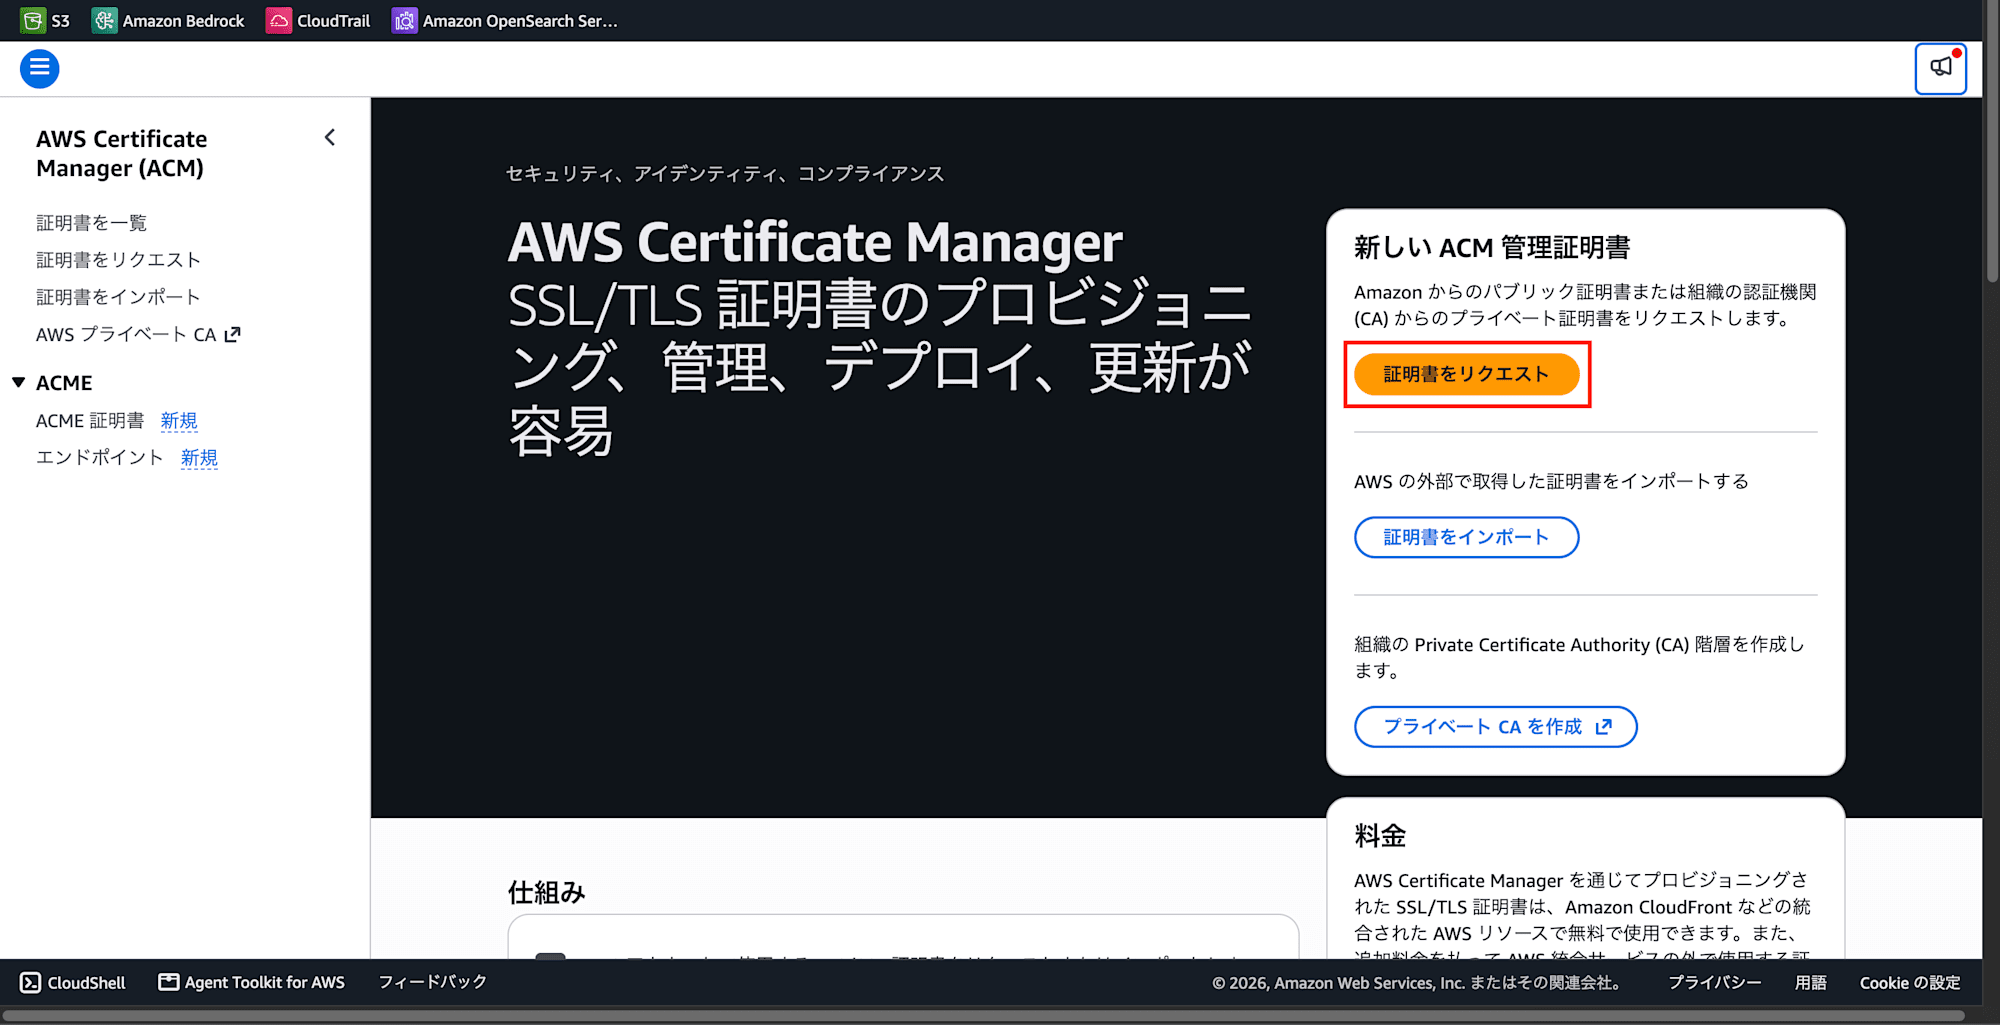
Request a certificate.
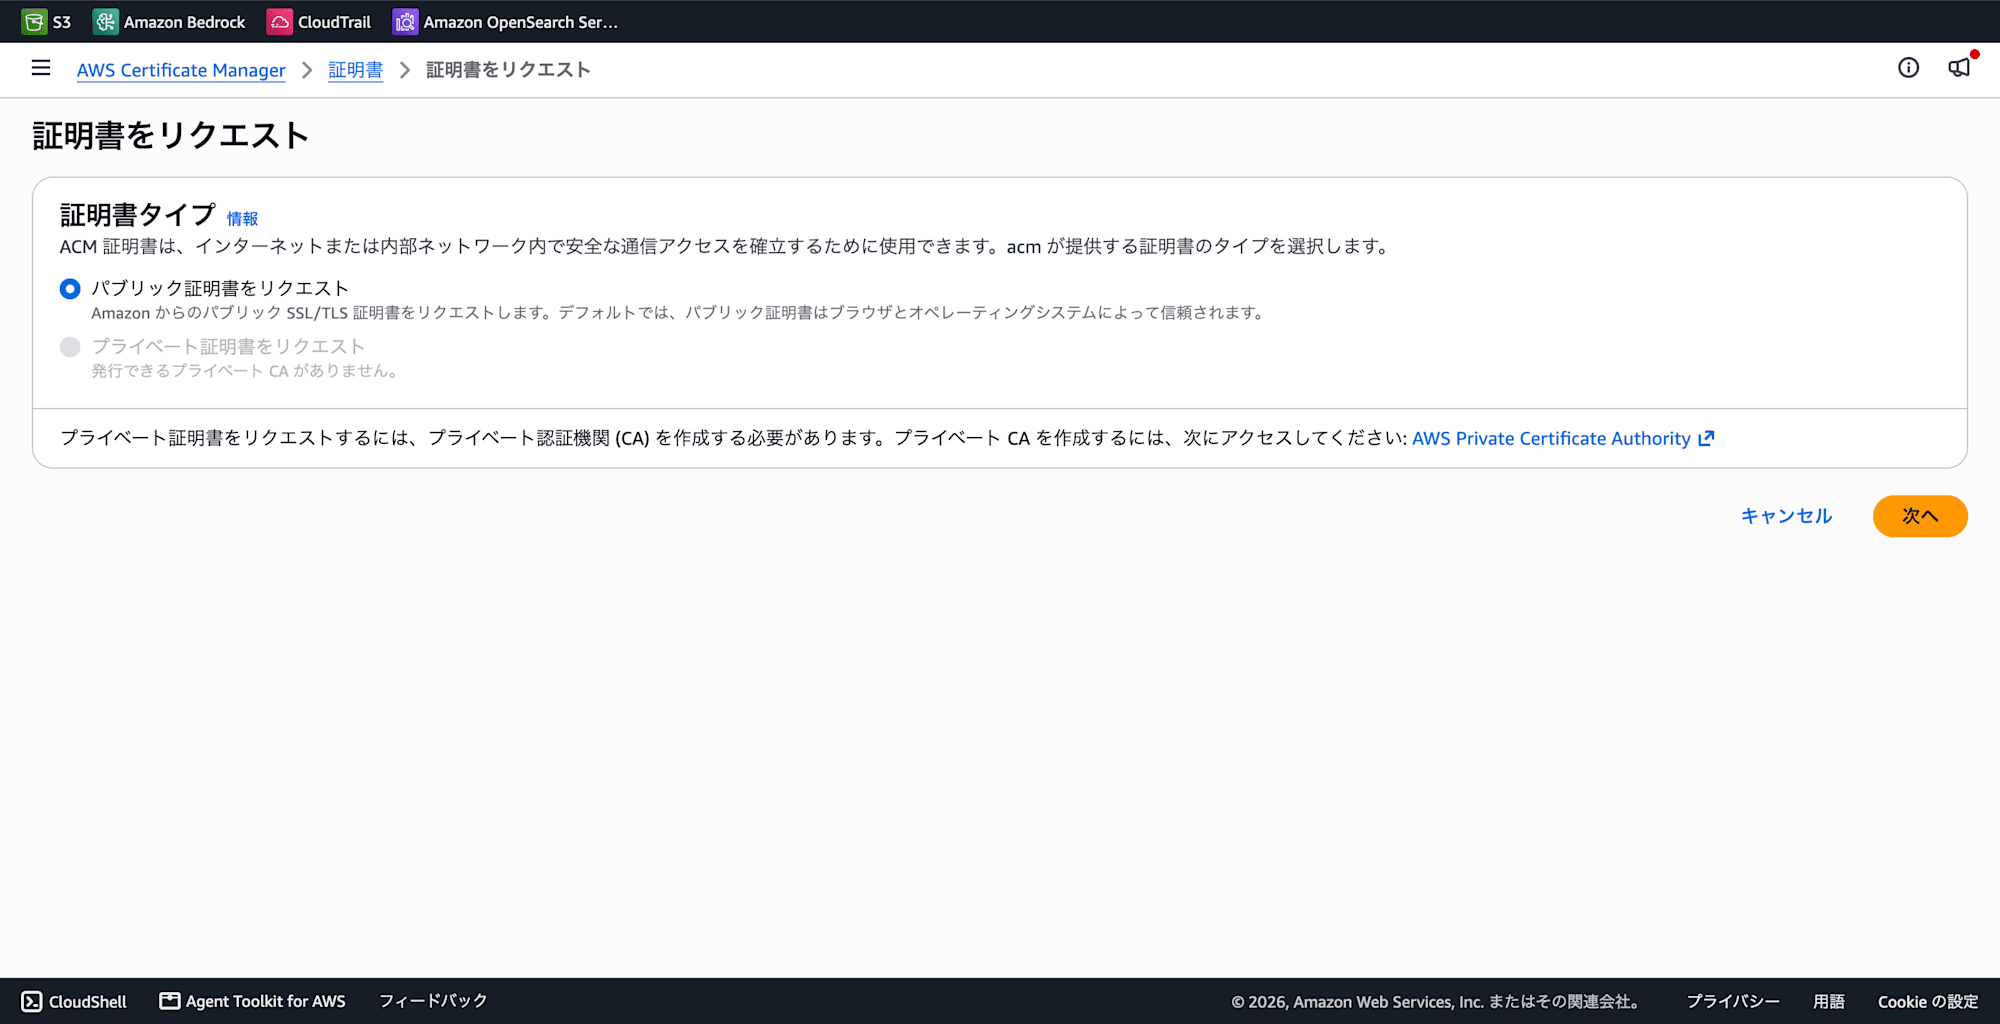
Request a public certificate.
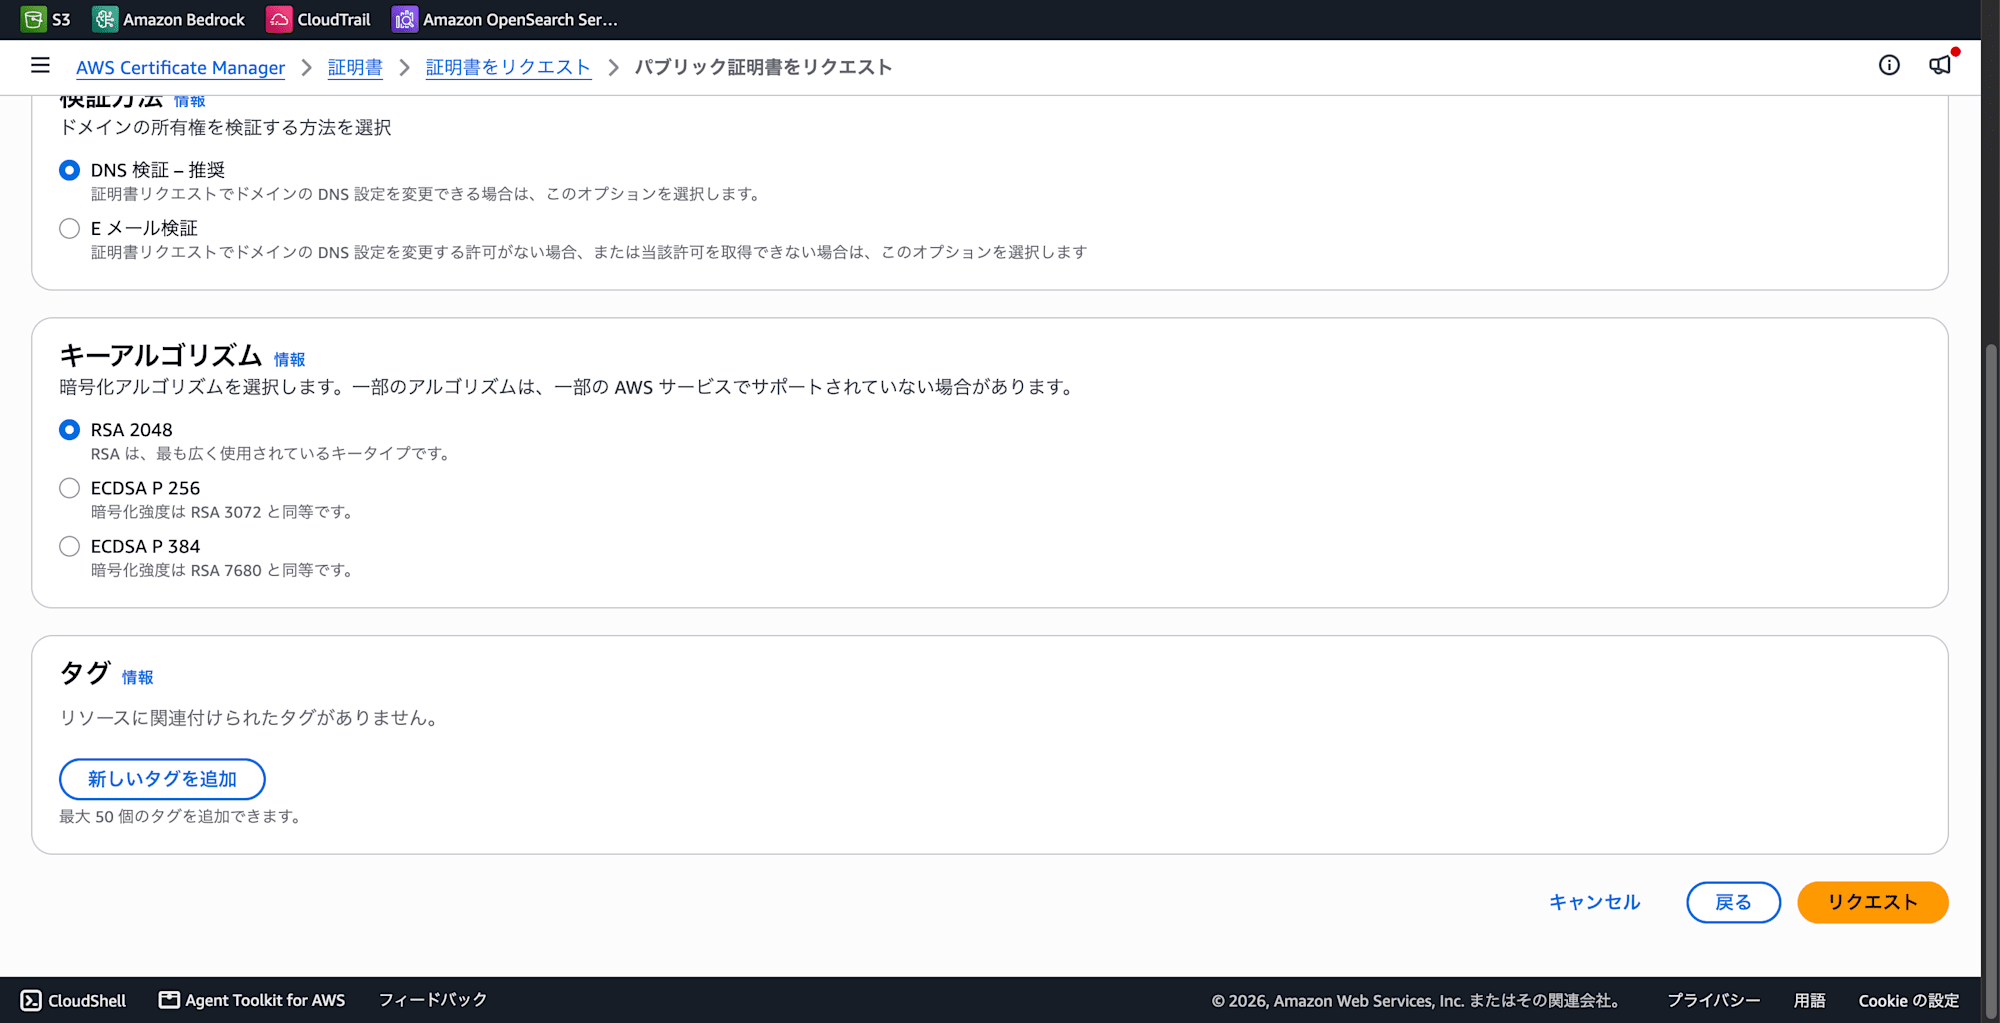
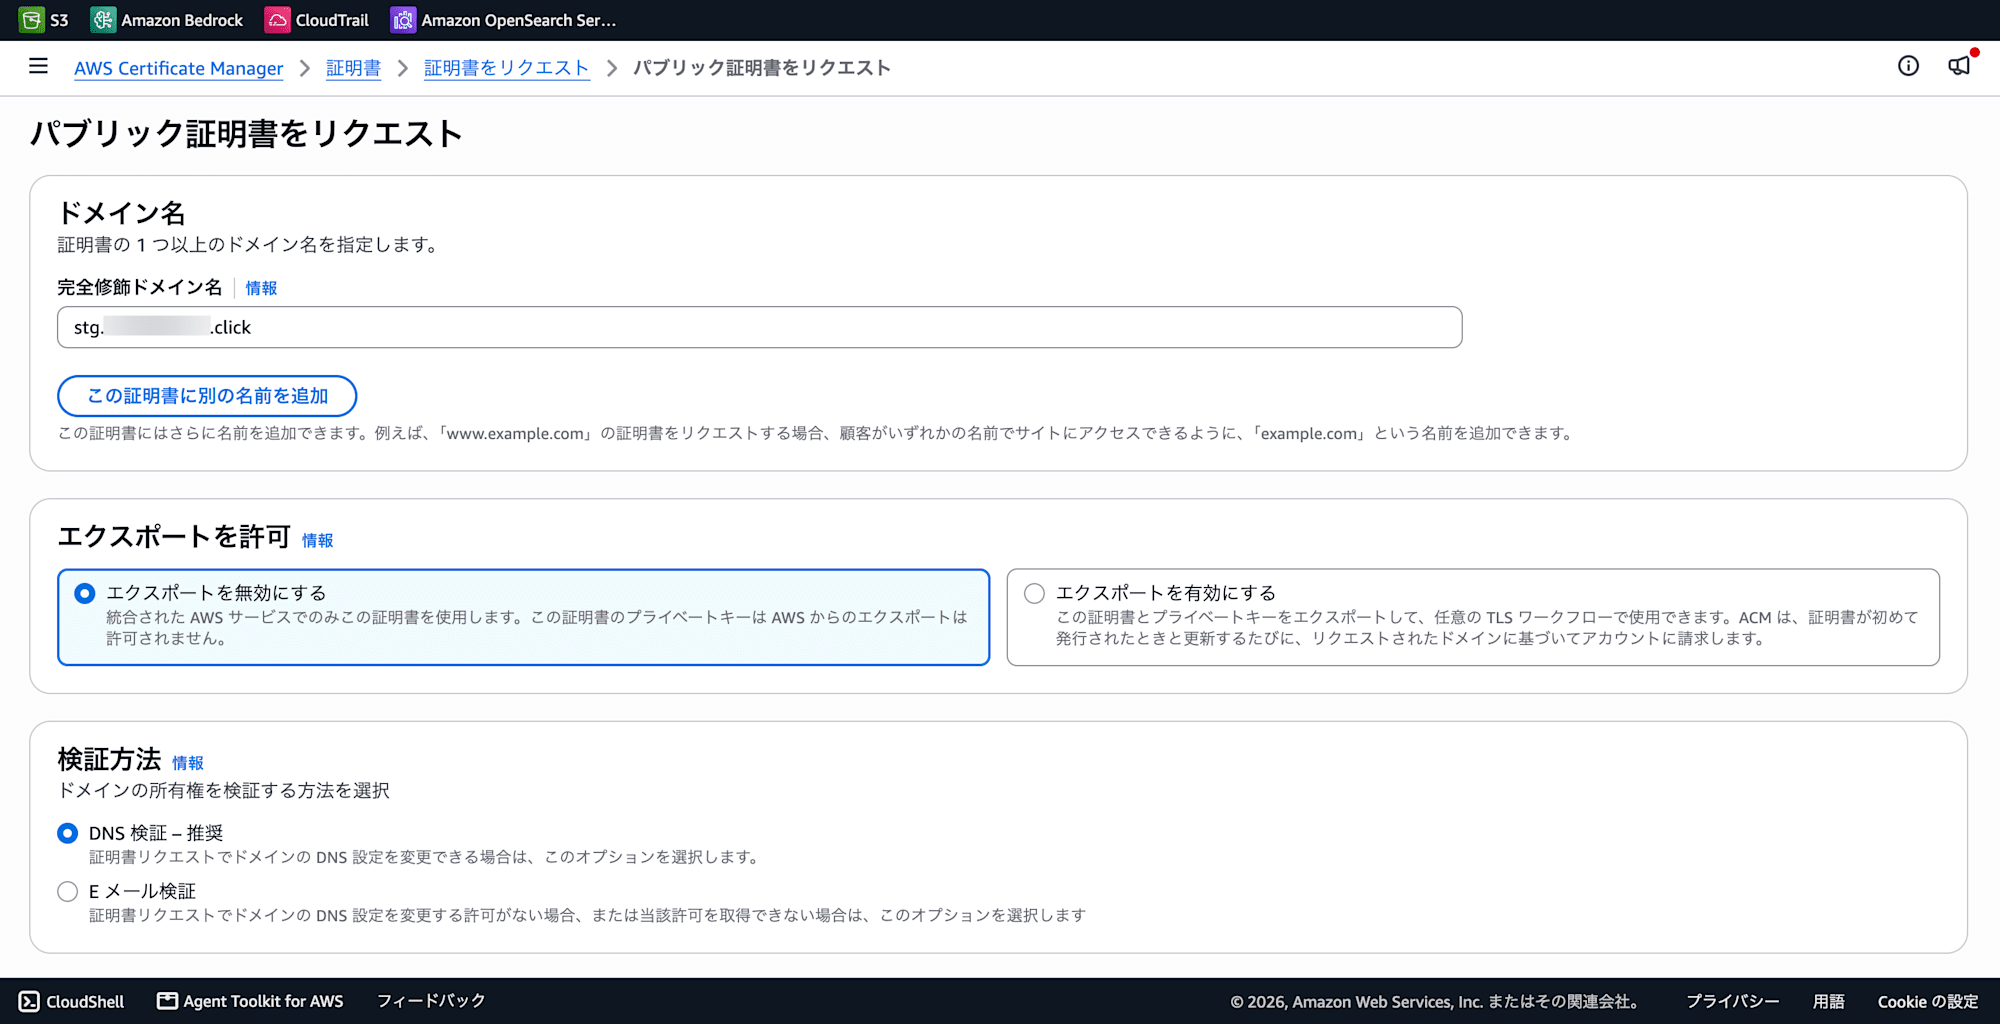
Register the previously registered domain + subdomain. In this case, I registered stg as the subdomain.
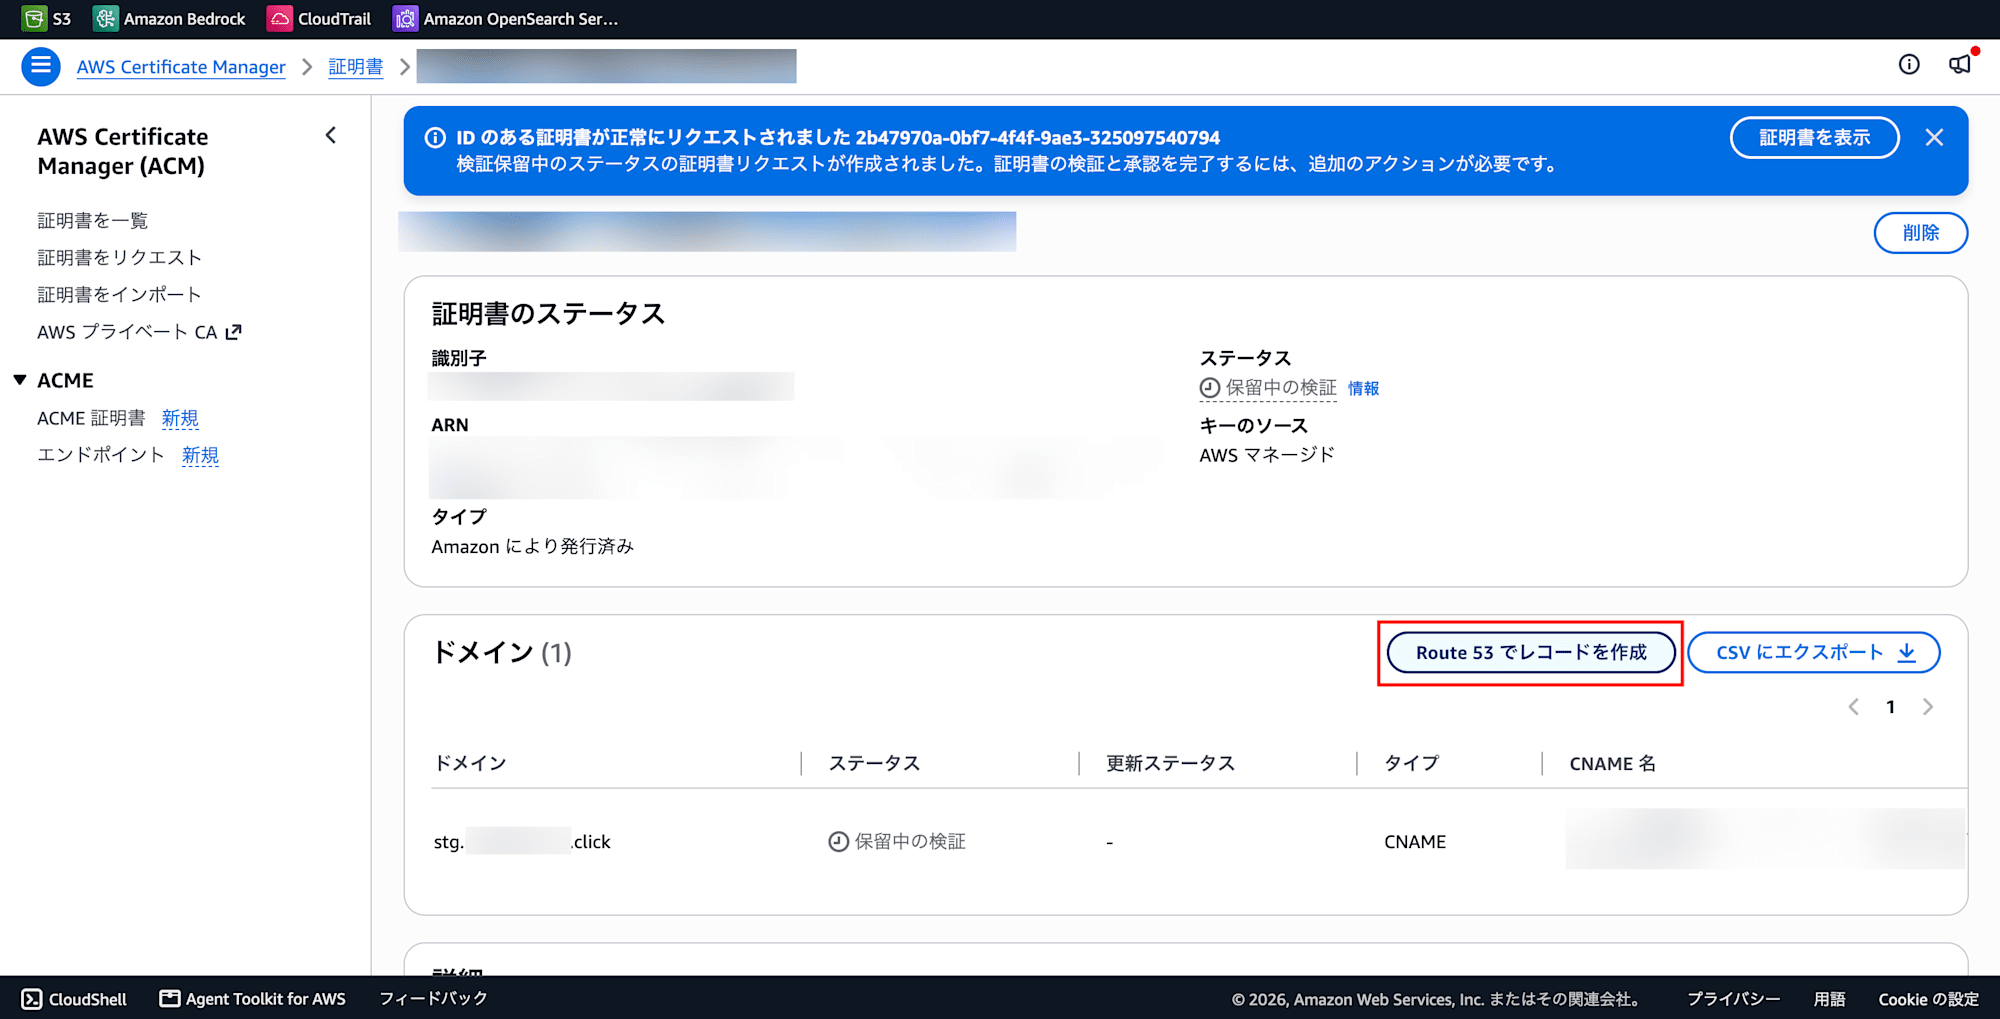
Select "Create record in Route 53".
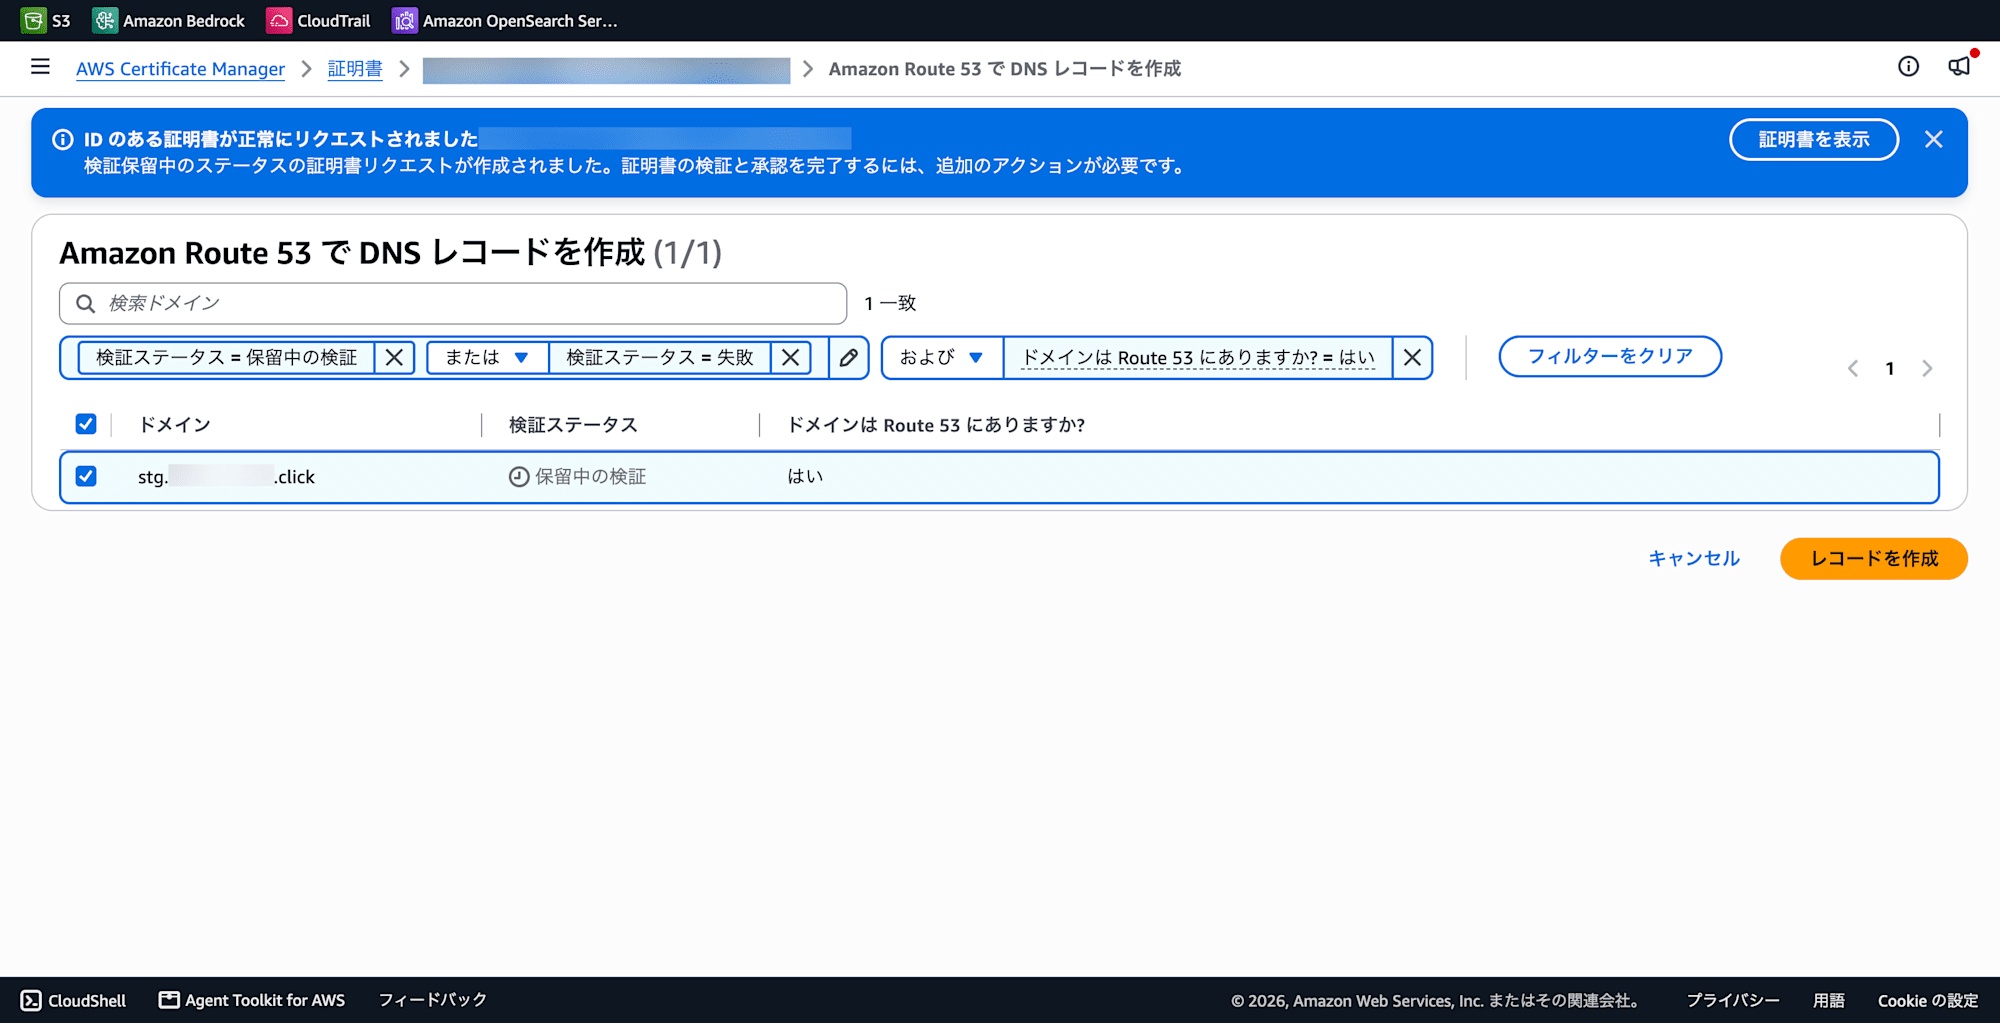
The ID portion contained in the certificate ARN is used for the CloudFormation parameter CertificateId.
Deploying the CDK synth Template from the CloudFormation Console
1. Generating the Template
pnpm cdk synth > template.yaml
2. Creating a Stack in the CloudFormation Console
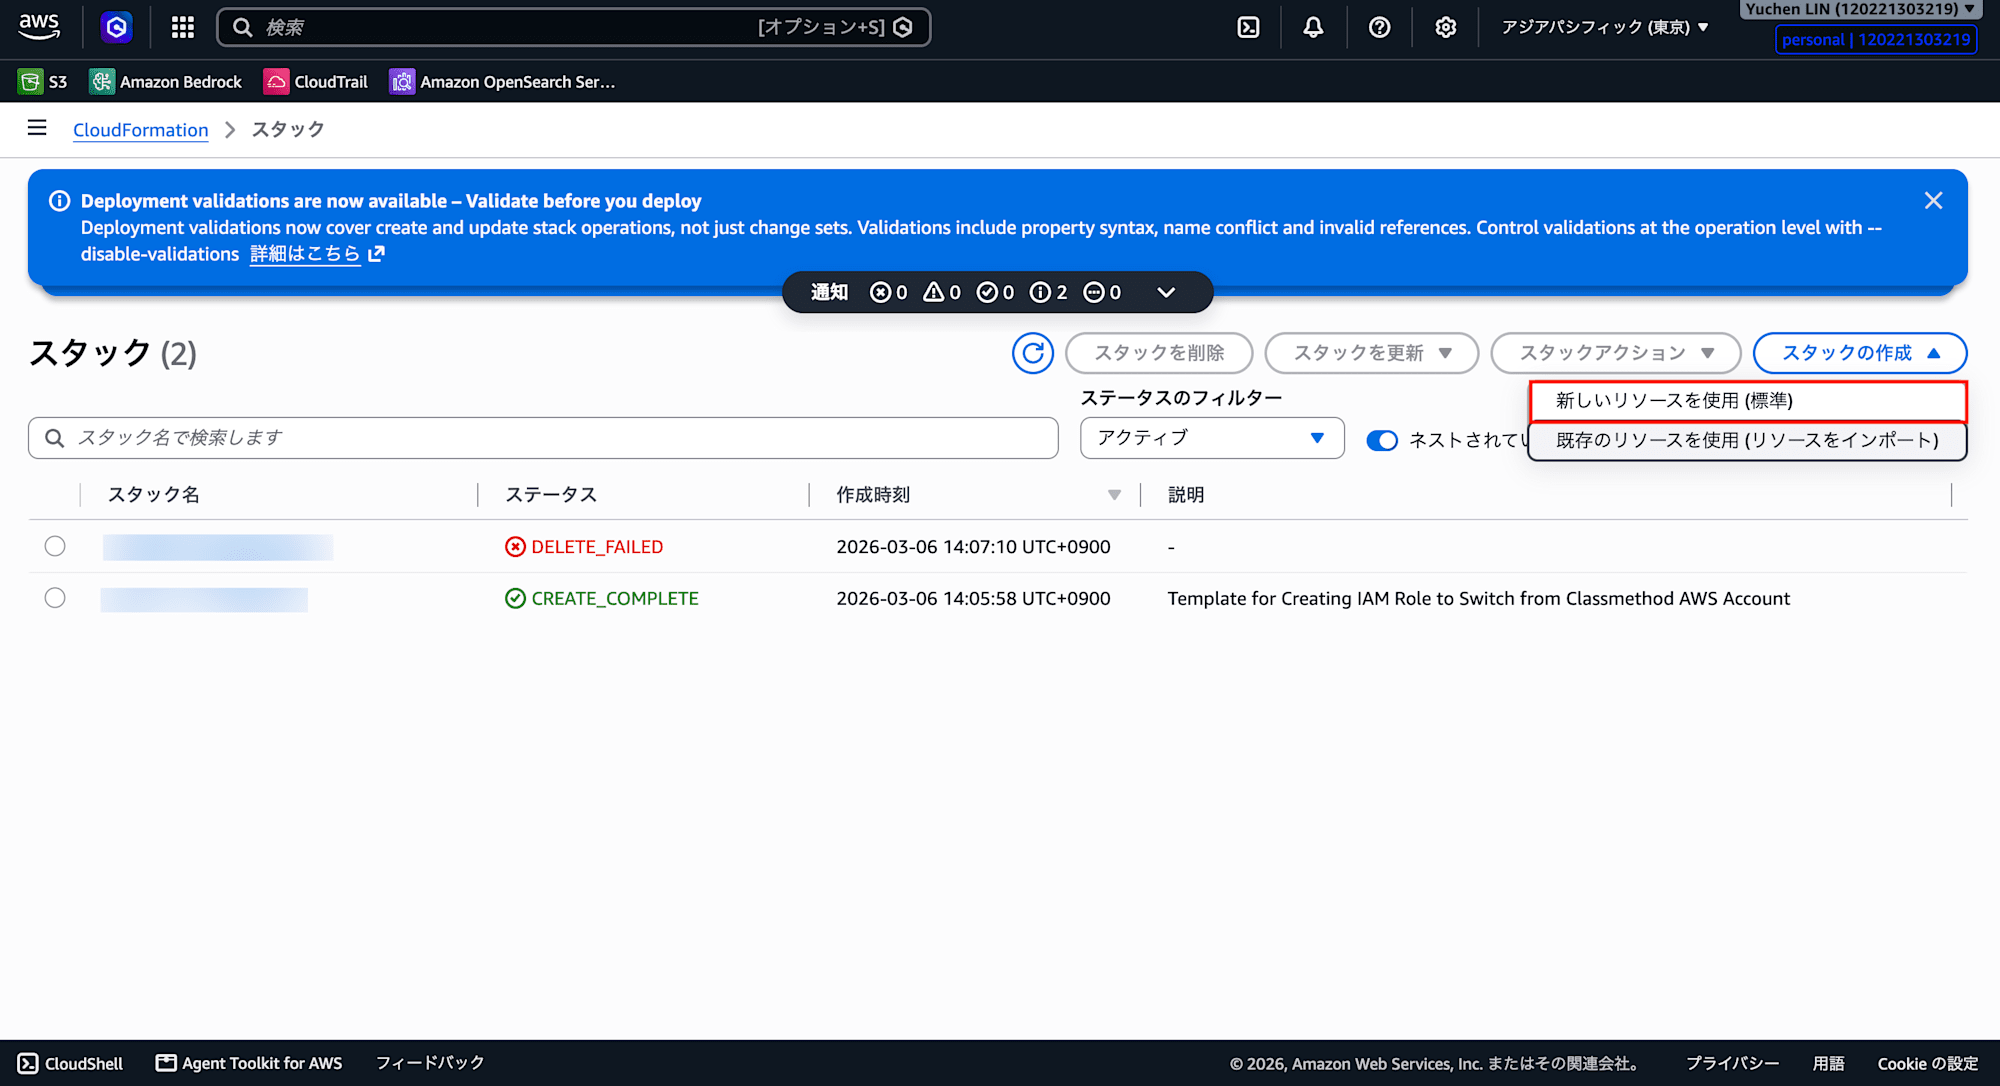
Open "CloudFormation" in the AWS console and create a stack with the following steps.
-
Select "Create stack" → "With new resources (standard)"
-
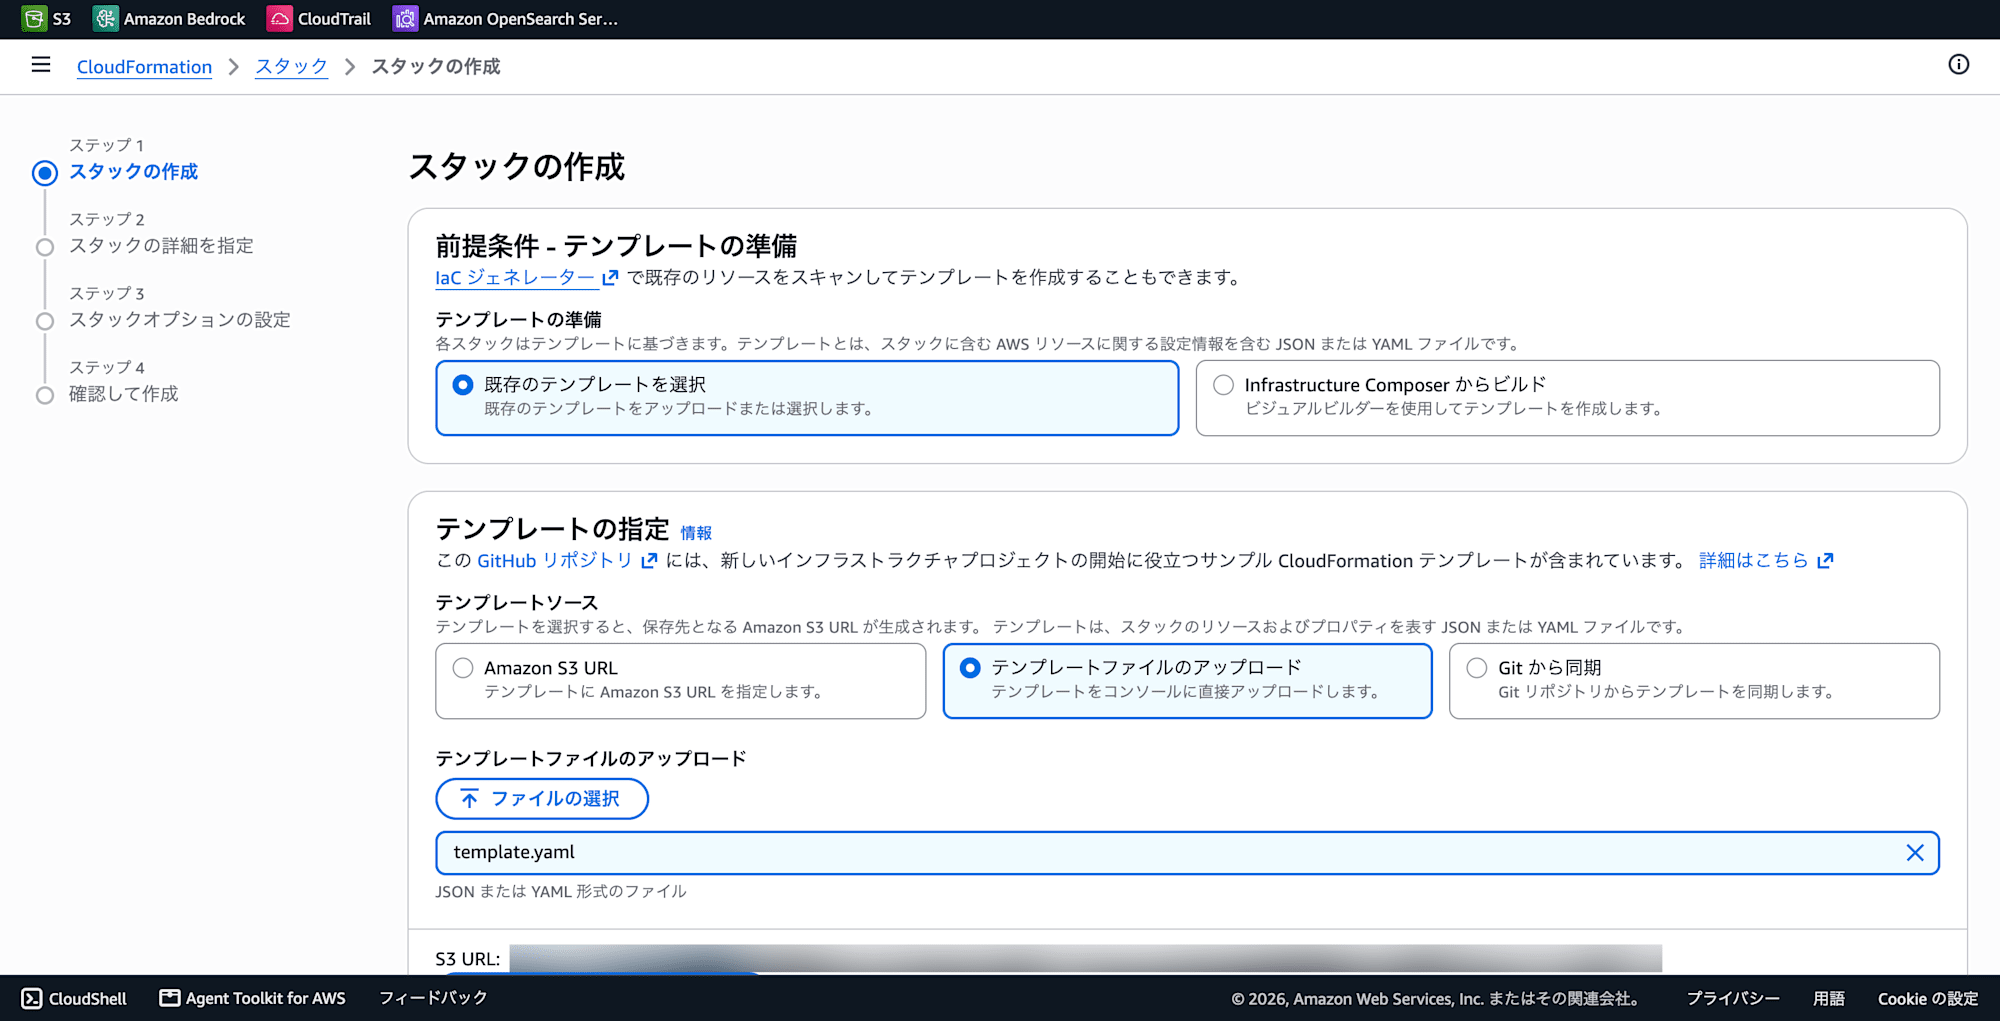
Upload the
template.yamlgenerated earlier via "Upload a template file"
-
Enter a stack name (e.g.,
cmais-prd-ai-starter-stack)
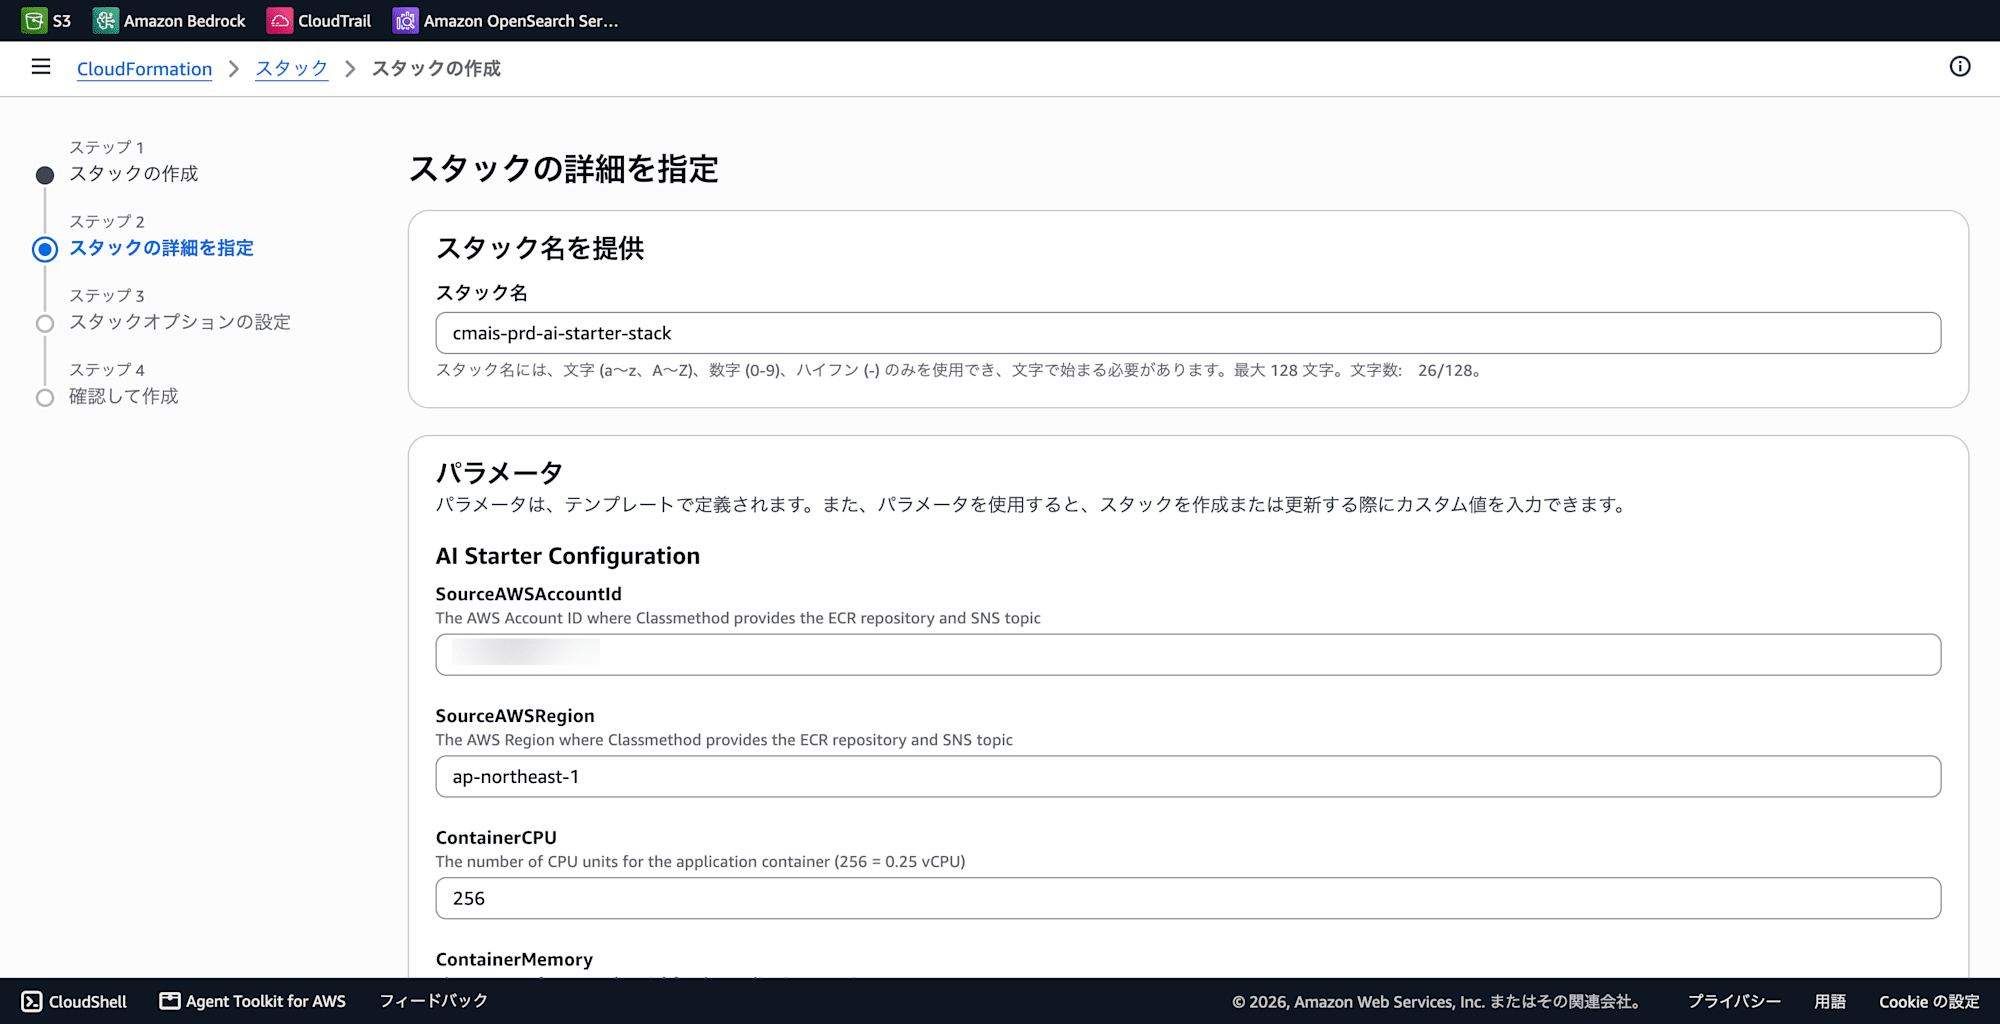
3. Entering Parameters
Enter the IDs of the resources prepared in advance.
| Parameter | Value to enter |
|---|---|
| VpcId | VPC ID (e.g., vpc-0abc1234def56789) |
| LBSubnetIds | Public subnet ID 1 / 2 |
| ServiceSubnetIds | Public subnet ID 1 / 2 |
| CertificateId | ACM certificate ID (the trailing part of the ARN) |
| NetworkType | Public (when no NAT gateway) or Private |
For NetworkType, select Public if placing the ALB in a public subnet for direct internet access, or Private if placing it in a private subnet. If you haven't created a NAT gateway for testing purposes, choose Public.
4. Executing Stack Creation
Proceed through the remaining options with the defaults by clicking "Next", and finally check "I acknowledge that AWS CloudFormation might create IAM resources." and click "Submit".
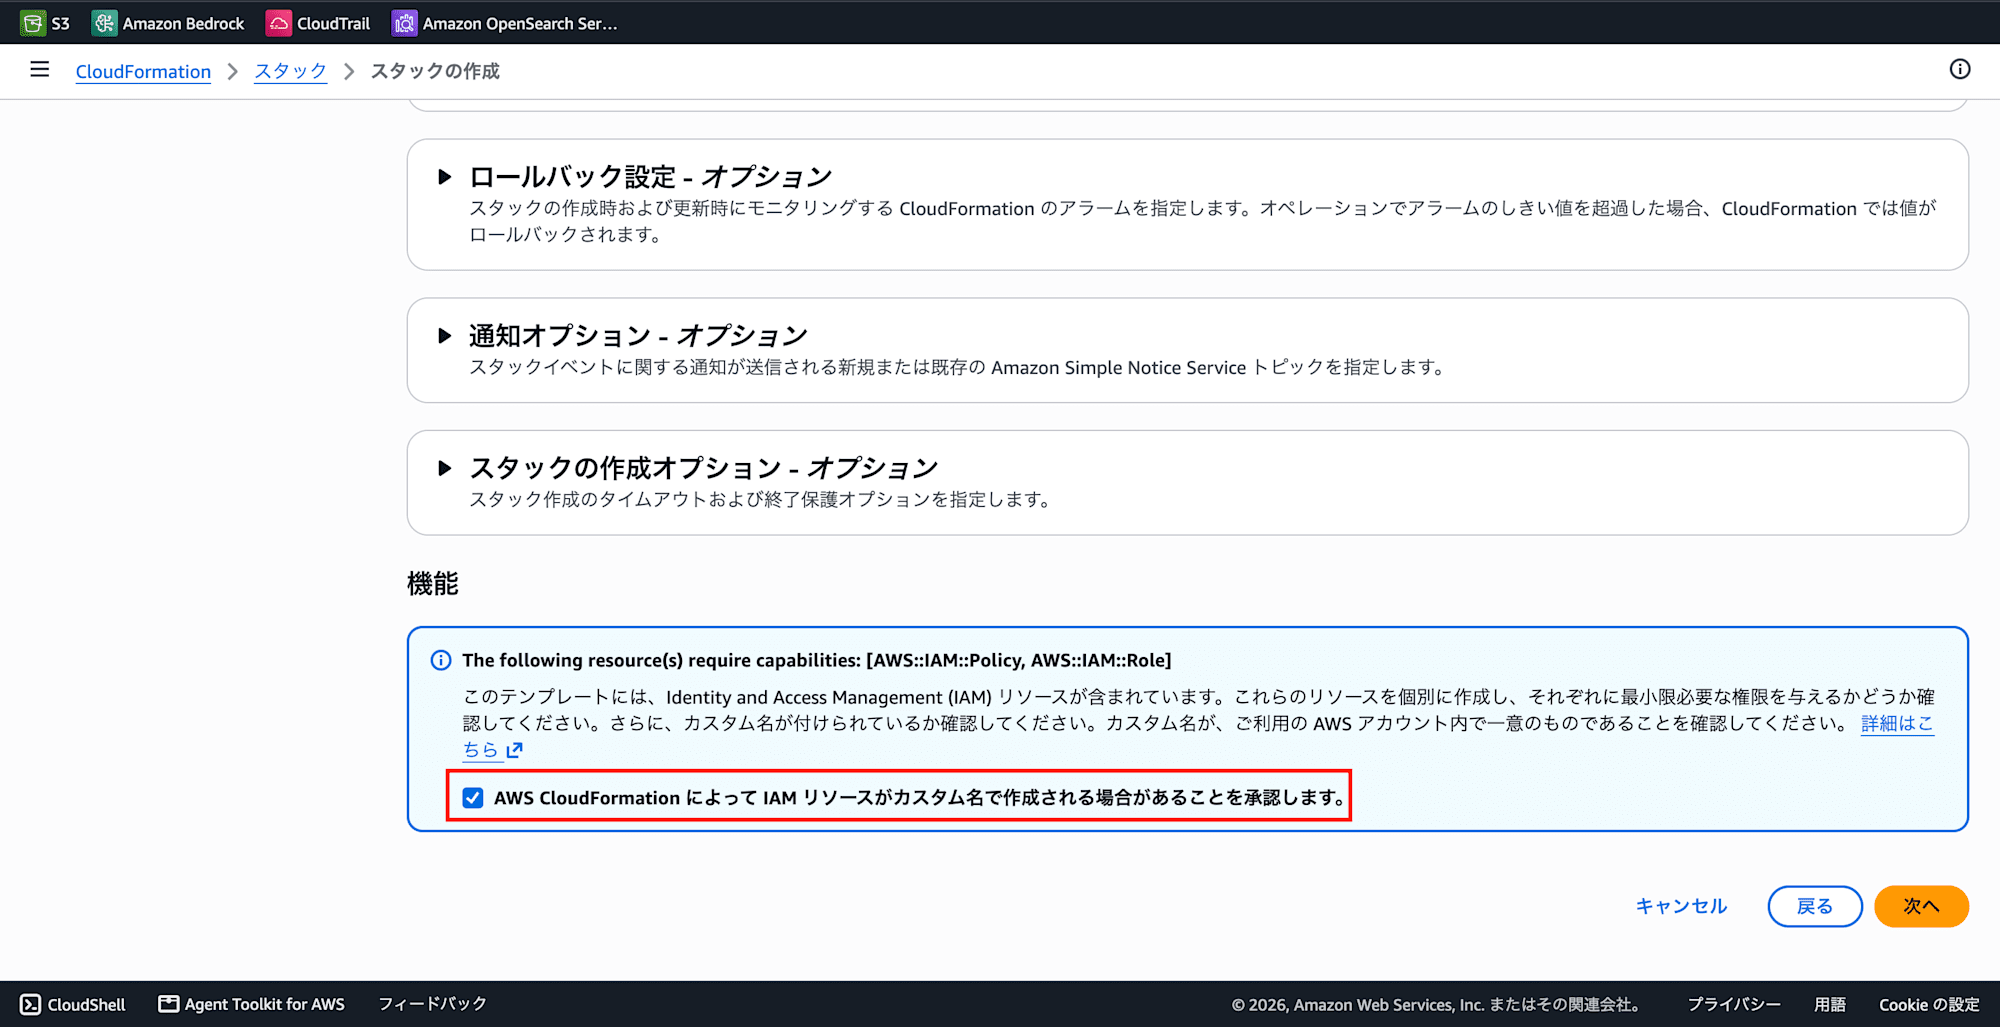
Stack creation takes about 10–15 minutes. Success is confirmed when the status becomes CREATE_COMPLETE.
If Stack Creation Fails
If stack creation fails (ROLLBACK_COMPLETE or CREATE_FAILED), you need to delete that stack and recreate it. Fix the parameters and create again with the same stack name.
The ecr:SetRepositoryPolicy permission is required. If you lack the permission, consult your organization's security administrator.
How ECR and Container Image Pulling Work
Let me clarify some terms here: "registry", "image", and "artifact".
| Term | Meaning |
|---|---|
| Container image | Application + runtime packaged together (think of it like a zip file) |
| Registry | A service that stores and distributes images (Docker Hub, GitHub Container Registry, ECR, etc.) |
| Repository | An image namespace within a registry (equivalent to a GitHub repository) |
| Artifact | A general term for build artifacts. A container image is one type of artifact |
Amazon ECR (Elastic Container Registry) is a managed container registry provided by AWS. Just as GitHub manages source code, ECR manages container images. ECS tasks fetch images from ECR via docker pull at startup and launch containers from those images.
Two Layers of Access Control
Access to ECR is controlled by the following two layers.
-
IAM Task Execution Role (pull side): The IAM role granted to ECS tasks. Permissions such as
ecr:BatchGetImageandecr:GetDownloadUrlForLayerare required. Since the CloudFormation stack creates this automatically, you normally don't need to be aware of it. -
ECR Resource-based Policy (registry side): A policy set on the ECR repository itself. Controls which AWS accounts can pull. For cross-account scenarios, you need to explicitly add the deployment destination account ID here.
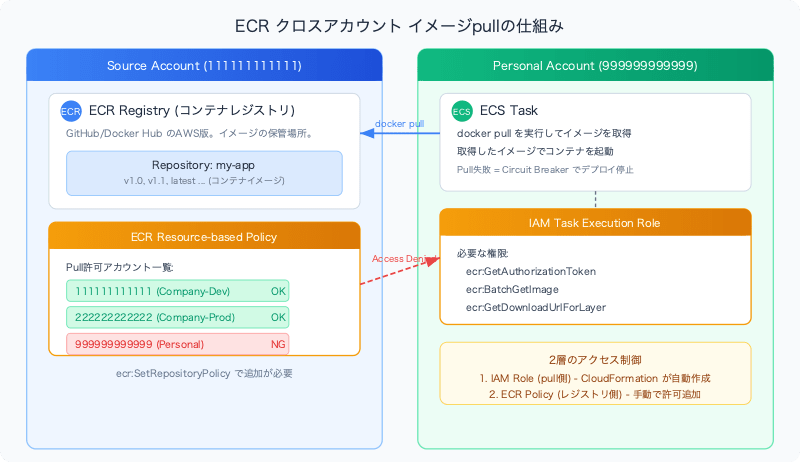
In this case, the IAM role (layer 1) had already been automatically created by CloudFormation, but the image pull was rejected because my personal account ID was not registered in the ECR repository's Resource-based Policy (layer 2).
DNS, ALB, and HTTPS Configuration
What are DNS Records?
A DNS record is an "entry in a lookup table" that maps a domain name to its destination. Every domain has a nameserver (DNS server) that manages this lookup table. Route 53 is AWS's nameserver, but if you're managing your domain with another service (Cloudflare, GoDaddy, etc.), you create the same records in that service's DNS settings screen.
Main record types:
| Record type | Maps to | Purpose |
|---|---|---|
| A | IP address | stg.example.click → 203.0.113.50 |
| CNAME | Another hostname | stg.example.click → my-alb-123.elb.amazonaws.com |
| AAAA | IPv6 address | IPv6 version of the A record |
| MX | Mail server | Specifies email destination |
| TXT | Arbitrary text | Used for domain validation (e.g., ACM DNS validation) |
Since we're connecting to an ALB this time, we're using the more efficient A record (Alias).
Configuring DNS Records for ALB
After creating the CloudFormation stack, the ALB is created but DNS records are not automatically created. You need to manually create an A record (Alias) pointing to the ALB in Route 53.
-
From the stack > stack details, note the value of LoadBalancerDNS.
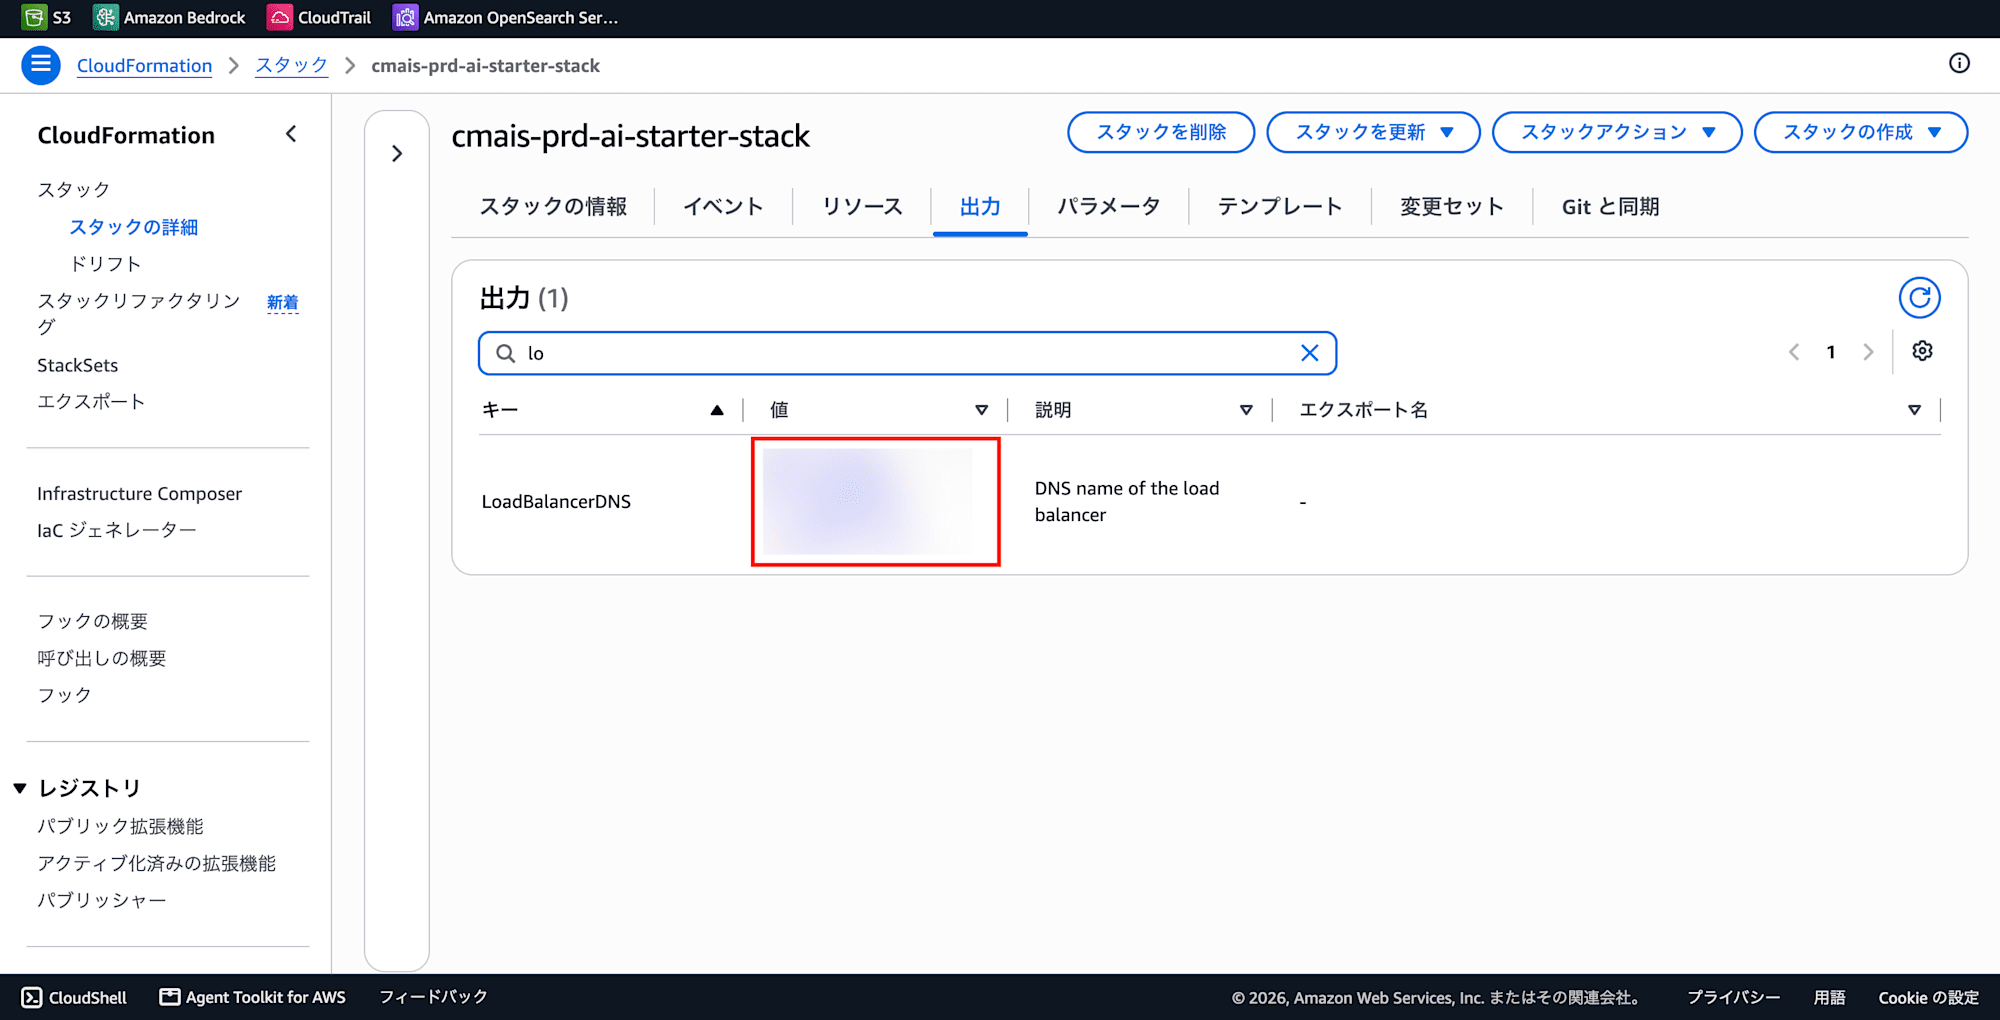
-
Go to Route 53 > the domain you registered earlier > select "Create record".
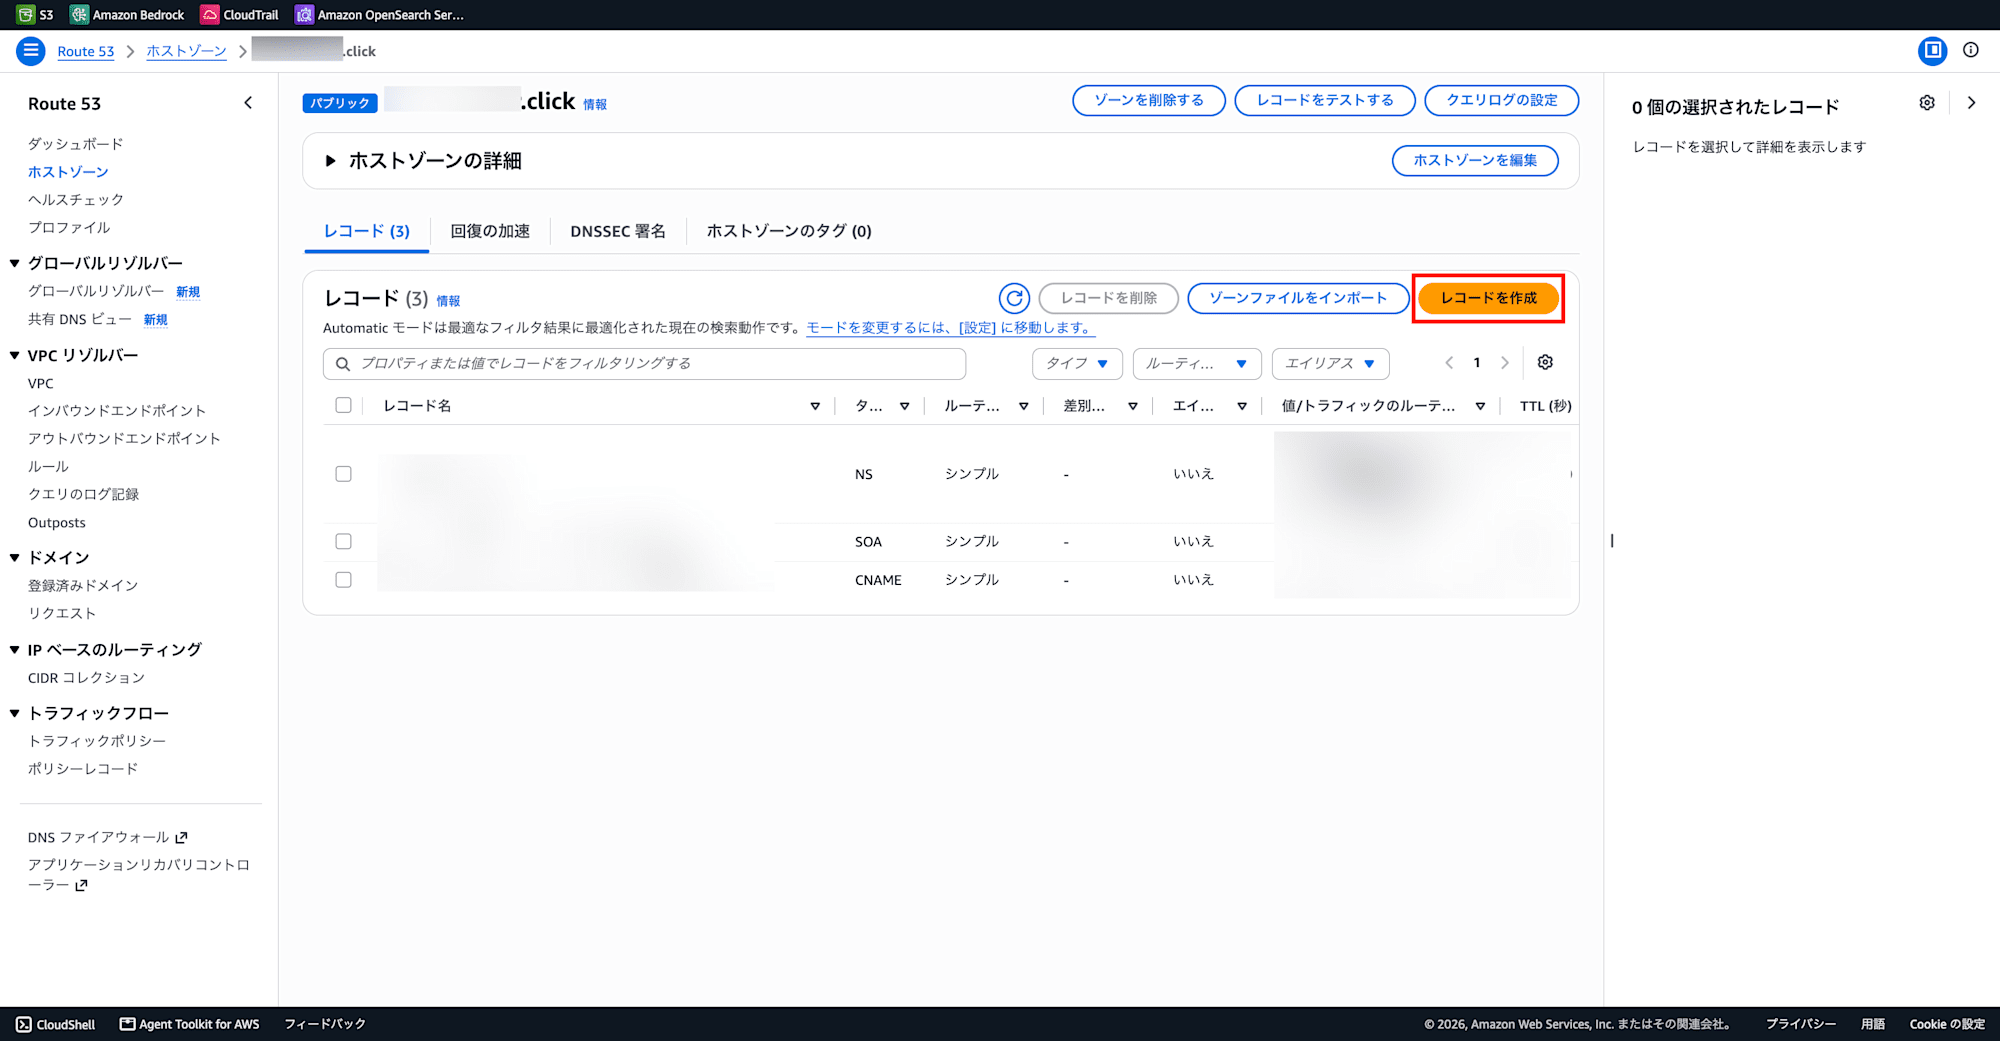
-
Enter the record parameters.
| Parameter | Value to enter |
|---|---|
| Record name | stg (the subdomain specified earlier) |
| Record type | A |
| Route traffic to | Alias to Application Load Balancer and Classic Load Balancer |
| Load balancer | dualstack.<the LoadBalancerDNS value noted earlier> |
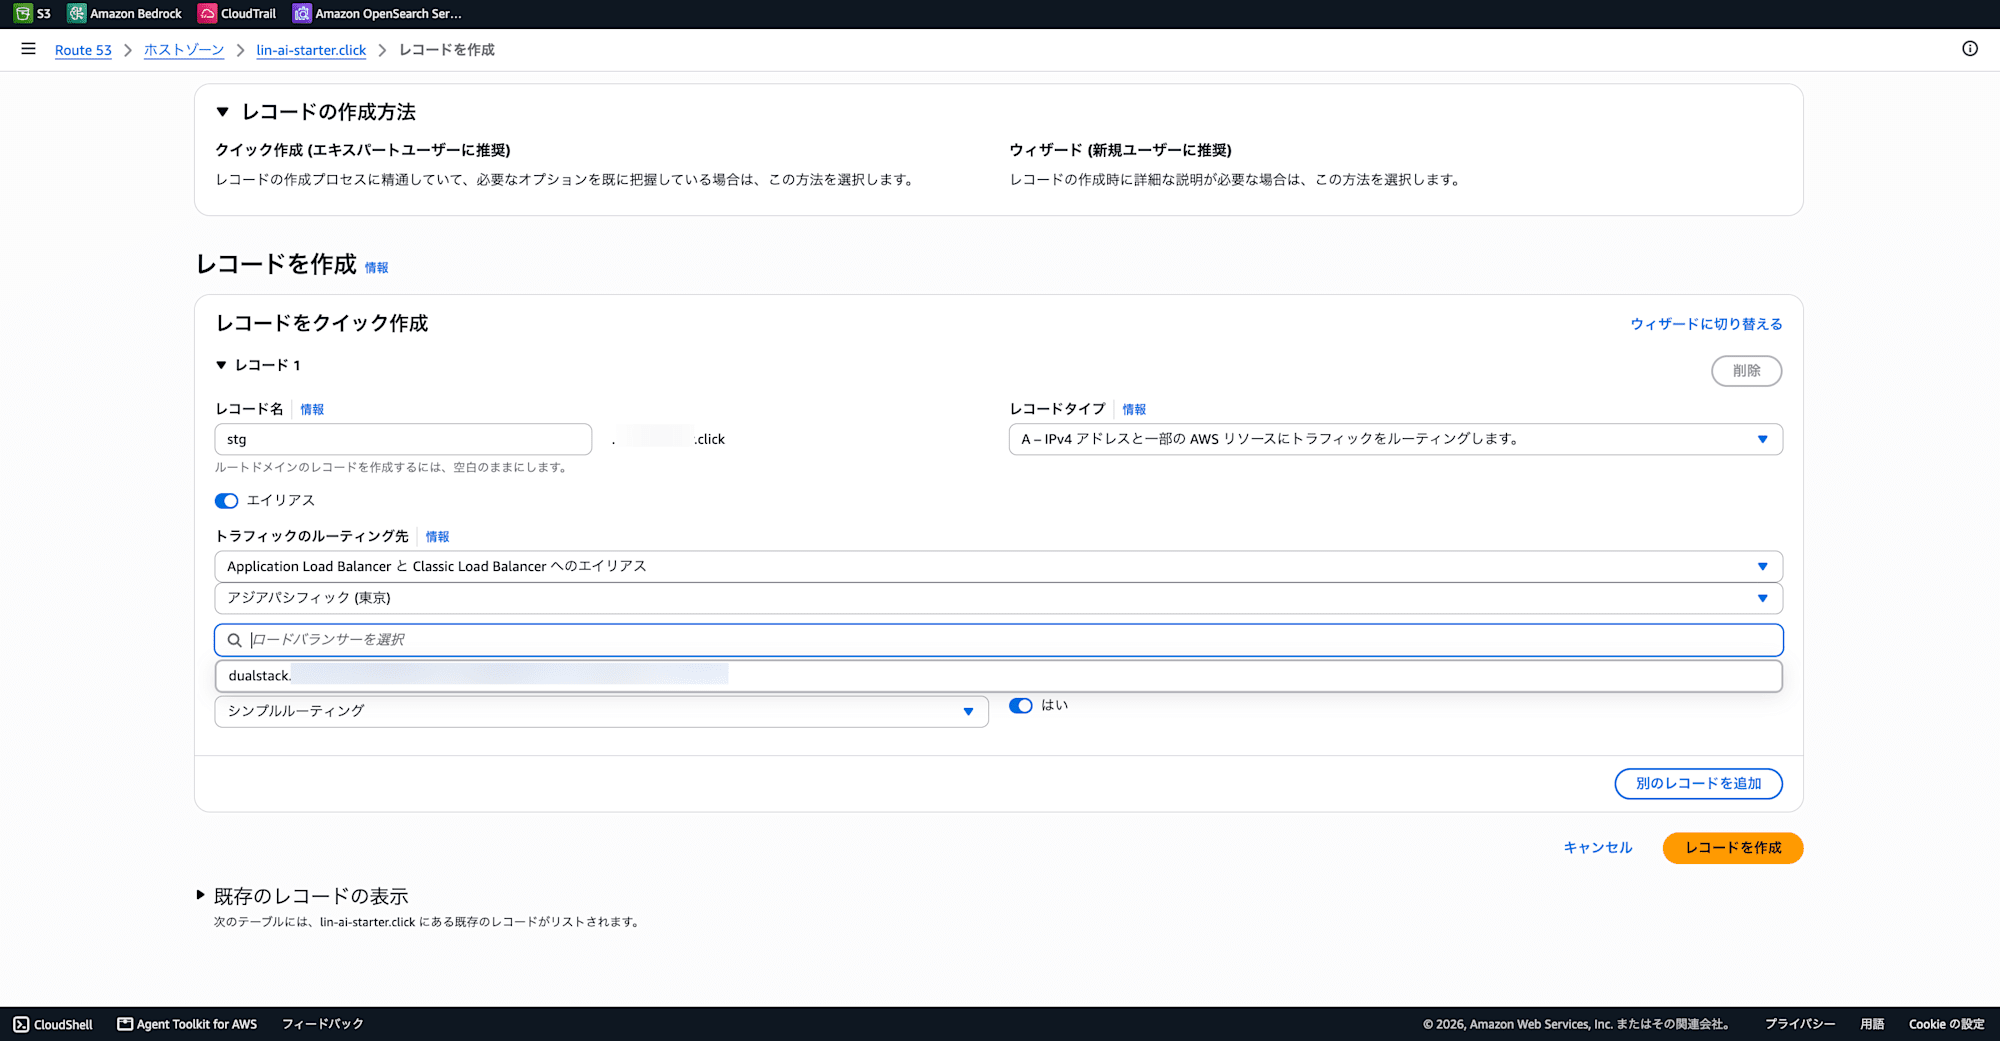
- Select "Create record"
You can now access the application from the configured domain.
Cognito + Secrets Manager Configuration
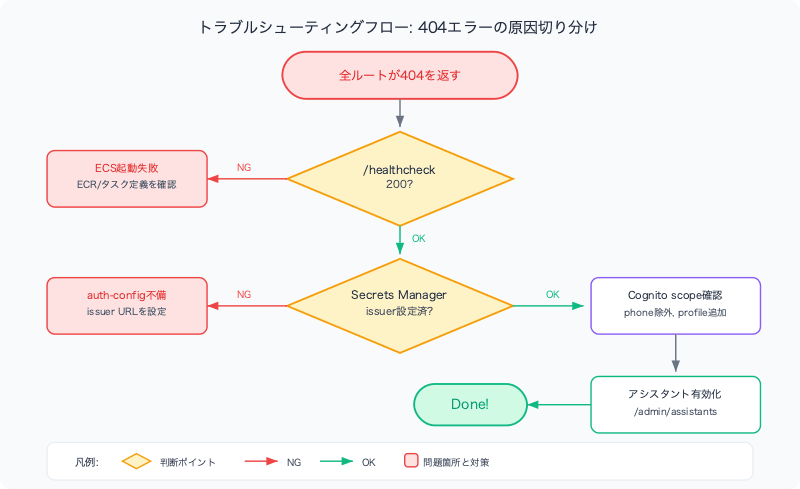
Problem: All Routes Return 404
After deployment, /healthcheck returned 200 normally, but a phenomenon occurred where all other routes like /login and / returned 404.
Investigating the Cause
After investigating the application code, I found that the server reads secrets from Secrets Manager at startup and initializes the OIDC authentication configuration. If this initialization fails, the server falls back to health check only mode, and no routes other than /healthcheck are registered.
Specifically, the issuer field of the auth-config secret was an empty string, causing the openid-client library to throw a TypeError: Cannot read properties of null.
Creating a Cognito User Pool
I created a Cognito user pool for OIDC authentication.
-
Amazon Cognito > Create user pool
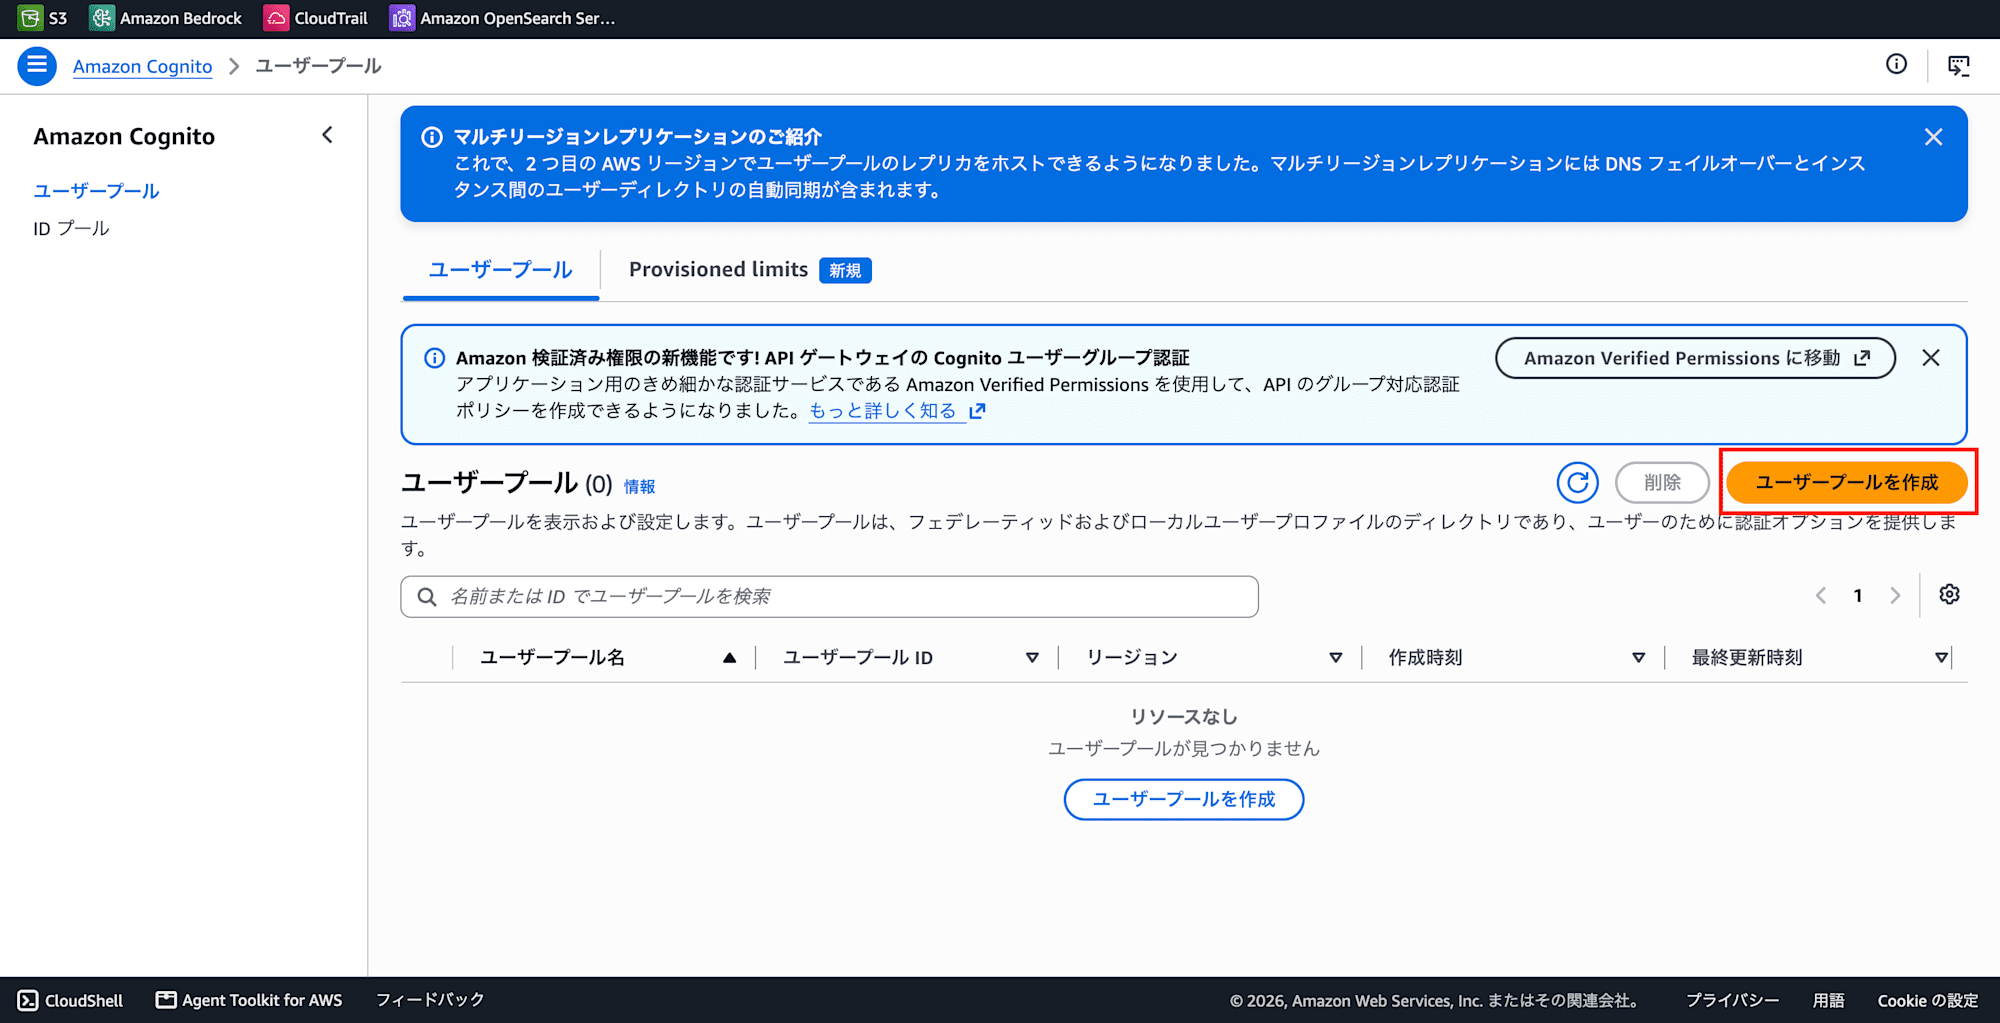
-
Configure the application.
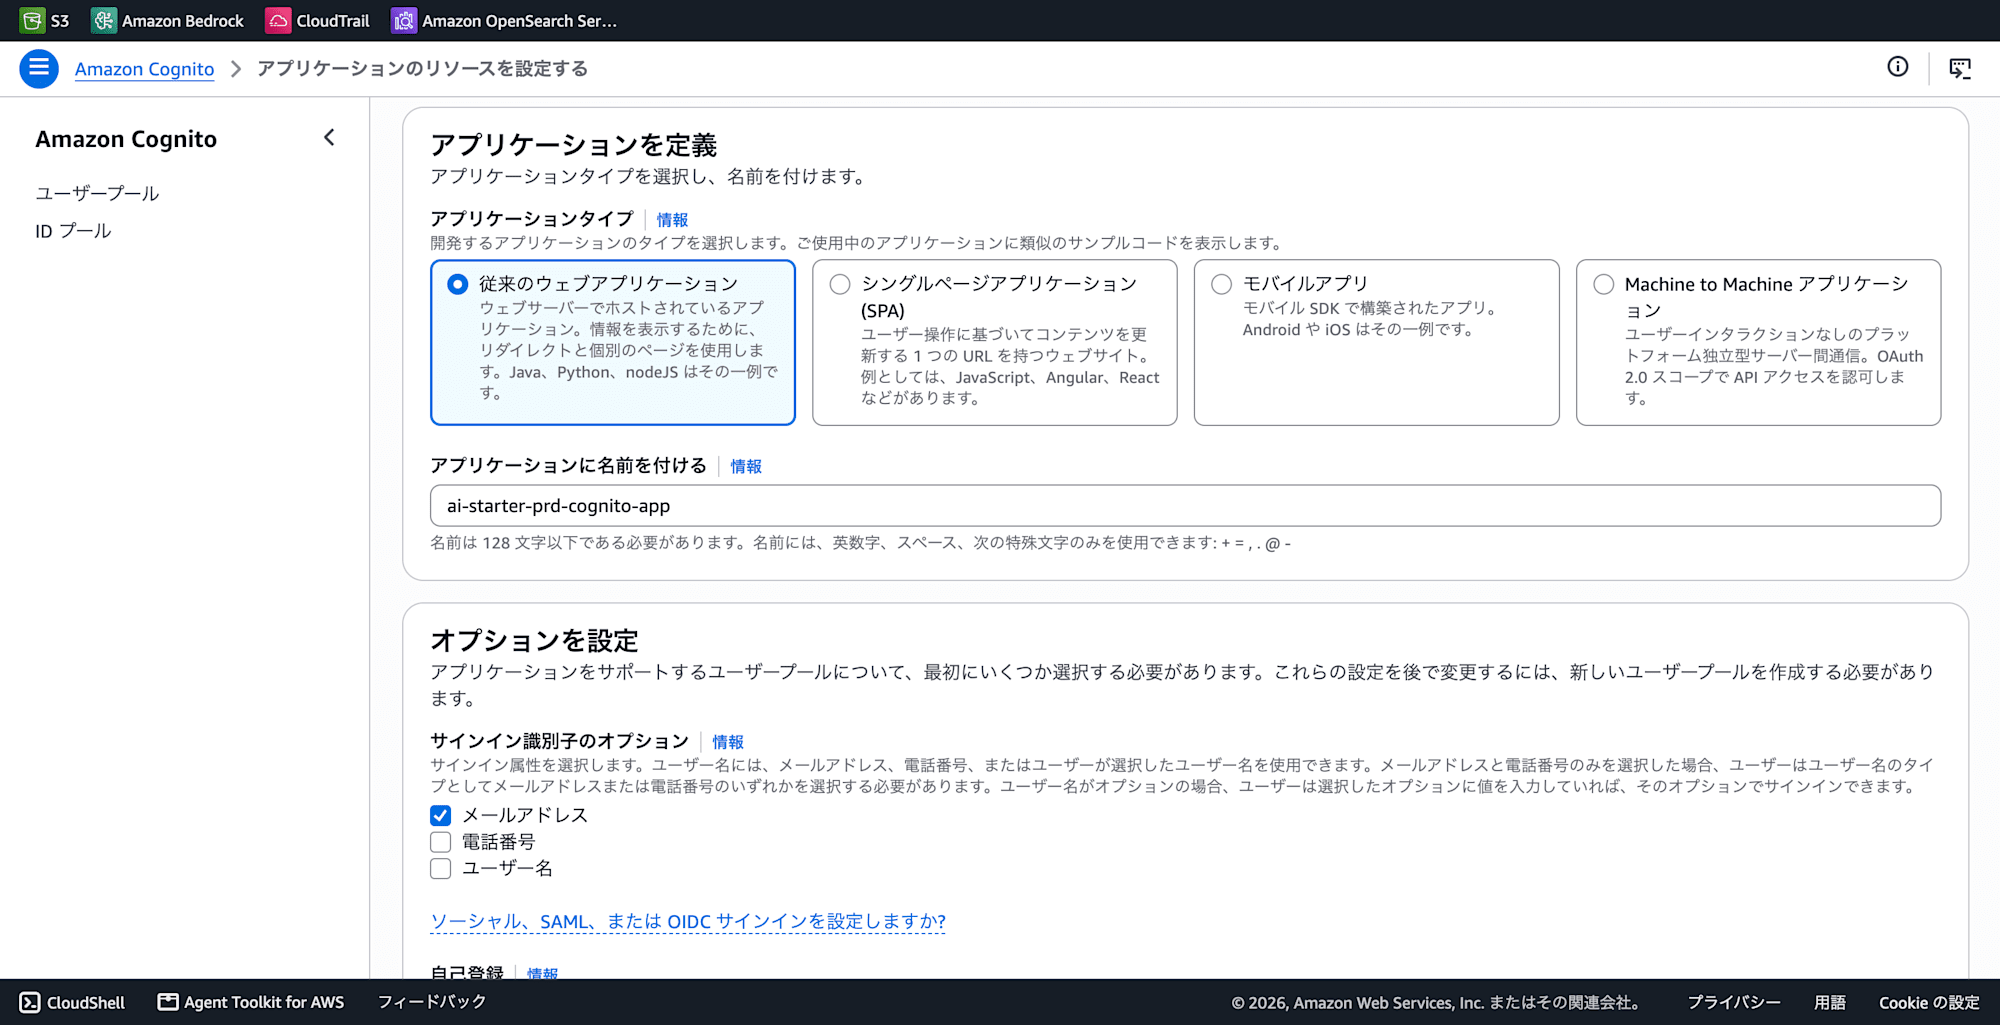
-
Configure the return URL.
| Item | Setting |
|---|---|
| Application type | Traditional web application |
| Application name | Any |
| Sign-in options | |
| Return URL | https://YOUR_DOMAIN/auth/callback |
| Allowed scopes | email, openid, profile |
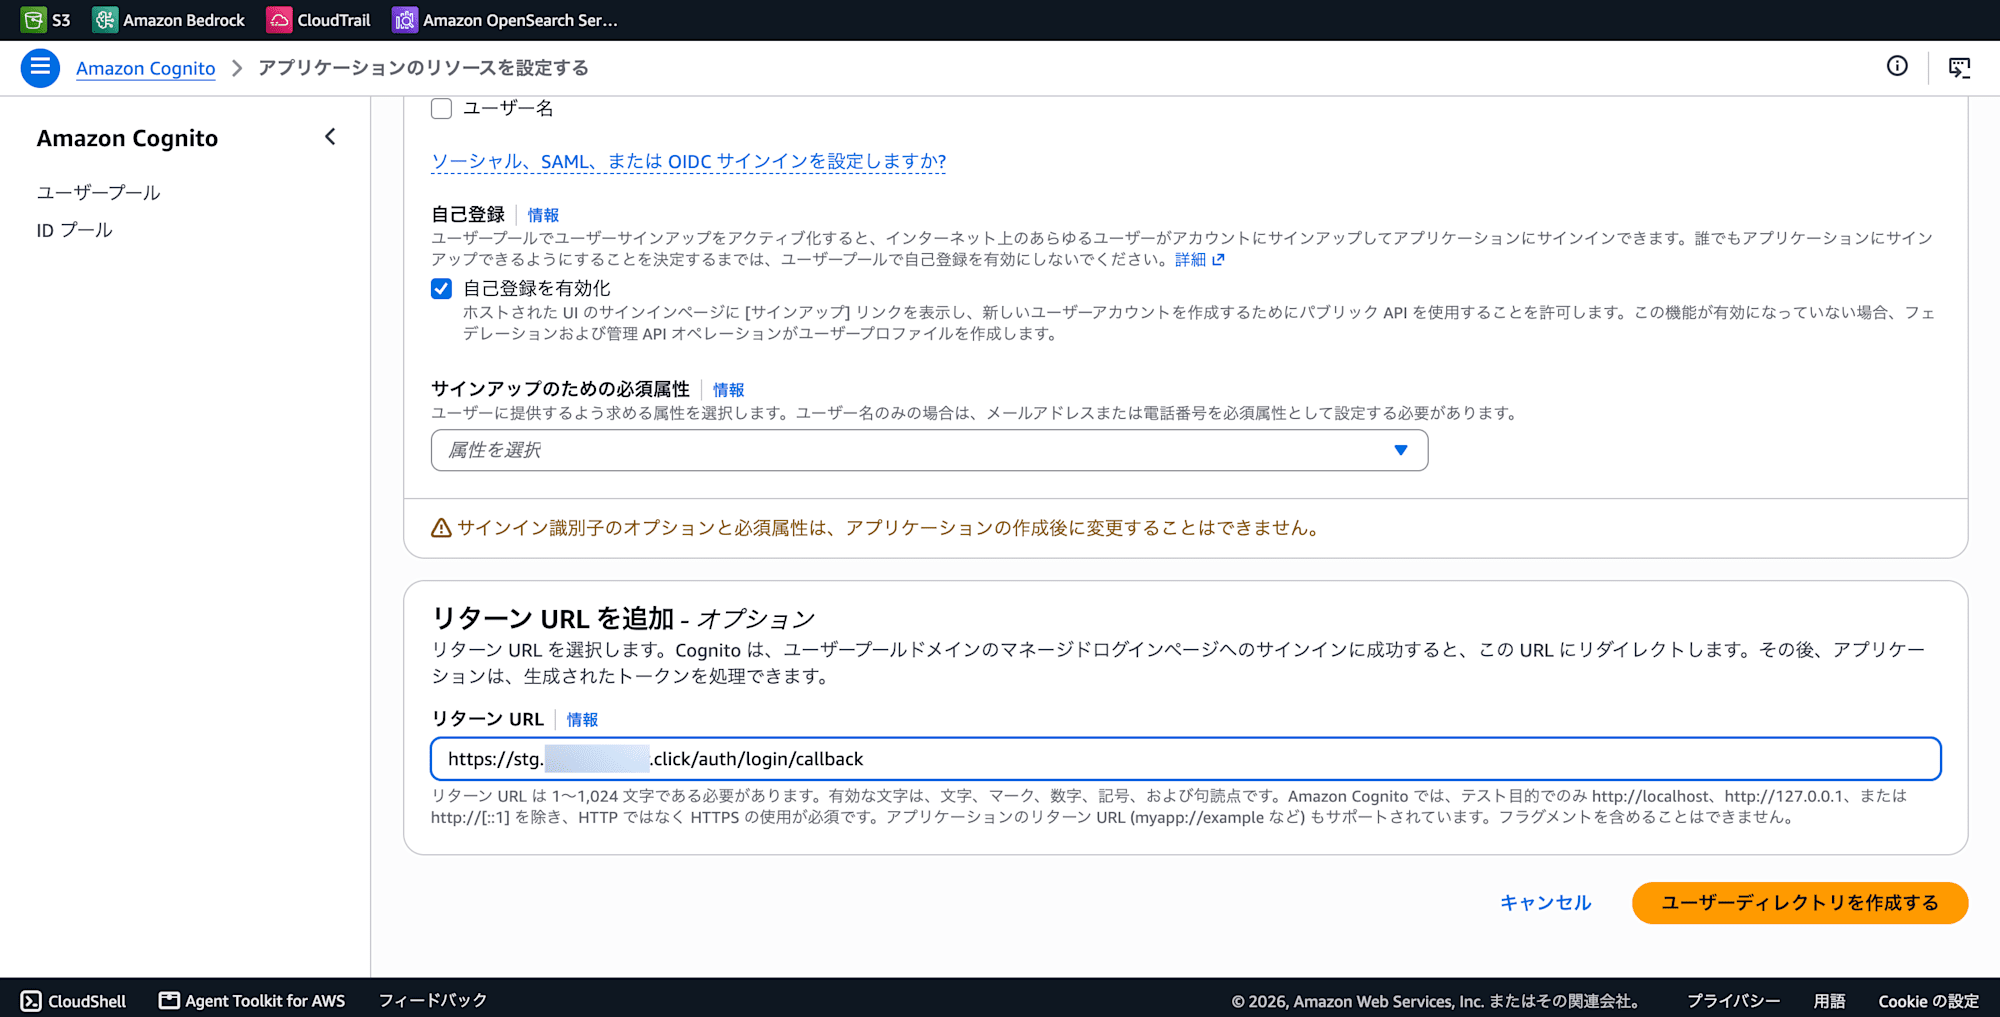
Registering a User
-
Amazon Cognito > User pool > Create user
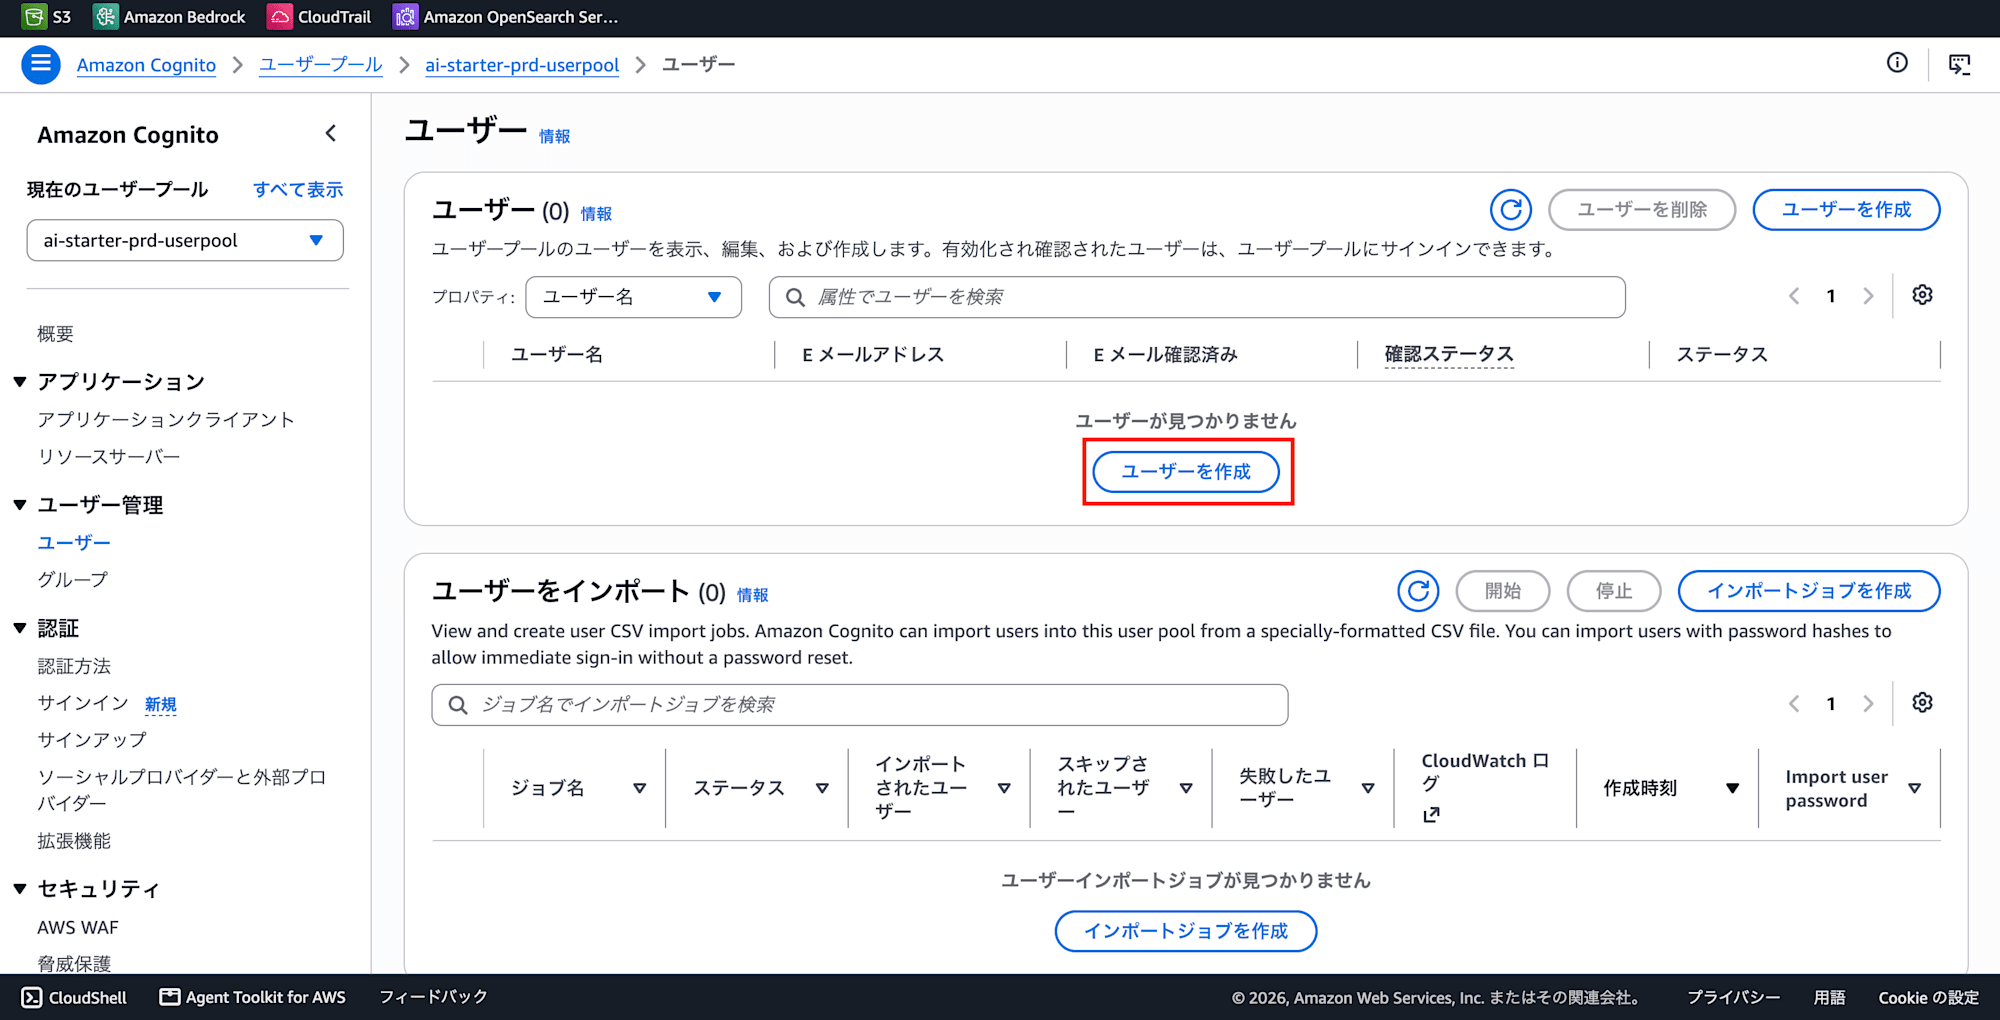
-
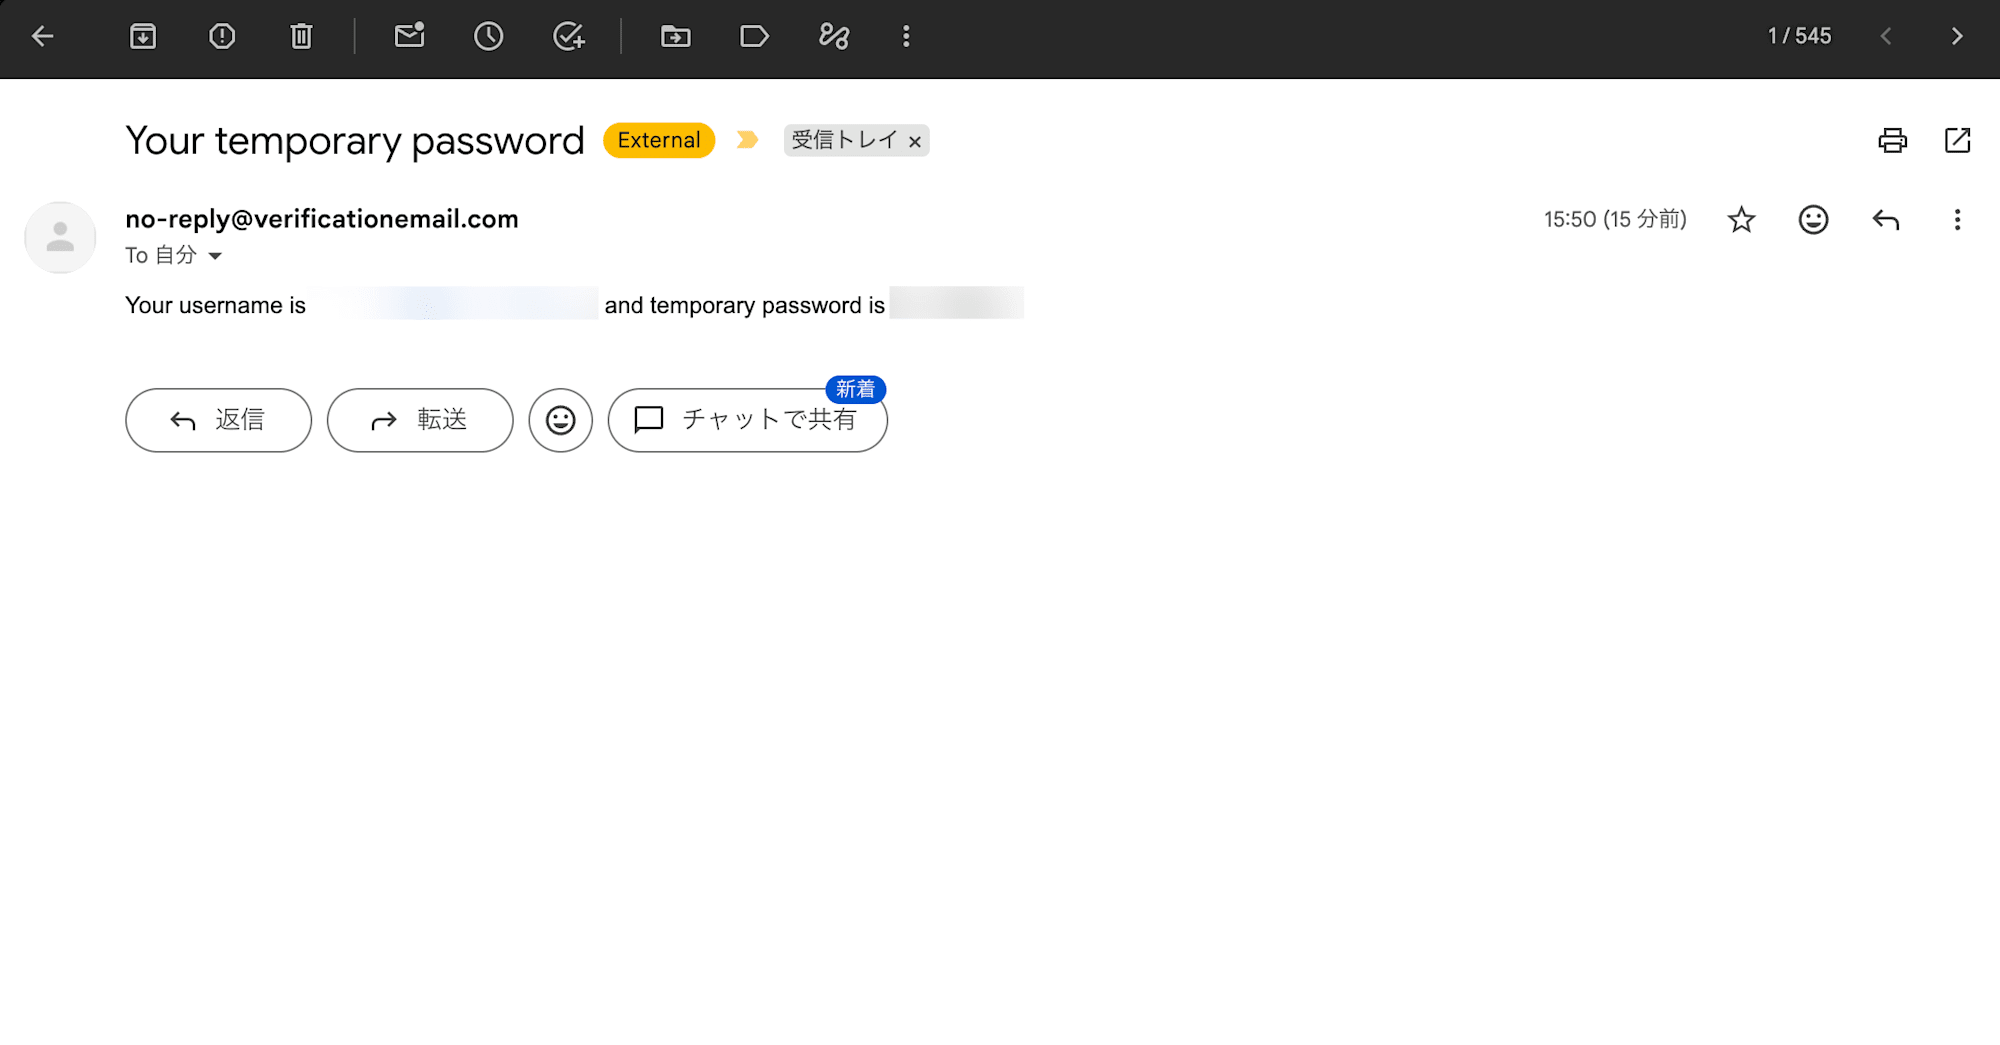
Send an invitation to the user (yourself).
| Item | Setting |
|---|---|
| Invitation message | Send invitation via email |
| Email address | <your email address> |
| Sign-in options | |
| Temporary password | Generate password |
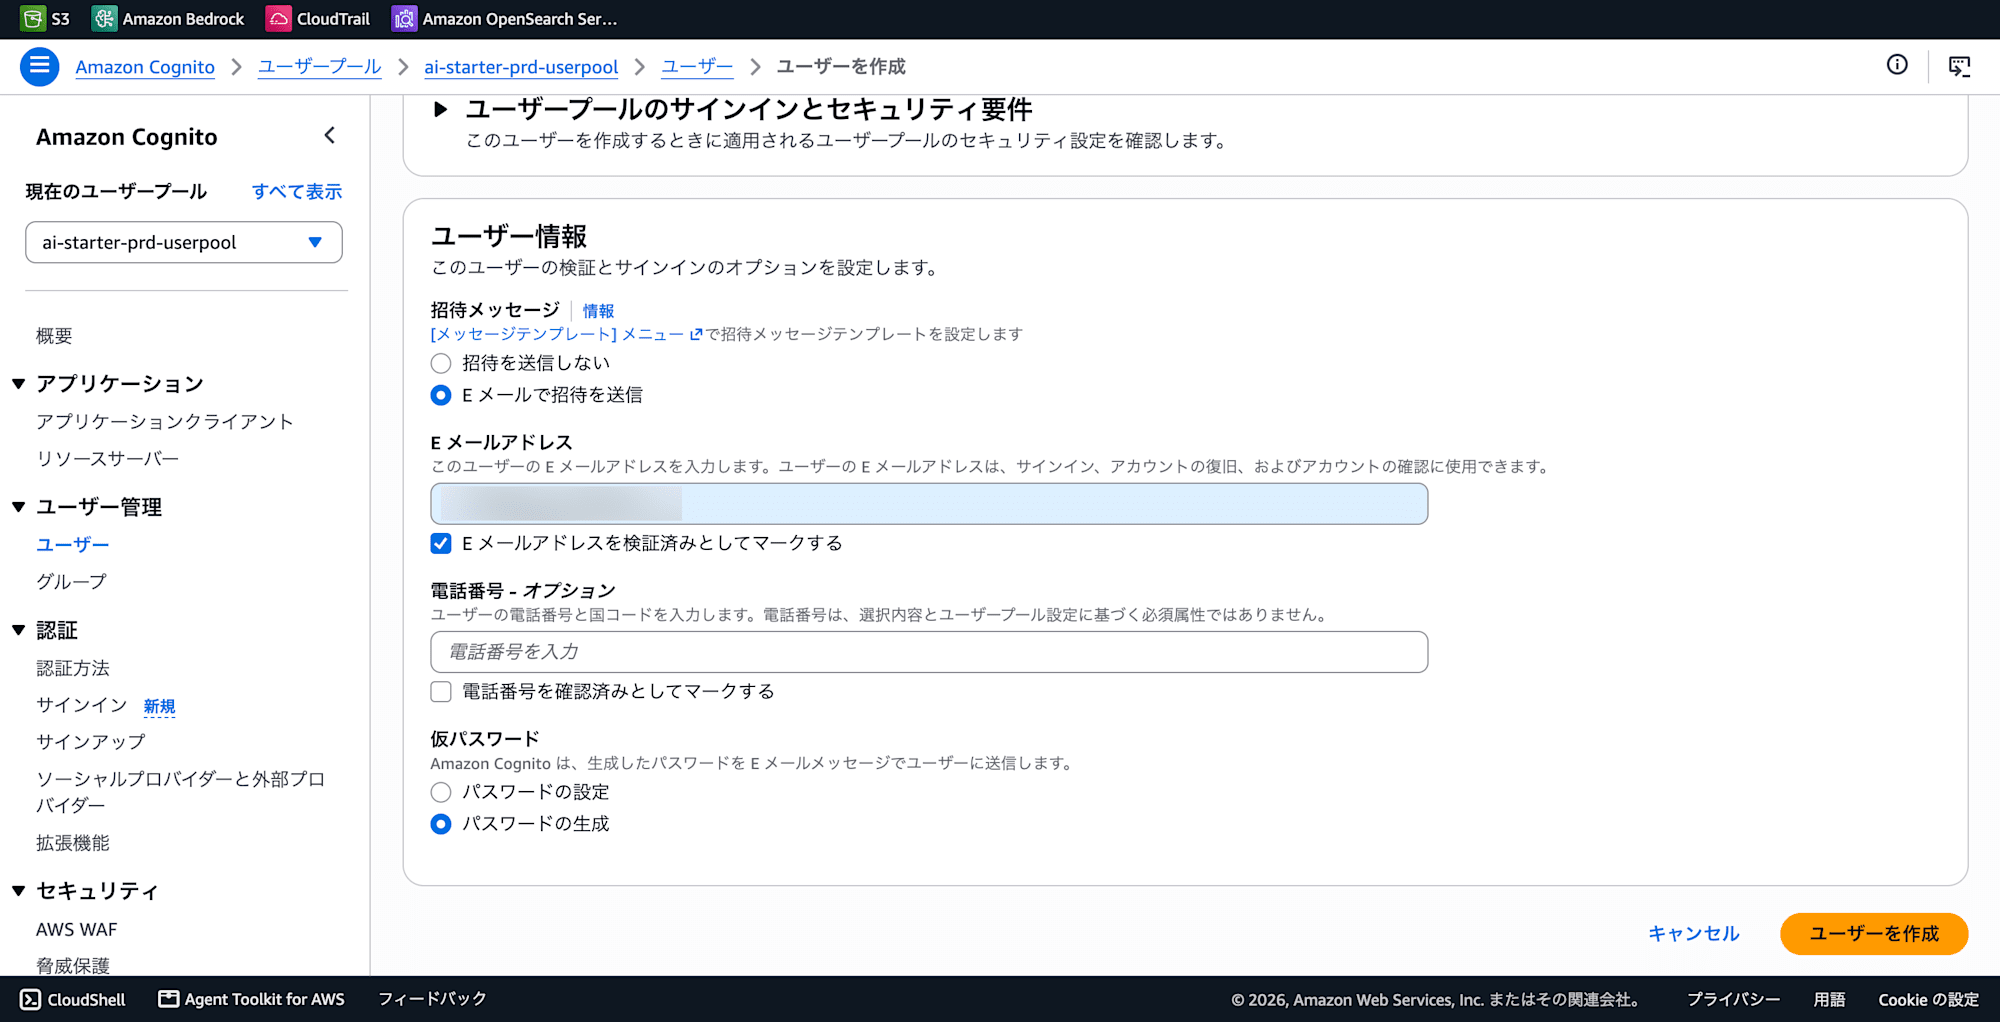
- Receive the temporary password.
Scope Configuration Mistake
When creating the Cognito app client, phone was included in the default scopes. Since it didn't match the scopes requested by the application (email openid profile), an invalid_scope error occurred at login.
aws cognito-idp update-user-pool-client \
  --user-pool-id ap-northeast-1_XXXXXXX \
  --client-id YOUR_CLIENT_ID \
  --allowed-o-auth-scopes email openid profile \
  --allowed-o-auth-flows code \
  --allowed-o-auth-flows-user-pool-client \
  --supported-identity-providers COGNITO \
  --callback-urls '["https://YOUR_DOMAIN/auth/callback"]'
Secrets Manager Configuration
Main secrets referenced by the application:
| Secret name | Required fields | Description |
|---|---|---|
auth-config |
issuer, client_id, client_secret |
OIDC authentication settings |
aws |
bedrock_region |
Region for using Bedrock |
customize |
title |
App title and other customizations |
Set the Cognito user pool issuer URL in the issuer field of auth-config:
https://cognito-idp.ap-northeast-1.amazonaws.com/ap-northeast-1_XXXXXXX
Enabling Assistants in the Admin Panel
At this point, you should be able to log in.
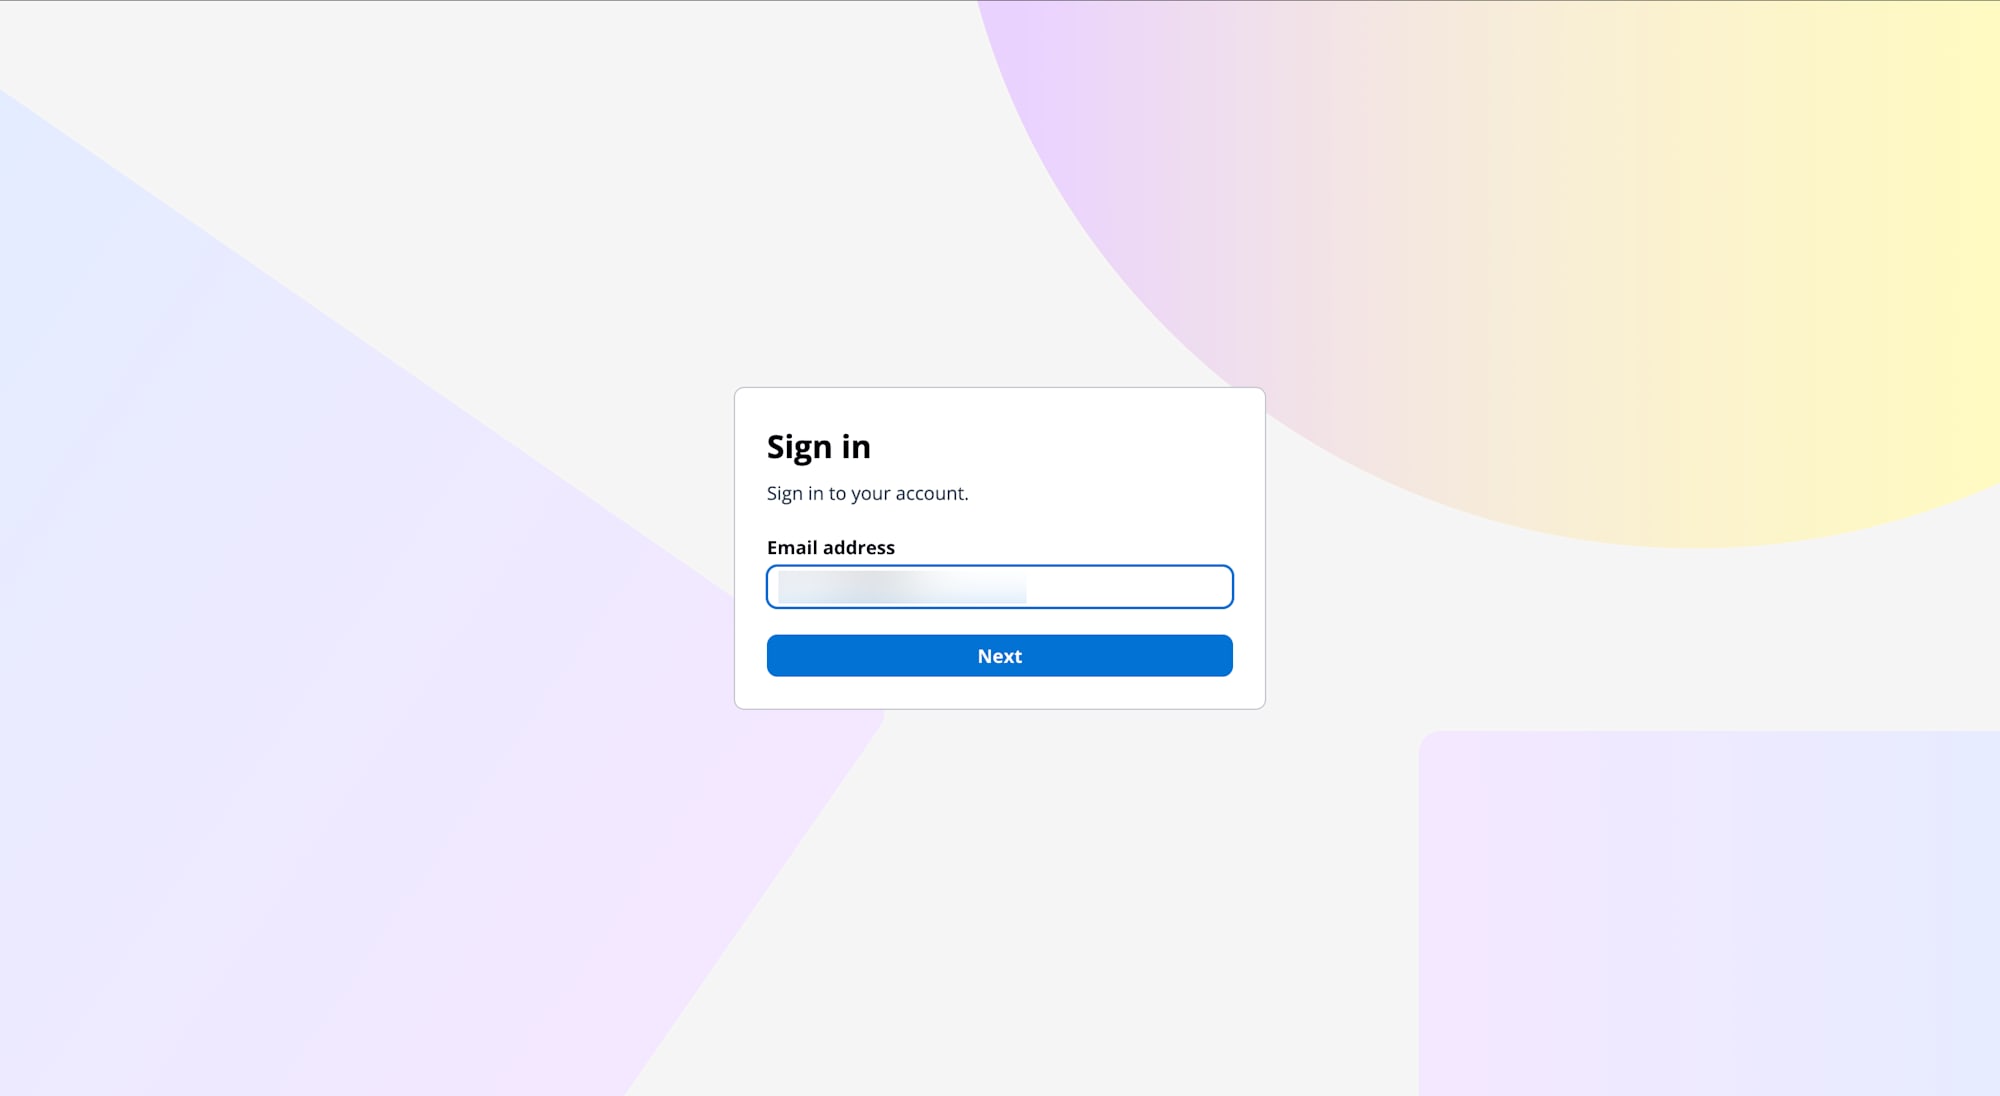
Enter your email.
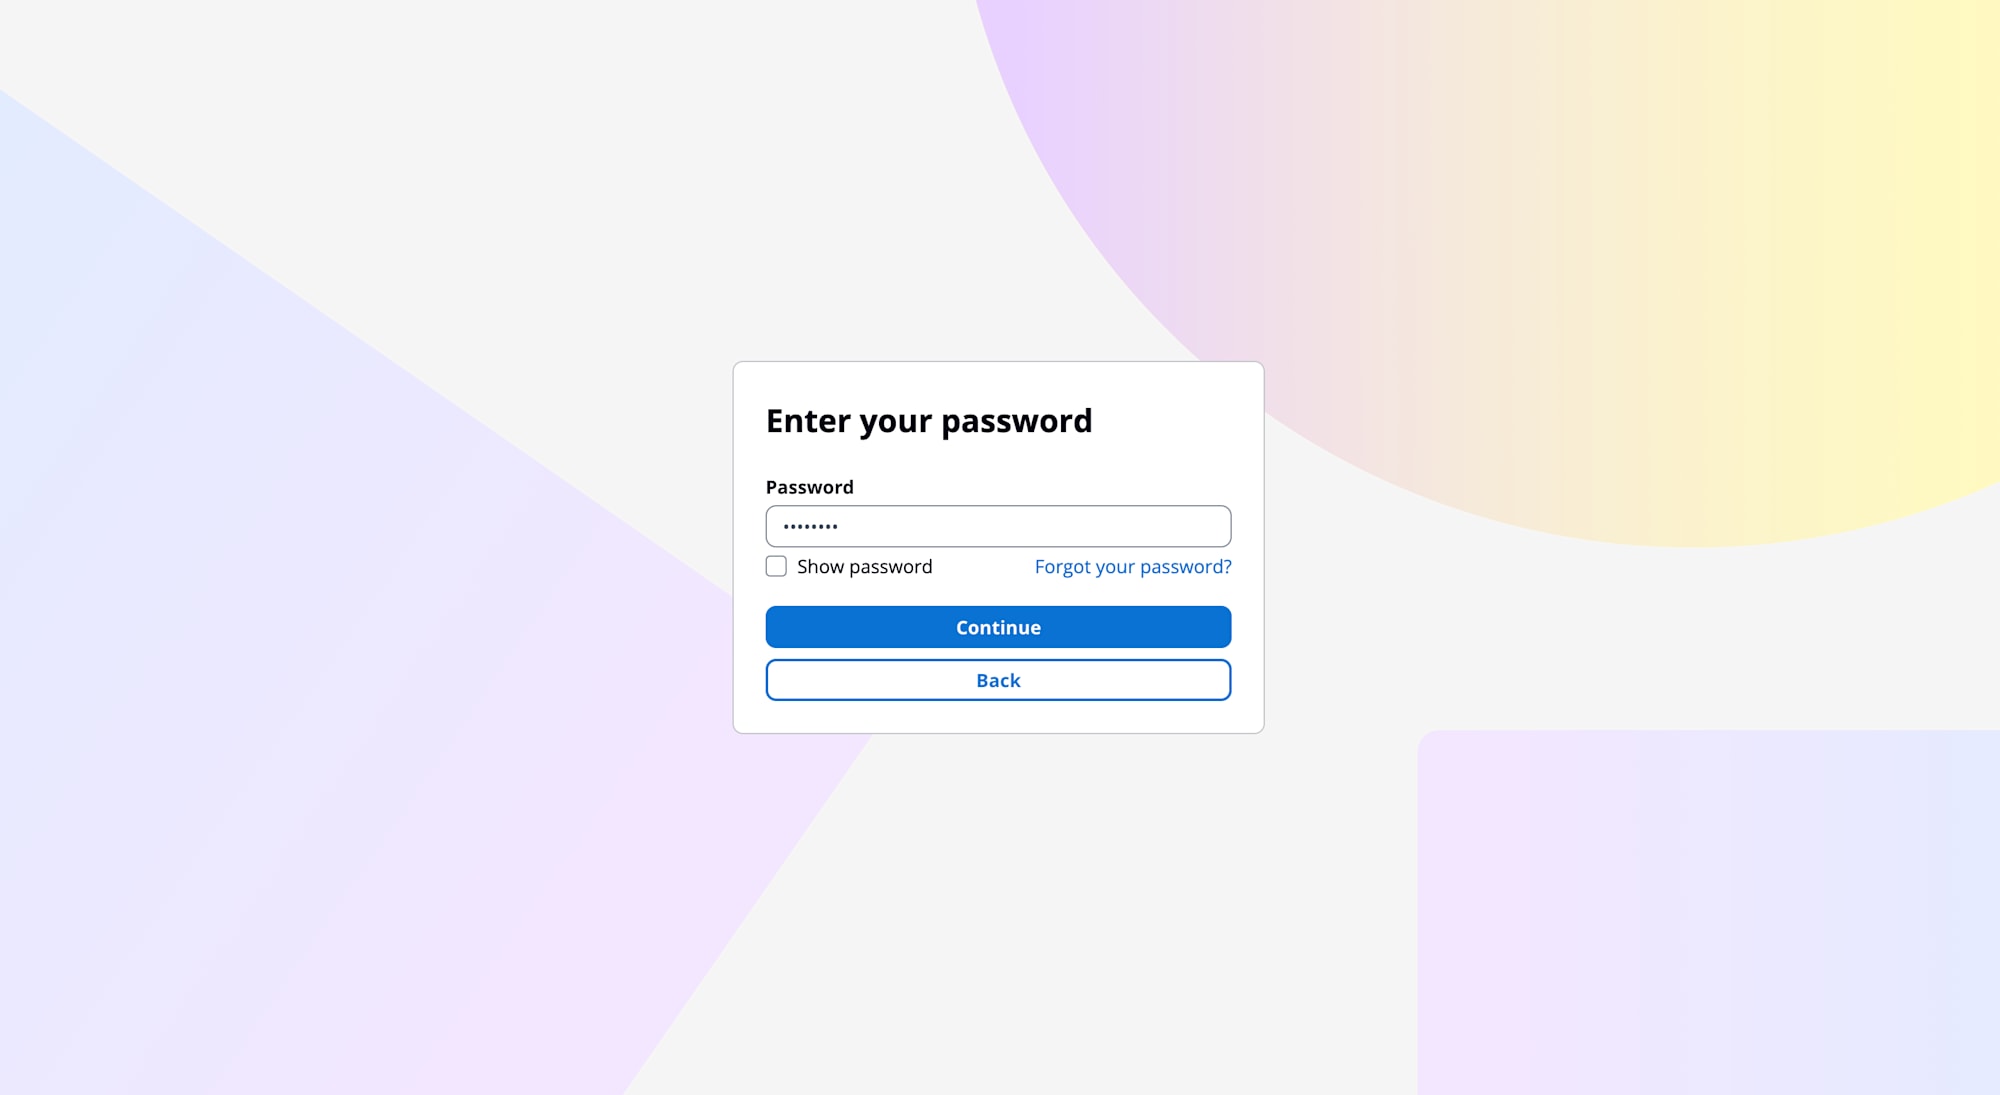
Enter the temporary password.
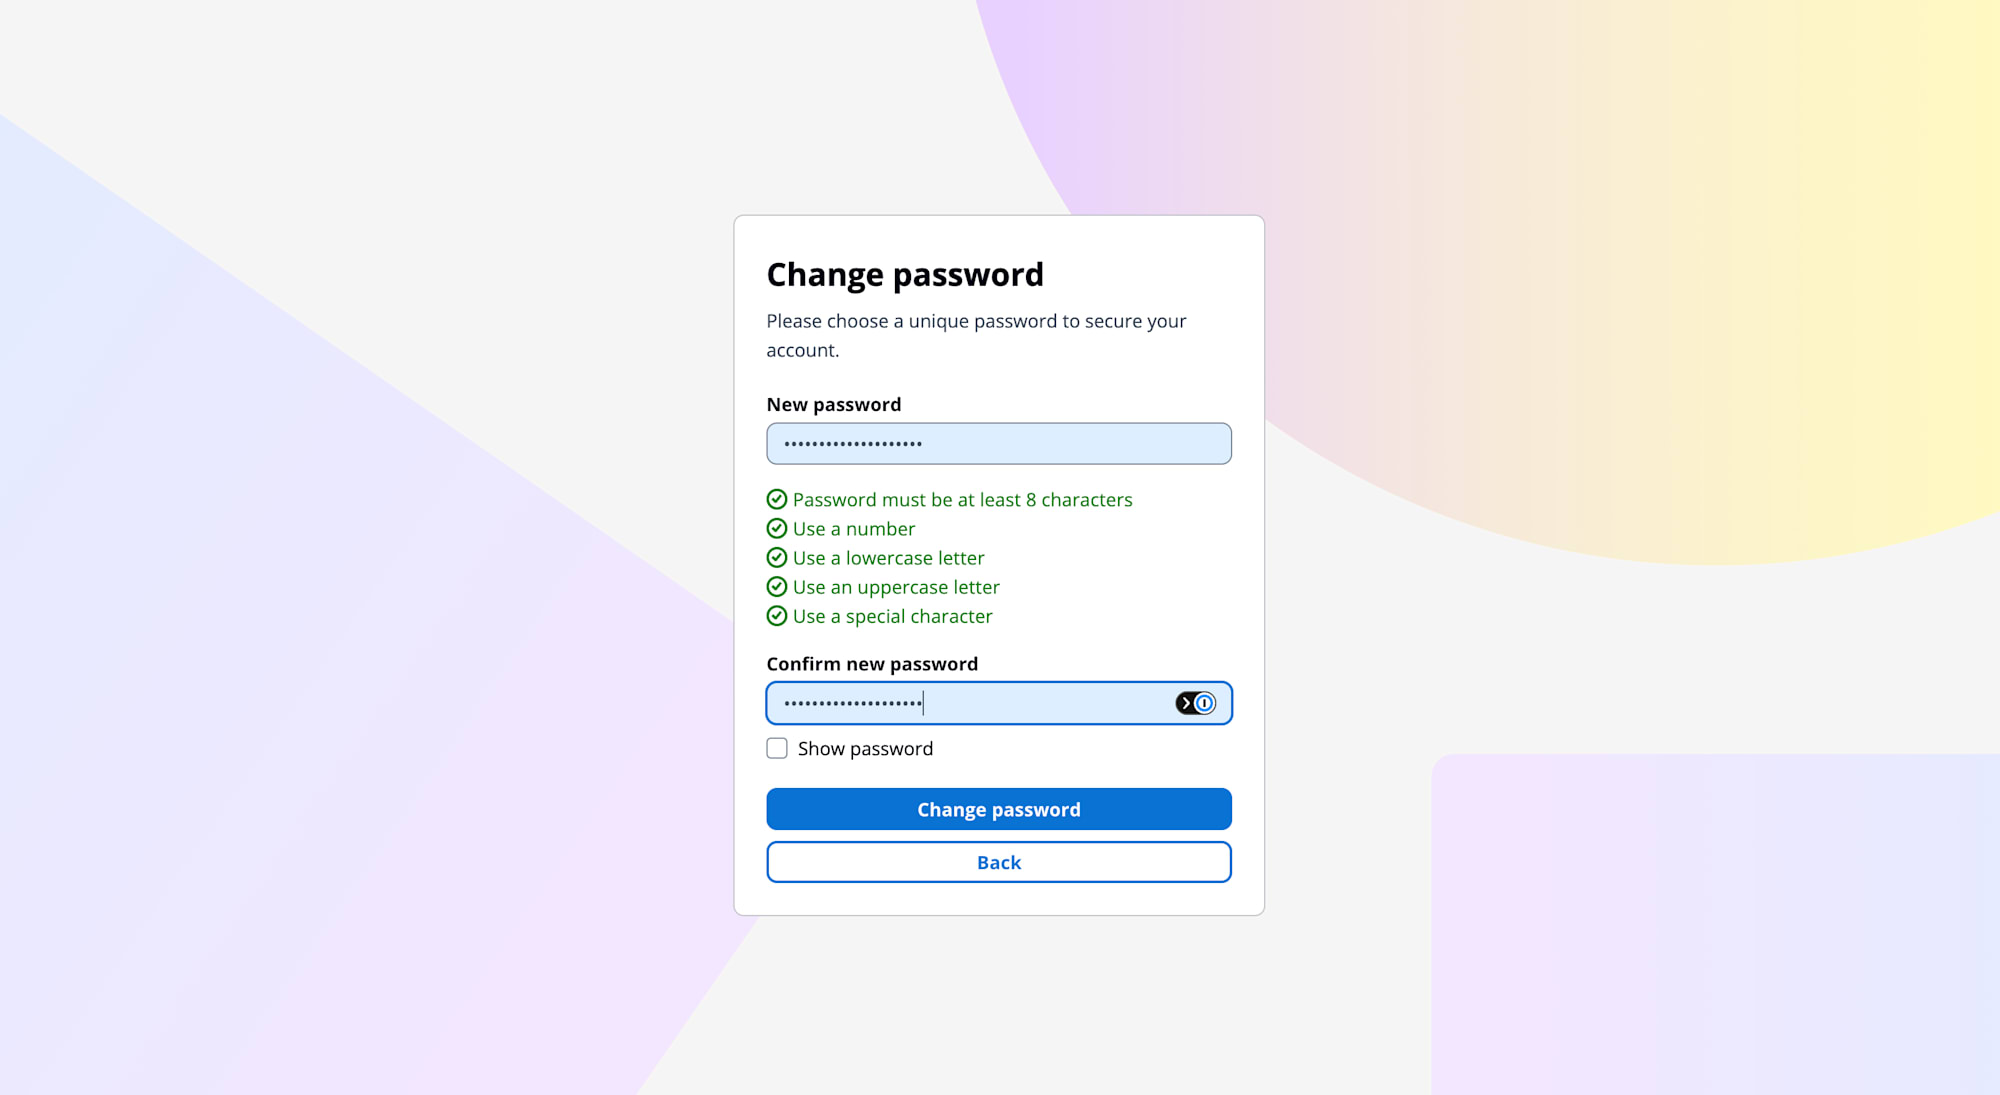
Set a new password.
Problem: After Login, "Currently being configured, please reload your browser after a while" is Displayed
Even after Cognito authentication succeeded and I could log in, the message "being configured" was displayed on the app's top page and I couldn't proceed.
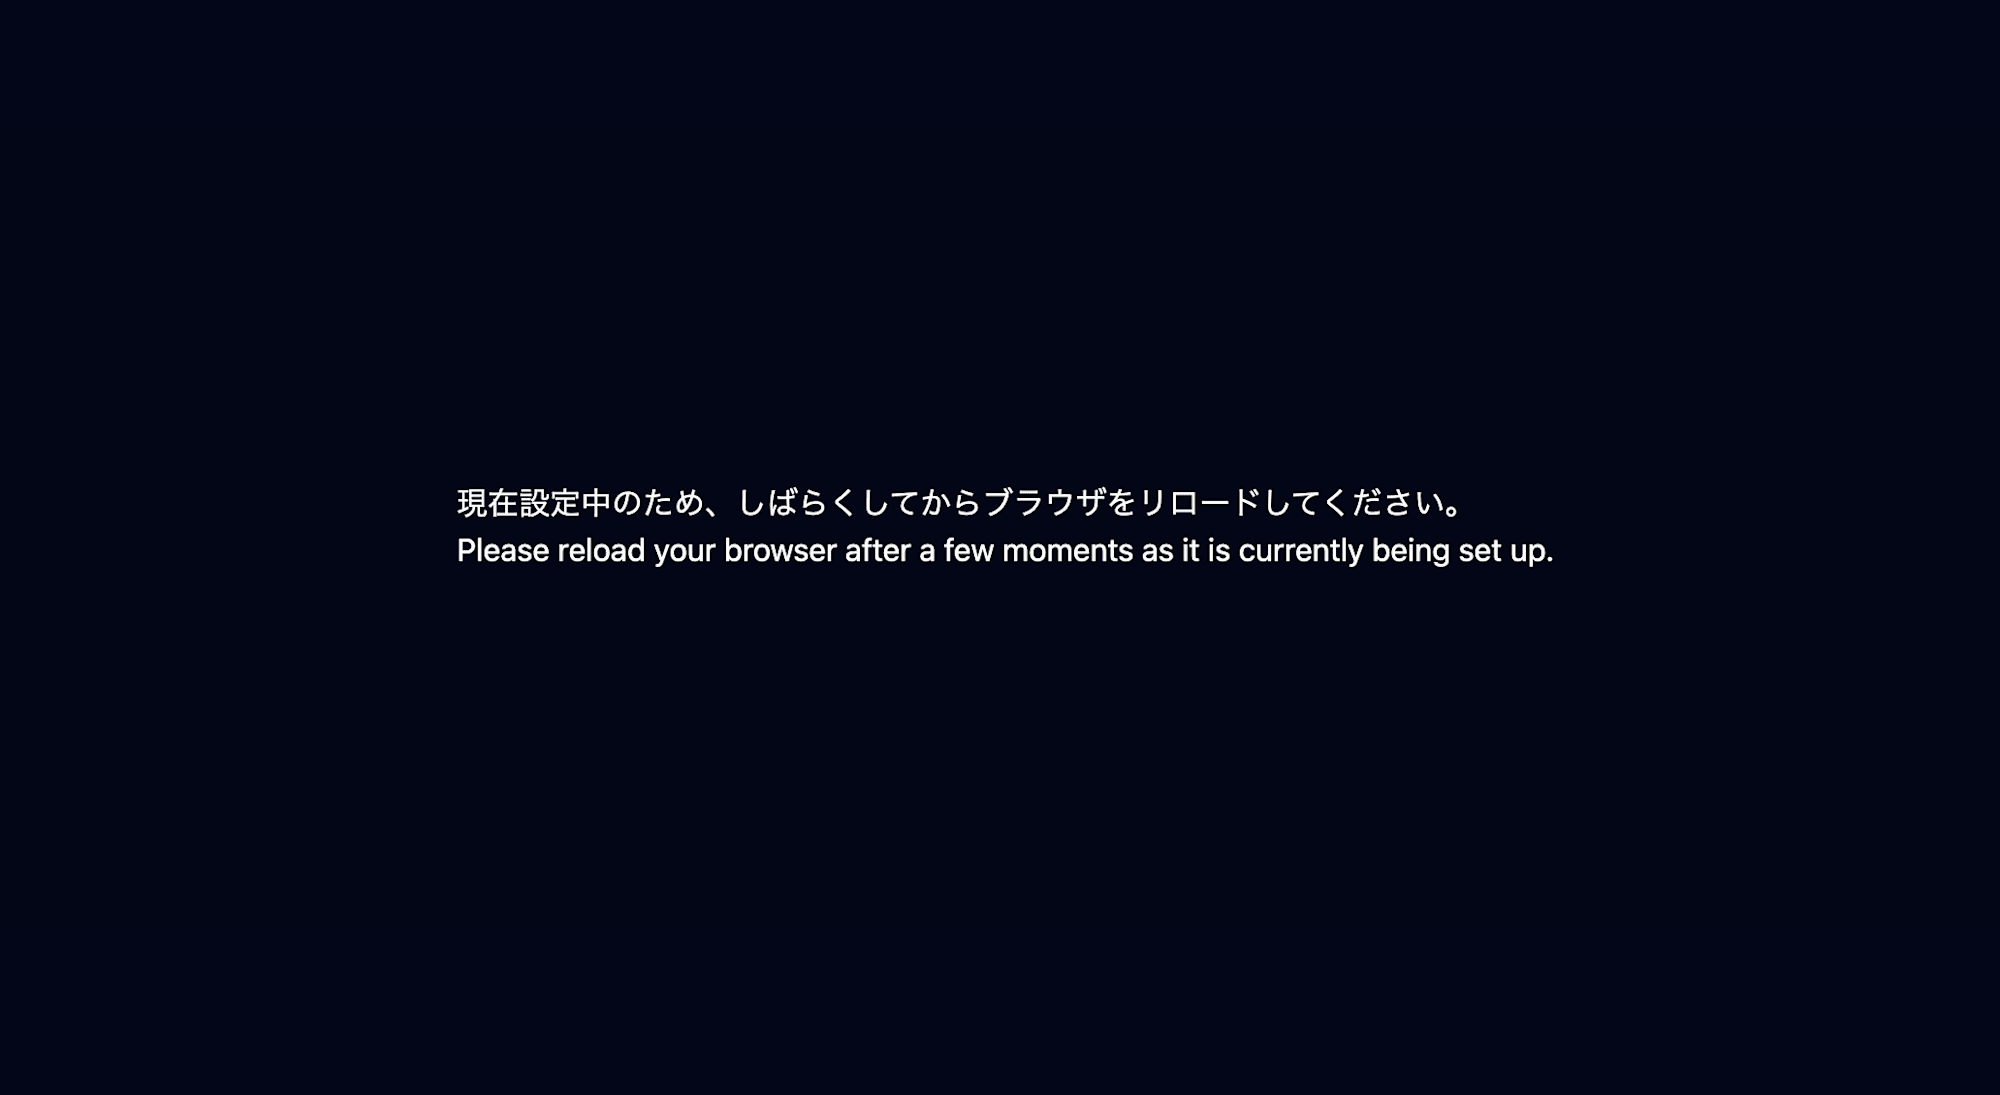
Cause
In this application, if no AI assistants (models) are enabled, you cannot navigate to the chat screen and a fallback "being configured" screen is displayed. By default, all assistants are disabled (enabled: false), and they need to be manually enabled from the admin panel.
Resolution Steps
1. Grant admin privileges to the user in DynamoDB
To access the admin panel, you need to set your user's group to AIS:admin in the user table.
aws dynamodb put-item \
  --table-name YOUR_PREFIX-user \
  --item '{"id":{"S":"your-email@example.com"},"group":{"S":"AIS:admin"}}'
2. Enable assistants in the admin panel
Access https://YOUR_DOMAIN/admin/assistants and enable the model you want to use (e.g., Claude Sonnet 4.6).
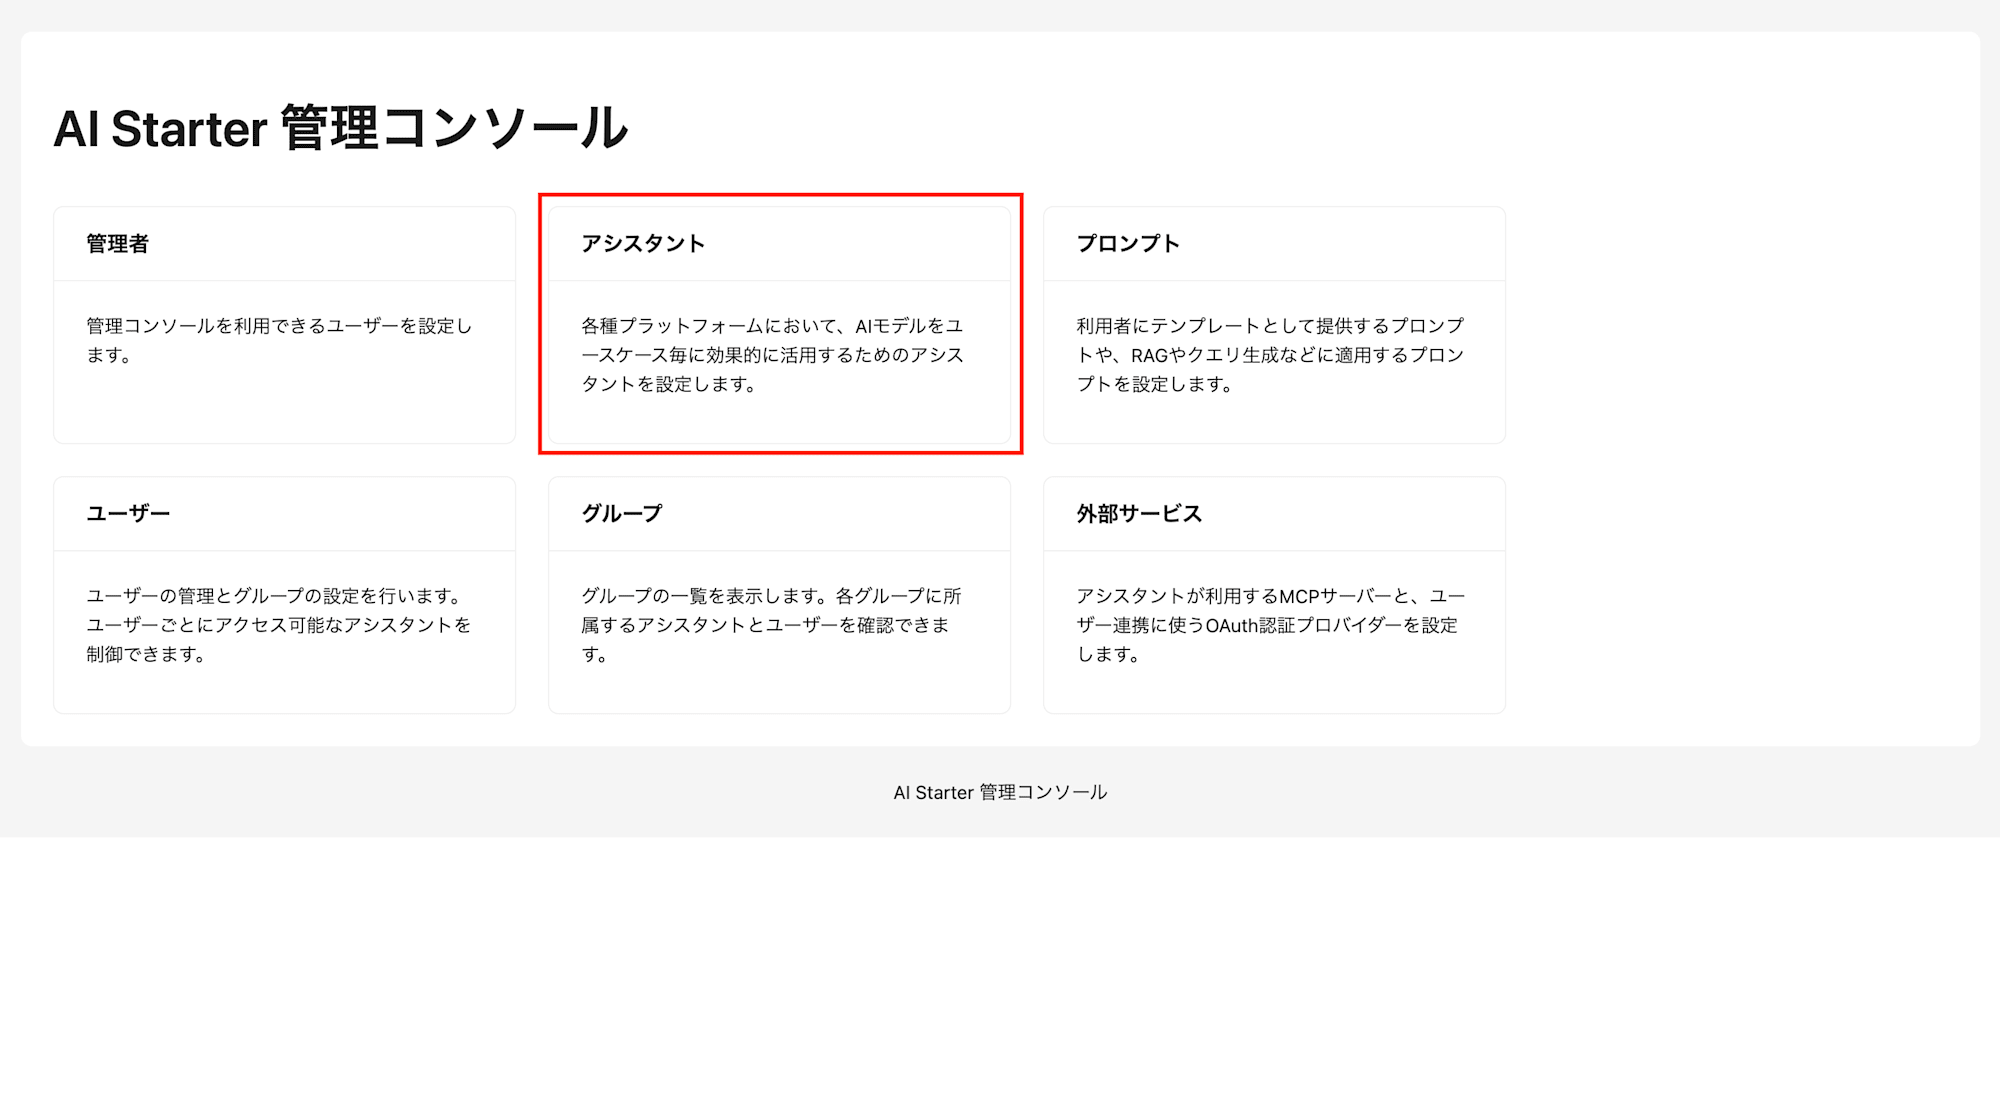
Select "Assistants" from the admin panel.
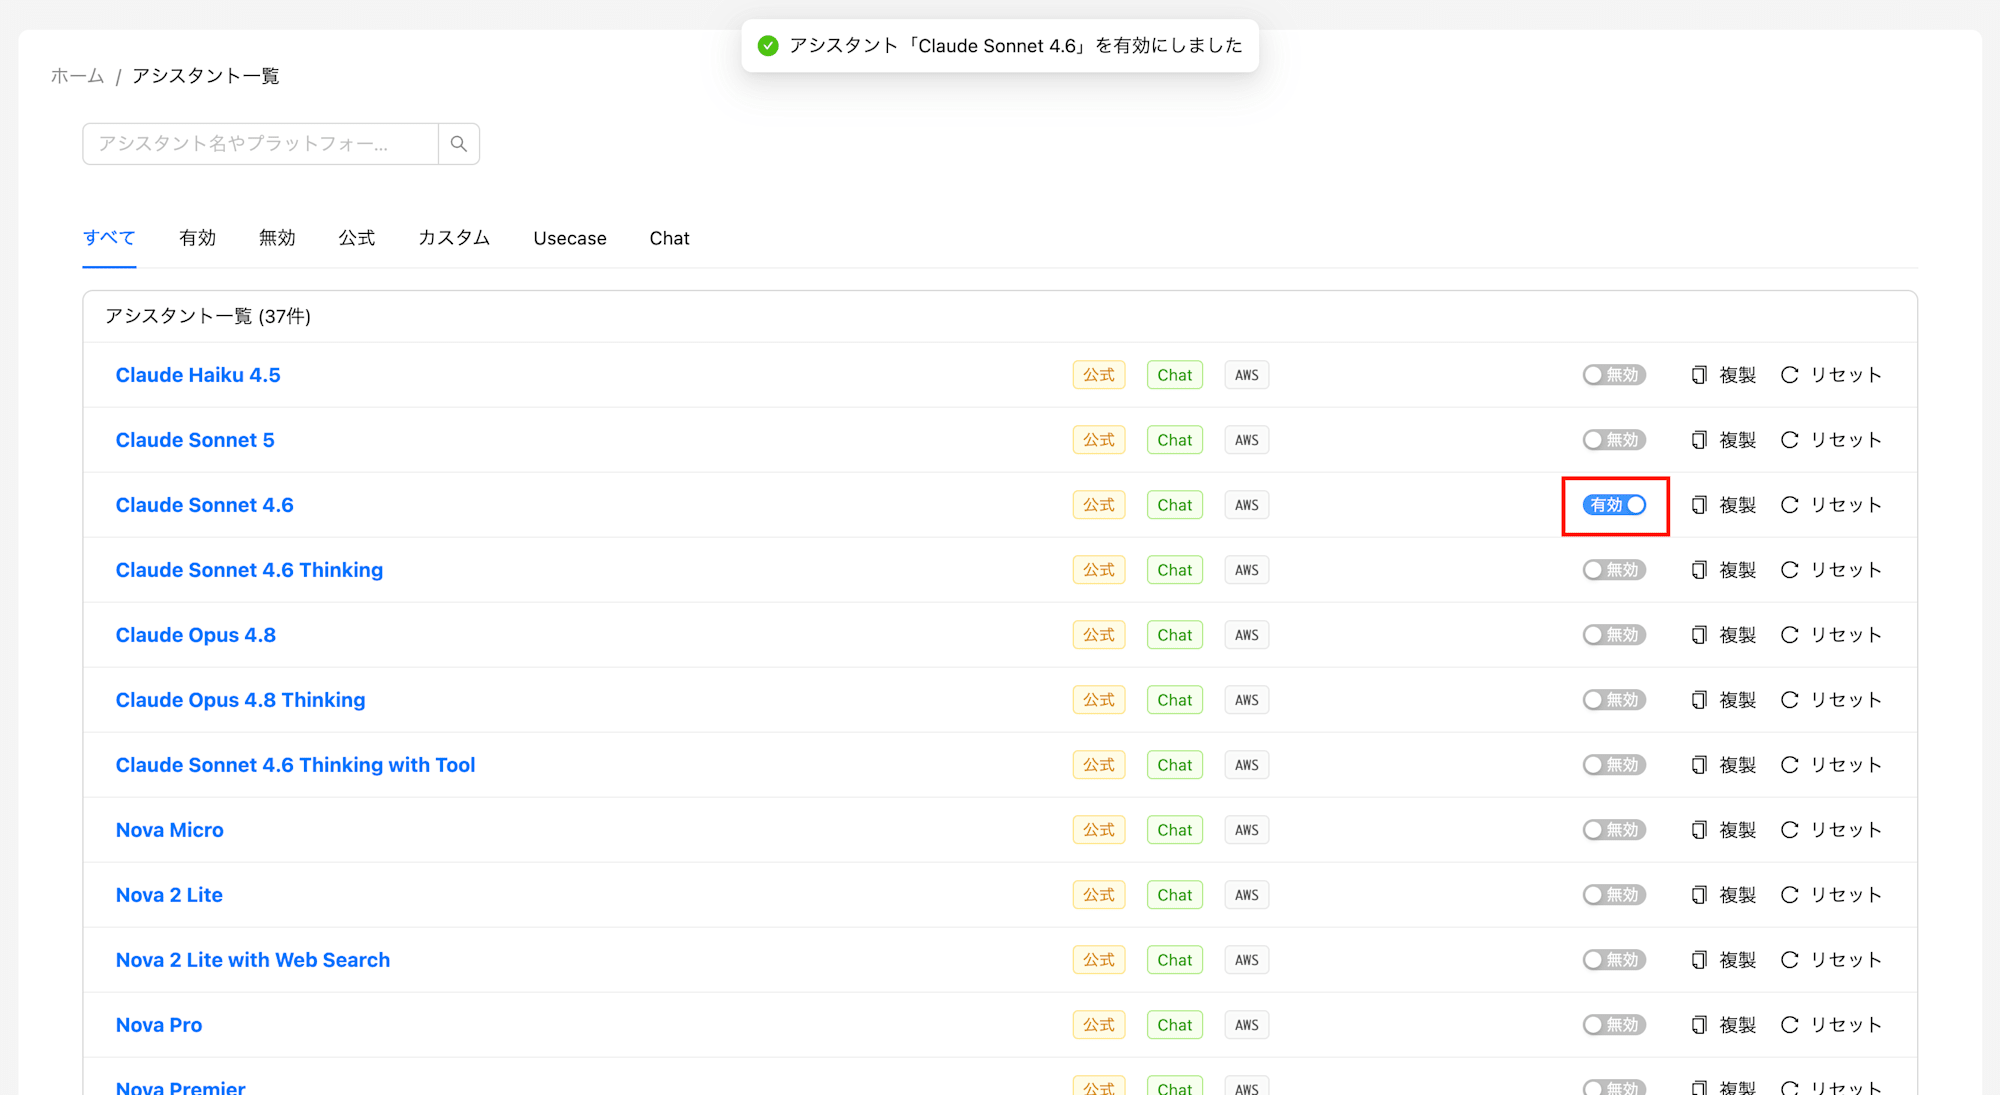
Enable the desired model (e.g., Claude Sonnet 4.6).
3. Reload the browser
After enabling an assistant, reload the main app page to navigate to the chat screen.
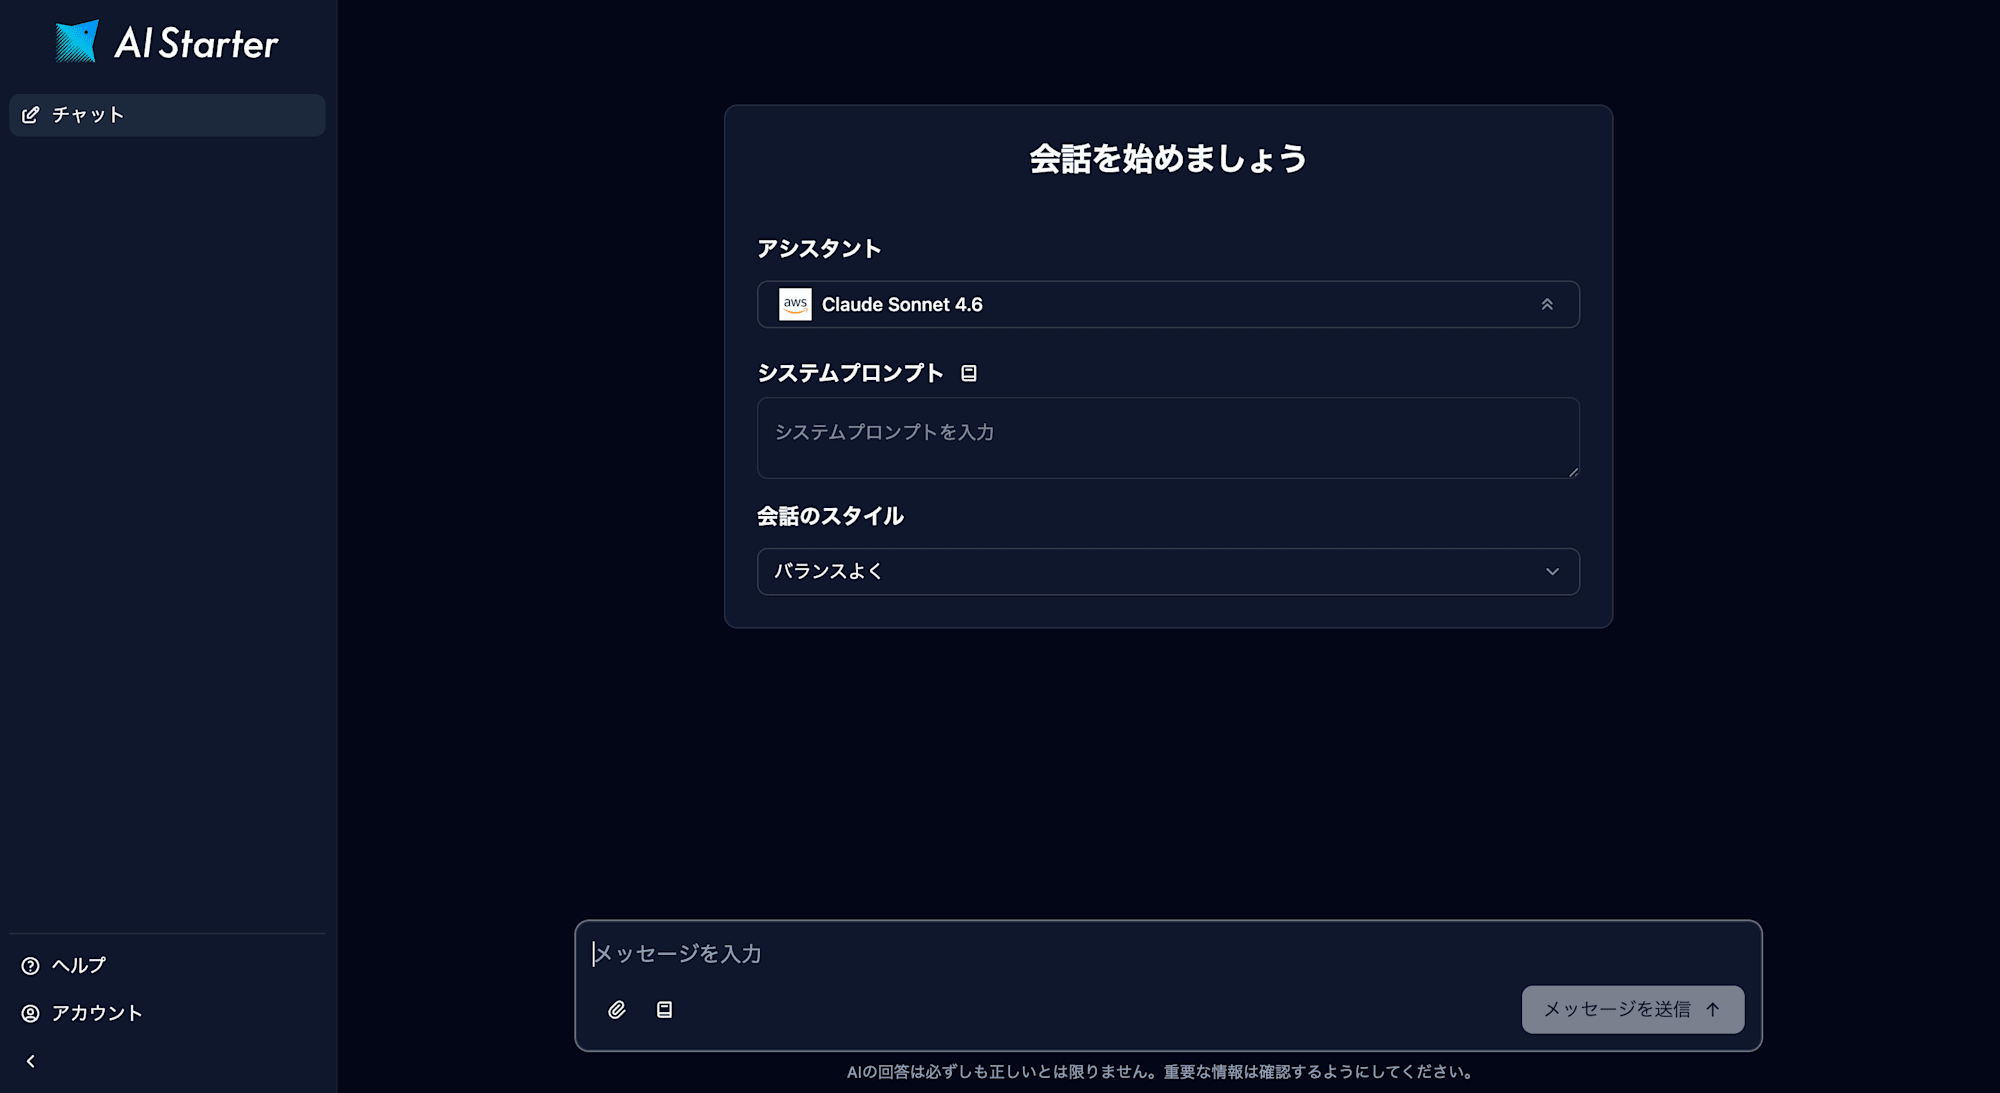
List of Stumbling Points
| Problem | Cause | Solution |
|---|---|---|
| CloudFormation template parse error | pnpm stdout contamination | Delete extra lines at the top of the template |
| Invalid subnet ID | Mistook the name for the ID | Copy the ID from the VPC console |
| ECS deployment failure (Circuit Breaker) | ECR cross-account access denied | Add to target account list |
| DNS not resolving | No record created in Route 53 | Create A record as ALB alias |
| HTTP connection not possible | No HTTP listener on ALB | Access via HTTPS |
| All routes 404 | Secrets Manager misconfiguration | Set the issuer in auth-config correctly |
| invalid_scope at login | Cognito scope misconfiguration | Exclude phone and add profile |
| "Being configured" displayed after login | Assistants not enabled | Enable from admin panel (/admin/assistants) |
404 at /admin |
No root page | Specify /admin/ |
Summary
Deploying from a CDK synth template via CloudFormation allows you to skip CDK bootstrap, but requires manual parameter entry and template modification.
Key lessons from this experience:
- ECR cross-account access is controlled by resource-based policies, so pre-registration of the deployment destination account is required
- ECS Circuit Breaker also triggers on image pull failures, so suspect ECR access first
- The pattern of 404 on all routes except health check may be caused by a configuration loading error at application startup
- Cognito scope settings require careful attention to default values. Match them to the scopes requested by the application
- Enabling assistants is an application-level setting separate from infrastructure. Grant admin privileges via DynamoDB and operate from the admin panel
In particular, cases where the CloudFormation stack itself is created successfully but the application doesn't work due to incorrect application-level settings (Secrets Manager, Cognito, assistant enablement) are easy to overlook. I recommend validating infrastructure construction and application configuration separately.