I tried making a 3D digital twin of DGX Spark from smartphone videos

This page has been translated by machine translation. View original
Introduction
Hello, I'm Morishige from Classmethod's Manufacturing Business Technology Department.
When you hear "digital twin," many of you probably think of large-scale factories in manufacturing or smart cities. NVIDIA Omniverse, OpenUSD, 3D simulation... All of it sounds interesting, but it's hard to know where to start when you're an individual.
I felt the same way, but I thought that starting from "converting a smartphone video into 3D" might be something an individual could tackle, so I gave it a try on my DGX Spark. The technology I used was 3D Gaussian Splatting (3DGS). To cut to the chase, I was able to create a reasonably high-quality 3D model of the DGX Spark itself from a 30-second smartphone video.
3D Gaussian Splatting and Digital Twins
A digital twin is "a technology that digitally reproduces real spaces and objects for use in simulation and visualization." It's used to reproduce factory lines in virtual space for operational simulations, or to examine equipment placement using 3D models of buildings.
What caught my attention as an entry point into this was 3D Gaussian Splatting (3DGS). It's a method announced in 2023 that represents a scene using millions of "Gaussians" (ellipsoidal 3D normal distributions) based on images taken from multiple viewpoints. Like NeRF (Neural Radiance Fields), it can generate images from novel viewpoints, but 3DGS is rasterization-based, making rendering fast.
NVIDIA is building a digital twin ecosystem centered on Omniverse and OpenUSD. At GTC 2026, the Cosmos 3 world foundation model and an OpenUSD-based simulation environment were announced in the context of Physical AI. The flow of capturing real space with 3DGS, converting it to OpenUSD format, and incorporating it into the Omniverse workflow feels like one realistic path for individuals to engage with digital twins.
However, there are still constraints in the ARM64 environment (DGX Spark), where some tools are unsupported or workarounds are needed. This time, I focused on the "smartphone capture → 3D reconstruction" step and also explored potential paths for further utilization.
Environment Used
Here is the environment used for this verification.
| Item | Specs |
|---|---|
| Hardware | NVIDIA DGX Spark (GB10, Unified Memory 128GB) |
| OS | DGX OS (Ubuntu 24.04-based) |
| CUDA | 13.0 / Driver 580.142 |
| GPU Compute Capability | 12.1 (SM121) |
| Python | 3.12 |
| PyTorch | 2.9.0+cu130 |
| Nerfstudio | 1.1.5 |
| gsplat | 1.5.3 (JIT build) |
| COLMAP | 3.9.1 (apt, CPU version) |
| Blender | 4.0.2 (apt) |
The GB10 does not have RT cores (dedicated ray tracing cores), so real-time path tracing in Omniverse and similar features are unavailable. This article proceeds with rasterization-based rendering.
Setting Up the Environment on DGX Spark (ARM64)
This was the trickiest part of this whole endeavor. Since the DGX Spark uses an ARM64 (aarch64) architecture, prebuilt wheels distributed for x86 often can't be used as-is, requiring several workarounds.
Installing PyTorch and gsplat
PyTorch provides cu130 wheels compatible with CUDA 13.0 also for ARM64. I installed it using uv.
uv venv --python 3.12 .venv
uv pip install torch==2.9.0 torchvision --index-url https://download.pytorch.org/whl/cu130
Since gsplat (the rasterization kernel for 3DGS) doesn't provide prebuilt wheels for ARM64, I handled it with JIT compilation. The key points are including ninja in the PATH and specifying TORCH_CUDA_ARCH_LIST.
uv pip install gsplat packaging ninja
export PATH="$PWD/.venv/bin:$PATH"
export TORCH_CUDA_ARCH_LIST="12.0"
The CUDA kernel is JIT-compiled on the first run of gsplat, completing the build in about 34 seconds. Since SM121 (GB10) is binary compatible with SM120, specifying TORCH_CUDA_ARCH_LIST="12.0" works.
Installing Nerfstudio
Running uv pip install nerfstudio directly hits some dependency issues. I worked around this by installing with --no-deps and then adding dependencies individually.
uv pip install av
uv pip install nerfstudio --no-deps
uv pip install opencv-python-headless scipy plotly rich scikit-image trimesh plyfile ...
Dependency packages that caused issues in the ARM64 environment and how they were handled
| Package | Issue | Workaround |
|---|---|---|
open3d |
No ARM64 wheel | Fallback with try: import (only needed for Metashape path, not required for COLMAP) |
av (PyAV) |
Source build of old version causes Cython error | Pre-install with uv pip install av to get a newer wheel |
rawpy / newrawpy |
numpy ABI mismatch | Downgrade to numpy<2 |
pymeshlab |
Excluded for ARM64 / aarch64 | Workaround via patch (affects mesh export) |
usd-core |
No ARM64 wheel | Can be replaced with usd-exchange (described later) |
For open3d and pymeshlab, patches were also needed to wrap the import locations in Nerfstudio's source code with try/except. Specifically, the import open3d in nerfstudio/process_data/metashape_utils.py and nerfstudio/scripts/exporter.py were modified.
COLMAP
COLMAP can be installed via apt install colmap. However, GPU-based SIFT extraction requires an OpenGL context and does not work in headless environments. I fell back to the CPU version (--SiftExtraction.use_gpu 0). For frame counts of around 50–200 images, the CPU version completes in a few minutes, so it's not a practical issue.
Capturing with a Smartphone and Reconstructing in 3D
Tips for Capturing
I chose the DGX Spark unit itself as the subject. It's a somewhat meta setup—"creating a 3D twin of the DGX Spark using the DGX Spark."
I captured two videos with an iPhone: one going around horizontally and one going around from slightly above.
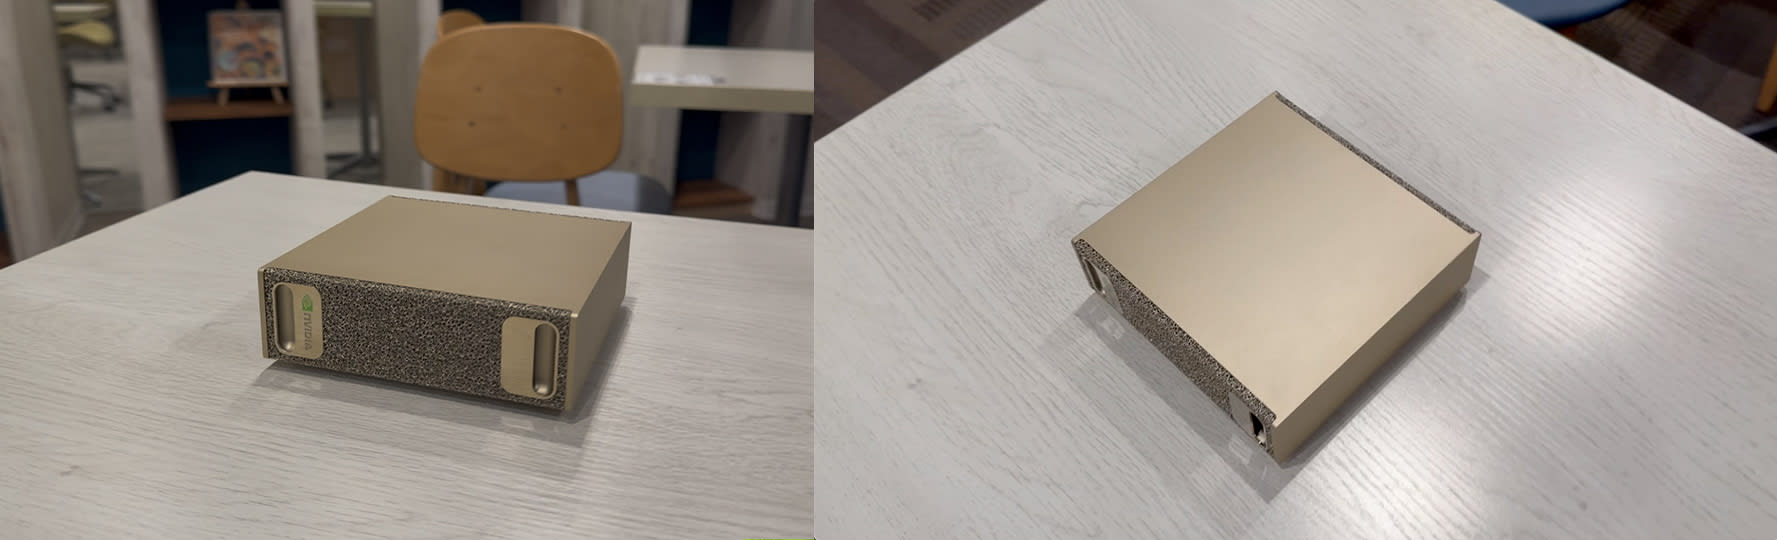
Recorded at 1080p / 30fps.
Frame Extraction and COLMAP
I merged the two videos with ffmpeg and extracted frames.
# Merge videos
ffmpeg -i side.mov -i upper.mov \
  -filter_complex "[0:v][1:v]concat=n=2:v=1:a=0[outv]" \
  -map "[outv]" -c:v libx264 -crf 18 combined.mp4

# Frame extraction (8fps)
ffmpeg -i combined.mp4 -vf "fps=8" -pix_fmt rgb24 -q:v 2 images/frame_%05d.jpg
When I initially extracted at 3fps (87 frames), only 43/87 frames were registered in COLMAP. Increasing to 8fps (232 frames) improved overlap between adjacent frames, raising the registration rate to 115/232 frames. For videos with faster motion, it seems better to set a higher frame extraction rate.
The COLMAP pipeline consists of three steps: feature extraction → matching → sparse 3D reconstruction.
export QT_QPA_PLATFORM=offscreen

# 1. Feature extraction (CPU)
colmap feature_extractor \
  --database_path colmap/database.db \
  --image_path images \
  --ImageReader.single_camera 1 \
  --ImageReader.camera_model OPENCV \
  --SiftExtraction.use_gpu 0

# 2. Matching (sequential: suited for video)
colmap sequential_matcher \
  --database_path colmap/database.db \
  --SiftMatching.use_gpu 0 \
  --SequentialMatching.overlap 20

# 3. Sparse 3D reconstruction
colmap mapper \
  --database_path colmap/database.db \
  --image_path images \
  --output_path colmap/sparse
In headless environments, setting QT_QPA_PLATFORM=offscreen is required. Attempting to use the GPU version fails to create an OpenGL context and crashes with SIGABRT.
Processing 232 frames took about 20 seconds for feature extraction, about 2.5 minutes for matching, and about 1.5 minutes for reconstruction—roughly 4–5 minutes total.
3DGS Training
Train splatfacto using Nerfstudio's ns-train command.
export TORCH_CUDA_ARCH_LIST="12.0"
export QT_QPA_PLATFORM=offscreen

echo "y" | ns-train splatfacto \
  --data data/dgx-spark/processed \
  --output-dir outputs/ \
  --max-num-iterations 30000 \
  --viewer.quit-on-train-completion True \
  colmap \
  --colmap-path colmap/sparse/1 \
  --downscale-factor 1
If COLMAP generates multiple sub-models, specify the model with the most registered frames using --colmap-path. In this case, 4 sub-models were generated, and I used model 1 with 115 registered frames.
Full resolution (1920x1080) training for 30,000 steps took about 45 minutes. At half resolution (downscale-factor 2), it completes in about 5 minutes, so it's efficient to check the overall flow at low resolution first before running the full version.
| Setting | Low Resolution | Full Resolution |
|---|---|---|
| Resolution | 960x540 | 1920x1080 |
| Steps | 15,000 | 30,000 |
| Training time | ~5 minutes | ~45 minutes |
| Step time | ~21 ms/step | ~90 ms/step |
Checking the Results
Nerfstudio Viewer
The trained model can be checked interactively using Nerfstudio's web viewer.
export TORCHDYNAMO_DISABLE=1
ns-viewer --load-config outputs/.../config.yml
Access http://localhost:7007 in a browser to view the 3DGS rendering results and rotate them with your mouse. Increasing Max Resolution in the left panel gives a more detailed display.
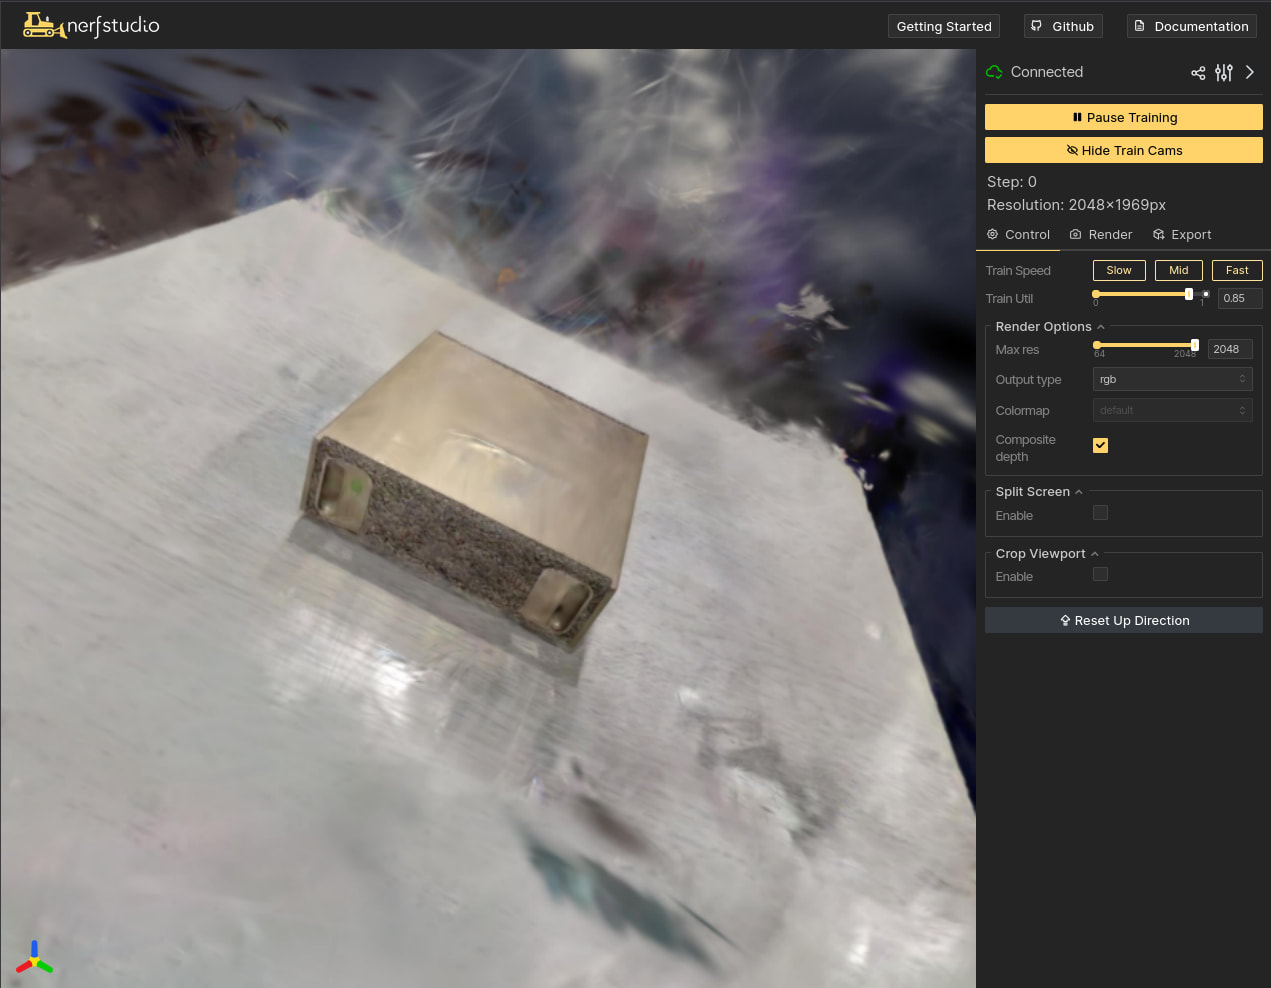
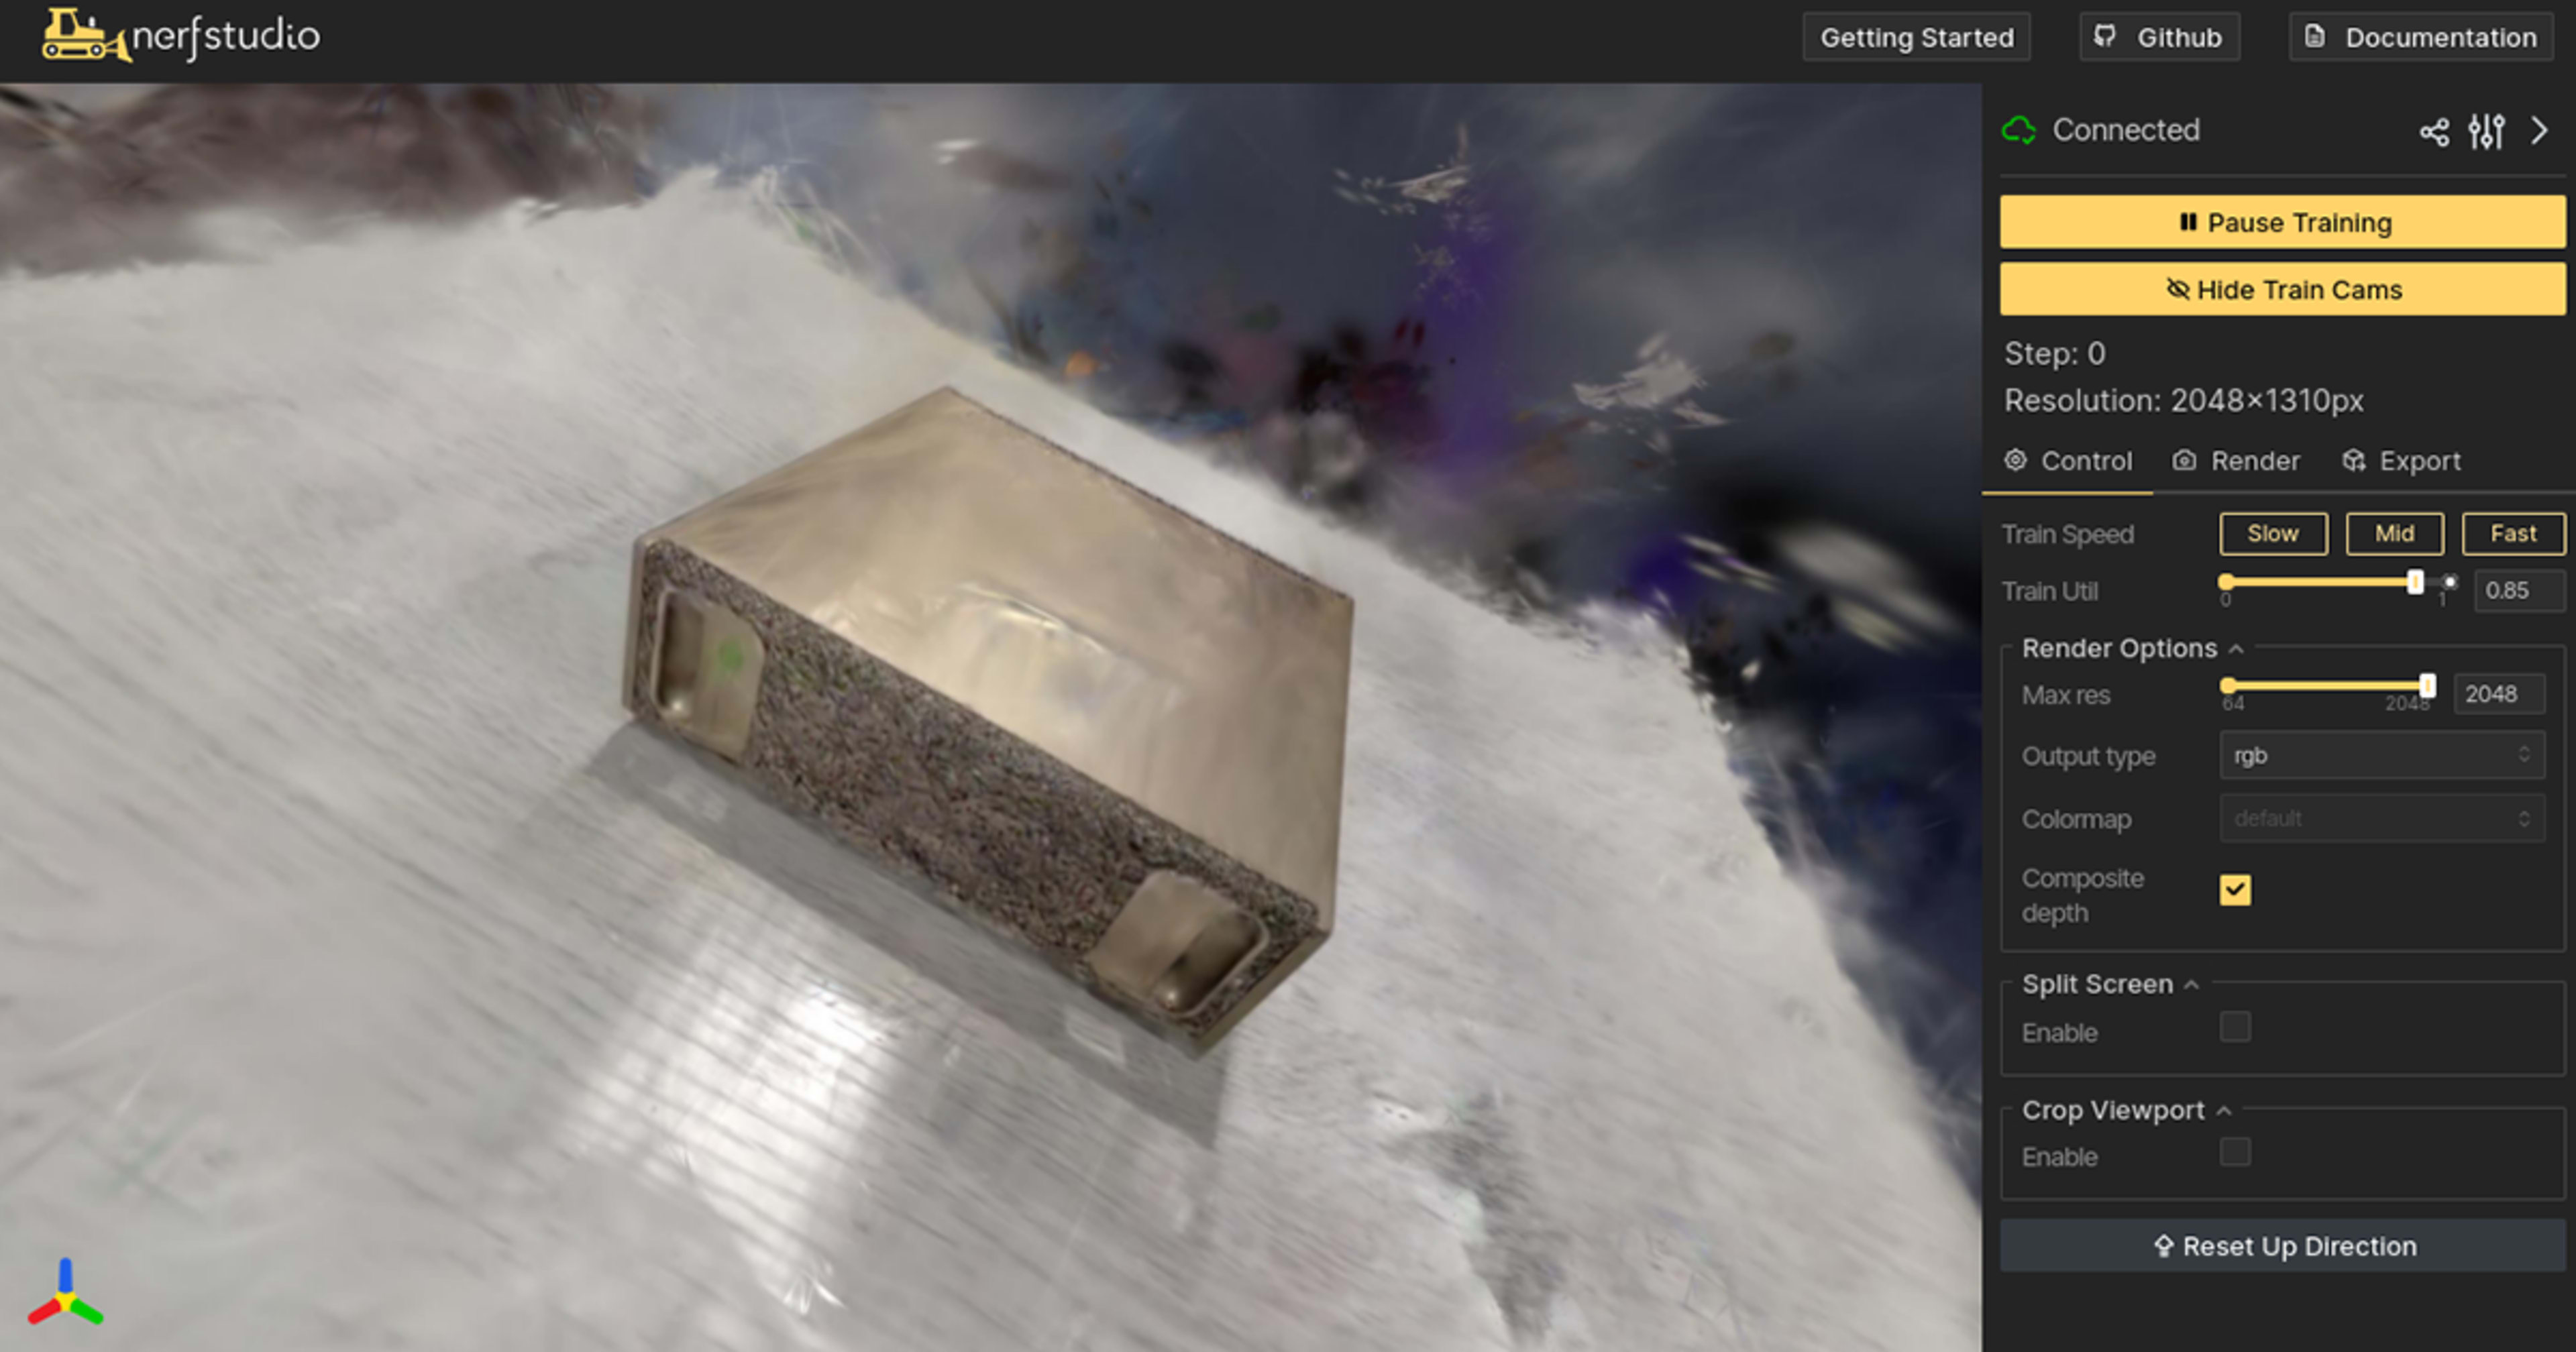
Looks like the dark world of Lord of the Rings!?
With the model trained at full resolution, the quality was enough to faintly make out ports on the front of the DGX Spark and even the NVIDIA logo. The table texture was also well reproduced.
Even with rough capturing, this level of quality was achievable, so a slower, more careful capture should yield even clearer results.
Extracting Point Cloud Data
The Gaussians from the 3DGS model can be extracted as a PLY-format point cloud. I wrote a script to extract directly from a checkpoint.
import torch
import numpy as np
from plyfile import PlyData, PlyElement

state = torch.load('step-000029999.ckpt', map_location='cpu', weights_only=False)
p = state['pipeline']

means = p['_model.gauss_params.means'].numpy()
features_dc = p['_model.gauss_params.features_dc'].numpy()

# SH0 → RGB conversion
C0 = 0.28209479177387814
colors = np.clip(features_dc * C0 + 0.5, 0, 1)

# PLY export
vertices = np.zeros(len(means), dtype=[
    ('x','f4'), ('y','f4'), ('z','f4'),
    ('red','u1'), ('green','u1'), ('blue','u1')
])
vertices['x'], vertices['y'], vertices['z'] = means[:,0], means[:,1], means[:,2]
vertices['red'] = (colors[:,0] * 255).astype(np.uint8)
vertices['green'] = (colors[:,1] * 255).astype(np.uint8)
vertices['blue'] = (colors[:,2] * 255).astype(np.uint8)

PlyData([PlyElement.describe(vertices, 'vertex')], text=False).write('output.ply')
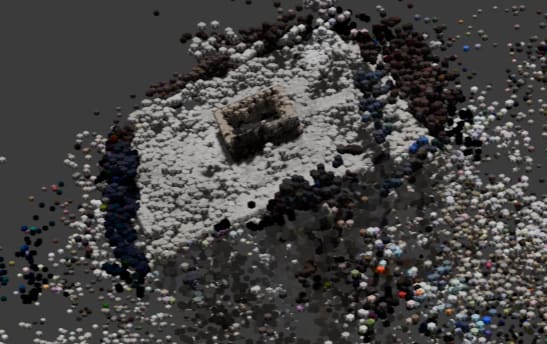
211,961 Gaussians are output as a PLY file. Loading it in Blender and using Geometry Nodes to instance spheres enables colored point cloud rendering. Compared to the Nerfstudio viewer the display is rougher, but it was useful for debugging and as material for articles, as it gives an overhead view of how Gaussians are distributed in 3D space.
PLY → USD Conversion
Initially, I had given up on USD conversion because the OpenUSD Python binding usd-core didn't support ARM64, but I found that NVIDIA's officially provided usd-exchange package supports ARM64.
uv pip install usd-exchange
This enables use of the pxr API. I wrote a script to convert the PLY point cloud to USD format.
from pxr import Usd, UsdGeom, Vt
from plyfile import PlyData

ply = PlyData.read('dgx_spark_3dgs_50k.ply')
v = ply['vertex']

stage = Usd.Stage.CreateNew('dgx_spark_3dgs.usda')
UsdGeom.SetStageUpAxis(stage, UsdGeom.Tokens.y)

points = UsdGeom.Points.Define(stage, '/DGXSpark/PointCloud')
positions = [(float(v['x'][i]), float(v['y'][i]), float(v['z'][i])) for i in range(len(v))]
points.GetPointsAttr().Set(Vt.Vec3fArray(positions))

colors = [(v['red'][i]/255.0, v['green'][i]/255.0, v['blue'][i]/255.0) for i in range(len(v))]
points.GetDisplayColorAttr().Set(Vt.Vec3fArray(colors))

stage.GetRootLayer().Save()
A colored point cloud of 50,000 points was output as a USD file (3.6 MB). It's great that the 3DGS → PLY → USD conversion pipeline completes entirely on the DGX Spark.
Similarly, pymeshlab also has an ARM64-compatible wheel (2025.7.post1) available, installable via uv pip install pymeshlab. PLY loading and normal computation work, but mesh generation via Poisson Surface Reconstruction was not stable with this point cloud. Since 3DGS Gaussians are placed to "optimize rendering quality," they don't uniformly line up on surfaces and have different properties from traditional photogrammetry point clouds. Improving capture quality and reducing outliers seem to be prerequisites for meshing.
Potential Use Cases Going Forward
Now that I have a 3D model from 3DGS, I thought about "how to use it."
What I actually tried was analysis using a VLM. When I fed a rendering image from v3 to Qwen2.5-VL (7B), for images taken from an angle where the ports are visible, it returned a response inferring even the purpose: "a computer or network device" with "ports and slots visible on the lower part."
This 3D rendering image depicts a product that is likely part of a computer or network device. The upper surface is glossy and the overall design is simple. Several ports and slots can be seen on the lower portion.
On the other hand, from a top-down angle, it was only recognized as "a pale beige cube." Since 3DGS's strength is the ability to render from any viewpoint, it seems interesting to pass images from various angles to a VLM for "analysis with no blind spots."
Beyond VLM analysis, several other directions emerged. One is integration with Isaac Sim. In a previous article, I ran the SO-ARM101 robot arm in Isaac Sim, and replacing the background of that scene with real space captured via 3DGS would enable a digital twin experience of "simulating a robot on your own desk." Another is integration with the Omniverse and OpenUSD ecosystem. This direction is already moving forward—in OpenUSD v26.03 released in March 2026, 3DGS was officially supported as the UsdVolParticleField3DGaussianSplat schema. NVIDIA also provides Omniverse NuRec, a library for handling 3DGS rendering within Omniverse. Since the PLY → USD conversion worked with usd-exchange this time, the pipeline of "smartphone capture → 3DGS → USD" is already achievable on the DGX Spark. With OpenUSD's 3DGS support advancing, this trend seems likely to accelerate.
Importing into Isaac Sim requires meshing, but given the nature of 3DGS point clouds, improved capture quality is a prerequisite for clean meshes. Since this was a rough capture this time, I gave up on meshing. Tools like pymeshlab (ARM64 compatible) and open3d (conda-forge version) are available, so there's room for improvement with more careful recapturing.
Summary of ARM64 Environment Constraints
Here is a summary of the ARM64 environment constraints identified through verification on the DGX Spark.
| Category | Constraint | Impact | Workaround |
|---|---|---|---|
| 3DGS training | No prebuilt wheel for gsplat | Handled via JIT compilation (~34 sec on first run) | TORCH_CUDA_ARCH_LIST="12.0" |
| USD | usd-core not supported on ARM64 |
Resolved with usd-exchange (installable via pip) |
|
| Mesh processing | pymeshlab now ARM64 compatible |
Poisson meshing requires parameter tuning | Installable via pip install pymeshlab |
| 3D processing | open3d pip version not supported on ARM64 |
Some point cloud processing limited | conda-forge version (CPU only) or source build |
| Blender | apt version lacks USD support, no official ARM64 Linux build | PLY/OBJ only | Point cloud display possible via Geometry Nodes |
| COLMAP | GPU version depends on OpenGL | Can't use GPU SIFT in headless mode | CPU version as substitute (sufficient in practice) |
| Rendering | GB10 has no RT cores | Path tracing unavailable | Handle with rasterization-based rendering |
When I started the verification, the ARM64 barriers felt thick, but as I investigated, I found that usd-exchange and pymeshlab had progressed in their ARM64 support. The full pipeline from 3DGS training → PLY export → USD conversion can now be completed on the DGX Spark alone. The remaining challenges are parameter tuning for meshing and GPU support for open3d, and I'm hoping these will improve further as NVIDIA expands the Playbook and toolchain for DGX Spark.
Summary
I went through the entire flow of creating a 3D digital twin of the DGX Spark from two 14-second smartphone videos.
There were several ARM64-specific stumbling points in setting up the environment, but I was able to confirm that gsplat's JIT compilation works on SM121, and I completed the full pipeline—3DGS training → rendering → point cloud export → USD conversion—entirely on the DGX Spark using Nerfstudio's splatfacto. Initially I had given up on USD conversion due to ARM64 constraints, but being able to achieve it thanks to NVIDIA's usd-exchange package was a pleasant surprise.
Full-resolution training for 30,000 steps took about 45 minutes, and rendering runs at 142fps. Getting a 3D model with enough quality to faintly make out the NVIDIA logo feels like a sufficient result as a personal-level introduction to digital twins. This was a fairly rough capture, but using a slower, more careful approach or a smartphone gimbal should produce even clearer 3D models.
While excessive expectations should be avoided, the experience of "being able to try everything from 3D reconstruction to USD conversion with just a smartphone and a DGX Spark" was quite an interesting first step into the world of digital twins. I'm also looking forward to what comes next—robot simulation in Isaac Sim, collaborative editing in Omniverse, and more.