![[Dify]
① LLM Node: A Summary of LLM Node Specifications](https://dify.ai/_astro/our-logo.D68f1zbh_Z2qYdBc.webp)
[Dify] ① LLM Node: A Summary of LLM Node Specifications

This page has been translated by machine translation. View original
1. Introduction
I'm Yamanaka from the AI Business Division.
Starting with this article, I will be writing about Dify.
I will focus on practical content regarding specific features and topics, including issues I encountered while using them.
In this article, I will explain the specifications of the LLM node that can be used within workflows.
For basic knowledge about Dify, @yushibats has put together a clear summary in the following article, so please refer to it.
2. Prerequisites
- Dify: v1.16.1 (localhost)
- Model: Anthropic Claude (Bedrock Plugin)
3. Usage and Specifications
The LLM node is a node that receives variables such as text and document files as input and outputs the LLM's response.
3.1. Model Settings
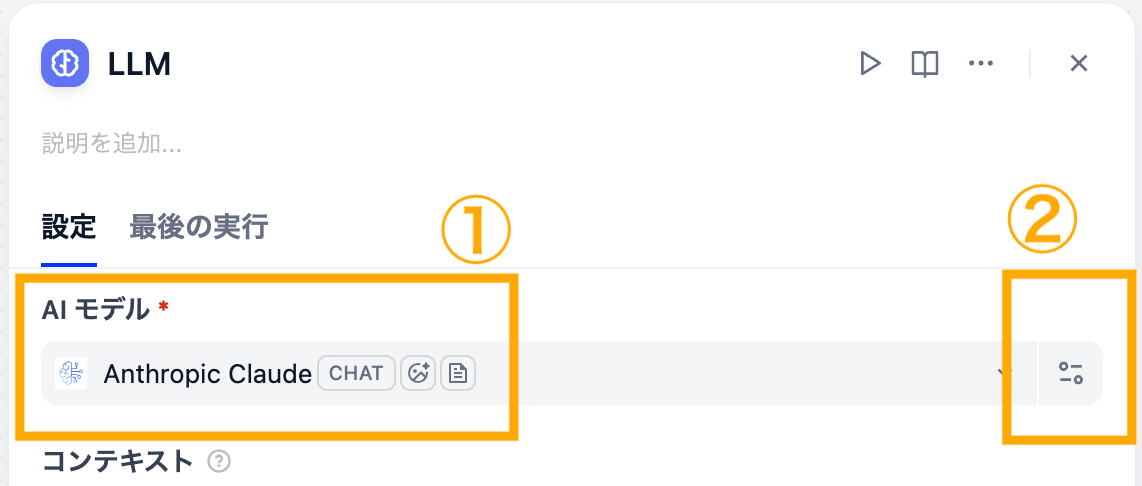
Placing the LLM node on the workflow and clicking it opens the settings screen.
①: You can select a model. Models introduced via plugins are also displayed here. The icon to the right of the model name shows the input formats supported by that model, such as CHAT and images.
②: Clicking the button at the far right of the model selection field opens the detailed model settings. The displayed content varies depending on the selected model, but you can make detailed model specifications (for Claude, Sonnet, Opus, etc.). Other items that non-engineers may interact with include Response Format, which determines the output format (described later).
3.2. Input
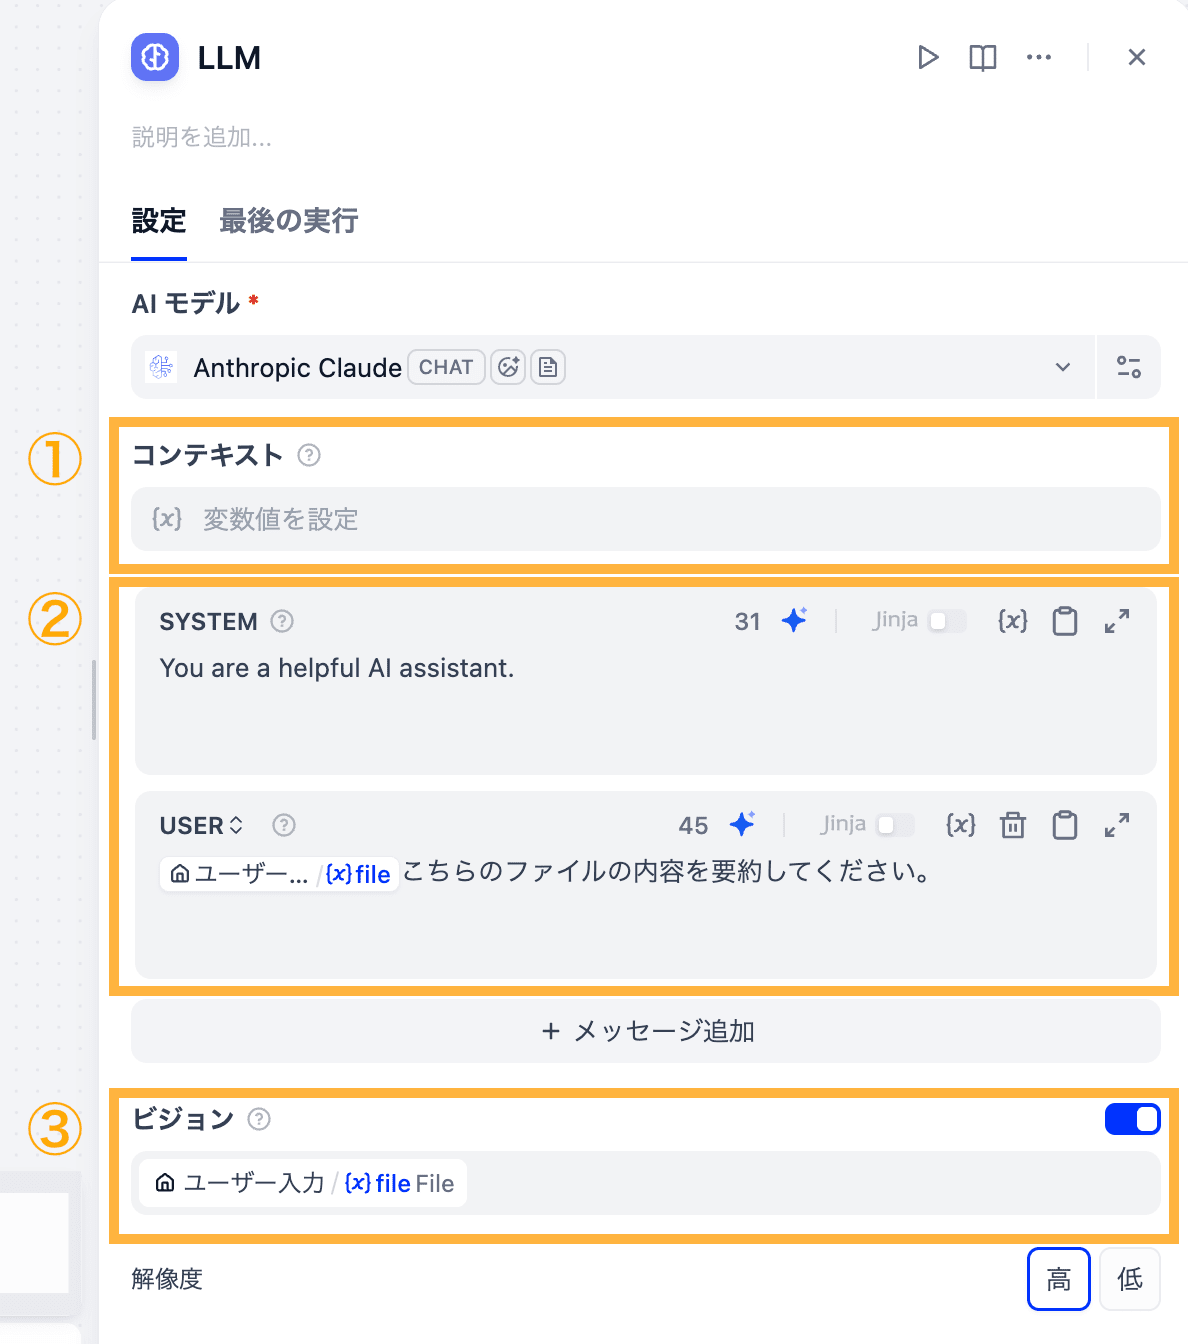
①: Context is used to pass knowledge as a variable when building a RAG system. Note that variables added to the context must be inserted into the prompt using method ②.
②: Write the system prompt in SYSTEM to instruct the response behavior, and write specific instructions in USER. If there is no USER, output will fail with an error. Variables can be inserted into the prompt from {x} in the upper right.
③: If the selected model supports images or documents and you want to load files using the model's OCR, enable Vision and add variables here (see image). Note that even if you specify an image file in the USER prompt, the file cannot be processed with OCR.
3.3. Output
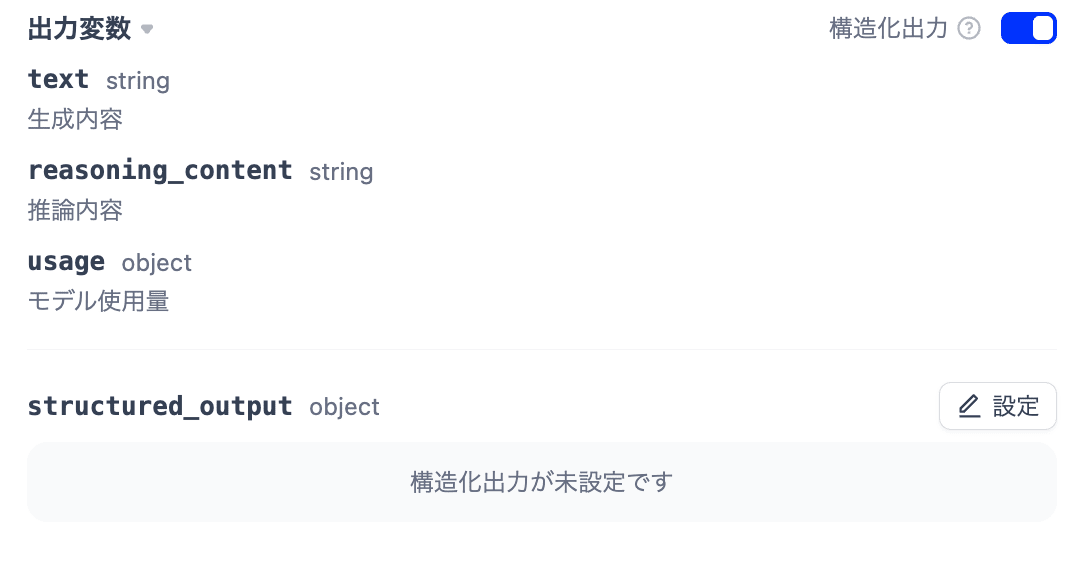
The output variables of the LLM node are three by default: text, reasoning_content, and usage, with contents as described respectively.
Also, for engineers, you can specify output formats such as JSON by enabling structured output. The steps are as follows. By specifying the corresponding variable as an input variable on the connected node side, you can use the LLM's response within the workflow.
- Enable "Structured Output" to the right of "Output Variables" and configure the JSON Schema from the structured_output settings.
- Open the detailed model settings mentioned in 3.1., enable Response Format, and select the output format.
Note that there is a JSON Schema item in the detailed model settings, but it is possible to use structured output without configuring this, and the official documentation also recommends configuring the JSON Schema from the node's general settings.
4. Troubleshooting
4.1. List of Errors I Encountered
| Problem | Error Behavior | Solution |
|---|---|---|
| USER prompt has not been added | Plugin Invoke Error |
Add a USER message |
| An unsupported file format was input | Plugin Invoke Error |
Convert to a format supported by the model before passing |
| File variable was set in the prompt or context | PluginInvokeError |
Move the File variable to the "Vision" field |
| Context variable is not embedded in the prompt | Processing may fail | Insert the corresponding variable into the prompt |
Response Format: JSON is not set in the model settings |
Failed to parse structured output |
Set Response Format: JSON in the model settings |
"additionalProperties": false is not set in the JSON Schema |
Failed to parse structured output |
Add "additionalProperties": false to the Schema |
"additionalProperties": false is enabled but structured output is disabled |
Output is None |
Enable structured output |
5. References
[1] Dify Official Documentation: https://docs.dify.ai/en/cloud/use-dify/nodes/llm