
What you should do to ensure email deliverability with SendGrid
This page has been translated by machine translation. View original
Introduction
No matter how good your campaign is, it's meaningless if your emails don't reach your audience.
To maintain high email deliverability, there are surprisingly many things you need to do, such as domain authentication, reputation management, and unsubscribe mechanisms. Building and operating these yourself can be challenging, but with SendGrid, you can complete most of these with just console settings.
This time, I've compiled the settings you should complete before sending your first email, following the actual SendGrid console screens.
Overview
Why Settings Are Necessary
Email recipients (Gmail, Outlook, etc.) make these judgments about incoming emails:
- Is this sender legitimate? (Domain Authentication)
- Does this sender have a good reputation? (Reputation)
Data shows that properly configured domain authentication significantly improves inbox delivery rates compared to unconfigured domains.
With SendGrid, you can complete most of this domain authentication just by following the on-screen flow.
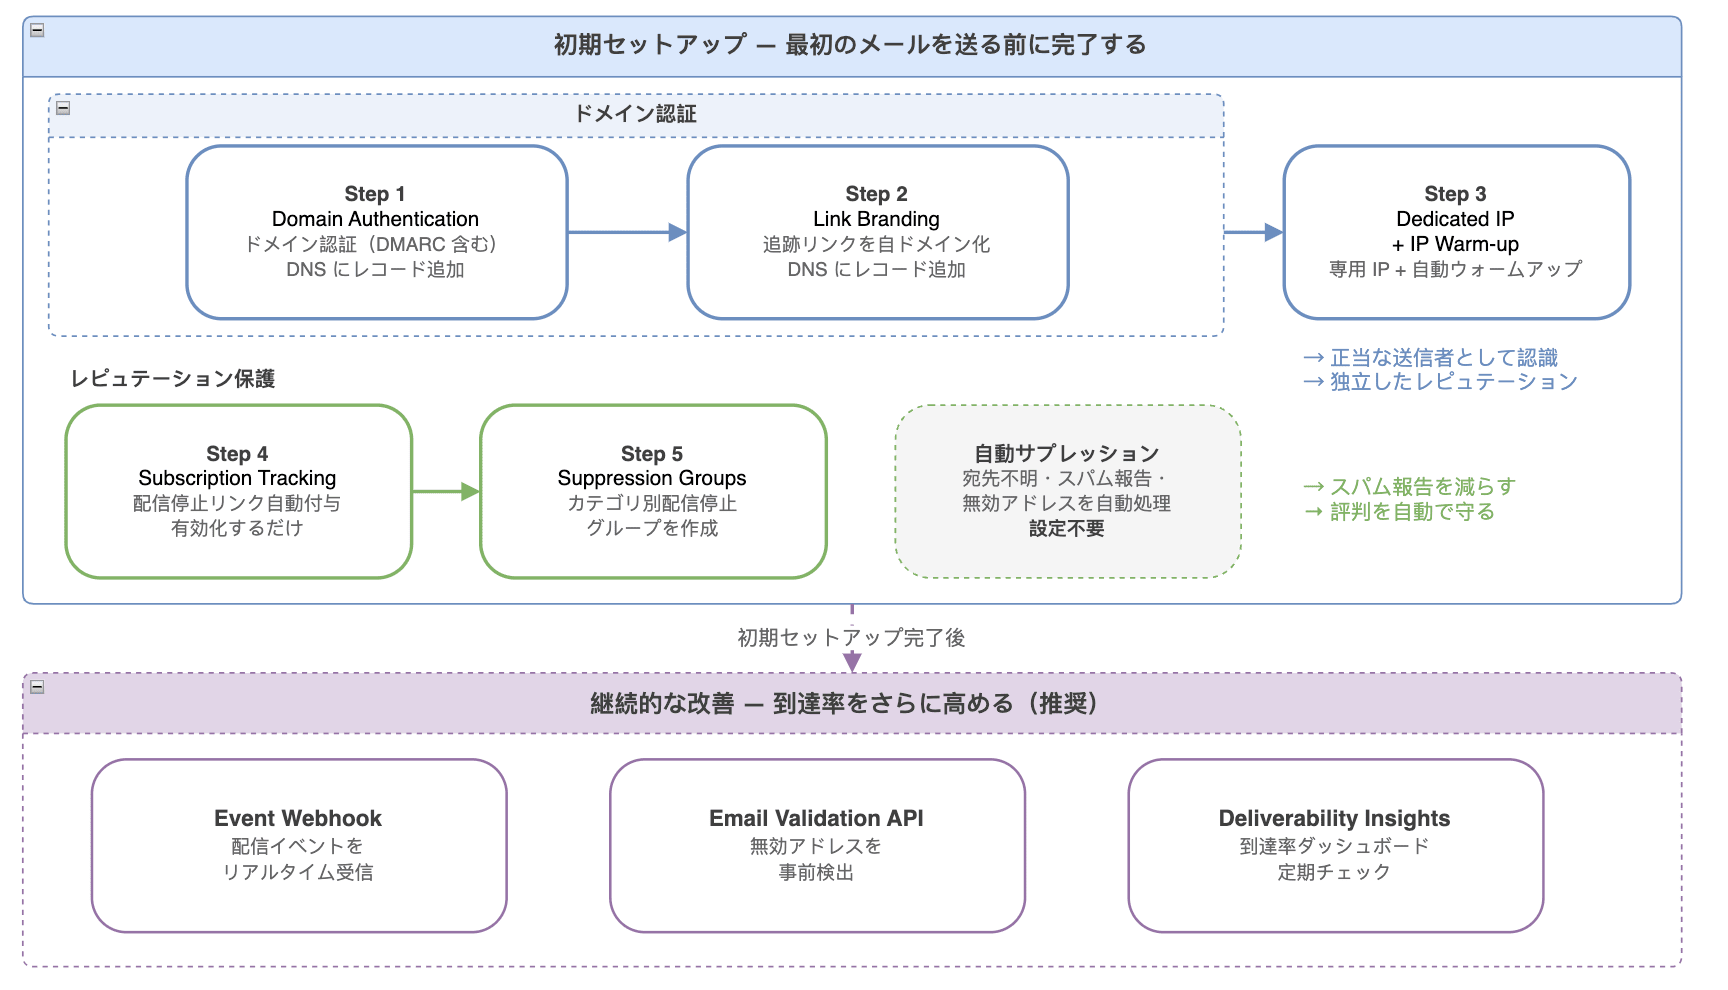
Initial Setup (Complete Before Sending Your First Email)
Complete the following steps in order to establish your email sending foundation.
Domain Authentication (Steps 1-2)
First, complete domain authentication.
This ensures that emails sent from your domain are recognized as "from a legitimate sender" by recipients.
Step 1. Domain Authentication
References:
- Official Documentation
- Previously written article: Trying SendGrid's Domain Authentication and Single Sender Verification
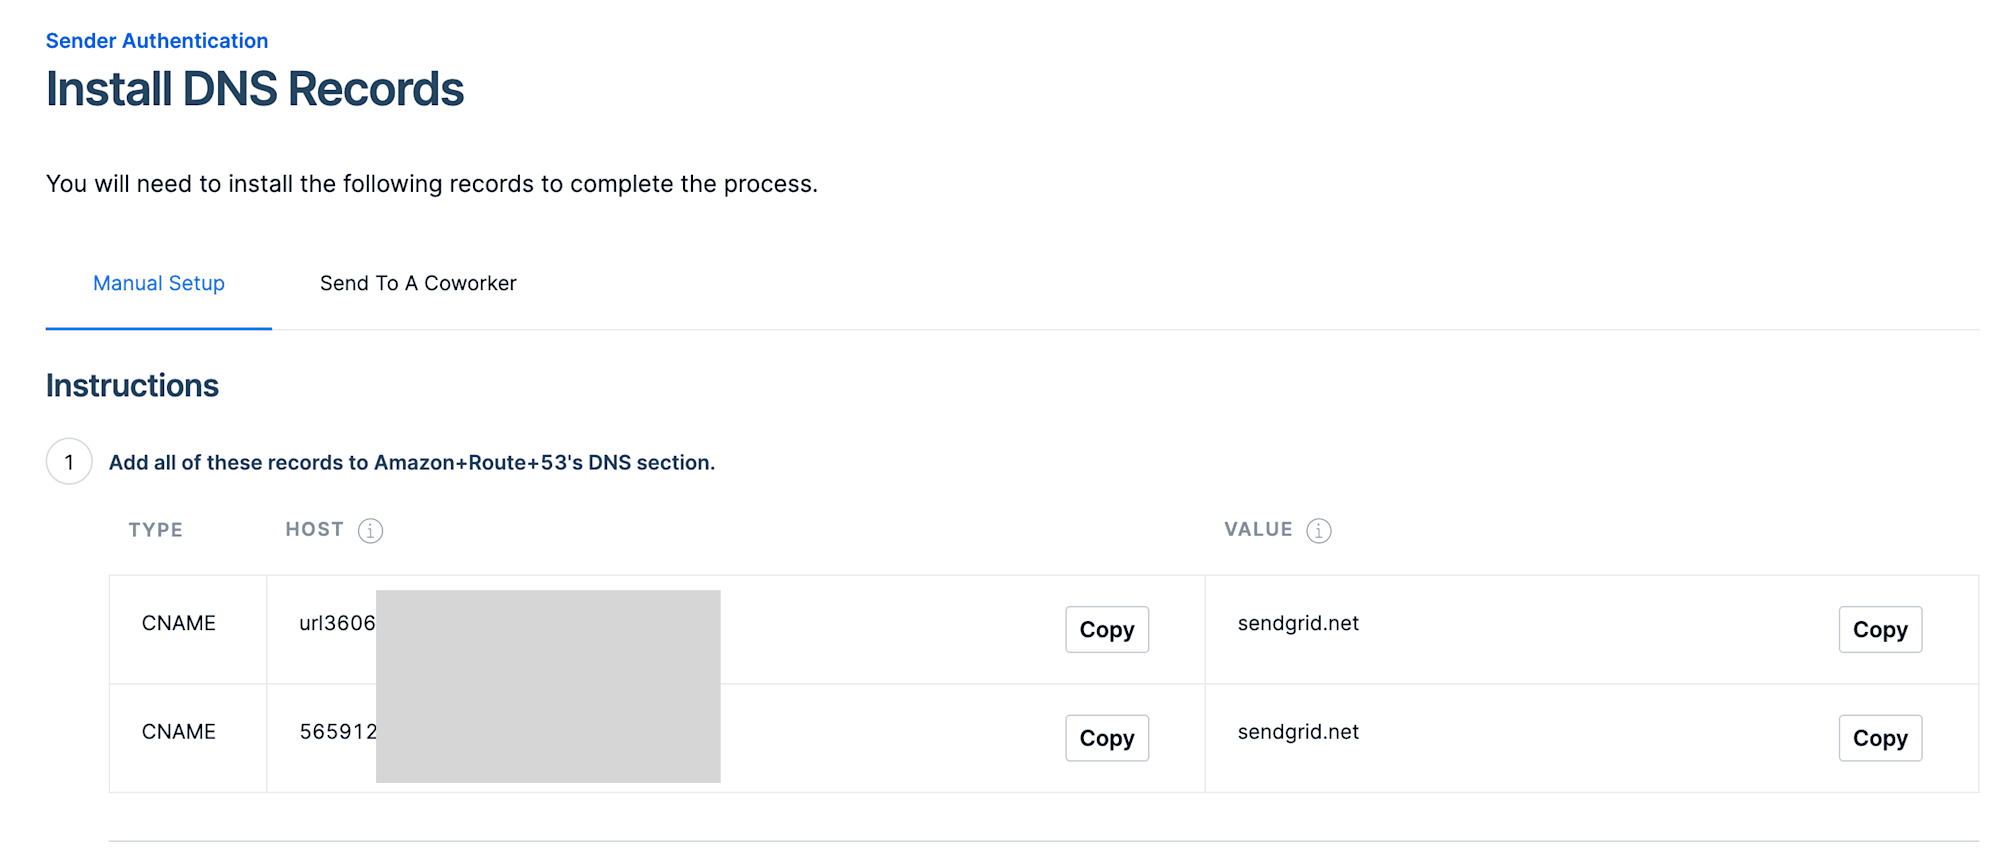
Set this up from Settings > Sender Authentication.
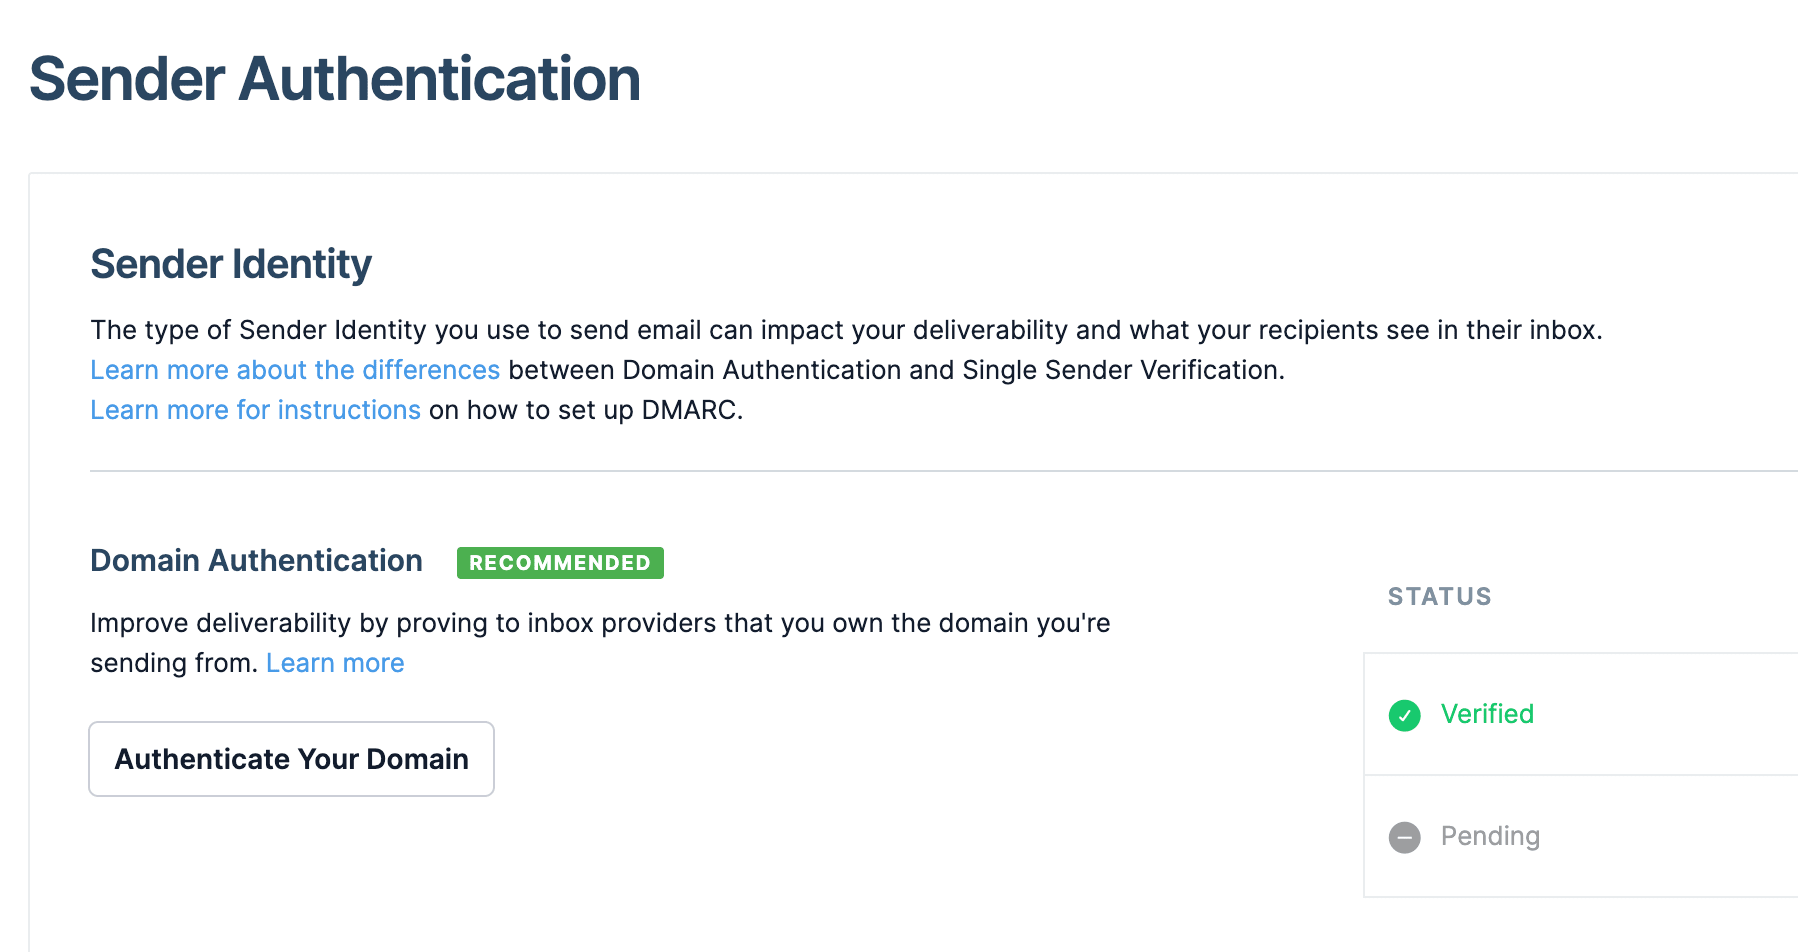
Following the on-screen flow, SendGrid automatically generates the records that should be added to DNS.
Add these to your DNS provider (Route53, Cloudflare, etc.), then click "Verify" on the SendGrid side to complete.
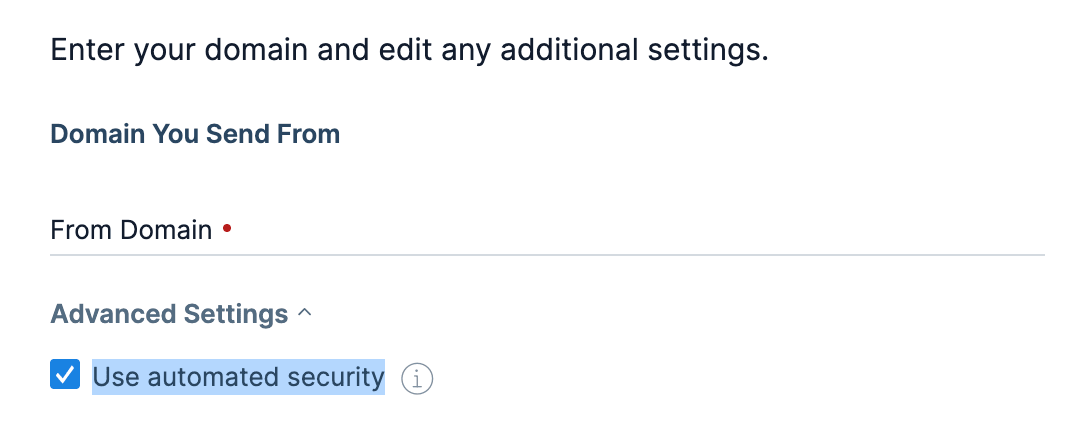
Keep "Automated Security" ON (default). SendGrid will automatically handle key management and rotation for domain authentication.
Note that the Domain Authentication flow also generates DMARC records (anti-spoofing policy). Since Gmail and Yahoo now require DMARC for bulk senders, it's helpful that SendGrid incorporates this as part of domain authentication.
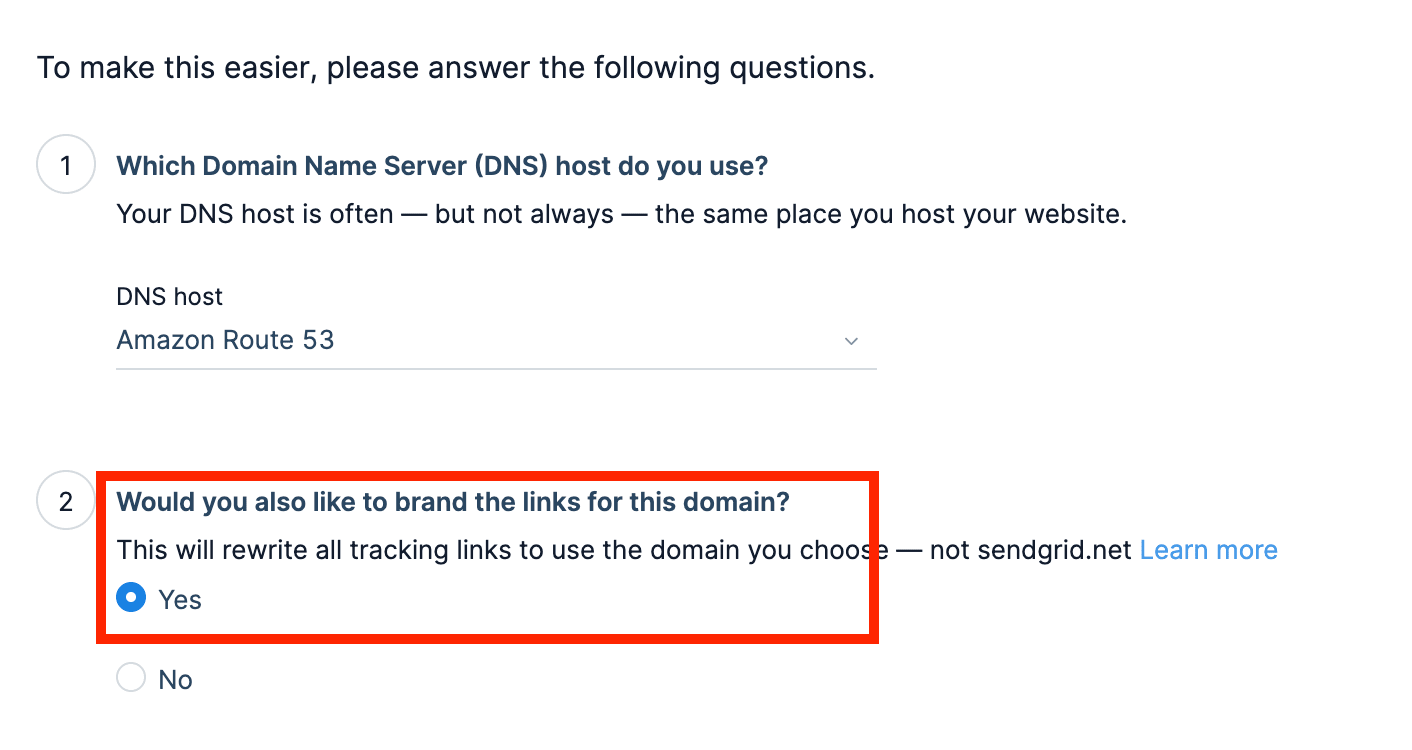
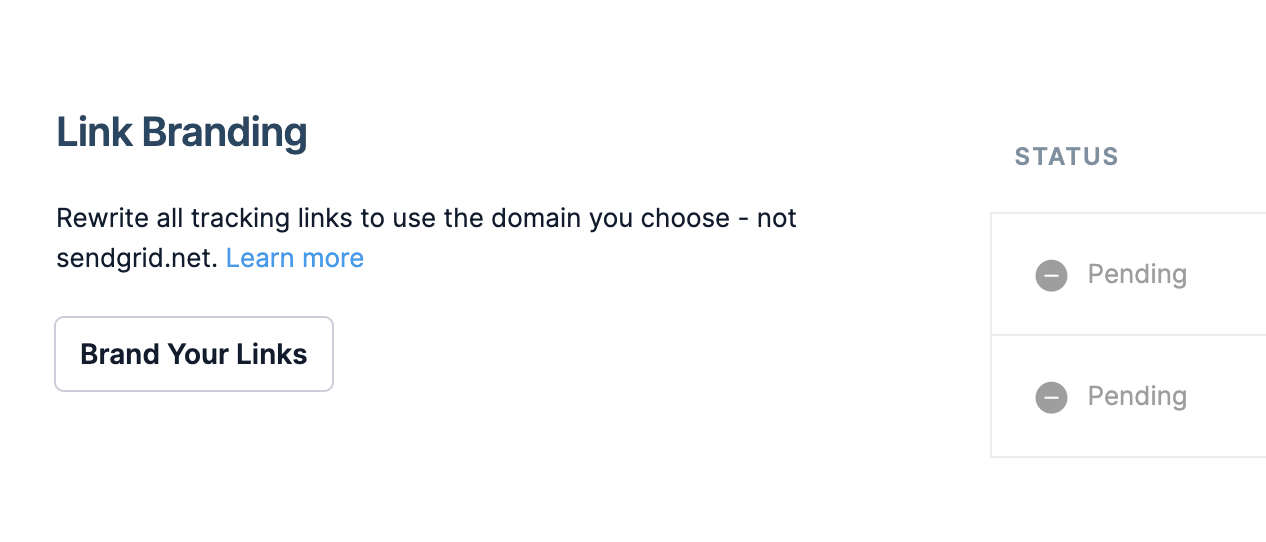
Step 2. Link Branding (Optional, Strongly Recommended)
Reference: Official Documentation
Set this up from Settings > Sender Authentication (same screen as Step 1).
This replaces click tracking links in emails from SendGrid's domain to your domain.
Since spam filters also evaluate link destinations in emails, using your own domain prevents being affected by other SendGrid users' sending quality.
If an option like "I would also like to brand the links for this domain" appears during Step 1, you can set it up simultaneously by checking this option.
Step 3. Dedicated IP + IP Warm-up
Reference: Official Documentation
Set this up from Settings > IP Addresses.
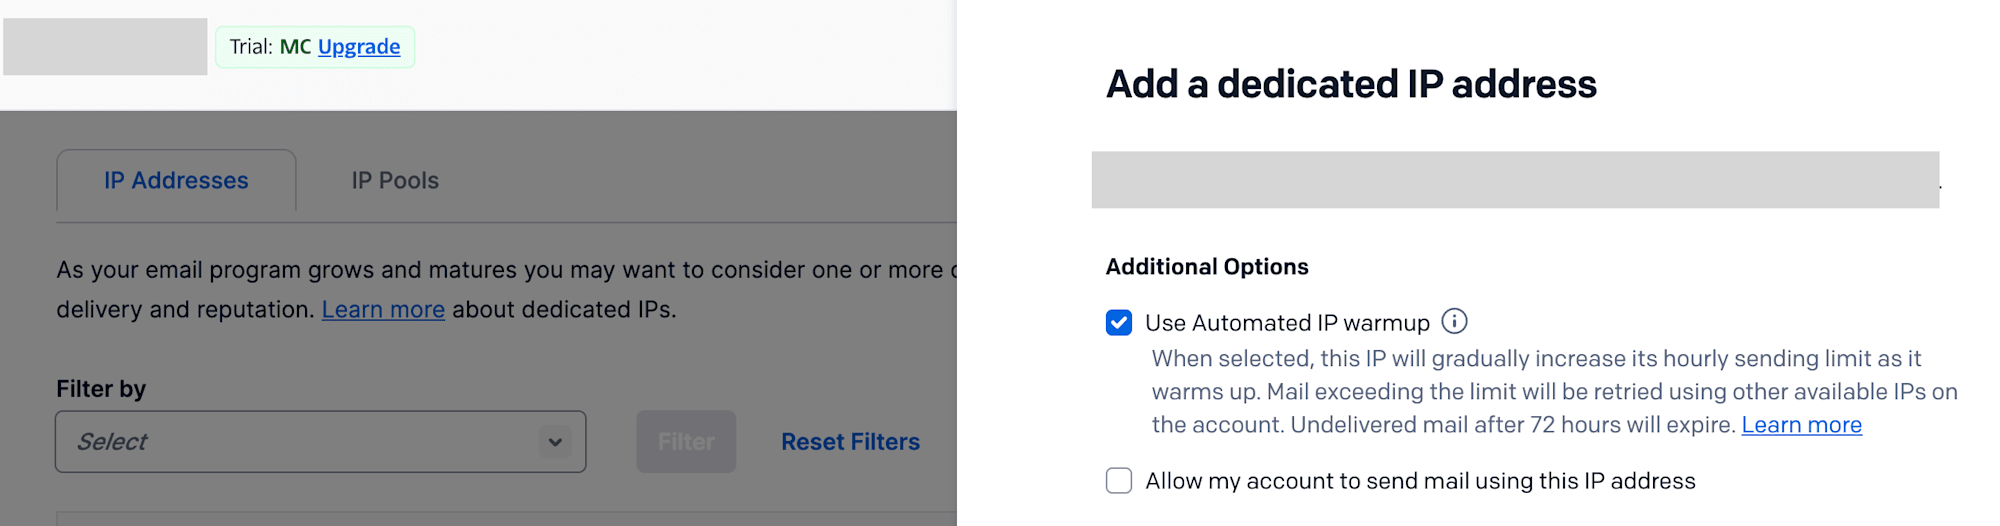
With SendGrid's shared IP, other users' sending quality might affect your emails. With a dedicated IP, your reputation is determined solely by your sending behavior.
After adding an IP, enable "Automated warmup". SendGrid will gradually increase your sending volume and automatically build trust for your IP.
Separating IPs for marketing and transactional (order confirmations, etc.) emails is even more effective.
Step 4. Subscription Tracking
Reference: Official Documentation
Set this up from Settings > Tracking > Subscription Tracking.
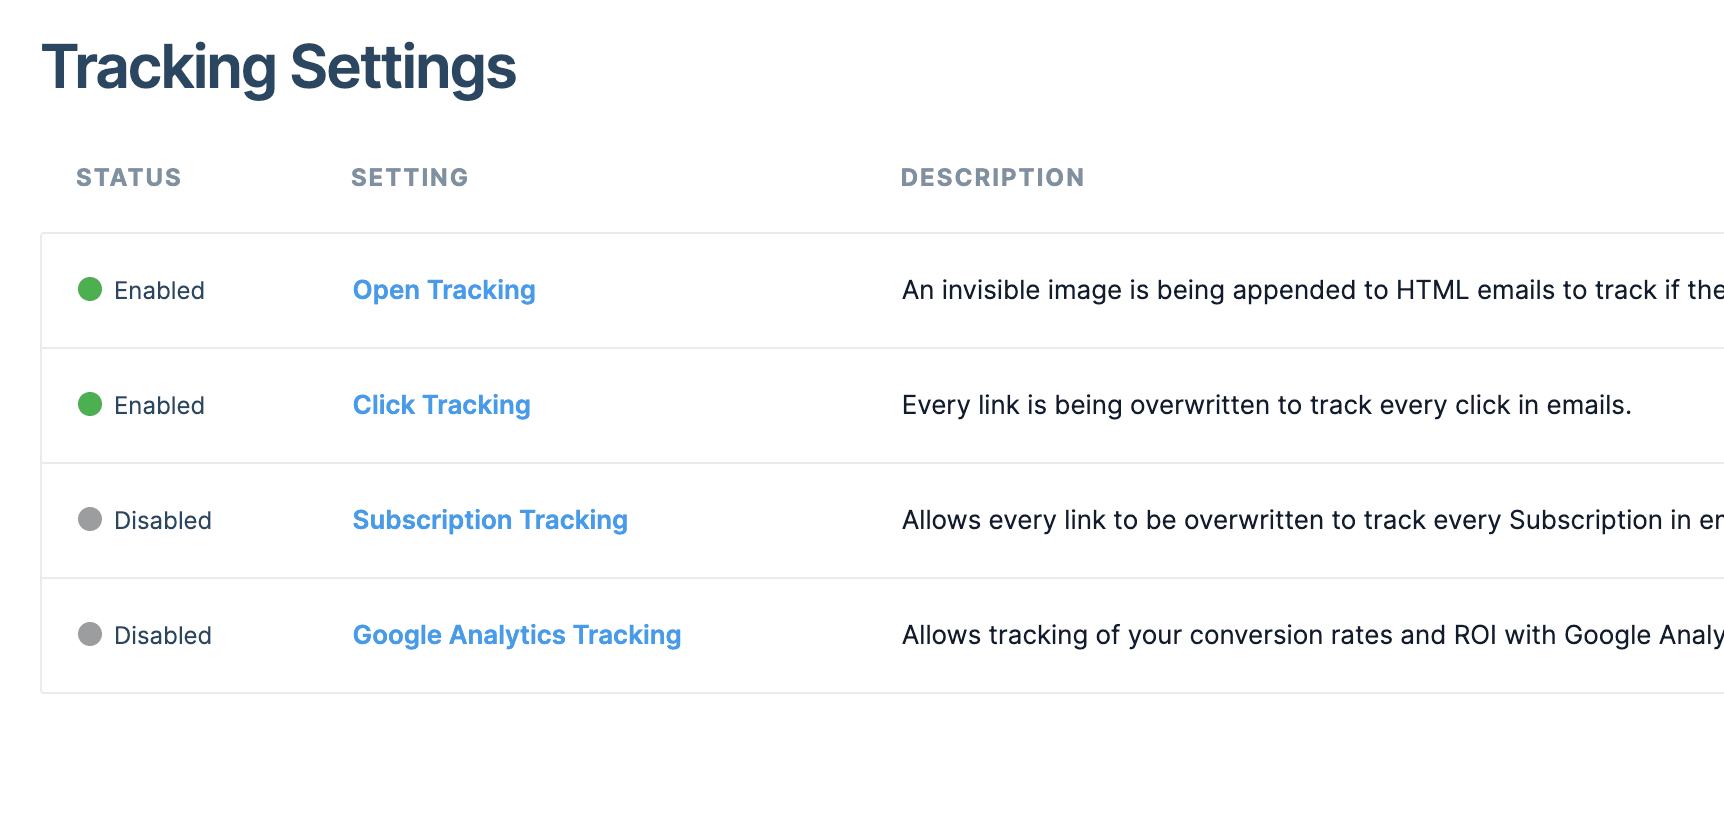
This feature automatically adds unsubscribe links to marketing emails or newsletters that recipients have "subscribed" to.
Gmail and Yahoo now require one-click unsubscribe for bulk senders. For marketing emails, enabling this setting satisfies this requirement.
One important note: Tracking Settings has multiple items, but only Subscription Tracking directly affects deliverability. Open Tracking and Click Tracking are ON by default, but Subscription Tracking remains OFF. This is easy to overlook, so be sure to check.
Note that if you're only sending transactional emails like order confirmations or password resets, this setting is unnecessary.
Step 5. Suppression Groups
Reference: Official Documentation
Set this up from Marketing > Unsubscribe Groups.

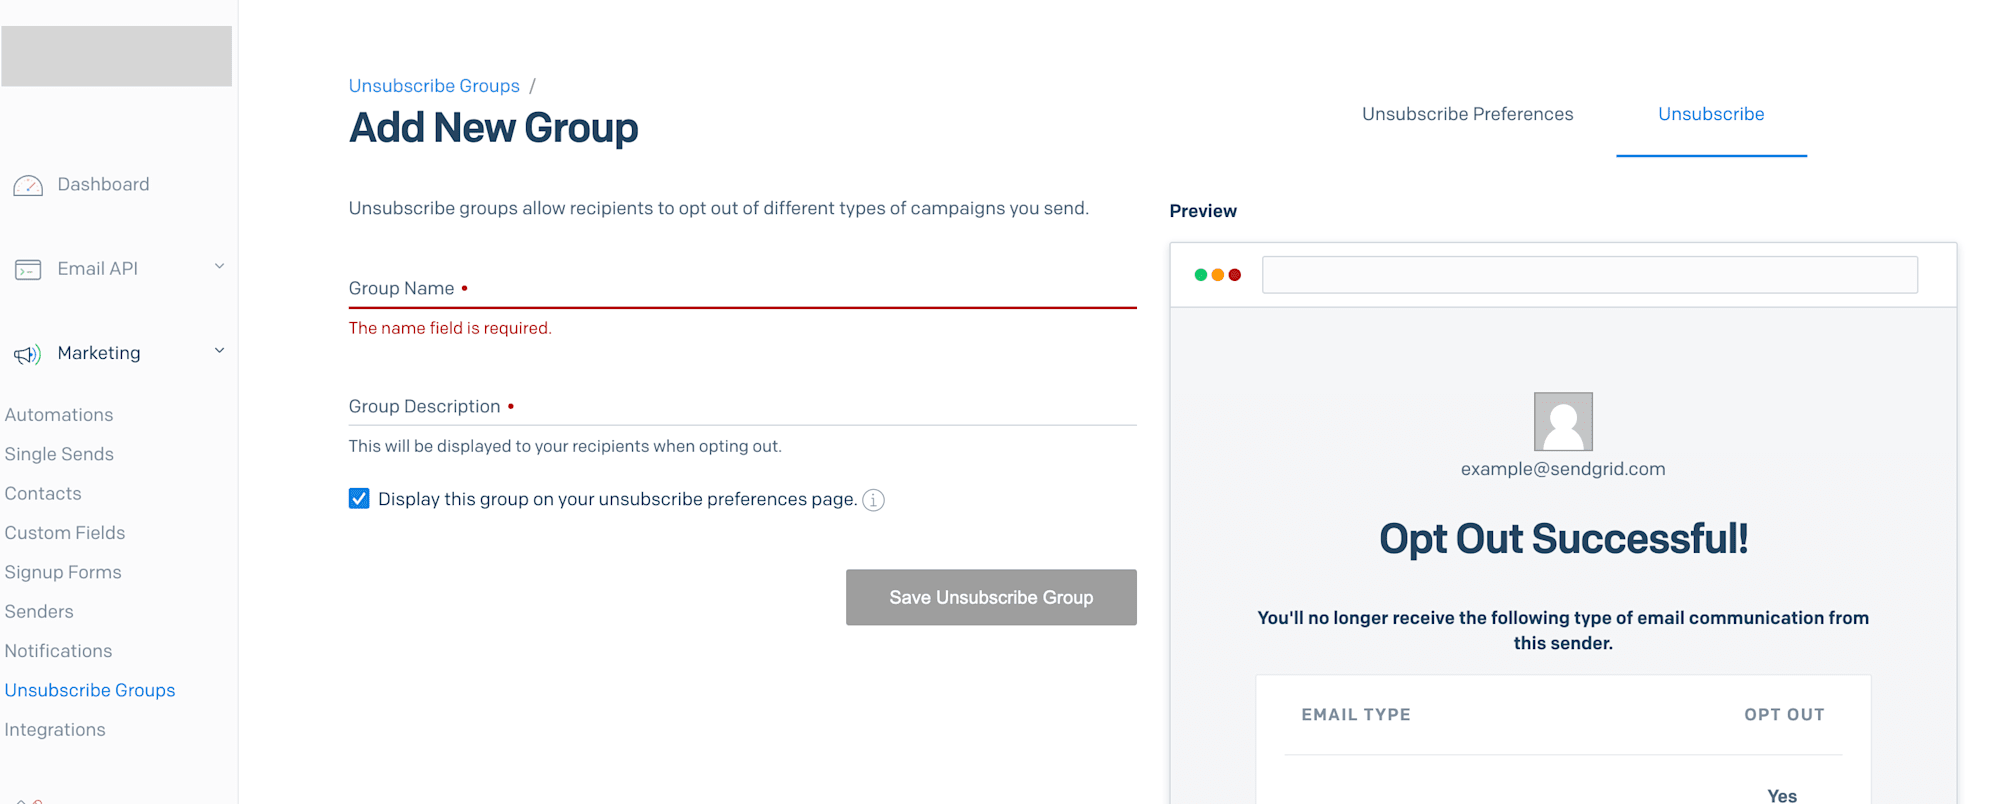
Create unsubscribe groups for different types of emails.
If recipients can only choose to "stop all emails," they tend to hit the spam report button. Letting them choose by category allows them to unsubscribe only from unwanted categories. This reduces spam reports, protecting your sender reputation.
Incidentally, SendGrid automatically handles suppression for addresses that bounce or report spam, so no configuration is needed.
Initial Setup Complete
At this point, you've established the following foundation:
- Domain Authentication (including DMARC) → Recognized as a legitimate sender
- Link Branding → Manage reputation with your own domain
- Dedicated IP + Warm-up → Build your own reputation
- Subscription Tracking → Automate unsubscribe mechanisms
- Suppression Groups → Provide options to reduce spam reports
- Automatic Suppression → SendGrid automatically handles bounces and spam reports
Continuous Improvement (Recommended)
After completing the initial setup, you can further enhance deliverability and operational visibility with these tools:
Event Webhook
Reference: Official Documentation
Set this up from Settings > Mail Settings > Event Webhook.
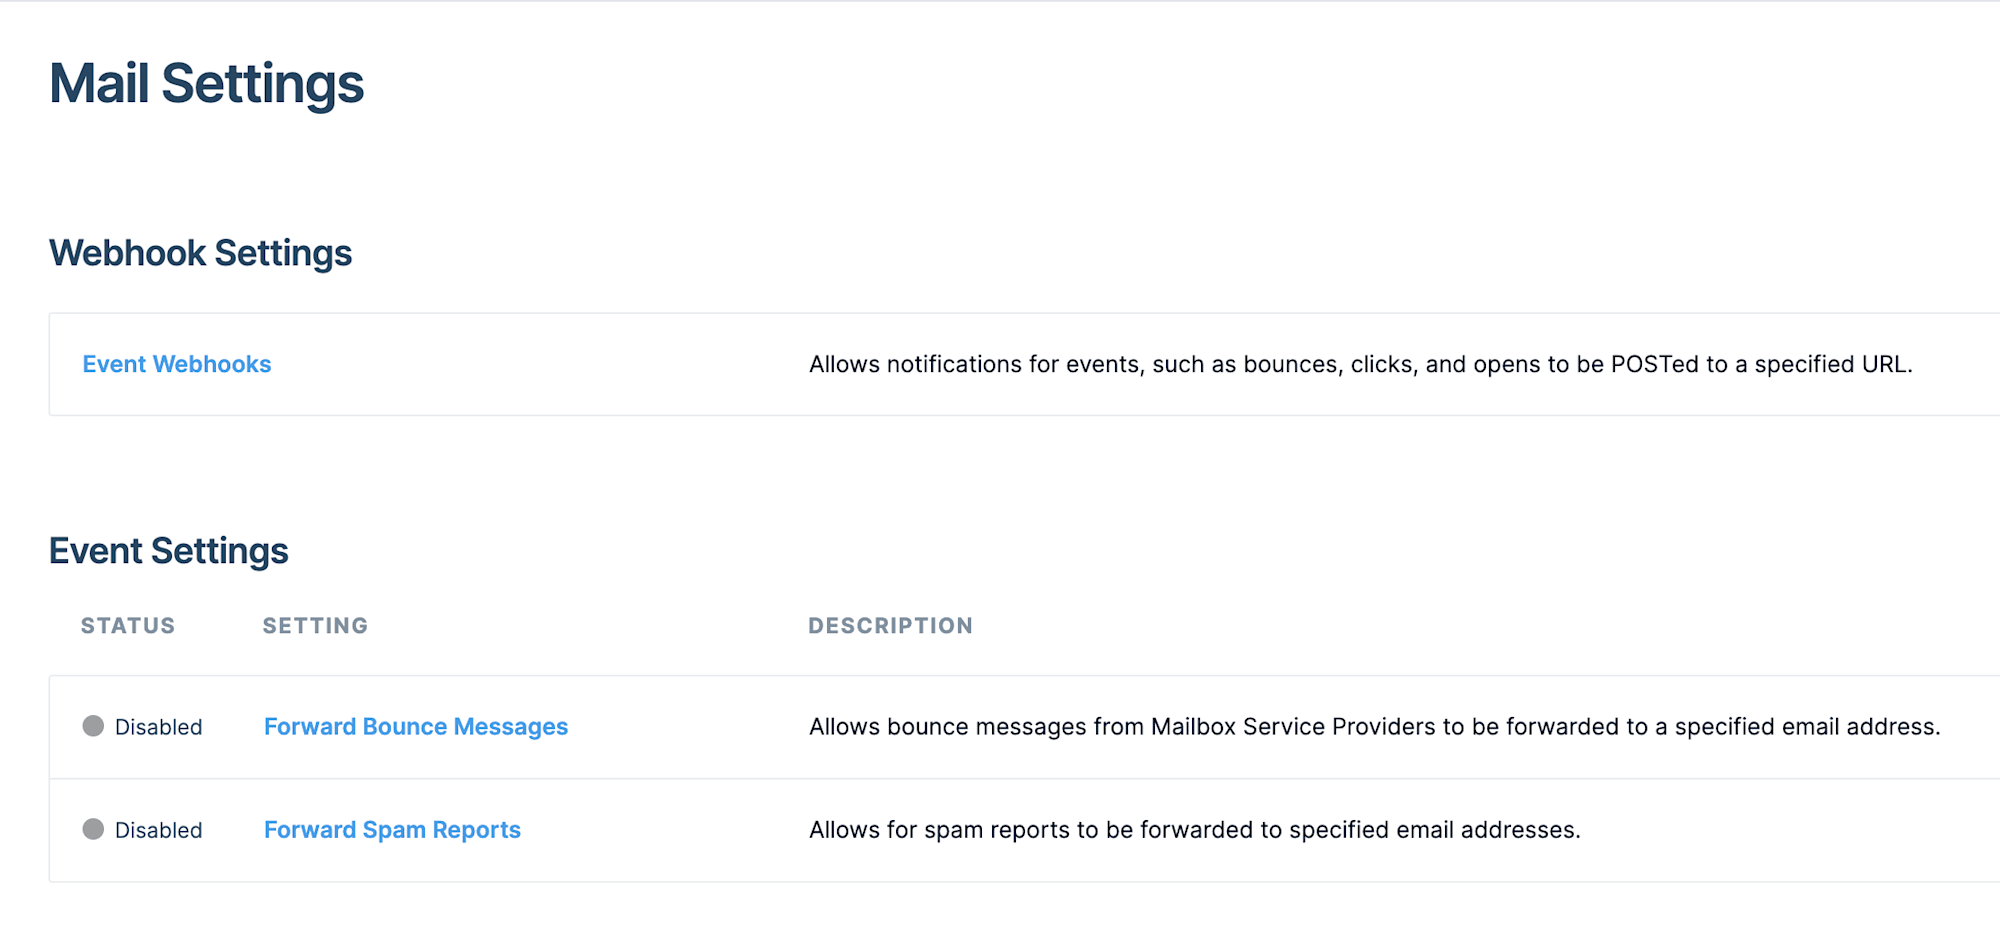
Receive events for email delivery, opens, clicks, bounces, etc. This helps detect delivery anomalies early and respond quickly to list quality issues.
Email Validation API
References:
Sending to invalid addresses increases bounces and decreases reputation. You can prevent this by validating at signup or by batch verification of existing lists.
Deliverability Insights
Reference: Official Documentation
View this from Stats > Deliverability Insights.
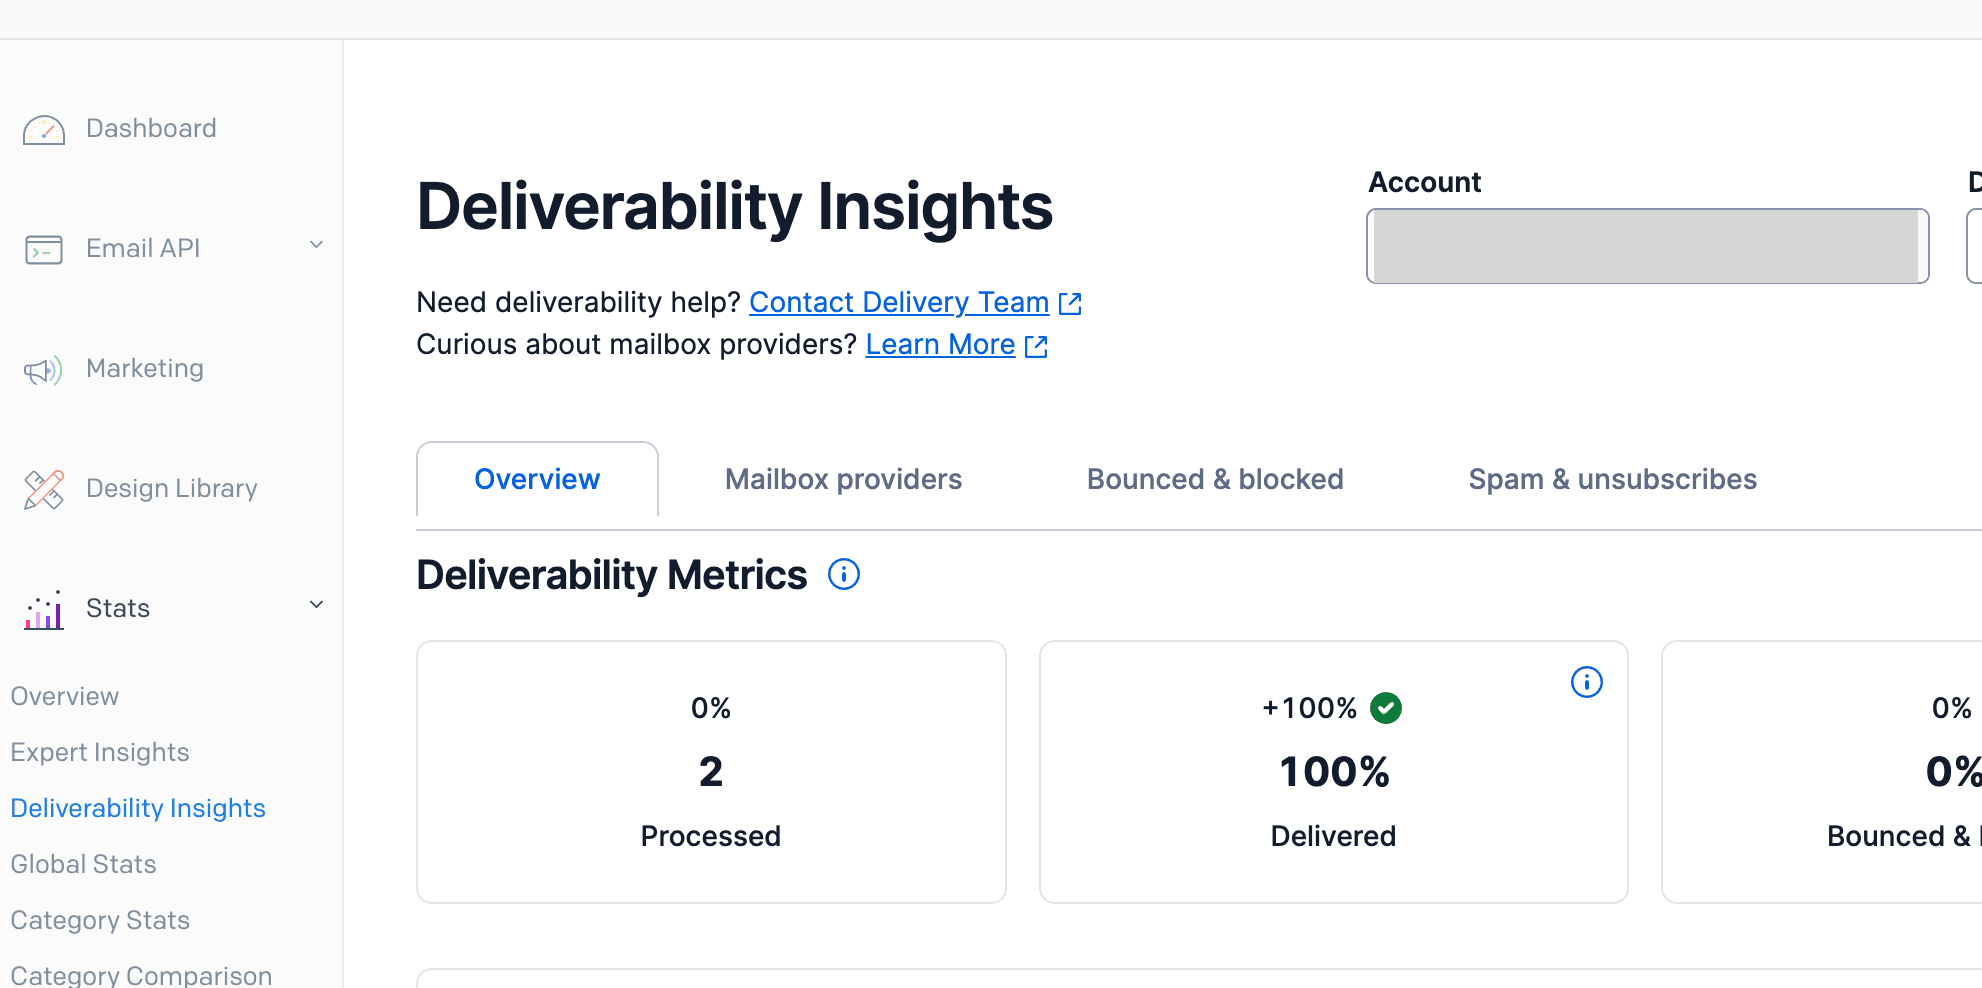
This is a deliverability dashboard built into SendGrid, ready to use without configuration.
You can check various metrics, so it's recommended to regularly monitor them to catch problem indicators early.
Conclusion
What you need to do to ensure email deliverability with SendGrid is actually very simple.
| Step | Action | Overview |
|---|---|---|
| 1 | Domain Authentication | Set up domain authentication (including DMARC) |
| 2 | Link Branding | Use your own domain for links in emails |
| 3 | Dedicated IP + Warm-up | Build independent reputation with dedicated IP |
| 4 | Subscription Tracking | Automatically add unsubscribe links |
| 5 | Suppression Groups | Provide category-based unsubscribe options |
SendGrid automatically handles bounce processing and domain authentication key rotation, so your daily tasks are reduced to occasionally checking Deliverability Insights.
With other email delivery services, you'd need to build and operate each of these mechanisms yourself. With SendGrid, once you complete the initial settings, you've created an environment where your emails reach the inbox rather than the spam folder.