I tried generating an OGP banner with Figma MCP that supports custom fonts
This page has been translated by machine translation. View original
Introduction
Figma's official blog introduced use cases and new features for Figma MCP.
- Create and update decks in Figma Slides
- Generate FigJam boards from live data
- Move designs back and forth between code and canvas with Figma Make
- Share work with the Figma agent
Additionally, new features were introduced including support for uploaded custom fonts and download_assets for exporting images. This article summarizes the steps to create a banner using custom fonts with Figma MCP connected to Claude Code, and export it to PNG and SVG using download_assets.
New Features Covered This Time
We will try out the following two features.
- Custom font support: Specify fonts uploaded to your Figma account for use from MCP or agents.
- Image export (
download_assets): Export specified nodes in PNG / JPG / SVG / PDF.
Previously, fonts available through Figma MCP were limited to Figma's standard font library. This update allows you to specify fonts uploaded to your account as well.
Note that fonts installed on your Mac or fonts activated via Adobe Fonts, as before, are not visible from MCP.
download_assets returns exported image files (and source images contained within the node), whereas get_screenshot returns a preview of the node's appearance. Export format and scale can also be specified.
Registering Custom Fonts
Upload custom fonts to Figma. This can be done from account settings on any plan.
Uploading Fonts
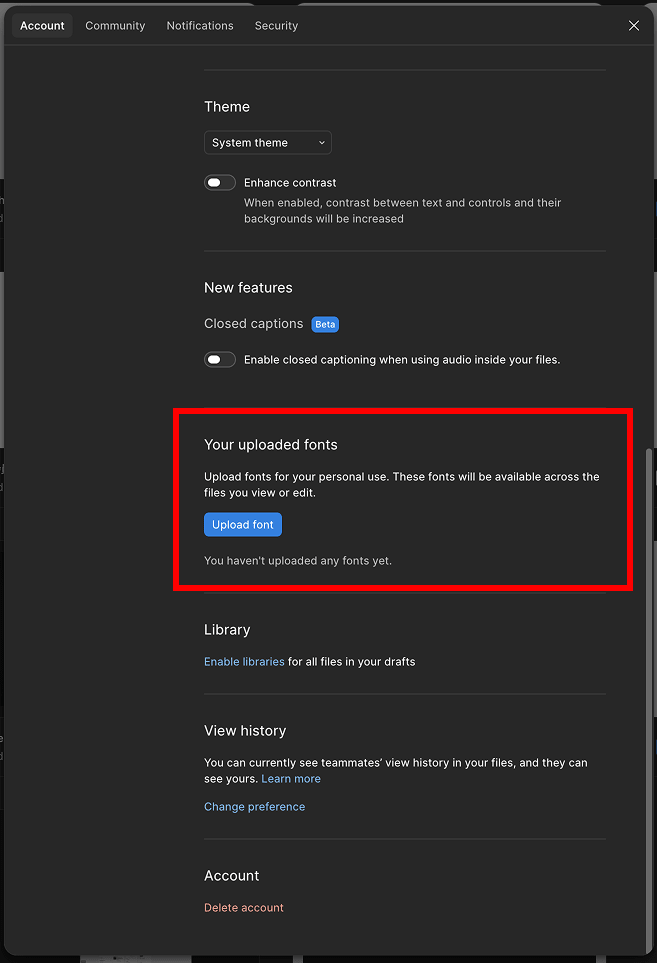
In the Figma file browser, open Settings from the avatar in the upper right, and add font files to "Your uploaded fonts" under the Account tab.
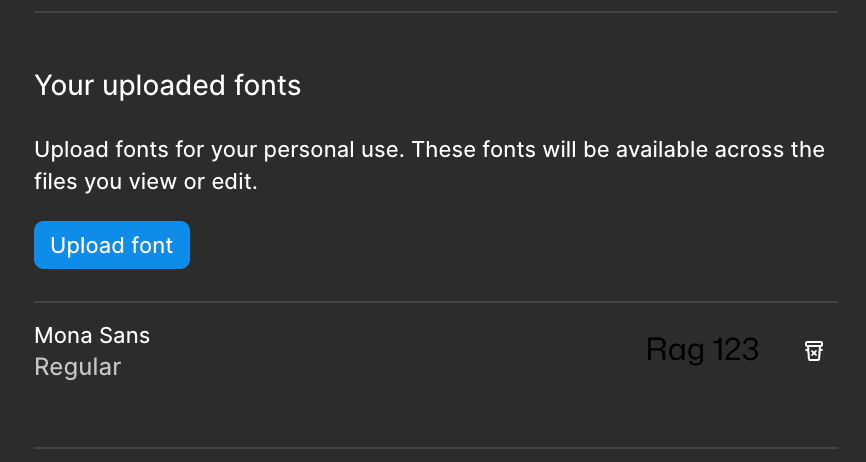
A popup will appear when uploading to confirm the licensing rights of the font, so check the box if the license is acceptable and upload. This time, Mona Sans under OFL (SIL Open Font License) is being used.
Once the upload is complete, you can confirm that the font you added is displayed.
Checking Visibility from MCP
Whether the uploaded font is visible from MCP can be confirmed with listAvailableFontsAsync() from the Plugin API. Run the following code from Claude Code via Figma MCP's use_figma.
const fonts = await figma.listAvailableFontsAsync();
const mona = fonts.filter(f => f.fontName.family.includes('Mona Sans'));
return mona.map(f => `${f.fontName.family} / ${f.fontName.style}`);
For Mona Sans, all weights were returned as follows.
Mona Sans / Black
Mona Sans / Bold
Mona Sans / ExtraBold
Mona Sans / ExtraLight
Mona Sans / Light
Mona Sans / Medium
Mona Sans / Regular
Mona Sans / SemiBold
Once you confirm they are displayed here, you can specify and use them as-is when creating banners.
Creating a Banner with the Added Font
Now that we've confirmed the font is usable, let's create a banner. This time, we're using a 1200×630 frame designed for OGP, with Mona Sans for headings and Noto Sans JP for Japanese text.
Specify the following in Claude Code.
Create an OGP-style banner at 1200×630 using the uploaded Mona Sans for headings and Noto Sans JP for Japanese text
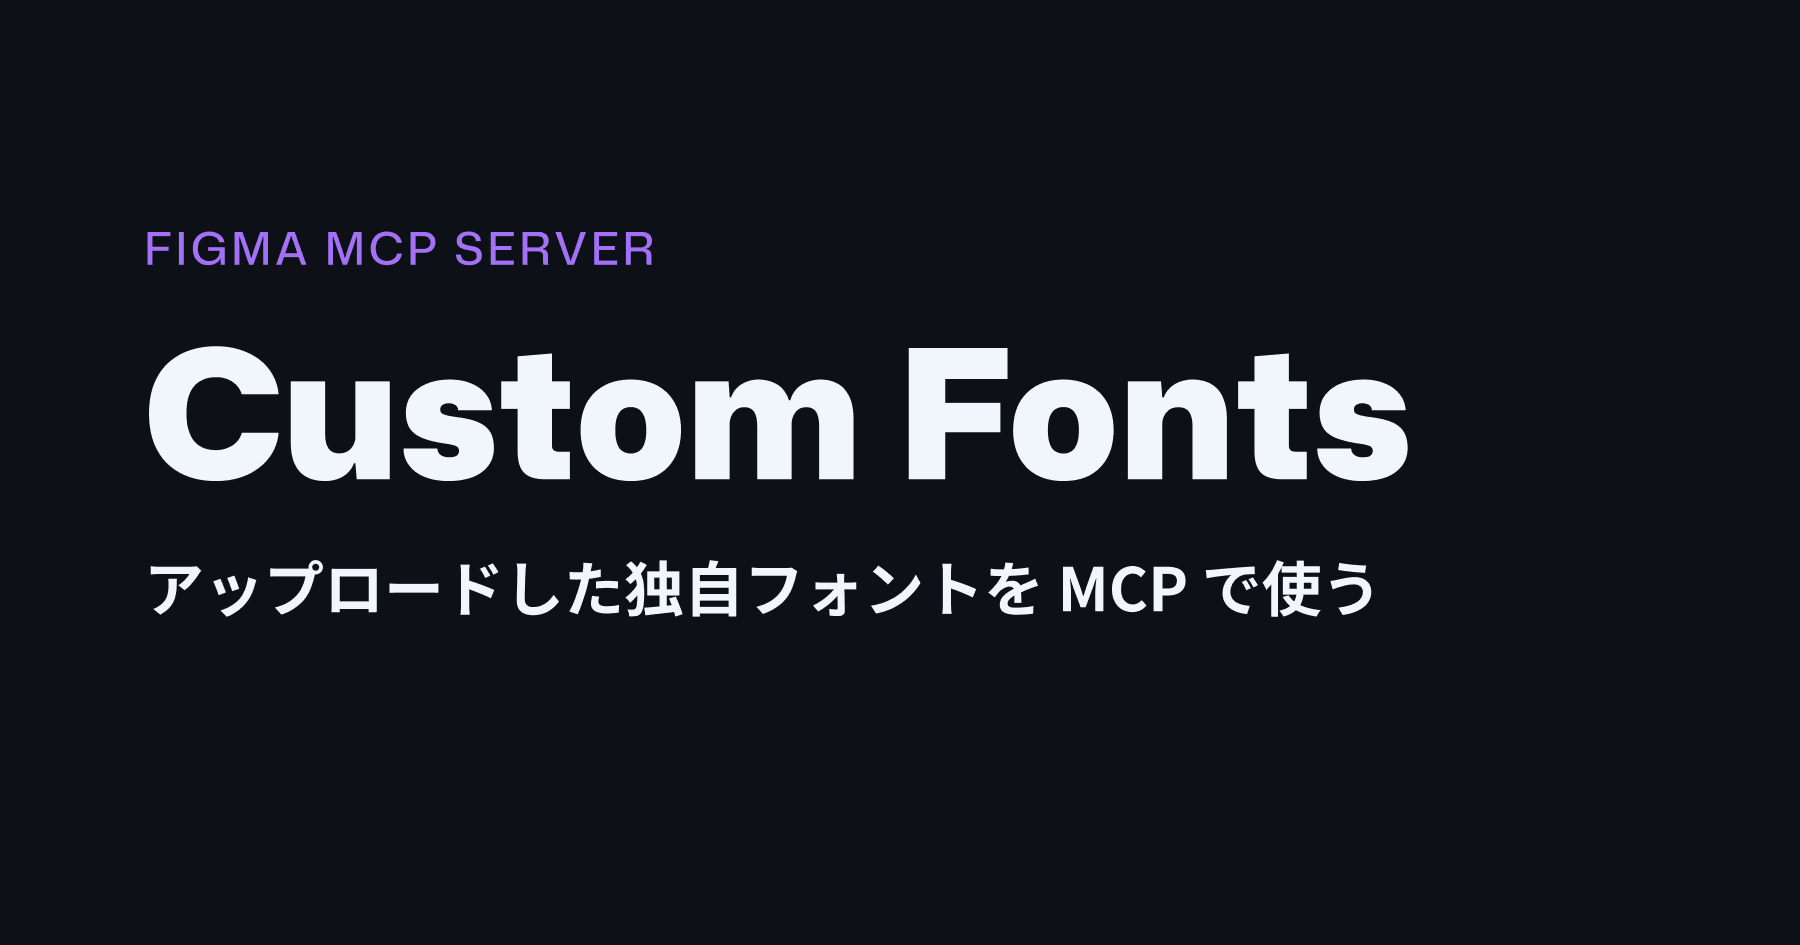
The following is the output banner. Mona Sans Black is used for the heading, and Noto Sans JP is used below it.
Exporting with download_assets
Export the created banner using download_assets.
If you specify the desired format, scale, and save destination, it will export to that directory. This time, both PNG and SVG were exported.
Continuing from before, specify the following.
Export this banner as PNG (2x) and SVG to ~/Desktop
Since a scale of 2x was specified for PNG, it was exported at 2400×1260, which is twice the size of 1200×630.
The parameters are as follows.
| Parameter | Description | This Time's Setting |
|---|---|---|
fileKey |
Key of the target file | The file containing the banner |
nodeId |
ID of the node to export | The banner frame |
defaultFormat |
Export format | png / svg |
defaultScale |
Export scale | 2 (for PNG) |
Summary
With Figma MCP's custom font support, where previously only Figma's standard fonts could be used, you can now upload the fonts you want to use in advance and specify those fonts from MCP or agents.
Also, using download_assets, you can export your created designs in PNG / SVG and other formats.
Combining these two features allows you to go through the entire process from design creation to export just by giving instructions to an AI agent, without even opening Figma. It seems like it will become easier to streamline and automate repetitive tasks such as creating everyday banners and OGP images.