I tried incremental integration of Salesforce data to Snowflake using Amazon AppFlow

This page has been translated by machine translation. View original
This is Suzuki from the Data Business Division.
I wanted to integrate Salesforce data into Snowflake using AppFlow, so I looked into how this could be achieved.
There are many examples of integrating Salesforce with Amazon S3, but there was surprisingly little information about integrating with Snowflake, so I'd like to introduce how it can be done at this point in time.
Of course, integrating with S3 and loading from an external stage is also a valid approach. The feature I'm introducing this time works that way internally as well.
The following is a useful reference for S3 integration.
Below, I'll introduce the AppFlow configuration for incrementally integrating Salesforce data into Snowflake, along with the results of the data integration.
1. Preparing the Data Source and Destination
i. Preparing the Salesforce Environment
I signed up for Salesforce Developer Edition and set up a Developer Edition environment.
For this article, I used data from the Opportunity object.
The following was a useful reference for Salesforce standard objects.
ii. Preparing the Snowflake Environment
For verification purposes, I created a user for AppFlow.
CREATE USER appflow_user
  PASSWORD = '<Enter a password for the user>'
  DEFAULT_ROLE = SYSADMIN
  DEFAULT_WAREHOUSE = COMPUTE_WH;
Since this is purely for verification, I granted SYSADMIN. In practice, I recommend granting a role with least privilege.
Next, I created a database and schema for AppFlow. I also created a table for Opportunity data retrieved from Salesforce.
When actually building a system, you would create the tables here to store the data retrieved from Salesforce.
Since importing all columns of the Opportunity object would make the configuration in the AppFlow flow creation screen unnecessarily complex for verification purposes, I limited it to a few columns here.
CREATE DATABASE APPFLOW_DB;
CREATE SCHEMA APPFLOW_DB.APPFLOW_SCHEMA;

CREATE OR REPLACE TABLE APPFLOW_DB.APPFLOW_SCHEMA.SALESFORCE_OPPORTUNITY (
  ID                       STRING        NOT NULL,
  NAME                     STRING,
  ACCOUNT_ID               STRING,
  OWNER_ID                 STRING,
  CREATED_DATE             TIMESTAMP_NTZ,
  LAST_MODIFIED_DATE       TIMESTAMP_NTZ,
  IS_DELETED               BOOLEAN,
  LOADED_AT                TIMESTAMP_NTZ DEFAULT CURRENT_TIMESTAMP(),
  PRIMARY KEY (ID)
);
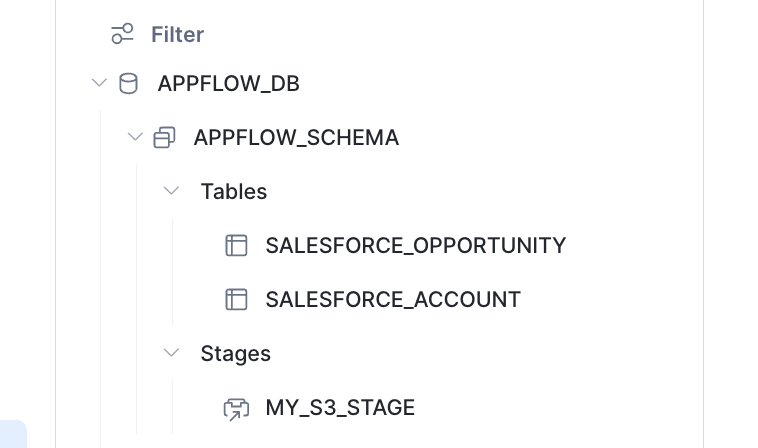
I also created a storage integration and external stage to be used by AppFlow when loading data retrieved from Salesforce into Snowflake.
This operation is covered in the guide, so I'll defer to that.
The S3 bucket and IAM role should be created in the same AWS account where the AppFlow flow will be created.
In the end, I had the following state.
2. Preparing AppFlow
i. Creating a Salesforce Connection
First, I created a connection to Salesforce.
This was straightforward — from Connections > Manage connections, I selected the Salesforce connector and clicked Create connection.
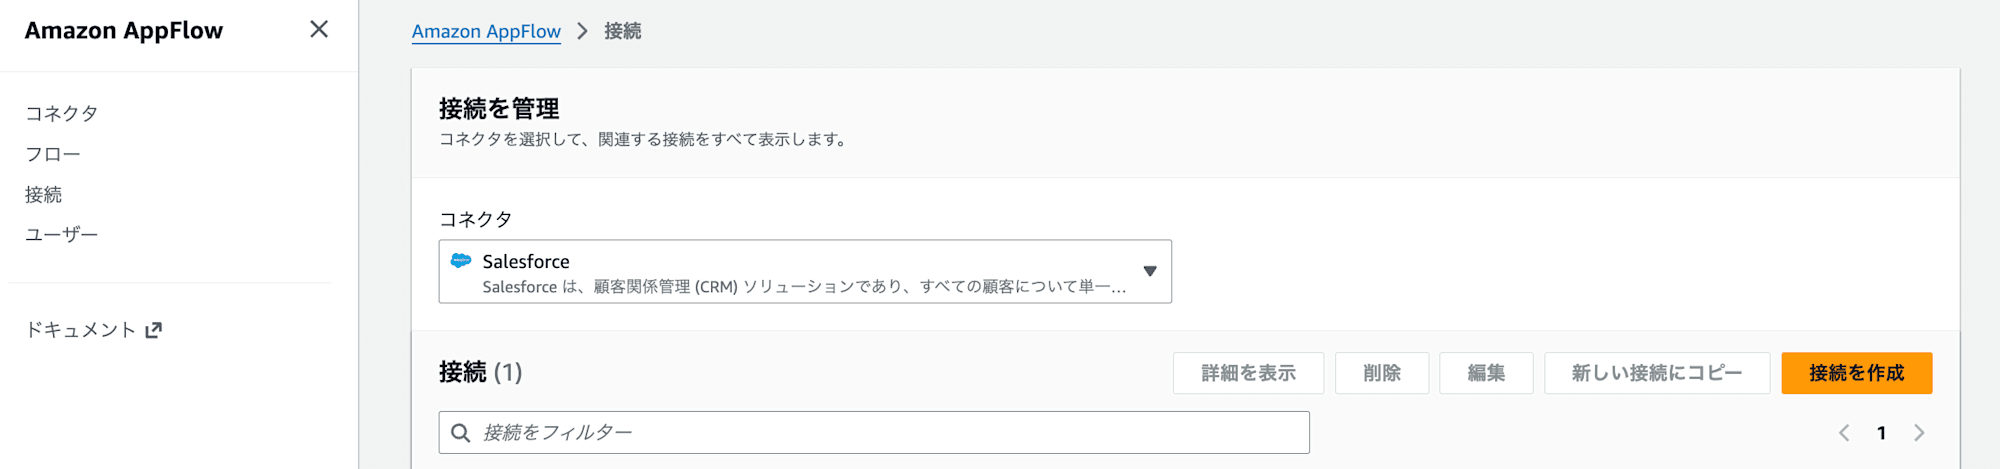
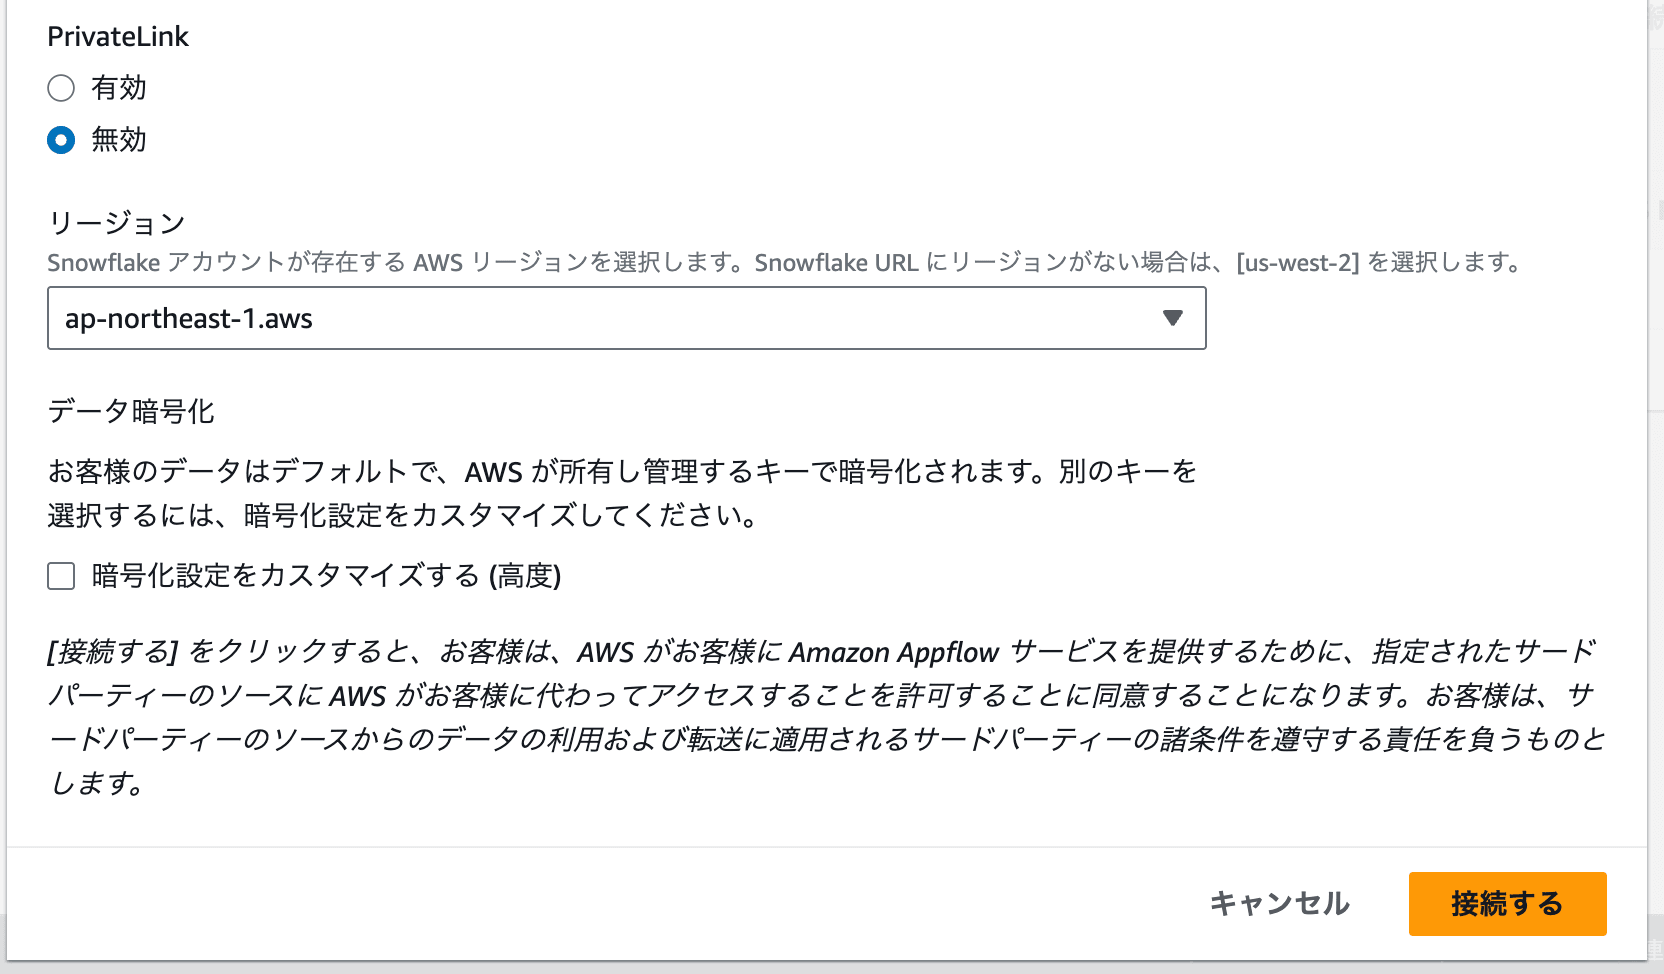
Since the data source was a Developer Edition environment, I selected Authorization code as the OAuth grant type and Production as the Salesforce environment.
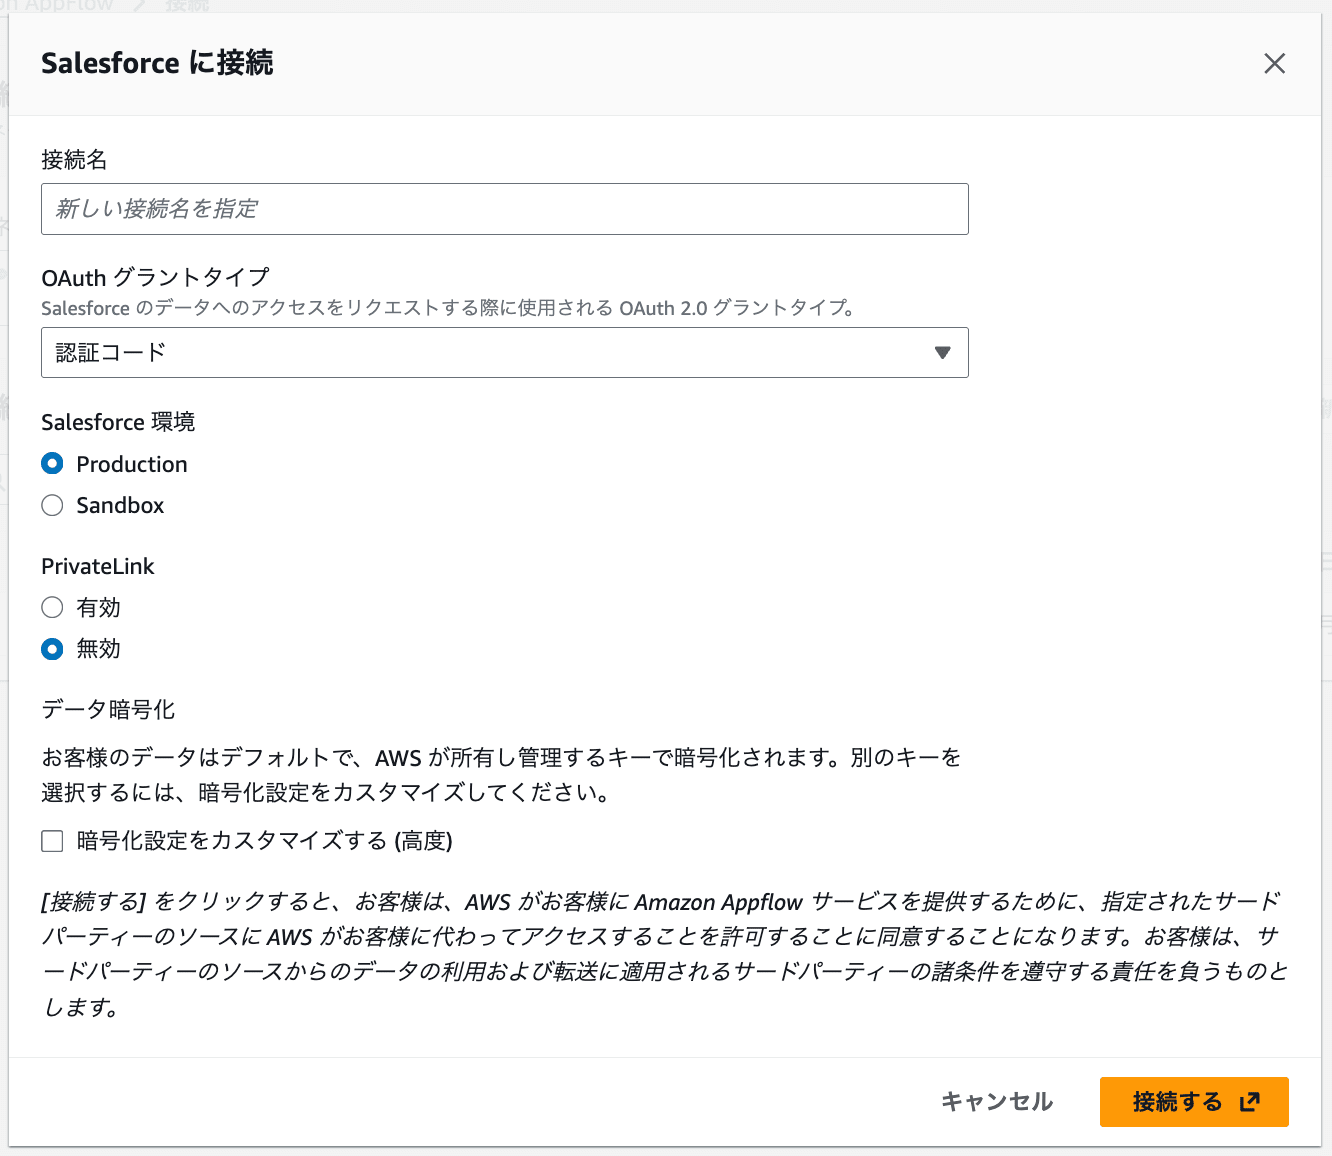
PrivateLink can also be enabled, but since a license is required on the Salesforce side, I disabled it this time.
When I clicked Connect, a popup appeared for authentication with the data source, and I authenticated with the account used to create the connection.
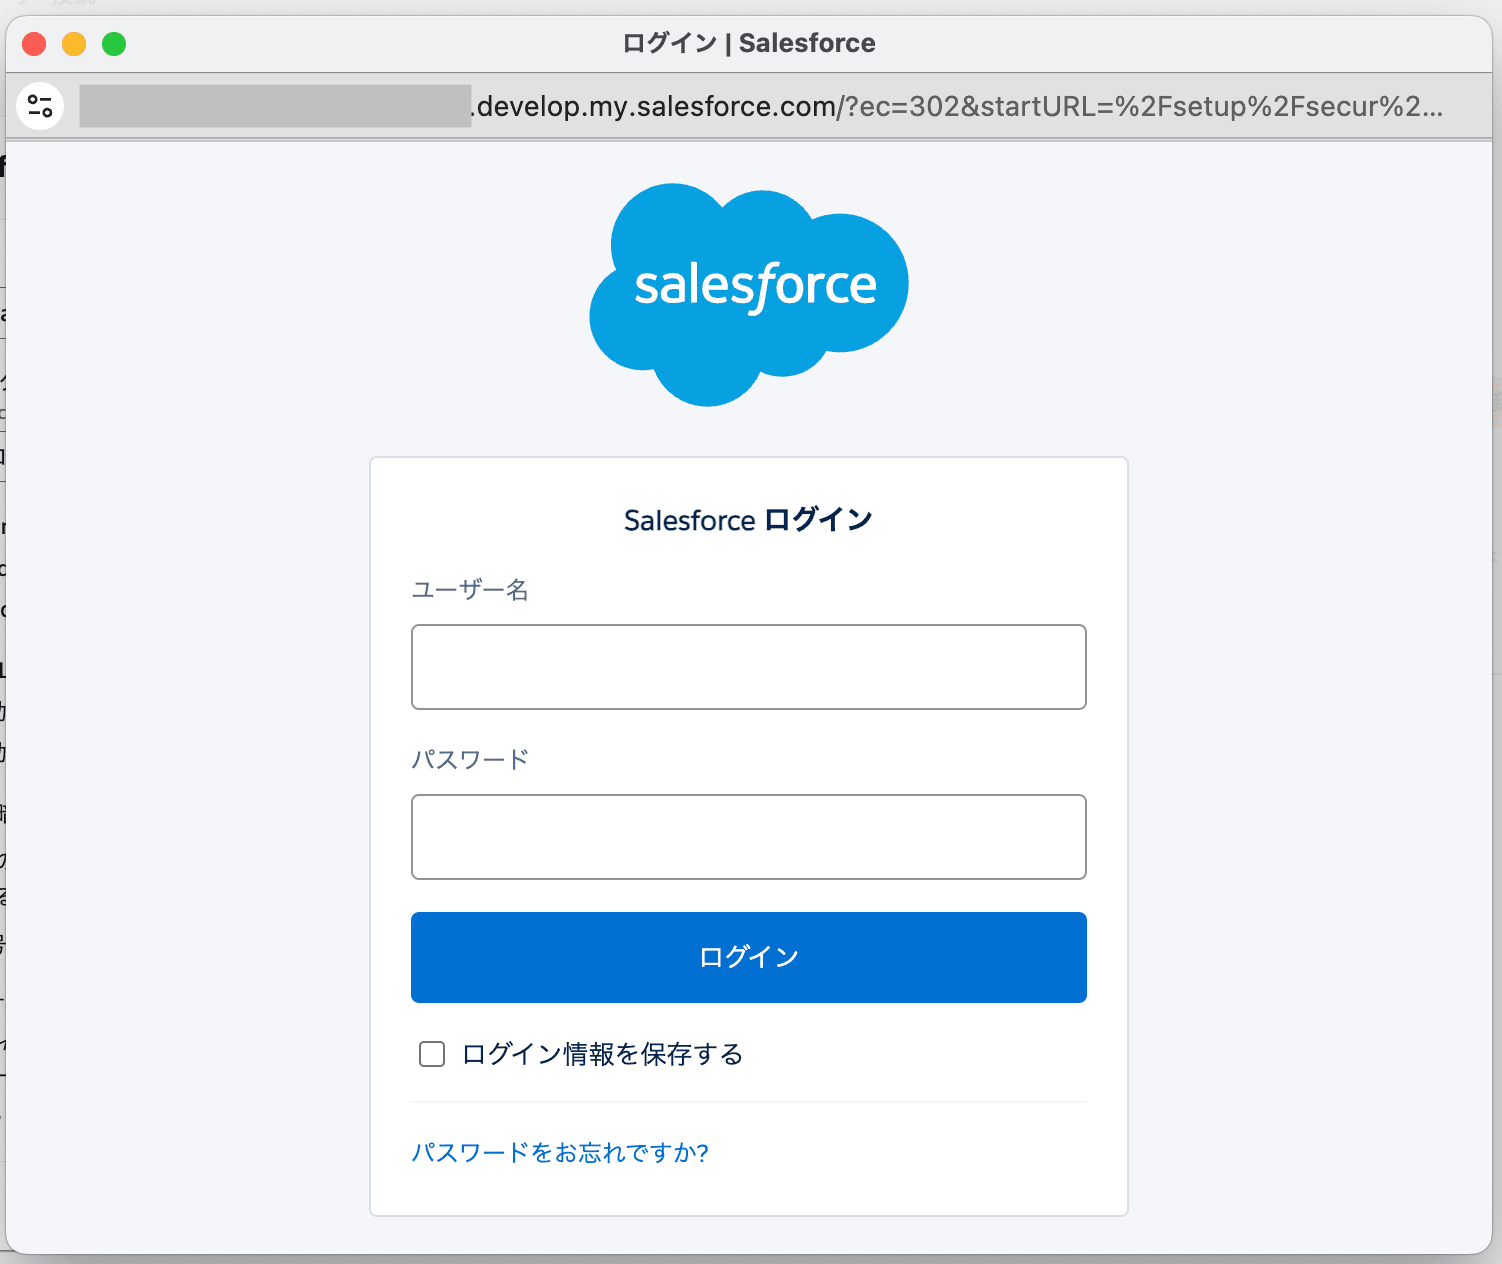
Once authentication is complete, the Salesforce connection creation is done.
ii. Creating a Snowflake Connection
Next, I created a connection to Snowflake.
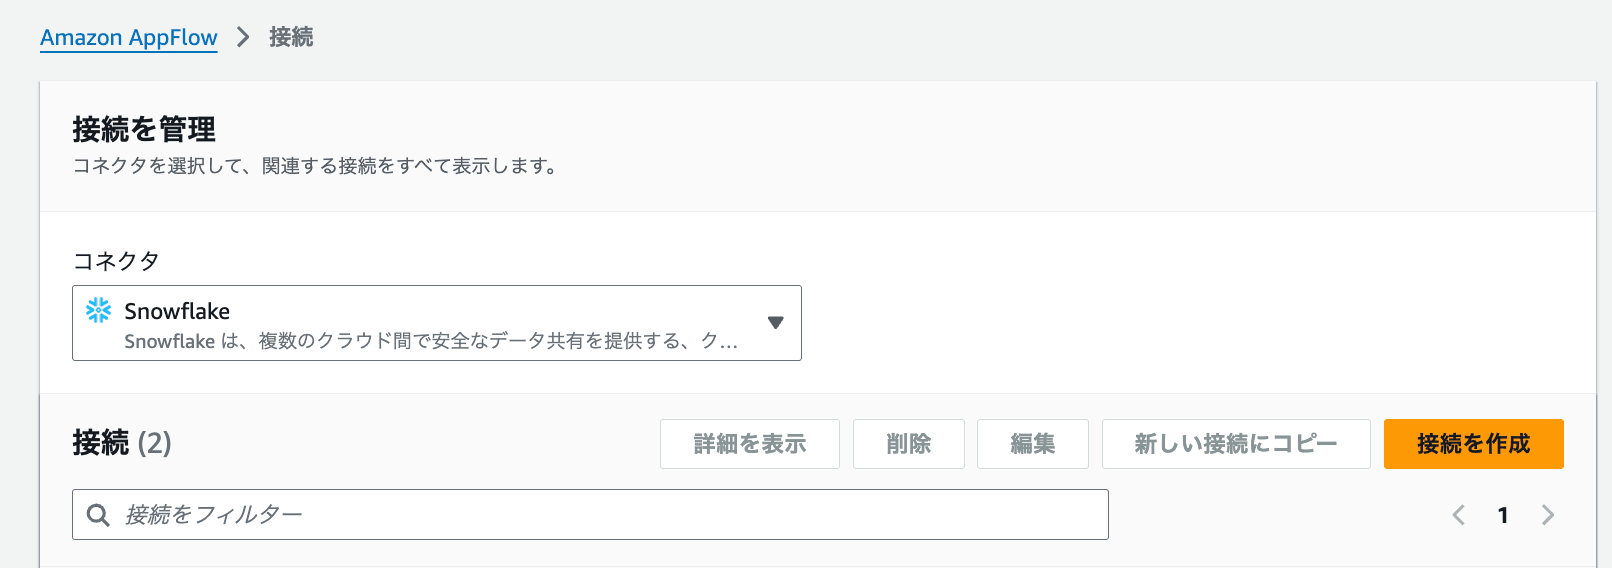
As with Salesforce, from Connections > Manage connections, I selected the Snowflake connector and clicked Create connection.
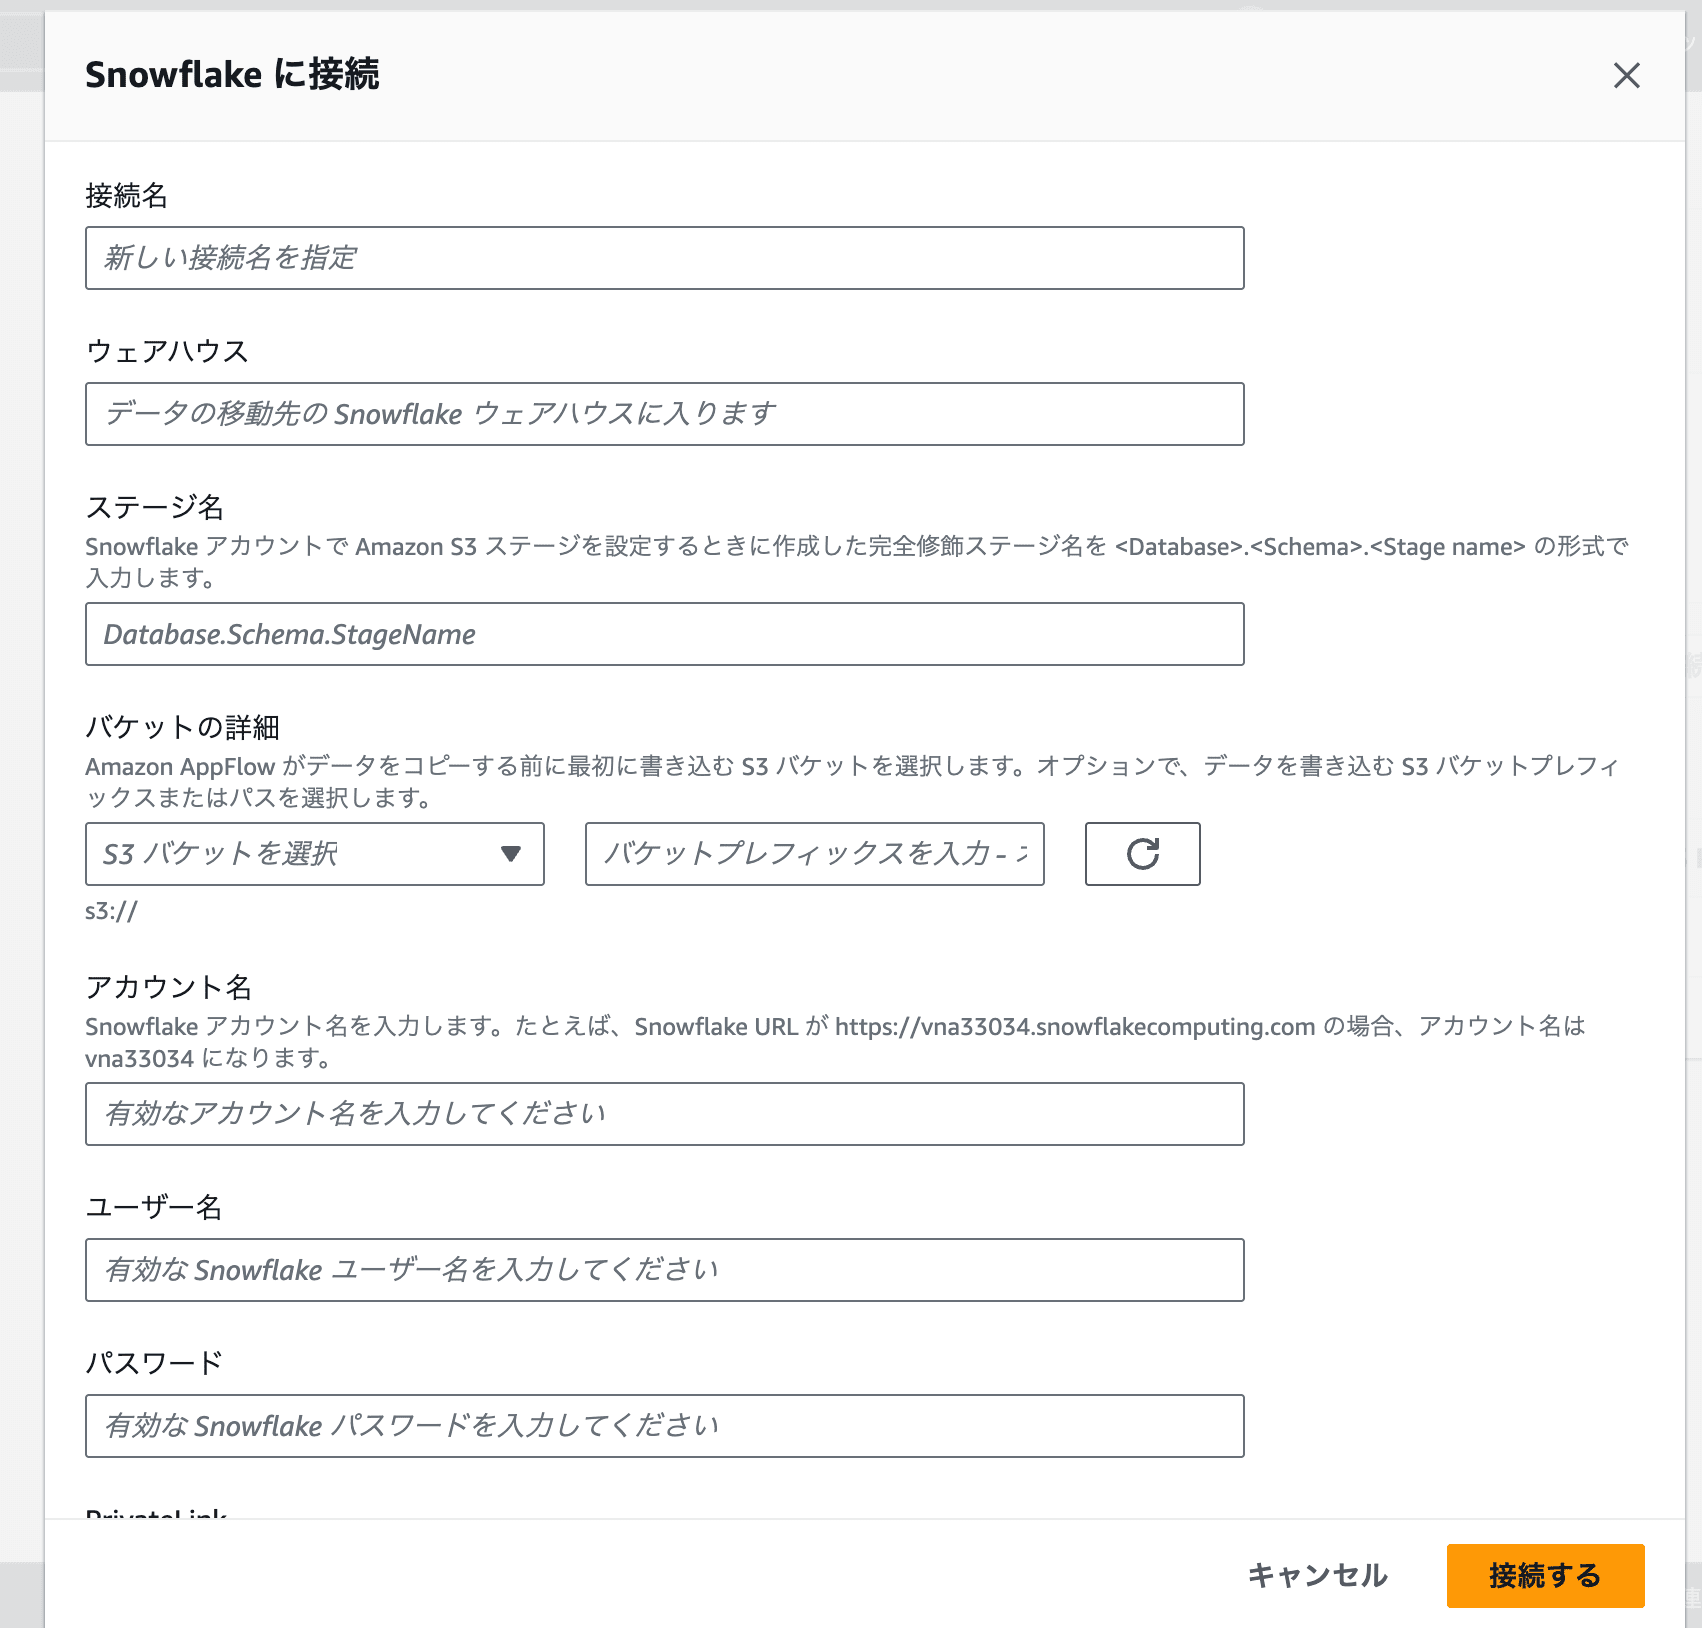
I entered the settings for the Snowflake environment to connect to.
In particular, the following were key points.
- Warehouse: Enter the name of a warehouse the user has permission to use
- Stage name: The fully qualified stage name of the S3 external stage
- Bucket details: The S3 path configured for the above S3 external stage
- Account name: The account locator (the value obtained with
SELECT CURRENT_ACCOUNT()) - Username: The Snowflake user to be used by AppFlow
- Password: The password for the above user
One issue I ran into was that when the user did not have permission on the warehouse, the destination table for data COPY did not appear during flow configuration. If the table doesn't appear even though the user should have permissions, check whether the user also has permission on the warehouse.
Also note that the stage name and bucket details both point to the same S3 external stage. As I'll describe later, when the flow runs, it places the integrated data under the prefix of the path set in bucket details + flow name. Therefore, if the path set in bucket details does not correspond to the location specified in the S3 external stage, the COPY command executed on the Snowflake side will point to a different location, potentially resulting in empty results or incorrect data being loaded.
Also, if the flow name is already included in the path set in bucket details, the object path appears to be determined by the path set in bucket details alone. The bucket details also appeared not to change the output destination at flow execution time even if edited after initial setup, so if you encounter the same issue, recreating the connection and setting it in the flow should reflect the changes.
The account name needed to be set to the account locator obtainable with SELECT CURRENT_ACCOUNT().
Once you enter the required parameters and click Connect, if it is created without errors, the task is complete.
iii. Creating a Flow
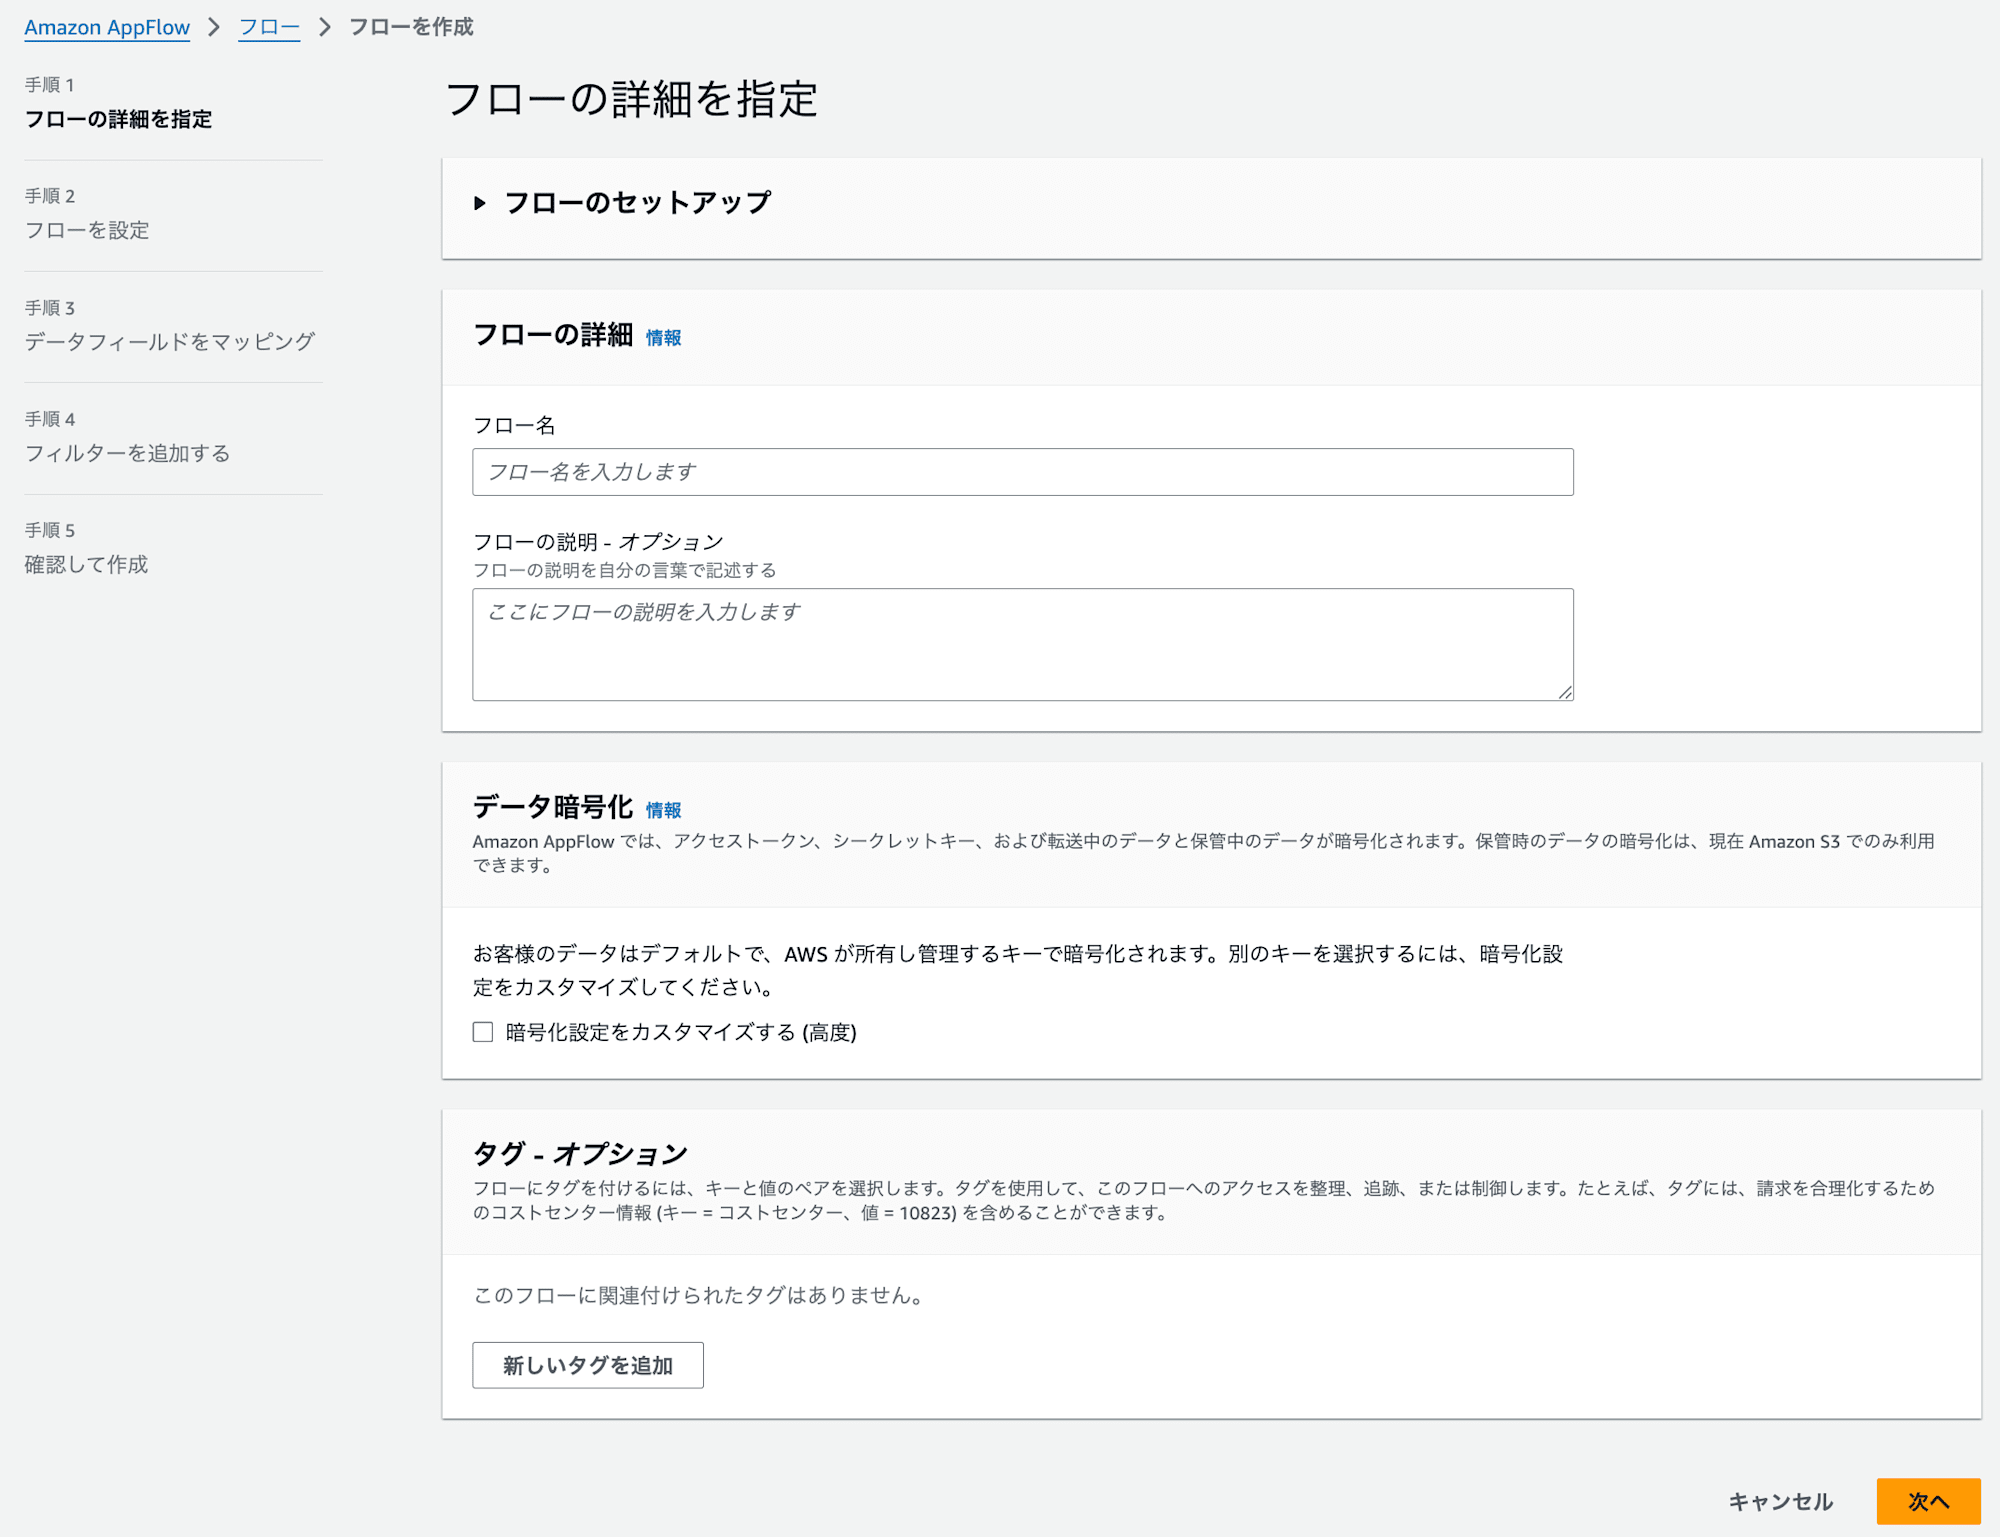
From Flows > Create flow, I created a new flow.
I entered a flow name and description, leaving everything else as default.
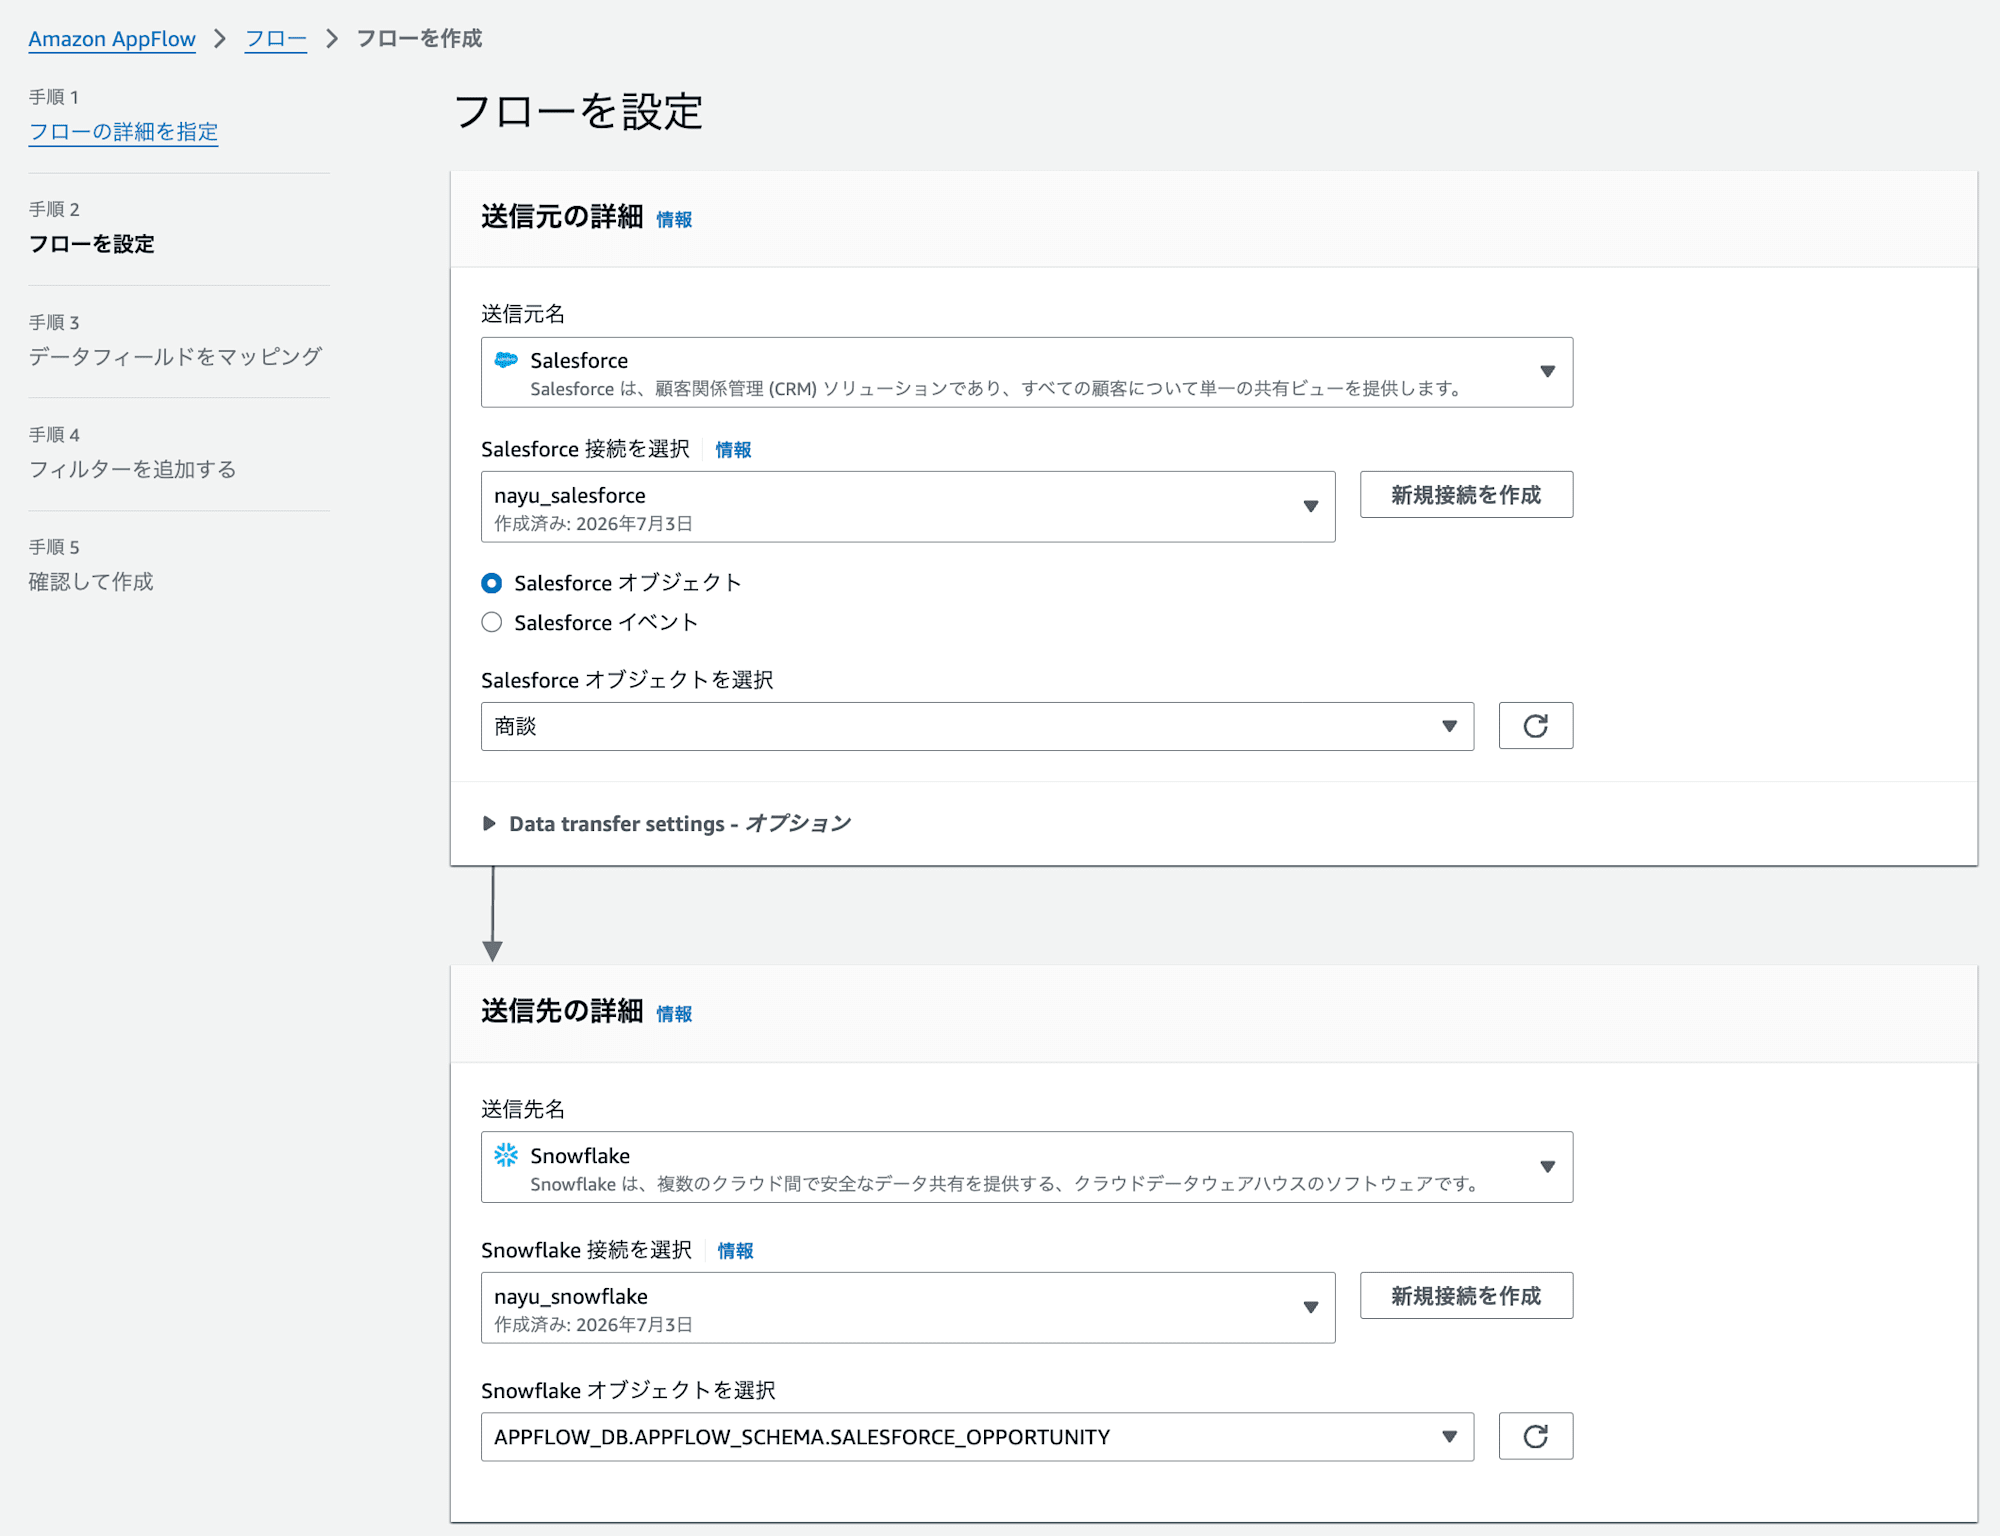
In the flow configuration, I specified the connections I had created.
For the source, I selected Opportunity as the Salesforce object, and for the destination, I selected the Opportunity table I created as the Snowflake object. From this configuration, it's clear that one flow needs to be created per integration object.
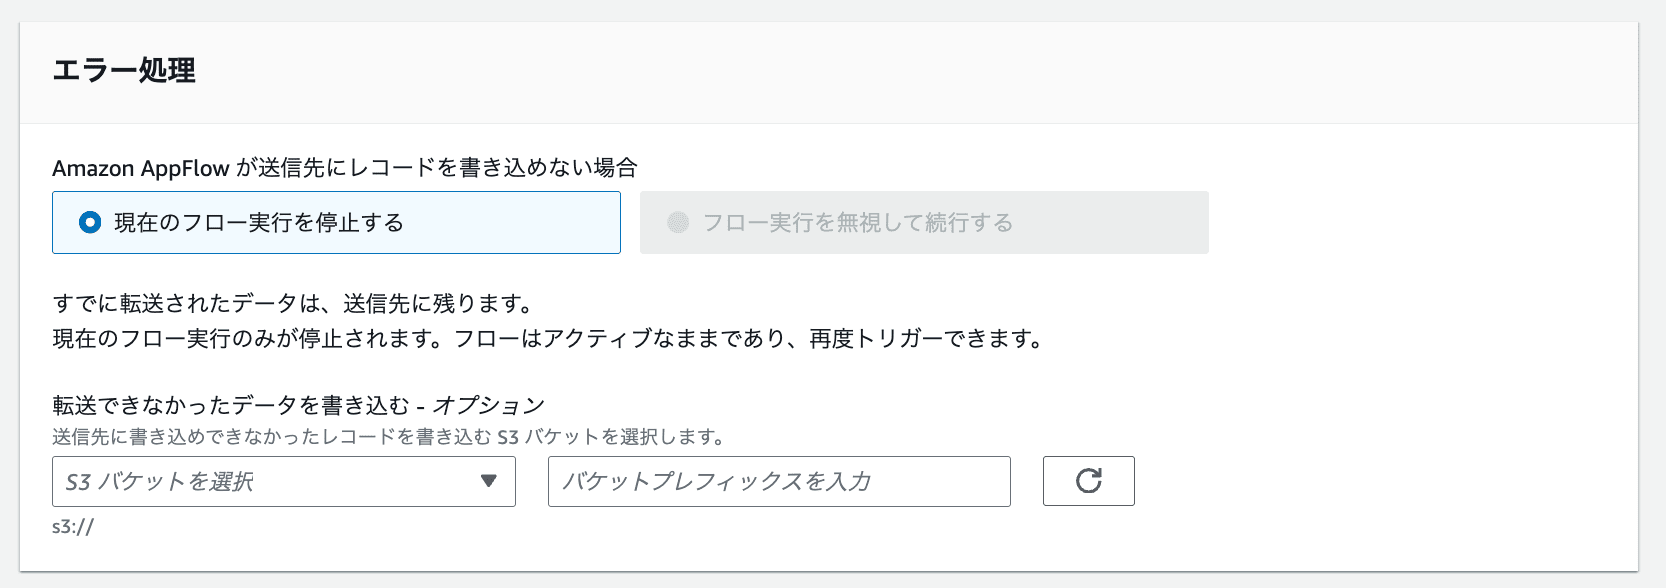
Error handling can also be configured.
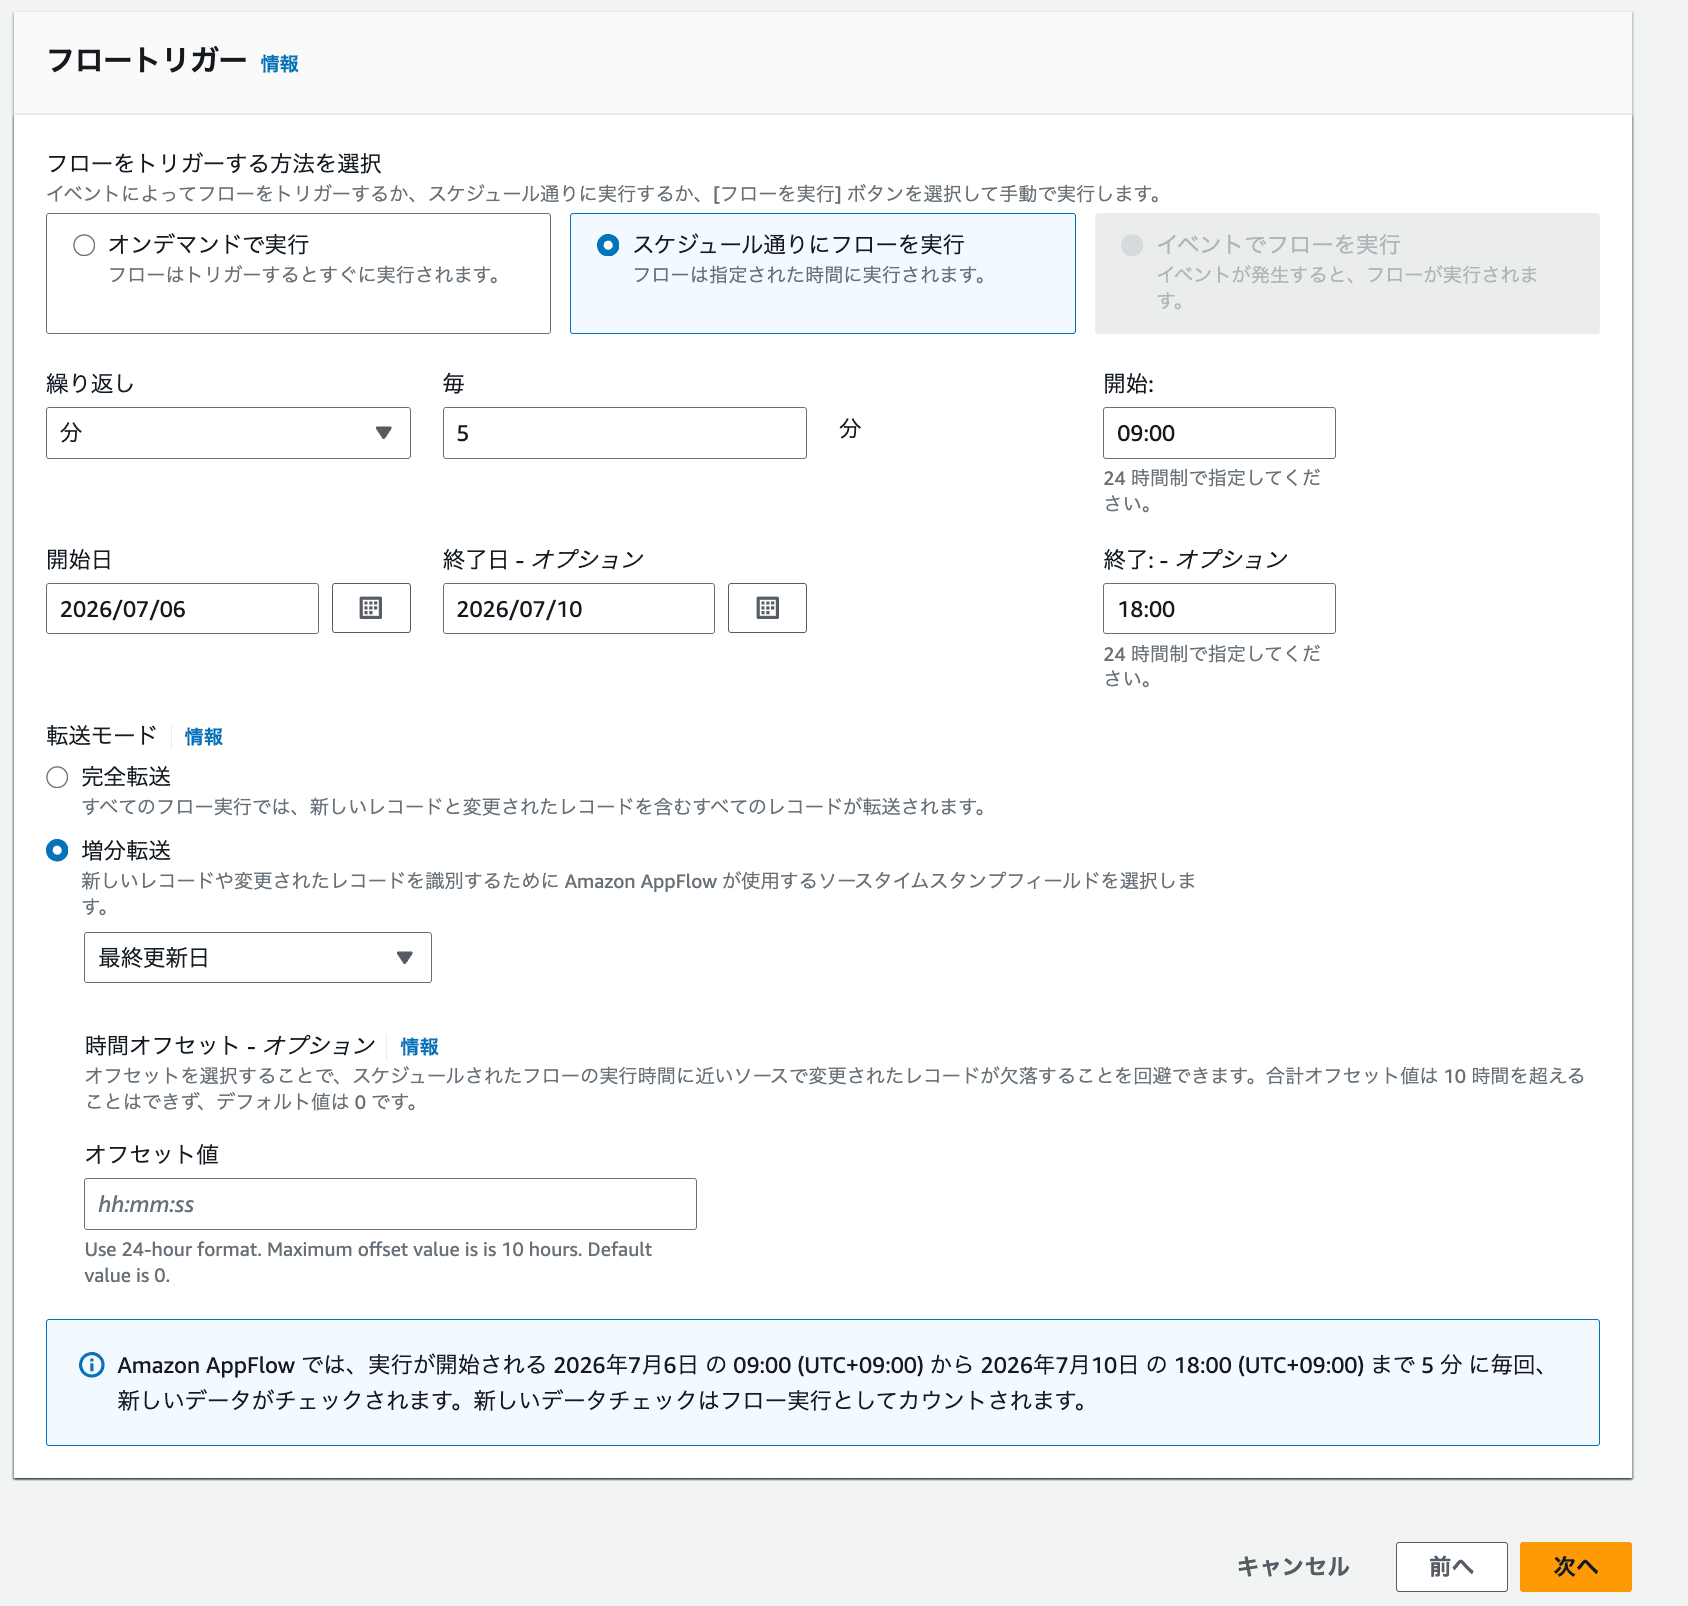
I also configured the flow trigger.
Since I wanted to verify incremental transfer, I configured scheduled execution.
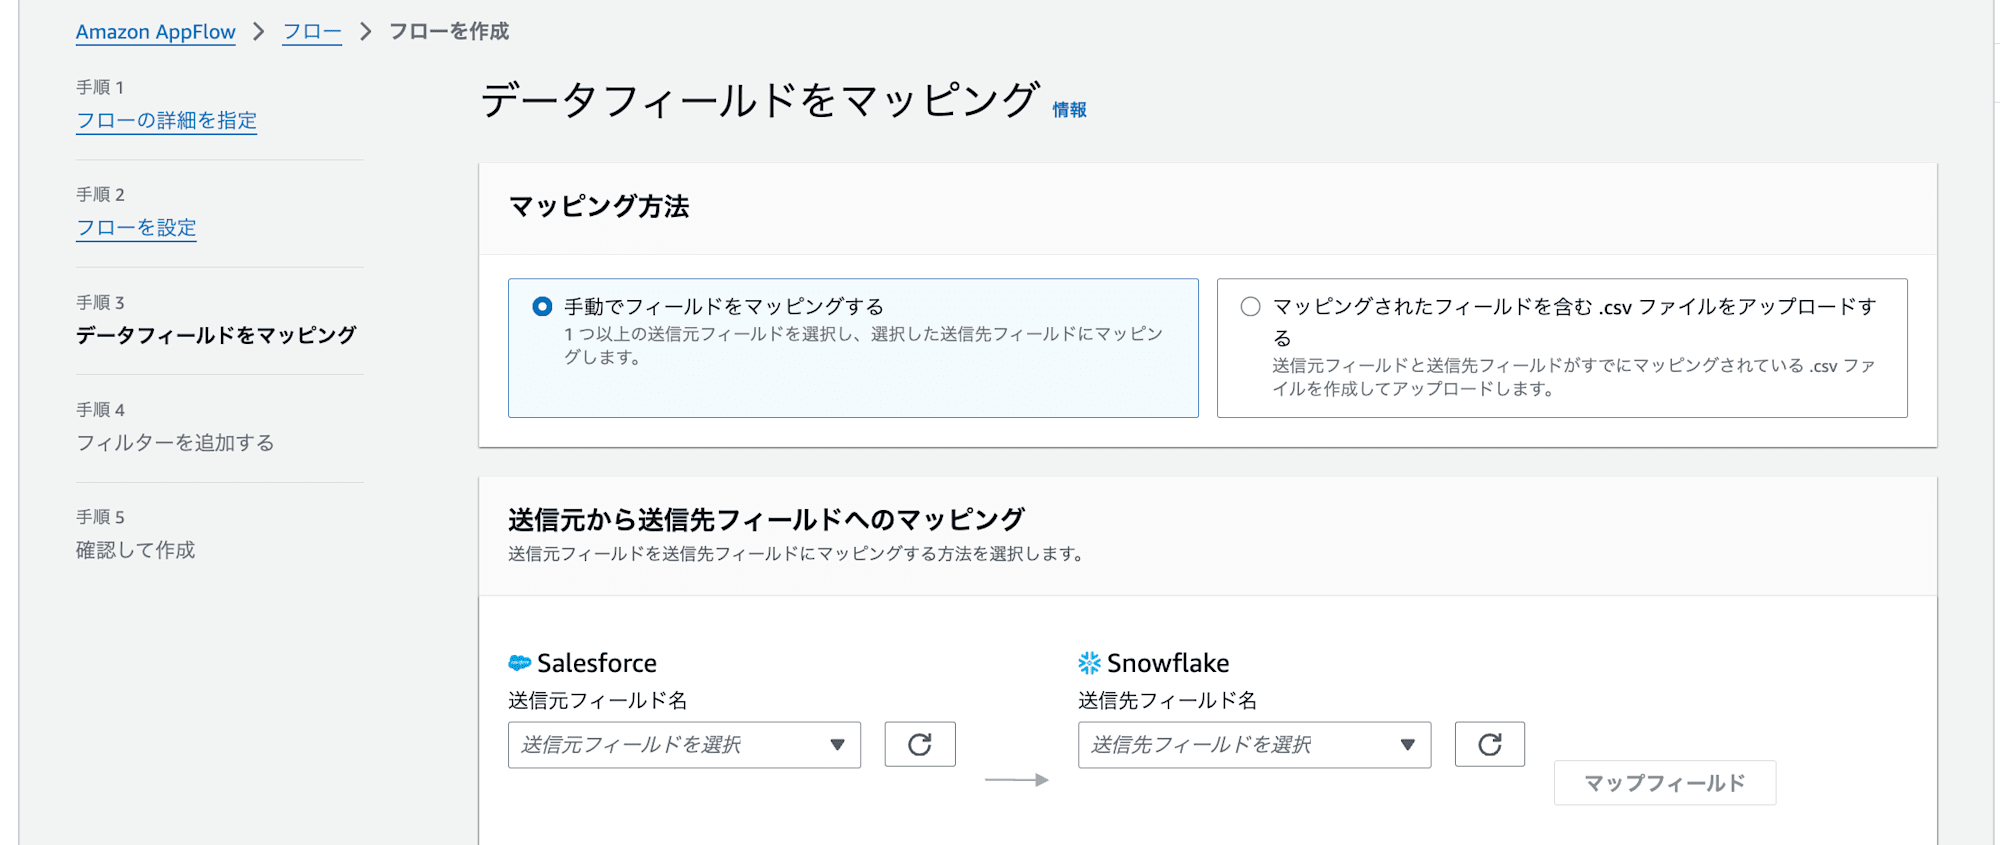
Next, I mapped the data fields in the source/destination settings.
This time, I mapped them manually.
I selected the corresponding pairs under Map source to destination fields and clicked Map field to add the mappings.
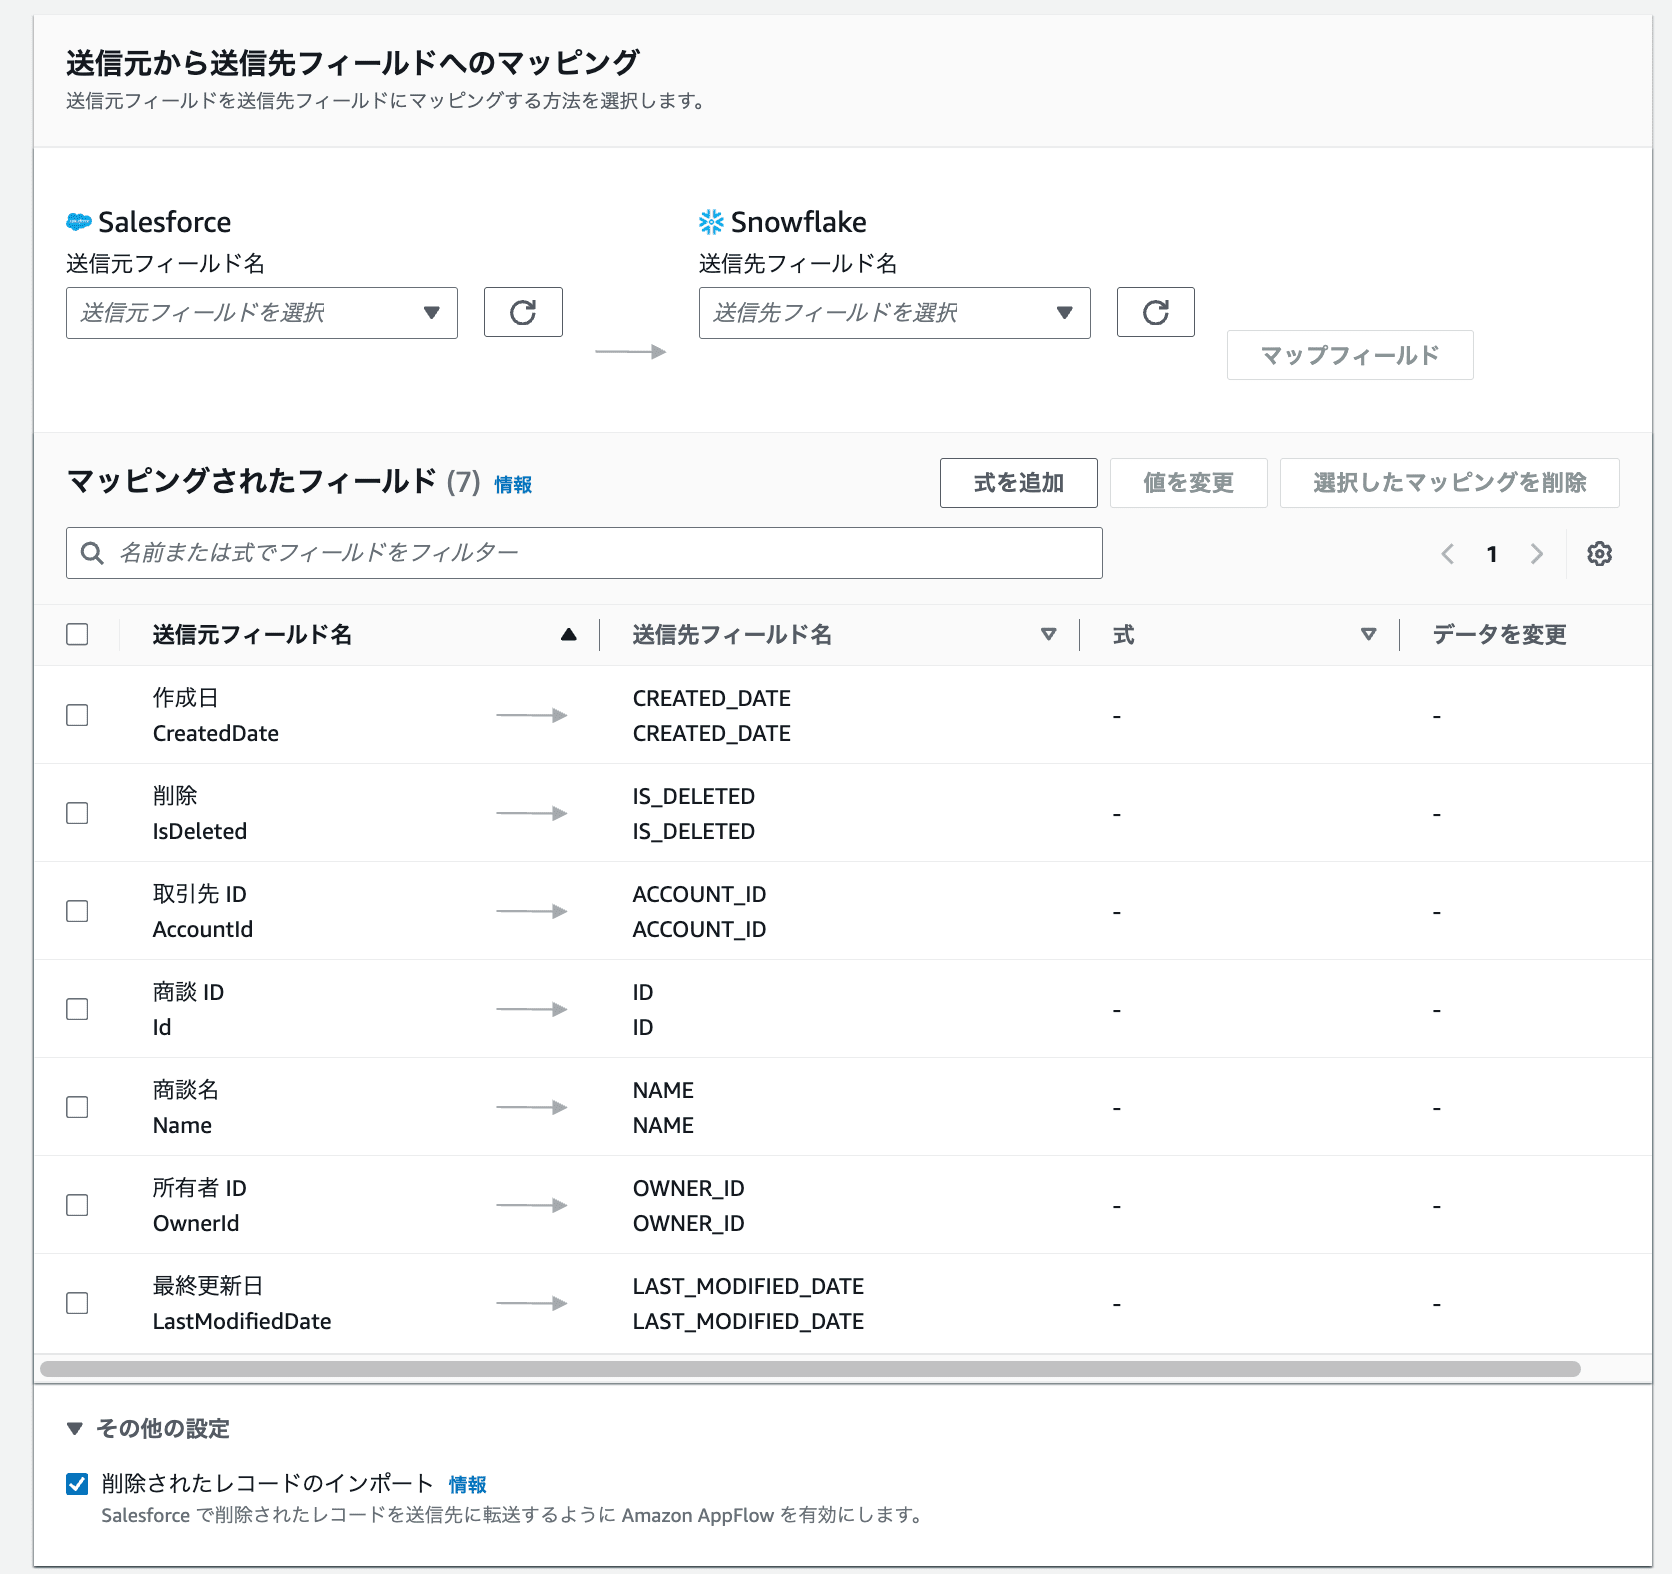
An important point here is Import deleted records under Additional settings. For incremental transfers, if a record is deleted from the data source, you generally want to send that information to the destination as well, so check this option in that case. If the source data is small and the flow replaces all data on every run, this is not needed.
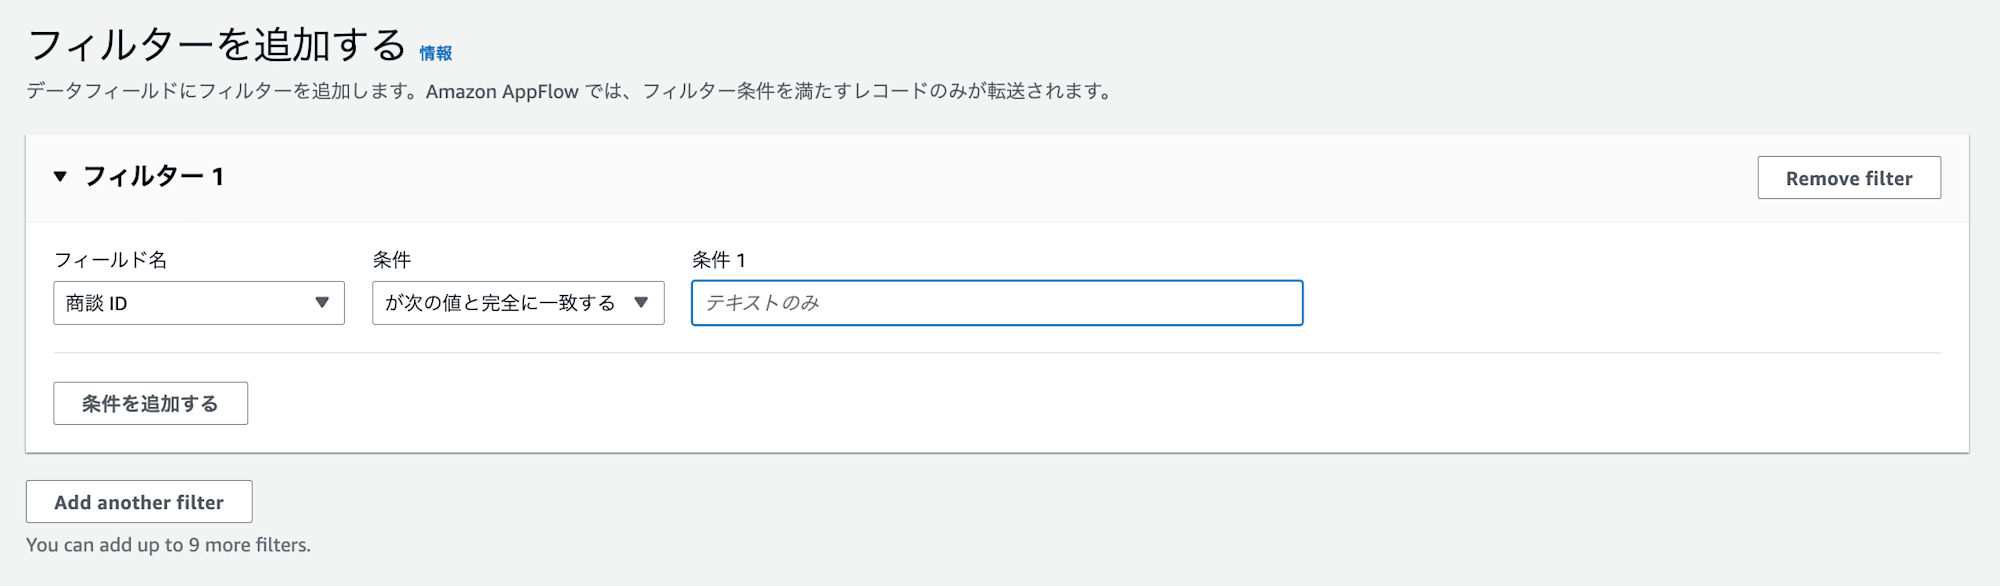
It was also possible to configure filters in the integration flow. I proceeded without any filters this time.
Finally, I reviewed the settings and completed the creation.
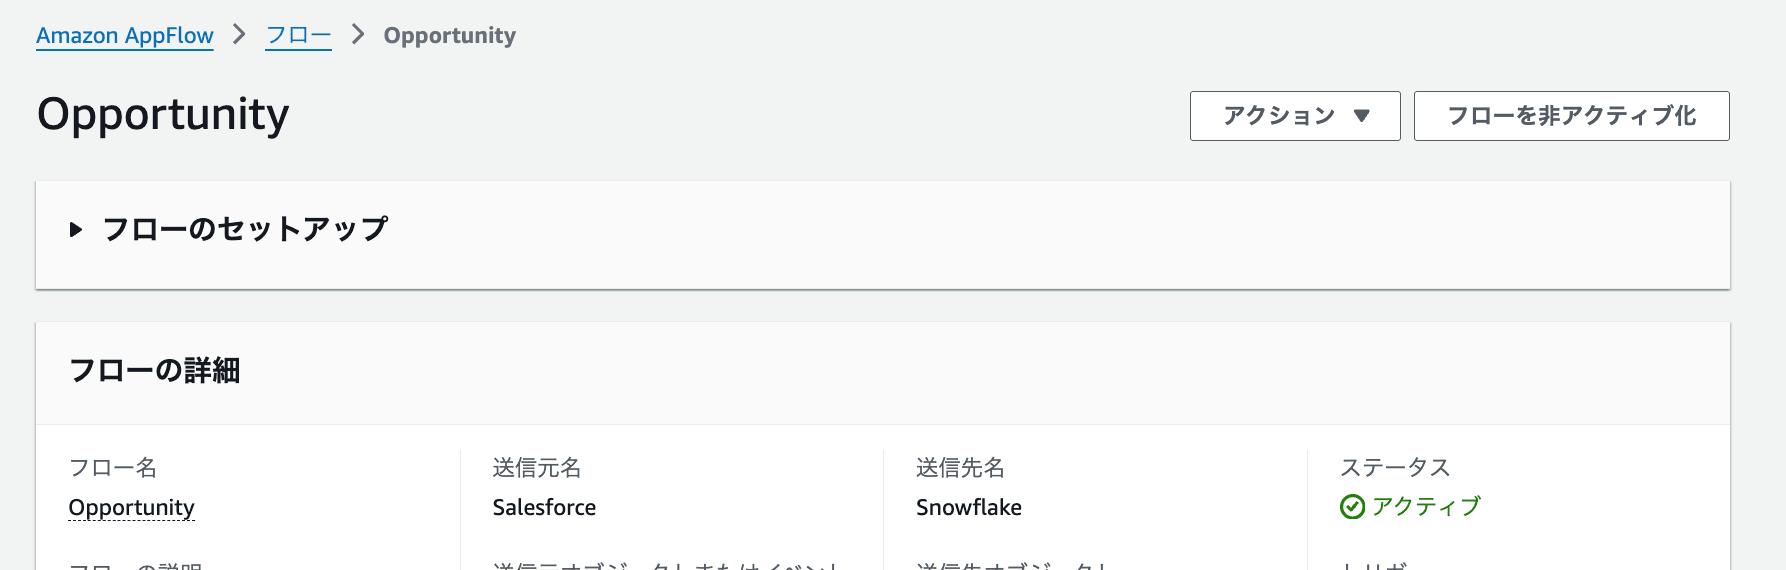
The flow starts in draft status, so I clicked Activate flow to begin scheduled execution.
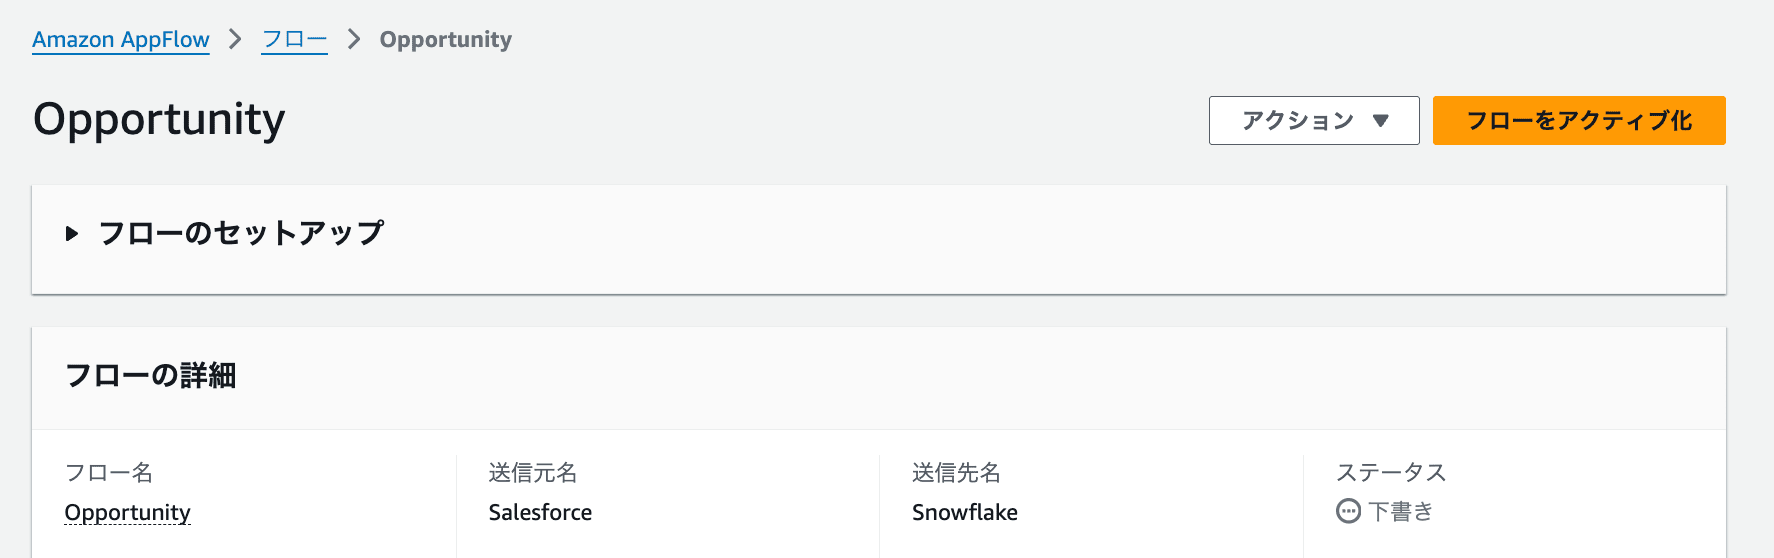
When it looks like the following, scheduled execution has started.
3. Verifying the Incremental Transfer Results of the AppFlow Flow
i. Checking the Results
With the explanation so far, the flow is running with incremental transfer, so all that's left is to wait for the transfer.
Checking the flow execution history gave me an overview of what transfers were performed and when.
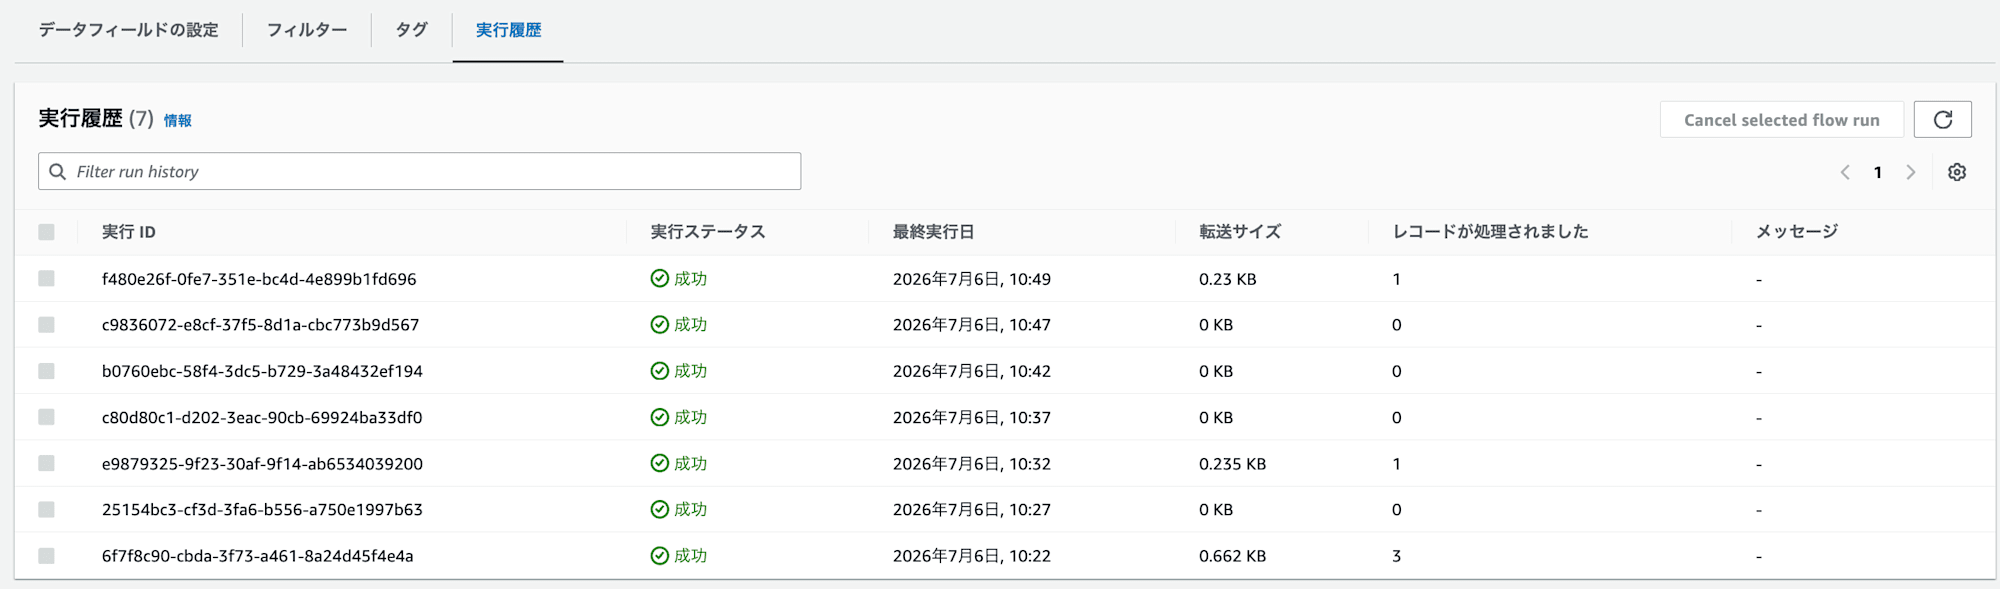
Checking the destination table in Snowflake confirmed that the Salesforce data had been successfully integrated.
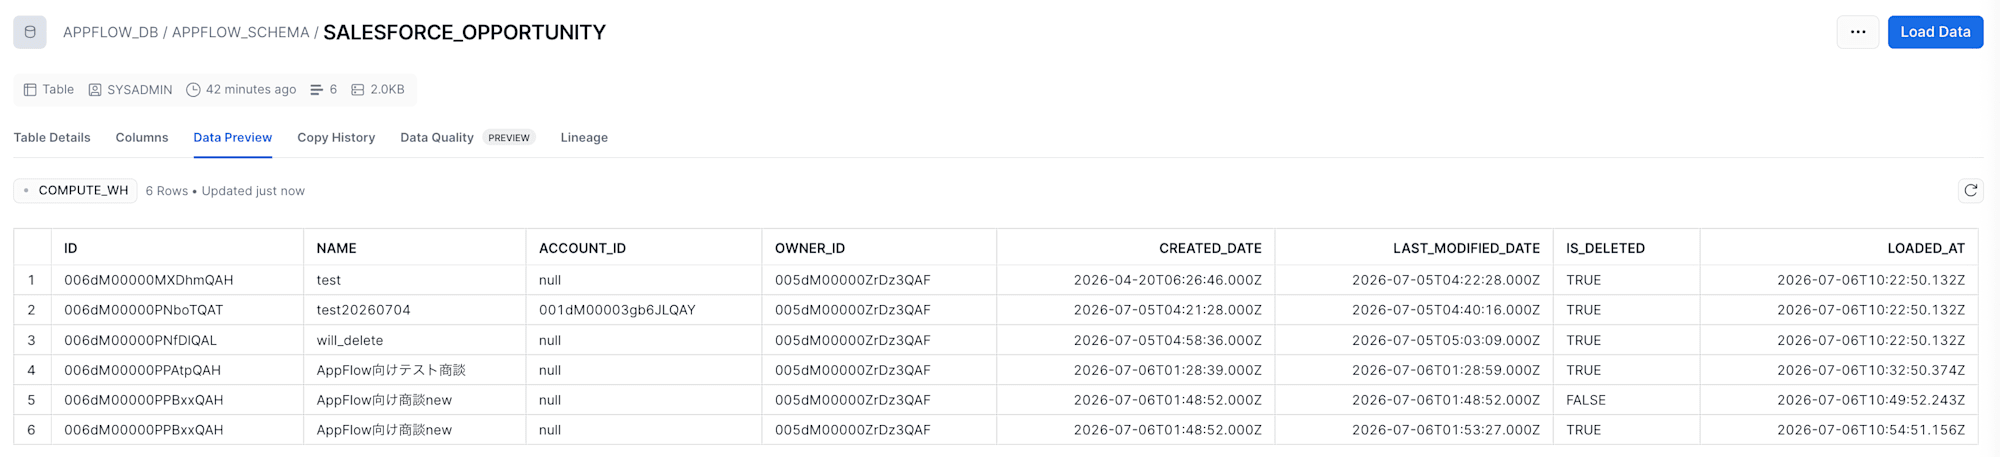
There are some records I created and deleted for verification purposes, but for incremental execution, the initial run integrates data from within the last 30 days.
When the IS_DELETED column is TRUE, the record has been deleted.
The state of the records at the time of each flow execution run was integrated.
AppFlow test opportunity was deleted immediately after creation, so only the post-deletion state was integrated.
AppFlow opportunity new had one integration run between its creation and deletion, so there are records with both TRUE and FALSE values for the IS_DELETED column.
The other records also have IS_DELETED as TRUE, as these were records created and deleted beforehand.
Objects were created with arbitrary names from the Salesforce Opportunity page.
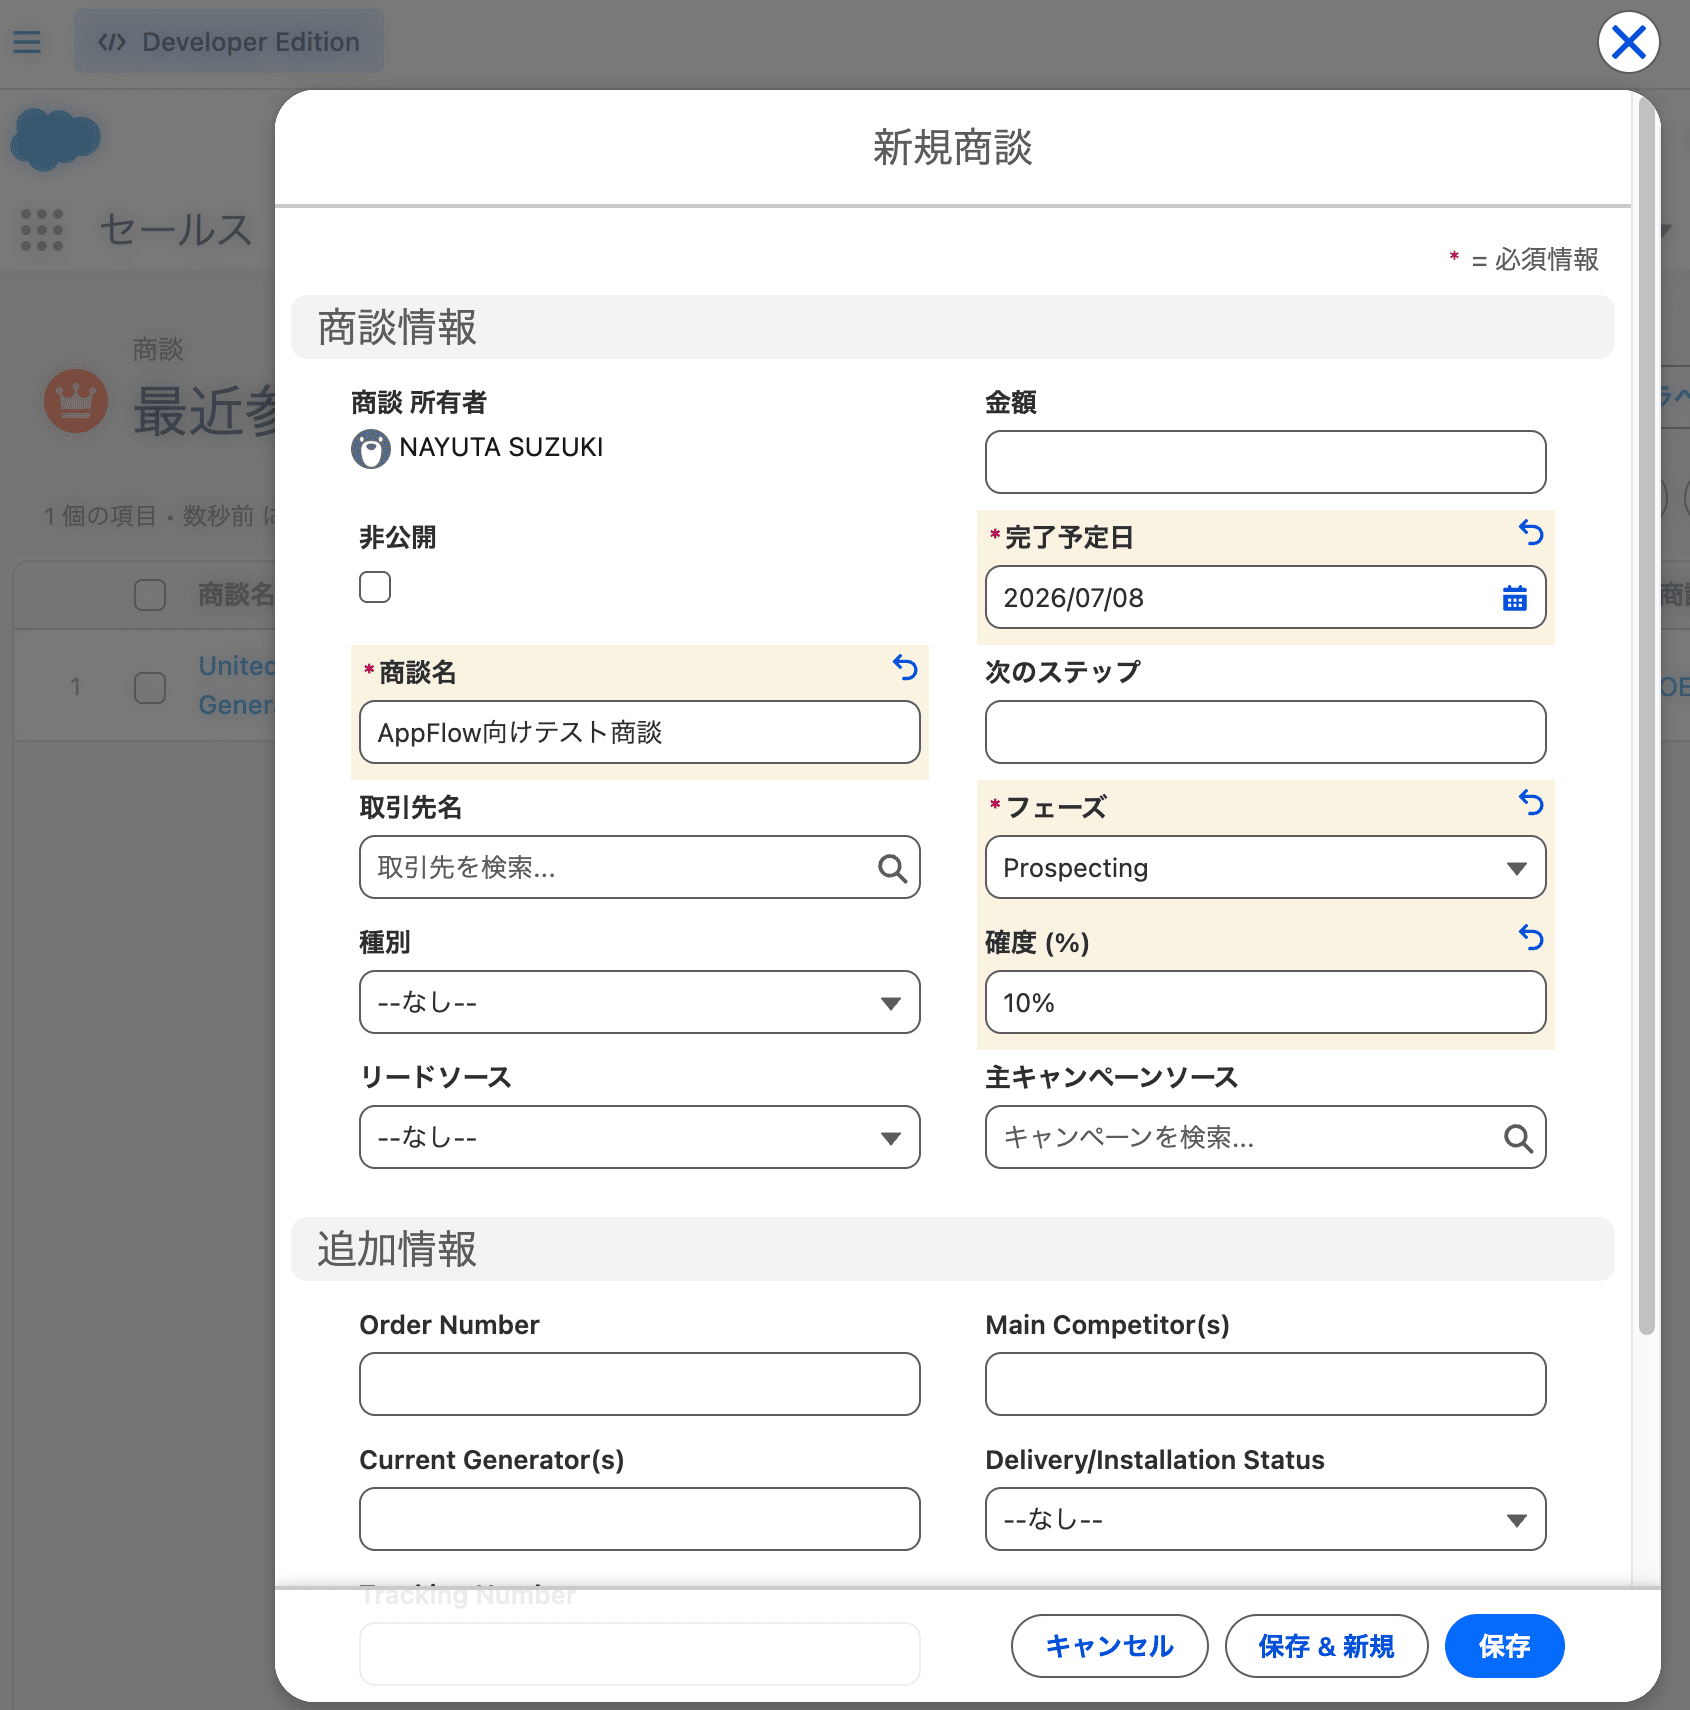
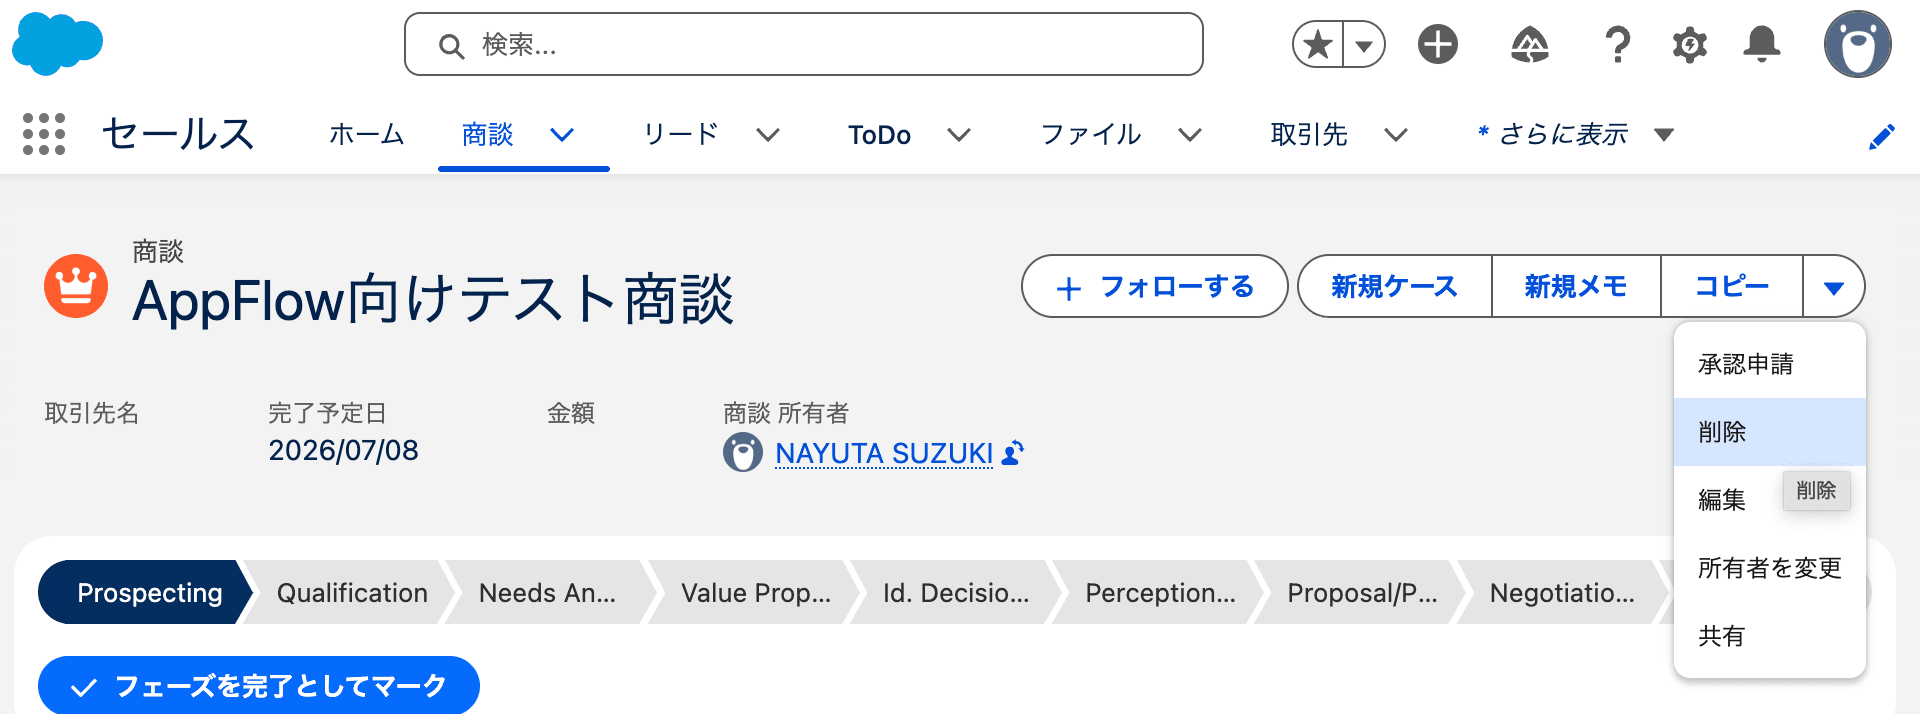
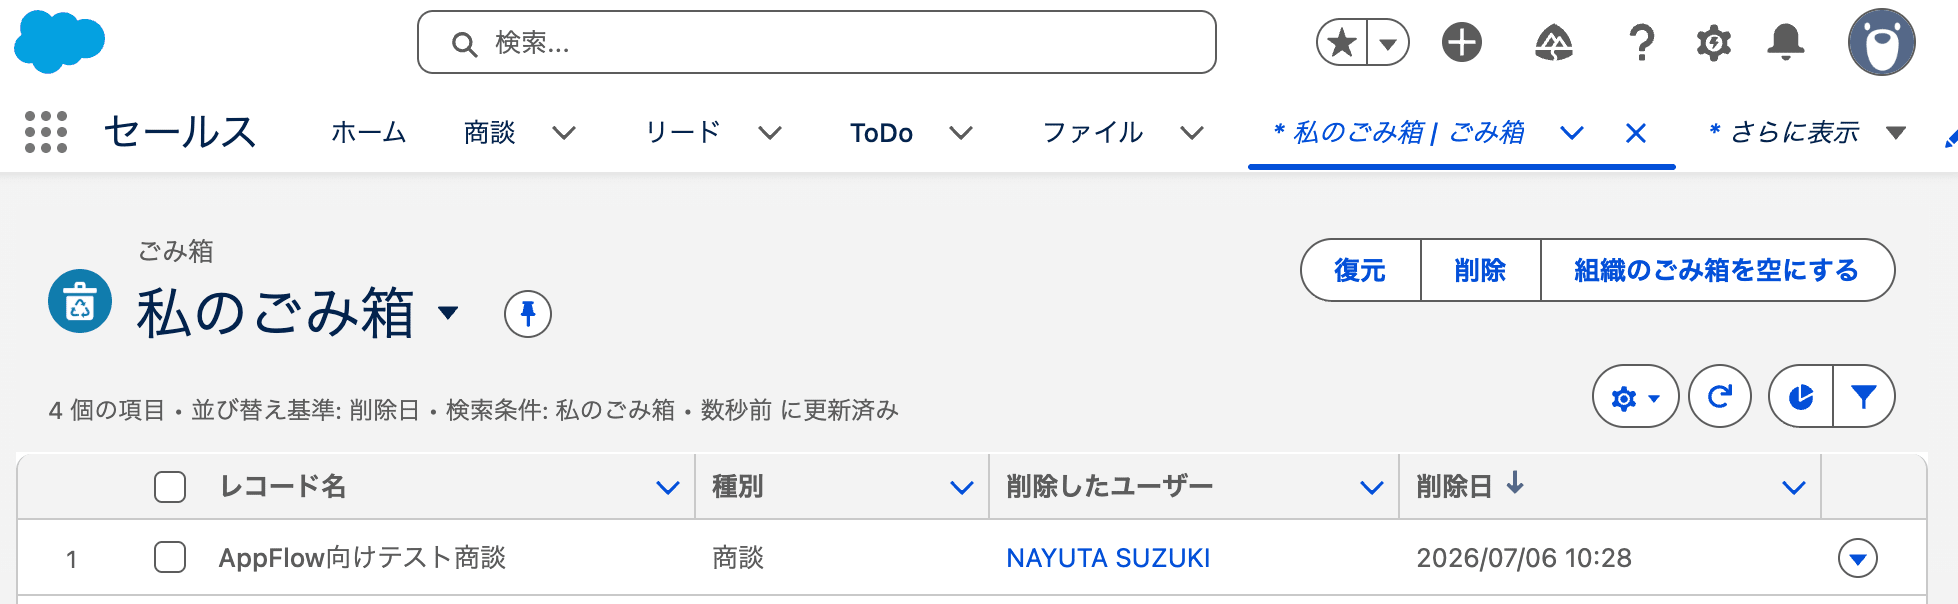
Clicking delete on an individual opportunity page moves it to the recycle bin and performs a soft delete. This is the state where the IS_DELETED column is TRUE.
ii. Checking How Objects Are Integrated into Snowflake
Let's also check the objects on S3.
As shown below, the integrated data was placed under the prefix of the path set in bucket details + flow name.
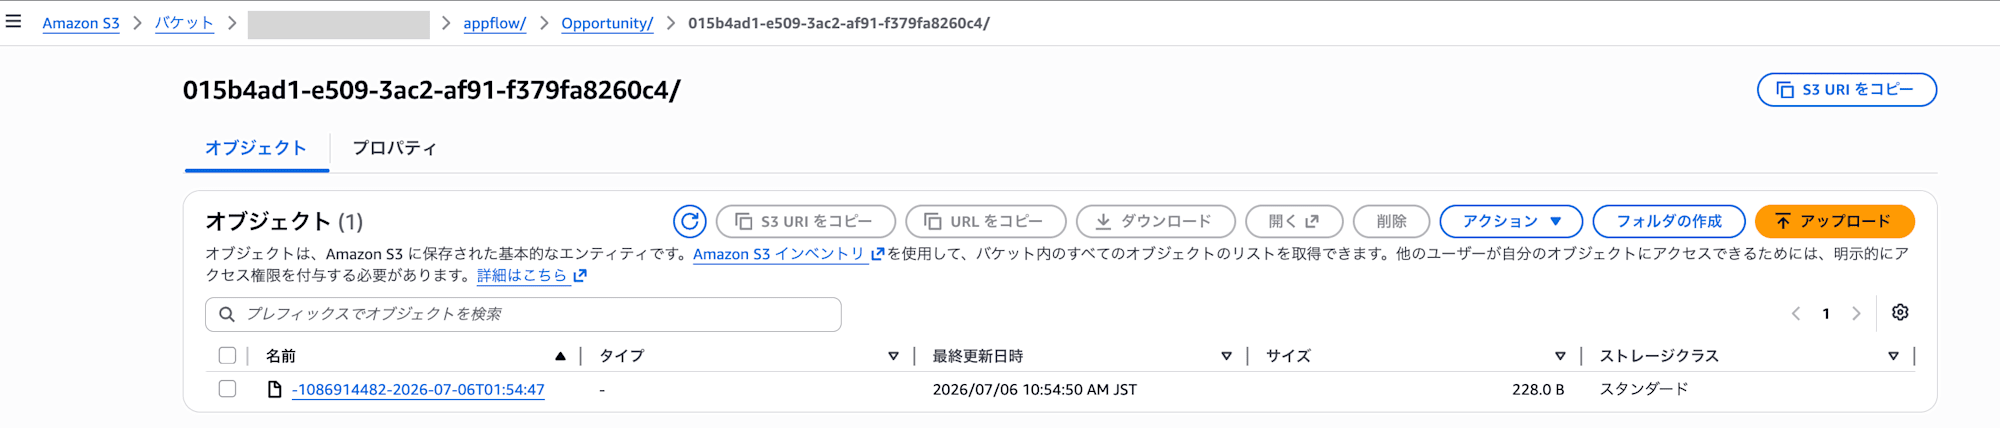
Checking the query history for the user configured in the flow shows that data was loaded from the above path using the COPY command.
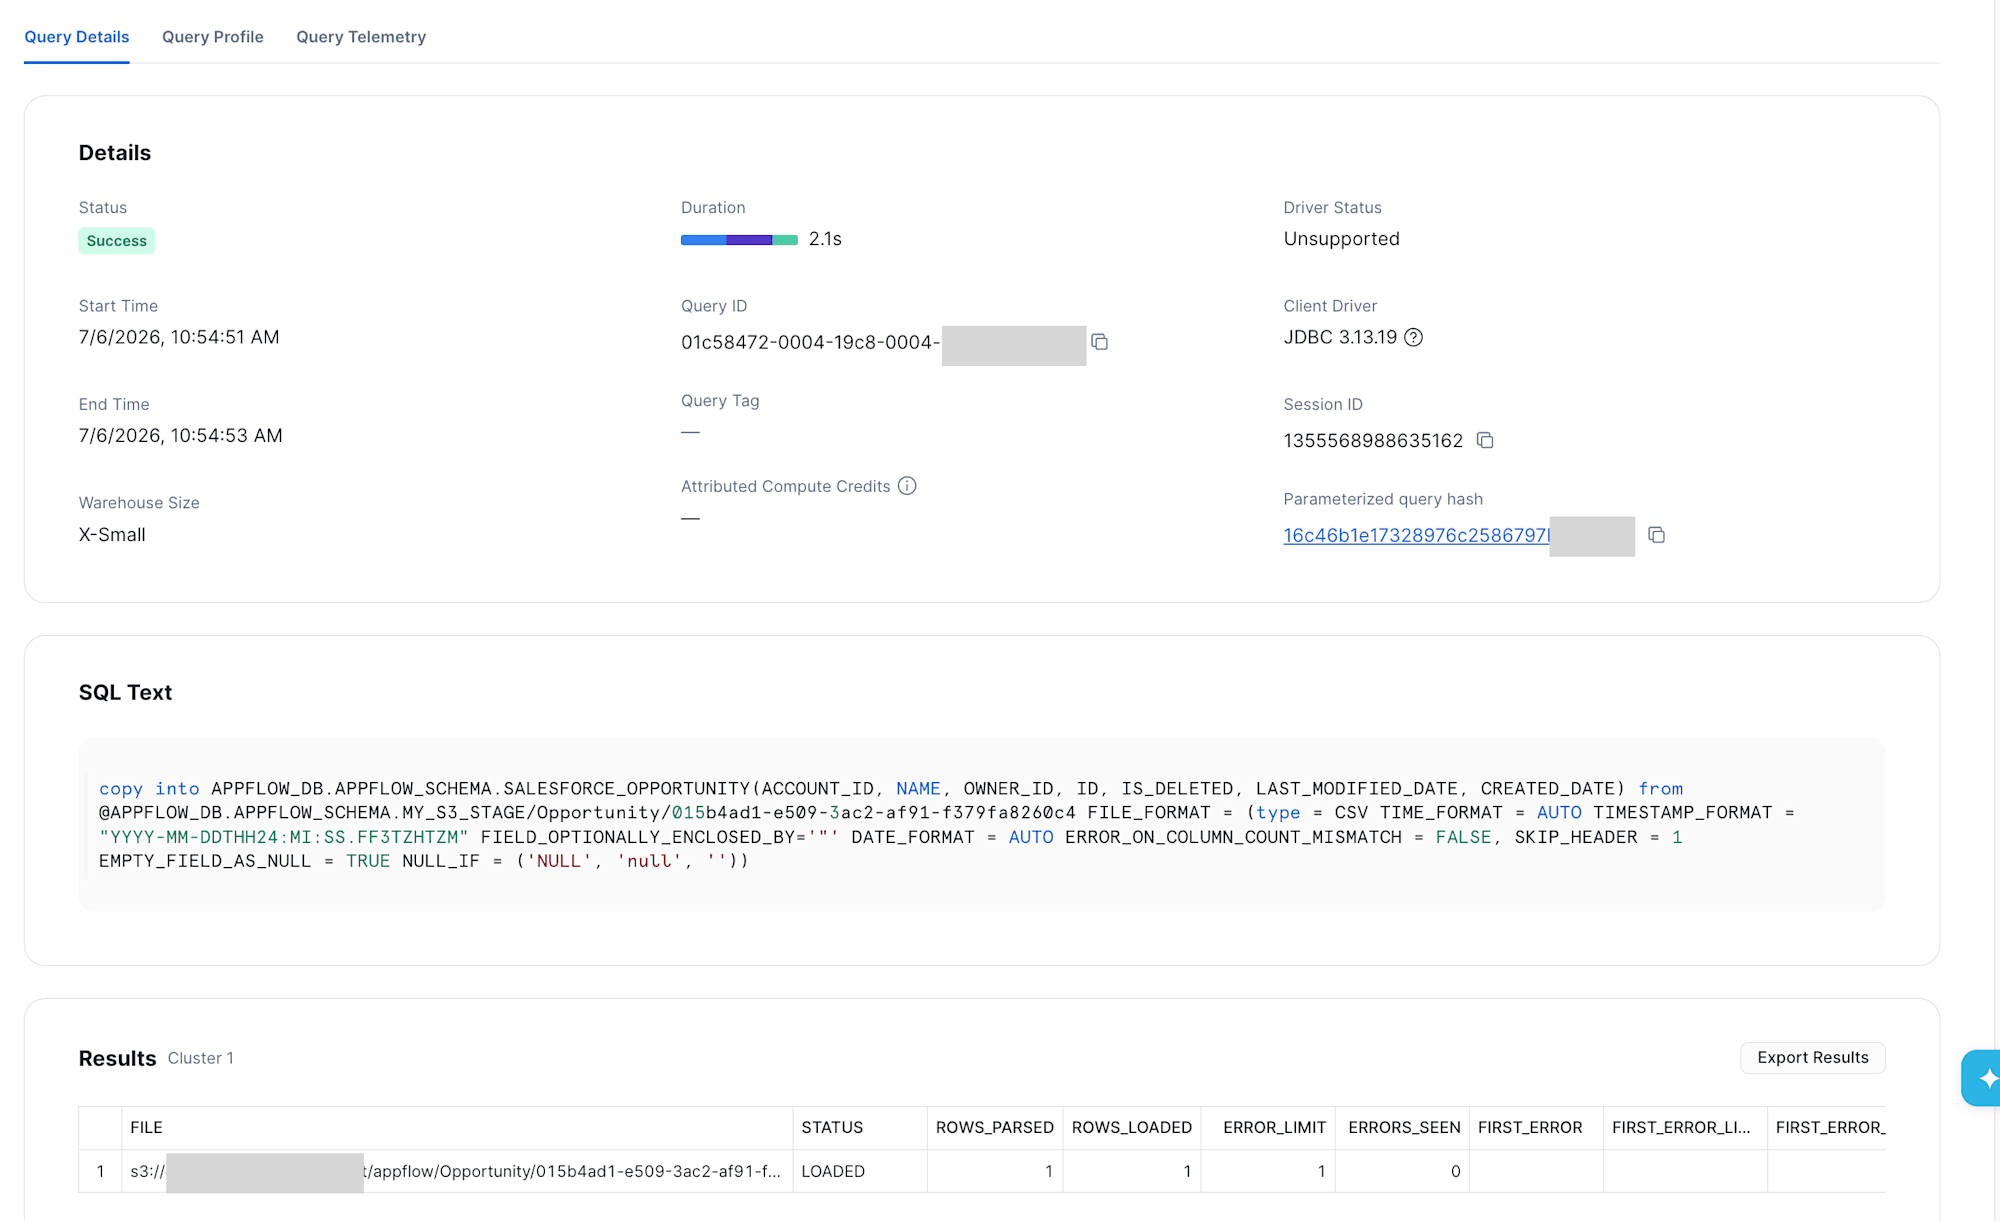
From these findings, it appears that the flow first outputs the data retrieved from Salesforce to S3, then loads it using the COPY command via an external stage. If the configuration for authentication seems correct but data is not loading into the table, it's worth checking whether the retrieved data on the stage and the source referenced by the COPY command match.
Finally
I introduced how I tried incrementally integrating Salesforce data into Snowflake using Amazon AppFlow.
While this is a feature that has existed for some time, there was surprisingly little information on how to configure it, and some of the detailed behavior could only be understood by trying it out, so I decided to summarize it again.
There were some areas where the configuration required a bit of know-how, but the pricing is affordable and it supports communication via PrivateLink when needed, making it quite a solid solution.
I hope this is helpful.