My First Time with Cognito Managed Login

This page has been translated by machine translation. View original
I'm Kazue from the Manufacturing Business Technology Department.
I'm a Cognito beginner. A toddler, really. My understanding is only rough: it's a login feature for web apps, and a handy service for managing logged-in users.
But I have to use it for work, so I'm studying it now.
Cognito has two features, "user pools" and "identity pools," but this article covers user pools, which handle the login feature.
A world without Cognito
You can build login processing without Cognito by storing user IDs and passwords in the web app's database. I used to build it that way. Wouldn't adding a third party like Cognito just make things harder to understand? What's the benefit of adding Cognito?
What's nice about having Cognito
You don't have to keep passwords in your own database
I see. Indeed, if you implement login processing yourself, you need to store passwords in the app's DB. You would probably hash them and add salt, taking into account a possible leak, but it's still worrying. If you leave it to Cognito, this worry goes away.
You don't have to build the features that come with login
Login needs a lot of surrounding features.
- Verifying email / phone number at sign-up
- Resetting a forgotten password
- MFA (TOTP, SMS, email one-time codes)
- Signing in with passkeys or passwordless
- The sign-in screen itself
You can shortcut implementing all of these by using Cognito.
※ Note that MFA with email one-time codes, passkeys, and passwordless sign-in are features of the Essentials plan or higher (the default plan for newly created user pools is Essentials).
Logins with external IDs can be handled together too
This may overlap with the "shortcut implementation using Cognito" mentioned above, but
it supports social login such as Google, as well as login using corporate identity platforms (SAML / OIDC) such as Okta and ADFS. Whichever method is used to log in, Cognito unifies the result into tokens of the same format, JWT, and hands them to the app. The app side doesn't need to care about the differences between login methods. Implementing each of these individually would be quite a chore.
Learning the flow
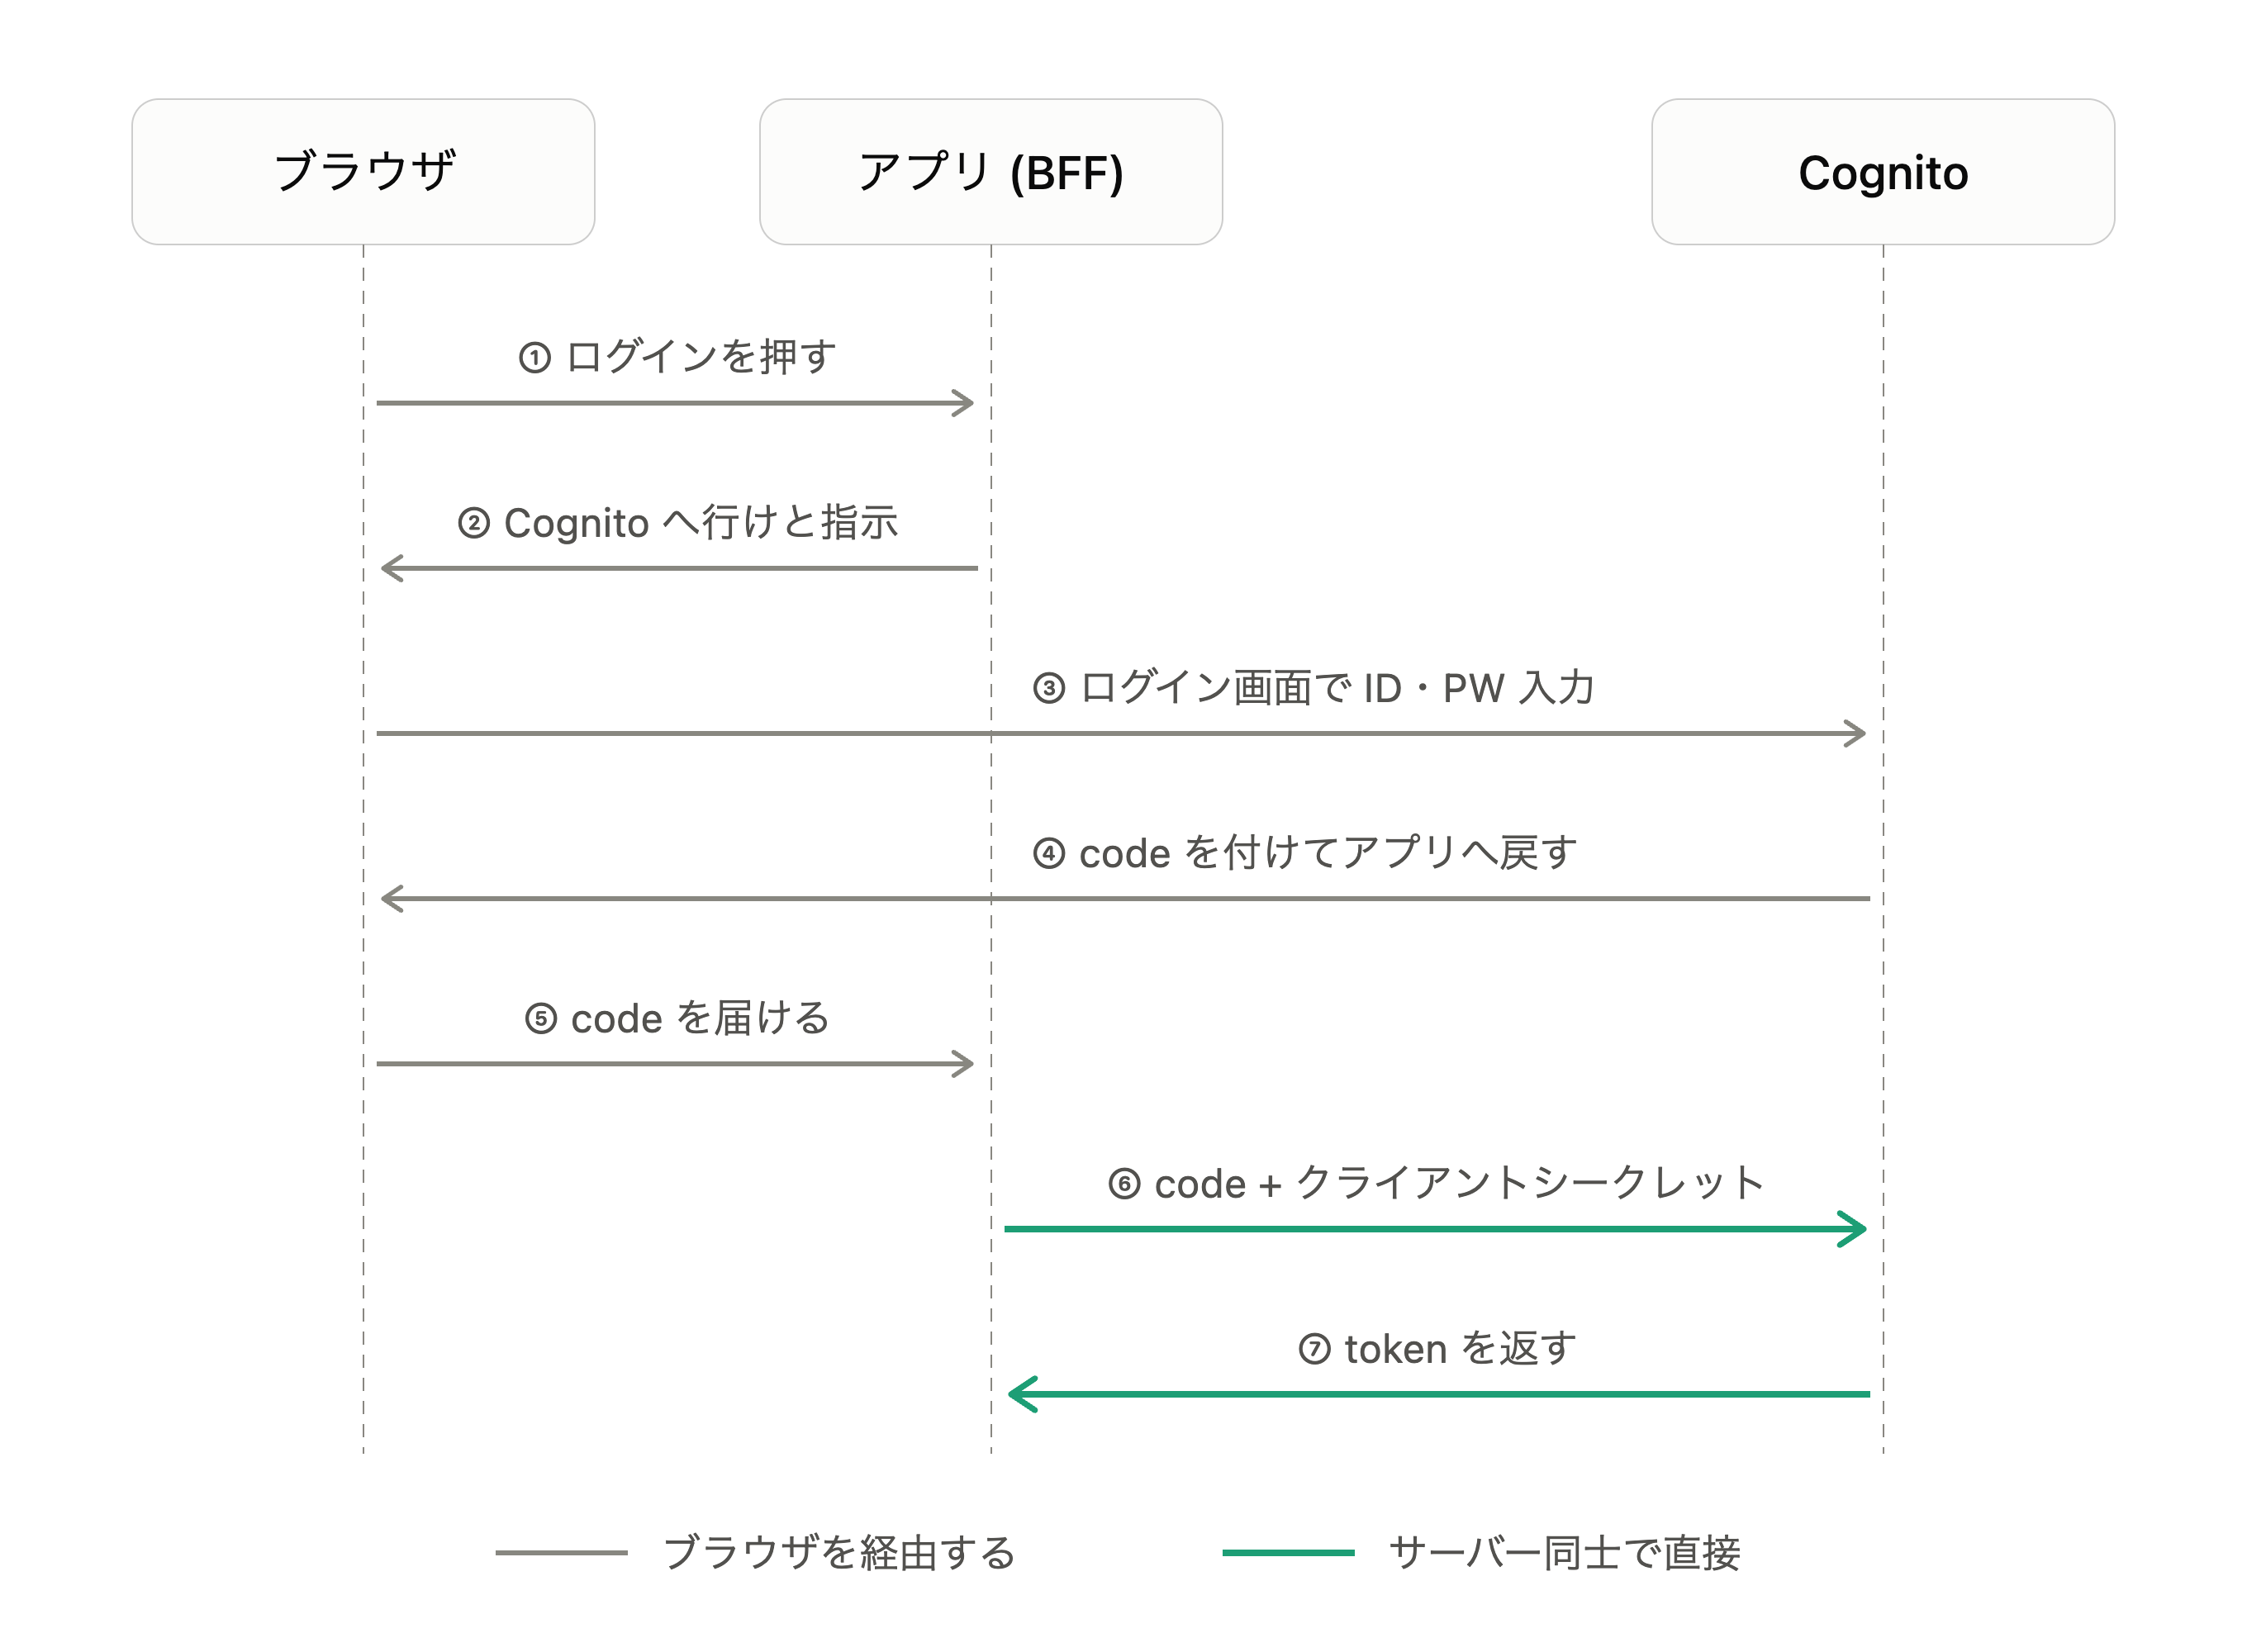
A diagram made by Opus
The diagram above is apparently the basic form of logging in to an app. (According to Opus.) I thought, "See, adding Cognito makes things complicated."
② and ④ are redirects (302). The user is redirected to the Cognito screen, logs in, and is then redirected again back to the app. The URL in ④ looks like https://アプリ/callback?code=abc123, and the code is right there in the URL.
Here's one question. In ④, why not pass the token in the URL right away instead of a code? Then ⑥ and ⑦ wouldn't be needed, right?
In fact, that approach (passing the token in the URL right away) exists as the Implicit grant, and you can choose it in Cognito too. However, the Cognito documentation treats it as a legacy method and does not recommend it.
The reason it's not recommended is that the token could be stolen. As mentioned, in ④ the value is placed in the URL, so it may be visible from various places such as the browser's address bar, history, and extensions. So at the ④ stage, a code that is hard to abuse on its own even if leaked is returned. The token is obtained in the exchange in ⑥ and ⑦, which doesn't go through the browser.
- To exchange a code for a token, ⑥ requires the client secret, which only the app has
- The code is valid for 5 minutes and becomes invalid once used (Cognito documentation)
Trying Managed Login
First, this time we'll check up to ④ in the diagram (the moment the code is returned in the URL).
The diagram again
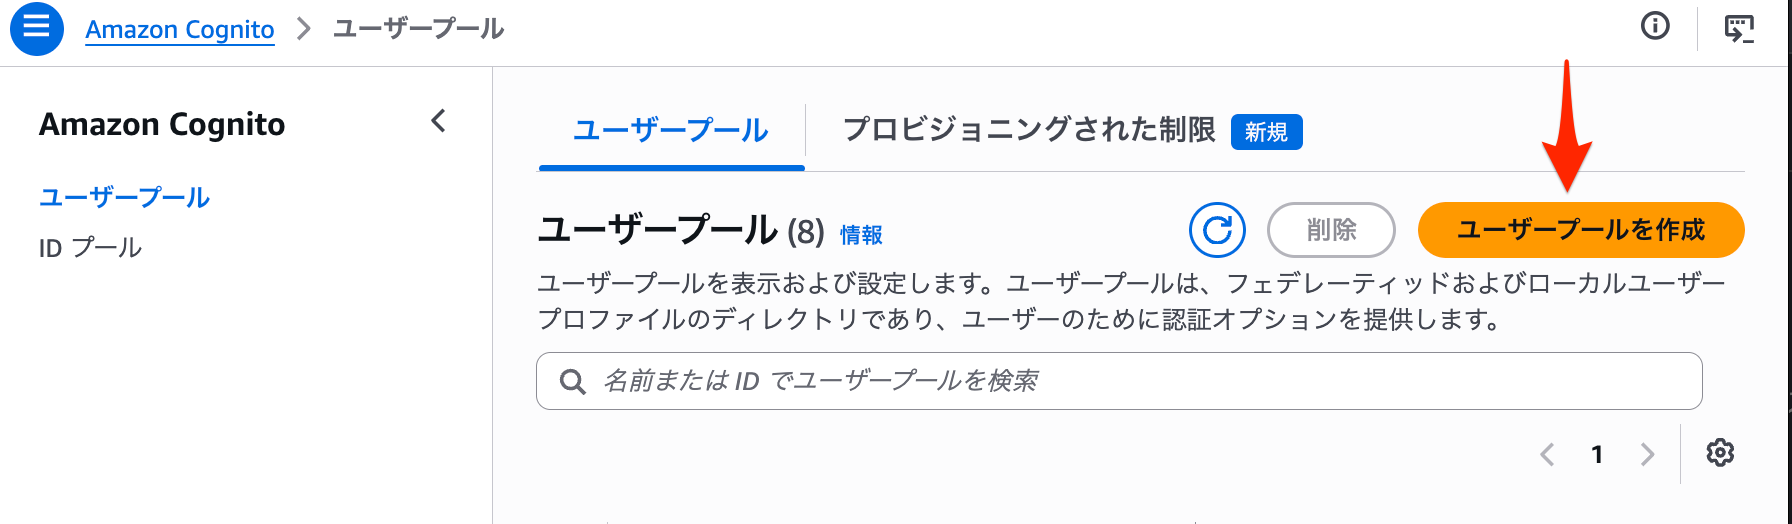
1. Create a user pool
Open Cognito in the Management Console and click "Create user pool."
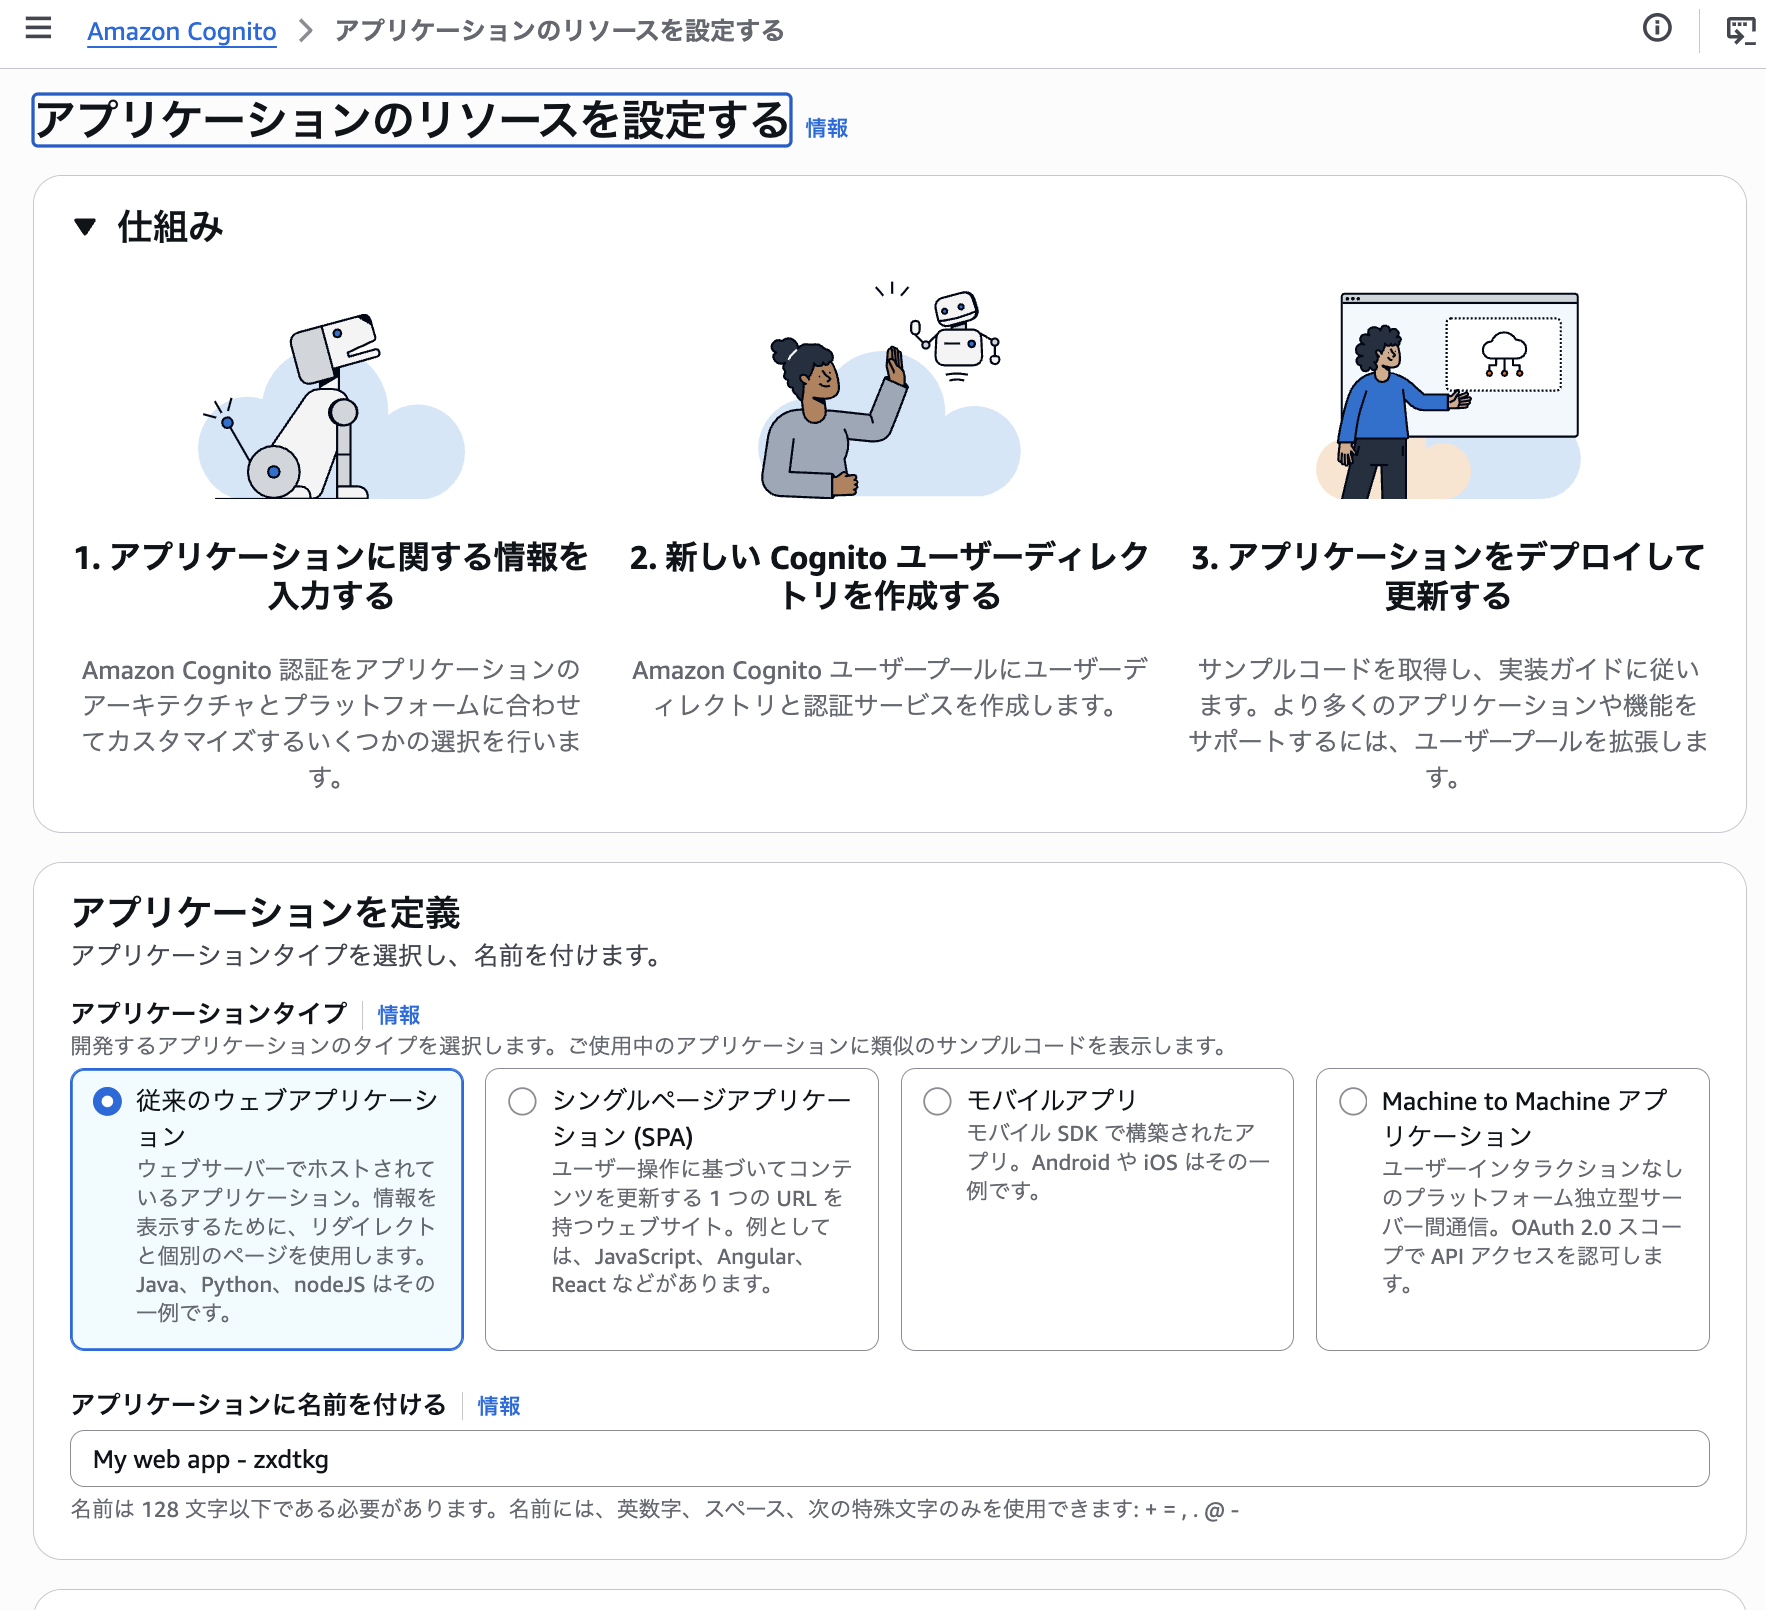
Select "Traditional web application" as the application type.
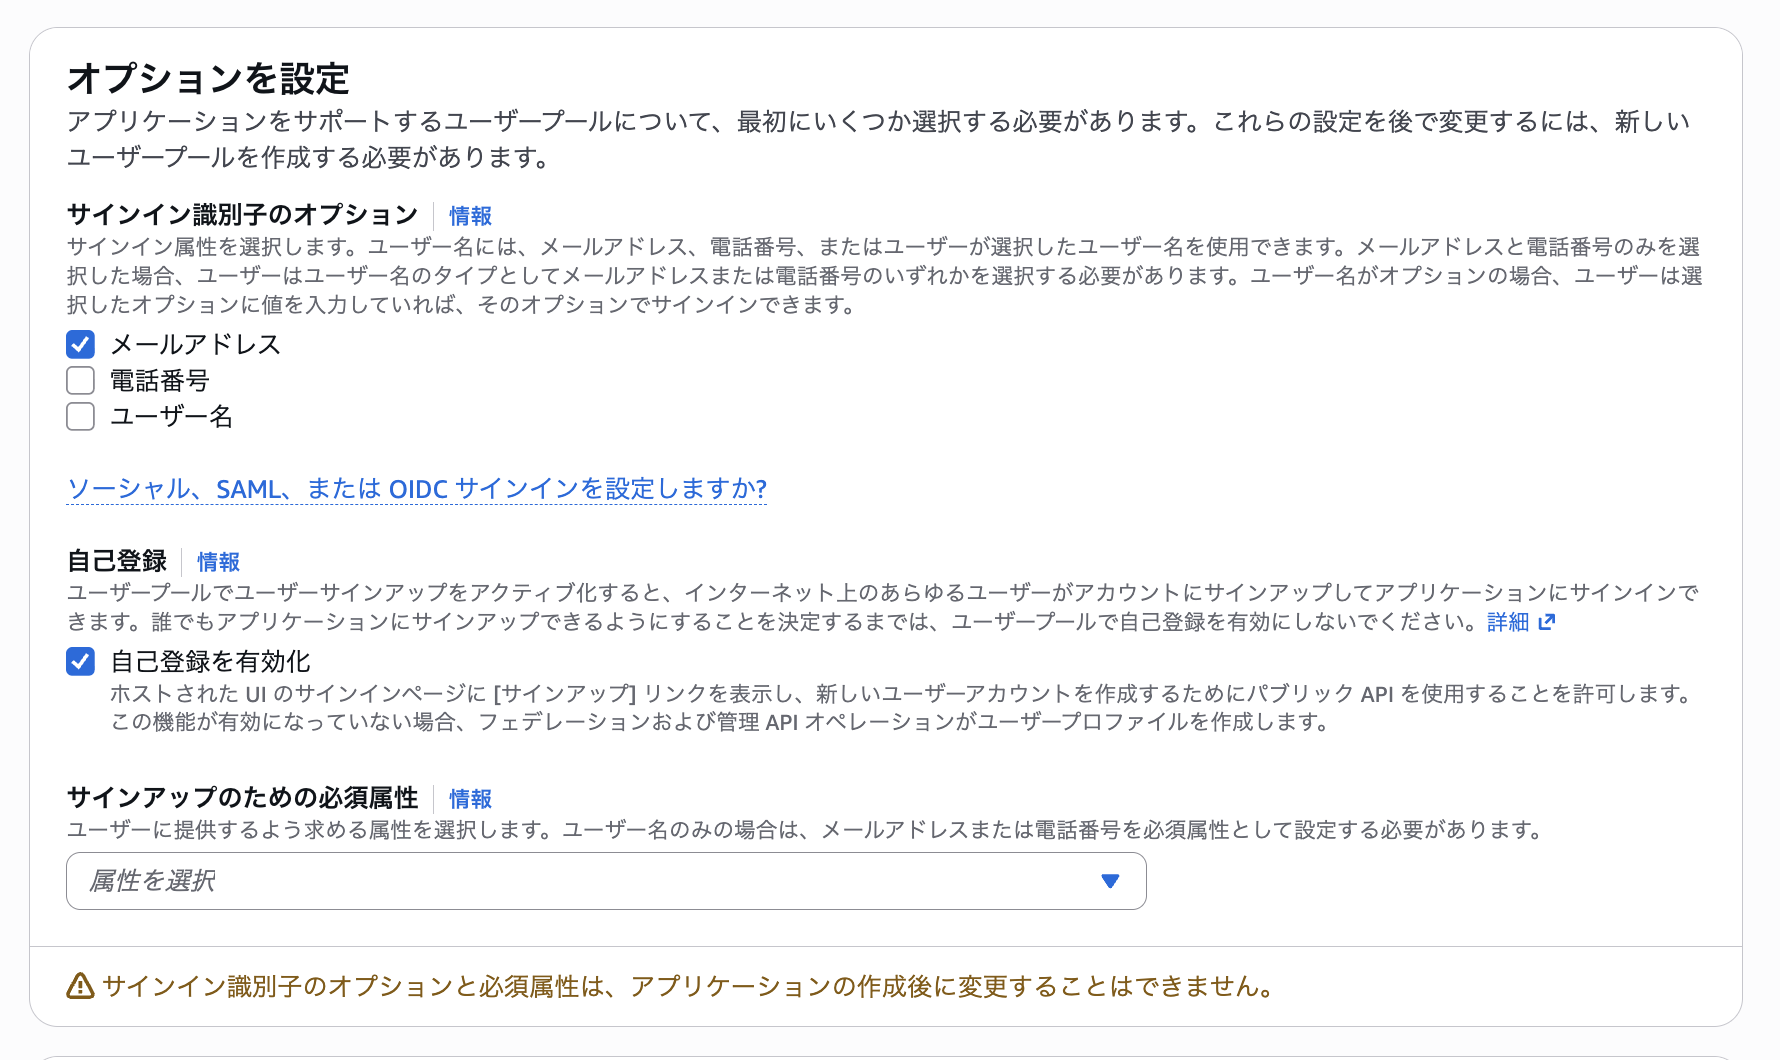
For "Options for sign-in identifiers" in the option settings, select "Email address."
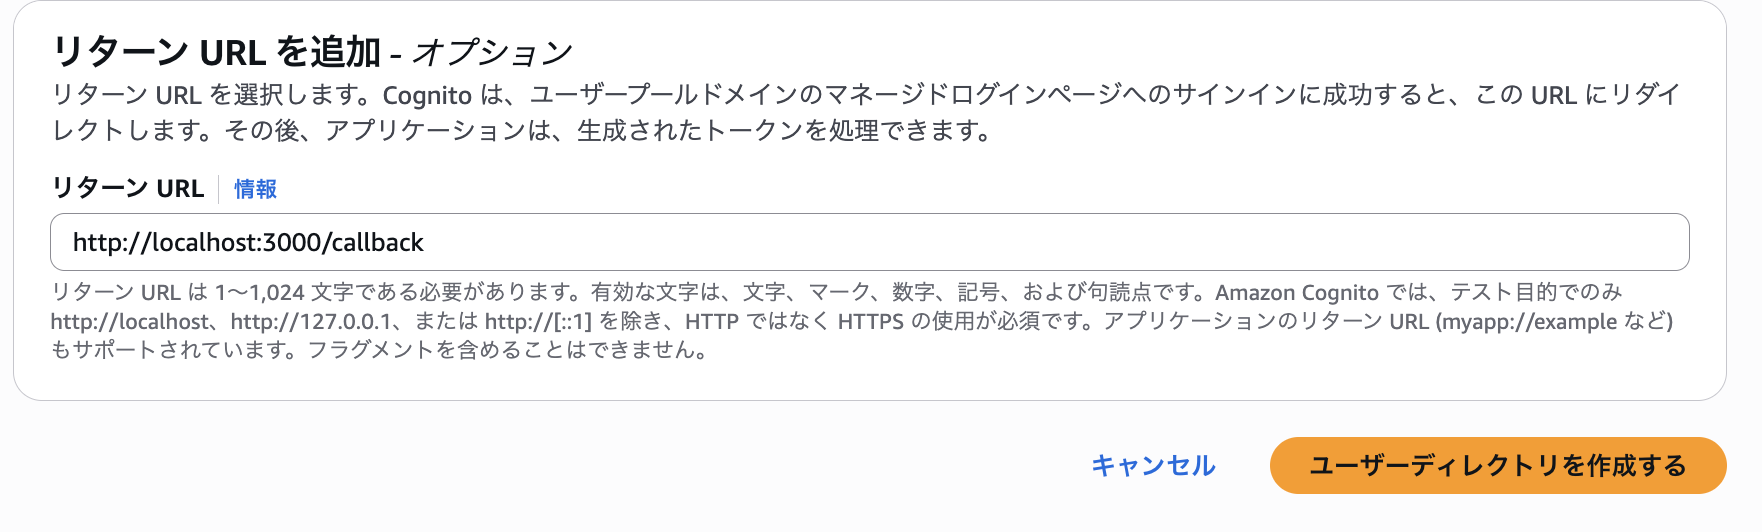
Enter http://localhost:3000/callback as the return URL and click "Create user directory."
The screen changes and shows "Application and user pool created successfully."

The two things created here have roughly the following roles.
- User pool: A place to store user information (email addresses, passwords, and so on). A user roster, so to speak
- Application (called an "app client" in the documentation): Settings for each app that uses the user pool. It holds the client ID, the client secret, the return URL entered in this procedure, the permitted sign-in methods, and so on
You can create multiple applications in one user pool, so for example a web app and an Android app can share the same user roster while having separate settings per app (Cognito documentation). The client secret used in ⑥ of the diagram is also tied to this application.
Now, the screen showing "Application and user pool created successfully" includes a Quick Setup guide, but ignore it and click "Go to overview" at the bottom of the screen.

2. Create a user
Click "Users" in the left pane.
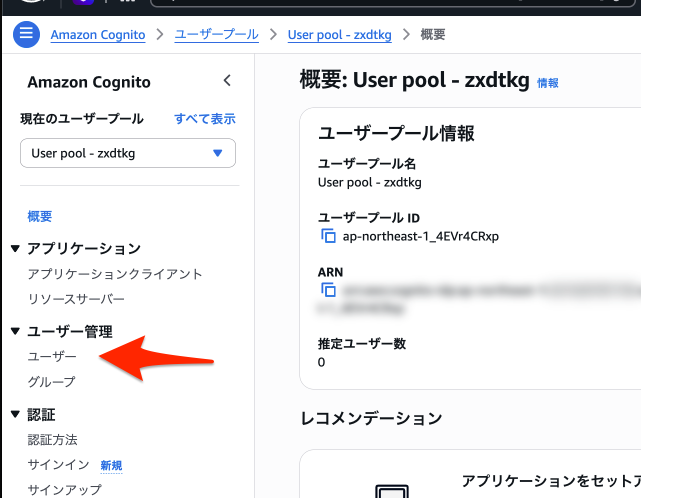
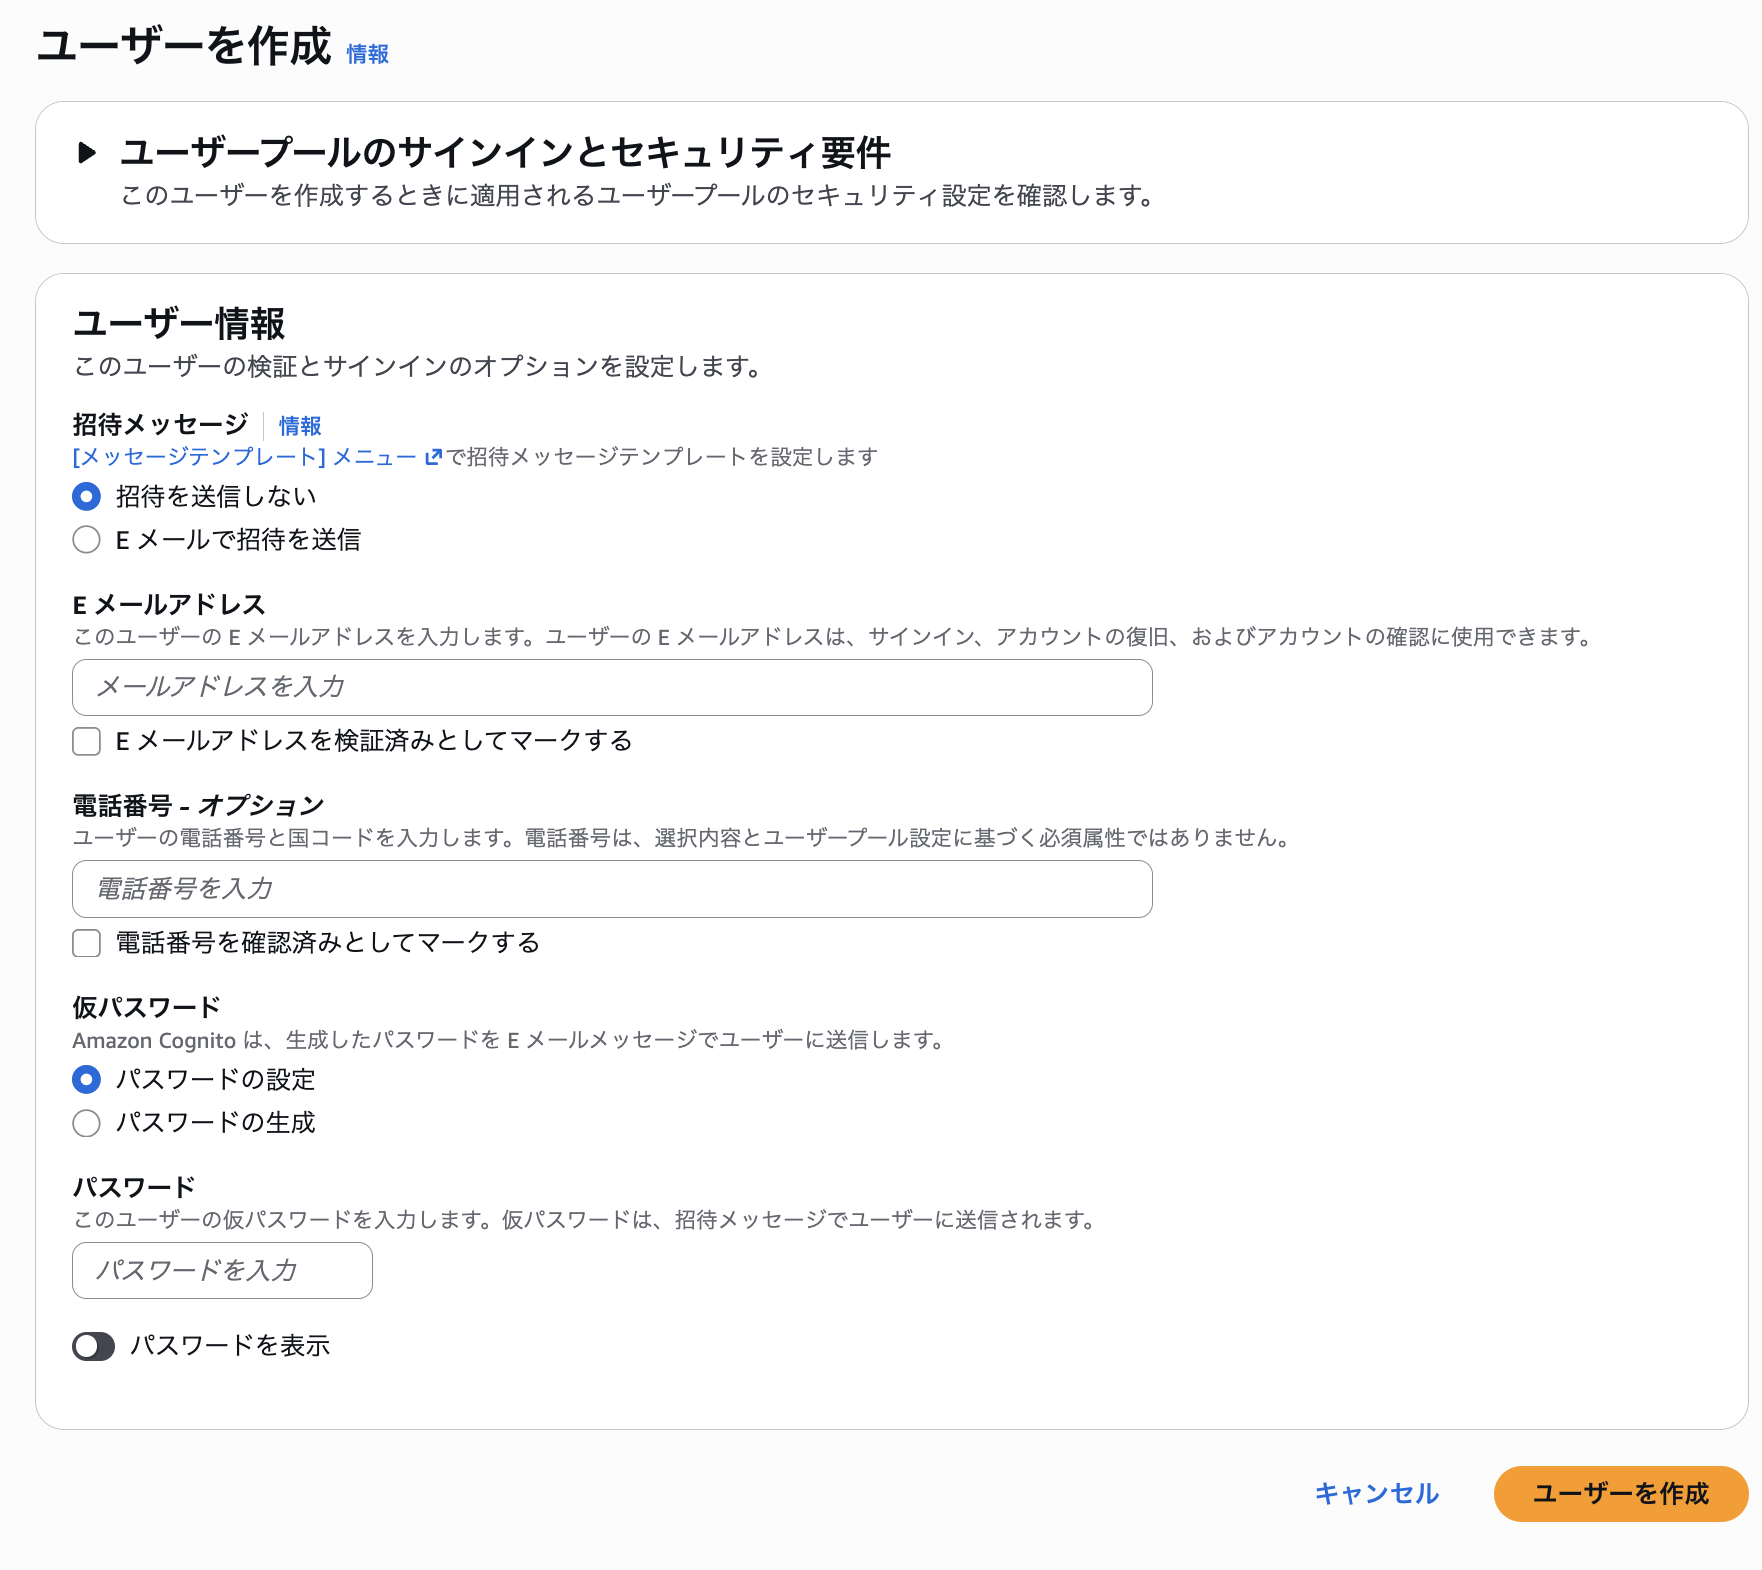
Create one user.
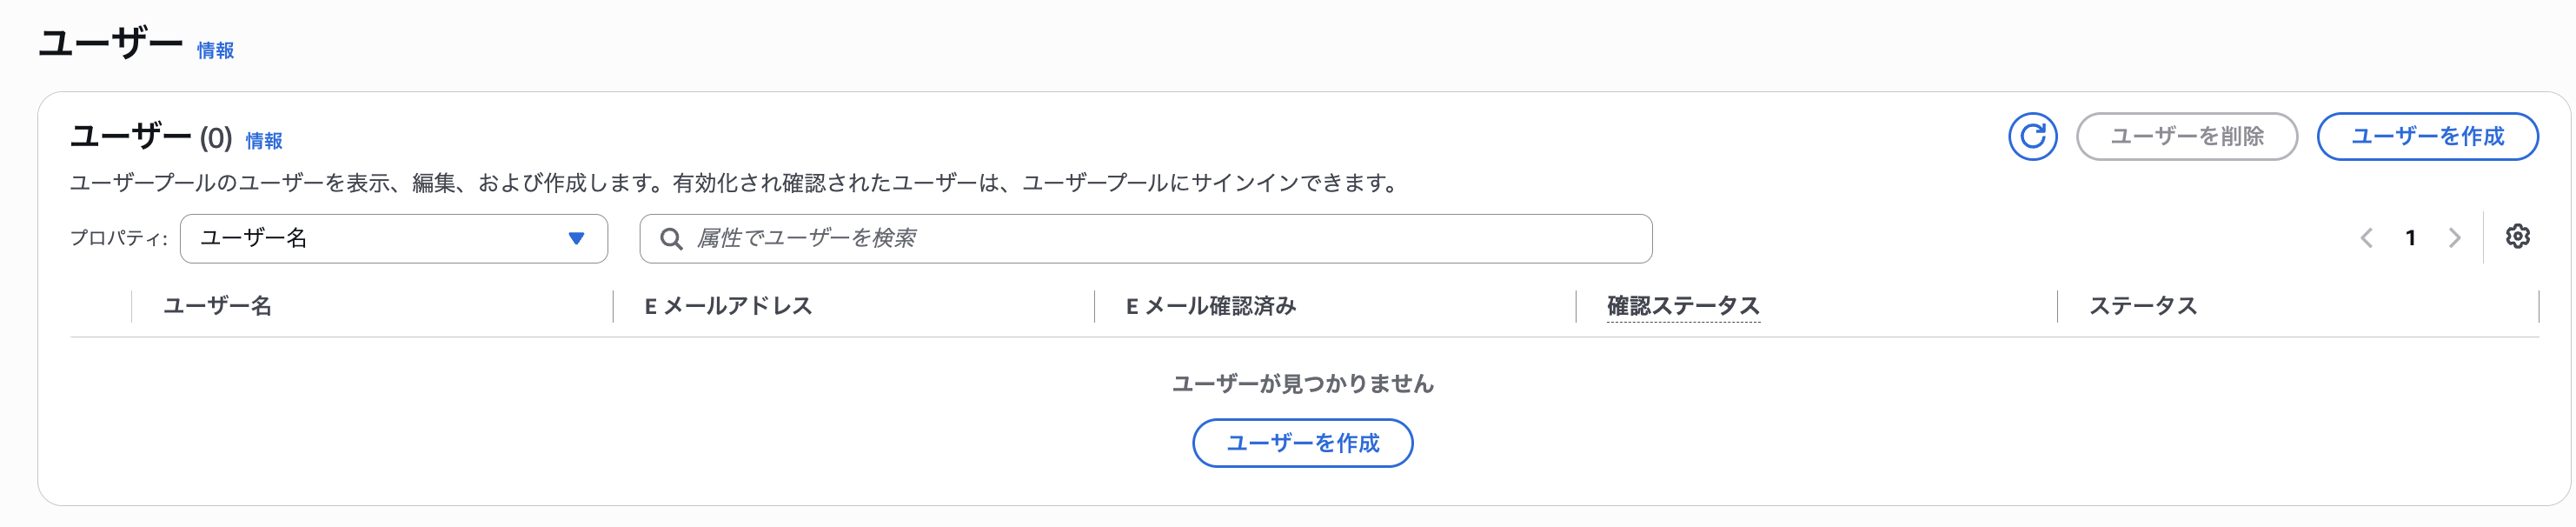
Create it with the following.
- Don't send an invitation
- Set a password
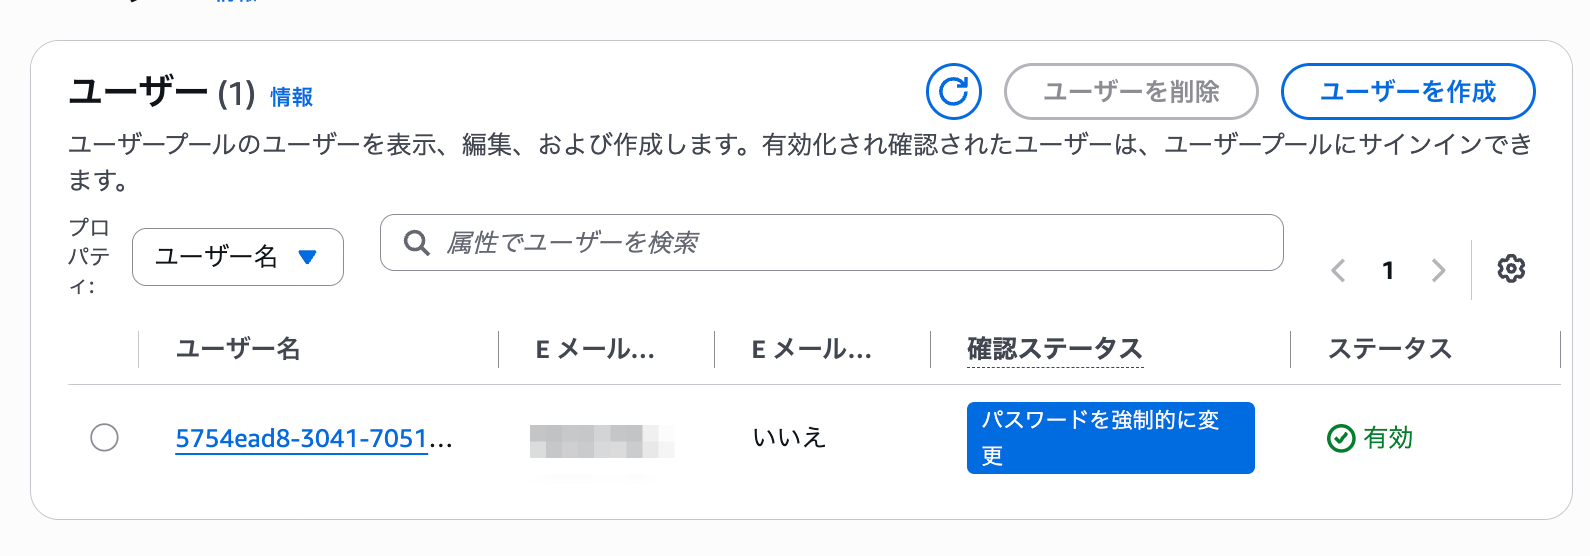
It was created.
3. Display the login page
Click "App clients" in the left pane. Then click the app client we just created.
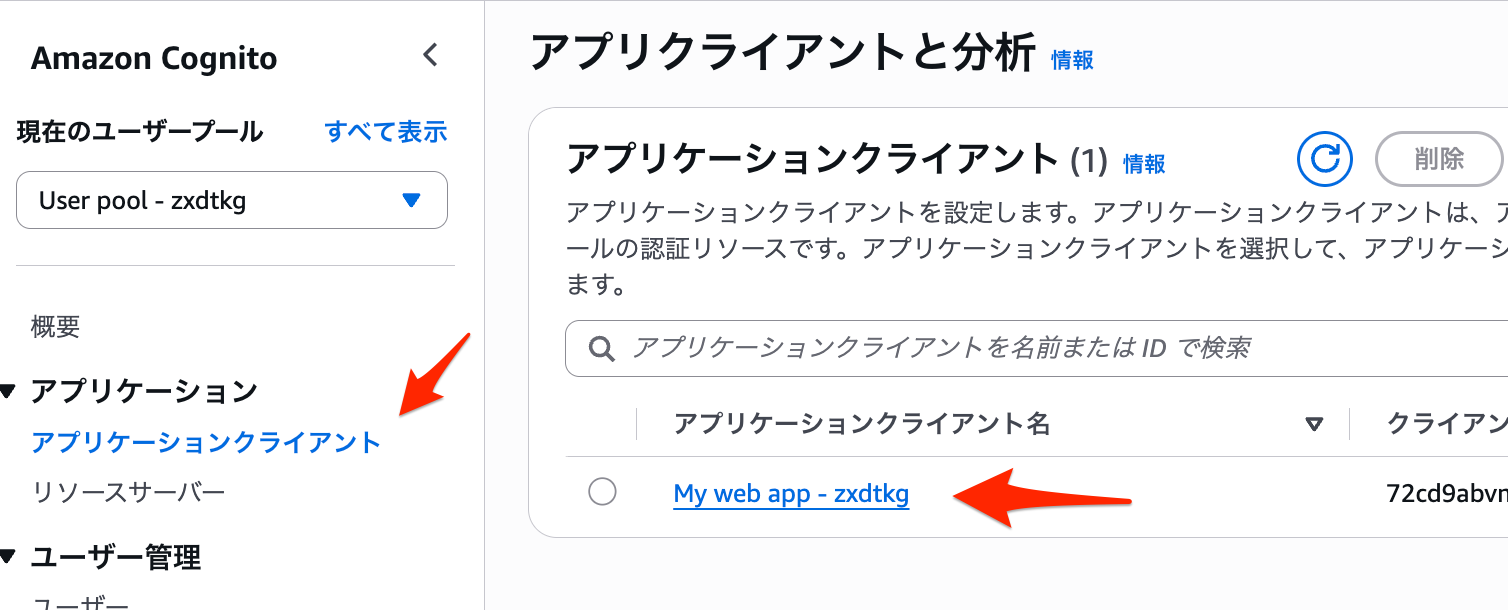
Click "View login page" at the top right.

There it is! The login page.
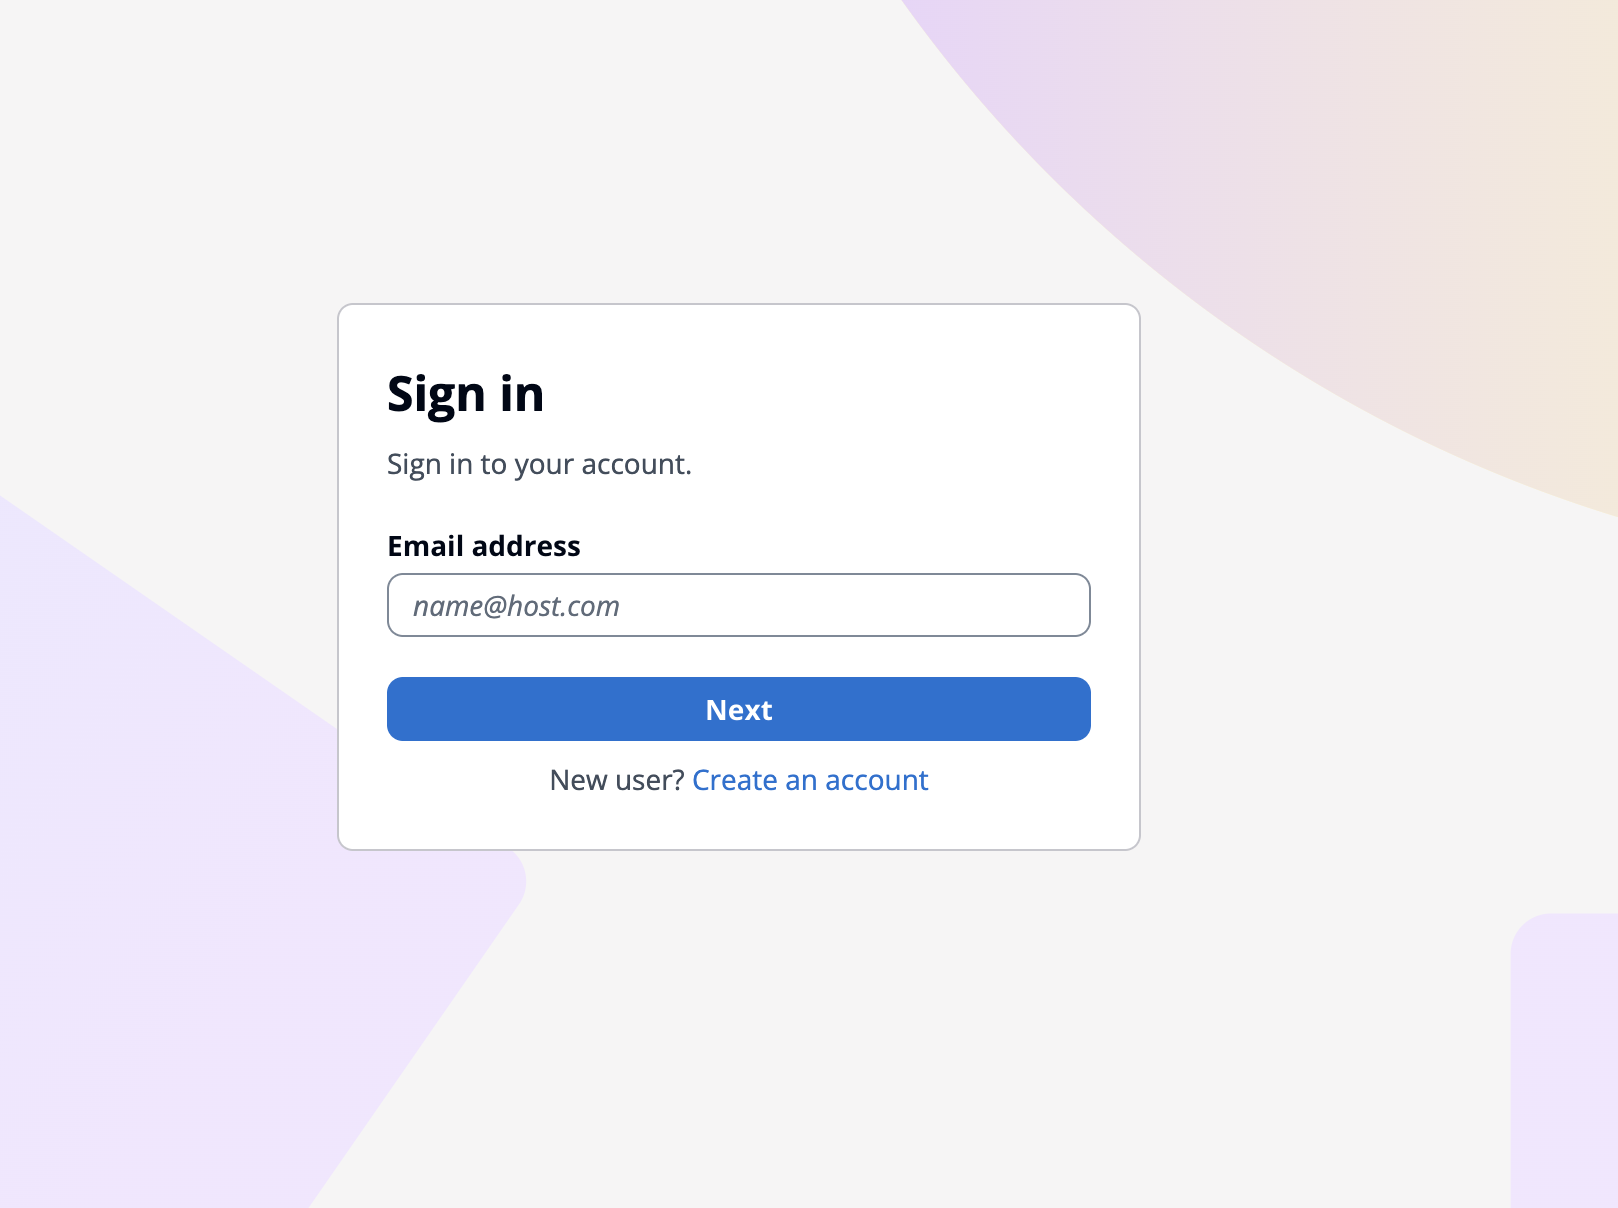
The URL was like https://ap-northeast-1xxxx.auth.ap-northeast-1.amazoncognito.com/login?client_id=yyy&response_type=code&scope=email+openid+phone&redirect_uri=http%3A%2F%2Flocalhost%3A3000%2Fcallback. So the return URL I set is attached as a query parameter.
4. Try logging in
Let's log in with the email address and password of the user created in "2. Create a user."
After entering them, I was taken to the Change password screen.
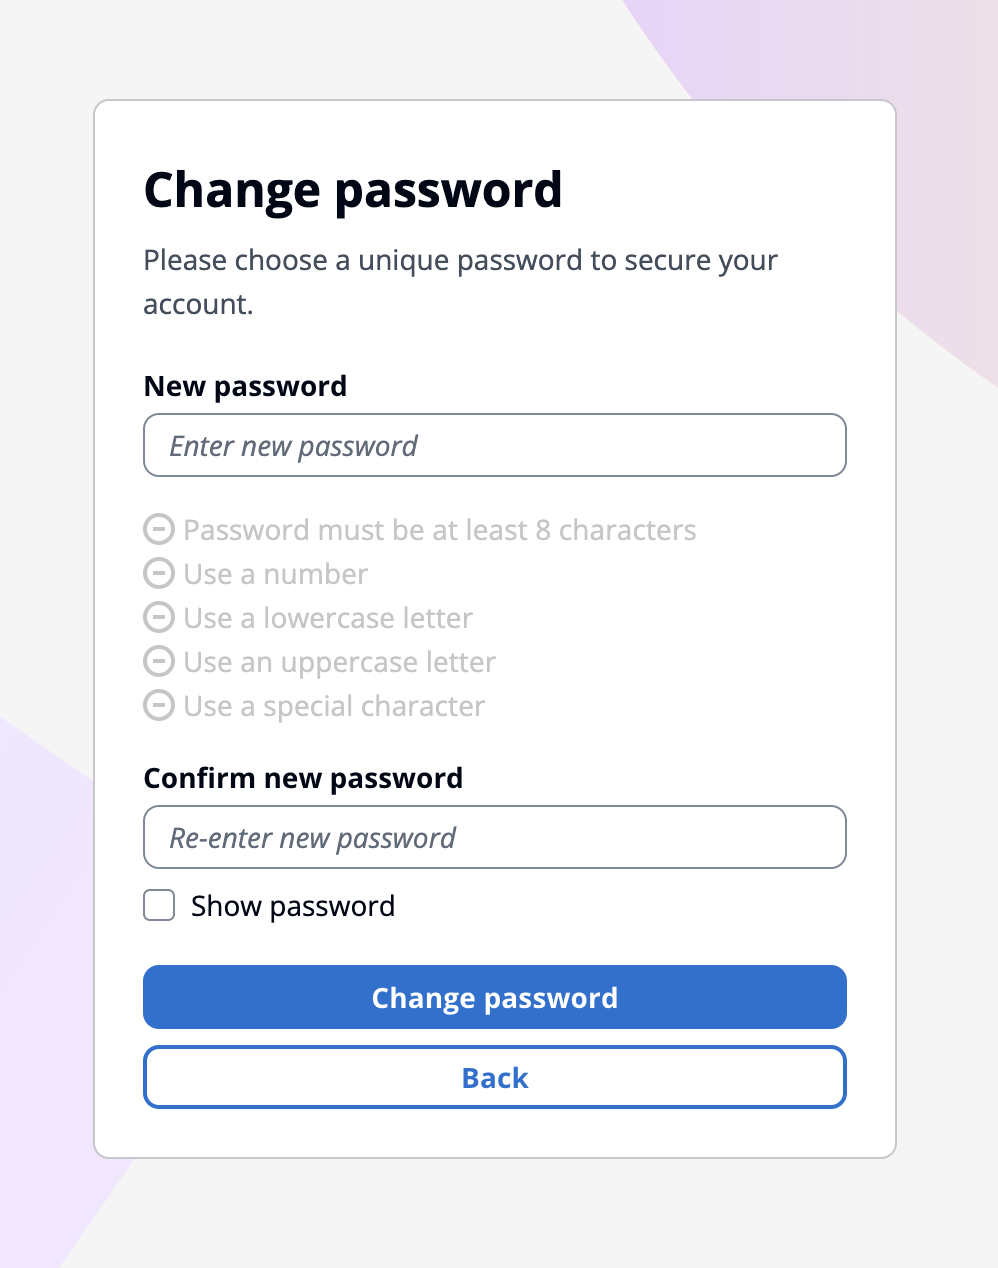
Sure enough, "Force password change" was shown when the user was created. ↓Shown again
Shown again: right after user creation. Look at the "Confirmation status" column
After registering a new password, I was taken to "This site can't be reached."
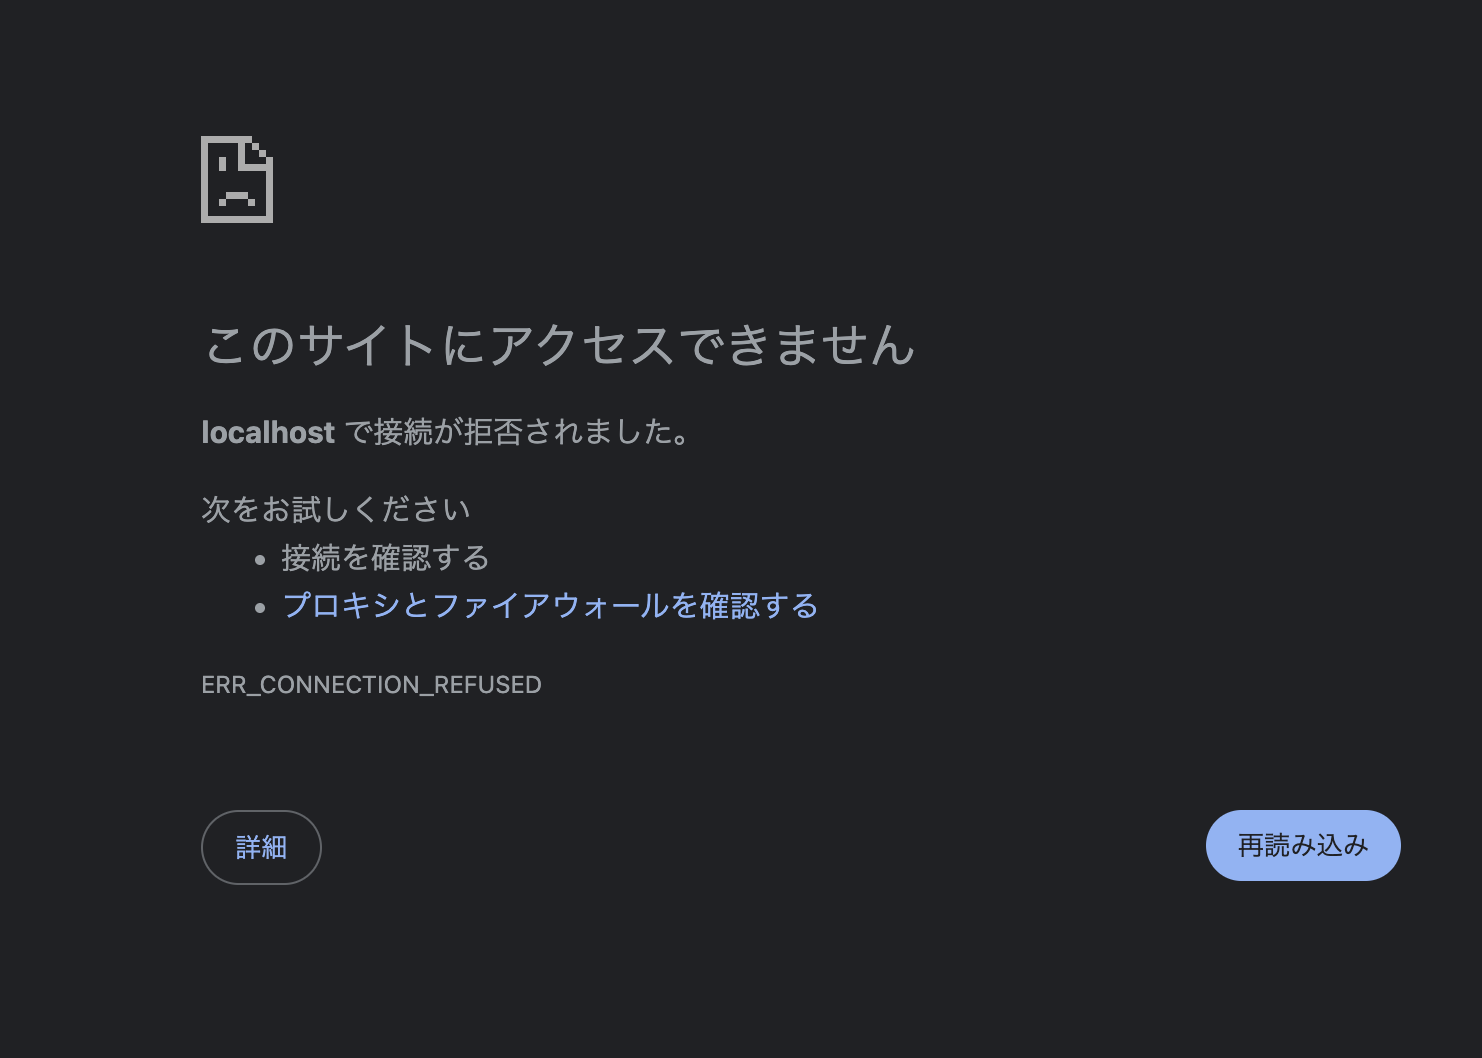
The URL is http://localhost:3000/callback?code=43609aaf-7271-46b0-82f3-afd7b08d65d2. Nothing is running on localhost:3000, so it's only natural that this happens (= "This site can't be reached"). We were redirected to the return URL, and the code is attached as a query parameter. We've confirmed "④ Return to the app with the code" from the diagram above!
The diagram again
Next, we'll check the continuation, the token exchange in ⑥ and ⑦.
Doing the token exchange yourself
1. Note down the necessary information
Note down the following three items shown in the Management Console.
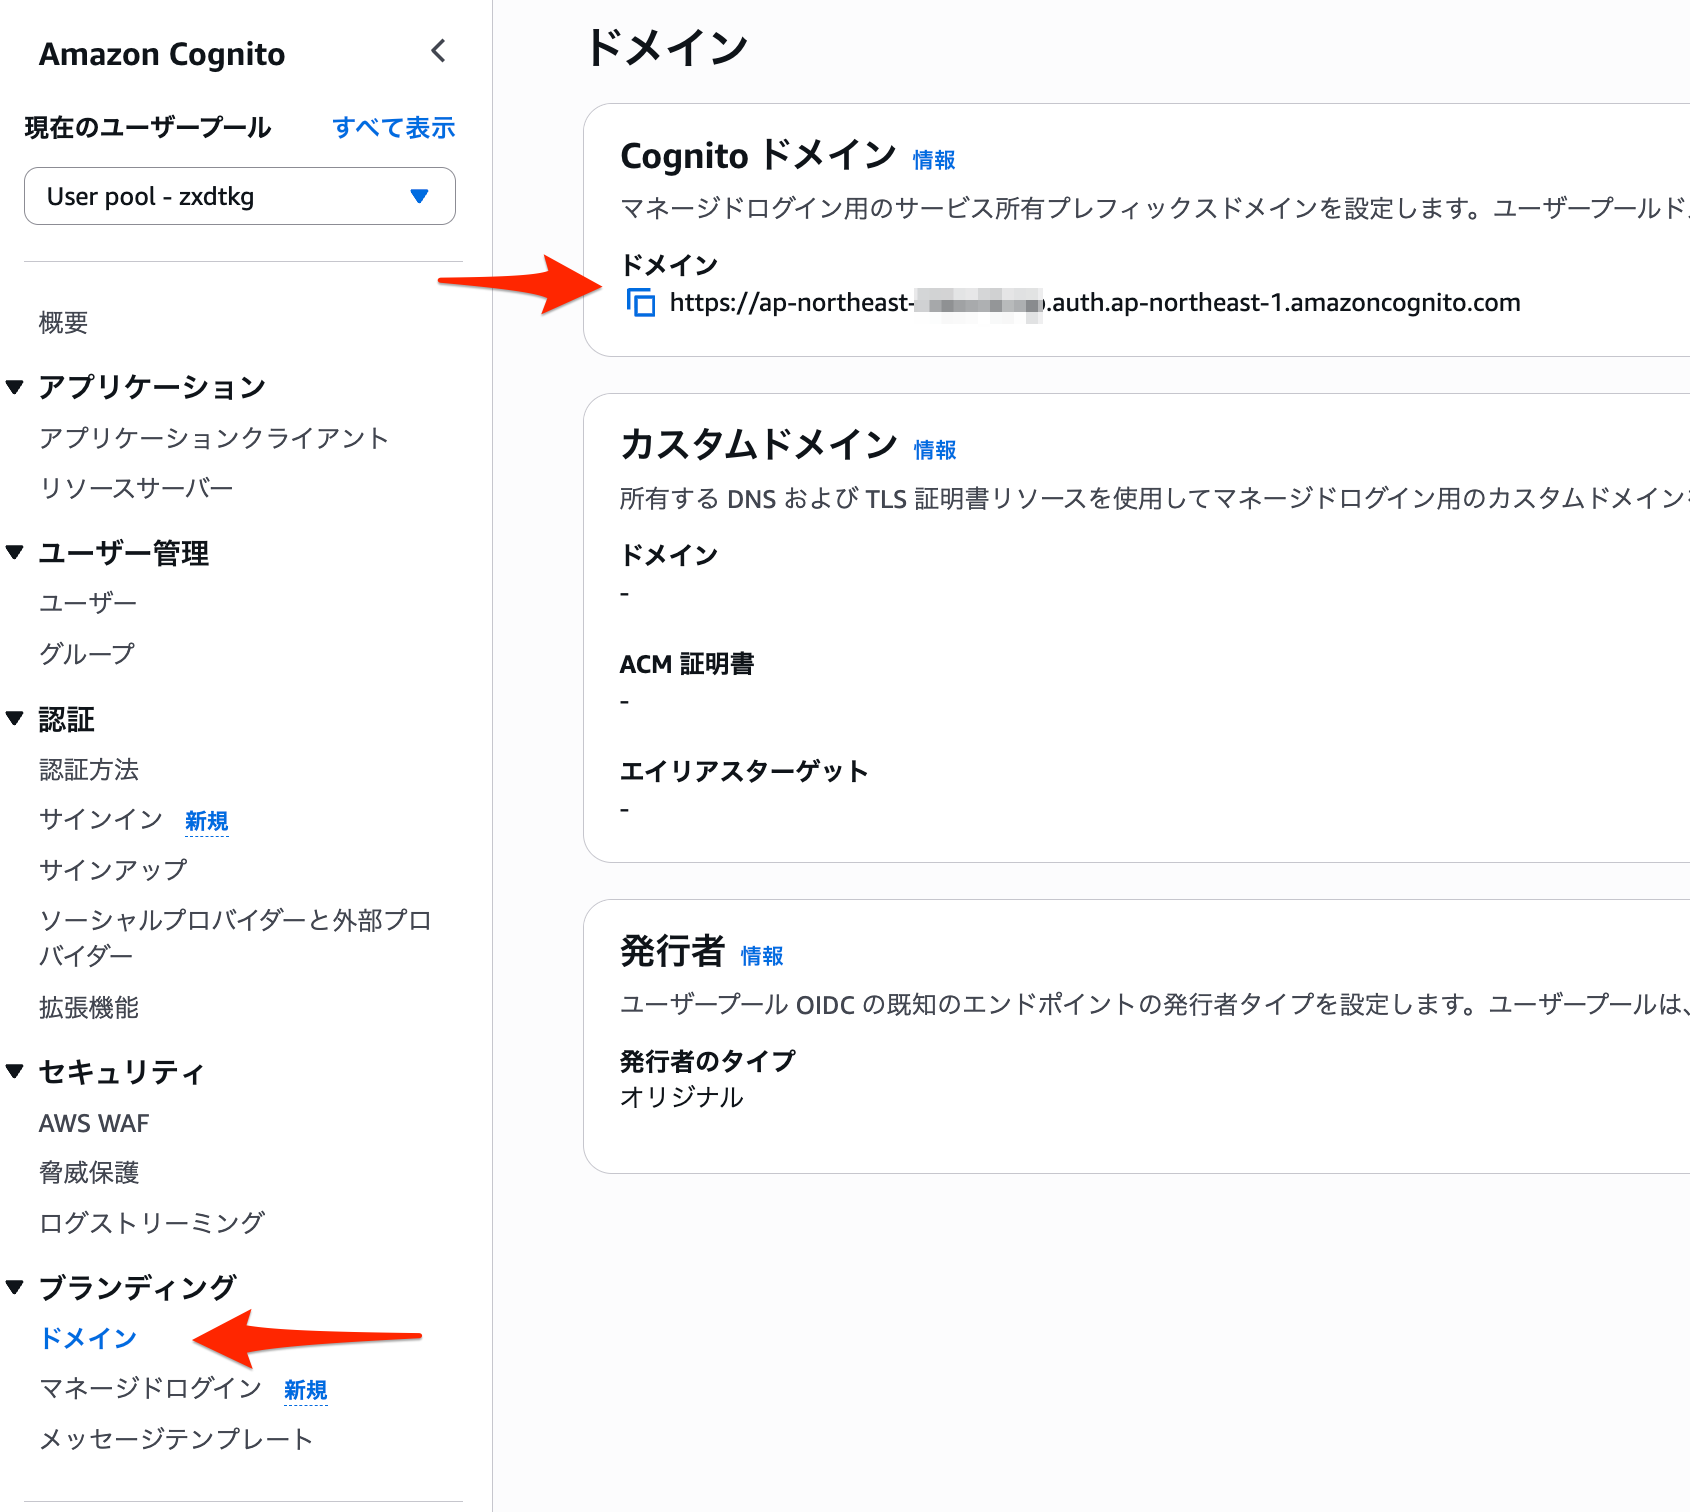
Domain
It's under "Branding → Domain" in the left pane.
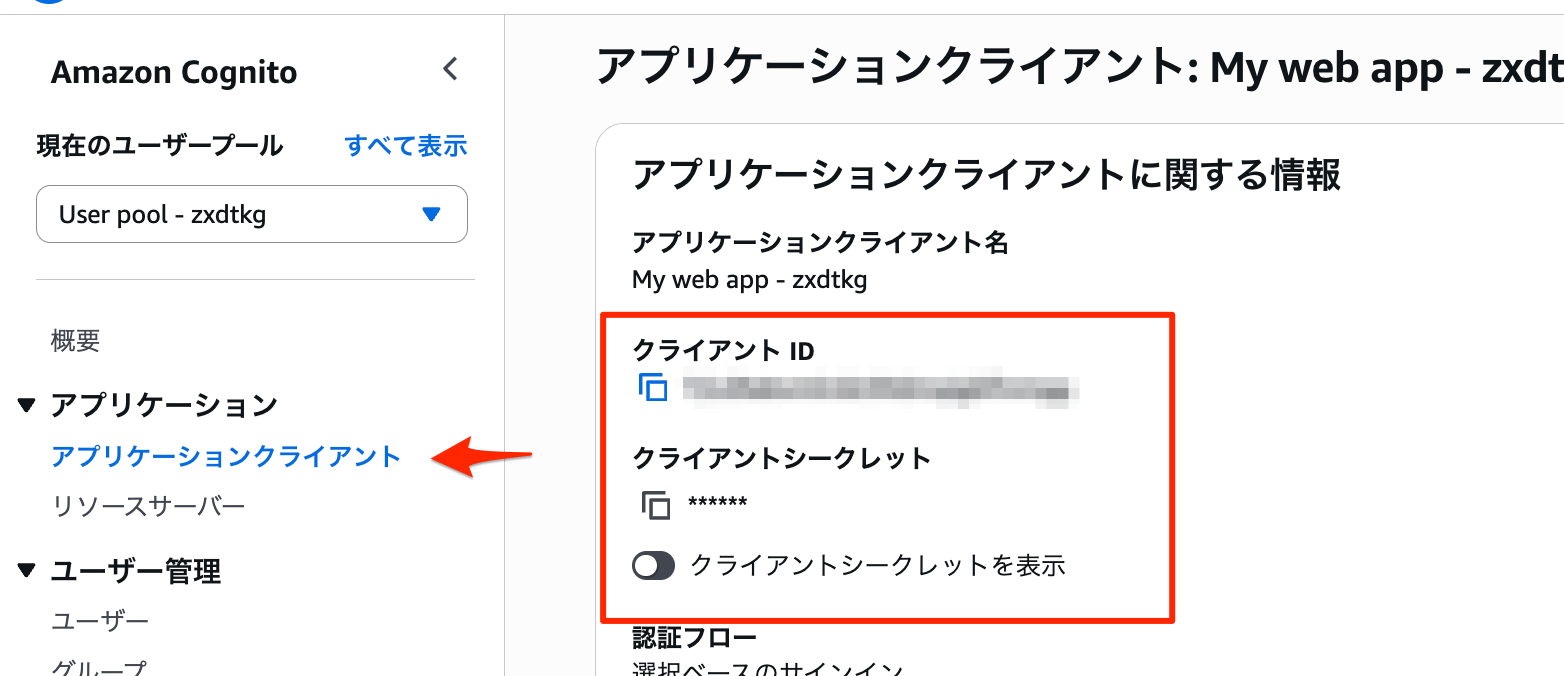
Client ID and client secret
They're on the "App clients" screen.
2. Store the client secret in a variable
After running the command below, paste the client secret from above. The value is assigned to the CLIENT_SECRET variable.
read -s CLIENT_SECRET
3. Get the code again
The code we obtained earlier has probably expired. Let's log in again and get a new code.
4. Hit the token endpoint
curl -s -X POST "https://<ドメイン>/oauth2/token" \
     -u "<クライアント ID>:${CLIENT_SECRET}" \
     -H "Content-Type: application/x-www-form-urlencoded" \
     -d "grant_type=authorization_code" \
     -d "code=<新しいcode>" \
     -d "redirect_uri=http://localhost:3000/callback"
If it succeeds, JSON is returned.
By the way, if you run the same curl command again, the response is {"error":"invalid_grant"}. This means the code → token exchange works only once.
The response JSON contains the following five fields.
| Field | Content | What it's used for |
|---|---|---|
id_token |
JWT | A certificate proving "who logged in." The app (BFF) reads it to learn the user's information. |
access_token |
JWT | A pass indicating "what you are allowed to do." You attach it as Authorization: Bearer ... when calling an API |
refresh_token |
Encrypted JWT (JWE). The app can't read its contents; it just passes it to Cognito | Used to get the two above reissued without making the user log in again when they expire. Because its lifetime is long (30 days by default), the damage is also greatest if it leaks. |
expires_in |
Number (default 3600) |
How many more seconds id_token and access_token are valid. One hour by default |
token_type |
"Bearer" |
The kind of usage for access_token. It means "whoever holds it can use it (Bearer = bearer of the token)." Simply holding the token is treated as being the user, so if it's stolen it can be used as is. |
JWT?
It's pronounced "jot." It stands for JSON Web Token.
JWT has two forms: signed (JWS) and encrypted (JWE). id_token and access_token are the signed kind, consisting of three parts, header.payload.signature, joined by . (the encrypted JWE is split into five).
The payload of a signed JWT is not encrypted; it is merely encoded in Base64url (Base64 using only URL-safe characters). Anyone can decode and read it, so the rule is not to put secret information in it.
What prevents tampering is the third part, the signature. The app verifies this signature with the public key published by Cognito before trusting the contents.
Looking inside the id_token
Log in again to get a new code, and run the previous curl wrapped in RESP=$(...). This stores the JSON from earlier in an intermediate variable RESP, which we decode with the following Python command. Within the same session, the CLIENT_SECRET variable defined earlier can be used as is.
RESP=$(curl -s -X POST "https://<ドメイン>/oauth2/token" \
     -u "<クライアント ID>:${CLIENT_SECRET}" \
     -H "Content-Type: application/x-www-form-urlencoded" \
     -d "grant_type=authorization_code" \
     -d "code=<新しいcode>" \
     -d "redirect_uri=http://localhost:3000/callback")
Decode and display the contents (payload) of the id_token.
python3 -c 'import json,sys,base64; t=json.loads(sys.stdin.read())["id_token"].split(".")[1]; print(json.dumps(json.loads(base64.urlsafe_b64decode(t+"="*(-len(t)%4))),indent=2,ensure_ascii=False))' <<< "$RESP"
You should see JSON output.
{
  "at_hash": "BV9bhy0XmKRLc0HuAntskA",
  "sub": "47a40af8-8021-7087-bc3b-xxxxxxxxxxxx",
  "iss": "https://cognito-idp.ap-northeast-1.amazonaws.com/ap-northeast-1_xxxxxxxxx",
  "cognito:username": "47a40af8-8021-7087-bc3b-xxxxxxxxxxxx",
  "origin_jti": "f02c185e-de3b-4182-98ad-366f0dbc228f",
  "aud": "72cd9abvmlmkt99xxxxxxxxxxx",
  "token_use": "id",
  "auth_time": 1792251173,
  "exp": 1792254773,
  "iat": 1792251173,
  "jti": "41f55969-8359-4a1f-bcec-f989e549a454",
  "email": "kazue@example.com"
}
The field names in the JSON should match the claim column in the table below. Here is what each one does.
| Role | Claim | Meaning |
|---|---|---|
| Who | sub |
An ID (UUID) that uniquely identifies the user within the user pool |
cognito:username |
The username on Cognito | |
email |
Email address | |
| Validity checks | iss |
Issuer. The URL of the user pool. It's checked to reject tokens from other pools |
aud |
Audience. It contained the client ID. As mentioned, you can create multiple applications in one user pool, so this is how you tell whether a received token is addressed to you. | |
exp / iat |
Expiration time and issue time (UNIX seconds) | |
auth_time |
The time the user actually entered the password and logged in. It doesn't change even when reissued by refresh | |
| Token management | token_use |
Whether it's id or access. Used to prevent mix-ups |
jti / origin_jti |
The ID of this token itself, and the ID of the original login. Used for revocation | |
at_hash |
A hash of the access_token issued together. Proof that the two were issued as a set |
Can we say "login succeeded"?
So far, we've followed the flow of login processing using Cognito.
The diagram again
We've completed ① through ⑦ in the diagram, but can we say that the user's login is complete at this point (= at the ⑦ stage)?
The interesting thing about this question is that the answer changes depending on whose viewpoint you take. Each participant has its own separate "logged in" state.
First, Cognito's viewpoint. For Cognito, "login succeeded" is the moment in ③ when it confirms that the ID and password are correct. At this point, Cognito places a cookie (Cognito's session) addressed to its own domain in the browser.
So what about the app (BFF)? In fact, at the ⑦ point it can't yet be said to be logged in.
- Verification: Check the signature, iss, aud, and exp of the received id_token. Until it passes here, the contents can't be trusted. (The "JWT?" section also said, "The app verifies this signature with the public key published by Cognito before trusting the contents.")
- Create the app's session: Generally, once verification passes, the app stores the information "this person is the user with sub = xxx" on the server side. It puts that session ID in a cookie, returns it to the browser, and redirects to the original page.
Thanks to 2, for subsequent requests the browser just sends the cookie, and the app knows "it's the same person as before." There's no need to query Cognito every time.
In other words, taking the browser, the app, and Cognito together, the login state is held in three layers.
| Layer | Where it is | Approximate lifetime |
|---|---|---|
| Cognito session | Cookie on the Cognito domain | Depends on Cognito's settings. In my testing, it was a cookie that expired about 1 hour after login. |
| Token | The app's server side | id/access: 1 hour, refresh: 30 days |
| App session | Cookie on the app's domain + server-side storage | Decided by the app |
So for the app, it is not yet in a "logged in" state. It's an intermediate stage.
Summary
I created a Cognito user pool and followed the login flow step by step using only the Management Console and curl.
- Using Cognito lets you separate password storage and login-related features from the app
- Login is a two-stage process: "receive a code via the browser (①–⑤)" and "exchange the code for a token server to server (⑥⑦)." The code that appears in the URL is designed so that it's hard to abuse on its own even if leaked
- The code is valid for 5 minutes and can be used only once. A second exchange with the same code results in
invalid_grant - The token endpoint returns
id_token,access_token, andrefresh_token. Anyone can decode theid_tokenand read its contents - The
audin theid_tokencontains the client ID, which lets you tell whether the token is addressed to you - However, merely receiving the token at ⑦ is not yet "login complete" for the app. Verification and session creation are needed
At first I thought, "See, adding Cognito makes things complicated," but after hitting each step by hand, I found that even the steps that look like detours each have their reasons.
Next time, I'd like to check by hand the question I left pending this time: "why can we trust the contents of a token that anyone can read?" In other words, signature verification.