
I have summarized the new bundled application method and phone number purchasing process for Twilio

Hello, this is Subaru.
In this post, I'll summarize Twilio's new bundle application method and phone number purchase process.
Introduction
I will explain Twilio's new bundle application method and phone number purchase process based on actual screens.
Also, as there are both Japanese and English notations, I will explain in the format of "Japanese (English)". Now let's try the bundle application process.
Bundle Application
Required Documents
- Complete Registry Certificate
- Document proving the delegator's address (such as utility bill issued within the last 6 months)
- Power of Attorney
- Document verifying the delegator's address (showing name, photo, and address)
- Driver's license (both sides)
- Driving history certificate
- My Number Card (Please do not upload the back side of the My Number Card.)
- Residence Card (for foreign nationals)
- Special Permanent Resident Certificate (for non-Japanese nationals)
- Application form### Application Procedure
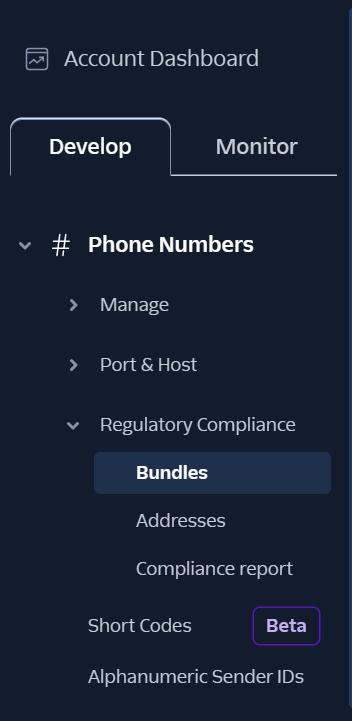
First, select "Phone Number" on the left side of the Twilio console screen. If this item is not available, select "Explore Products" on the left side of the console screen. Then, various menus will be displayed, and from there, select "Phone Number" from the Super Network to proceed.
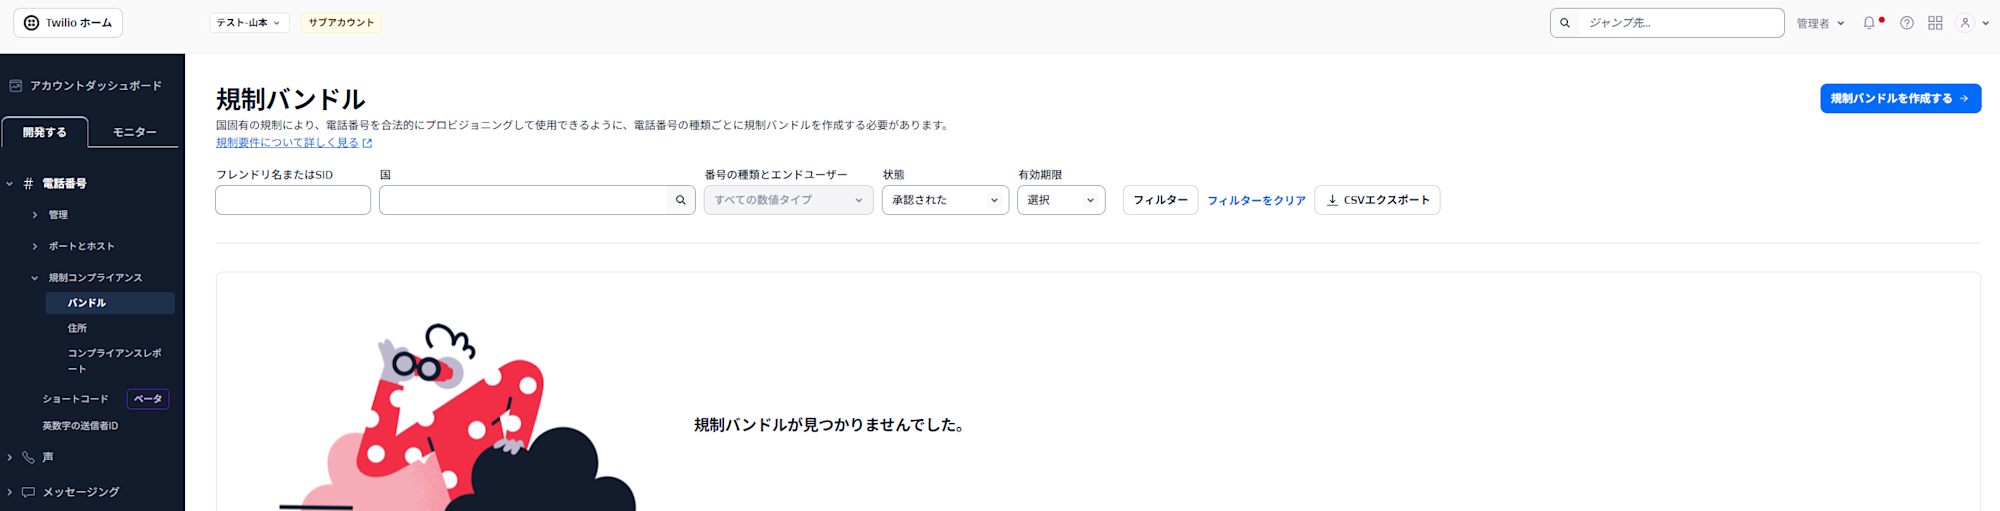
Navigate to Phone Numbers > Regulatory Compliance > Bundles, and proceed with the application from "Create a Regulatory Bundle" in the upper right corner of the screen.
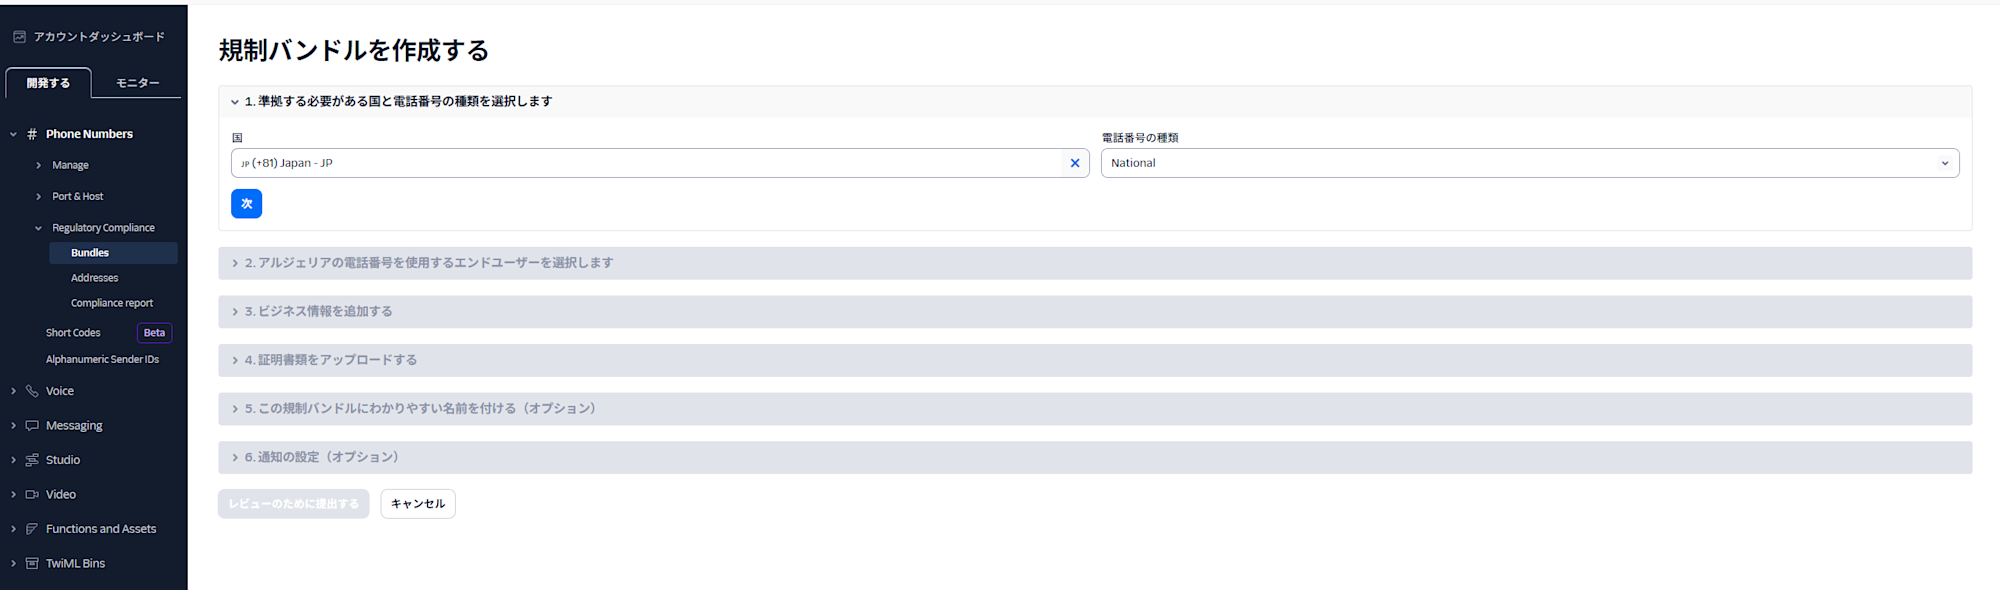
First, select the country and Type of Phone Number. For the type, choose from Local, National, or Toll-Free. After making your selection, click next to proceed.
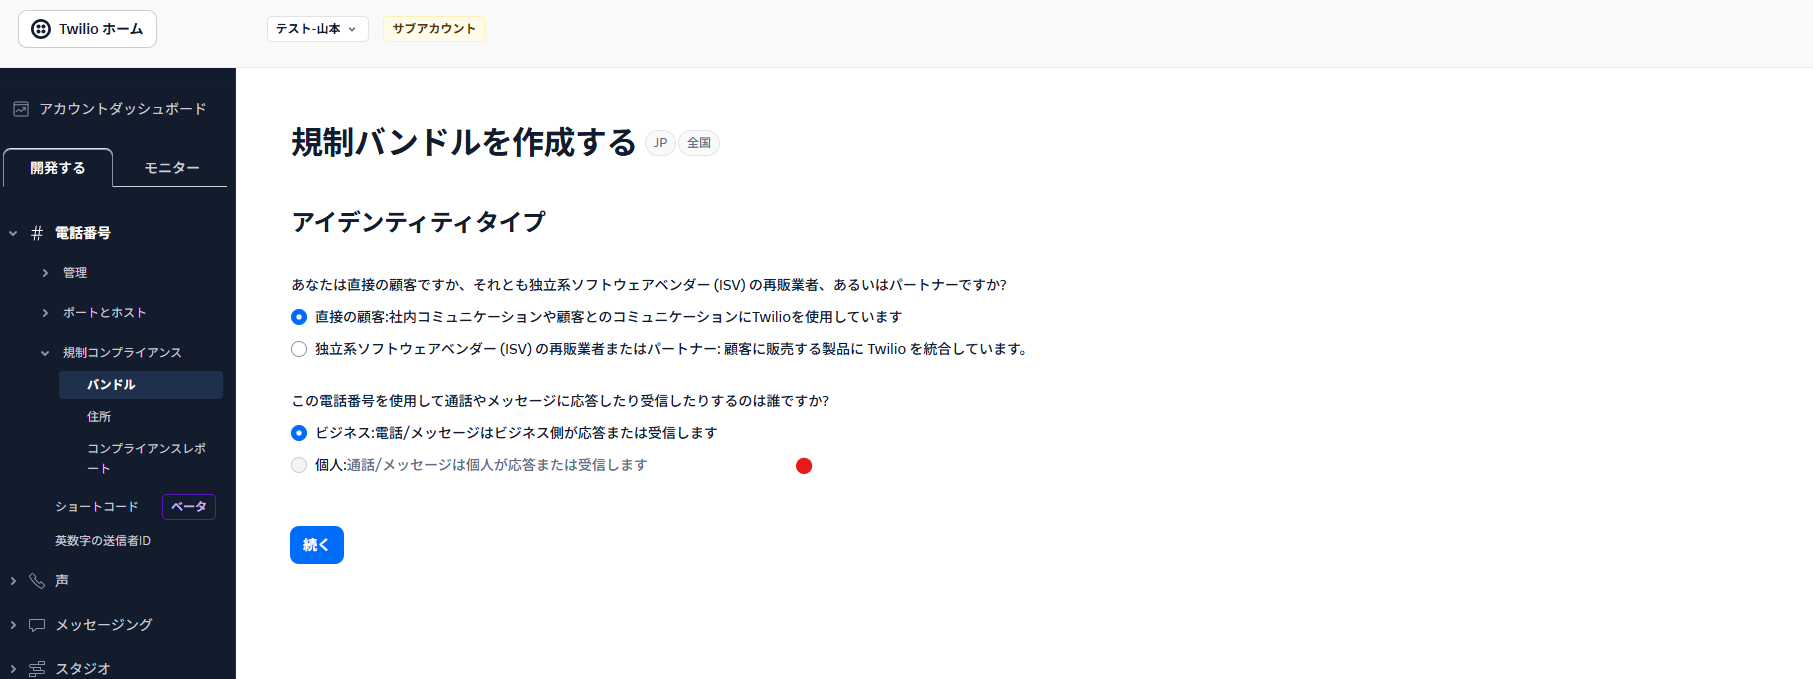
Next, select the identity type. You will answer the following two questions. Basically, for the first question, select Direct Customer. When Direct Customer is selected, only Business can be selected for the second question.
-
Are you a direct customer or an Independent Software Vendor (ISV), Reseller, or Partner?
- Direct Customer: I use Twilio for internal communications and interactions with customers.
- Independent Software Vendor (ISV), Reseller, or Partner: I develop products with Twilio integrated and sell them to customers.
-
Who will respond to and receive calls and messages on this phone number?
- Business: Calls and messages are responded to and received by the business.
- Individual: Calls and messages are responded to and received by an individual.
After completing your selection, click Continue to proceed to the next step.
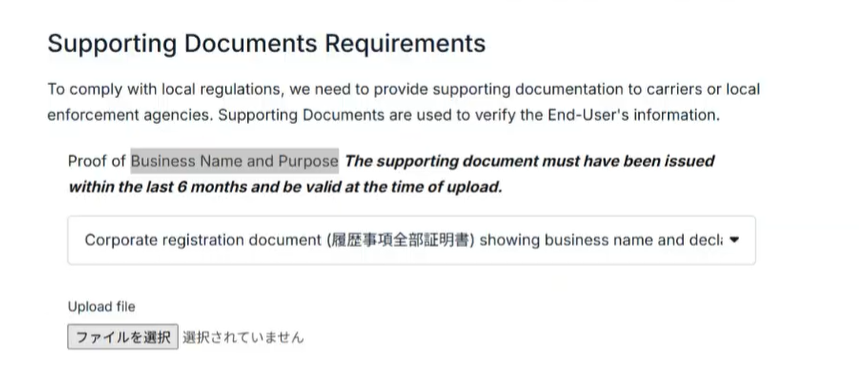
Next, enter the Business Information. Fill in both businessName and businessPurpose.
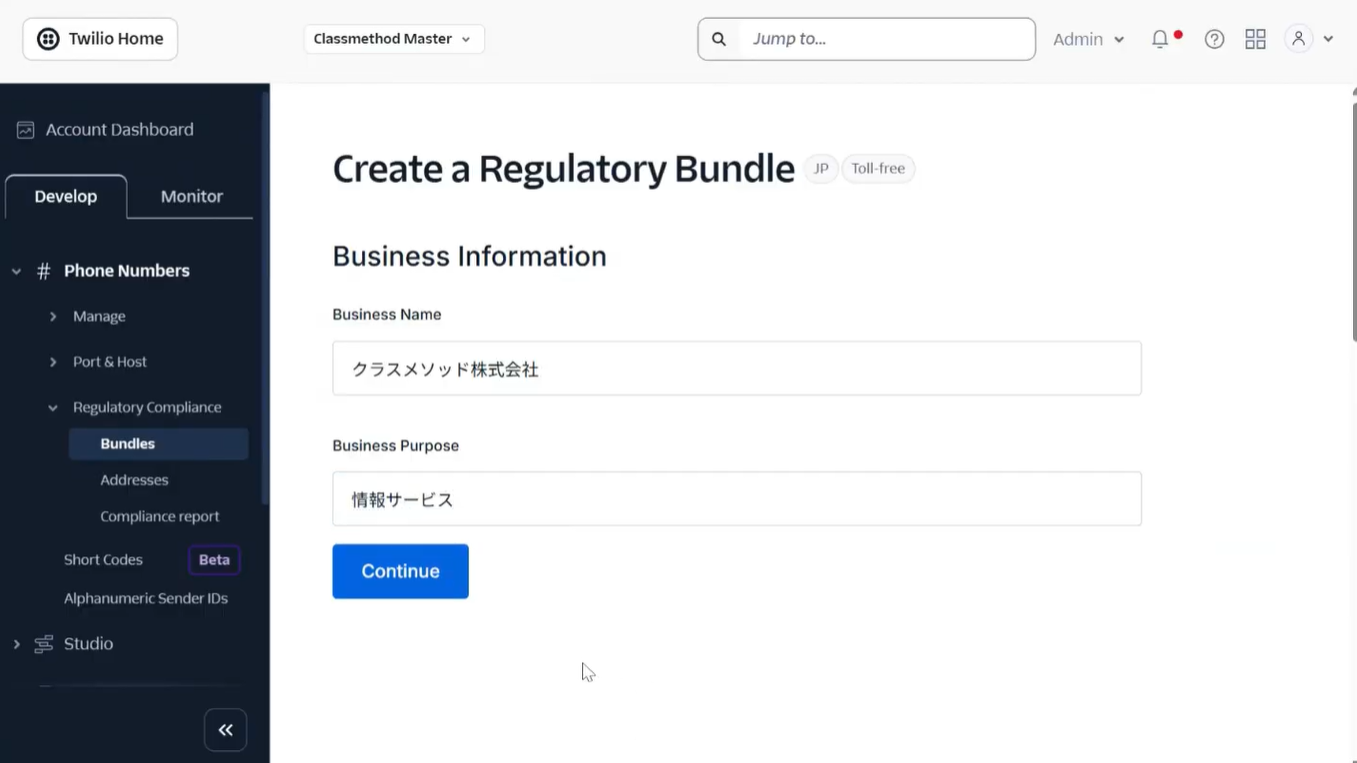
After completing the input, click Continue to proceed to the next step.
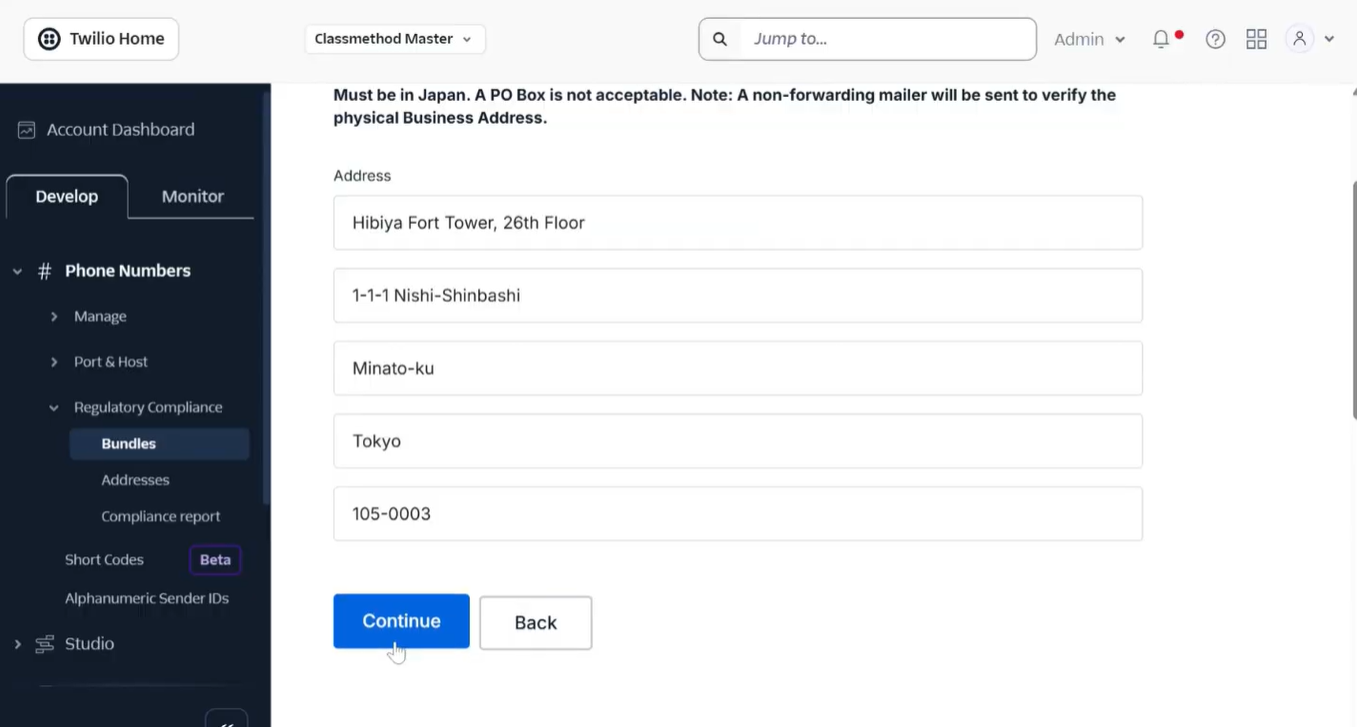
Next, enter the Business address. First, select your country from the list and click Continue.
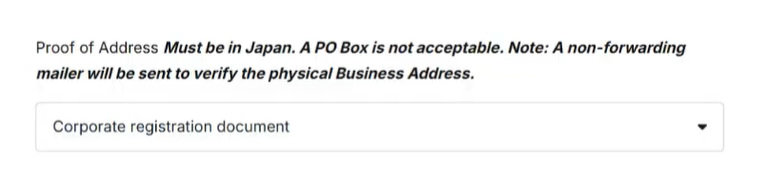
Then enter the actual address and click Continue. Please note that non-forwardable mail will be sent to verify the actual business address that you enter here. Therefore, P.O. boxes are not acceptable.
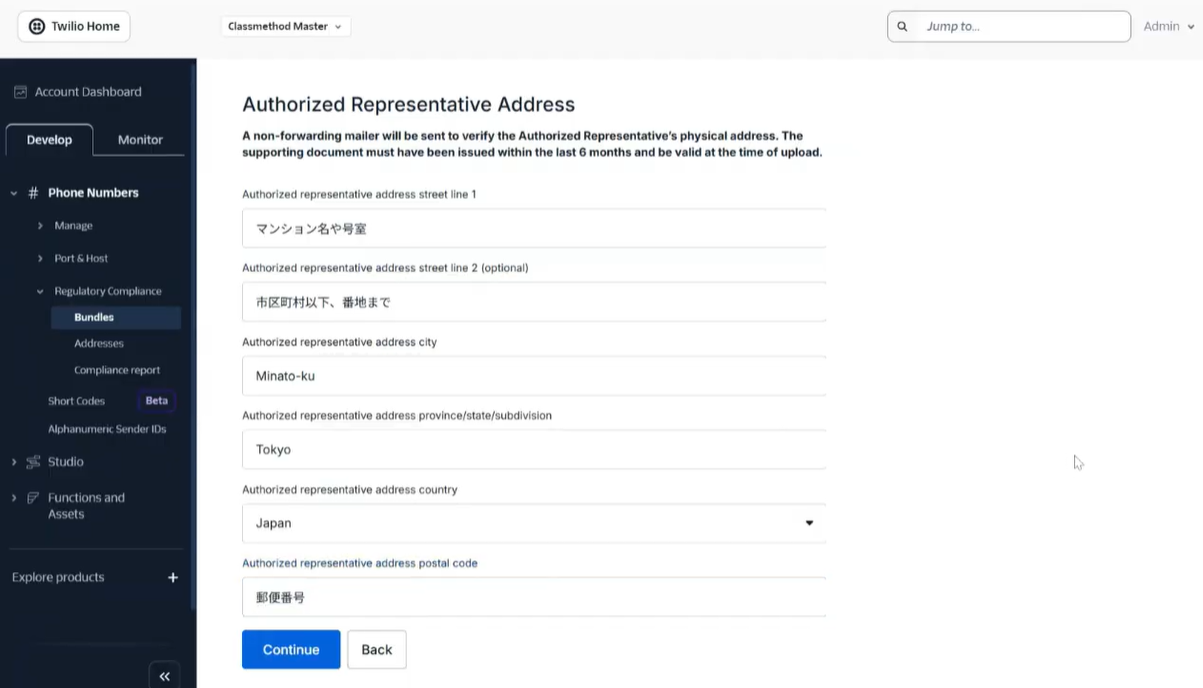
 Next, we will enter the Authorized Representative Address. While the notation is slightly different from the company address we entered earlier, the questions are largely the same. After completing the entries, click Continue.
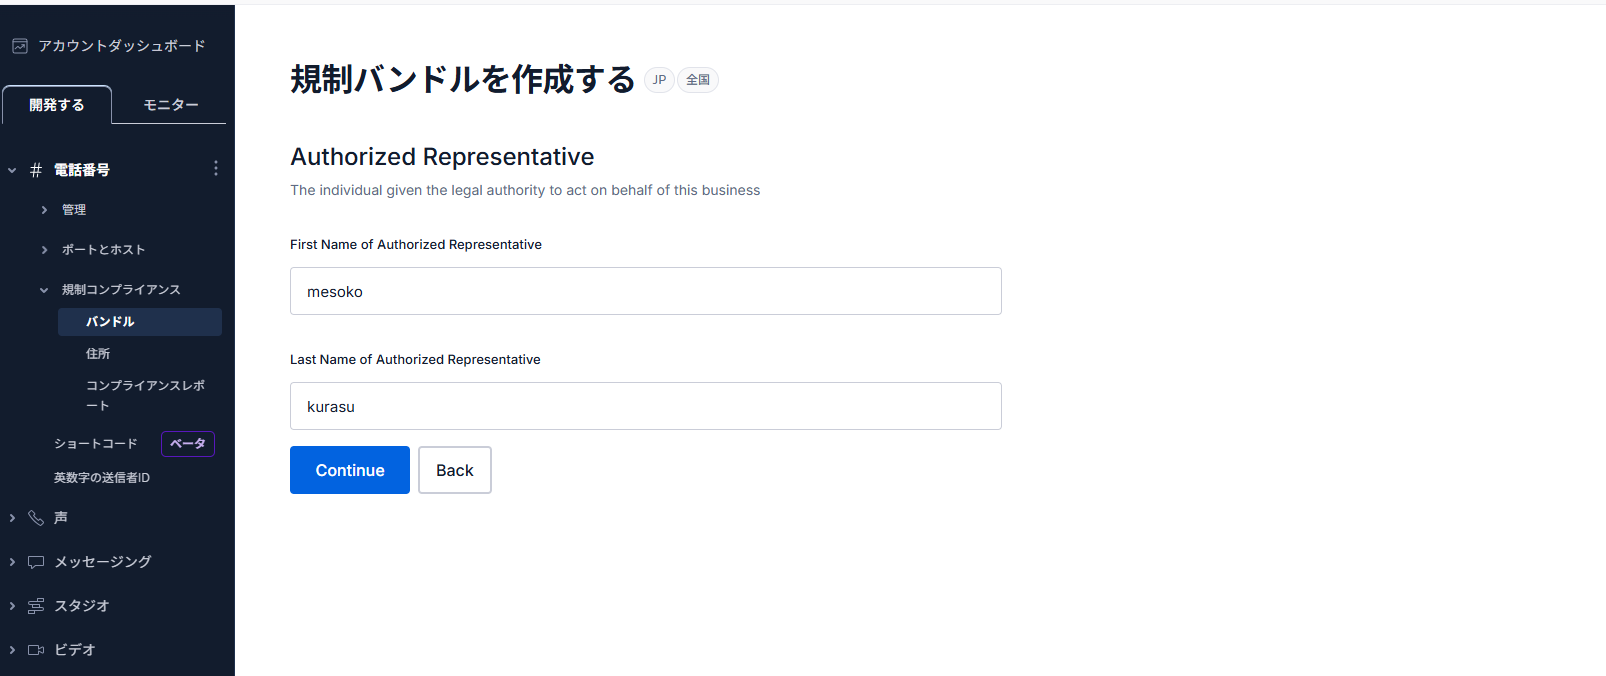
Next, we will enter information about the Authorized Representative. Enter the name and click Continue.
Next, we will select and upload supplementary documents.
First, for "corporate registration documents showing company name and business purpose," select "Complete Historical Corporate Registry Certificate" and upload the file.
From here, we will address the authorized representative information.
Next, select a document to verify the address. Choose "Corporate registration document" from the options.
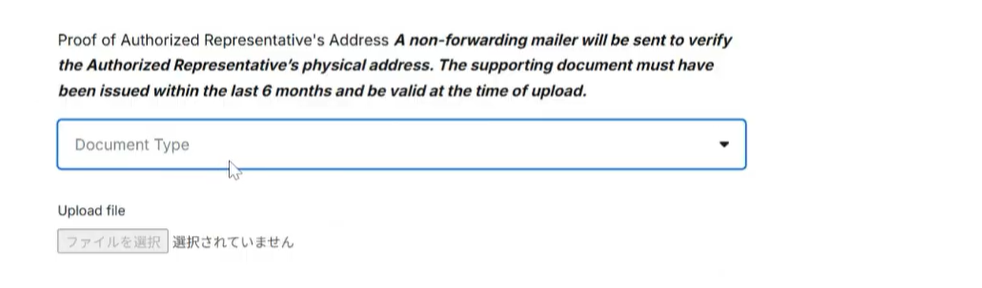
Next, select and upload a document to verify the authorized representative's address. (Such as a utility bill issued within the past 6 months)
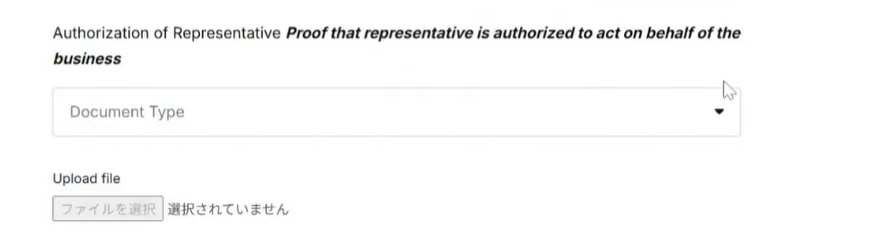
Next, regarding the authority of the representative, select "Power of attorney" and upload the file.
Next, select a method to verify the representative's address (something showing name, photo, and address) from "Driver's license," "My Number Card," or "Driver's History Certificate," and upload the file.

Finally, select the application form and upload it. (Currently this option only includes the application form.)
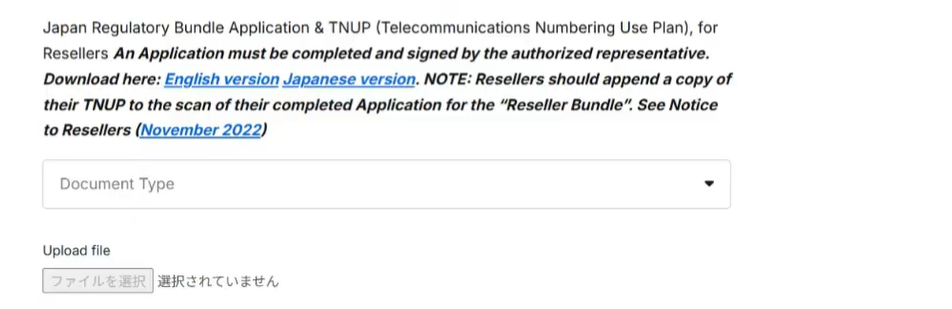
After completing all selections and document uploads, click Continue to proceed to the next step.
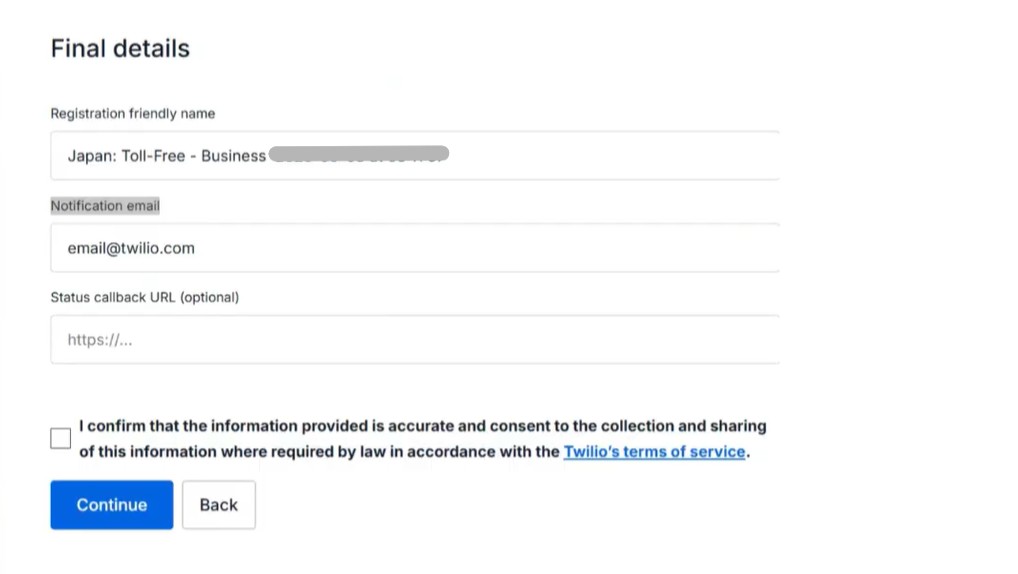
Next is the Final details section.
In the second item, enter the email address where you want to receive notifications about the status of your bundle application. After completing the entry, check the checkbox at the bottom of the screen and click Continue to proceed. (The checkbox content states something like "I confirm that the information provided is accurate and agree to the collection and sharing of this information in accordance with Twilio's Terms of Service, where required by law.")
When you proceed to the next screen, you will see a screen like this, and the application is complete.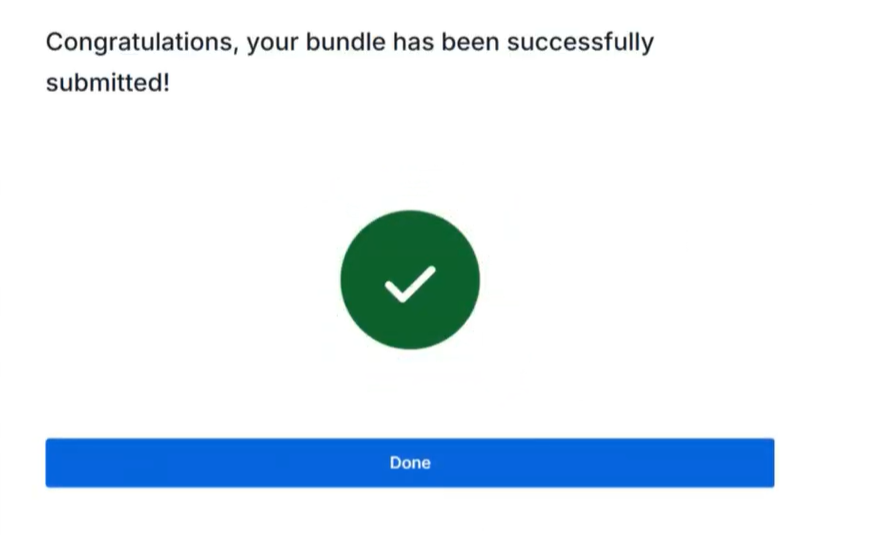
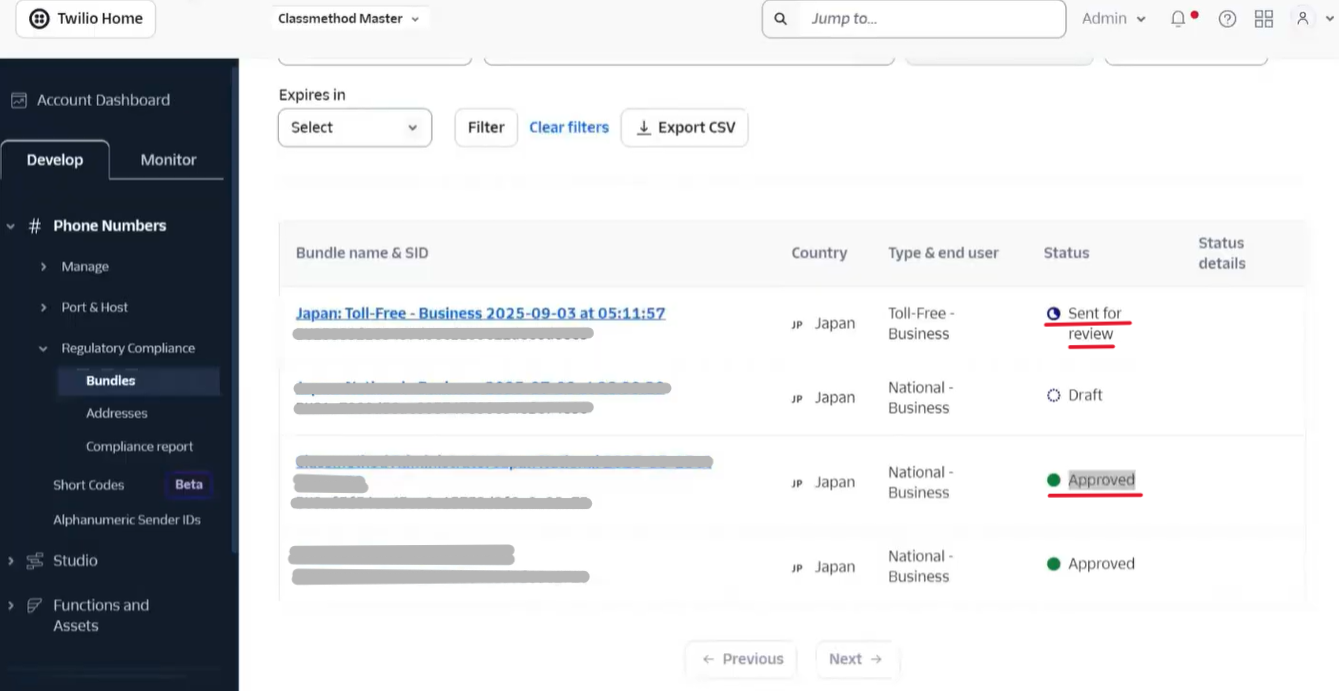
Checking Application Status
You can check the application status from the same Bundles list. If it's still in progress, the status will show "Sent for review," and when approved, it will display "Approved."
Purchasing Phone Numbers
Application Procedure
First, select "Phone Number" from the left side of the Twilio console screen.
From the selected items, choose "Manage," and then select "Buy a number."

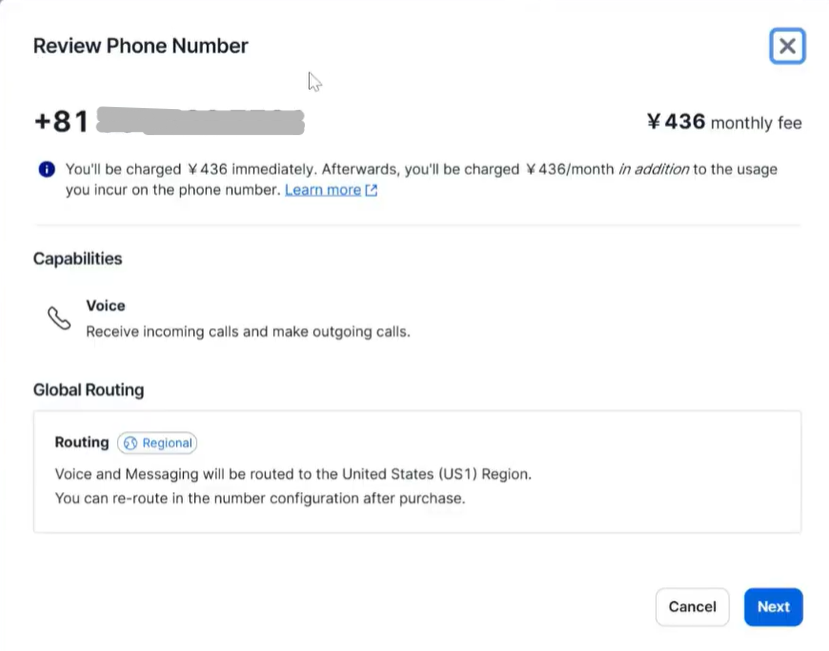
Select "🇯🇵 (+81) Japan - JP" for "Country" and click "Search," then select "Buy" for the number you want to purchase from the list.
A confirmation screen for the number will appear. Check the details and select "Next."
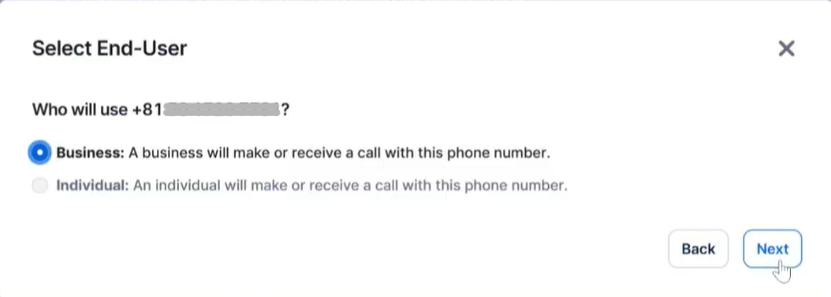
Next, choose the type of end user from the following two options. Select "Business" and move to the next item by clicking "Next."
- Business: A business will make or receive calls with the phone number.
- Individual: An individual will make or receive calls with the phone number.
Next is about bundle assignment.
Under "Assign approved Bundle," select a bundle from the list and assign it to the number. Then, under "Assign Address," select the company address.
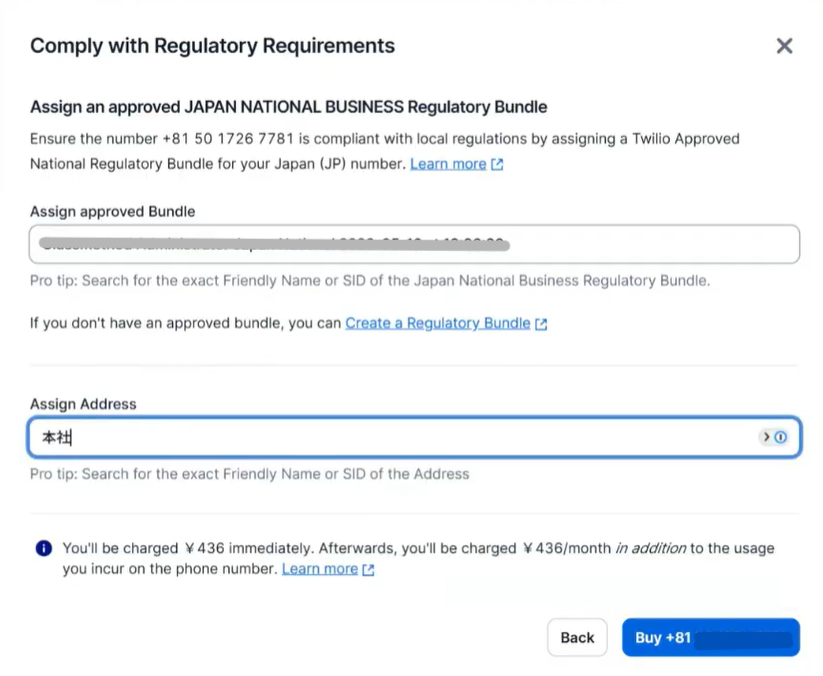
Finally, click "Buy" (phone number) to complete the purchase.
Summary
In this article, I've summarized the new bundle application process and phone number purchasing method in Twilio.
I hope this blog has been helpful to you.
Announcement
We hold Twilio/SendGrid seminars every month
Classmethod holds Twilio/SendGrid seminars every month.
Classmethod holds monthly Twilio/SendGrid seminars. The content explains the basics for those who are not familiar with Twilio and SendGrid, so if you're considering implementing Twilio/SendGrid in the future, or if you've already implemented it and want to study the basics again, please feel free to join us.