Import existing TiDB Cloud Starter (formerly: Serverless) clusters into Terraform management

Introduction
This article explains the procedure for importing an existing TiDB Cloud cluster under Terraform management. We will focus on Starter, with Dedicated being outside the scope of this article. We'll concisely cover the Terraform provider installation, API key configuration, obtaining Project ID and Cluster ID, region specification, and running terraform import with consistency verification using a minimal configuration. For Starter, the key challenges are the limited available regions and the requirement to specify region.name in the canonical form regions/aws-<region-id>.
What is TiDB
TiDB is a MySQL-compatible distributed database. It can handle both online transaction processing and analytical processing on the same cluster. With TiDB Cloud, you can operate it in a managed environment, offering a free Starter tier and a flexible Dedicated tier.
What is Terraform
Terraform is an IaC tool. It allows you to declare the desired state of cloud resources in code and apply differences using plan and apply. Existing resources can be brought under management using import.
Target Audience
- Those who have already created a TiDB Cloud cluster via the console and want to move it under Terraform management
- Those who want to quickly understand the stumbling points around Starter region specification and import
- Those who want to organize their setup for safe re-execution from CI
References
- Get the TiDB Cloud Terraform Provider
- Use the tidbcloud_serverless_cluster Resource
- Use the tidbcloud_sql_user Resource
Environment Setup
We'll set up a Terraform work environment with the premise of later importing an existing Starter cluster. The goal is to ensure the provider is correctly initialized and that a plan passes with minimal configuration.
Install Terraform and Provider
First, set up the CLI. Here's an example for macOS.
			brew tap hashicorp/tap
brew install hashicorp/tap/terraform
terraform -version
For other OSes, refer to Install Terraform. The provider will be automatically downloaded during initialization as described below.### Issue API Keys and Pass Them as Environment Variables
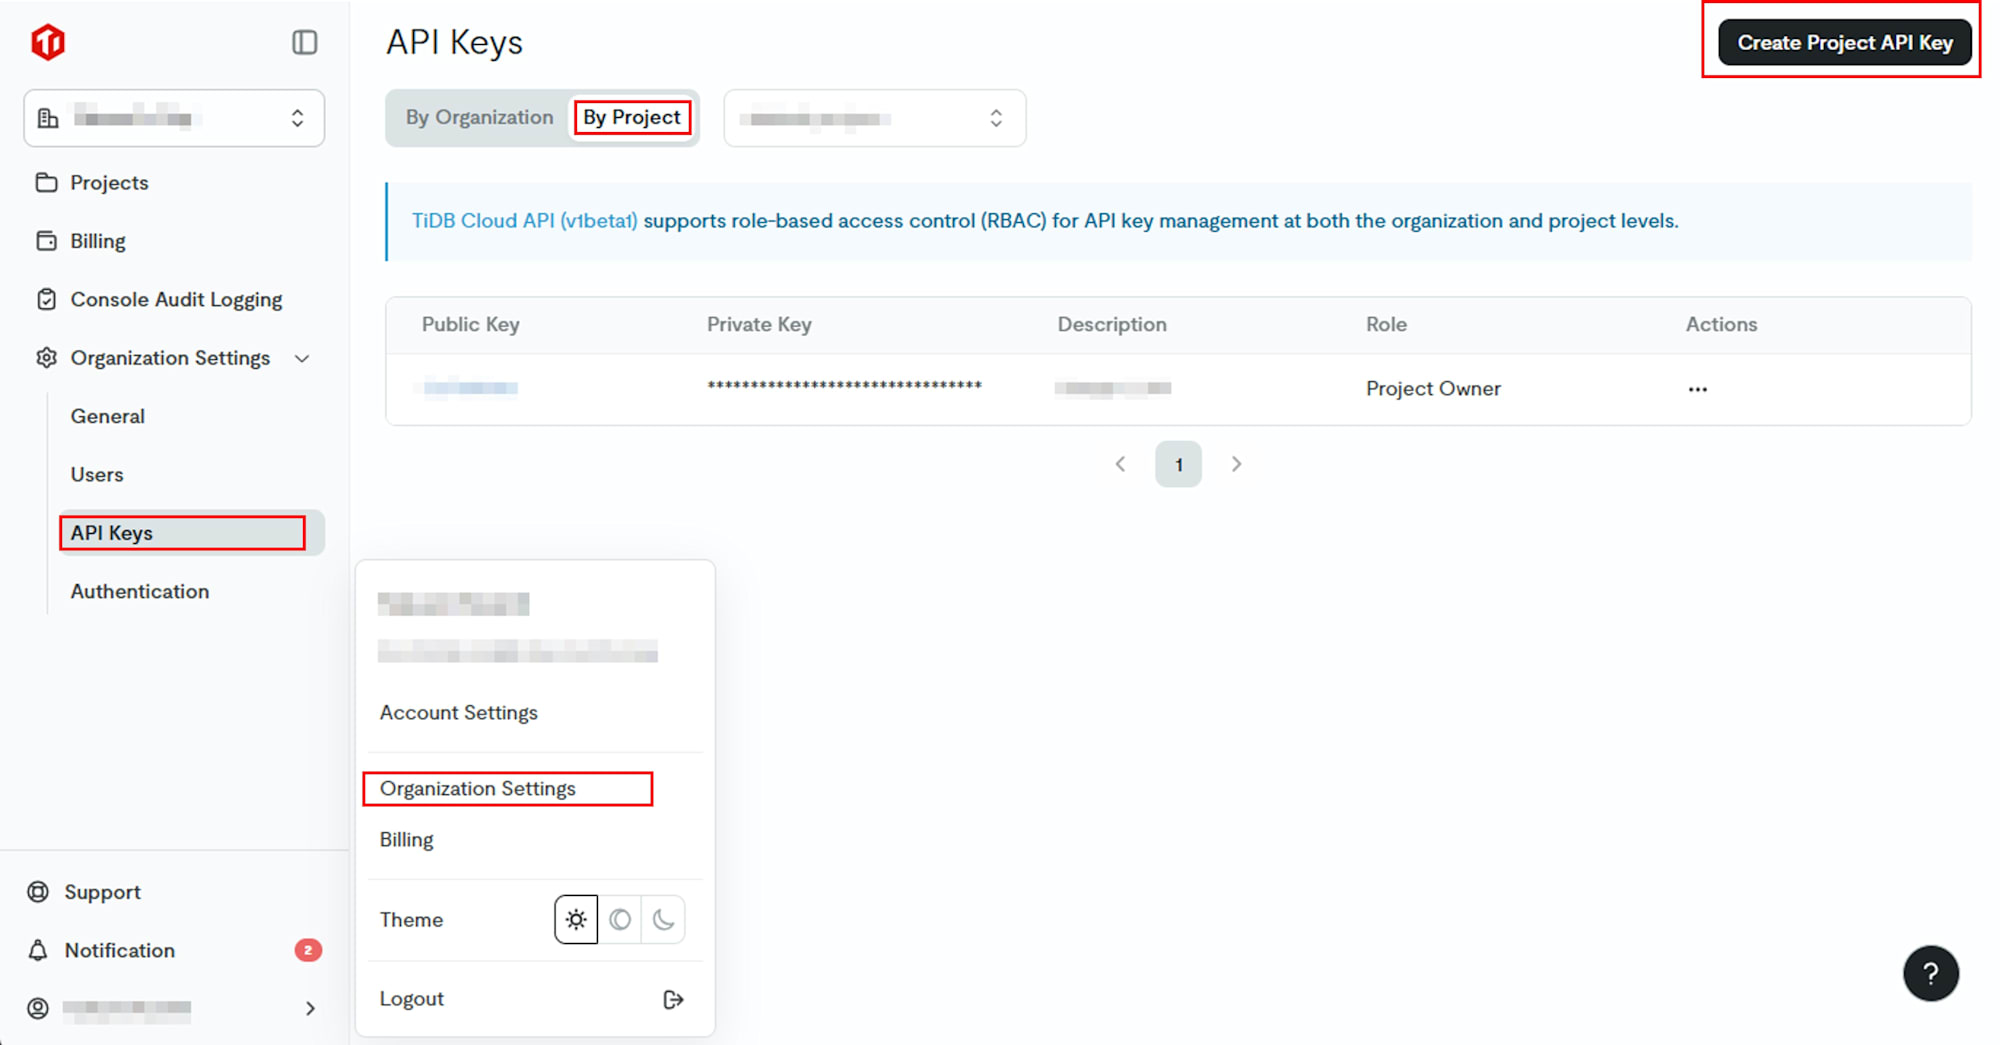
Create API keys in the TiDB Cloud console.
Go to Organization Settings > API Keys > By Project > Create Project API Key to create them.
Pass them to your shell as environment variables.
			export TIDBCLOUD_PUBLIC_KEY="xxxxxxxx"
export TIDBCLOUD_PRIVATE_KEY="xxxxxxxx-xxxx-xxxx-xxxx-xxxxxxxxxxxx"
In CI, register these as repository secrets and expose them as job environment variables with the same names.
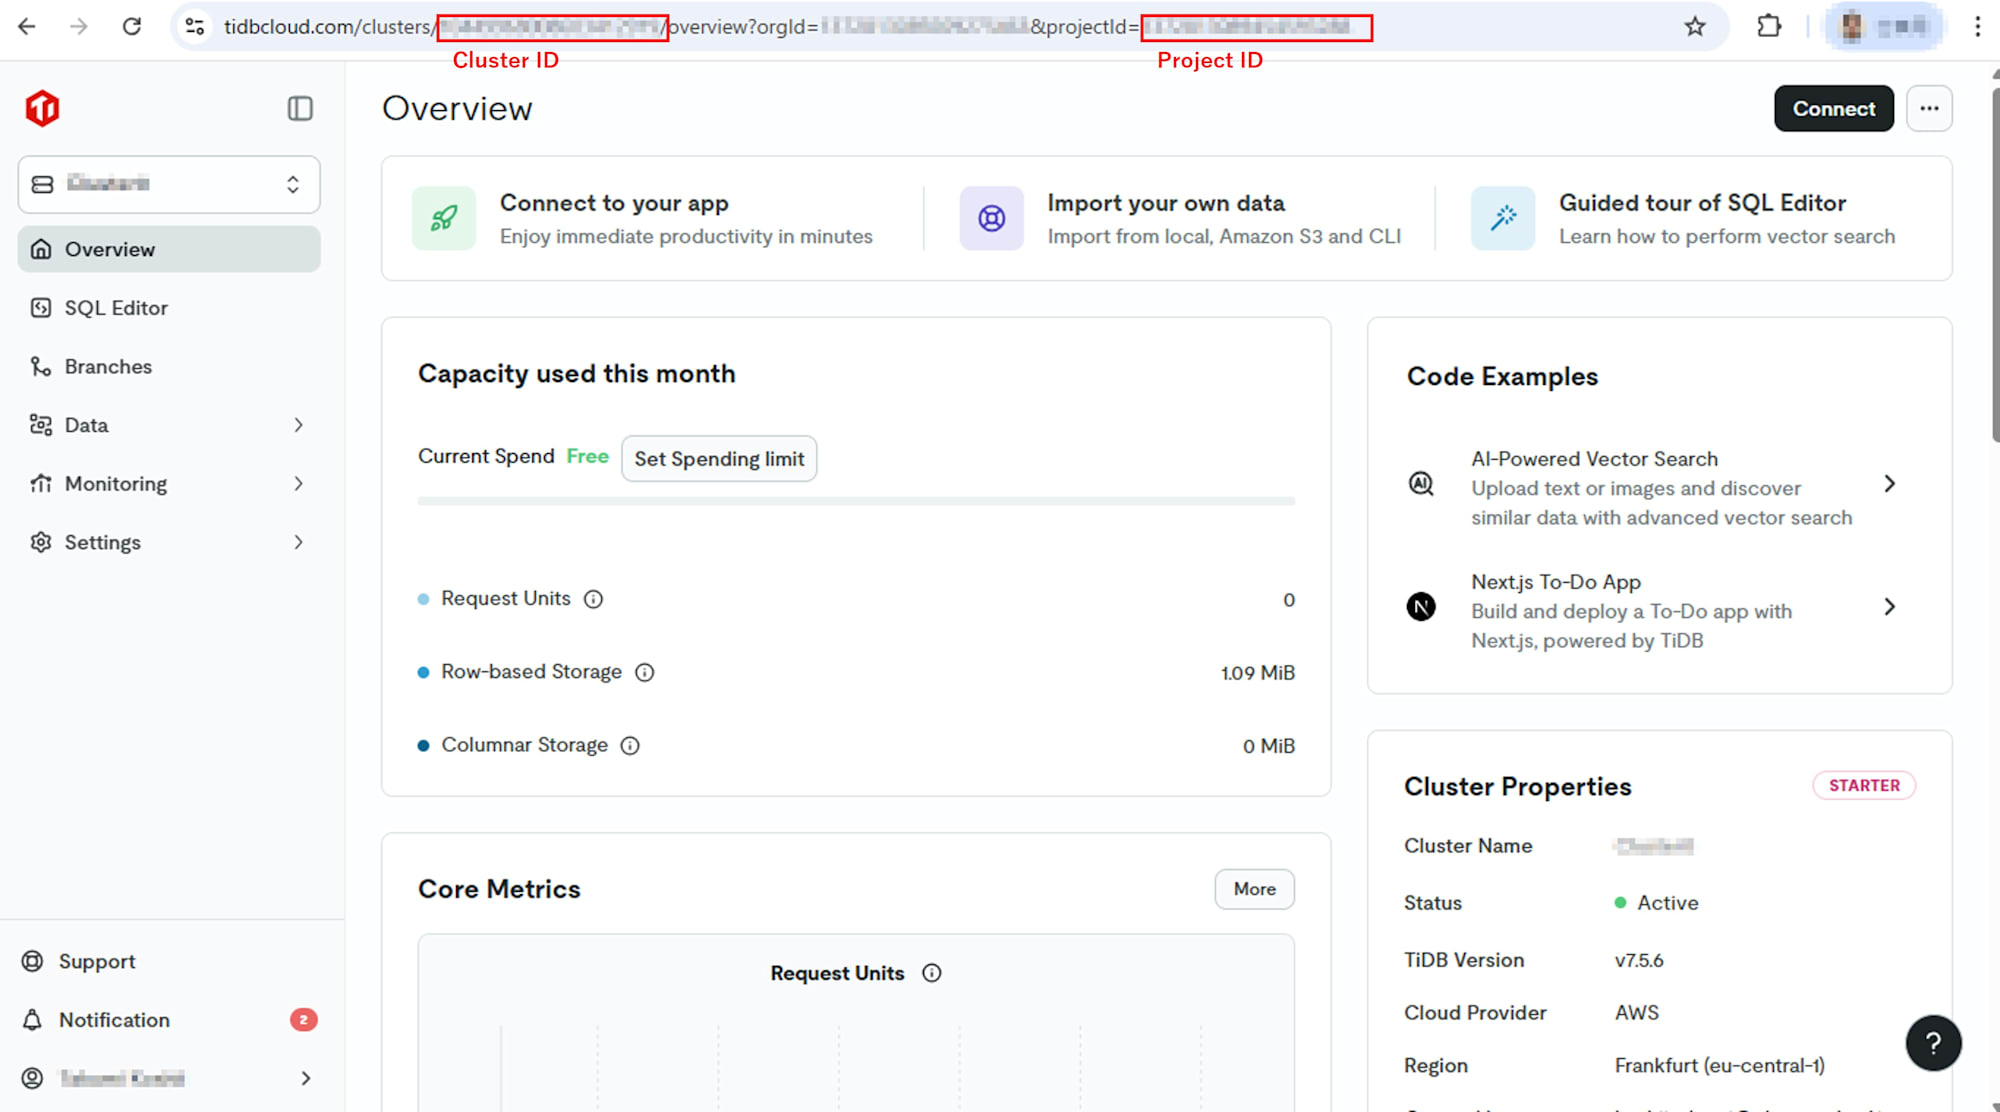
Note the Project ID and Cluster ID
- Project ID
You can find this in the URL of the target project in the TiDB Cloud console. Specify this in the subsequent variable tidbcloud_project_id. - Cluster ID
This is needed when importing existing clusters. You can find it in the URL of the target cluster in the console. Specify this alongside the resource address during import.
Prepare Minimal Configuration Files
We'll create a minimal configuration for Starter that can be imported later. Place the following 4 files in your working directory.
versions.tf
			terraform {
  required_version = ">= 1.0.0"
  required_providers {
    tidbcloud = {
      source  = "tidbcloud/tidbcloud"
      version = "~> 0.4.0"
    }
  }
}
providers.tf
			provider "tidbcloud" {
  # Automatically detects environment variables TIDBCLOUD_PUBLIC_KEY and TIDBCLOUD_PRIVATE_KEY
  sync = true  # Wait synchronously for cluster-related operations
}
variables.tf
			variable "tidbcloud_project_id" {
  description = "TiDB Cloud project id"
  type        = string
}

variable "cluster_region" {
  description = "Starter region name in canonical form, e.g.: regions/aws-eu-central-1 or regions/aws-ap-northeast-1"
  type        = string
}

variable "display_name" {
  description = "Display name of the cluster"
  type        = string
  default     = "my-starter-db"
}
```#### main.tf

This is a declaration of the Starter cluster. The region is specified as a block with provider and name, not just a simple string.

```hcl
resource "tidbcloud_serverless_cluster" "starter" {
  project_id   = var.tidbcloud_project_id
  display_name = var.display_name

  region = {
    provider = "AWS"
    name     = var.cluster_region
  }

  lifecycle {
    prevent_destroy = true
    ignore_changes  = [display_name]
  }
}
For detailed specifications, refer to Using the tidbcloud_serverless_cluster resource.
Initialize and verify operation
Pass variables through environment variables, then run init and plan.
			export TF_VAR_tidbcloud_project_id="xxxxxxxxxxxxxxxxxxx"
export TF_VAR_cluster_region="regions/aws-eu-central-1"  # Specify in canonical form

terraform init -reconfigure # -reconfigure forces reloading of backend and provider configurations. It can be safely executed repeatedly even in an existing working directory.
terraform validate
terraform plan
If the plan succeeds, you're ready to go. If there's a region mismatch, you'll get an error. Adjust TF_VAR_cluster_region to match the options in the console.
Import an existing cluster
You can incorporate an existing Starter cluster that was created via the console into Terraform state management without destroying it. Prepare a declaration that matches the actual resource, bind it to the state with terraform import, and then verify consistency with plan -refresh-only.
Import is an operation that adds a resource to the state. If the HCL(*) declaration and the actual resource differ, differences will appear in subsequent plan operations. Make sure to adjust the variables.tf and main.tf from the previous chapter to match your actual Project and Region.