
Applying a Voice Changer to Phone Calls: Replacing Outgoing Audio and Applying VST3 in Twilio Voice JS SDK
This page has been translated by machine translation. View original
Introduction
When using voice effects like voice changers in video streaming, there may be moments when you want to use the same effects on phone calls with end users. This article introduces an experiment where we replaced the outgoing audio of the Twilio Voice JS SDK to send voice processed by native VST3 plugins through phone calls.
What is Twilio?
Twilio is a cloud service that allows you to incorporate communication features like phone calls and SMS into applications through APIs.
The Twilio Voice JS SDK connects to Twilio via WebRTC from web browsers or Electron applications to make voice calls through the PSTN (public switched telephone network). The Device acts as a softphone, allowing the application to handle call initiation, termination, and event processing. Additionally, through device.audio, you can incorporate the Audio Processor API to modify the audio before transmission, in addition to selecting input devices.
What are VST plugins?
VST (Virtual Studio Technology) is a common interface for connecting host applications, such as DAWs, with audio plugins like effects and synthesizers.
In October 2025, Steinberg released the VST 3.8 SDK and simultaneously changed the license to the MIT license (reference). Previously, Steinberg's proprietary license (and sometimes individual contracts) was required, but now you can freely use it, including in commercial products, by following the MIT license. The main requirements are to retain the copyright notice and license text. Please check the license text for details.

Target Audience
- Those who want to use native VST3 plugins with phone audio
- Those interested in implementation examples of Twilio Voice JS SDK and Audio Processor
- Those wanting to create a PoC for voice calls in a standalone application
References
- Twilio Voice JavaScript SDK Device Audio
- How to use Twilio Functions (Overview)
- Steinberg VST3 SDK Documentation
Architecture
When considering how to process phone audio, one approach is to use Twilio Media Streams to output audio via WebSocket to an external server, process it, and return it.
However, this configuration increases network roundtrips, latency, and operational costs. The goal of this experiment is to process only our outgoing audio when making a phone call and deliver it to the recipient. Since we wanted to first check the shortest path that could be completed with just the client application, we adopted the approach of replacing the outgoing audio with Twilio Voice JS SDK's AudioProcessor. (Note: This assumes one concurrent call.)
The Renderer handles the Twilio Voice JS SDK and WebAudio, passing audio buffers to the native VST3 host in the Main process when needed. Twilio Functions is responsible for issuing Access Tokens and dialing a fixed number.
- Twilio Functions: Issues Access Tokens and dials a fixed number with TwiML when a call starts
- Renderer: Handles call start/end, generates outgoing audio, switches audio sources, and has UI controls for VST
- Main: Has VST3 host functionality and loads, processes, and displays plugin UI upon request from the Renderer
- Native Addon: Uses VST3 SDK to load plugins and call the equivalent of
process()
Phase 0: Establishing a call with Twilio Voice JS SDK
We'll create a state where we can call from the Electron app to a fixed phone number. We'll send the microphone input directly as audio. Before replacing the outgoing audio in Phase 1 and beyond, the goal is to confirm that the Twilio settings and Device.connect() work correctly. If the call is established at this point, it will be easier to isolate the cause to the audio processing side if there's no sound in subsequent phases.
Setting up a Twilio Function for Access Token issuance
The Twilio Voice JS SDK initializes the Device by passing an AccessToken to the browser. For this experiment, we used Twilio Functions to create a token endpoint that can be called from the browser.
/token
// /token
const twilio = require('twilio');

exports.handler = function (context, event, callback) {
  const response = new twilio.Response();
  response.appendHeader('Access-Control-Allow-Origin', '*');
  response.appendHeader('Access-Control-Allow-Methods', 'GET, POST, OPTIONS');
  response.appendHeader('Access-Control-Allow-Headers', 'Content-Type');

  if (event.httpMethod === 'OPTIONS') {
    response.setStatusCode(204);
    return callback(null, response);
  }

  const AccessToken = twilio.jwt.AccessToken;
  const VoiceGrant = AccessToken.VoiceGrant;

  const identity = event.identity || 'electron-vst-client';

  const voiceGrant = new VoiceGrant({
    outgoingApplicationSid: context.TWIML_APP_SID,
    incomingAllow: false,
  });

  const token = new AccessToken(
    context.ACCOUNT_SID,
    context.API_KEY_SID,
    context.API_KEY_SECRET,
    { identity }
  );
  token.addGrant(voiceGrant);

  response.setBody({
    token: token.toJwt(),
    identity,
  });

  callback(null, response);
};
Select Public for the Visibility of the /token Function.

Set environment variables from the Environment Variables in the Twilio Function console.
| Variable | Value |
|---|---|
| ACCOUNT_SID | ACxxxxxxxxxxxxxxxxxxxxxxxxxxxxxxxx |
| API_KEY_SID | SKxxxxxxxxxxxxxxxxxxxxxxxxxxxxxxxx |
| API_KEY_SECRET | xxxxxxxxxxxxxxxxxxxxxxxxxxxxxxxx |
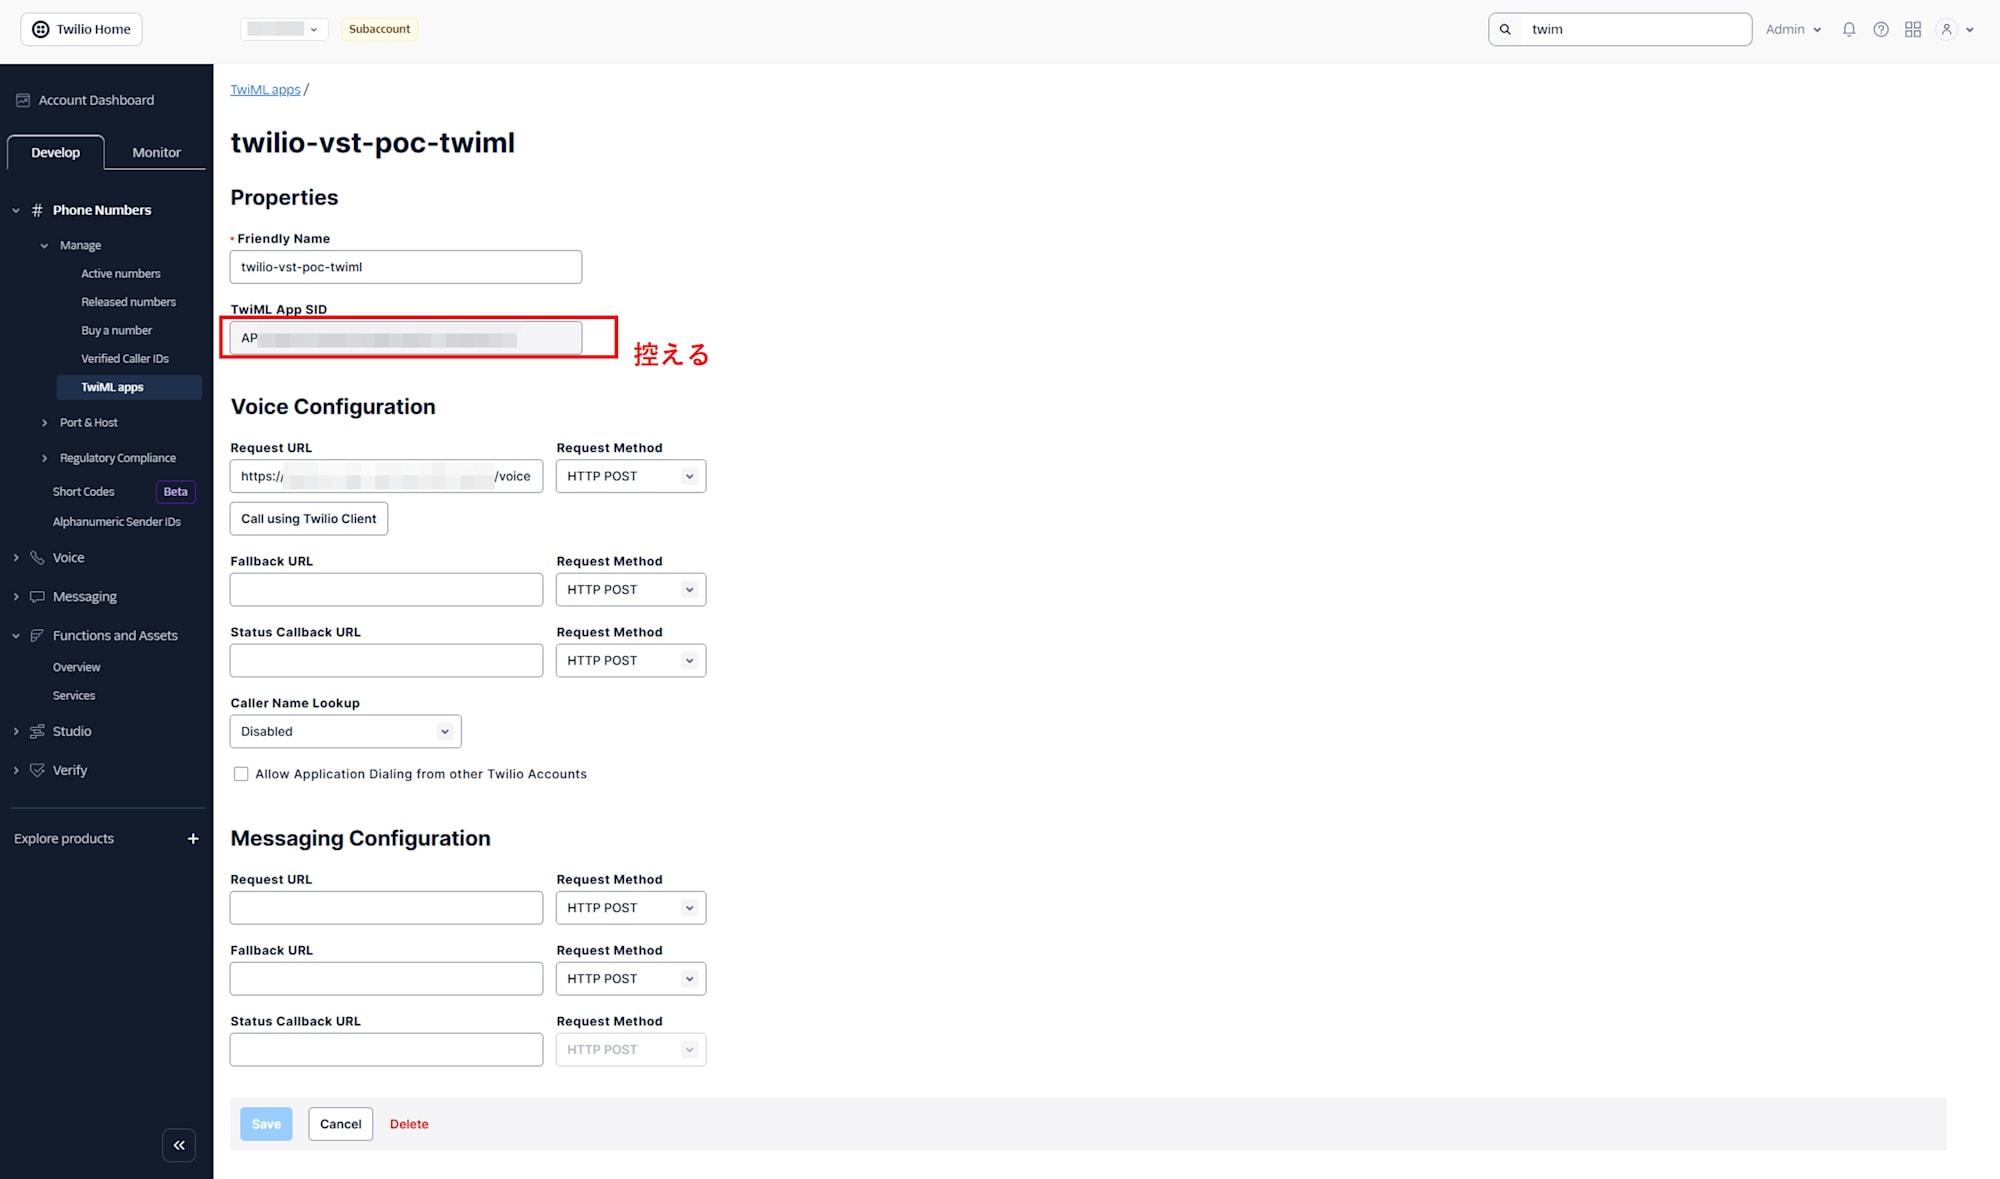
| TWIML_APP_SID | APxxxxxxxxxxxxxxxxxxxxxxxxxxxxxxxx |
| CALLER_ID | +81xxxxxxxxxx |
| DEFAULT_TO_NUMBER | +81xxxxxxxxxx |
API_KEY_SID,API_KEY_SECRET, andTWIML_APP_SIDwill be obtained in later steps.CALLER_IDspecifies the originating number purchased from Twilio.DEFAULT_TO_NUMBERis the destination when the client doesn't provide aToparameter.
Setting up a Function to return TwiML
Device.connect() hits the Voice URL of the TwiML App. We'll set it up to return Dial to forward to a fixed phone number.
/voice
// /voice
const Twilio = require('twilio');

exports.handler = function (context, event, callback) {
  const twiml = new Twilio.twiml.VoiceResponse();

  const toNumber = event.To || context.DEFAULT_TO_NUMBER;

  const dial = twiml.dial({
    callerId: context.CALLER_ID,
  });

  dial.number(toNumber);

  return callback(null, twiml);
};
TwiML Configuration
Next, create a TwiML App. Set the Voice Request URL to the URL of the voice Function you created as HTTP POST, and set the SID of the created TwiML App in the Function's environment variables.
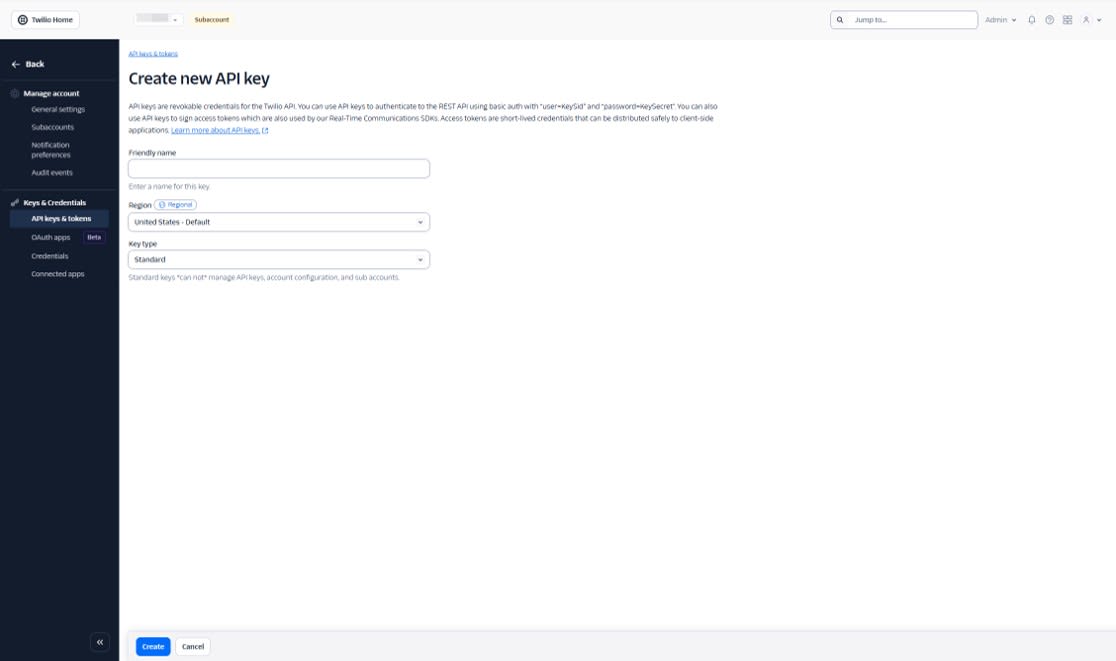
Creating an API Key
Create an API Key and Secret in API keys & tokens and also set these in the Function's environment variables.
Electron Implementation
Set the environment variables as follows. VITE_TWILIO_TOKEN_ENDPOINT is the URL of the /token Twilio Function.
VITE_TWILIO_TOKEN_ENDPOINT=https://xxxxx.twil.io/token
Device Initialization and Call Initiation
Fetch the token at startup to generate the Device, and call with connect() by passing the To parameter.
Excerpt from src/hooks/useTwilioDevice.ts
// Fetch token and create Device (excerpt)
const resp = await fetch(TOKEN_ENDPOINT);
const { token } = await resp.json();

const device = new Device(token, {
  logLevel: 'debug',
  codecPreferences: ['opus', 'pcmu'],
  edge: 'tokyo',
});

// Make a call (excerpt)
const call = await deviceRef.current.connect({
  params: { To: phoneNumber },
});
Verification Steps
Hit the token URL with a browser or curl to confirm that JSON is returned. The token value in the response will be a long string as it's a JWT.
{
  "token": "eyJhbGciOiJIUzI1NiIsInR5cCI6IkpXVCJ9....",
  "identity": "electron-vst-client"
}
Next, launch the Electron app and check that Device initialization and registration proceed in the DevTools console logs. With logLevel: debug enabled, you'll see logs related to registration and connection.
At this point, even if the VST3 host native addon hasn't been built, it won't affect the establishment of the call in Phase 0. There may be errors in the logs, but as long as you can make a call, there's no problem for Phase 0.
Execute Call and verify that the specified number receives the call.
- The destination rings
- You can converse in both directions when answered
- The call is recorded in the Twilio Console's Call Logs
Phase 1: Replacing Outgoing Audio with Test Tones
In Phase 1, we'll send clearly identifiable test tones instead of microphone input to confirm that replacing outgoing audio works. On phone lines, quality expectations are low, and slight differences in volume or quality might be hard to notice. Test tones are easier to distinguish even over the phone.
Implementation Strategy
The Twilio Voice JS SDK allows inserting an Audio Processor right before the audio is sent. Here, we'll build a WebAudio pipeline and return MediaStreamDestinationNode.stream to replace the outgoing audio passed to Twilio.
In this phase, we'll prepare two audio sources:
- microphone: Send the microphone input directly
- tone: Send a test tone generated by an OscillatorNode
Audio Processor Implementation
We'll create src/audio/CustomAudioProcessor.ts to implement Twilio's AudioProcessor. In createProcessedStream(), we'll generate WebAudio nodes and return the stream to Twilio.
Excerpt from CustomAudioProcessor
import type { AudioProcessor } from '@twilio/voice-sdk'

type AudioSourceType = 'microphone' | 'tone'

export class CustomAudioProcessor implements AudioProcessor {
  private audioContext?: AudioContext
  private micSourceNode?: MediaStreamAudioSourceNode
  private destinationNode?: MediaStreamAudioDestinationNode

  private oscillator?: OscillatorNode
  private oscillatorGain?: GainNode

  private sourceType: AudioSourceType = 'microphone'

  async createProcessedStream(stream: MediaStream): Promise<MediaStream> {
    this.audioContext = new AudioContext({ sampleRate: 48000 })

    this.micSourceNode = this.audioContext.createMediaStreamSource(stream)
    this.destinationNode = this.audioContext.createMediaStreamDestination()

    this.oscillatorGain = this.audioContext.createGain()
    this.oscillatorGain.gain.value = 0.1

    this.updateAudioRouting()
    return this.destinationNode.stream
  }

  setSourceType(type: AudioSourceType) {
    this.sourceType = type
    this.updateAudioRouting()
  }

  startTone(freqHz: number) {
    if (!this.audioContext) return
    this.stopTone()

    this.oscillator = this.audioContext.createOscillator()
    this.oscillator.type = 'sine'
    this.oscillator.frequency.value = freqHz
    this.oscillator.connect(this.oscillatorGain!)
    this.oscillator.start()
  }

  stopTone() {
    if (this.oscillator) {
      this.oscillator.stop()
      this.oscillator.disconnect()
      this.oscillator = undefined
    }
  }

  private updateAudioRouting() {
    if (!this.destinationNode) return

    // Disconnect all connections first
    this.micSourceNode?.disconnect()
    this.oscillatorGain?.disconnect()

    // Connect only the selected source to destination
    if (this.sourceType === 'microphone') {
      this.micSourceNode?.connect(this.destinationNode)
    } else {
      this.oscillatorGain?.connect(this.destinationNode)
    }
  }
}
Integration with Device
Register the Audio Processor with the Device created in Phase 0. Calling device.audio.addProcessor() after creating the Device works fine.
Integration example in useTwilioDevice
import { Device } from '@twilio/voice-sdk'
import { CustomAudioProcessor } from '../audio/CustomAudioProcessor'

const processor = new CustomAudioProcessor()
device.audio.addProcessor(processor)

// Switch based on UI operations
processor.setSourceType('tone')
processor.startTone(440)
Verification Steps
For Phase 1 verification, check the following in order to ensure a clear difference is noticeable over the phone:
- Make a call using the same procedure as Phase 0, and the recipient can answer
- During the call, switch the outgoing audio source to
toneand start a test tone of around 440 Hz - The recipient hears a continuous beep sound instead of a voice
- Switch back to
microphone, and voice is transmitted again
Phase 2: Processing Microphone Input with a "Mock VST Effect" for Transmission
In Phase 1, we confirmed that "outgoing audio can be replaced" using test tones. In Phase 2, we'll advance one step further to process and transmit microphone input. On phone lines, differences from light EQ or subtle reverb may be difficult to notice due to bandwidth and compression. Therefore, in this phase, we'll implement a ring modulator (strong processing that makes voices sound robotic) using only WebAudio as a mock VST, which will create a noticeable change even over the phone.
Implementation Strategy
- The source of outgoing audio is the same as Phase 1:
AudioProcessor.createProcessedStream() - Convert microphone input
MediaStreamtoMediaStreamAudioSourceNodeand pass it through WebAudio nodes - Finally, return
MediaStreamDestinationNode.streamto Twilio to use as outgoing audio
In this phase, we'll prepare two transmission paths:
- microphone: Send microphone input directly
- vst-processed: Process microphone input with mock VST (WebAudio) and send it
Creating a Mock VST (WebAudio Ring Modulator)
Extracting the effect as a "component with input/output nodes" makes it easier to replace it with a real VST3 in Phase 3. In Phase 2, we'll insert a temporary implementation that applies amplitude modulation to the input with another waveform. WebAudio doesn't have a node for multiplying audio signals, but we can achieve something similar by varying GainNode.gain at audio rate.
Excerpt from src/audio/MockVstEffect.ts
export class MockVstEffect {
  constructor(
    private carrierFreqHz = 90,
    private depth = 0.8,
    private outputGain = 1.0
  ) {}

  createNodes(ctx: AudioContext) {
    const input = ctx.createGain()
    const output = ctx.createGain()

    // carrier (modulation waveform)
    const carrier = ctx.createOscillator()
    carrier.type = 'sine'
    carrier.frequency.value = this.carrierFreqHz

    // Create (1 + depth * carrier) and put it into Gain
    const depthGain = ctx.createGain()
    depthGain.gain.value = this.depth

    const constant = ctx.createConstantSource()
    constant.offset.value = 1.0

    const modulator = ctx.createGain()

    carrier.connect(depthGain)
    depthGain.connect(modulator.gain)
    constant.connect(modulator.gain)

    // Apply modulation to input and send to output
    input.connect(modulator)
    modulator.connect(output)

    const outGain = ctx.createGain()
    outGain.gain.value = this.outputGain
    output.connect(outGain)

    carrier.start()
    constant.start()

    return { input, output: outGain, carrier, constant }
  }
}
Integrating with CustomAudioProcessor
In src/audio/CustomAudioProcessor.ts, connect "microphone input → mock VST → destination" when sourceType === 'vst-processed'. Twilio Voice JS SDK's audio settings can also be handled through device.audio, which aligns well with our goal of "wanting to process before sending." Note that when switching connections, always disconnect before connecting, and when applying effects, browser audio processing (AEC/NS/AGC) might interfere, so disable it as needed.
Excerpt from CustomAudioProcessor.ts
// Example of replacing with "mic -> MockVstEffect -> destination" only when sourceType === 'vst-processed'

import { MockVstEffect } from './MockVstEffect'

type AudioSourceType = 'microphone' | 'tone' | 'vst-processed'

export class CustomAudioProcessor {
  private audioContext?: AudioContext
  private micSourceNode?: MediaStreamAudioSourceNode
  private destinationNode?: MediaStreamAudioDestinationNode

  private sourceType: AudioSourceType = 'microphone'

  private mock?: { input: GainNode; output: GainNode }
  private mockEffect = new MockVstEffect()

  async createProcessedStream(stream: MediaStream): Promise<MediaStream> {
    this.audioContext = new AudioContext({ sampleRate: 48000 })
    this.micSourceNode = this.audioContext.createMediaStreamSource(stream)
    this.destinationNode = this.audioContext.createMediaStreamDestination()

    // Initialize Mock VST as a component
    const { input, output } = this.mockEffect.createNodes(this.audioContext)
    this.mock = { input, output }

    this.updateAudioRouting()
    return this.destinationNode.stream
  }

  setSourceType(type: AudioSourceType) {
    this.sourceType = type
    this.updateAudioRouting()
  }

  private updateAudioRouting() {
    if (!this.destinationNode) return

    // Disconnect all connections first
    this.micSourceNode?.disconnect()
    this.mock?.input.disconnect()
    this.mock?.output.disconnect()

    if (this.sourceType === 'vst-processed') {
      // Mic -> MockVst -> destination
      this.micSourceNode?.connect(this.mock!.input)
      this.mock!.output.connect(this.destinationNode)
    } else {
      // Mic -> destination (or tone is handled separately)
      this.micSourceNode?.connect(this.destinationNode)
    }
  }
}
Verification Steps
- Make a call using the same procedure as Phase 0, and the call is established
- During the call, switch sourceType to
vst-processed - The recipient hears a clearly changed voice quality (robotic/metallic)
- Switch back to
microphone, and the voice returns to normal
Phase 3: Processing and Transmitting with Native VST3 Plugins
In Phase 2, we confirmed that "processed audio can be sent" using WebAudio alone. In Phase 3, we'll use a native VST3 host prepared in the Electron Main process to send audio processed by actual VST3 plugins. The Renderer handles 48 kHz audio blocks with WebAudio (AudioWorklet). Since direct IPC from Worklet is not possible, we'll return the processing results via Worklet → Renderer main thread → Electron IPC → native processing.
Architecture
Role of the Native VST3 Host (Native Addon)
The Native Addon uses the VST3 SDK to load VST3 plugins, pass input waveforms (Float32Array), and return processing results. Additionally, if the plugin has an Editor (UI), it can display it as a separate window.
In this experiment, we'll prepare approximately the following interfaces:
- loadPlugin(path): Load a VST3
- unloadPlugin(): Unload
- process(input): Process audio
- showUI(): Display plugin UI
- hideUI(): Close UI
Using AudioWorklet in Renderer
While we want to execute VST3 processing on the native side, WebAudio processing has high real-time requirements and should run in a location less affected by main thread load and GC. Therefore, in Phase 3, we'll divide responsibilities as follows:
- AudioWorkletProcessor: Receive input blocks and send processing requests to the Renderer main thread
- Renderer main thread: Execute native processing via Electron IPC and return results to Worklet
For the AudioWorklet, it's important to "flow blocks in order," so we'll add simple sequence numbers for the round trip.
CustomAudioProcessor Routing
Similar to Phase 2, we'll build a pipeline in AudioProcessor.createProcessedStream() and route through the Worklet only when sourceType is native processing.
- microphone: Direct microphone input to destination
- vst-processed: Microphone input to Worklet → to destination
Returning MediaStreamDestinationNode.stream to Twilio is the same as in Phases 1/2.
Verification Steps
- Make a call using the same procedure as Phase 0, and the call is established
- Load a VST3 plugin (for verification, AGain See here for AGain build)
- Switch sourceType to
vst-processed - The recipient hears a clearly changed voice quality
- The effect changes based on bypass settings
- Switching back to
microphonereturns to the original voice
Considerations
Latency Bottlenecks and the Meaning of This Configuration
I found that the overall call latency is more strongly dominated by the latency of the phone call itself than by client-side audio processing. In my experience, the latency difference with or without VST was hardly noticeable and didn't become a bottleneck. This is likely because the noticeable latency in calls is already occurring at the network and line levels.
While I didn't implement the Twilio Media Streams version, configurations that increase WebSocket round trips are likely to increase costs in terms of both latency and operations. Using the method of replacing the audio just before transmission with the Voice JS SDK's Audio Processor, as we did here, the perceived latency was not significantly different from a normal phone call.
Phone Line Audio Quality and the Direction of Effects to Add
To verify the effectiveness of VST, I used customized AGain to make changes more noticeable. However, due to bandwidth and compression effects on phone lines, audio quality expectations are inherently not high. As a result, subtle processing like light EQ or mild texture changes may not be noticeable to the recipient.
On the other hand, processing that adds strong characteristics to the timbre, like ring modulation, is more easily recognized even over the phone and more meaningful to add. In conclusion, when inserting VST into calls, applications that intentionally add character, such as voice changers or distortion, are more suitable than hi-fi audio quality improvements.
Summary
Using the Twilio Voice JS SDK's Audio Processor, you can replace outgoing audio with app-side processing. This functionality can be useful for use cases such as applying VST3 plugin effects to calls. In my experience, the dominant factor in latency is on the line side, and audio replacement processing on the app side did not cause latency issues. Since audio quality expectations are not high for phone lines, effects that add strong characteristics are more effective than subtle corrections.