
What happened when I had Claude Code modify a TPS game in Unity MCP
This page has been translated by machine translation. View original
Introduction
Using Unity's officially released MCP (Model Context Protocol) package com.unity.ai.assistant, AI agents like Claude Code can directly manipulate the Unity Editor. In this article, I combined this package with Claude Code to task an AI with modifying a TPS (Third Person Shooter) template scene, investigating how practical it is and at what stage human review becomes necessary.
What happens when work traditionally done by humans using a mouse in the GUI is instructed to an AI via text? Through the following three tasks, I'll examine the current state of this technology:
- Automatic stage layout generation
- Lighting and post-processing adjustments
- Creating custom MCP tools
Testing Environment
| Item | Version / Details |
|---|---|
| Unity | 6000.3.10f1 (LTS) |
| Unity MCP | com.unity.ai.assistant 2.0.0-pre.1 |
| AI | Claude Code + Claude Opus 4.6 |
| OS | Windows 11 |
| Template | Multiplayer Third Person Gameplay |
Target Audience
- Engineers who have used Unity or are interested in game development
- People interested in MCP and AI agent trends who want to know about practical usability
- Those who want to understand the possibilities and limitations of AI support in game development
References
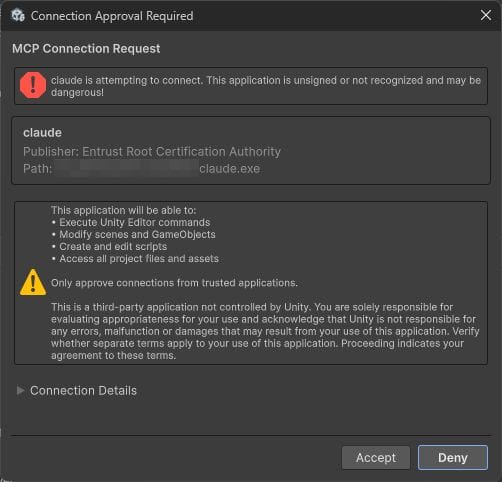
Unity MCP Setup
Unity MCP is a package that connects the Unity Editor with external AI agents using MCP. Instructions from Claude Code are processed through a relay binary and MCP bridge, then handled as MCP tool calls exposed by the Unity Editor.
Setup consists of 3 steps:
- Install
com.unity.ai.assistantfrom the Unity Package Manager

- Run the
claude mcp addcommand in Claude Code to register the relay binary as an MCP server
- Approve the connection request in the Unity Editor under Project Settings > AI > Unity MCP
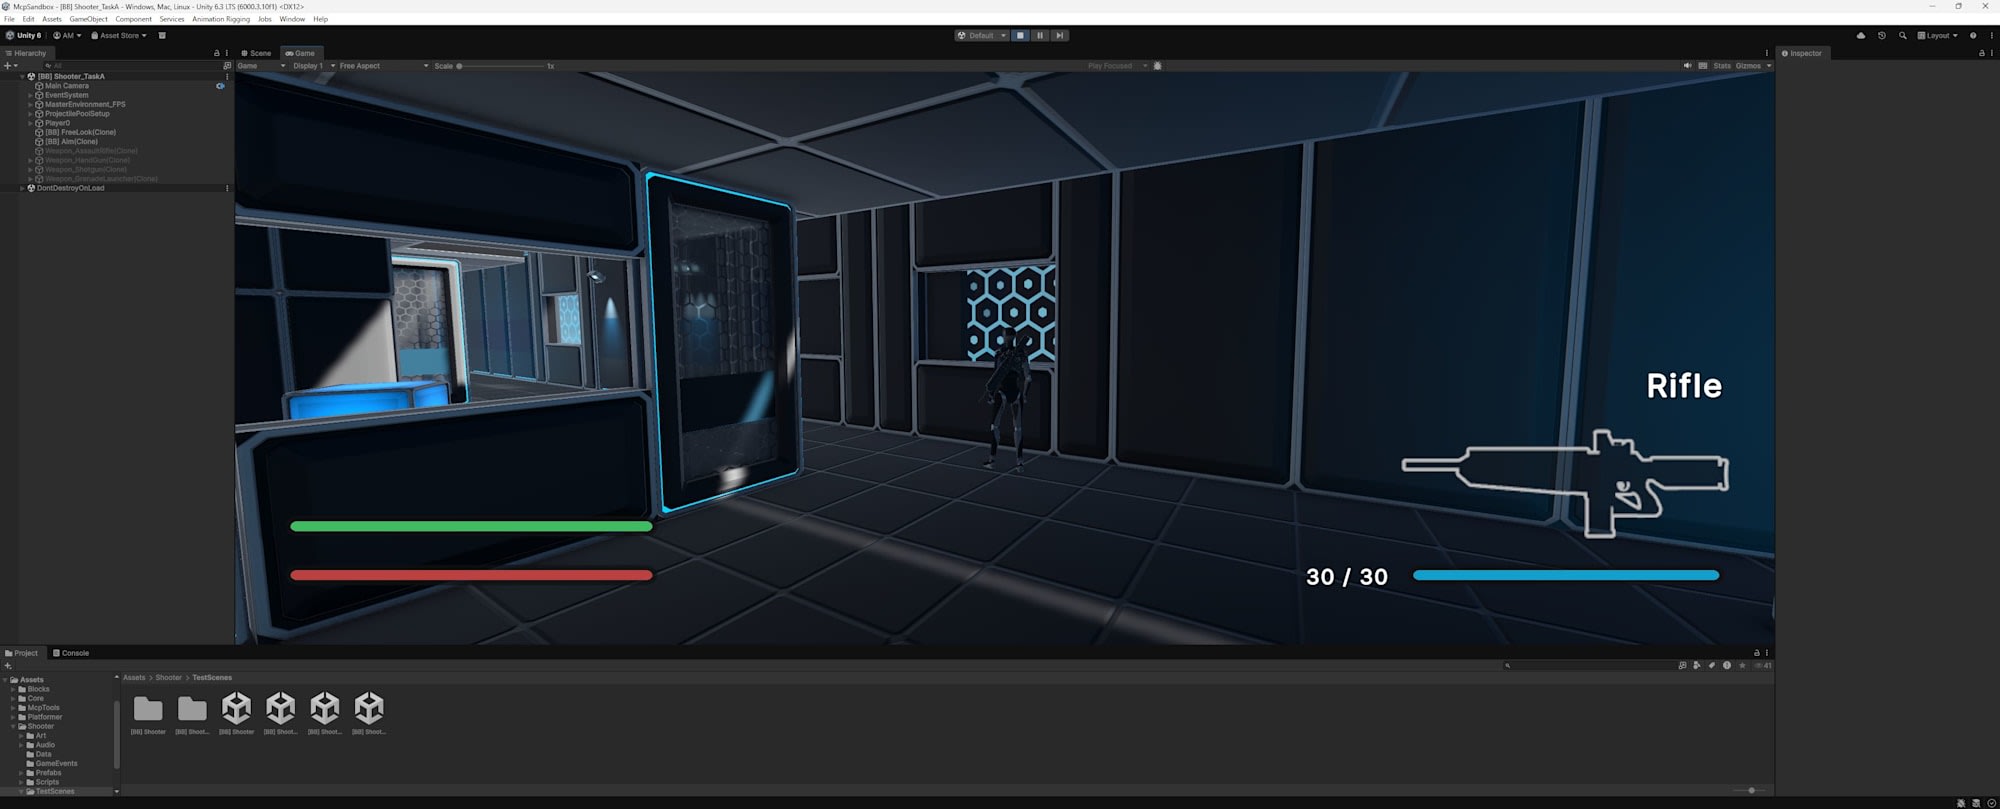
Test 1: Automatic Stage Layout Generation
I instructed the AI to add a new room at the northern end of the Shooter scene.
Please add a new room at the northern end (Z+ direction) of the Shooter scene.
Include a structure with walls, floor, ceiling, and doorway that connects to the existing map.
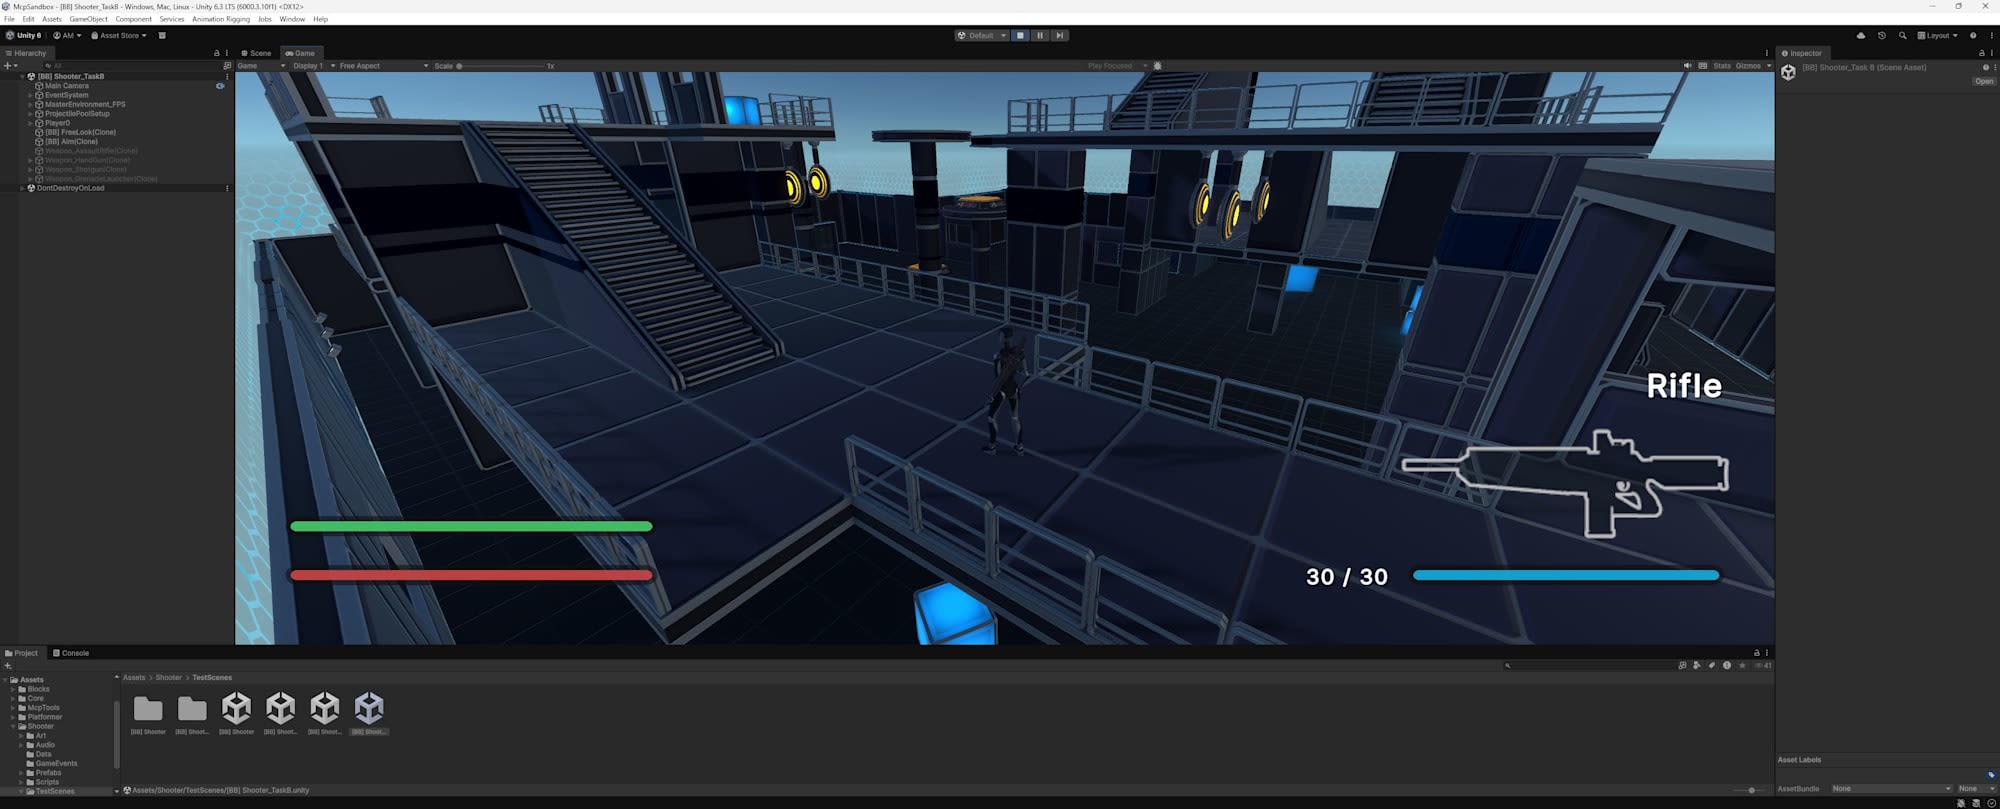
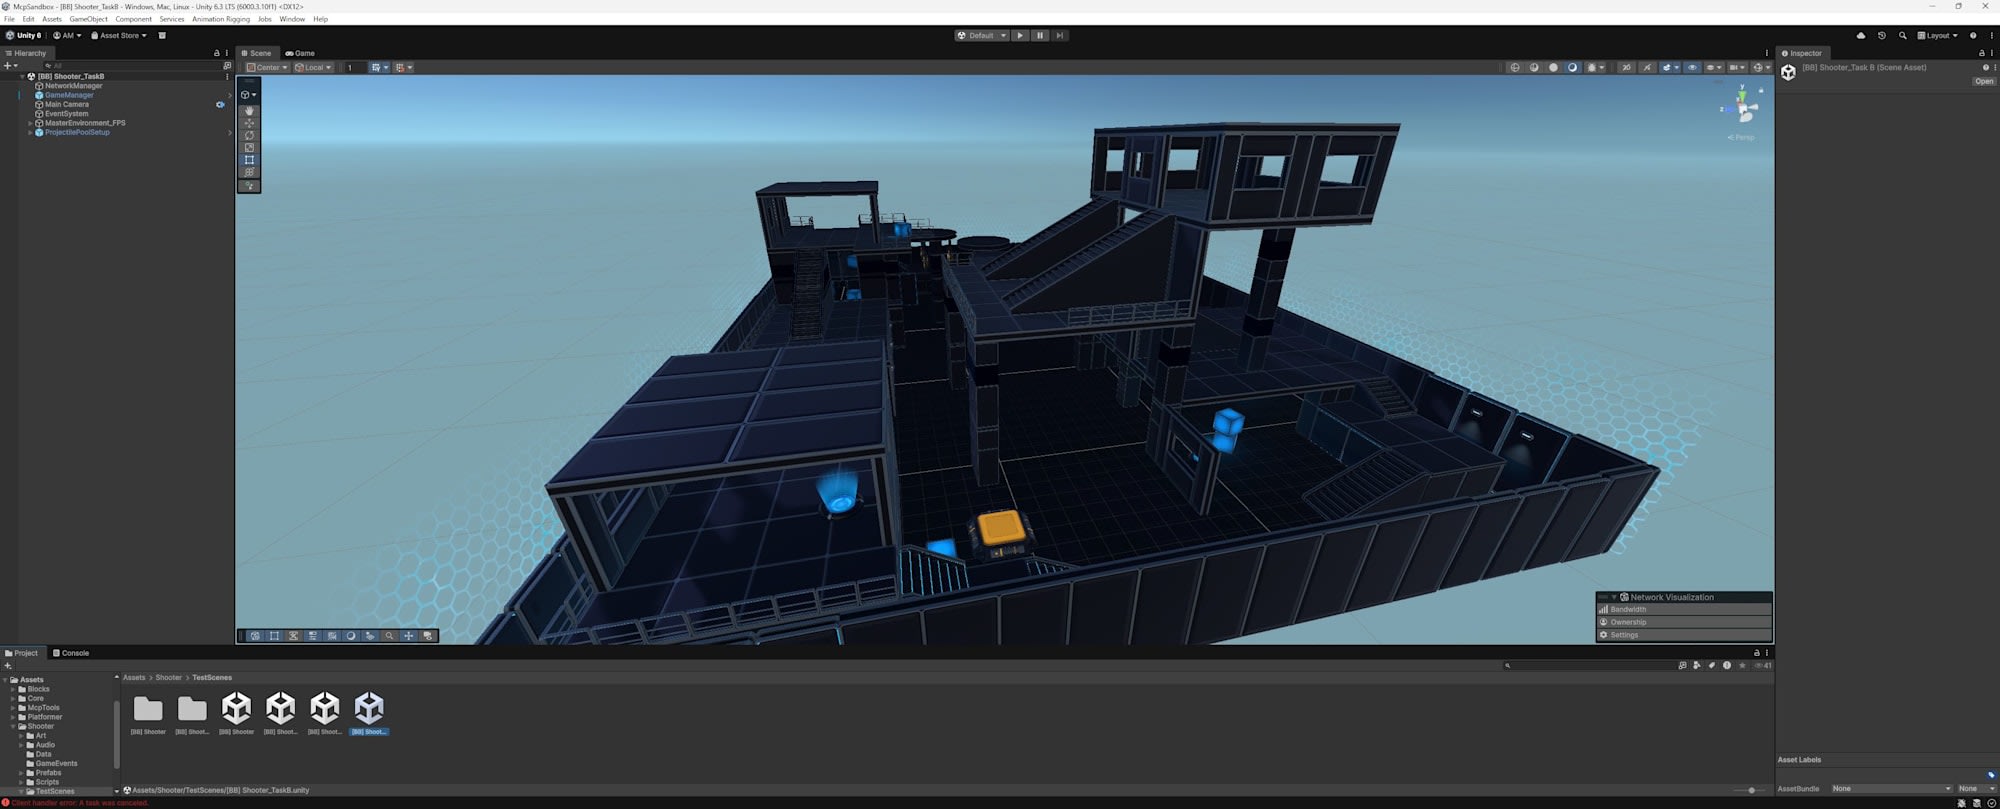
The AI generated a total of 12 objects, including walls, floor, ceiling, doorway, pillars, platform, and a ramp.
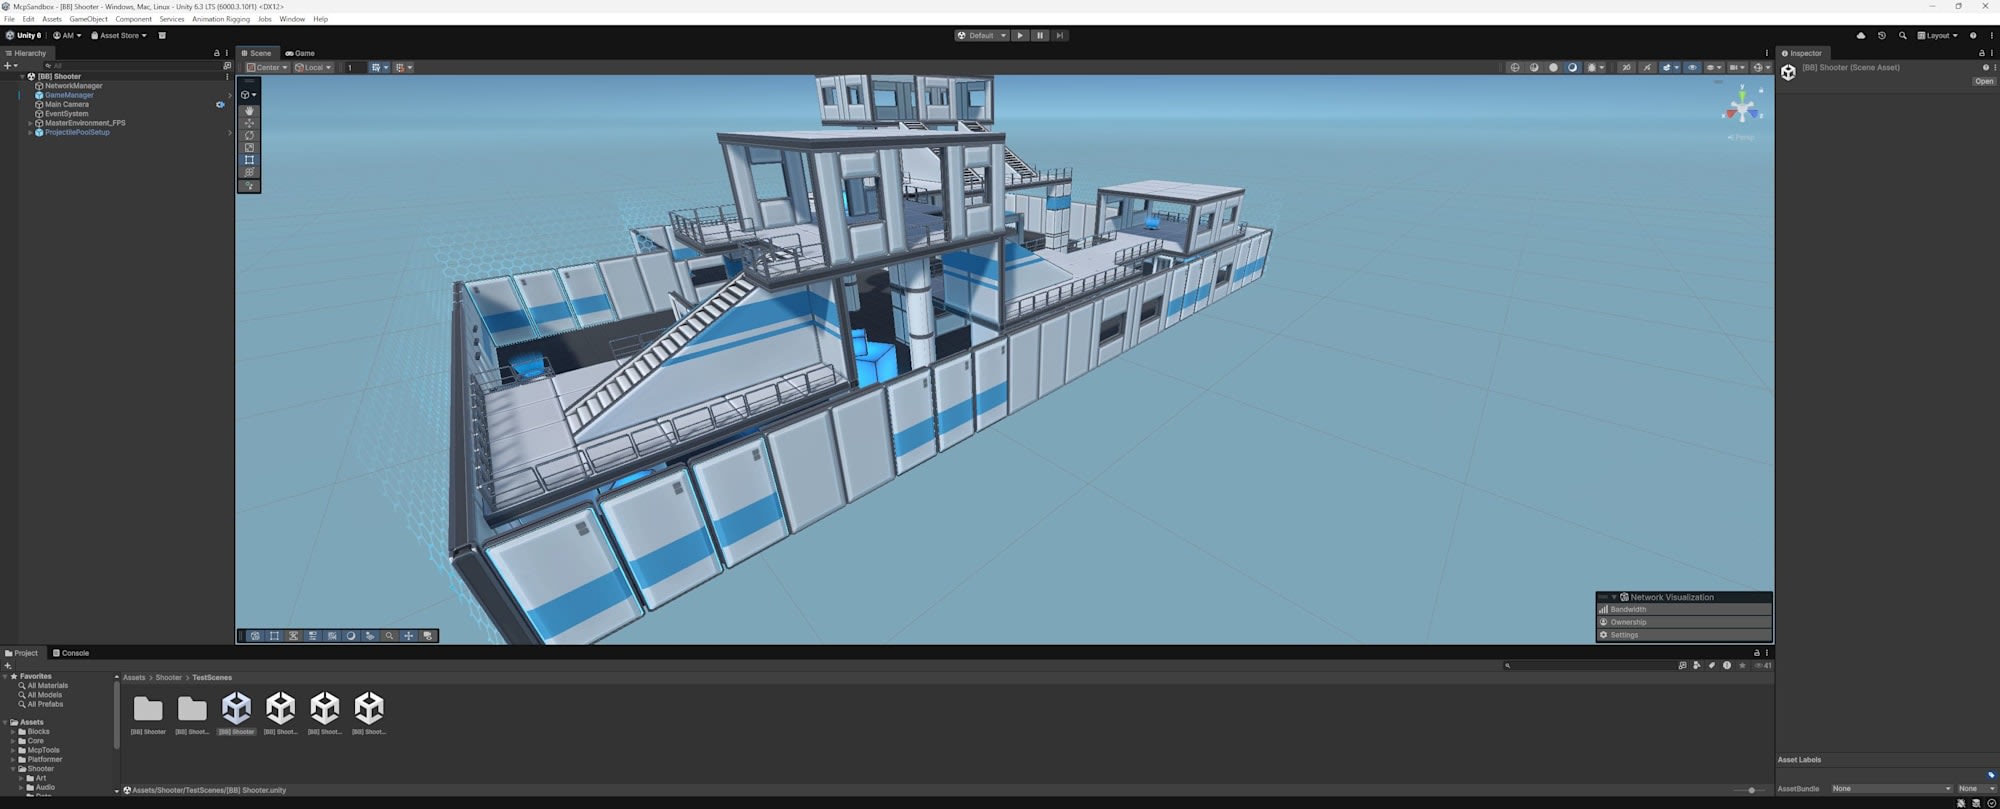
Before addition
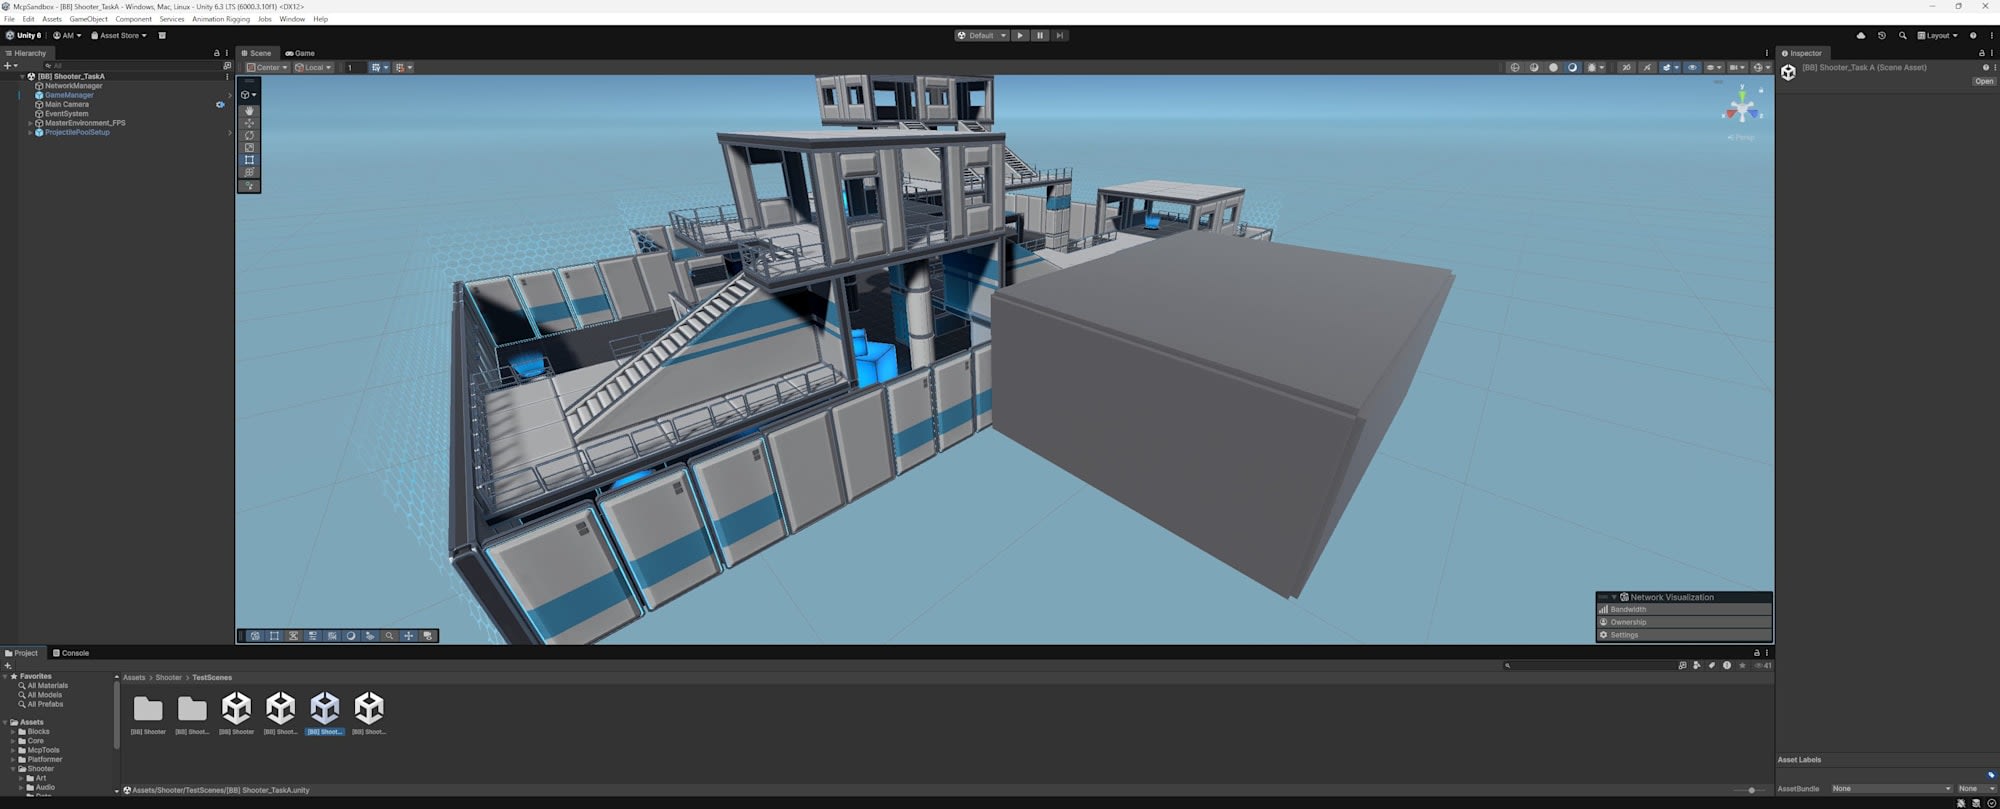
After addition
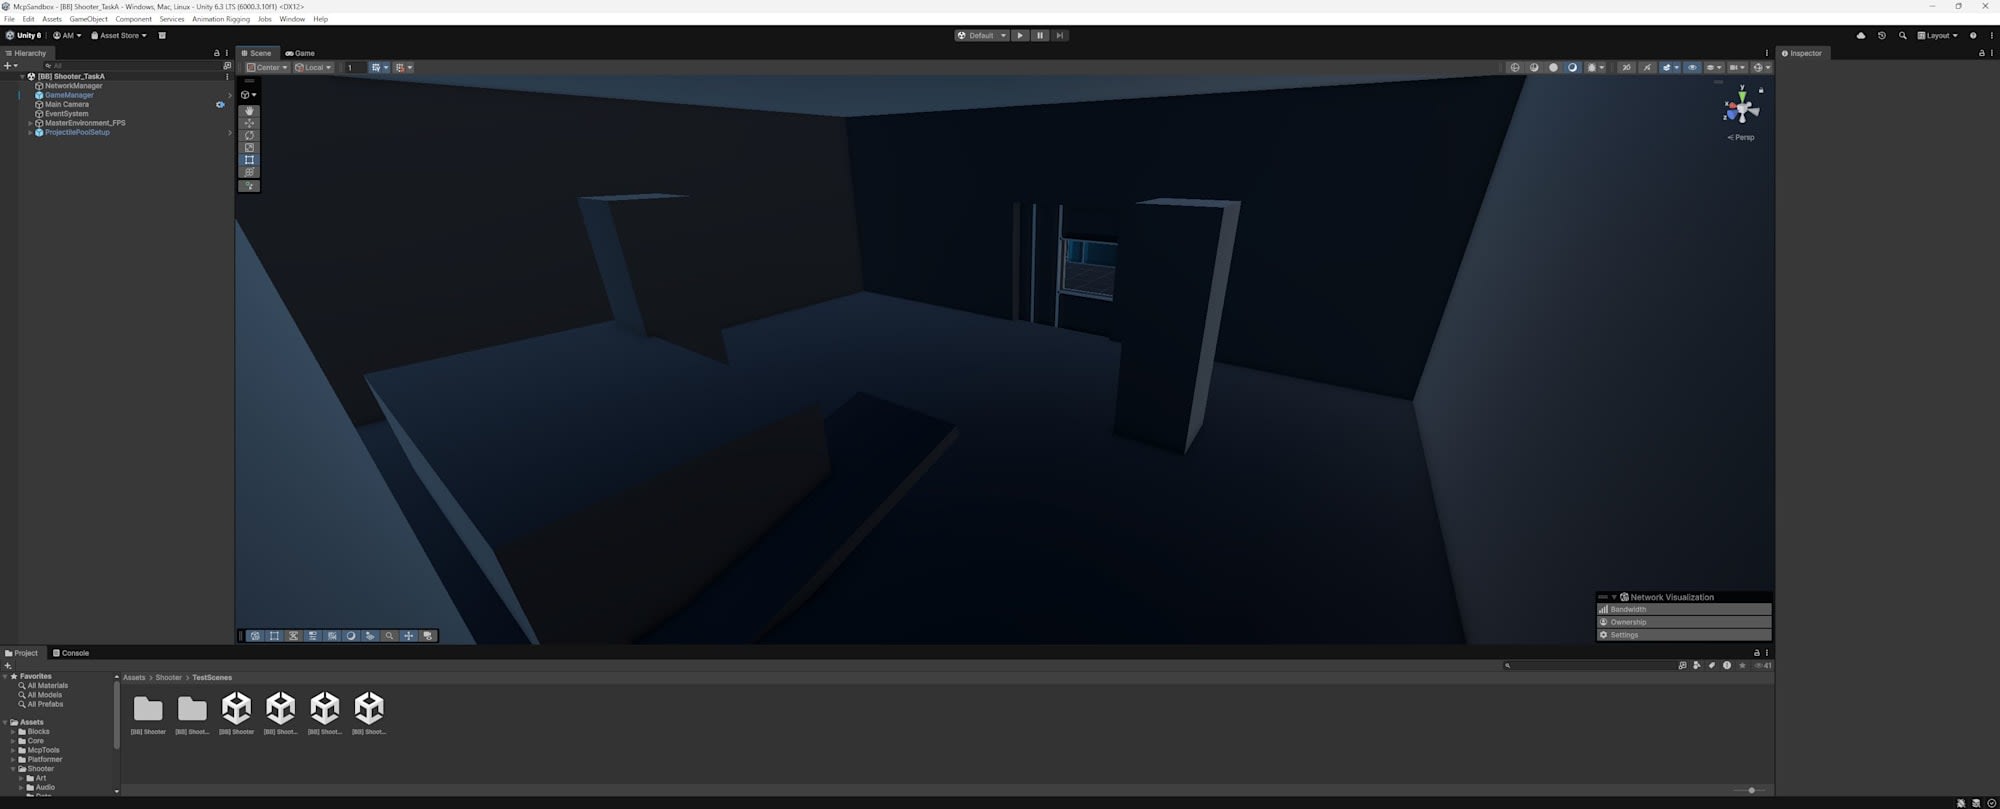
Inside the room
Test Results
Visual inspection revealed the following issues:
-
Inconsistent materials
All objects used the URP defaultLitmaterial, lacking consistency with the existing map. The frames and blue lines present in the original map weren't replicated, making AI-placed objects immediately distinguishable. -
Doorway connection problems
An existing wall remained at the doorway position, preventing access to the room. Walking around in Play mode, I couldn't find an entrance.
-
Darkness inside the room
No lights were placed inside the room with a ceiling, making the interior completely dark. -
Scale mismatch
The room was too large compared to adjacent walls. There was a clear difference in dimensional feel and detail density compared to the existing map. -
Static Editor Flags not set
Existing objects had multiple Static Editor Flags set toEverything(=enabled), but all flags were disabled for objects added by the AI. This could exclude them from static optimizations like GI, static batching, and occlusion culling that the existing scene relies on.
Analysis
The AI managed to place geometry but failed to connect with the existing environment or maintain artistic consistency. Checking the logs revealed that the AI only took one multi-angle view capture (Isometric, Front, Top, Right external 4 views) without moving the camera inside the room with a ceiling. A human would naturally move the camera inside the room to check, but this verification step wasn't selected in the current behavior. Issues like the absence of lights or inaccessibility can't be noticed from just an external overview.
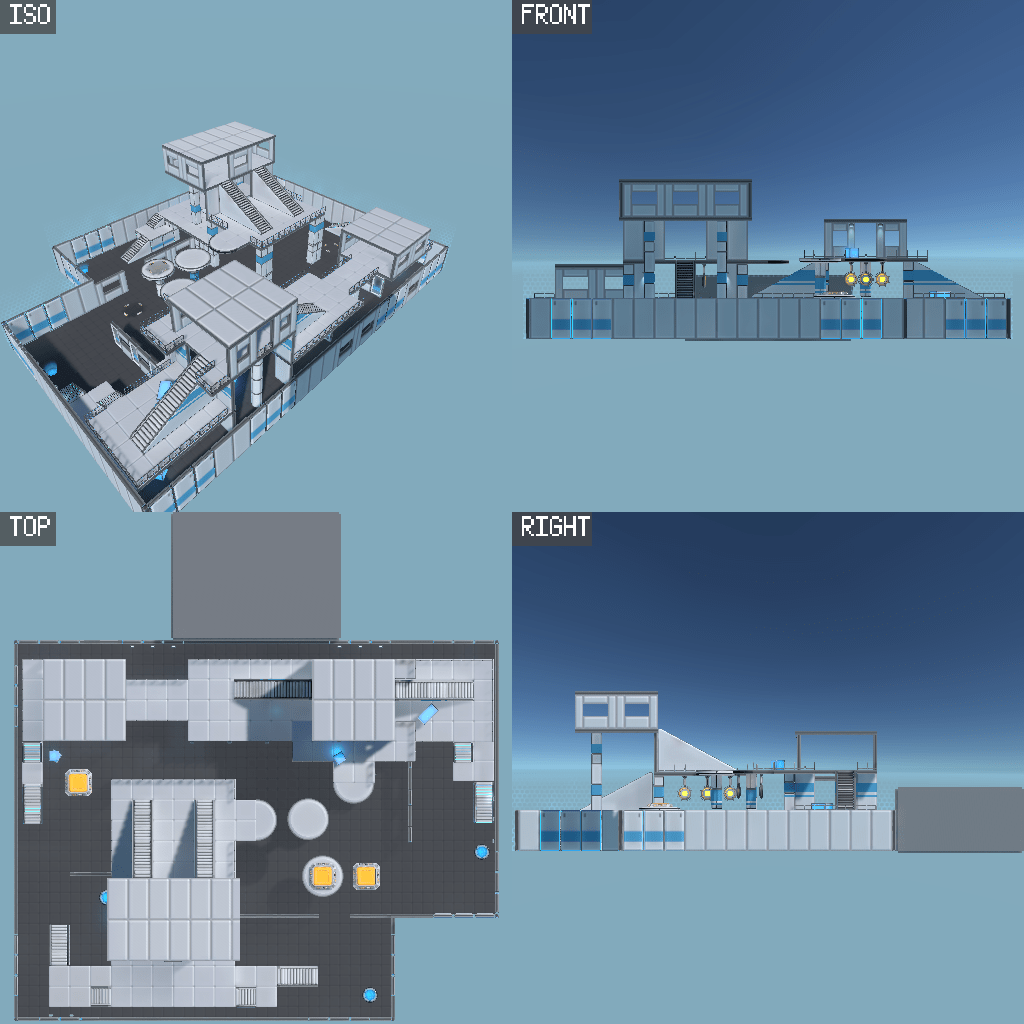
Multi-angle view captured by the AI. Only external 4 views from outside, with no interior shots
Test 2: Lighting and Post-Processing Adjustments
I instructed the AI to change the scene to a "night combat mode."
Please change the Shooter scene to night combat mode.
Dim the Directional Light, adjust ambient color, add fog,
and apply post-processing effects (Bloom, ColorAdjustments, Vignette, etc.).
The AI applied the following parameters:
| Parameter | Setting |
|---|---|
| Directional Light | intensity 0.15, bluish moonlight color |
| Ambient | Flat mode, intensity 0.3 |
| Fog | ExponentialSquared, density 0.03 |
| Bloom | intensity 3.5, threshold 0.3, scatter 0.9 |
| ColorAdjustments | postExposure -2.5, contrast 40, saturation -30 |
| Vignette | intensity 0.55 |
| LiftGammaGain | adjusted toward blue |
| All point lights | reduced to 30% |
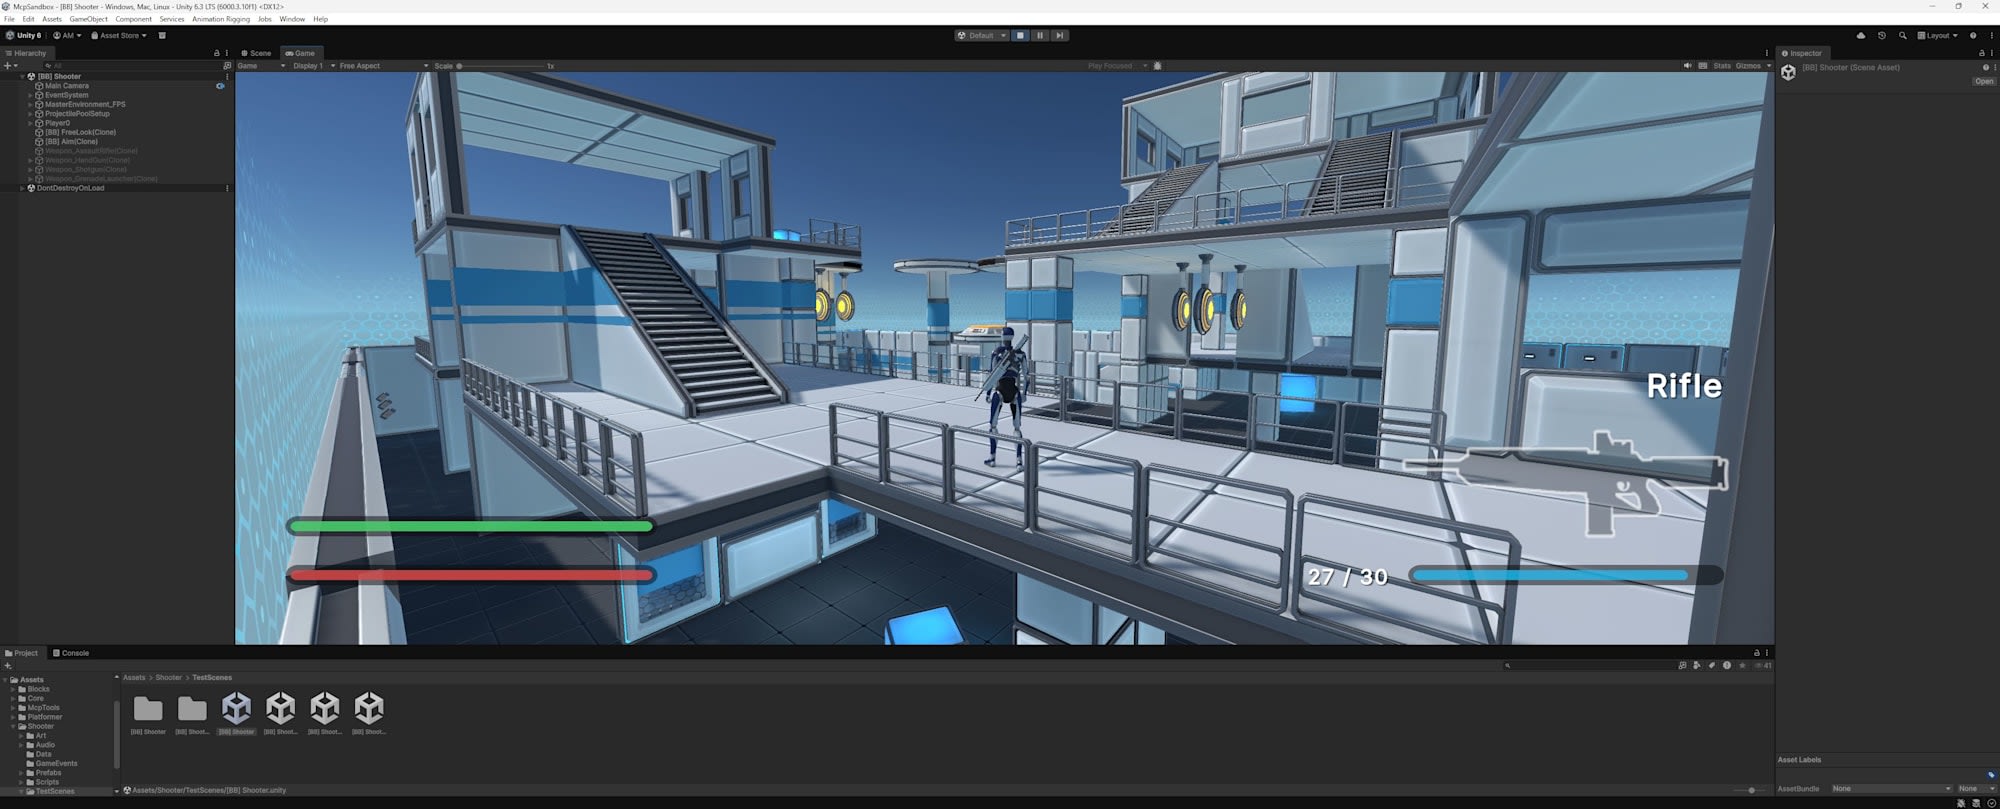
Before application
After application
What was interesting about this task was the large gap between the AI's self-assessment and human visual evaluation. The AI checked the image taken by Camera Capture and self-evaluated it as "almost complete darkness with critical breakdown." However, when a human checked in Play mode, the impression was quite different. Walls and targets were visible, and operation wasn't hindered. There was a difference between the Camera Capture result and the Game View appearance.

Image captured by AI via Camera Capture. Almost completely black with just a blue light slit visible in the center
Test Results
It wasn't as catastrophic as the AI's self-assessment, but there were quality issues as a "night" scene:
-
Skybox remained daytime
While the stage was darkened, the sky remained a bright blue. With no stars visible, looking up only shows daytime. This gives the impression of a "dark stage" rather than "night."
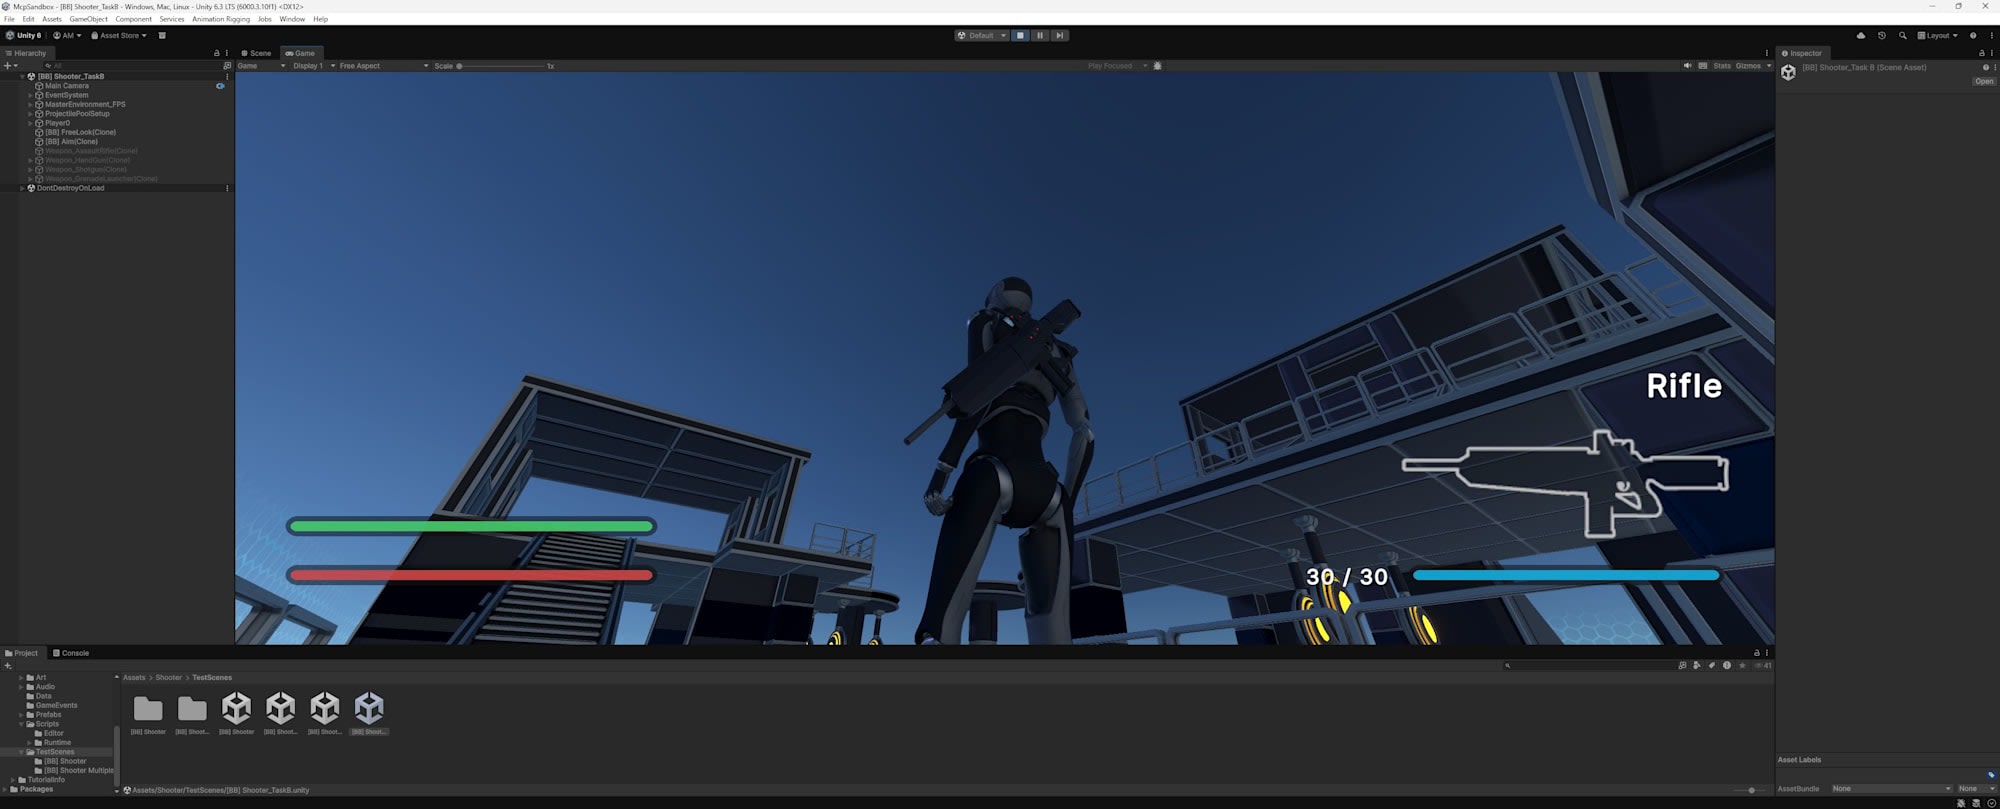
-
Fog not functioning
While fog parameters were set, the effect wasn't noticeable in the actual stage. Visibility was too clear for nighttime. -
Double-applied effects
The AI applied multiple darkening methods simultaneously, resulting in excessive darkness. All lights were reduced to 30% and then postExposure -2.5 was applied on top, causing effects to stack. A human would typically check the screen after each change and fine-tune, but the AI didn't perform such gradual adjustments. On the other hand, the Bloom effect successfully highlighted target lights, creating a glowing effect. Some intended effects were achieved partially.
Analysis
The gap between the image that appeared completely black to the AI via Camera Capture and what humans saw in Play mode highlights a fundamental challenge in AI-operated Unity. The AI can only evaluate the scene through the limited perspective of Camera Capture, creating a disconnect with how the actual game screen appears. Also, overlooking elements that constitute the overall atmosphere, like changing the skybox, are issues that can't be addressed by just adjusting parameters.
Test 3: Creating Custom MCP Tools
Unity MCP allows registering custom tools using the [McpTool] attribute. I had the AI create a scene quality checker tool to automatically detect the issues found in Tests 1 and 2.
Create a scene quality checker tool as a custom Unity MCP tool.
Using the [McpTool] attribute, implement functionality that automatically detects
missing collisions, default material usage, lighting anomalies,
physics setting anomalies, and unreachable areas.
The AI created a SceneQualityChecker class implementing 5 check items. For this simplified verification, default material detection was implemented using material name-based heuristics.
SceneQualityChecker.cs (excerpt)
using Unity.AI.MCP.Editor.ToolRegistry;

public static class SceneQualityChecker
{
    [McpTool("Scene_QualityCheck",
        "Run automated quality checks on the active scene. " +
        "Detects missing colliders on visible meshes, " +
        "unreachable areas, lighting anomalies, " +
        "and objects with default materials.")]
    public static object RunQualityCheck()
    {
        var issues = new List<object>();

        CheckMissingColliders(issues);
        CheckDefaultMaterials(issues);
        CheckLightingAnomalies(issues);
        CheckFloatingObjects(issues);
        CheckUnreachableRenderers(issues);

        return new { totalIssues = issues.Count, issues };
    }

    // Example: Default material detection
    static void CheckDefaultMaterials(List<object> issues)
    {
        var renderers = Object.FindObjectsByType<MeshRenderer>(
            FindObjectsSortMode.None);
        foreach (var r in renderers)
        {
            if (!r.gameObject.activeInHierarchy) continue;
            if (r.sharedMaterial == null) continue;
            string matName = r.sharedMaterial.name;
            if (matName == "Lit" ||
                matName == "Default-Material" ||
                matName == "Default-Diffuse")
            {
                issues.Add(new
                {
                    category = "DefaultMaterial",
                    severity = "info",
                    objectName = r.gameObject.name,
                    objectPath = GetGameObjectPath(r.gameObject),
                    materialName = matName,
                    message = "Object uses a default/placeholder material"
                });
            }
        }
    }
}
Test Results
The tool itself worked properly. It was registered in Unity MCP's Tools list as Scene_QualityCheck and could be called from Claude Code.
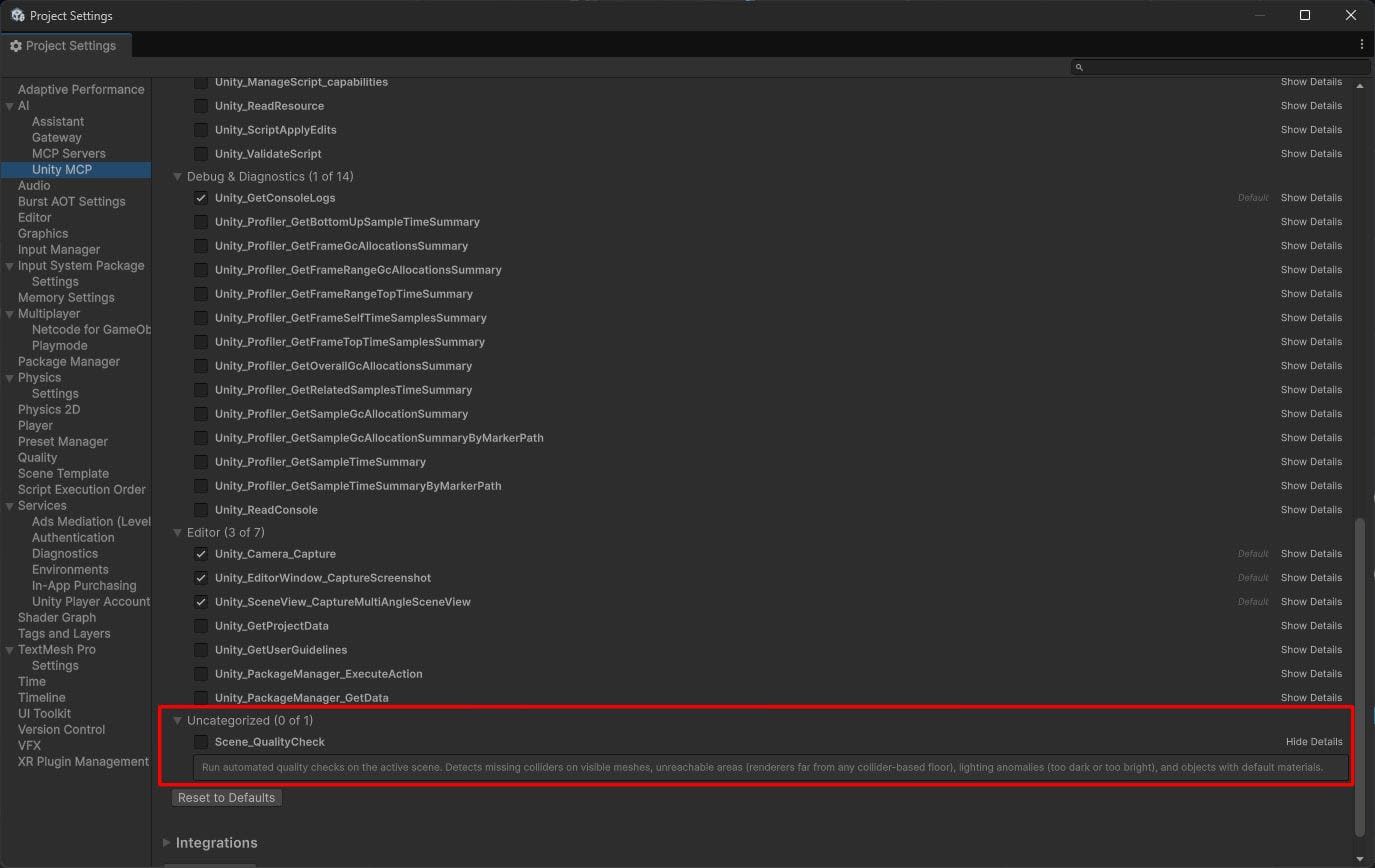
When run on the original scene, it detected 0 issues. On the scene including the room added by the AI in Test 1, it correctly detected 12 instances of default materials. However, there are practical challenges. The tool created by the AI lacks a user interface for human operators, and modifying the source code is necessary to toggle check items on/off.
Analysis
Custom tool registration using the [McpTool] attribute is useful for extending the AI agent's "eyes." However, in this tool, check items are hardcoded in the source code, preventing flexible operation based on the situation. For example, there's no way for humans to intervene with decisions like "I want to focus only on material checks this time" or "I want to exclude this object as an exception."
To create a human-in-the-loop configuration, check item selection and threshold adjustments should be operable from the Unity Editor's Inspector or a dedicated window, with the AI running checks according to those settings. In the Unity MCP tool registration mechanism referenced in this test, there doesn't appear to be a system that automatically links with Inspector or EditorWindow. To achieve this, custom tools and Editor extensions would need to be combined and built from scratch.
Conclusion
Through these three tasks, we can see the current state of AI-operated Unity:
-
What AI can do
It can handle "tasks" like placing primitives, changing lighting parameters, and generating C# code without issues. The technical foundation for calling Unity Editor APIs via MCP functions adequately. -
What AI cannot do
Visual consistency with existing environments and quality judgments that depend on human perception, like a "nighttime atmosphere," are still challenging. The gap between images captured by the AI via Camera Capture and what humans see in Play mode demonstrates this challenge. -
Realistic workflow
Currently, "AI working with human review" is more realistic than "AI working independently." Having AI perform rough work while humans visually verify and give correction instructions. By utilizing Unity MCP custom tools, the AI's self-checking capability can also be enhanced.
Unity MCP itself is a highly extensible tool. As AI agent capabilities improve, the practicality of this workflow will also increase.
In the next article, I'll explore AI limitations with 2D game generation tasks.