
Windows App (formerly: Microsoft Remote Desktop) Usage Guide Summary
This page has been translated by machine translation. View original
Introduction
Hello everyone, I'm Akaike.
Recently, I had the opportunity to RDP connect from a Mac to a Windows server,
and I tried the Windows App (formerly Microsoft Remote Desktop) which is commonly used on Mac.
However, the UI is different from the standard Windows Remote Desktop, and I found some settings confusing.
So, I decided to summarize the procedure and various settings for connecting via RDP from a Mac using the Windows App.
About Windows App
Windows App is a remote desktop client provided by Microsoft.
It was previously called Microsoft Remote Desktop, but has now been renamed to Windows App.
It can be installed from the Mac App Store and mainly supports connections to the following:
- Azure Virtual Desktop
- Windows 365
- Microsoft Dev Box
- Remote Desktop Services
- Remote PC (standard RDP connection)
This article focuses on RDP connection to remote PCs, explaining connection methods and various settings.
Note that macOS 13.0 or higher is required for the operating environment.
Connection Setup
First, let's configure the connection to the remote PC.
1. Add a PC
When you launch Windows App, you'll see a screen like this:
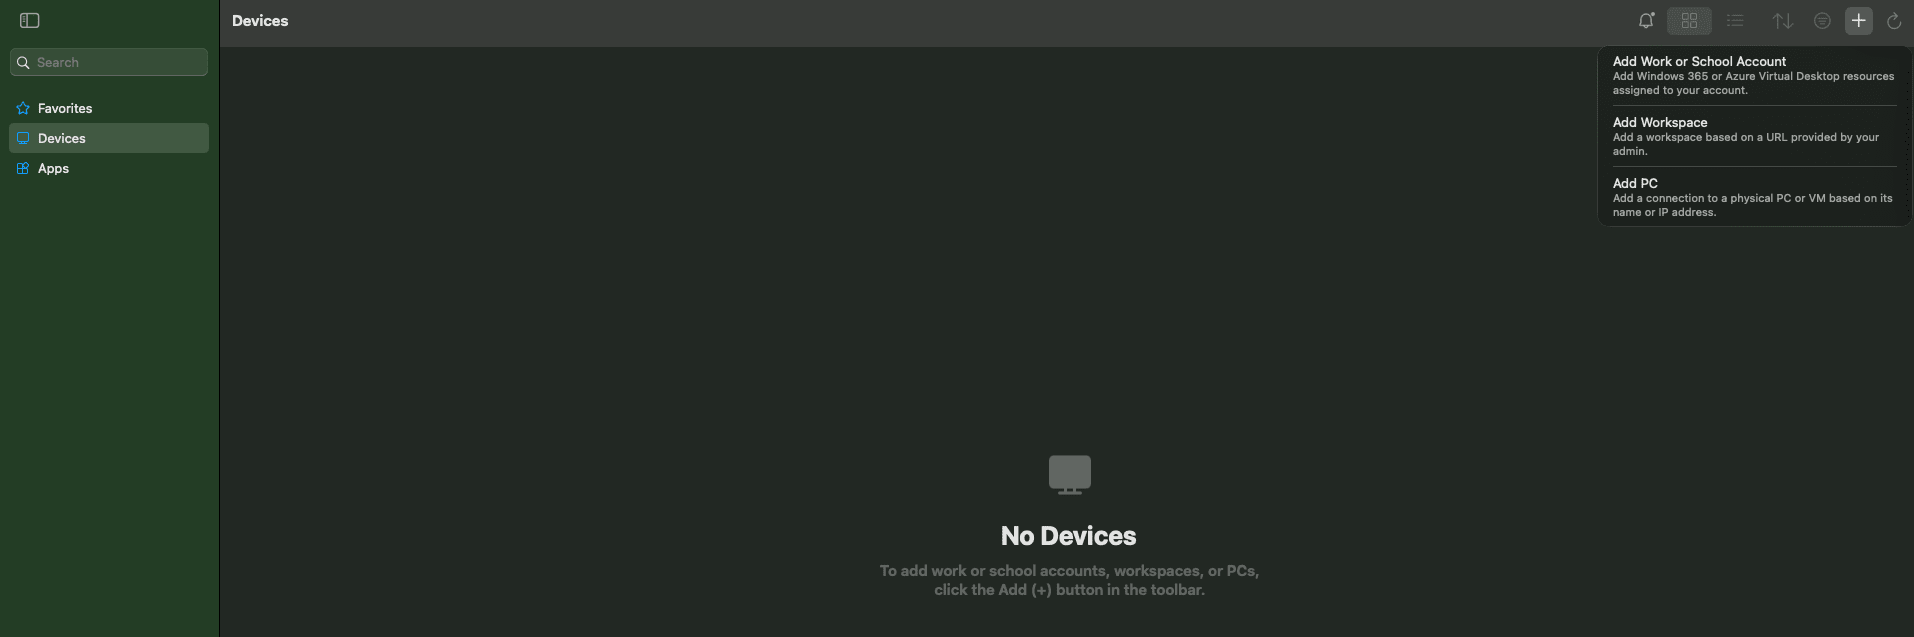
Clicking the "+" button in the top right corner displays the following three options:
- Add Work or School Account: For connecting to Azure Virtual Desktop or Windows 365
- Add Workspace: For connecting via a workspace URL provided by an administrator
- Add PC: For RDP connection to a remote PC
Since we want to connect to a remote PC, select "Add PC".
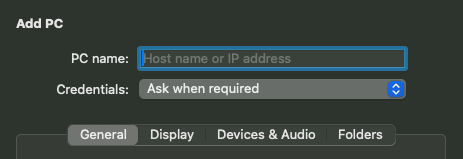
2. Enter connection information
When you select "Add PC", the following input screen appears:
- PC name: Enter the hostname or IP address of the destination
- Credentials: Authentication settings. The default is "Ask when required" (enter each time when connecting)
3. Pre-register authentication information (optional)
Select "Add Credentials" from the "Credentials" dropdown to pre-register your authentication information.
- Username: Enter the username in the format
User@DomainorDomain\User - Password: Enter your password
- Friendly name: You can set an easy-to-understand name (this is just a management label, so anything is OK)
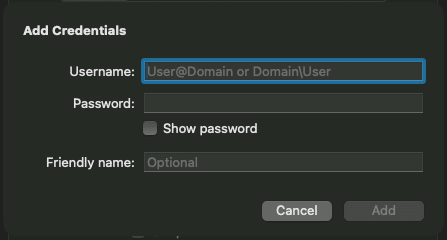
Once you've completed the input, click the "Add" button to save.
Note that if you leave it as "Ask when required" without pre-registering, you'll need to enter your authentication information each time you connect.
Pre-registering is convenient if you connect frequently.
4. Connect
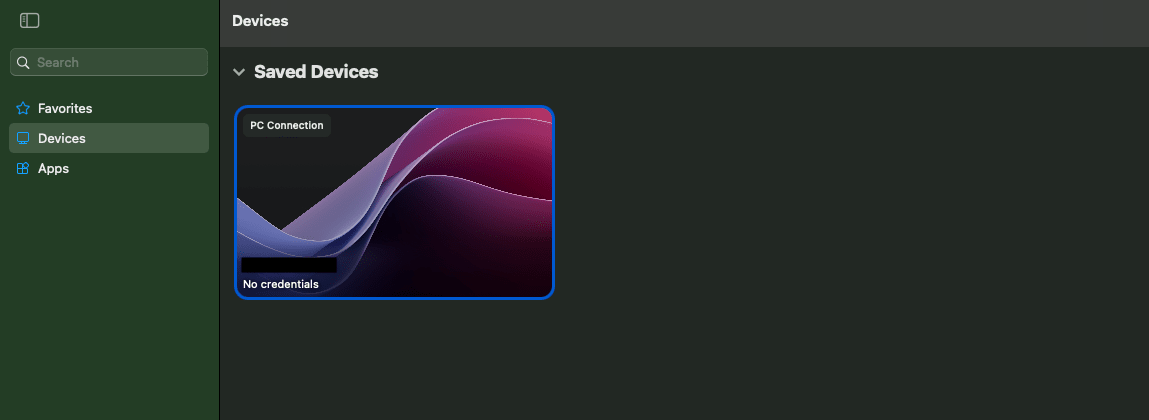
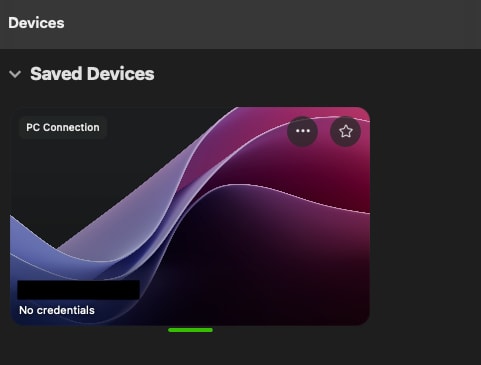
Once setup is complete, the PC you added will appear in the Devices tab.
Double-click on it to start an RDP connection to the remote PC.
Other Settings
Click on the "..." (three dots) on the added PC card and select "Configuration" to change detailed settings.
Settings are divided into four tabs: General, Display, Devices & Audio, and Folders.
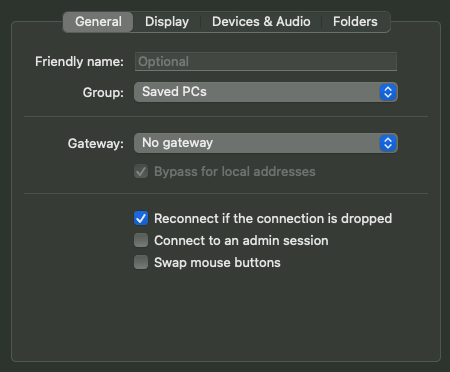
General
In the "General" tab, you can configure gateway settings and basic connection options.
| Item | Description |
|---|---|
| Friendly name | Easy-to-understand name for the connection |
| Group | Device grouping |
| Gateway | Specify Remote Desktop gateway. Used when connecting via corporate network, etc. |
| Bypass for local addresses | Whether to bypass the gateway when connecting to local addresses |
| Reconnect if the connection is dropped | Automatically reconnect if the connection is lost |
| Connect to an admin session | Connect as an administrator session |
| Swap mouse buttons | Swap the left and right mouse buttons |
If you want to use a gateway, you can click on Gateway and add one from "Add Gateway".
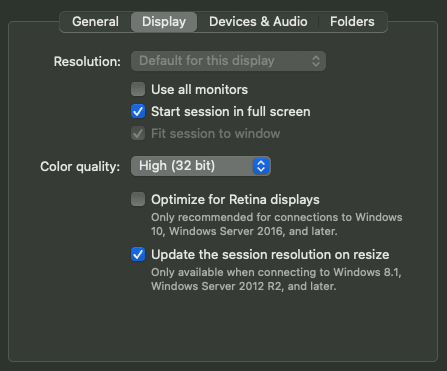
Display
In the "Display" tab, you can configure screen display settings.
| Item | Description |
|---|---|
| Resolution | Screen resolution of the connection destination |
| Use all monitors | Whether to use all screens in a multi-monitor environment |
| Start session in full screen | Display in full screen when starting the session |
| Fit session to window | Fit the session to the window size |
| Color quality | Color quality (High 32 bit is the default) |
| Optimize for Retina displays | Optimization for Retina displays. For Windows 10, Windows Server 2016 or later |
| Update the session resolution on resize | Update the session resolution when resizing the window. For Windows 8.1, Windows Server 2012 R2 or later |
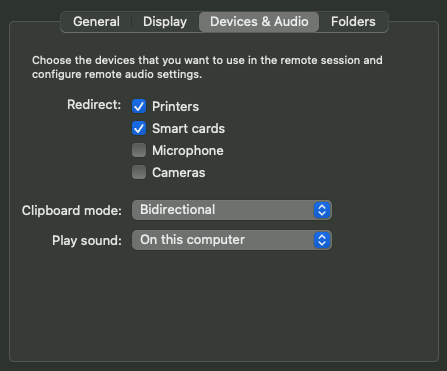
Devices & Audio
In the "Devices & Audio" tab, you can configure devices and audio settings used in the remote session.
| Item | Description |
|---|---|
| Redirect: Printers | Use local printers in the remote session |
| Redirect: Smart cards | Redirect smart cards |
| Redirect: Microphone | Use microphone in the remote session |
| Redirect: Cameras | Use cameras in the remote session |
| Clipboard mode | Clipboard sharing mode. "Bidirectional" allows copying and pasting in both directions |
| Play sound | Where to play the sound of the remote session (On this computer / On remote PC / Never) |
Clipboard sharing is set to "Bidirectional" by default, so you can copy text from the Mac side and paste it on the remote PC side, and vice versa.
Folders
In the "Folders" tab, you can configure settings to share (redirect) Mac-side folders to the remote session.
By default, "Redirect folders" is unchecked, and folder sharing is disabled.
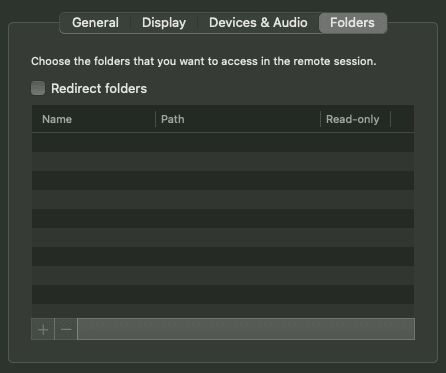
To add a folder, check "Redirect folders",
click the "+" button at the bottom left, and select the folder you want to share.

Once you select a folder, it will be added to the list.
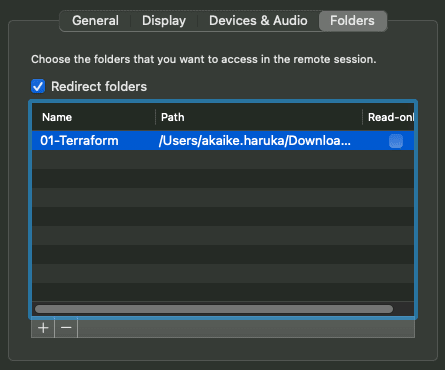
Shared folders can be accessed as network drives from the Explorer on the remote PC side.
Note that checking "Read-only" makes it read-only from the remote PC side.
Proxy Settings
When using Windows App in a proxy environment, both macOS proxy settings and Windows App proxy enablement are required.
Setup procedure
- macOS side (left side of the image below): Set proxy from "System Settings" > "Network" > "Proxy"
- Windows App side (right side of the image below): From the menu bar, go to "Windows App" > "Settings" > "General" tab and check "Use system proxy configuration"
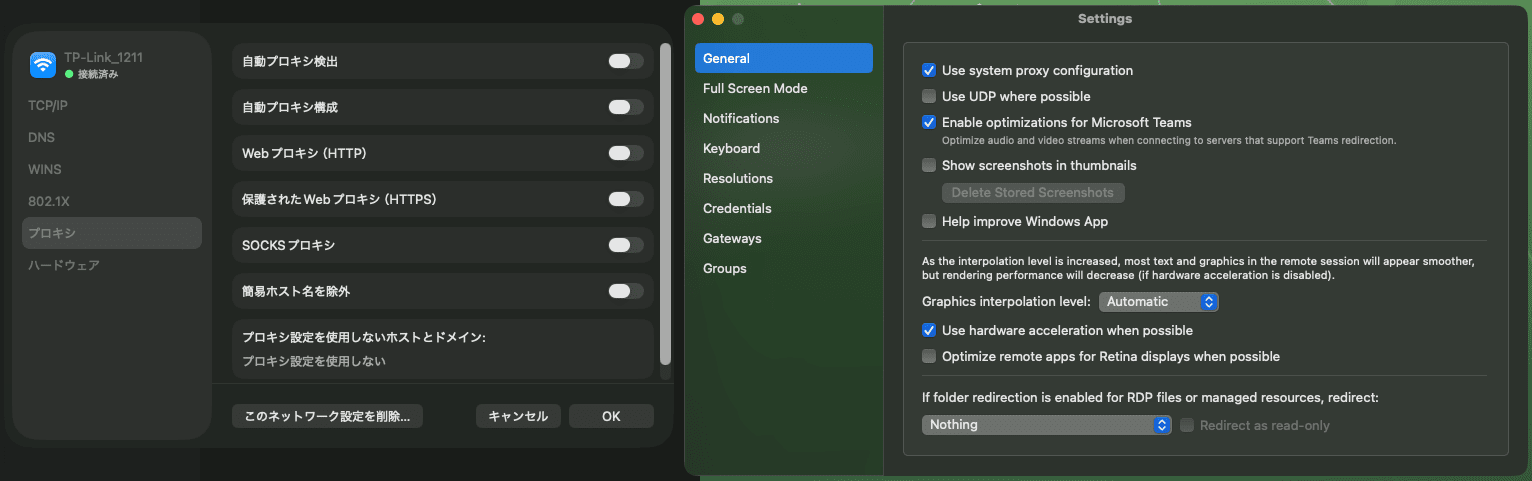
Note that the official documentation mentions HTTP proxy, but there is no mention of SOCKS proxy.
When I actually tried it, I couldn't connect with a SOCKS proxy. (It might just be my environment...)
Conclusion
That's a summary of how to RDP connect from Mac using Windows App (formerly Microsoft Remote Desktop).
I hope this helps those who have opportunities to RDP connect from a Mac.