
Windows to Mac "Switching" Survival Guide

This page has been translated by machine translation. View original
Introduction
This is a simple summary of the key points that developers find confusing when switching from Windows to MacBook.
It's a quick reference guide + useful tool introduction to solve the question "How do I do that shortcut on Mac?"
1. Keyboard "Translation"
Here's how to replace familiar Windows operations on Mac:
| Operation | Windows | Mac |
|---|---|---|
| Delete | Del |
Fn + Delete |
| Screen Lock | Win + L |
Cmd + Ctrl + Q |
| Quit App | Alt + F4 |
Cmd + Q |
| Copy / Paste | Ctrl + C / Ctrl + V |
Cmd + C / Cmd + V |
On Mac, many shortcuts use the Cmd key instead of Ctrl. Getting used to this is the first hurdle.
2. Browser & Developer Tools
Shortcuts that web developers use on a daily basis.
| Operation | Windows | Mac |
|---|---|---|
| DevTools | F12 / Ctrl + Shift + I |
Cmd + Option + I |
| Hard Reload | Ctrl + Shift + R |
Cmd + Shift + R |
Also, with Spotlight Search (Cmd + Space), you can instantly launch apps just by typing "Terminal" or "VS Code". It feels similar to the Windows Start menu search.
3. Screenshots (Instead of the PrintScreen Key)
Mac's screenshot functionality is extremely powerful out of the box. You can select a region or specify a window without any third-party tools.
| Operation | Shortcut |
|---|---|
| Entire Screen | Cmd + Shift + 3 |
| Select Region | Cmd + Shift + 4 |
| Specify Window | Cmd + Shift + 4 → Space |
Screenshots taken are saved to the Desktop by default.
Pressing Cmd + Shift + 5 lets you change options such as save location and timer.
Saving a Screenshot and Copying to Clipboard Simultaneously
In macOS, "saving to disk" and "copying to clipboard" are mutually exclusive by default for screenshots. Cmd + Shift + 4 saves a file, and adding Ctrl copies to clipboard only. If you want to do both at the same time, here are the options:
Method 1: Use the Thumbnail Preview (No Setup Required)
- Take a screenshot as usual with
Cmd + Shift + 4(or 3 / 5) - Click the thumbnail preview that appears in the bottom right of the screen
- Press
Cmd + Cin the markup screen to copy to clipboard - Click Done
This saves it as a file while also copying it to the clipboard.
Method 2: Automate with Shottr (Recommended)
If you want to seriously streamline your screenshot workflow, Shottr is the best option. It's free, lightweight, and operates faster than macOS native tools.
Shottr Features:
- Save + Copy simultaneously: Just press a key to complete both file saving and clipboard copying in one shot
- Custom file names: Set a file name template to maintain the same naming convention as macOS standard
- Fast performance: As a compiled native app, it responds faster than Shortcut apps or system standard tools
Setup Steps:
- Download and install from the Shottr official website
- Open Shottr settings

- Navigate to the Hotkeys tab and press the "Open System Settings" button
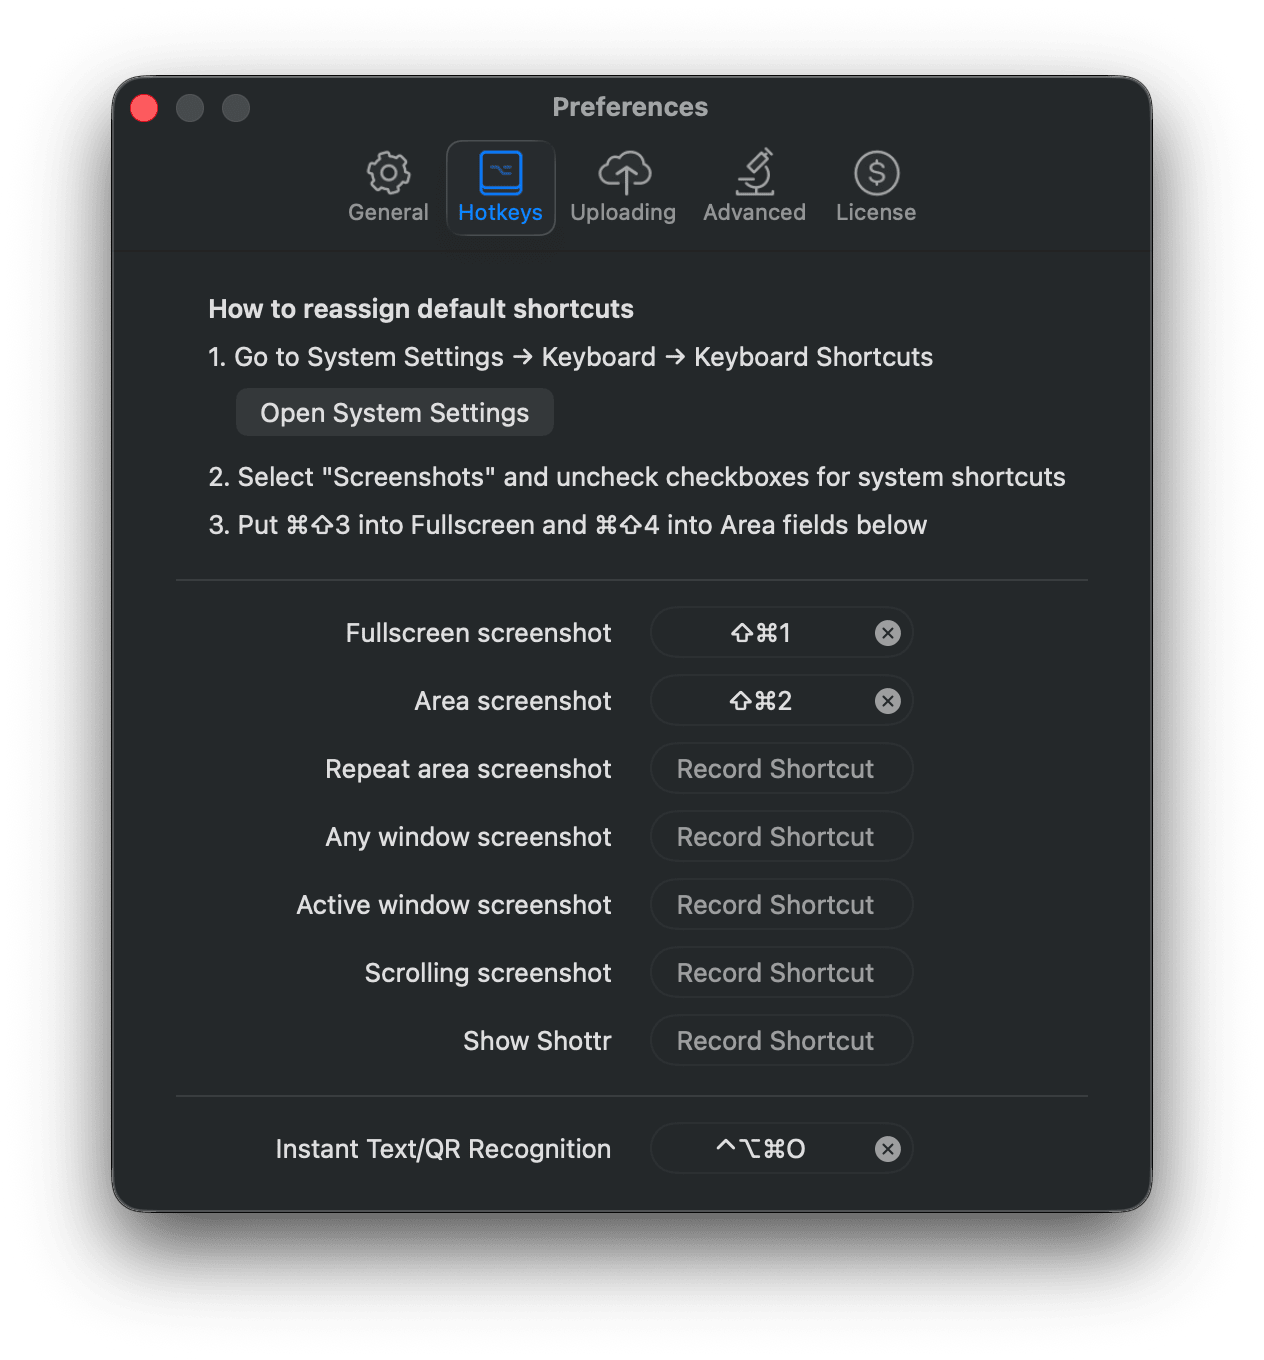
- Since we're overriding existing behavior, uncheck all checkboxes
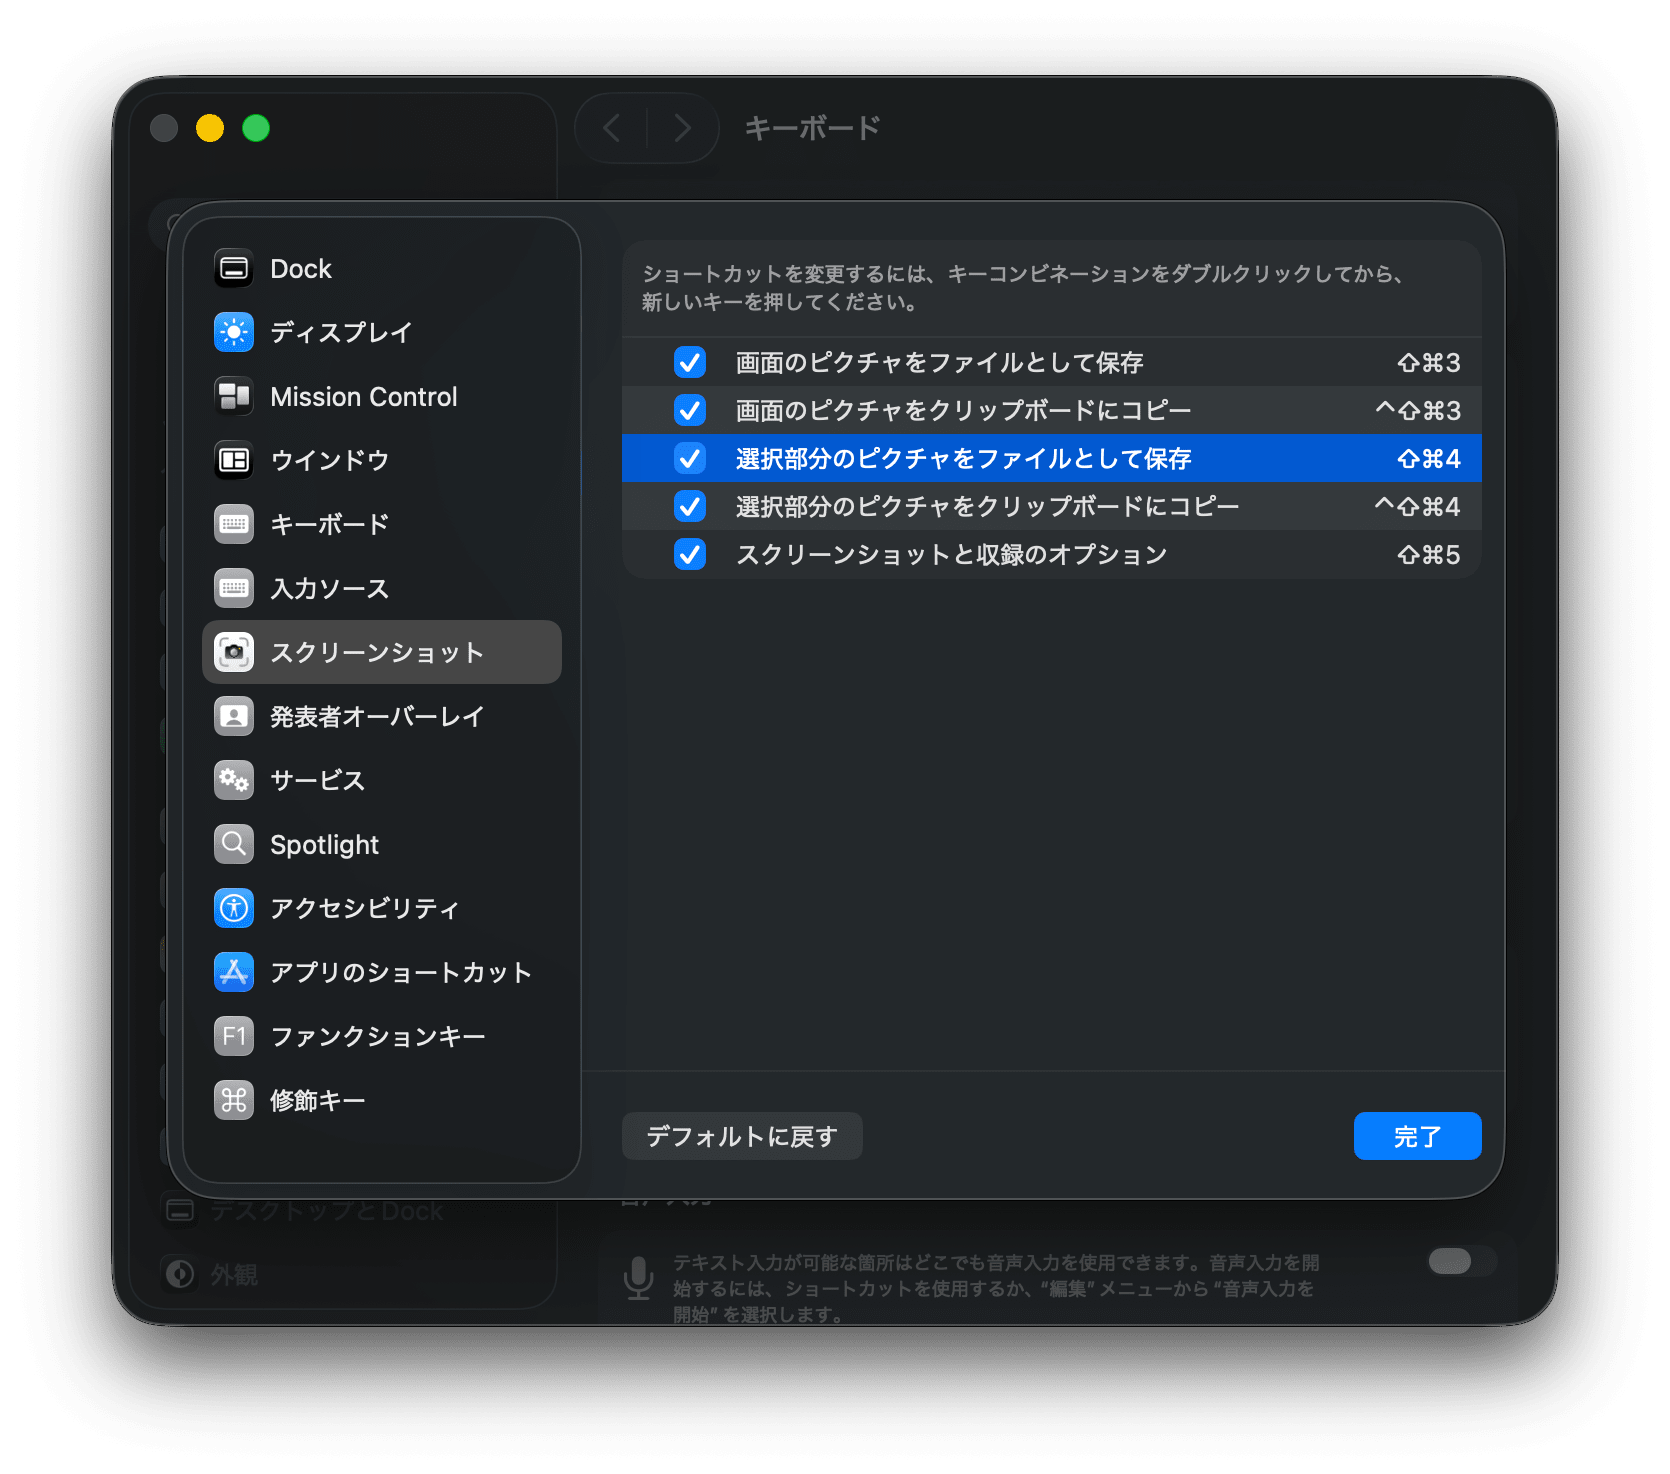
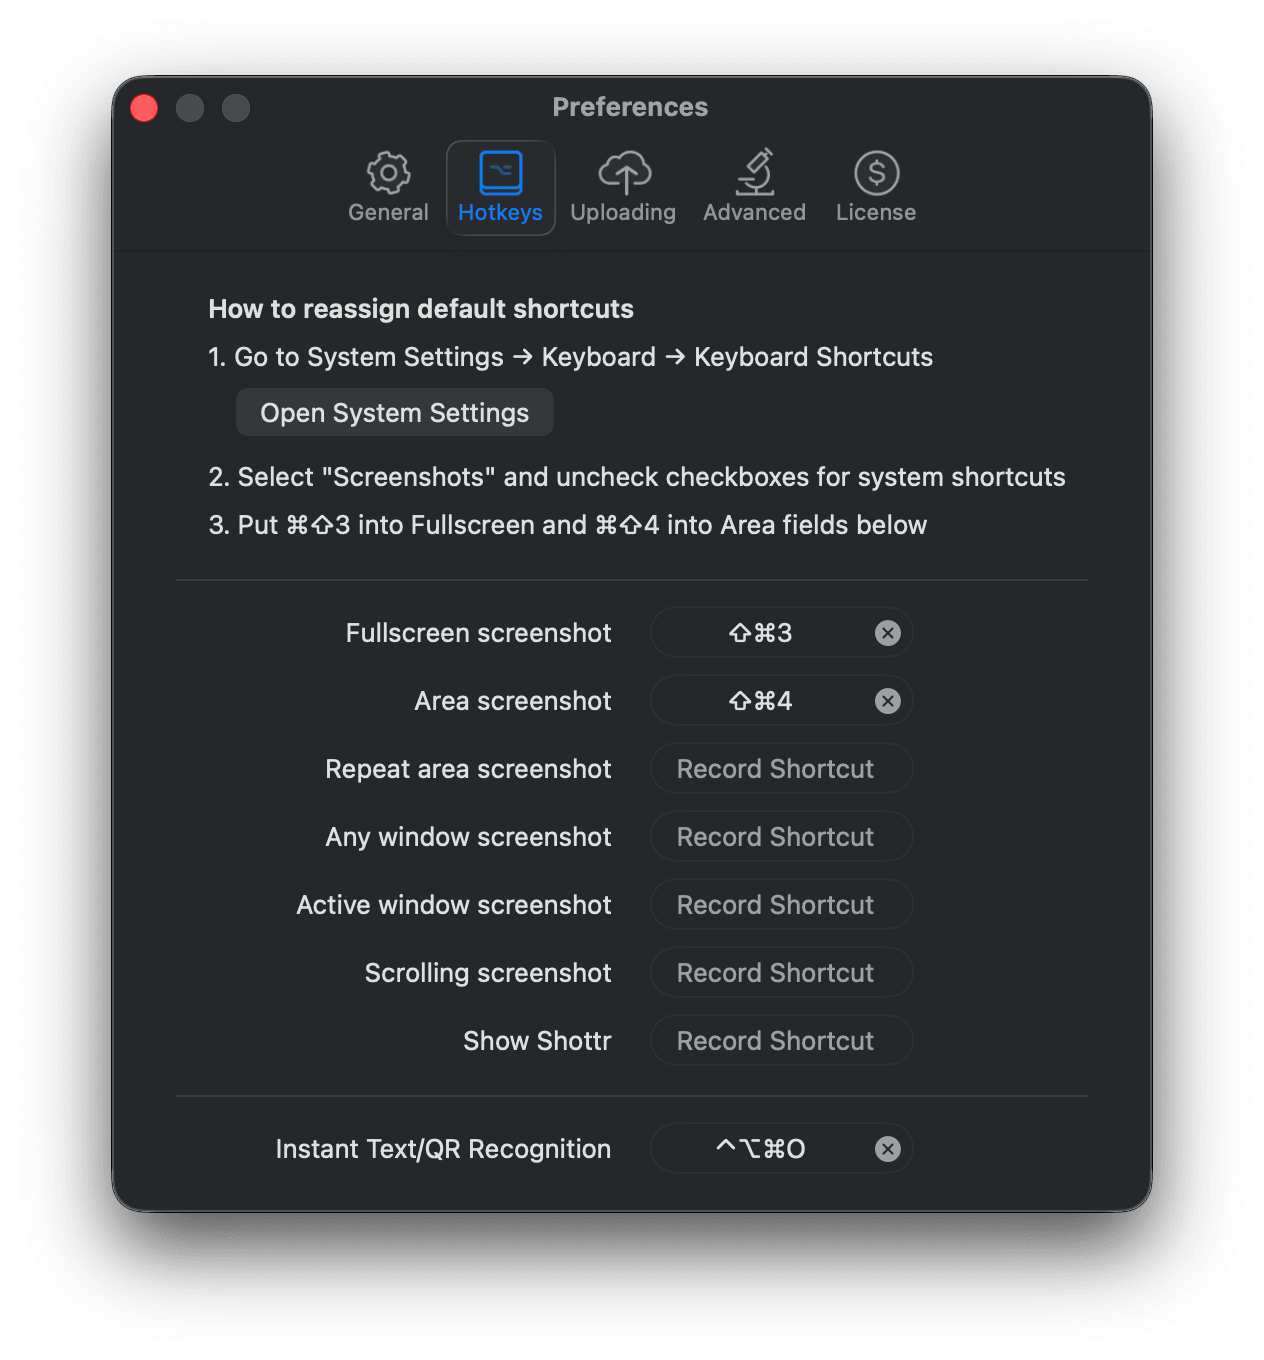
- Return to the settings screen and set the hotkeys to
Cmd + Shift + 3andCmd + Shift + 4
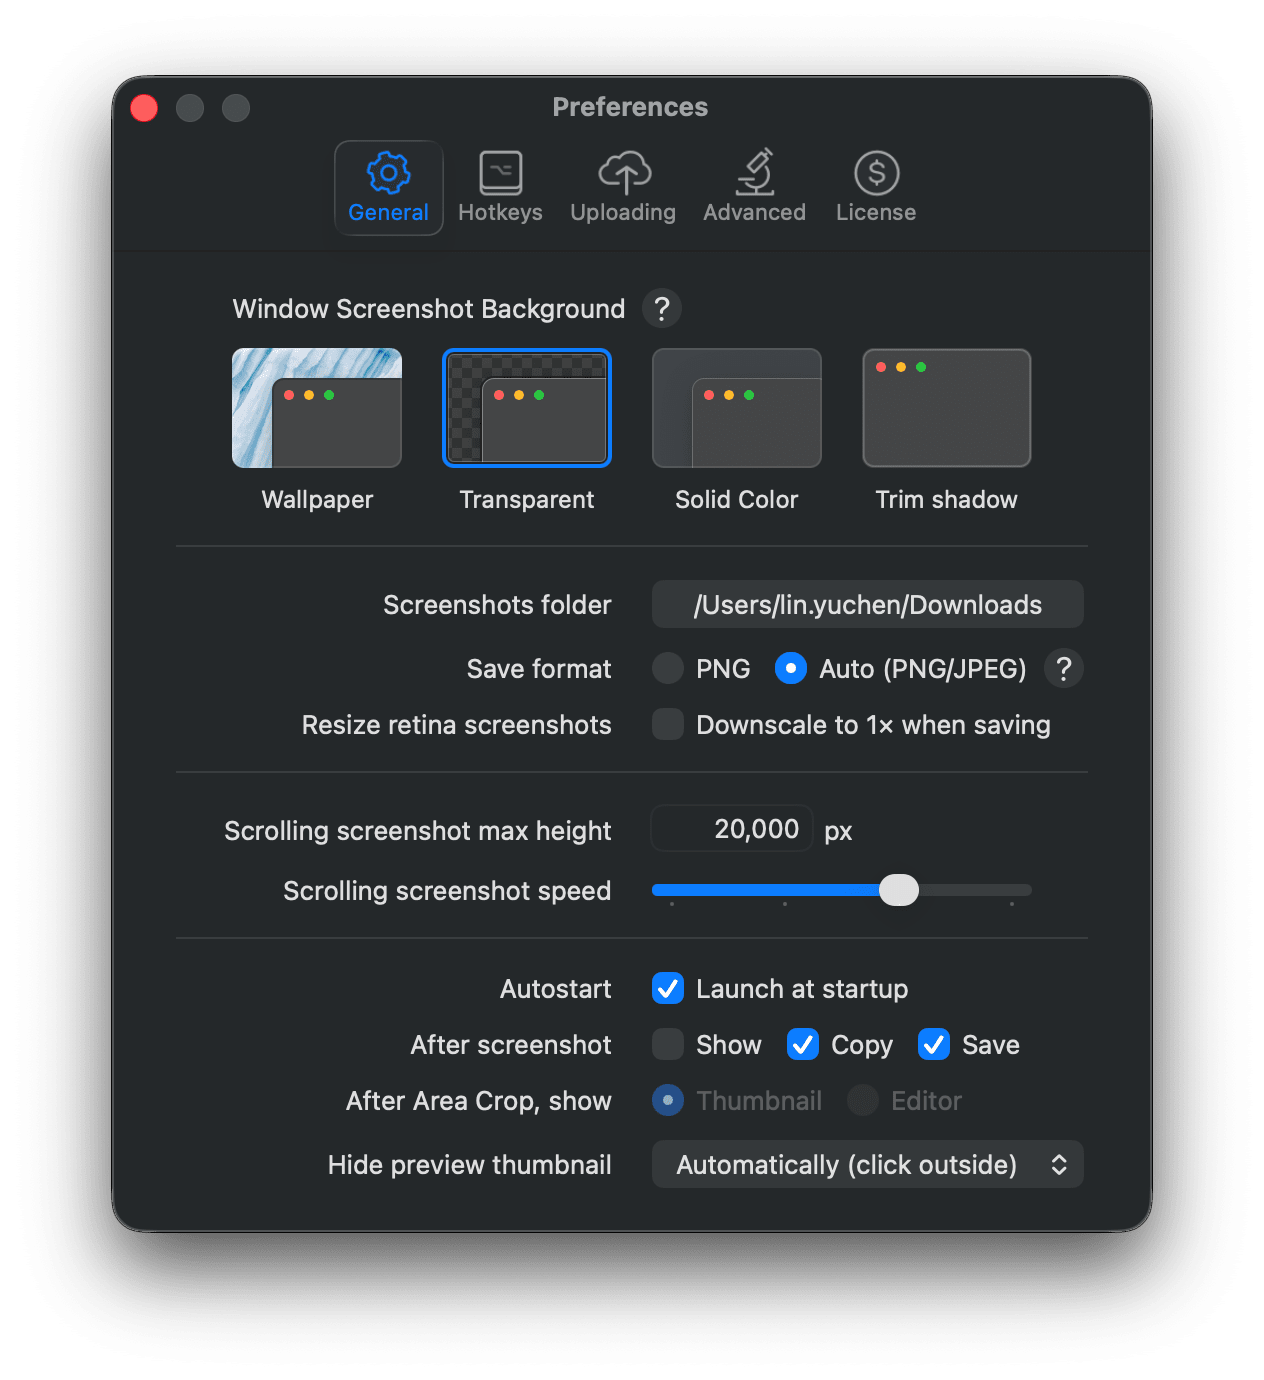
- Navigate to the Hotkeys tab and check both
CopyandSaveunder After Screenshot
4. Enhancing Clipboard History with Raycast
If you're used to Win + V (clipboard history) on Windows, you'll be dismayed by Mac's "only one item saved" behavior. To solve this, many engineers introduce external tools.
My personal top recommendation is Raycast.
- What can it do?: Not just clipboard history, but it speeds up all kinds of operations including app launching, calculations, and window resizing
- Shortcut example:
Cmd + Space(launch Raycast) → Search for "clipboard History", right-click and selectConfigure Command
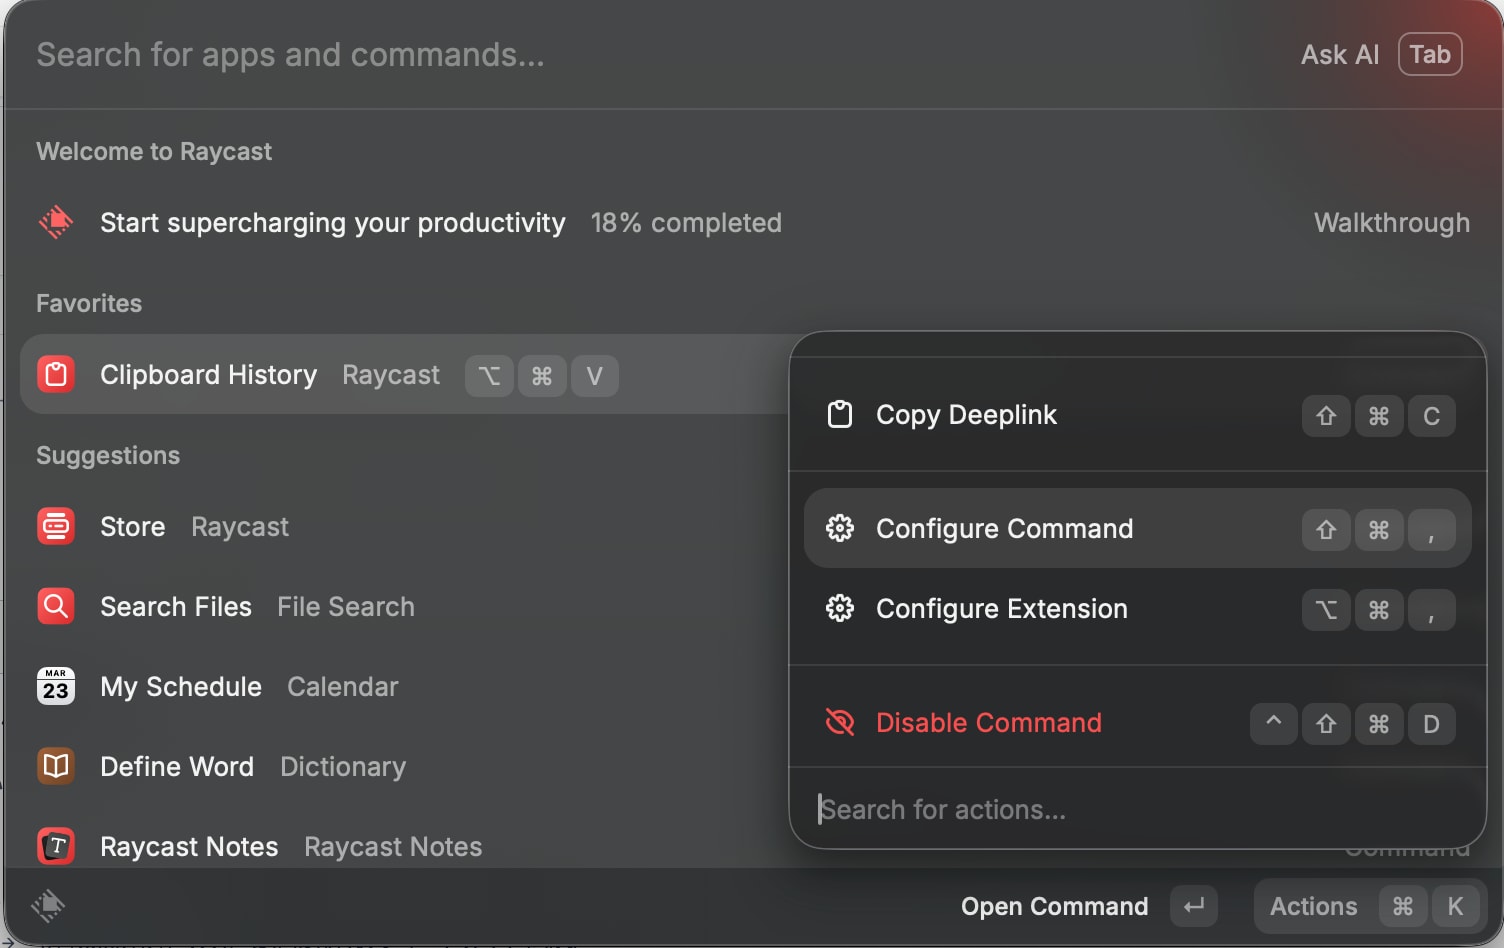
Author's settings example:
I assign clipboard history toCmd + Option + V. This lets me pull up past copied content with the same feel asWin + Von Windows.
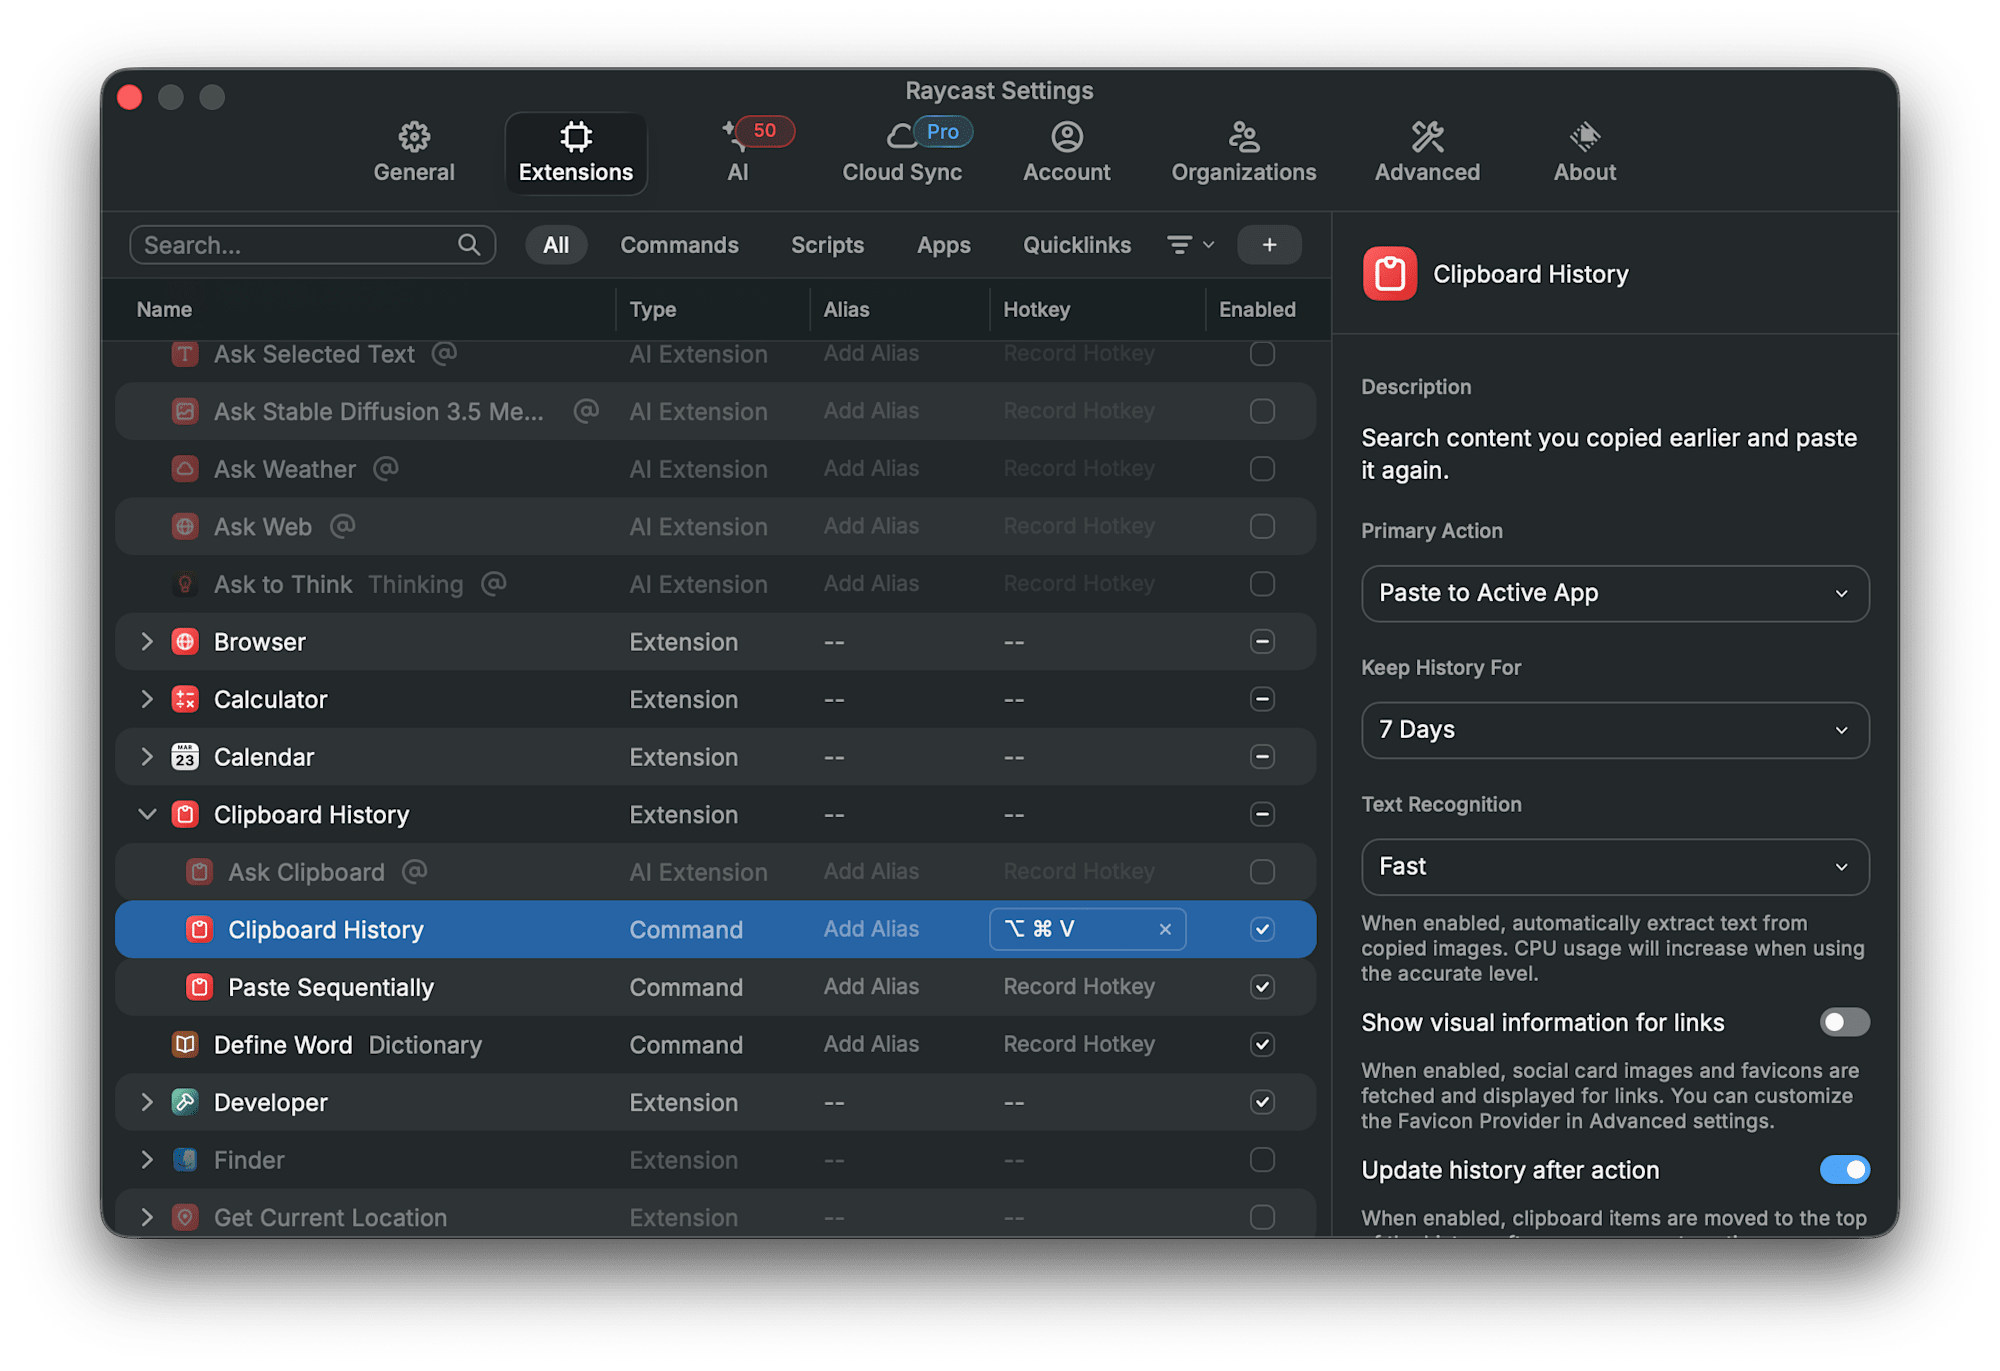
Also, when pasting from Raycast's clipboard history, plain text (unformatted) pasting is the default. There are many situations where you want to paste text copied from web pages or documents without extra fonts, colors, or sizes, so this is extremely convenient. With macOS standard Cmd + V, formatting is pasted along with the text, requiring Cmd + Option + Shift + V for unformatted pasting, but via Raycast you don't need to think about it.
5. Multi-Monitor Management with Raycast
Setup is easy — just enable the Window Management extension (it's a core extension, so it's already installed from the start).
Assigning a Shortcut to "Next Display"
To move a window to the adjacent display, use the "Next Display" command. Here's how to set up the shortcut:
- Launch Raycast (default is
Option + Space) - Type "Extensions" and press
Enter
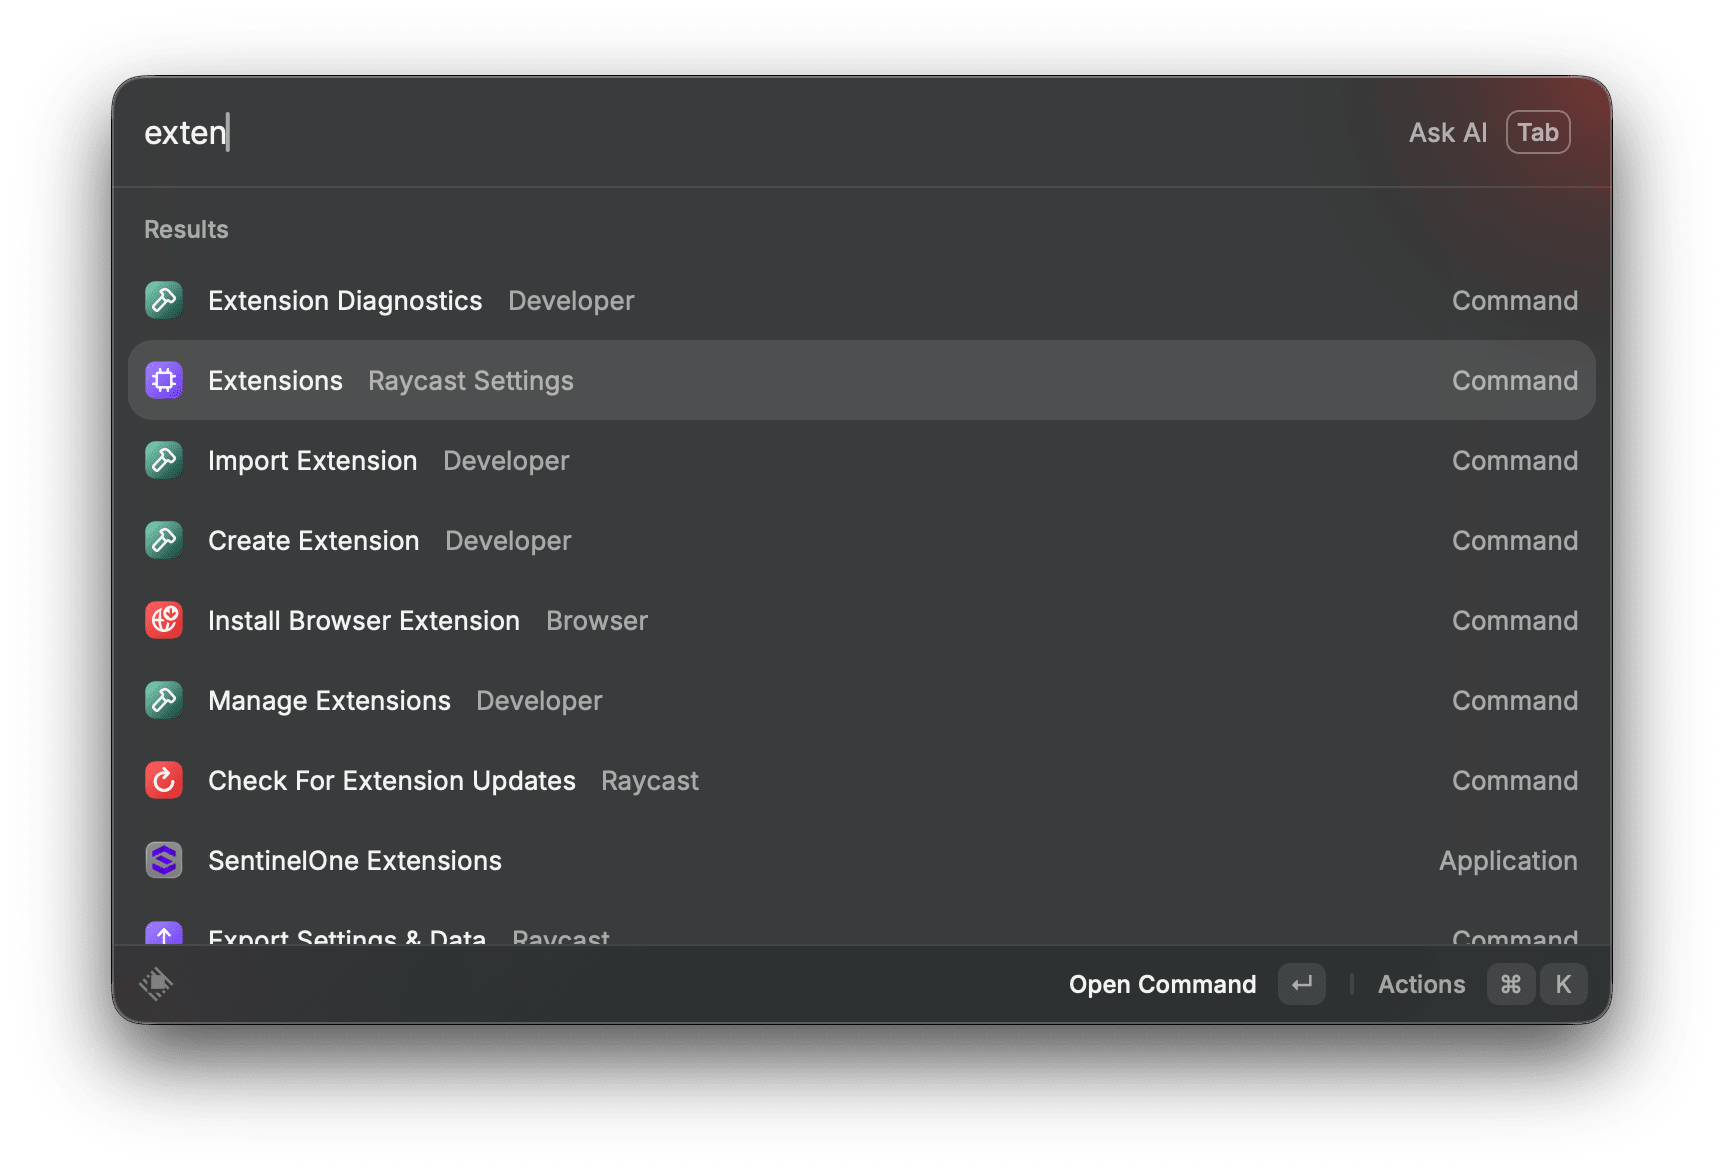
- Search for Next Display
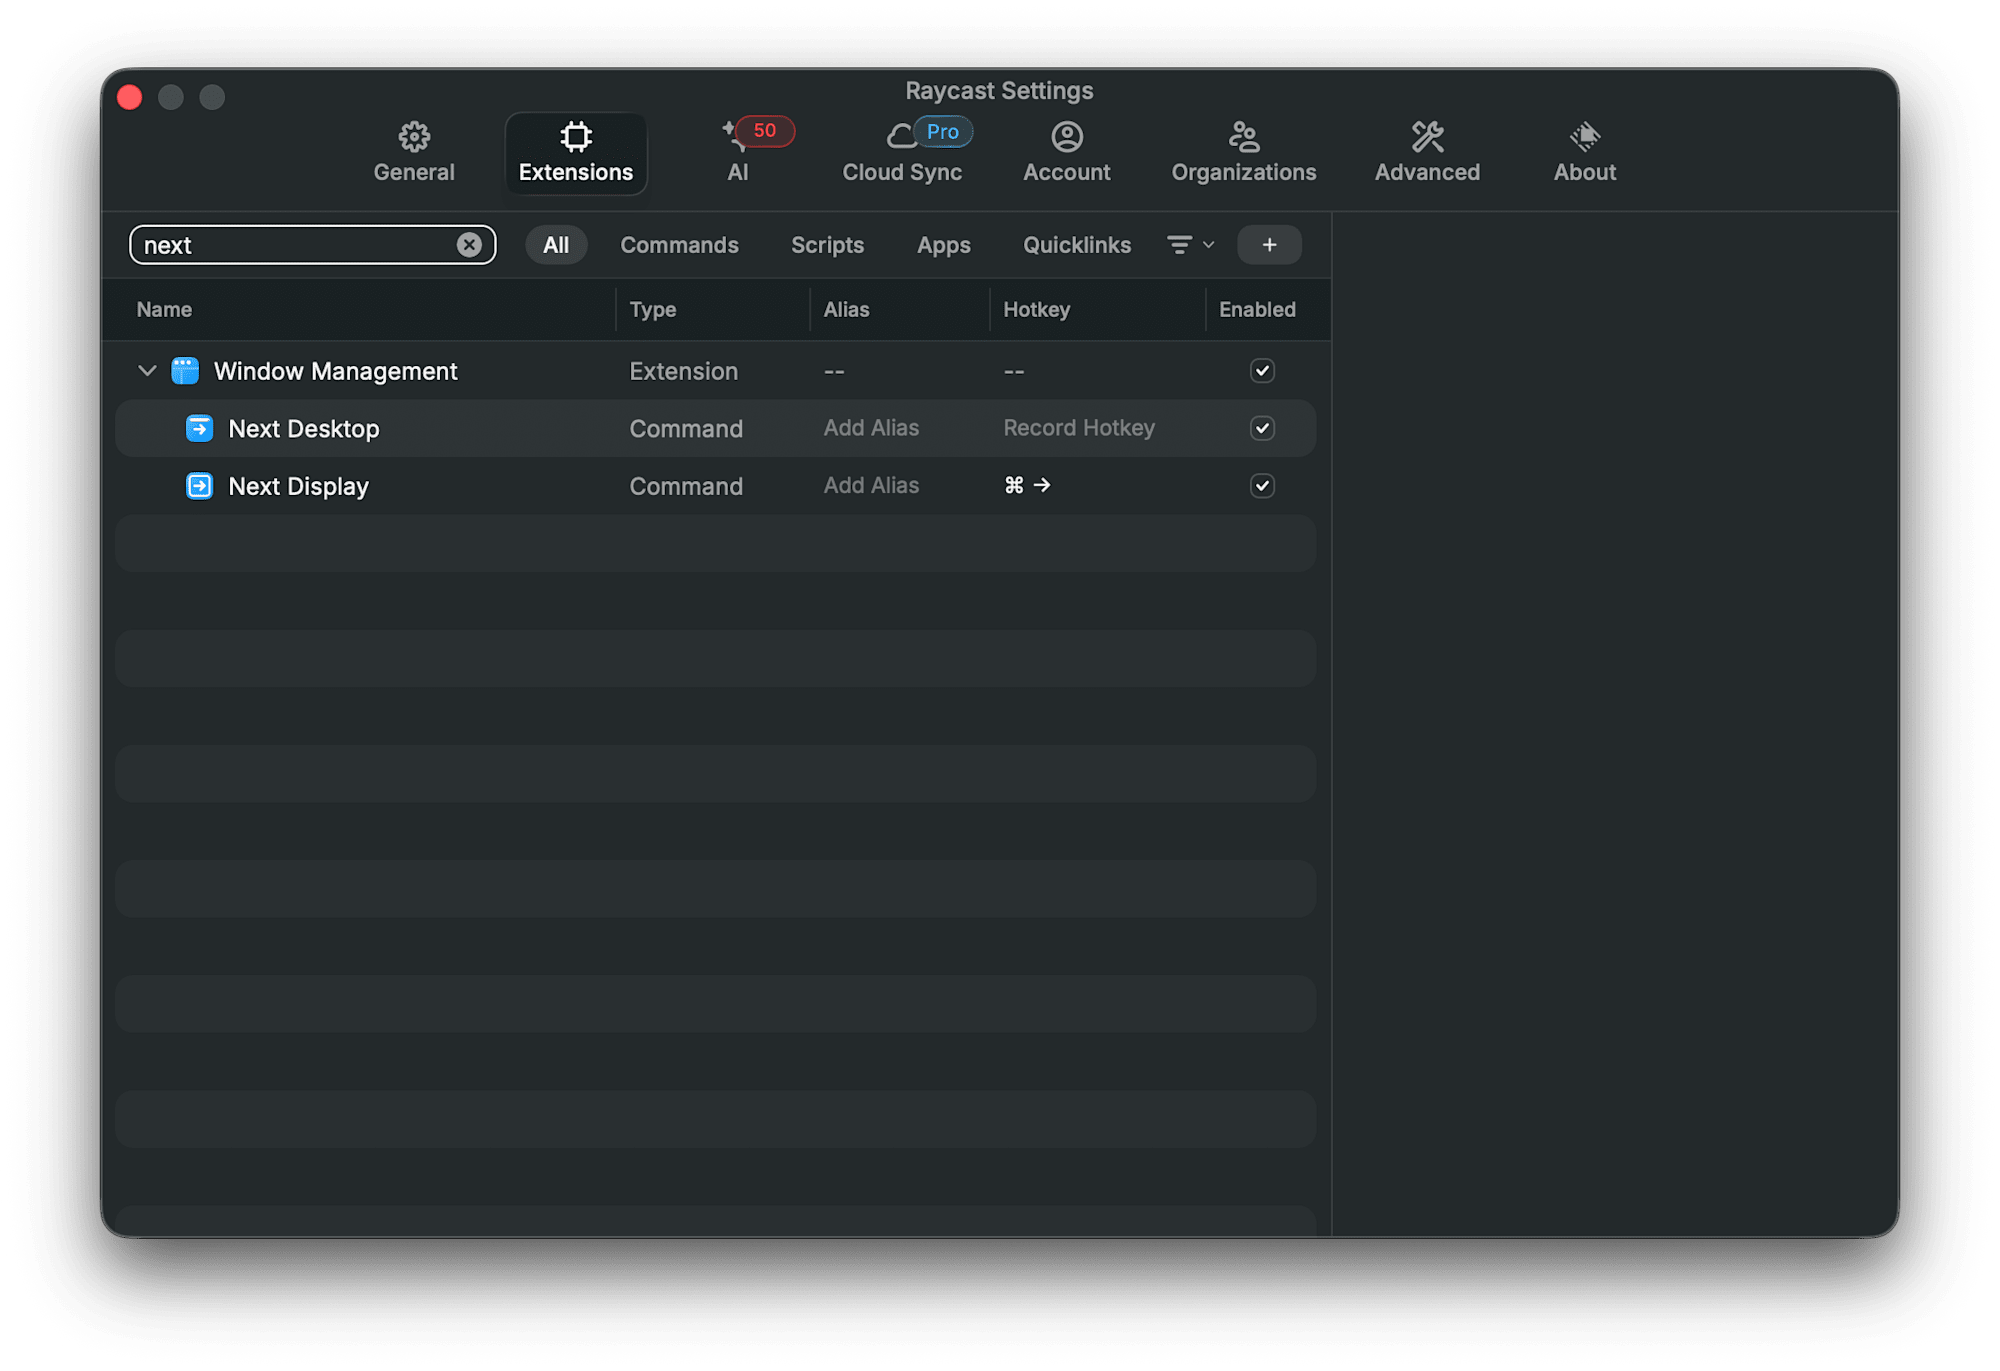
- Click the Hotkey field and register your shortcut
Recommendation: Setting it to
Cmd + →gives a feel closer to Windows operations.
Creating Window Layouts
If you use the same window arrangement every day (e.g., Slack on the left screen, browser on the right), Raycast's "Create Window Layout" command is convenient.
- Arrange all windows in your preferred position and size
- Save it as a layout
- From then on, a single Raycast command will automatically arrange all apps to the specified screen and size
6. Tips That Will Make Your Life Easier
The Enter Key Trap
When you select a file in Finder and press Enter, it renames the file rather than opening it. Use Cmd + O to open files. This is the first stumbling block for Windows users.
Switching Windows
- Switch between apps:
Cmd + Tab(similar to Windows'Alt + Tab, but switches by app) - Switch between windows of the same app:
Cmd + ~(backtick)
Windows' Alt + Tab switches by window, but Mac's Cmd + Tab switches by app. To switch between multiple windows of the same app, you need to use Cmd + ~.
Copying a Folder Path from Finder
Press Cmd + Option + C in Finder to copy the folder path.
Hidden Files (Dotfiles) Are Not Visible
On macOS, files and folders starting with a dot (.) — so-called "dotfiles" — are hidden by default. This is to prevent accidental deletion or moving of configuration files like .env or .git.
There are two ways to show them.
Keyboard Shortcut (Fastest)
Just press the following shortcut inside a Finder window:
Cmd + Shift + .(period)
Press it once and hidden files appear semi-transparently; press it again to hide them again.
Permanently Configure via Terminal
If the shortcut doesn't work or you want to configure it via command line, run the following:
defaults write com.apple.finder AppleShowAllFiles -bool true
killall Finder
To revert: Use the same command but change
truetofalse.
Accessing the "Library" Folder
The ~/Library folder is also hidden by default, but it's not a dotfile. Click Go in the Finder menu bar and hold down the Option key to see "Library" appear as an option.
Showing Hidden Files in File Selection Dialogs
Even if you've set Finder to show hidden files, hidden files may not be visible in browser upload dialogs and similar contexts.
Solution: Use the Shortcut Inside the Dialog
With the file selection window active, press Cmd + Shift + . in the same way. macOS remembers this setting per dialog, so it will remain visible from next time onward.
Summary
Switching from Windows to Mac is confusing at first, but once you grasp the basic shortcut "translations," it goes more smoothly than you'd expect. In particular, keeping the following points in mind will make things easier:
- Train your body to remember the
Ctrl→Cmdreplacement - Speed up app launching with Spotlight (or Raycast)
- Introduce a clipboard history tool early on
- Remember that
Cmd + Shift + .can show hidden files - If you need screenshot save + copy, make use of tools like Shottr
I hope this article helps ease the "I don't understand anything" state on your first day with Mac.