
I tried aggregating IVR input results from Amazon Connect customers as wrap-up codes on a dashboard

This page has been translated by machine translation. View original
Introduction
Wrap-up codes are commonly used to categorize how contacts were handled after they end.
For example, the following categories might be used.
- Resolved
- Callback Required
- Inquiry
- Complaint
In general, the typical operation assumes that agents select wrap-up codes during after-call work.
In this case, however, to verify the dashboard aggregation mechanism, instead of agent after-call work, we treated IVR number input results as wrap-up codes.
Customers enter 1~4 in the IVR, and the result is saved in a contact segment attribute called Disposition. The contact count per Disposition is then viewed on the Amazon Connect Customer dashboard.
In September 2025, Amazon Connect Customer added the ability to associate custom attributes with interaction segments. Pre-defined attributes can be set as contact segment attributes from a flow or via the UpdateContact API.
In this article, we will save IVR input results as wrap-up codes in contact segment attributes, and aggregate the contact count per code on the Amazon Connect Customer dashboard.
Configuration for This Article
The verification flow used in this article is as follows.
Make a phone call
↓
Enter 1~4 in the IVR
↓
Determine Disposition based on input value
↓
Save Disposition as a contact segment attribute
↓
End the call
↓
Check the count per Disposition on the dashboard
The correspondence between IVR input values and Disposition is as follows.
| Input Number | Disposition Value |
|---|---|
1 |
Resolved |
2 |
Callback Required |
3 |
Inquiry |
4 |
Complaint |
Creating Pre-defined Attributes
From [Routing] → [Predefined attributes] in Amazon Connect Customer, create an attribute for wrap-up codes.
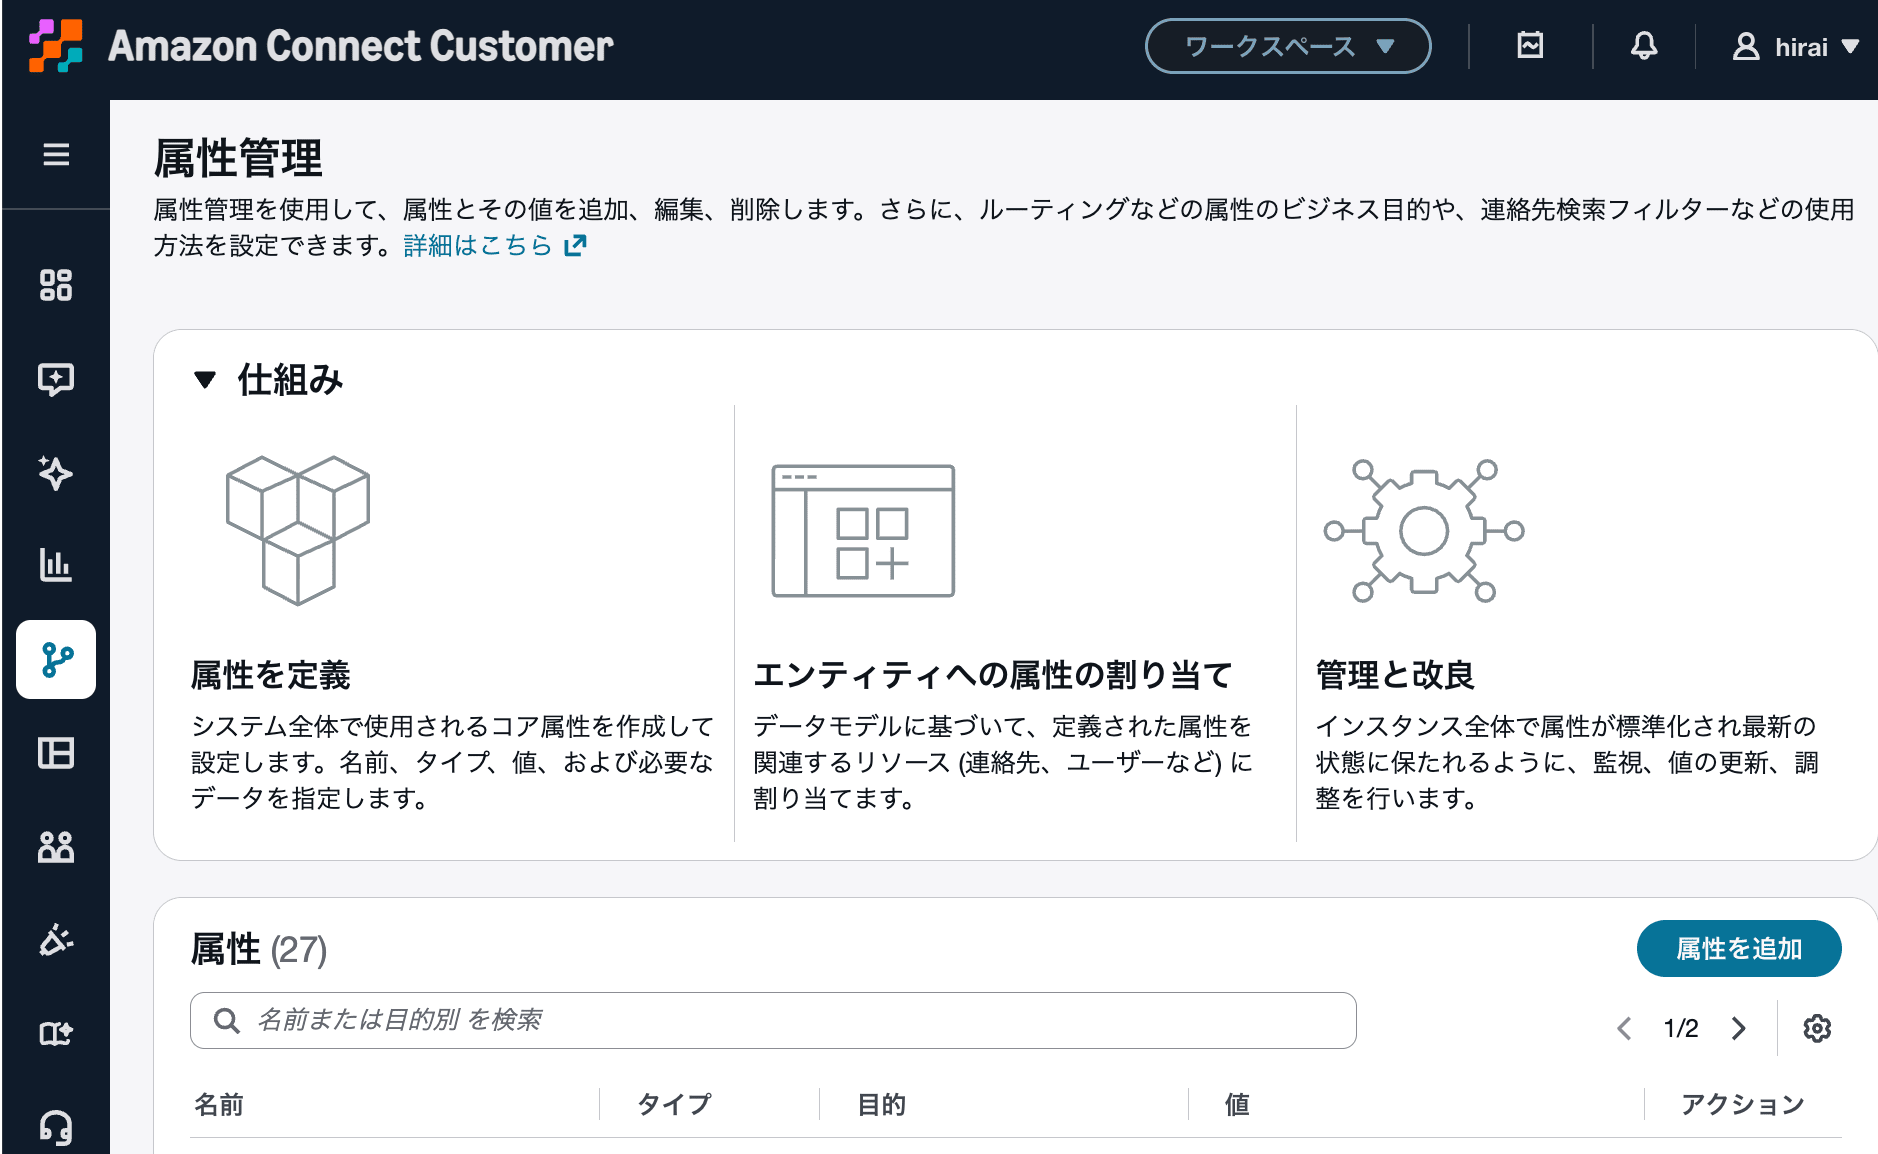
Attribute management screen in Amazon Connect Customer
In this article, Disposition was defined with the following settings.
- Name:
Disposition - Attribute type: User
- Values:
Resolved,Callback Required,Inquiry,Complaint
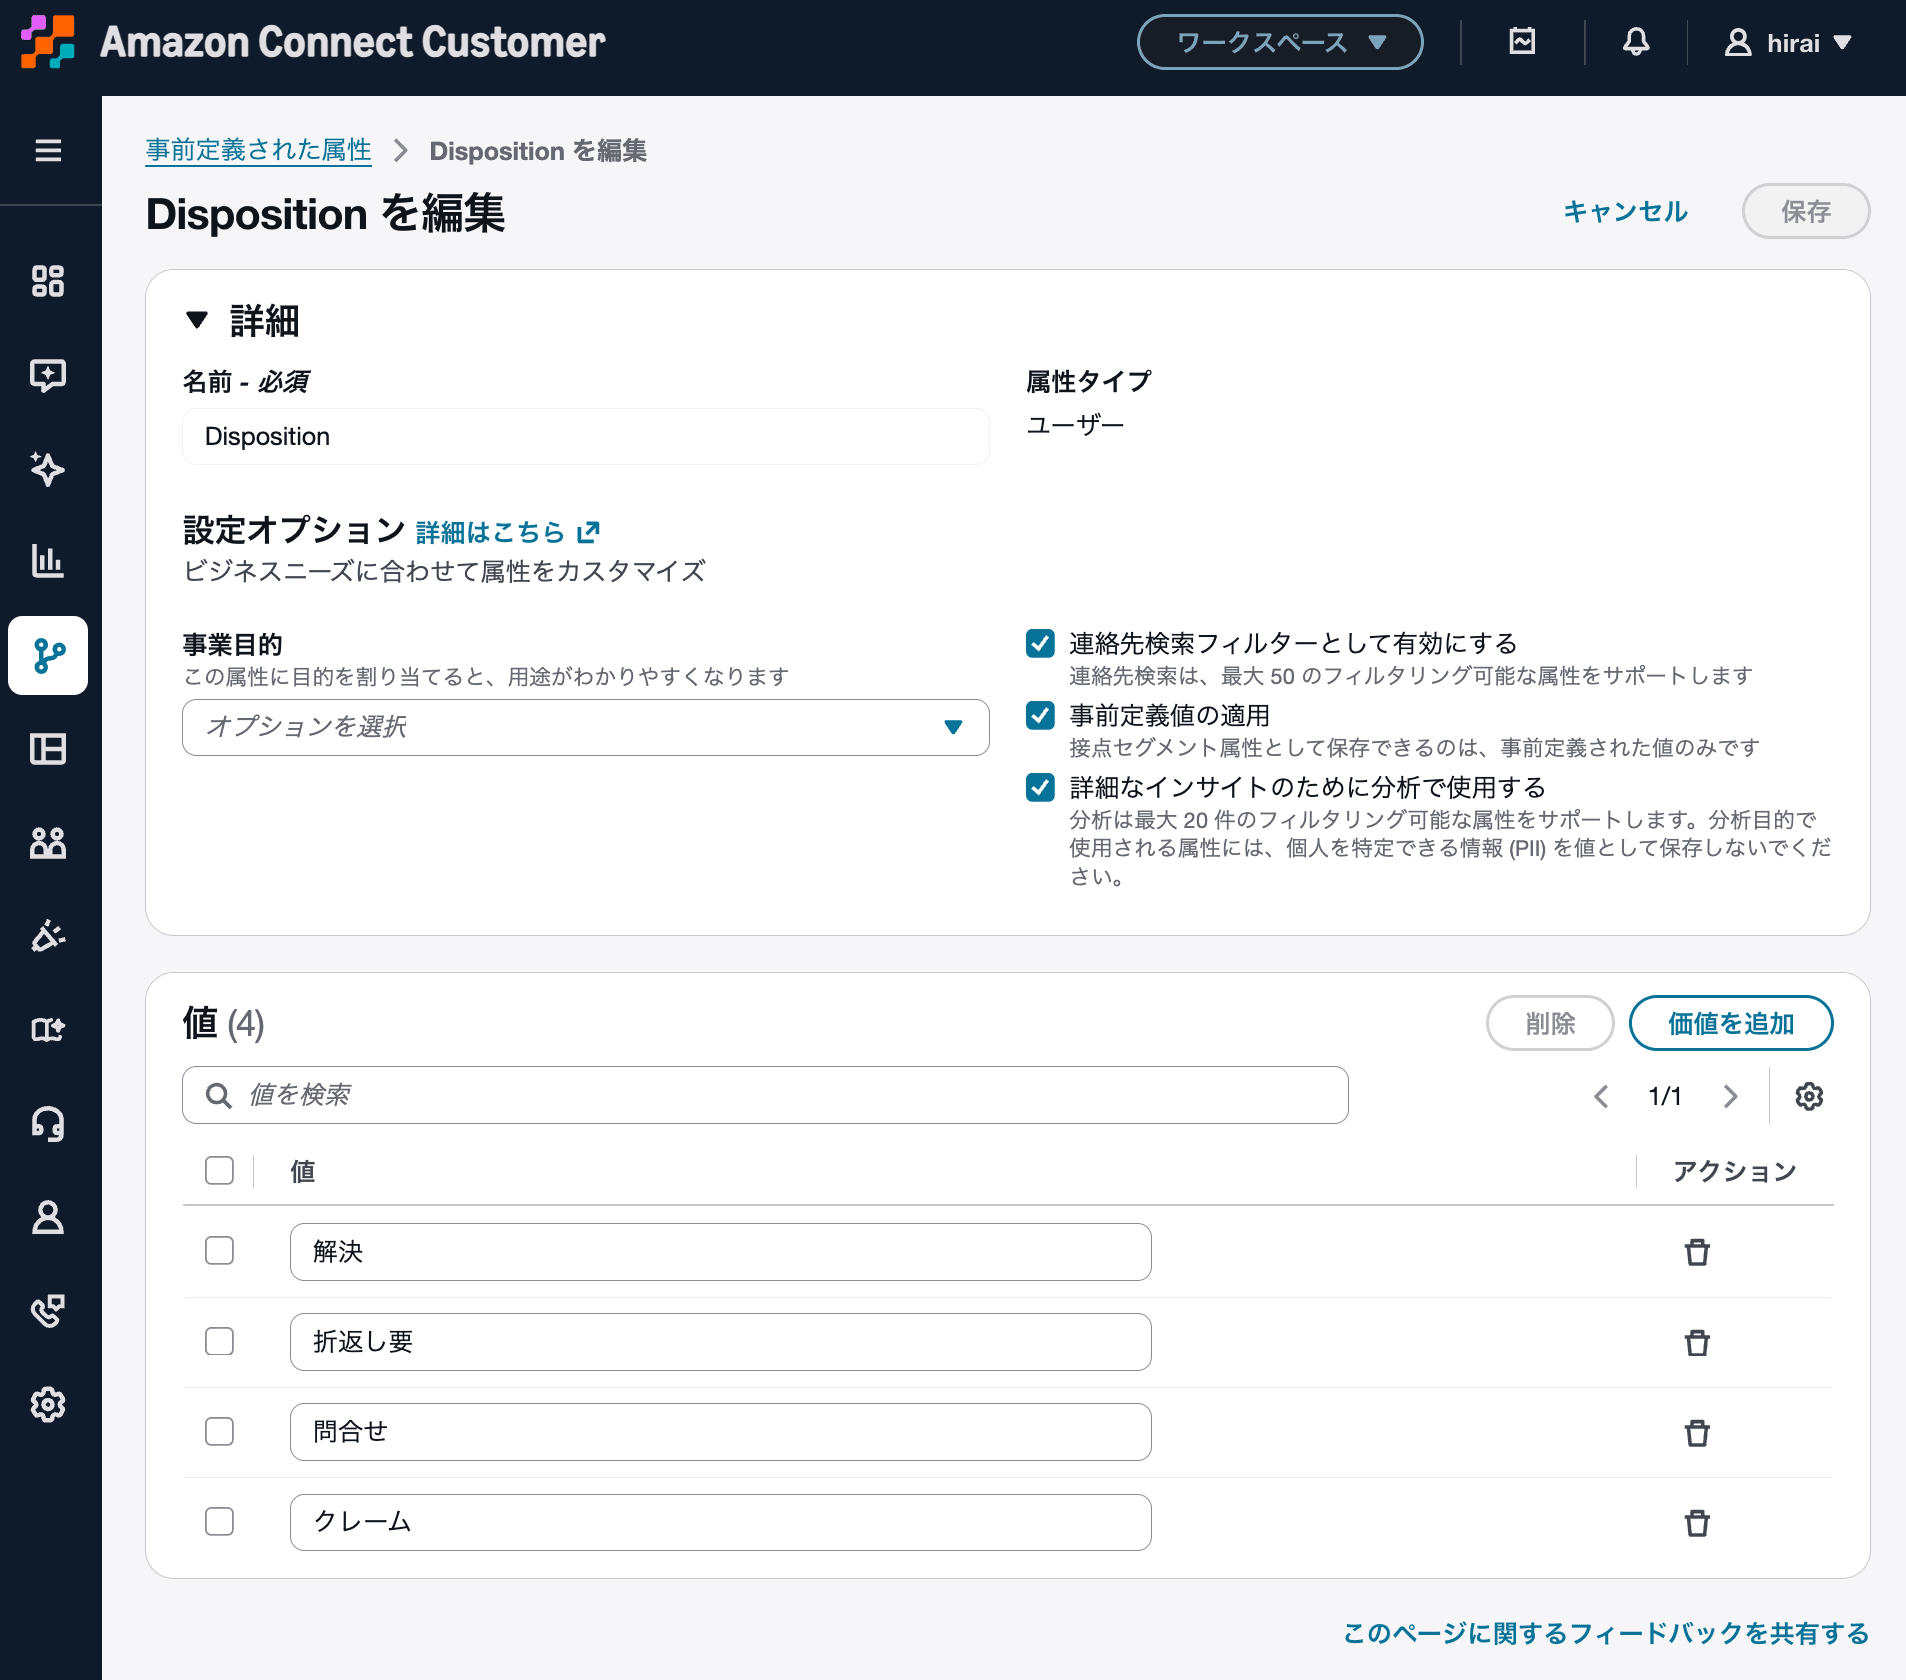
Disposition values and configuration options
The following 3 items were enabled in the configuration options.
| Configuration Item | Purpose |
|---|---|
| Enable as a contact search filter | Use Disposition as a condition in contact search |
| Enforce predefined values | Restrict values that can be saved as contact segment attributes to only the defined values |
| Use in analytics for detailed insights | Use Disposition as a filter in the historical contact metrics on the dashboard |
When "Enforce predefined values" is enabled, the values that can be saved as contact segment attributes are limited to the 4 values defined here.
For example, if Complaint is a classification value, it becomes harder to save variations such as Complaint Handling or Complaint with trailing spaces. This is a useful setting when you want to fix classification values to avoid having values with the same meaning spread across different representations at aggregation time.
Also, user-defined attributes with "Use in analytics for detailed insights" enabled can be used as filters in historical contact metrics. Avoid saving personally identifiable information such as names, phone numbers, and email addresses in attributes used for analysis.
The method for creating pre-defined attributes is described in the following documentation.
Saving IVR Input Results as Segment Attributes in the IVR Flow
The flow used in this article is as follows.
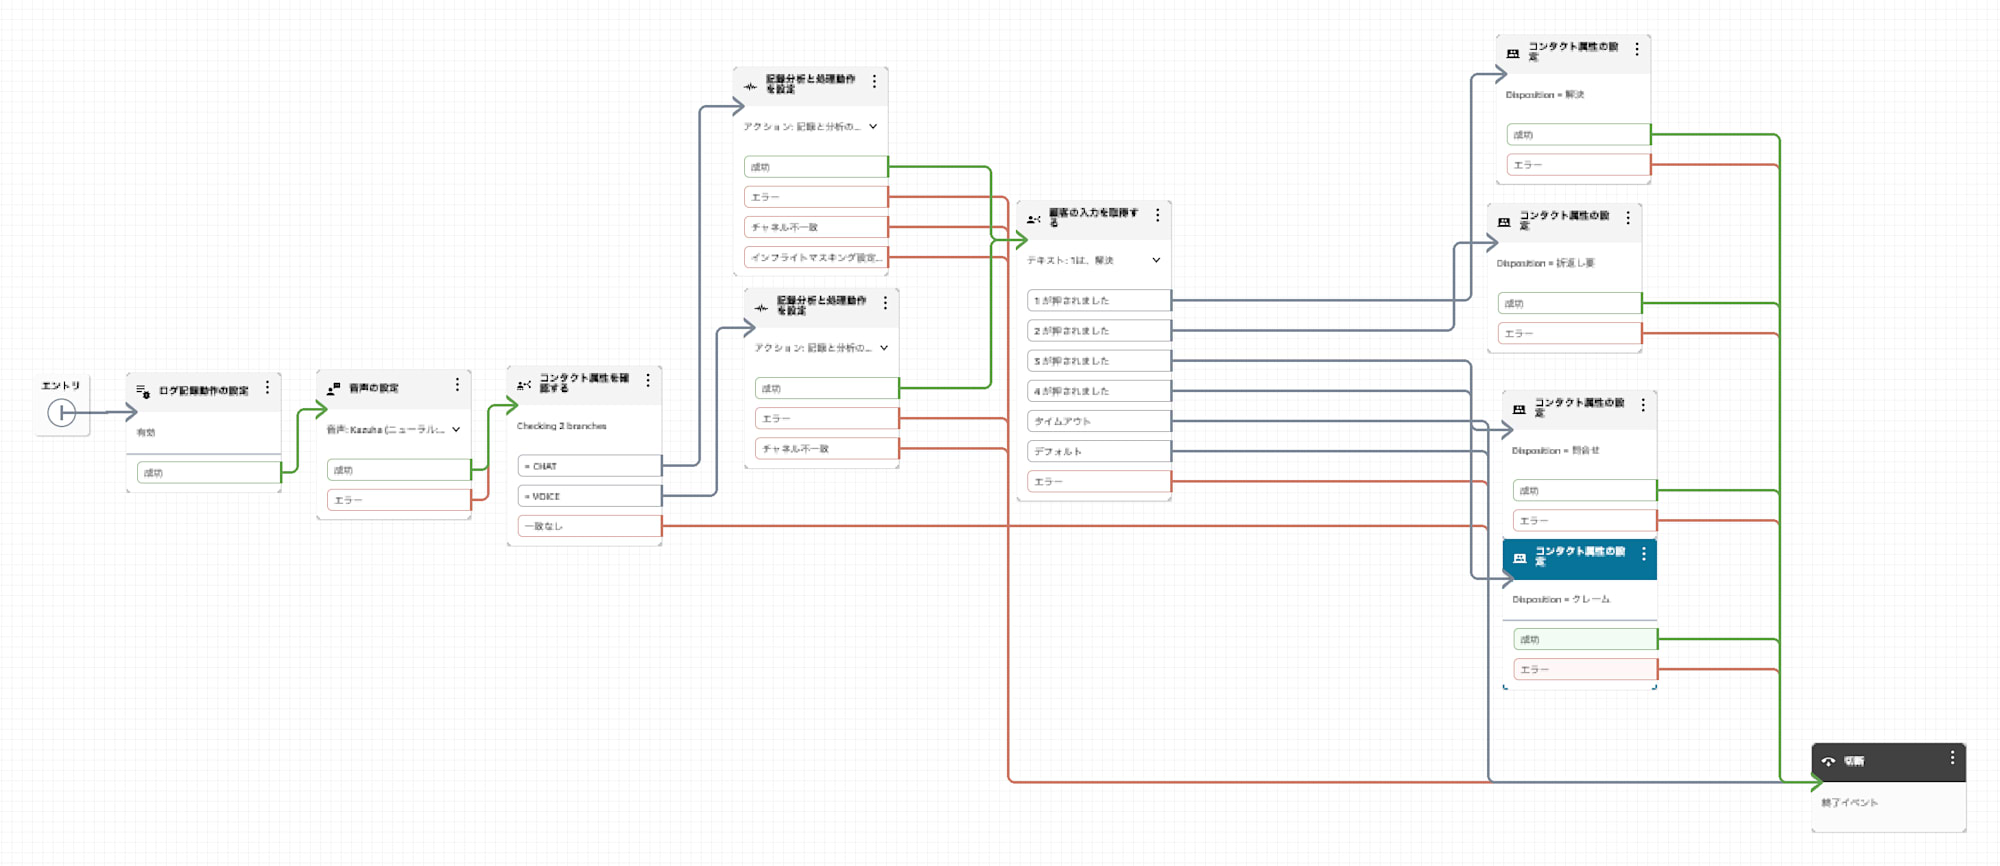
A flow that sets Disposition based on input values 1~4 and ends the call
In the flow, the [Get customer input] block branches subsequent processing based on the 1~4 entered by the customer.
A [Set contact attributes] block is executed in each branch.
For example, when 1 is pressed, Disposition = Resolved is set.
The important point here is to select [Segment attributes] as the storage destination, rather than regular contact attributes.
| Item | Setting Value |
|---|---|
| Namespace | Segment attributes |
| Key | Disposition |
| Value | One of: Resolved, Callback Required, Inquiry, Complaint |
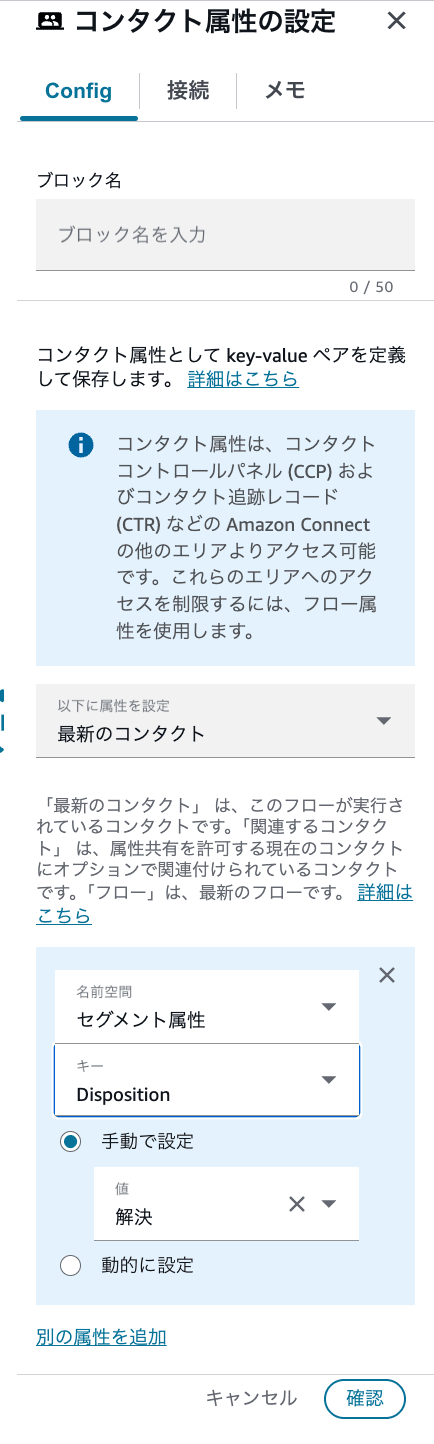
Example of setting Disposition = Resolved as a segment attribute
When using Disposition as a filter for dashboard analysis, the storage destination in the flow should be set to segment attributes. When [Segment attributes] is selected as the namespace, pre-defined attributes appear as key candidates.
The method for setting contact segment attributes is described in the following documentation.
Verifying in Contact Details
After publishing the flow, we made calls from a test phone number, entered 1~4, and ended the calls.
After the call ended, opening the target contact from contact search allows you to check segment attributes on the contact details page.
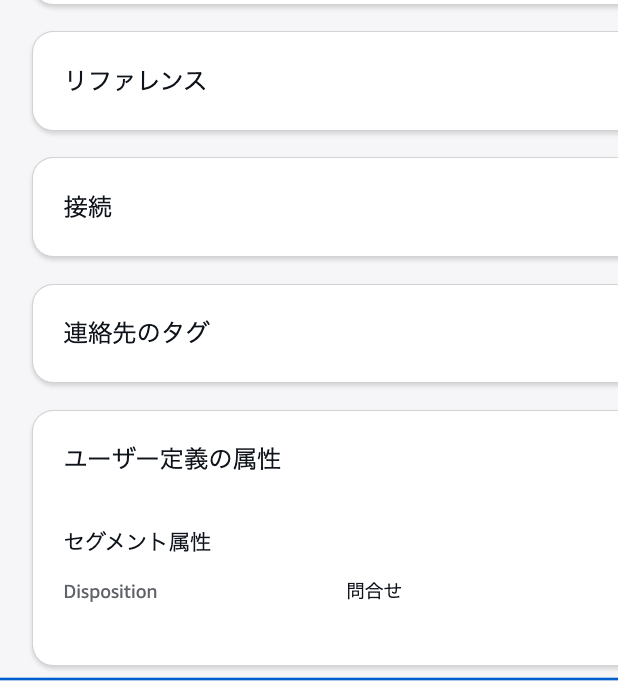
The Disposition segment attribute can be confirmed in contact details
In this verification, we confirmed that the following values were saved according to the entered number.
Disposition = Resolved
Disposition = Callback Required
Disposition = Inquiry
Disposition = Complaint
If the expected values are not displayed on the dashboard, it is easier to first check the contact details and confirm whether Disposition is saved as a segment attribute to isolate the issue.
Aggregating by Wrap-up Code on the Dashboard
Contact Counts Were Not Displayed in the Standard "Contacts Handled"
Initially, we tried to check the count per Disposition using [Contacts handled] displayed in the [Contact performance overview] widget.
However, the verification flow in this article is configured without connecting to an agent.
IVR number input
↓
Set Disposition
↓
End the call
As a result, "Contacts handled" remained at 0.
Contacts handled is a metric that counts contacts connected to an agent. On the other hand, Contacts created is a metric that counts contacts created during the specified period.
For an IVR self-service flow like this one, it was necessary to use [Contacts created], which is counted regardless of whether a connection to an agent was made.
Creating a Custom Metric
Since no standard widget that directly displays "Contacts created" was found among the standard widgets reviewed, a custom metric was created.
From [Dashboards and reports] → [Dashboards] → [Custom metrics], select [Create metric].
The creation method selected was [Metric builder].
The configuration settings are as follows.
| Item | Setting Value |
|---|---|
| Component identifier | M1 |
| Metric | Contacts created |
| Definition | SUM(M1) |
| Display format | Integer |
| Metric name | Wrap-up code count |
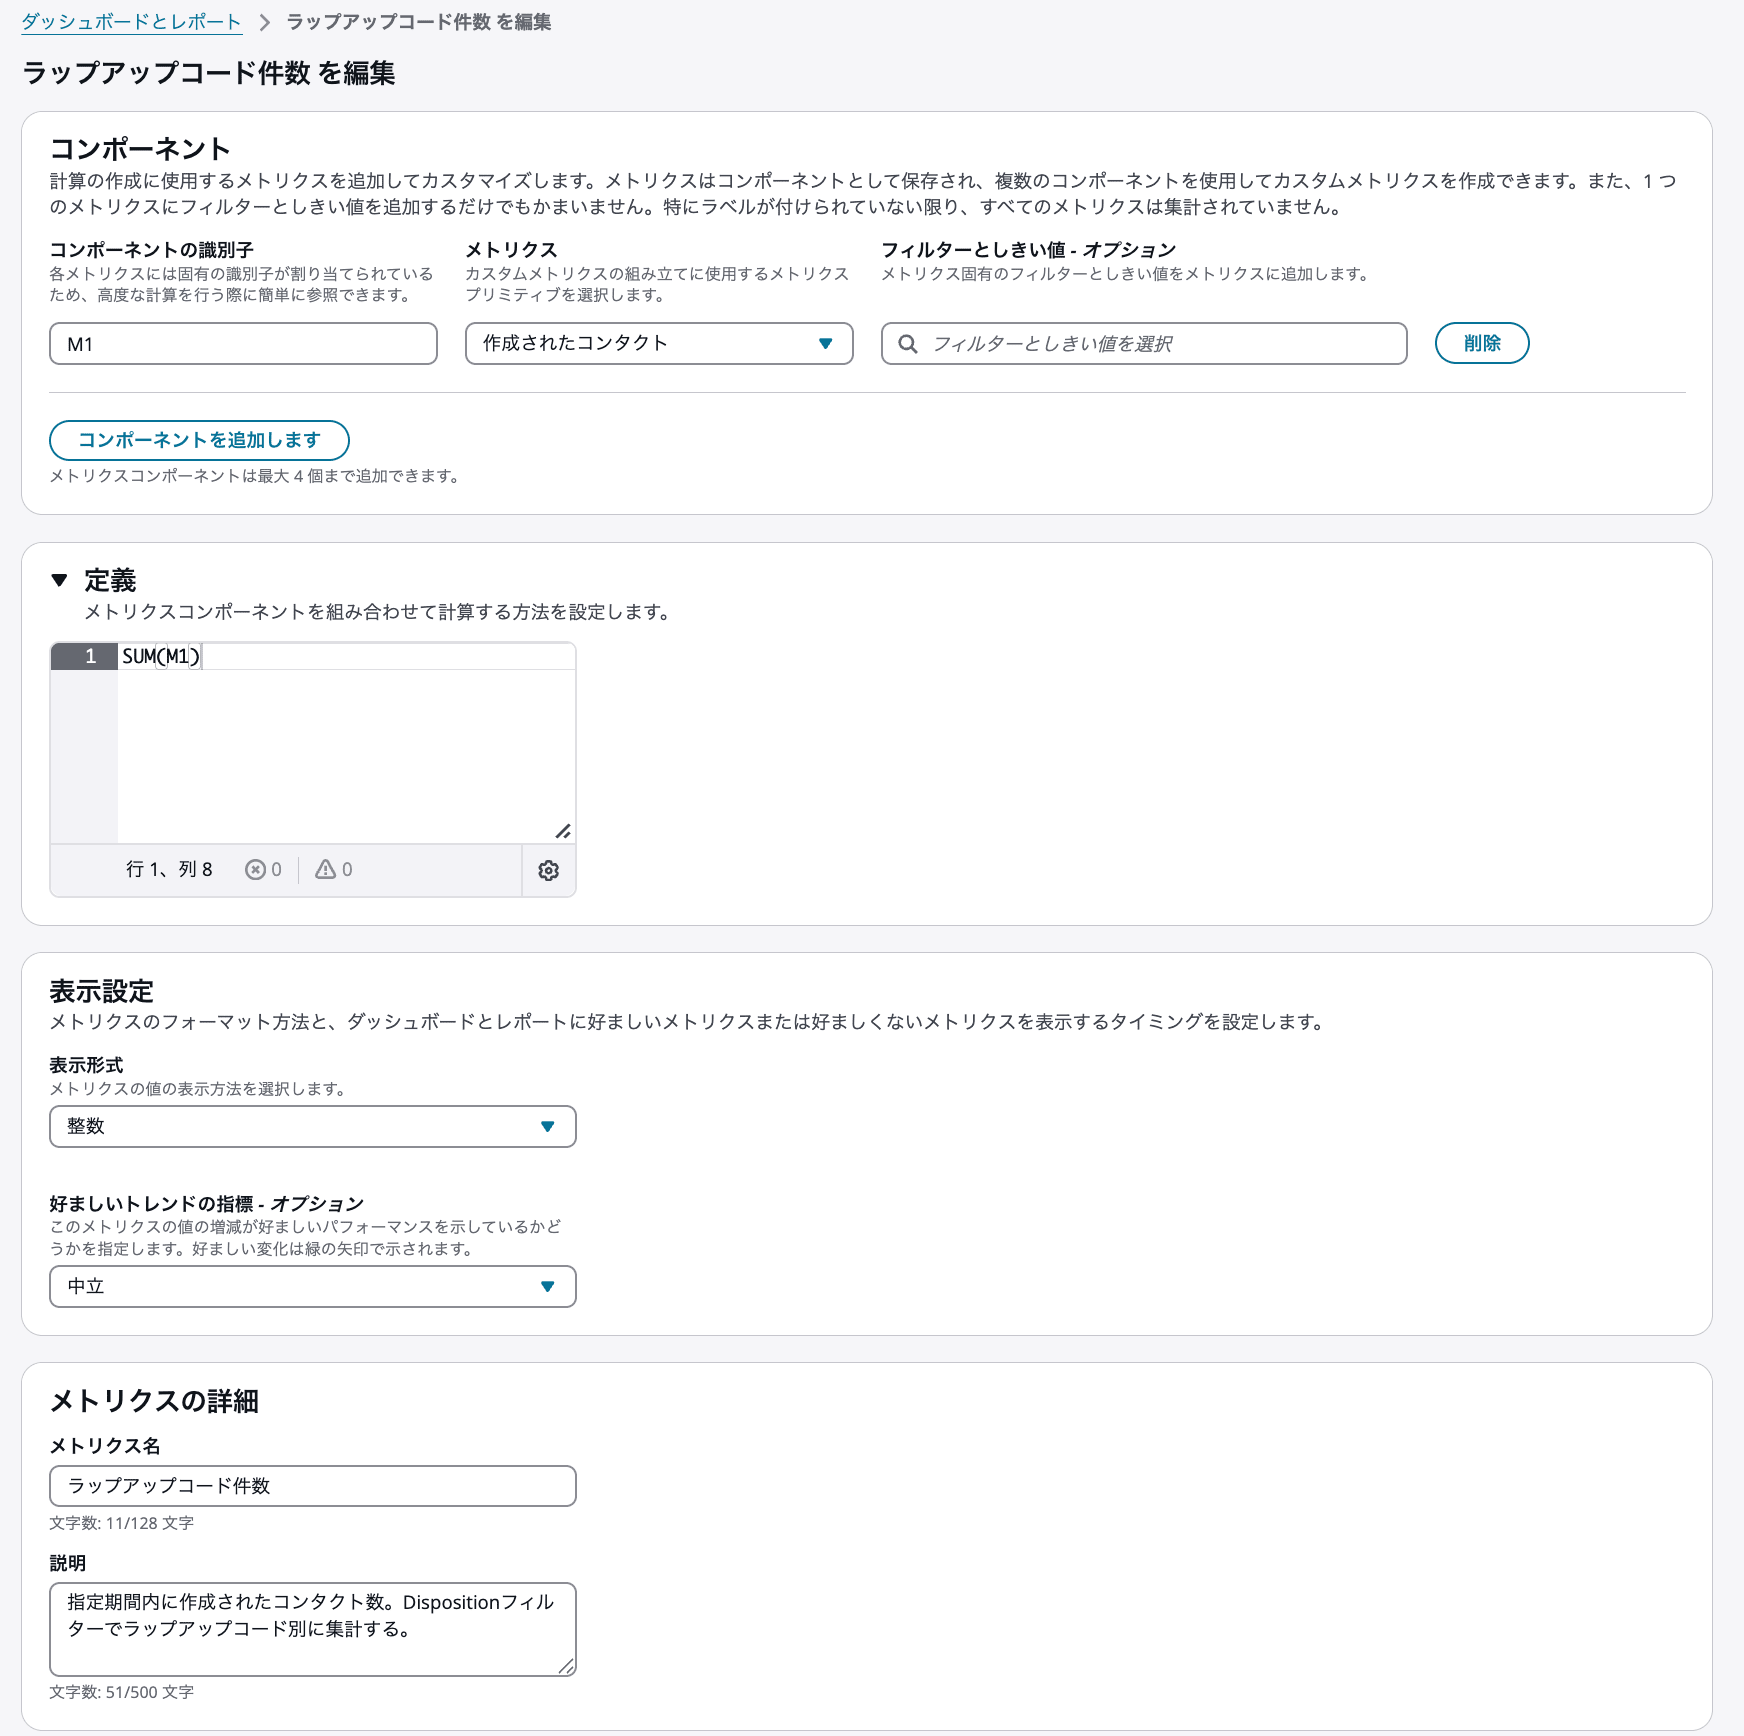
A custom metric that totals "Contacts created"
Enter the following in the definition field.
SUM(M1)
Since "Contacts created" is specified for M1, SUM(M1) allows displaying the number of contacts created within the specified period.
No Disposition filter is set on this custom metric itself. This is because a wrap-up code filter for each value will be set on each widget on the dashboard.
The method for creating custom metrics is described in the following documentation.
Filtering Disposition per Widget
Four contact [Contact performance overview] widgets are added to the dashboard, and the Wrap-up code count metric created earlier is added to each widget.
The created custom metric could be added from the widget's [Actions] → [Edit].
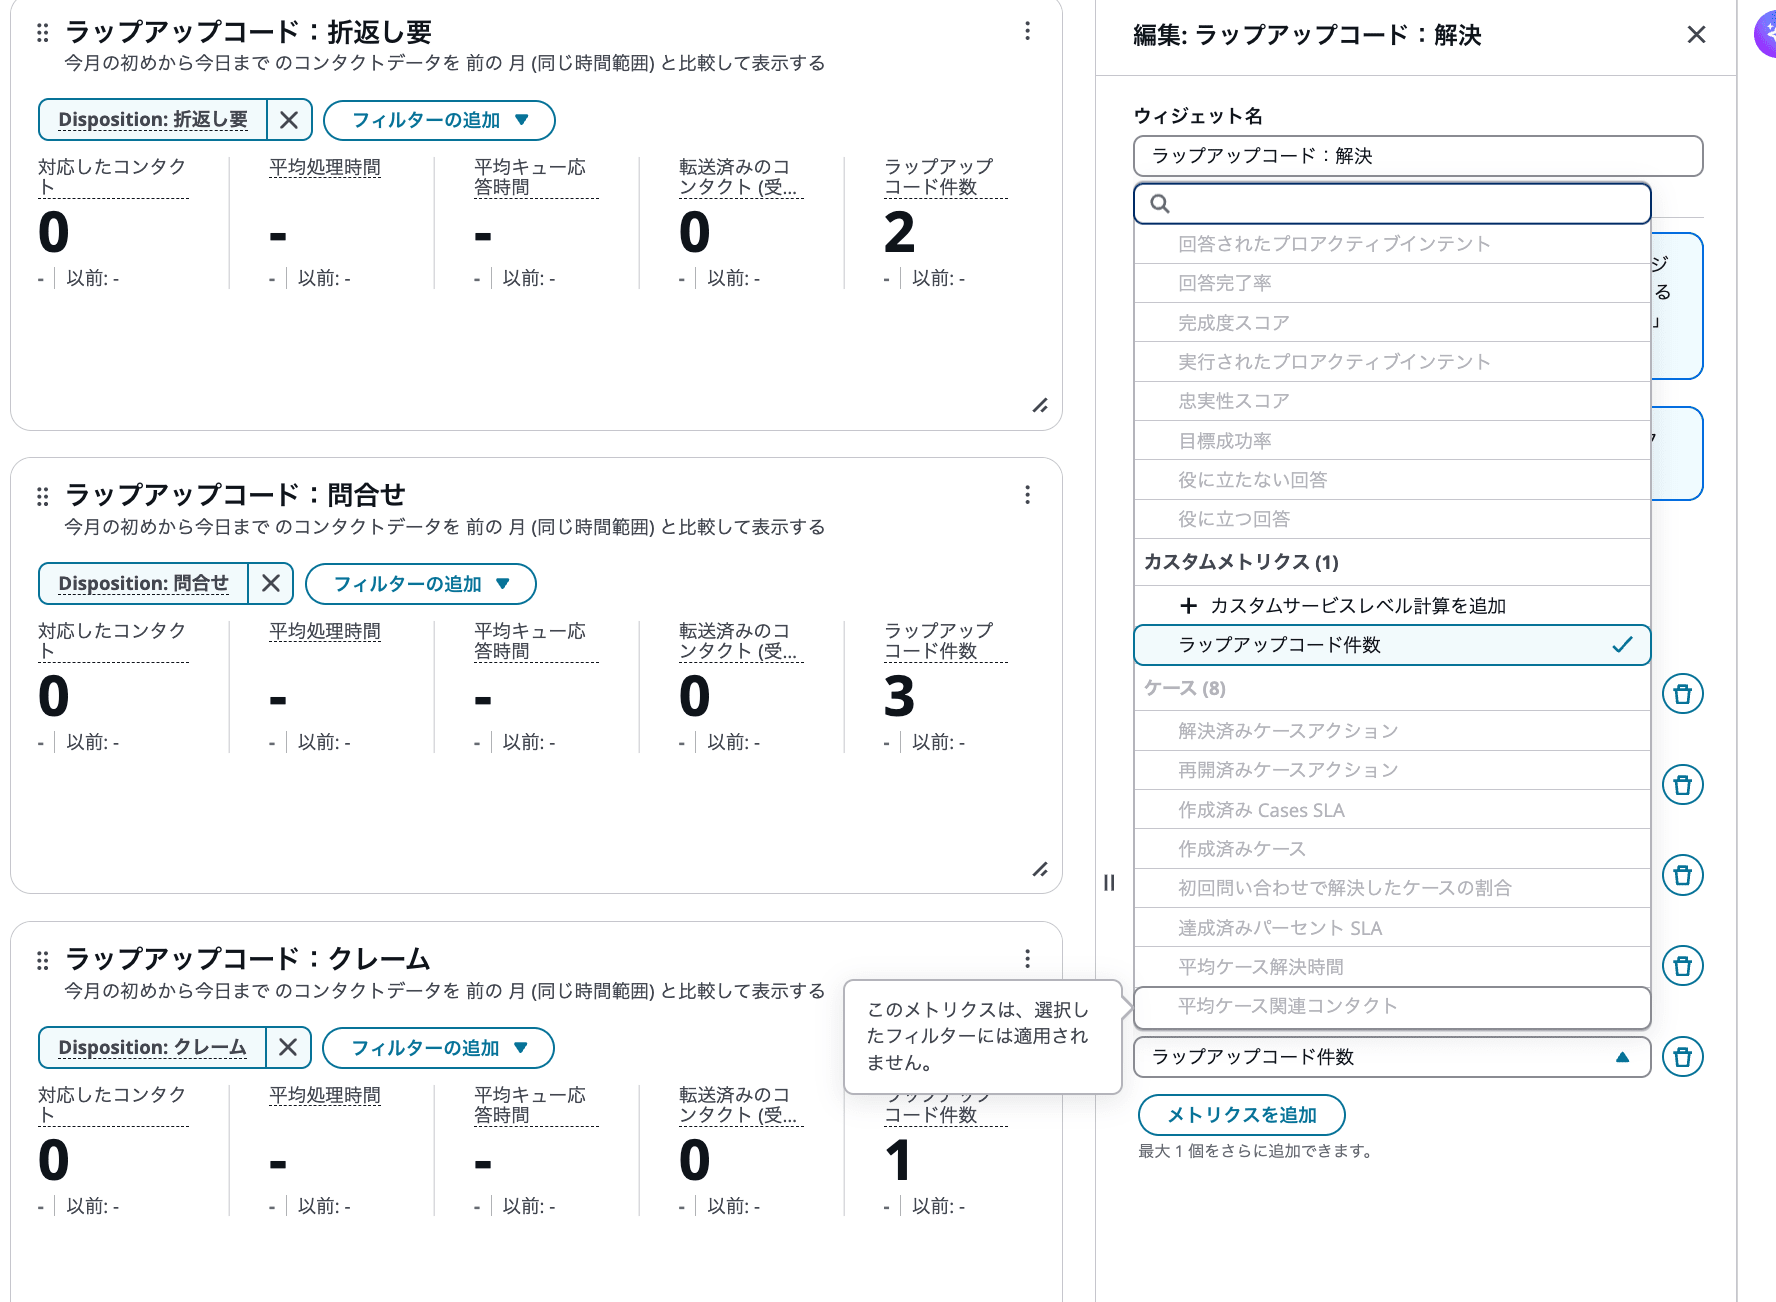
Selecting the created custom metric in the widget edit screen
In addition, one Disposition value filter was configured for each widget.
| Widget Name | Filter |
|---|---|
| Wrap-up code: Resolved | Disposition = Resolved |
| Wrap-up code: Callback Required | Disposition = Callback Required |
| Wrap-up code: Inquiry | Disposition = Inquiry |
| Wrap-up code: Complaint | Disposition = Complaint |
User-defined predefined attributes are used as filters on the dashboard, not for grouping by arbitrary attribute values.
Therefore, when checking the counts for "Resolved," "Callback Required," "Inquiry," and "Complaint" simultaneously as in this case, we adopted a configuration where a widget is prepared for each value with a different Disposition filter set on each.
The method for using predefined attributes on the dashboard is described in the following documentation.
Dashboard Aggregated by Wrap-up Code
Ultimately, we were able to create a dashboard that displays the contact count per Disposition, where IVR input results are saved as wrap-up codes.
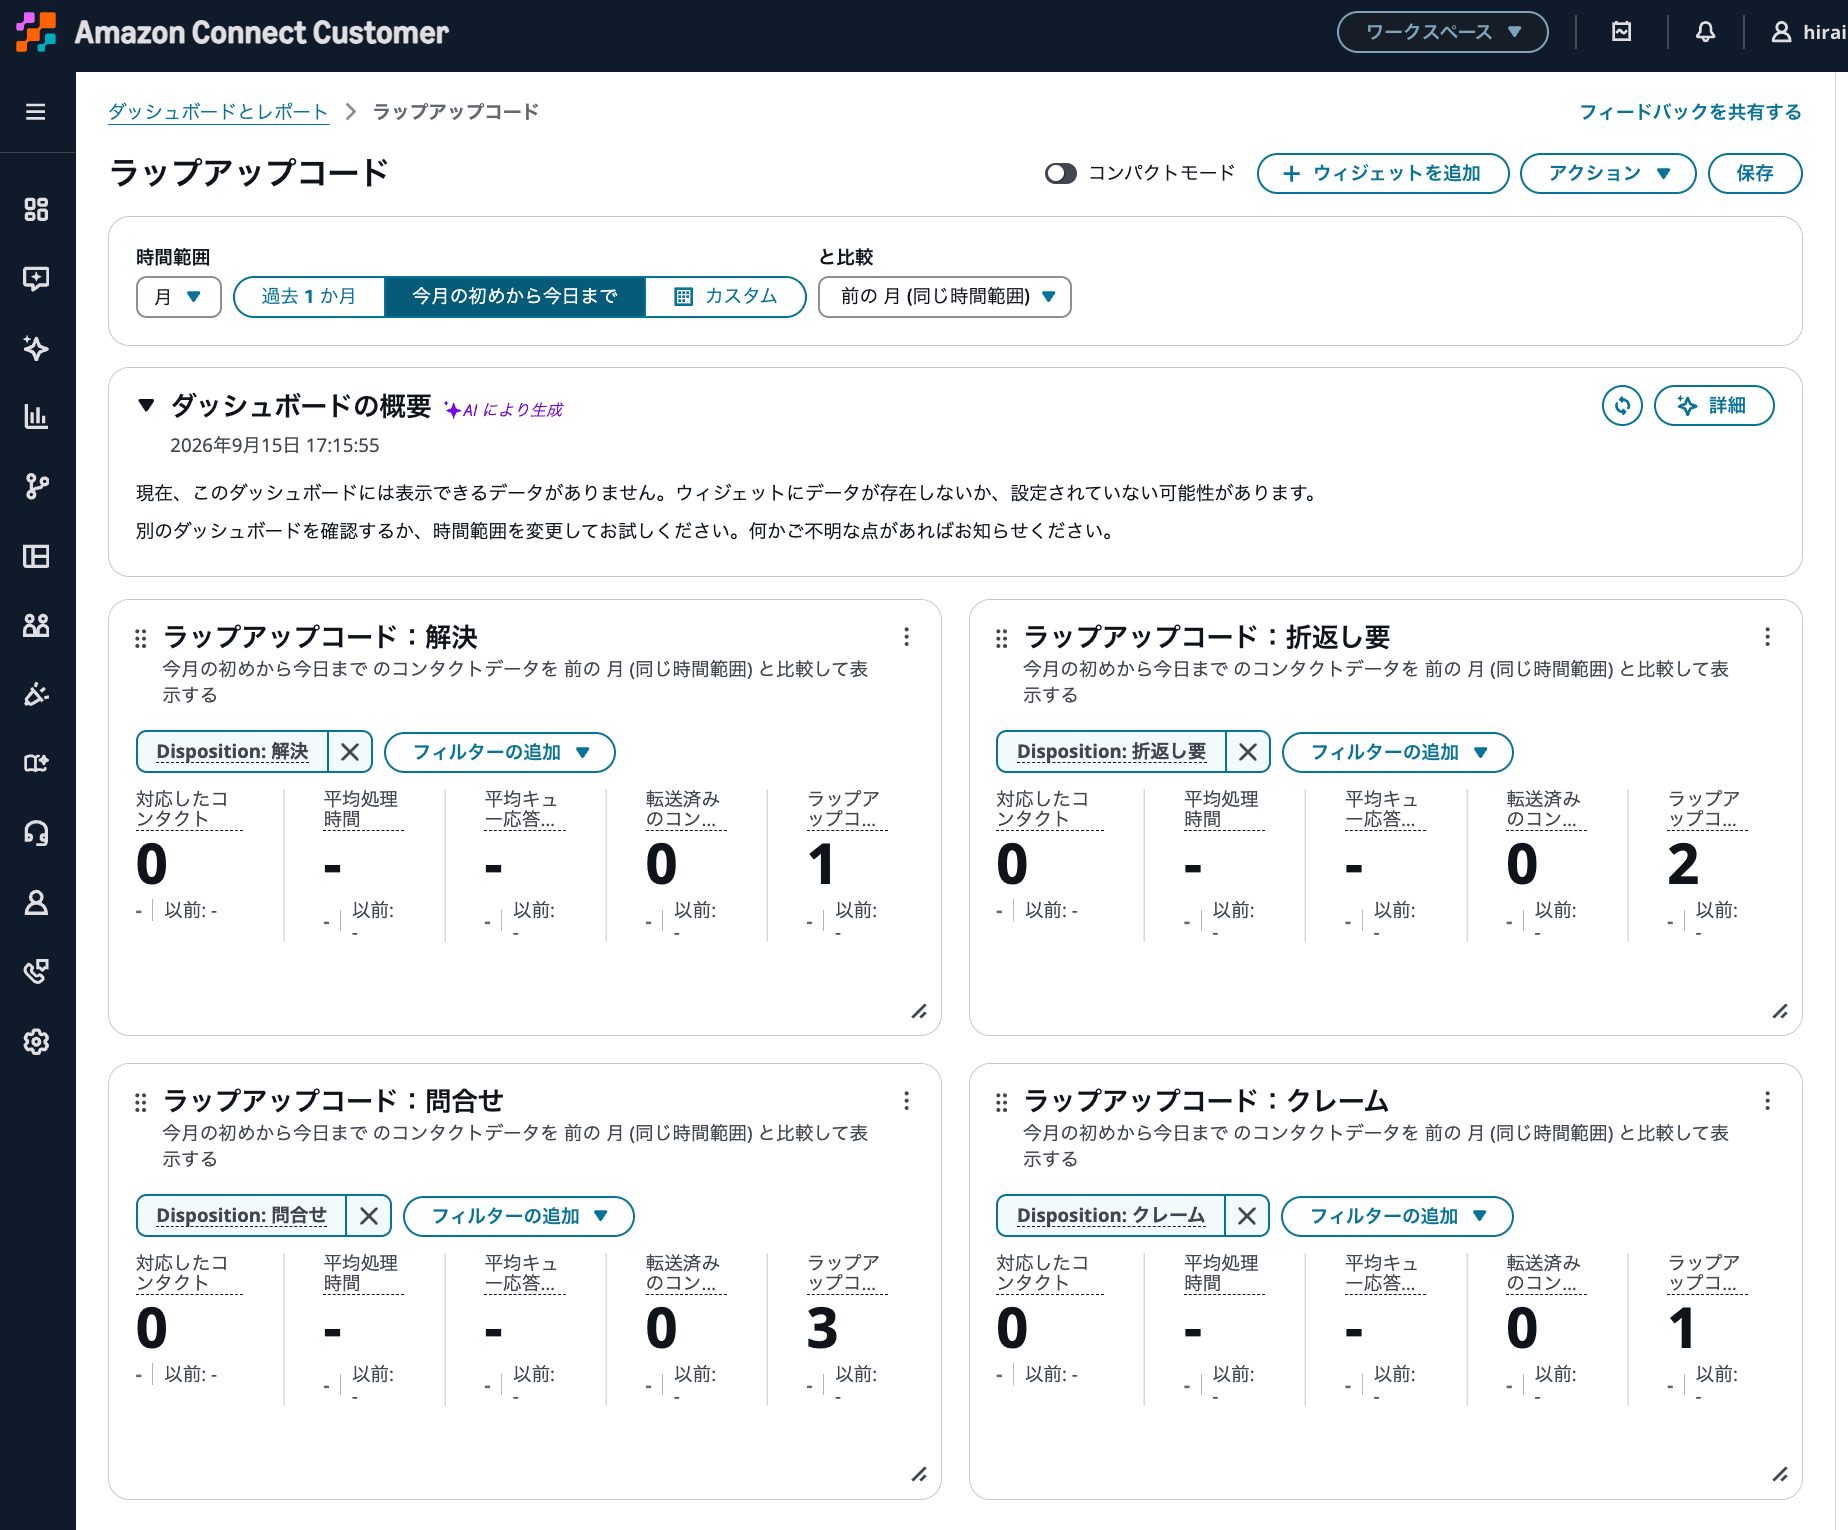
A dashboard displaying the contact count per Disposition where IVR input results are saved as wrap-up codes
Since each widget has a different Disposition filter set, you can view the counts for "Resolved," "Callback Required," "Inquiry," and "Complaint" that occurred in the same period side by side.
For a flow that completes entirely in the IVR as in this case, using a custom metric based on "Contacts created" made it possible to display the contact count per Disposition.
Addendum
In the main text, the following was written.
Since no standard widget that directly displays "Contacts created" was found among the standard widgets reviewed, a custom metric was created.
After that, upon reviewing the standard widgets, the [Contacts created] widget was found to exist.
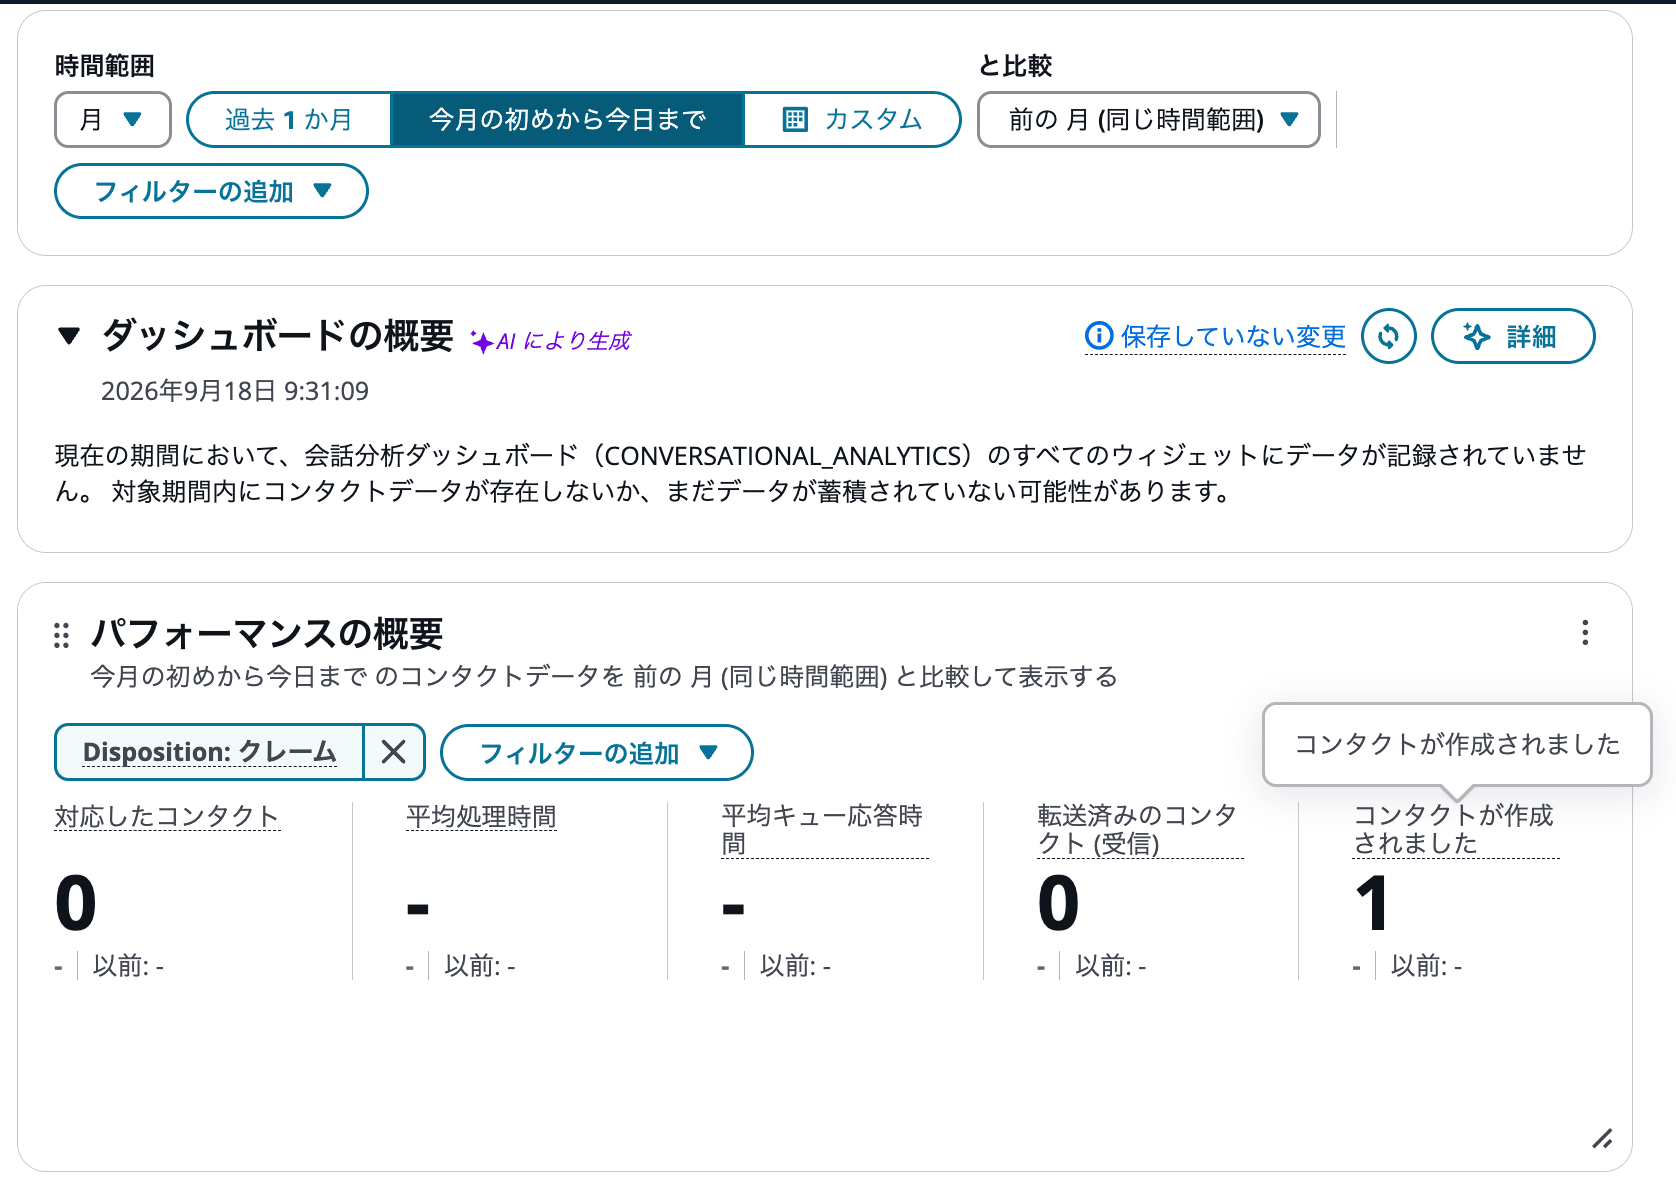
The "Contacts created" widget
By setting a Disposition filter on this widget, it was possible to display the counts for "Resolved," "Callback Required," "Inquiry," and "Complaint" for contacts that occurred in an IVR self-service flow.
However, for the purpose of displaying wrap-up code-specific figures side by side on the dashboard, we felt that the widget name [Contacts created] alone made it difficult to determine what the count represented.
Therefore, the configuration of displaying the custom metric created in this article as Wrap-up code count can serve as a way to make the meaning of figures on the dashboard easier to understand.
Summary
In Amazon Connect Customer, we were able to save IVR input results as wrap-up codes in the Disposition contact segment attribute, and aggregate the contact count per code on the dashboard.
The key points are to enable Disposition for analysis and save it as a segment attribute from the flow.
Also, for an IVR self-service flow that does not connect to an agent, we used a custom metric based on "Contacts created" rather than "Contacts handled."