![[Update] AWS Lambda MicroVMs for validating untrusted code in sandbox environments are now available](https://images.ctfassets.net/ct0aopd36mqt/wp-thumbnail-484d8afca1cbe50513cd4d6738af2960/fa0838fa40f247093d532945fc785e88/aws-lambda?w=3840&fm=webp)
[Update] AWS Lambda MicroVMs for validating untrusted code in sandbox environments are now available
This page has been translated by machine translation. View original
This is Iwata from the Retail App Co-Creation Division @ Osaka.
There was an interesting-looking update to Lambda dated 6/22.
This update makes available a sandbox environment isolated by Firecracker MicroVMs for running untrusted code, such as AI-generated code.
Firecracker MicroVMs themselves have been used behind the scenes in Lambda execution environments for some time, but users never had to be aware of them. Please refer to the following blog for more details.
So what does this update change? Let's dive right in and take a look.
Update Overview
As mentioned above, this is an update to provide an isolated environment for safely running code that developers did not write themselves — i.e., untrusted code such as AI-generated code. This environment is based on Firecracker MicroVMs.
Traditional VM-based environment isolation tends to incur significant overhead. On the other hand, environment isolation using only container technology operates with low overhead and high speed, but since the kernel is shared, there is a trade-off in that damage can spread easily if a vulnerability exists in the container runtime. Firecracker was developed to resolve these dilemmas that AWS Lambda faced as a service, and it is a lightweight VMM that provides strong hypervisor-level environment isolation while being able to start virtual machines in the hundreds-of-milliseconds range.
With the recent rise of AI, the question of how to provide a safe code execution environment has become a challenge, and Firecracker is once again attracting attention.
The official documentation introduces a use case for using Lambda MicroVMs as the execution platform for Claude's Self-hosted sandboxes, and a SAM template for a reference architecture has also been published on GitHub.
GitHub - aws-samples/sample-lambda-microvm-claude-managed-agents · GitHub
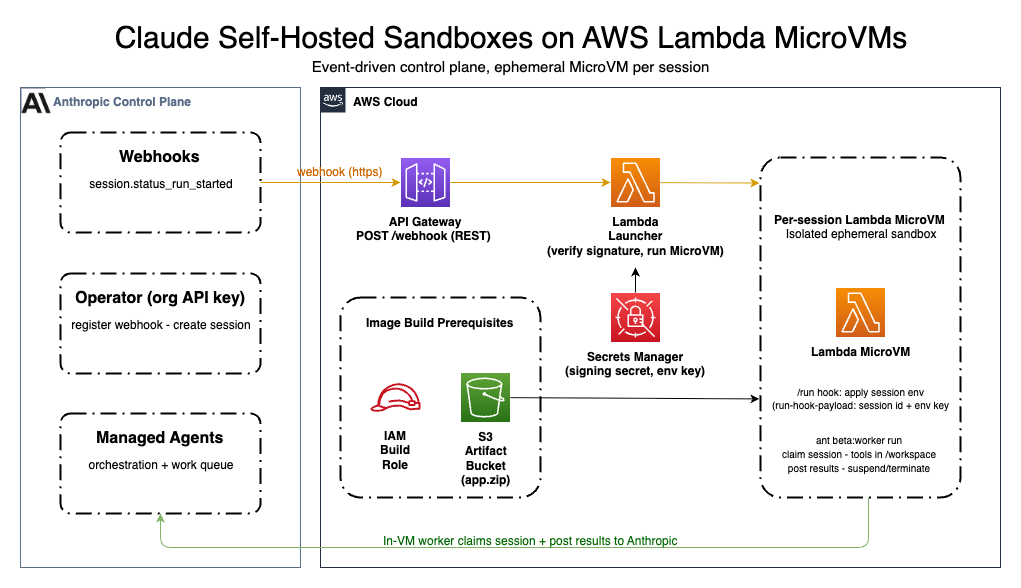
※The above image is quoted from the official documentation
MicroVM images are built from a Dockerfile and managed as Firecracker snapshots. This means that starting/stopping a MicroVM equals resuming/suspending a snapshot, which speeds up the development lifecycle.
What's Different from Traditional Lambda Functions
I have briefly tried out Lambda MicroVMs, so I will share my perspective on the differences from traditional Lambda Functions, along with what the documentation says.
As the concept suggests, my understanding is that Lambda MicroVMs are not an environment for executing "functions" like traditional Lambda Functions, but rather an environment positioned for interactively running and testing application code. Running production-facing applications on Lambda MicroVMs is not assumed; it seems intended purely as an environment for development and testing, where code that has been verified to work is then expected to run as a traditional Lambda Function or ECS task as usual.
Unlike regular Lambda Functions, there is no triggering code execution inside a handler based on some event, nor does it automatically scale out on demand in response to the number of requests. Although it carries the Lambda service name, I think it is easier to understand if you treat it as something completely different from Lambda Functions.
Another notable feature is that Linux Capabilities can be specified, making it usable for testing eBPF programs as well.
Accessing Applications Running on MicroVMs
Applications running on a MicroVM can be accessed via an HTTPS endpoint managed by AWS. This endpoint authenticates using a temporary token and forwards authenticated requests to a specified port on the MicroVM. The supported protocols are as follows.
- HTTP/1.1
- HTTP/2
- WebSockets
- gRPC
- Server-Sent Events (SSE)
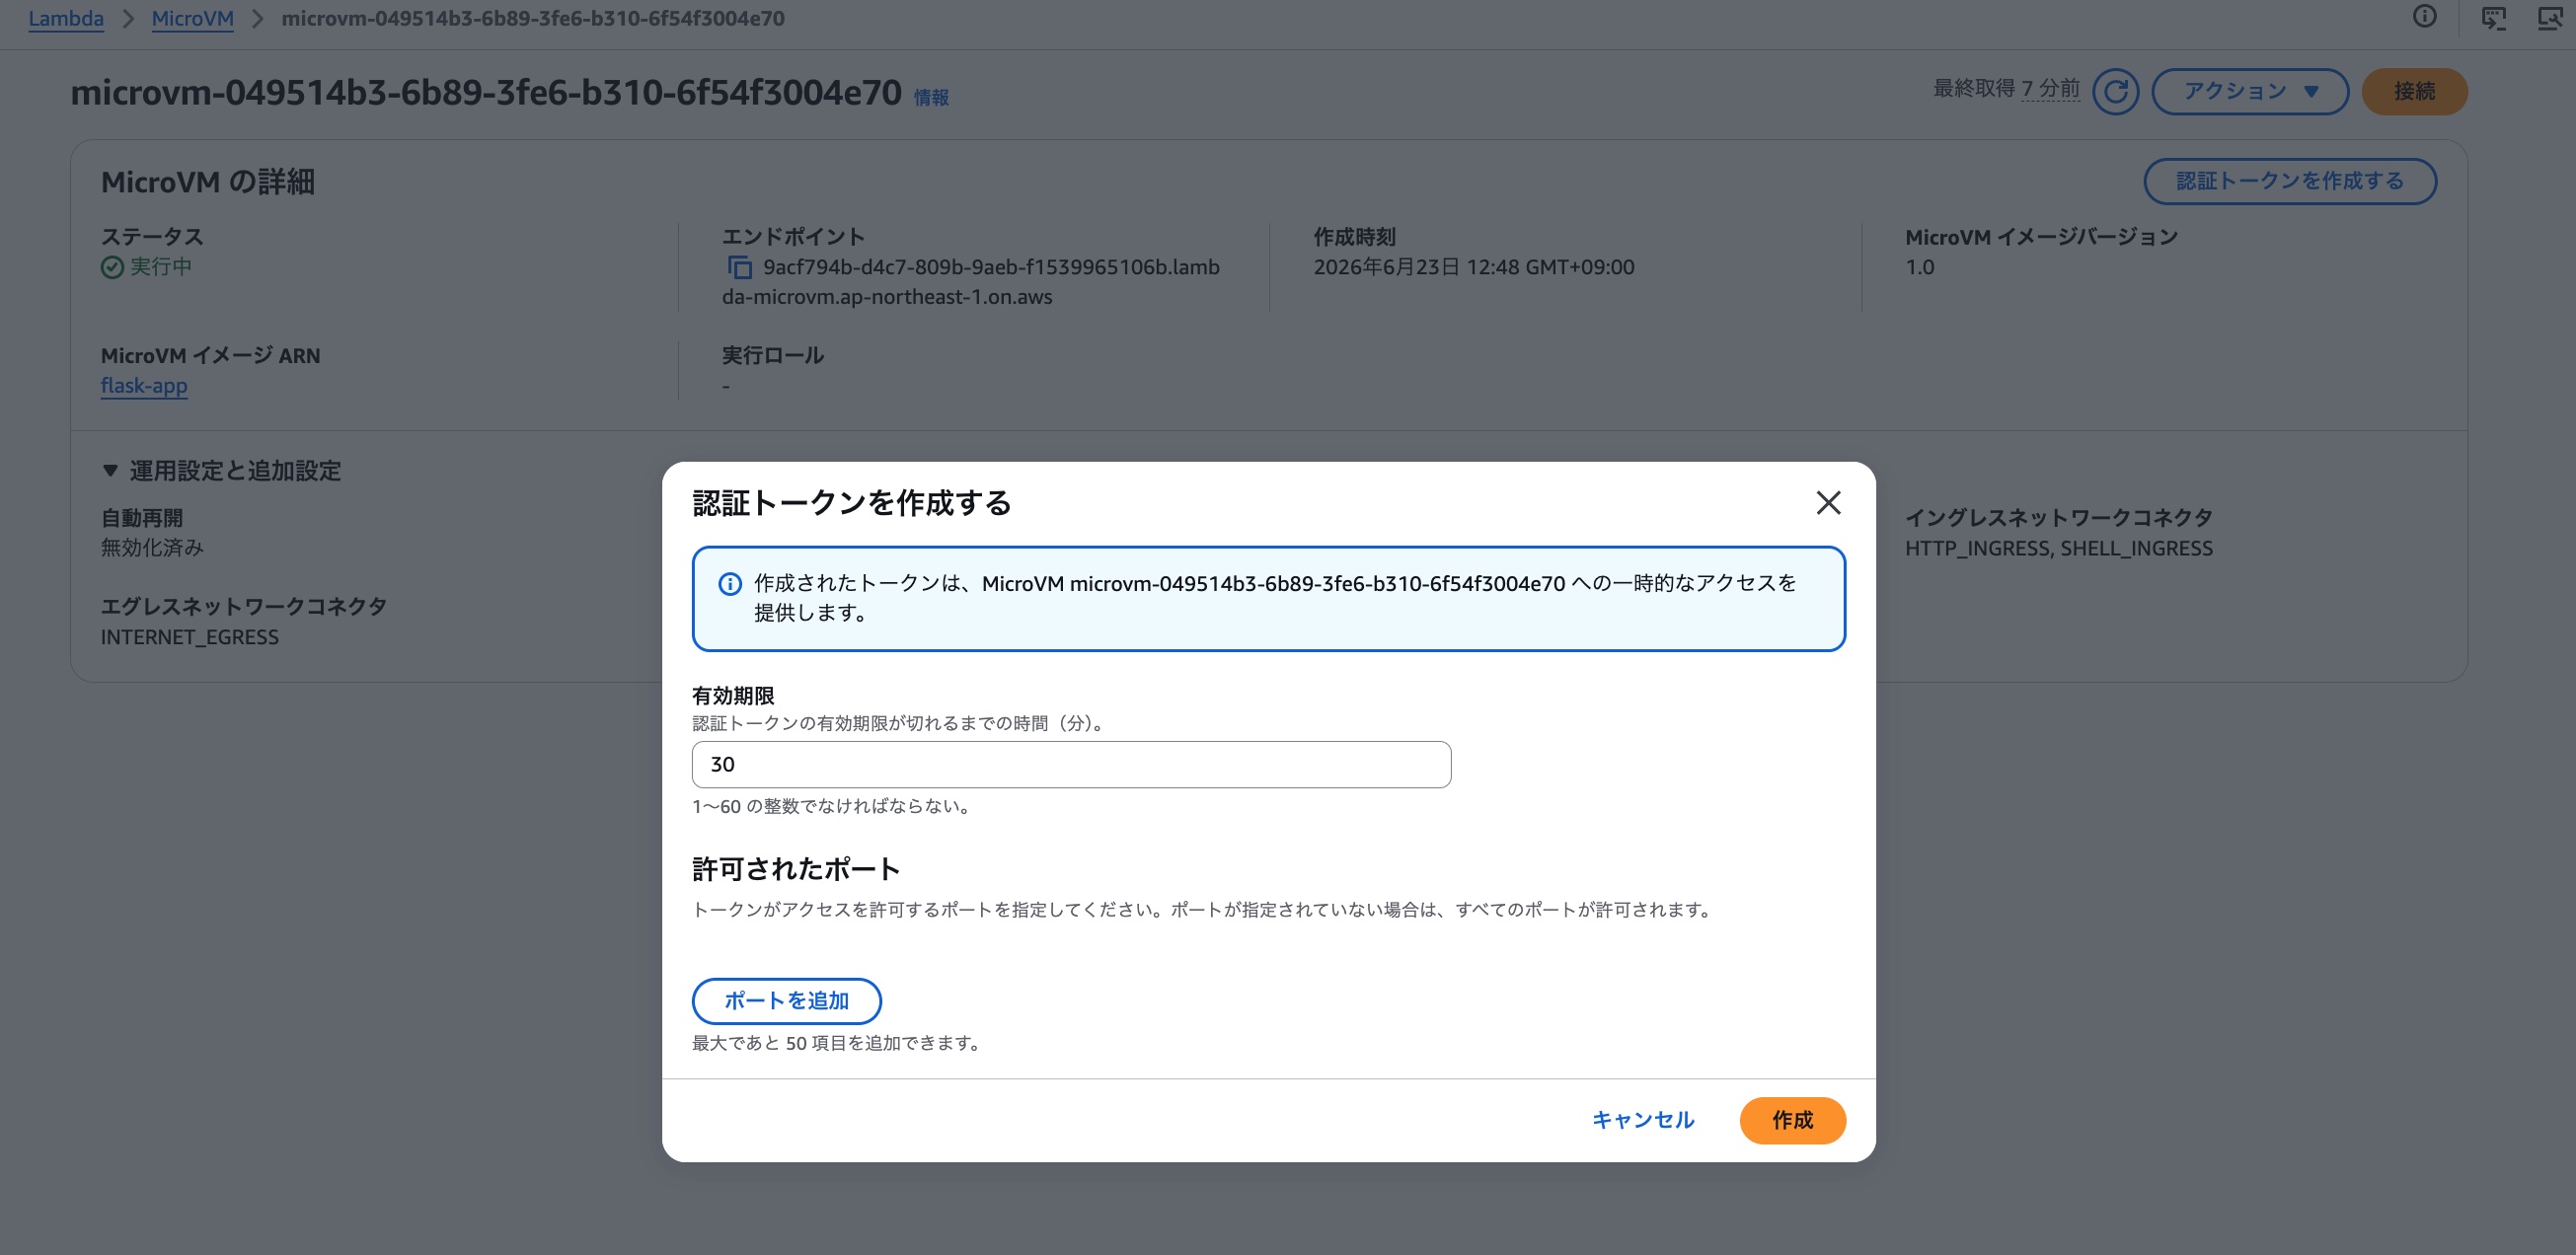
When issuing a temporary token, you can specify the token's expiration time and the port number on the MicroVM to which traffic forwarding is permitted.
Available Regions
As of today, the regions where Lambda MicroVMs are available are as follows.
- Virginia (us-east-1)
- Ohio (us-east-2)
- Oregon (us-west-2)
- Ireland (eu-west-1)
- Tokyo (ap-northeast-1)
Pricing
Lambda MicroVMs incur charges for compute resources, snapshot storage and read/write operations, and standard AWS data transfer. For the Tokyo region, the pricing structure is as follows.
Compute Resources
| Item | Price |
|---|---|
| vCPU | $0.0000322421 per second |
| Memory | $0.0000042688 per GB per second |
Snapshots
| Item | Price |
|---|---|
| Snapshot Storage | $0.09600 per GB per month |
| Snapshot Read | $0.00185 per GB |
| Snapshot Write | $0.00466 per GB |
For details, please refer to the following official page.
Let's Try It Out
Let's get started right away. Following the content of the AWS blog below, I will try the entire flow from running an application on a MicroVM to sending a request from Postman.
The general flow is as follows.
- Preparing the source code and uploading to S3
- Building the MicroVM image
- Starting the MicroVM
Preparing the Source Code
First, prepare the source code for a Flask app.
import logging

from flask import Flask, jsonify

app = Flask(__name__)
logging.basicConfig(level=logging.INFO)


@app.route("/")
def hello():
    app.logger.info("Received request to hello world endpoint")
    return jsonify(message="Hello, World!")


if __name__ == "__main__":
    app.run(host="0.0.0.0", port=5000)
Also prepare a requirements.txt for installing Flask.
gunicorn
flask
Prepare a Dockerfile for building the image.
FROM public.ecr.aws/lambda/microvms:al2023-minimal
RUN dnf install -y python3 python3-pip && dnf clean all

WORKDIR /app

COPY requirements.txt .
RUN pip install --no-cache-dir -r requirements.txt

COPY app.py .

EXPOSE 5000

CMD ["gunicorn", "--bind", "0.0.0.0:5000", "app:app"]
Once the above three files are ready, compress them into a ZIP and upload to an appropriate S3 bucket.
Building the MicroVM Image
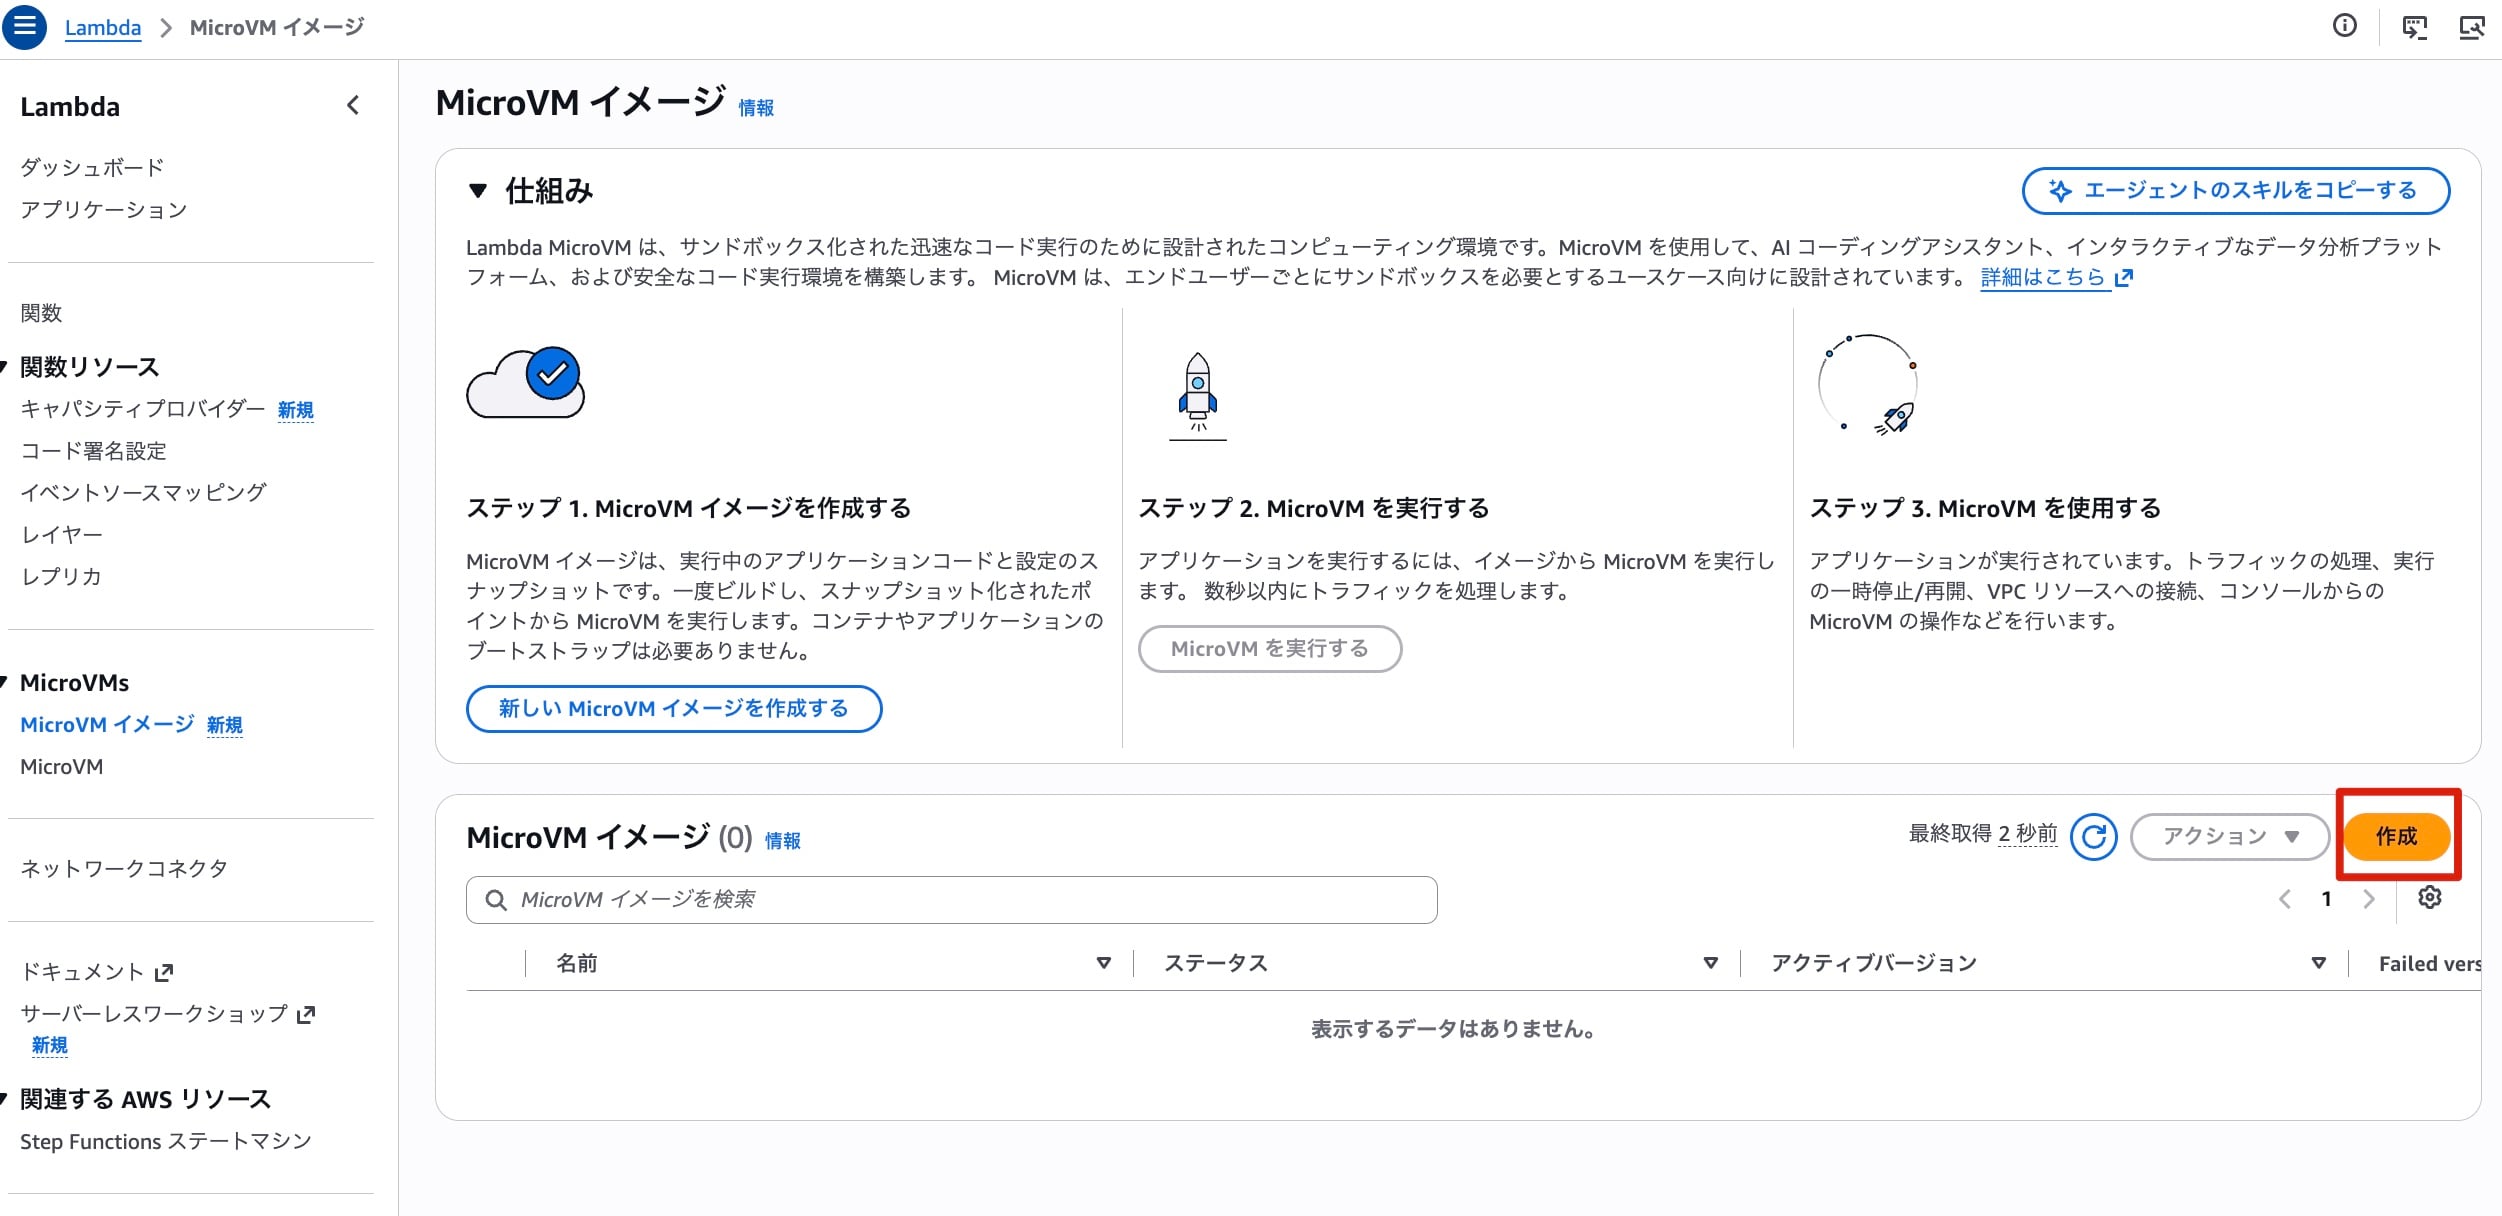
Next, let's build the MicroVM image. A MicroVMs menu has been added to the Lambda console, so select MicroVM Images from here and click the "Create" button.
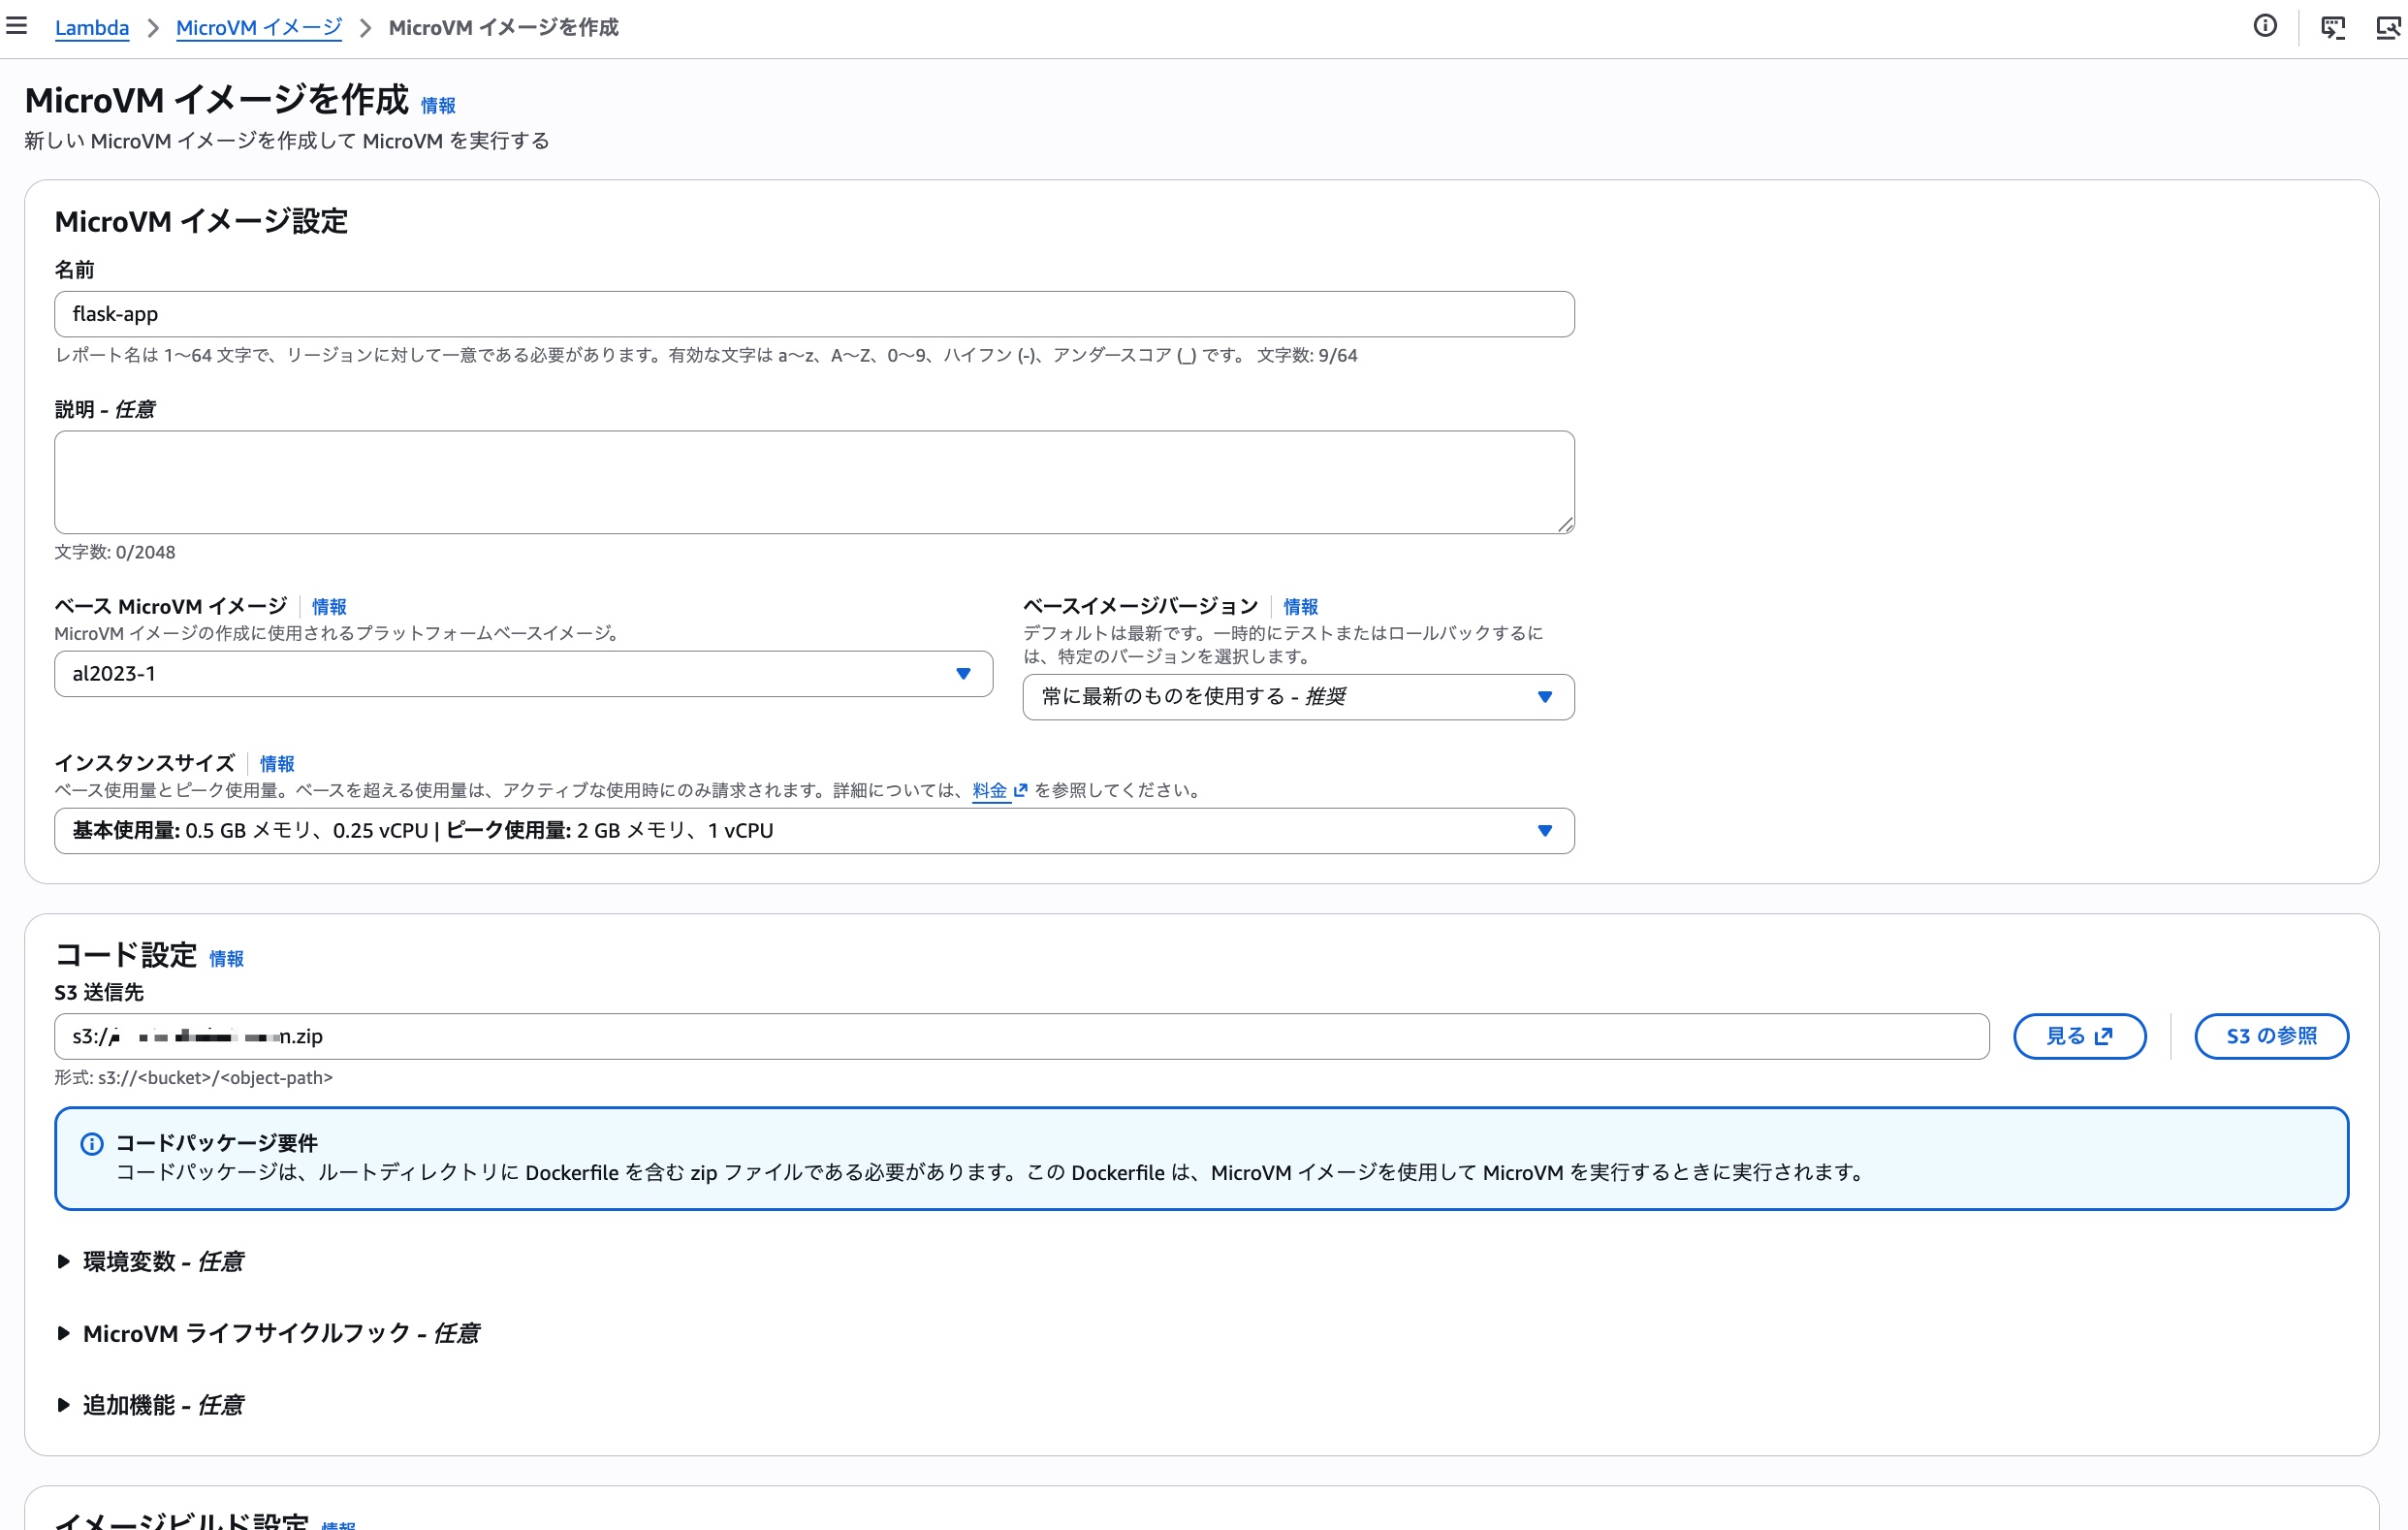
Next, specify the details for the MicroVM image. This time, I specified the key of the object uploaded to S3 earlier and proceeded with the build using the default settings for everything else. There are also some interesting-looking settings among the optionally configurable items, so I'd like to dig deeper into those in the future.
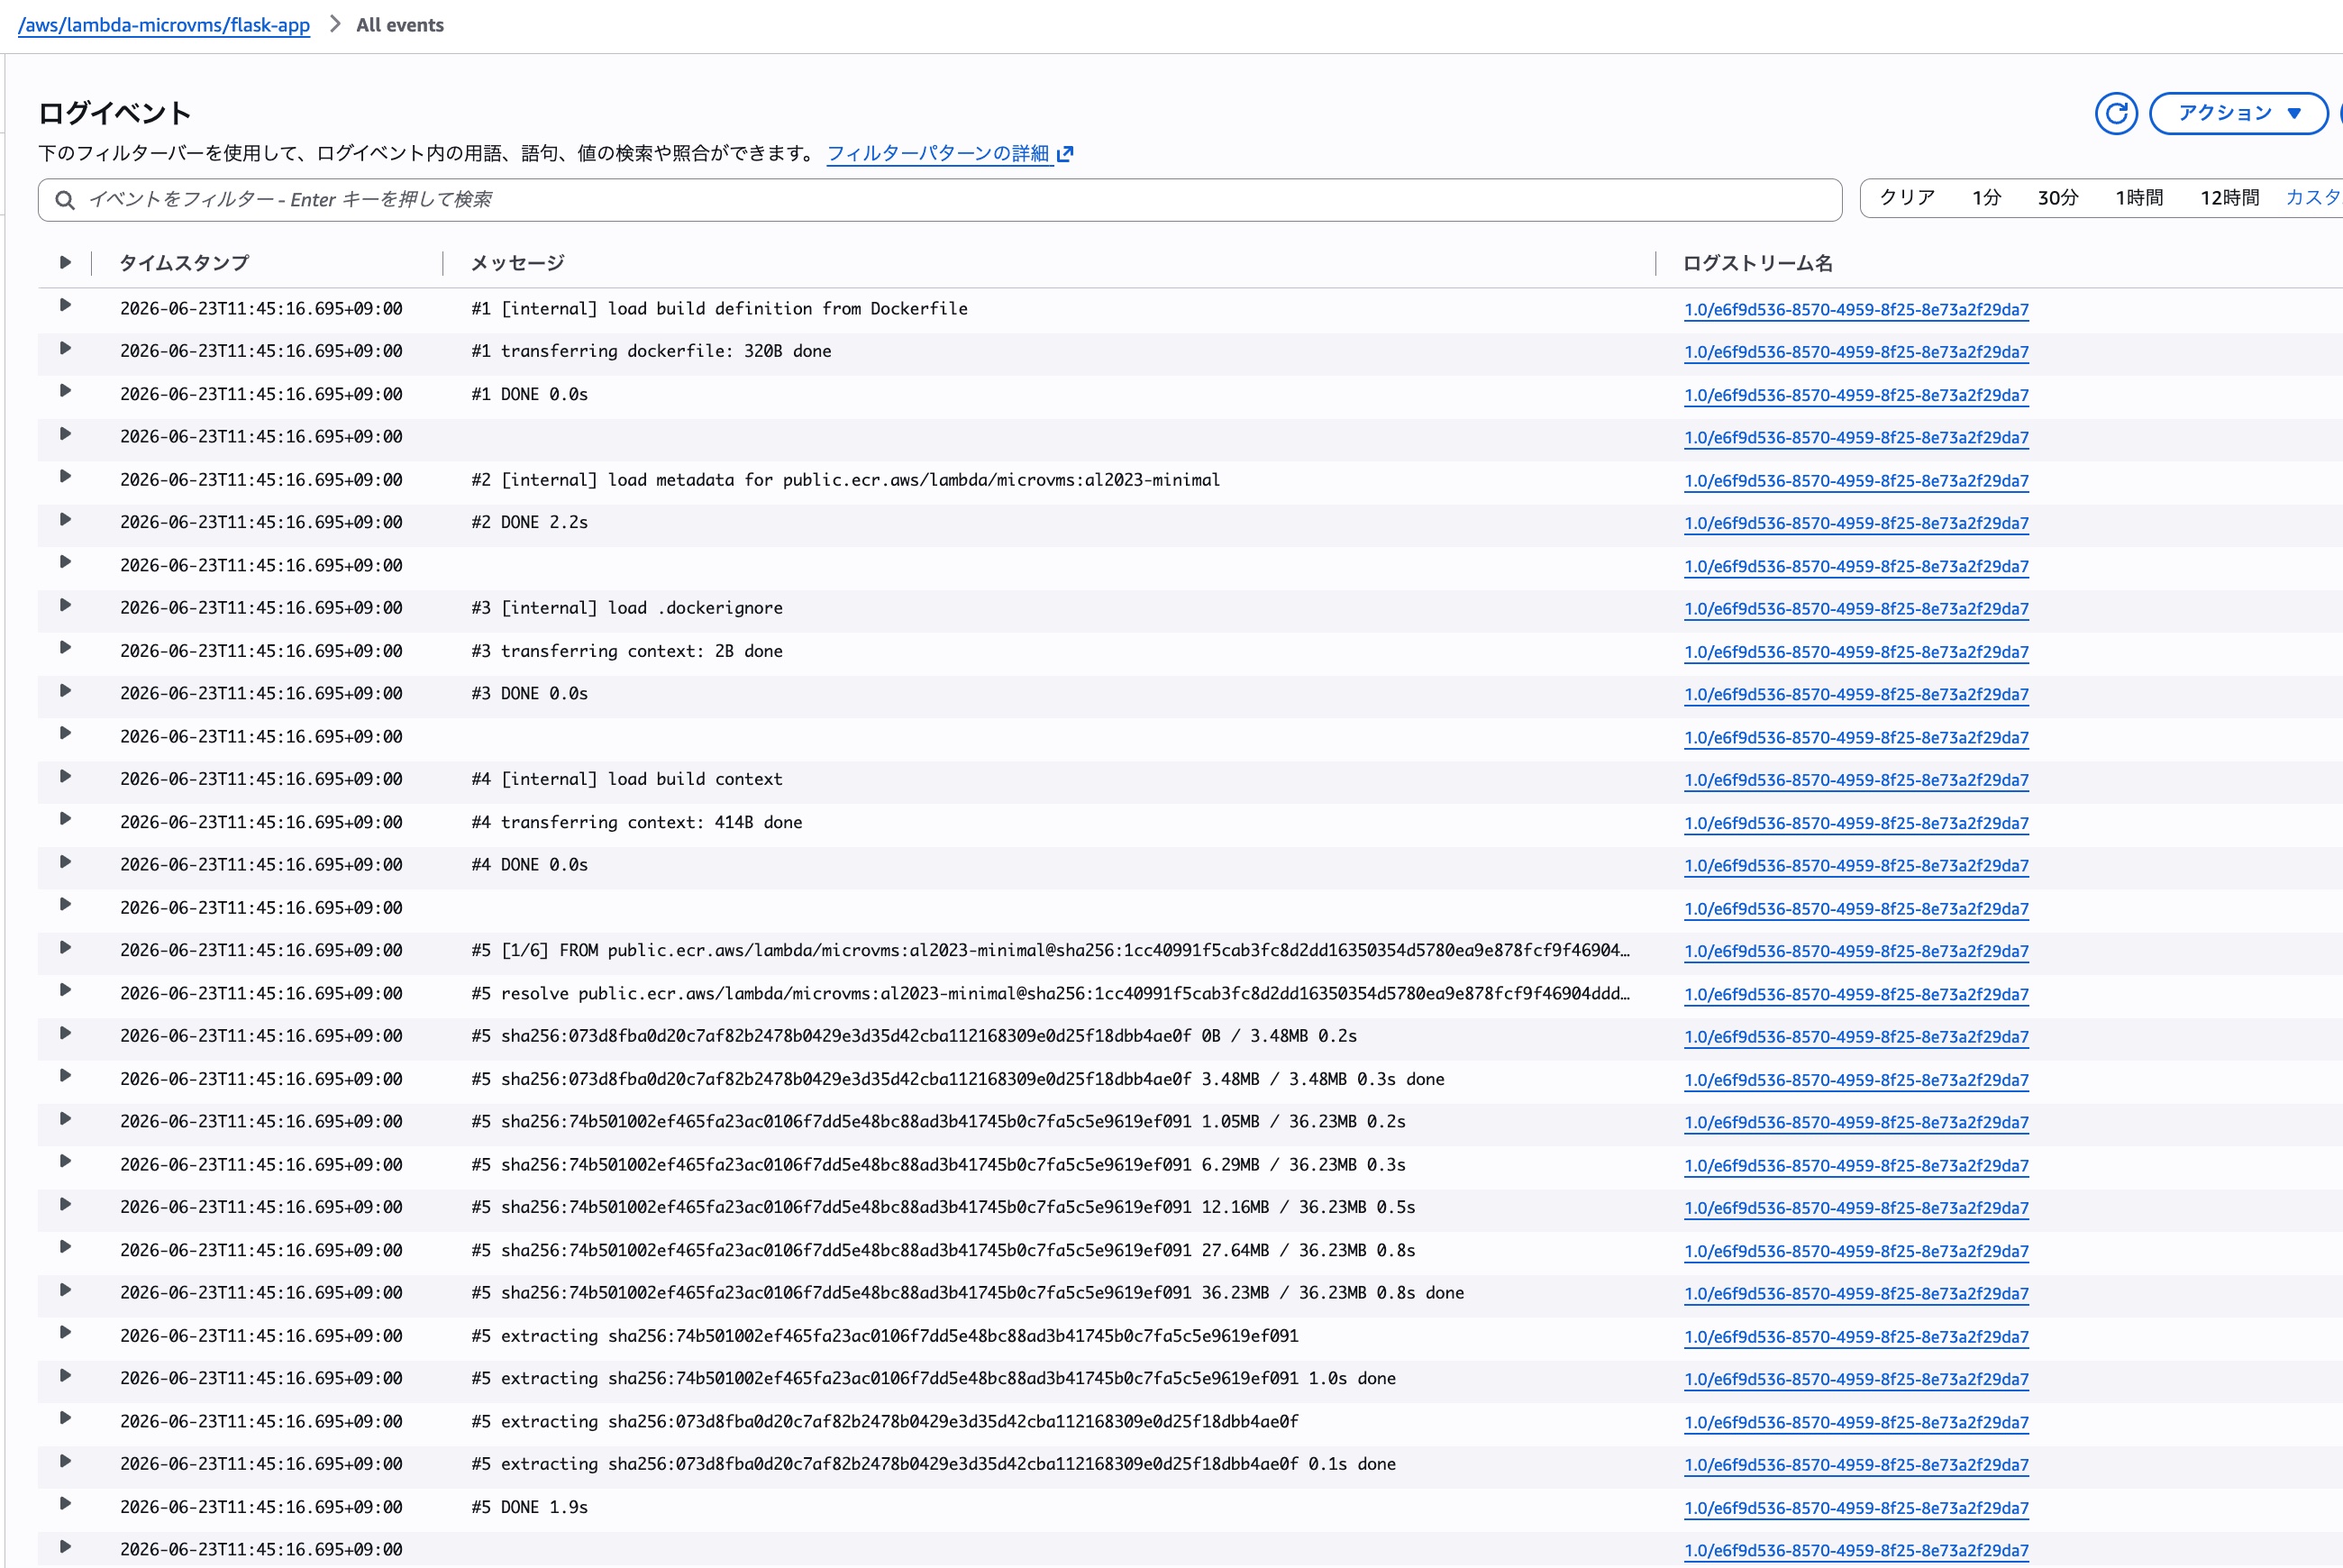
After waiting a moment, the build completes.
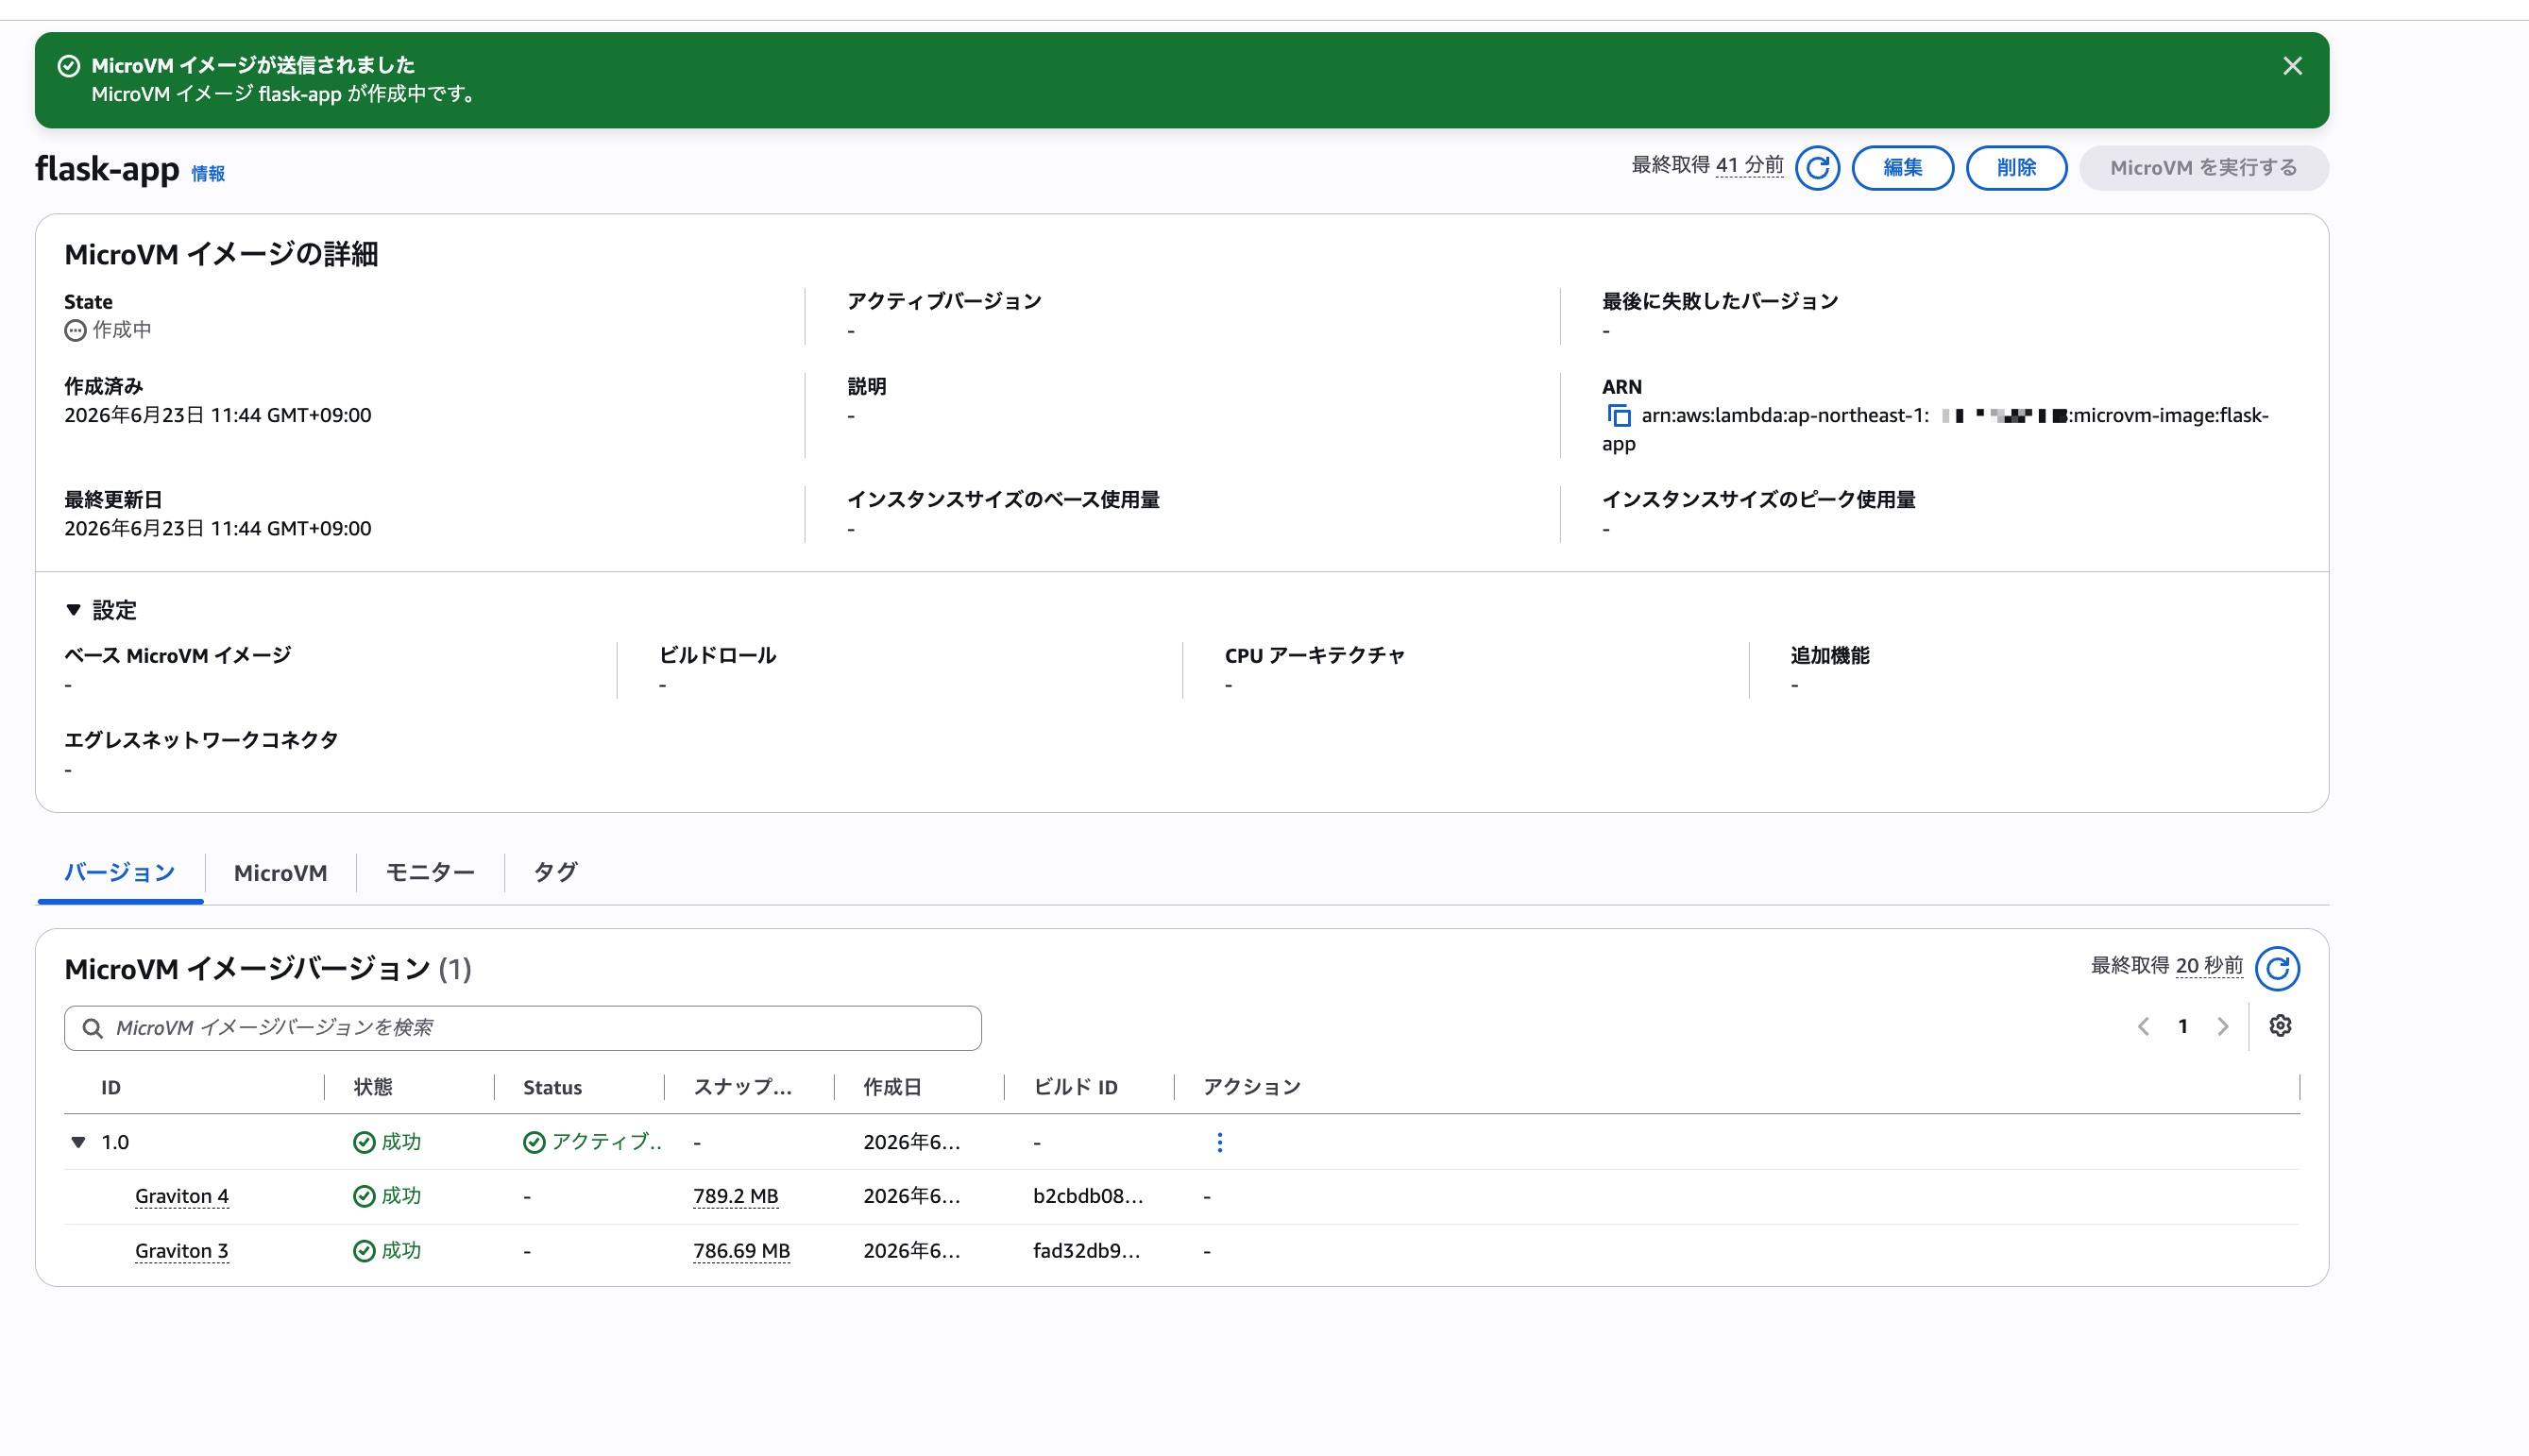
Build logs are output to the CW Logs log group /aws/lambda/<MicroVM image name>, so if the build doesn't go well, it's a good idea to check this log group.
Starting the MicroVM
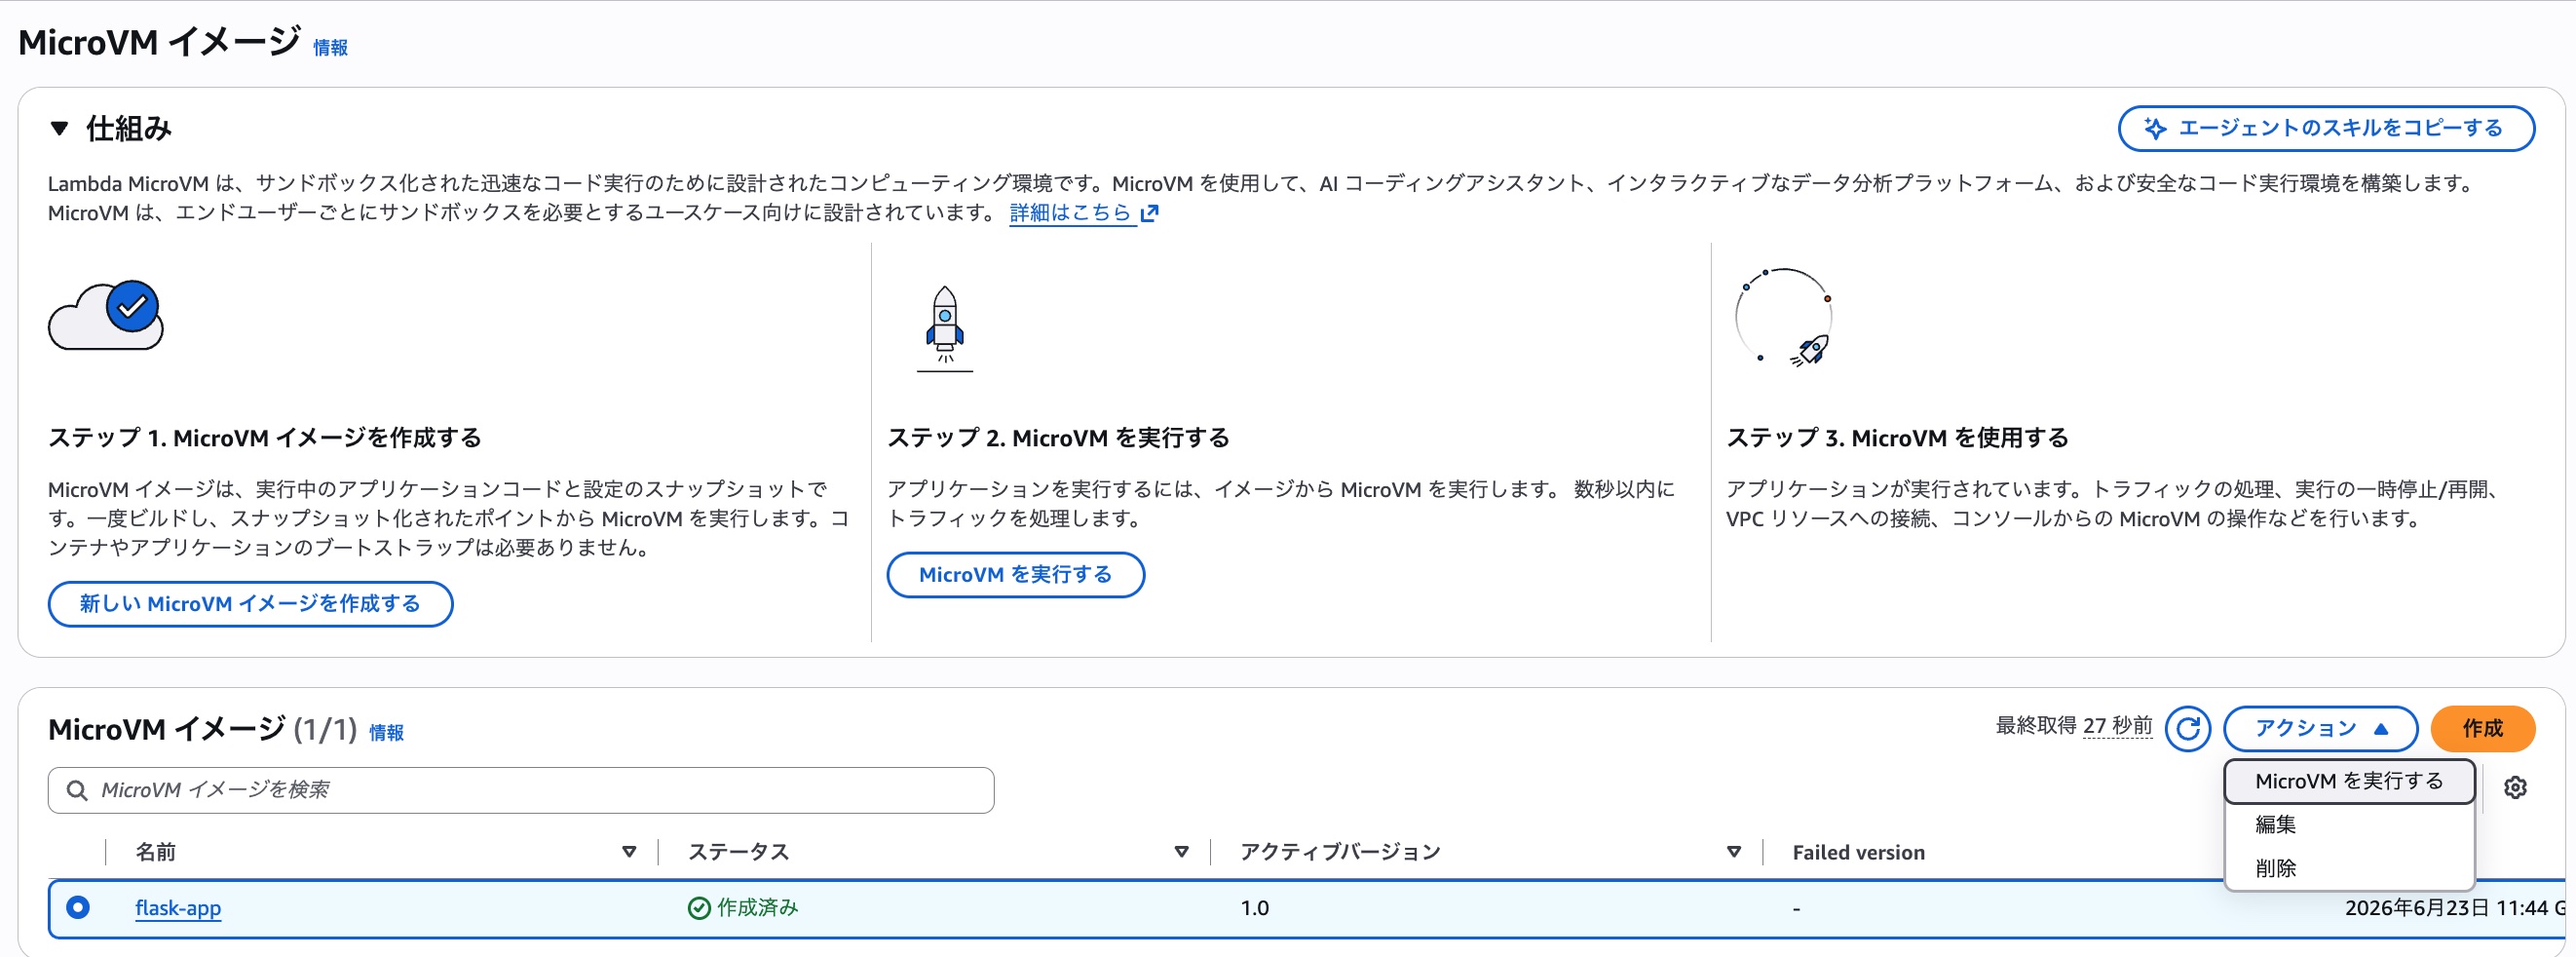
Now that the image is ready, let's start the MicroVM. Select the MicroVM image created earlier, then choose "Run MicroVM" from "Actions."
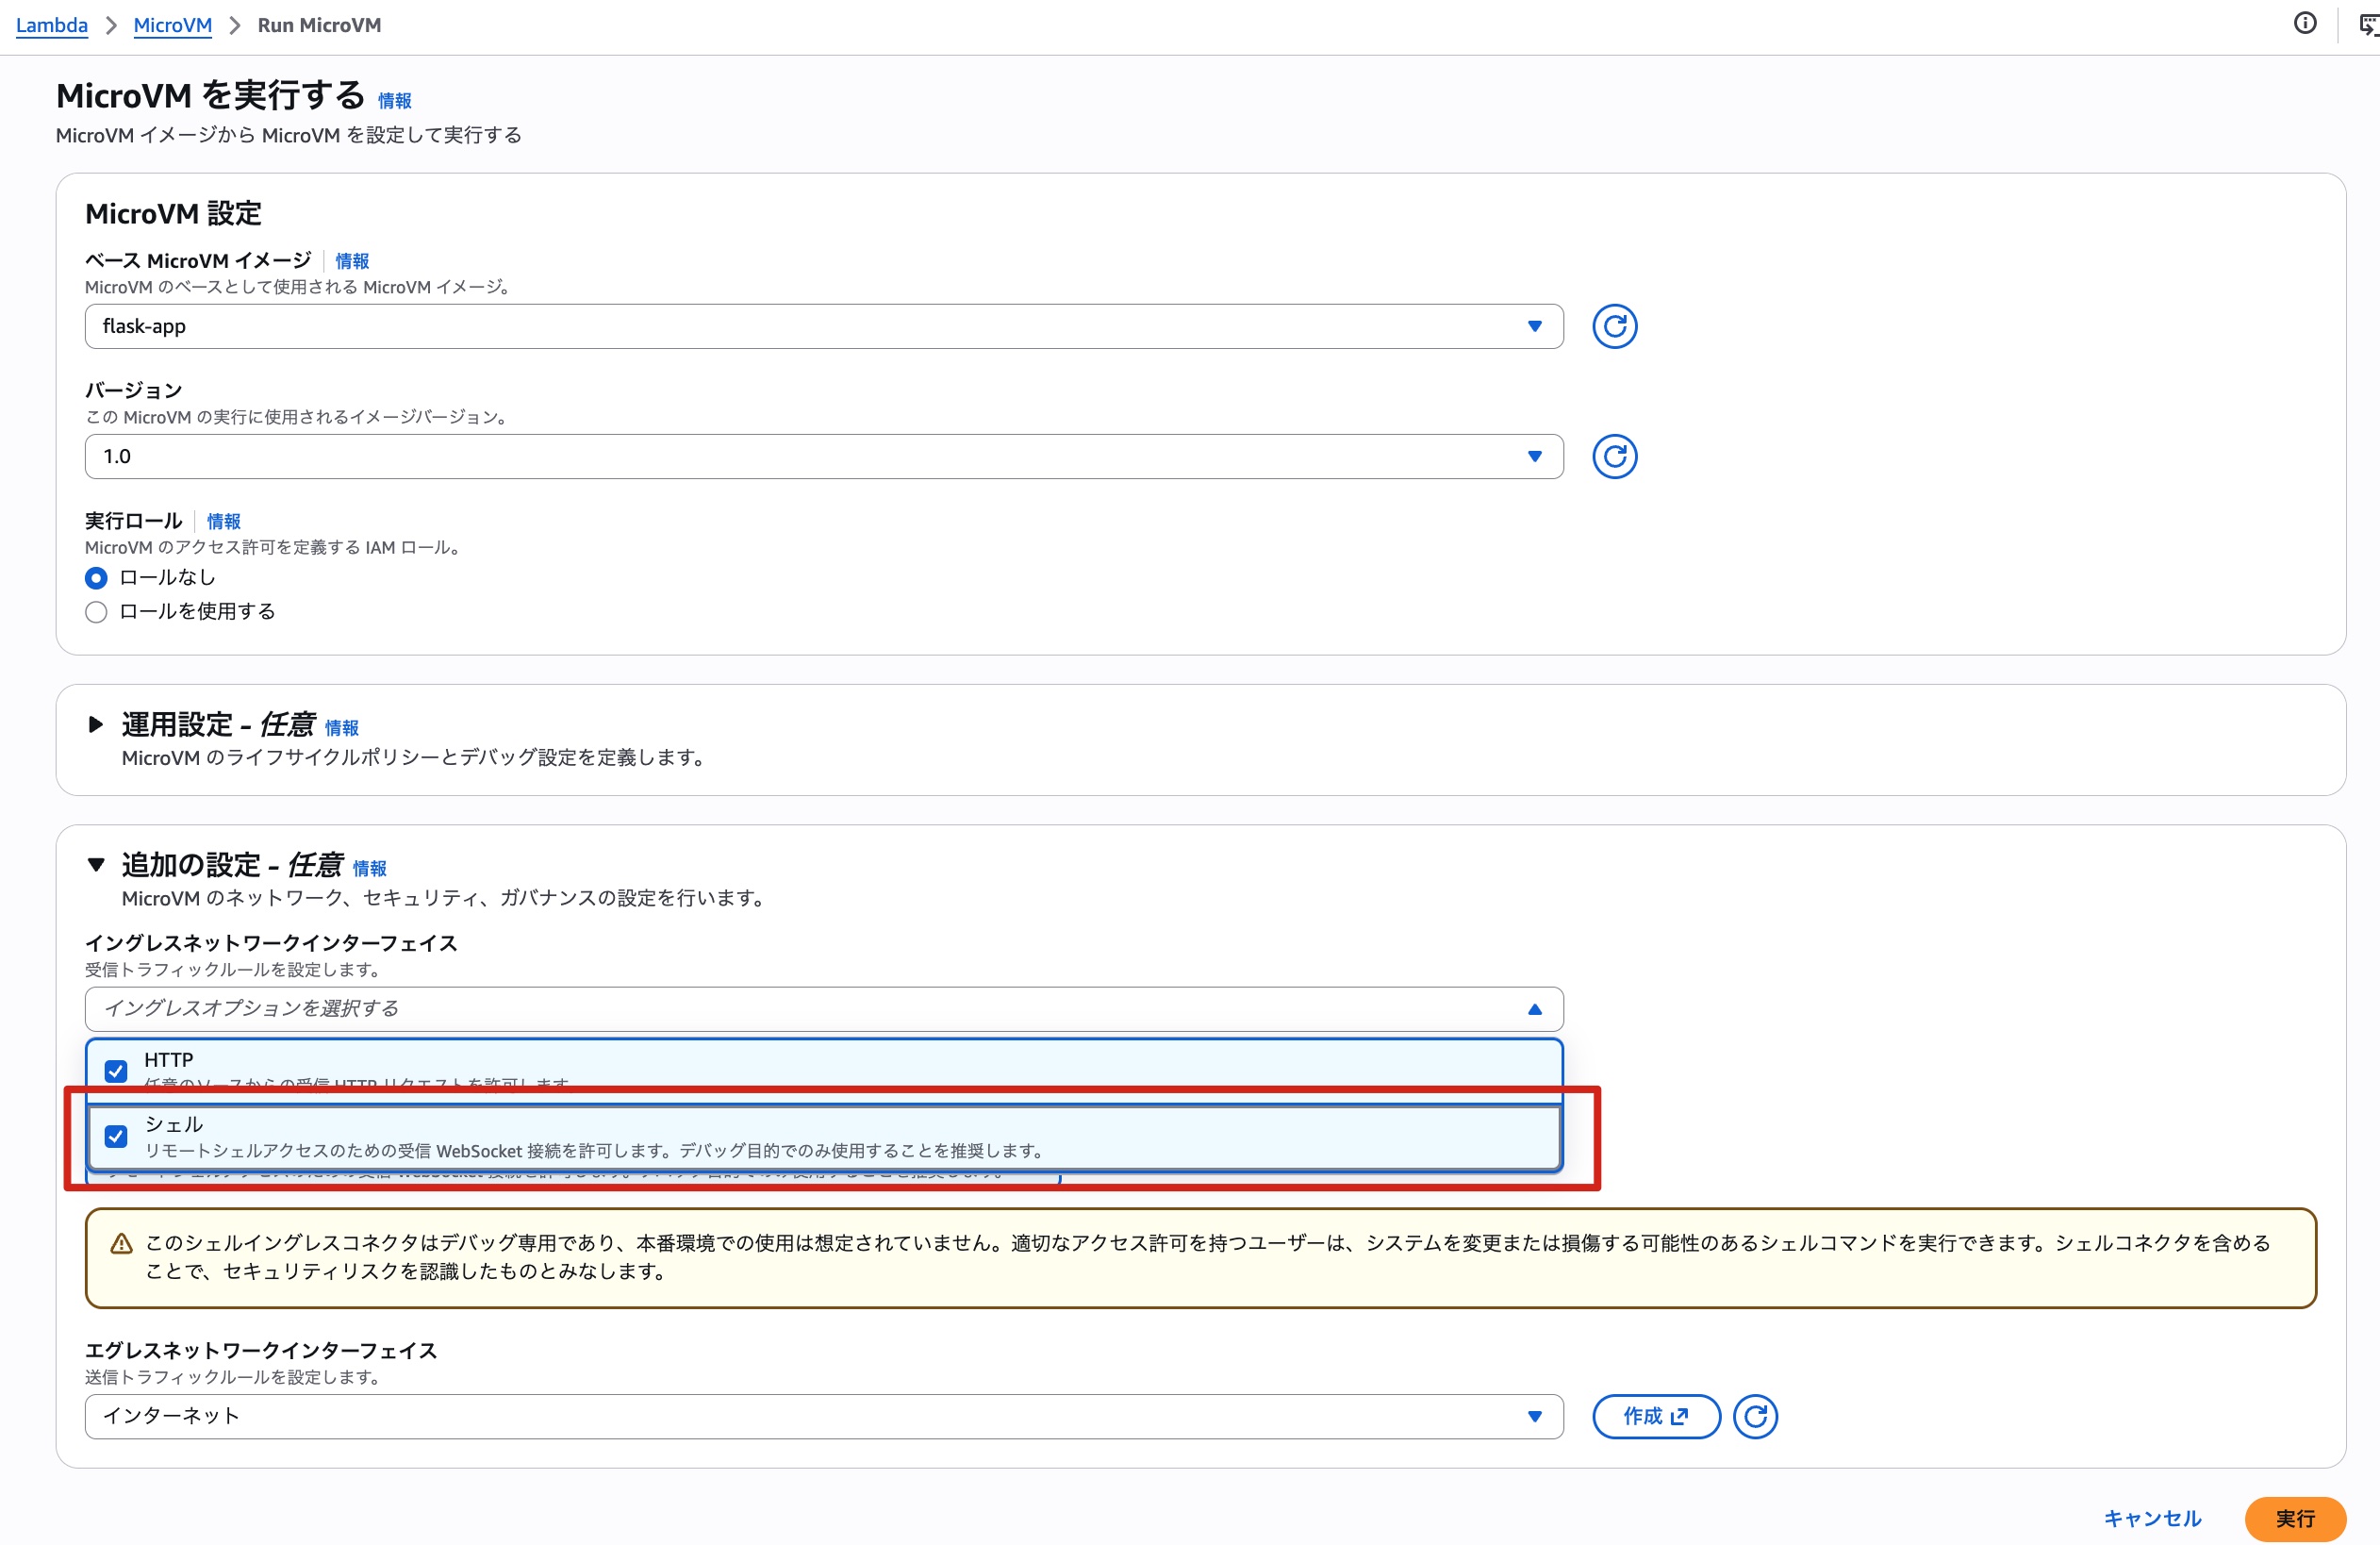
A details screen opens where you specify the MicroVM settings. This time, in addition to the default settings, I also selected "Shell" for the "Ingress Network Interface."
Clicking the "Run" button starts the MicroVM in an instant. That's Firecracker for you!! So fast!!
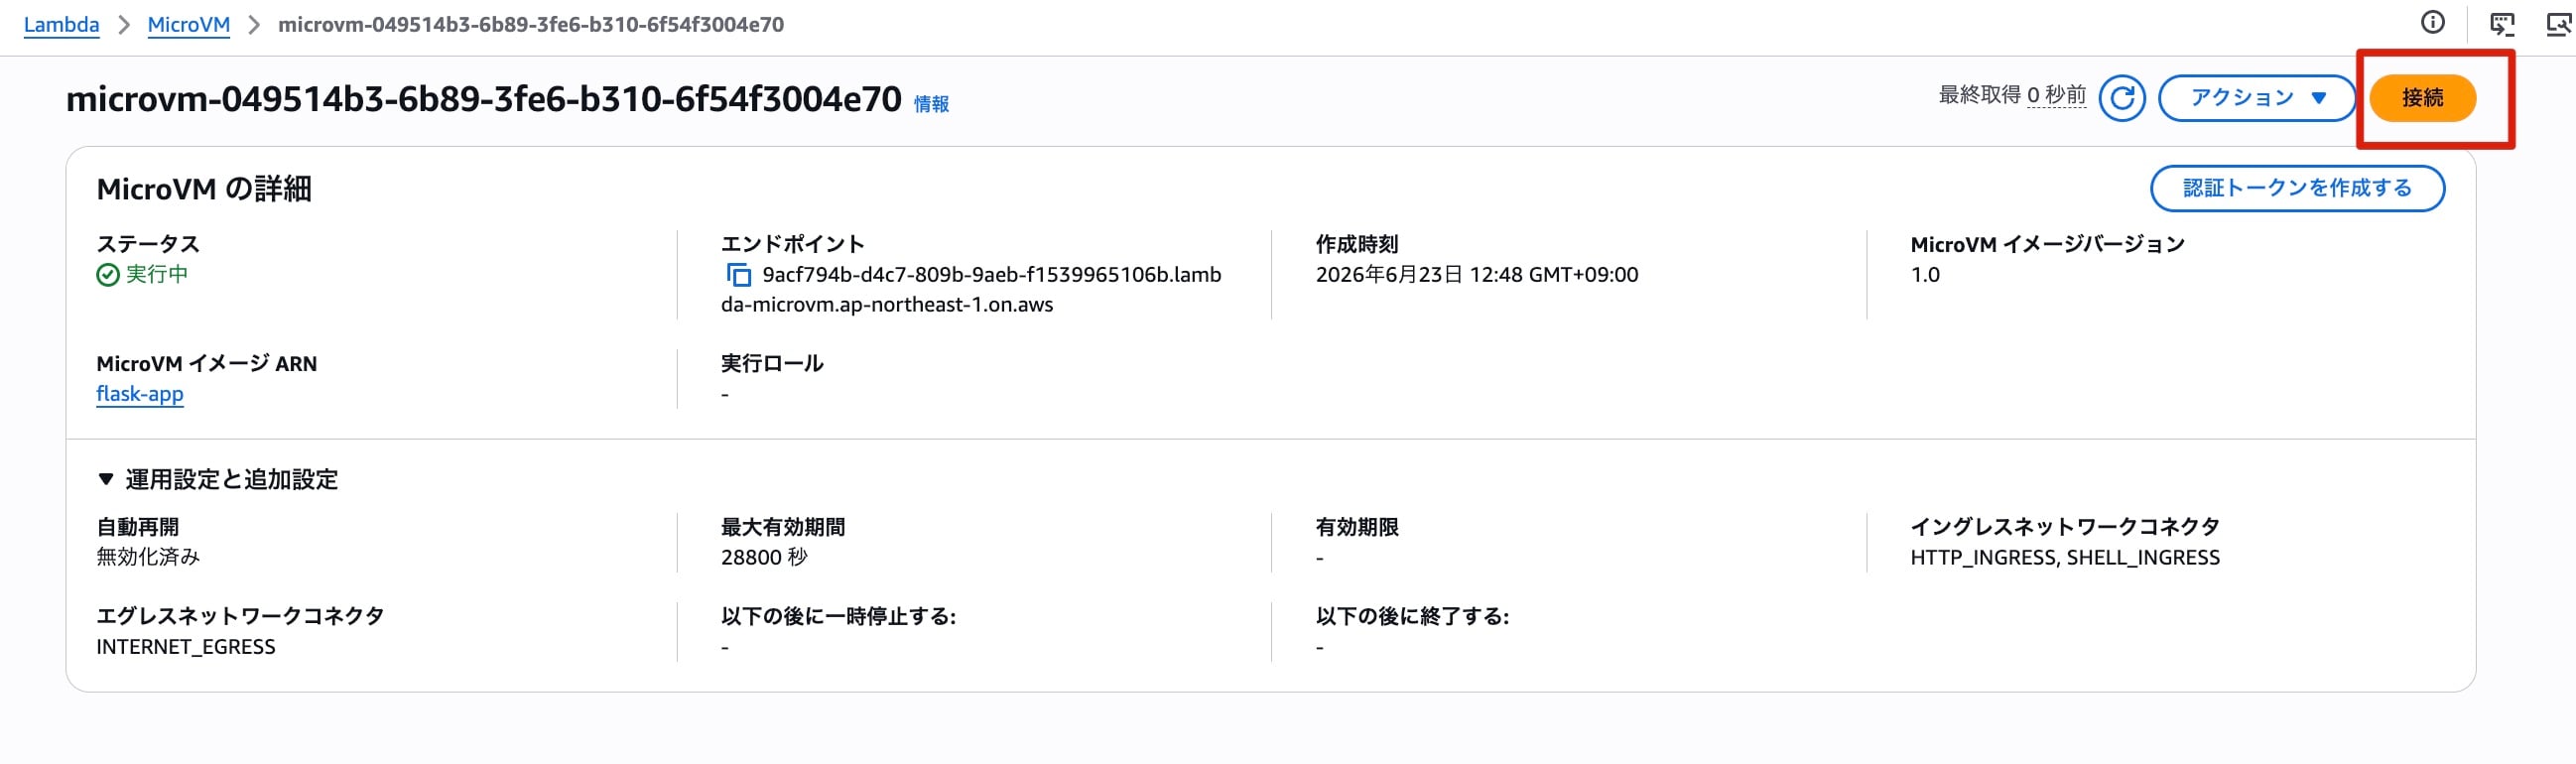
Since I allowed the shell earlier, the "Connect" button is now available. Clicking this button lets you operate the MicroVM's shell from the browser, just like SSM Session Manager. I tried running a few commands.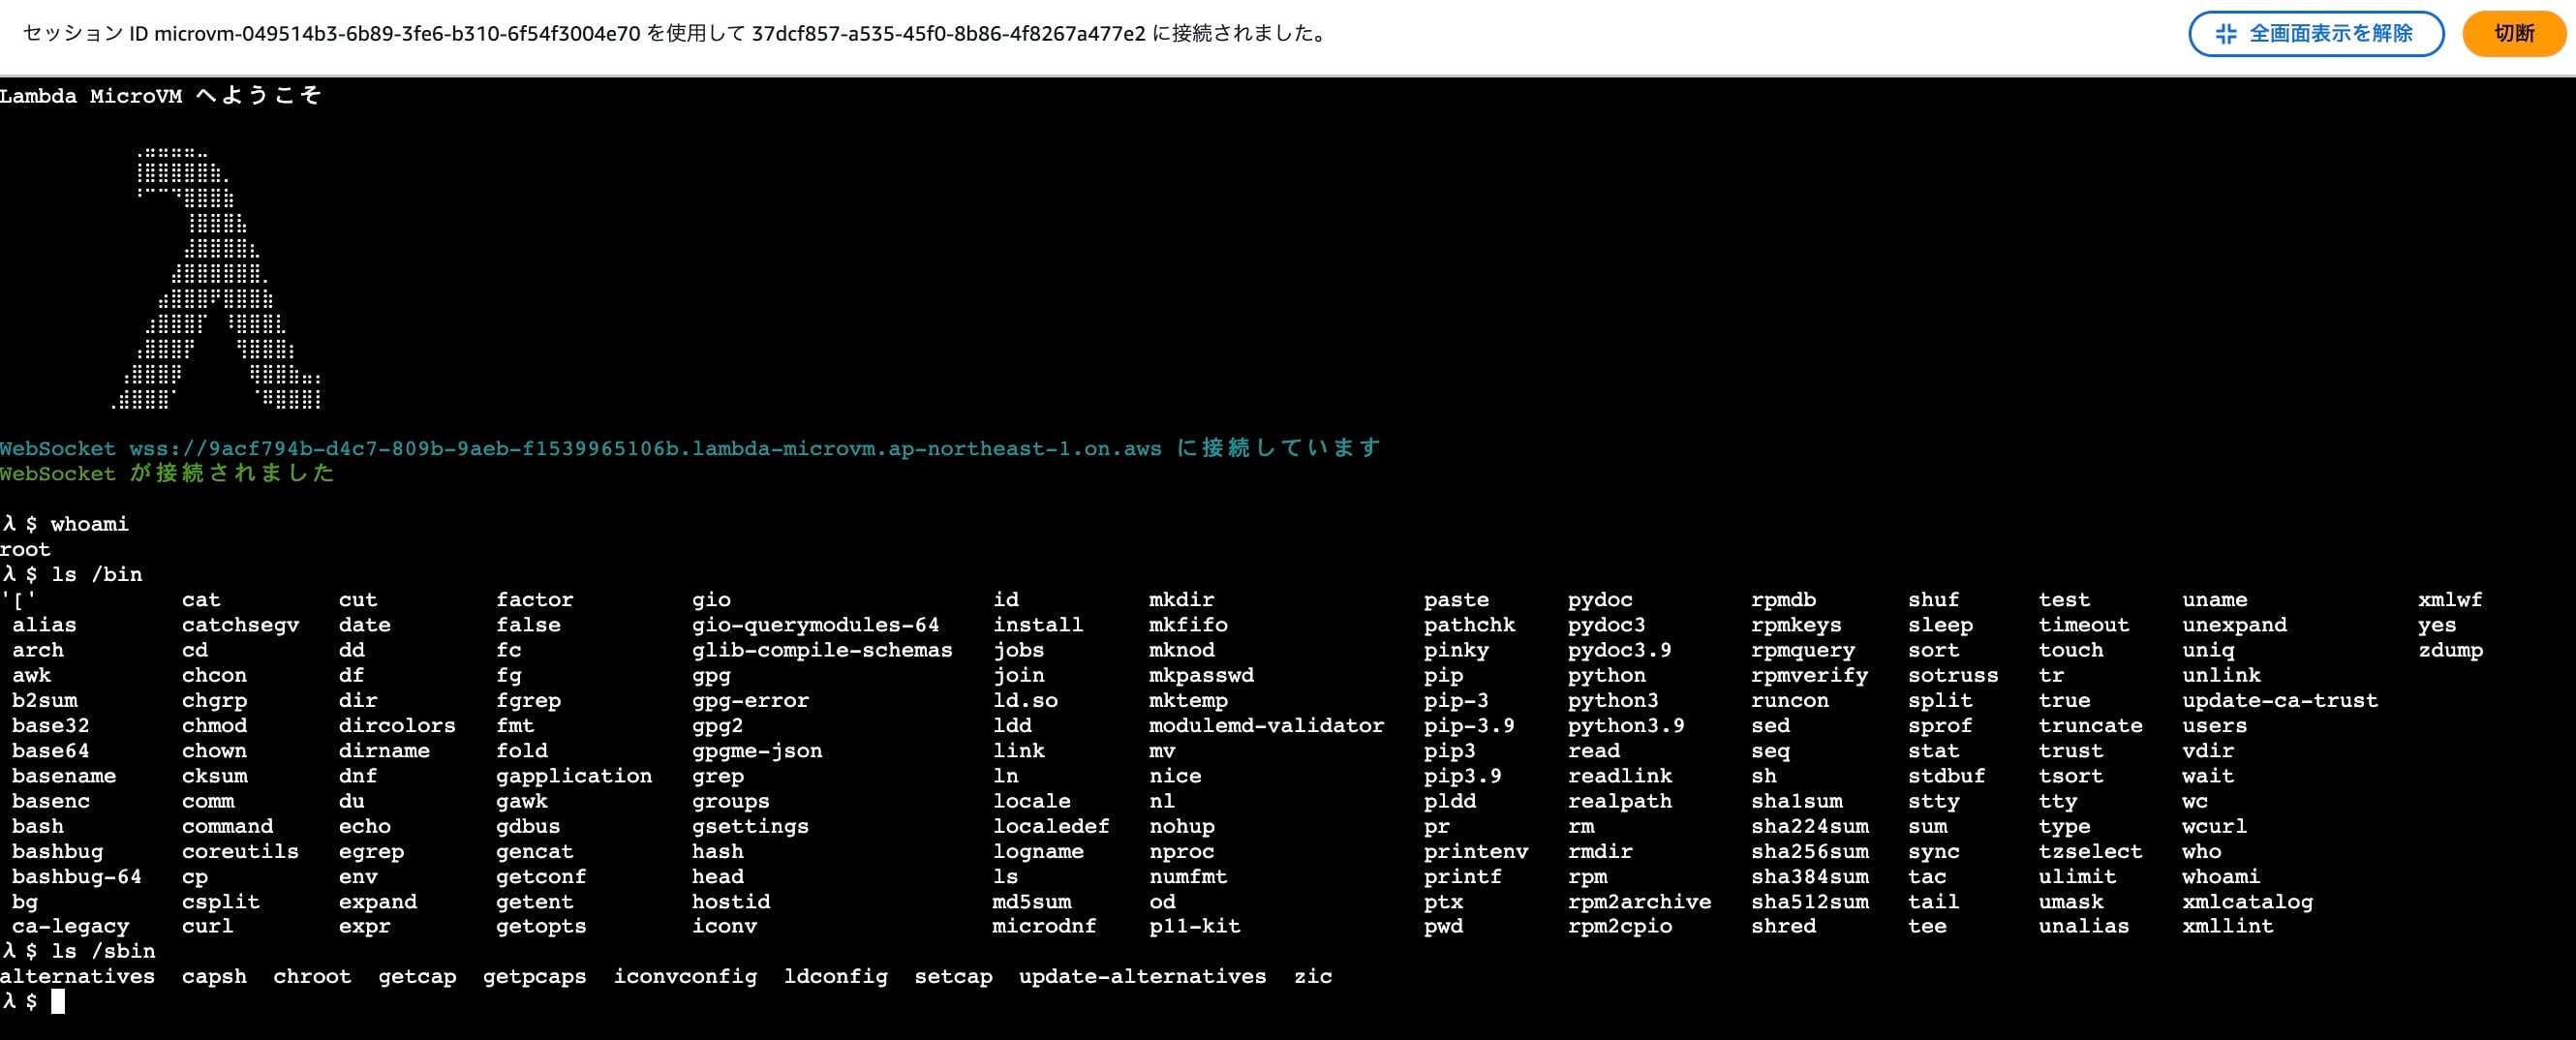
There are various differences from the Lambda Function execution environment. Personally, I like the λ $ in the prompt.
Creating an Auth Token and Accessing from Postman
Now that the MicroVM is running, let's finally try accessing the Flask app. From the details screen earlier, click "Create Auth Token" to create a token.
Let's use the issued endpoint and token to send a request to the MicroVM from Postman. At this point, set the request headers as follows.
-
X-aws-proxy-auth: the issued token-
A token in JWE format was issued. Decoding the header portion gives the following.
{
  "kid": "91ea60c2-ecf2-4bc8-a6e7-10850a647641",
  "alg": "dir",
  "enc": "A256GCM"
}
-
-
X-aws-proxy-port: 5000- Specify the port number of the application running on the MicroVM. If this header is not specified, port 8080 is used by default.
- If this port is not included in the port numbers permitted at the time of token issuance, a 403 error will be returned.
When the request is executed...
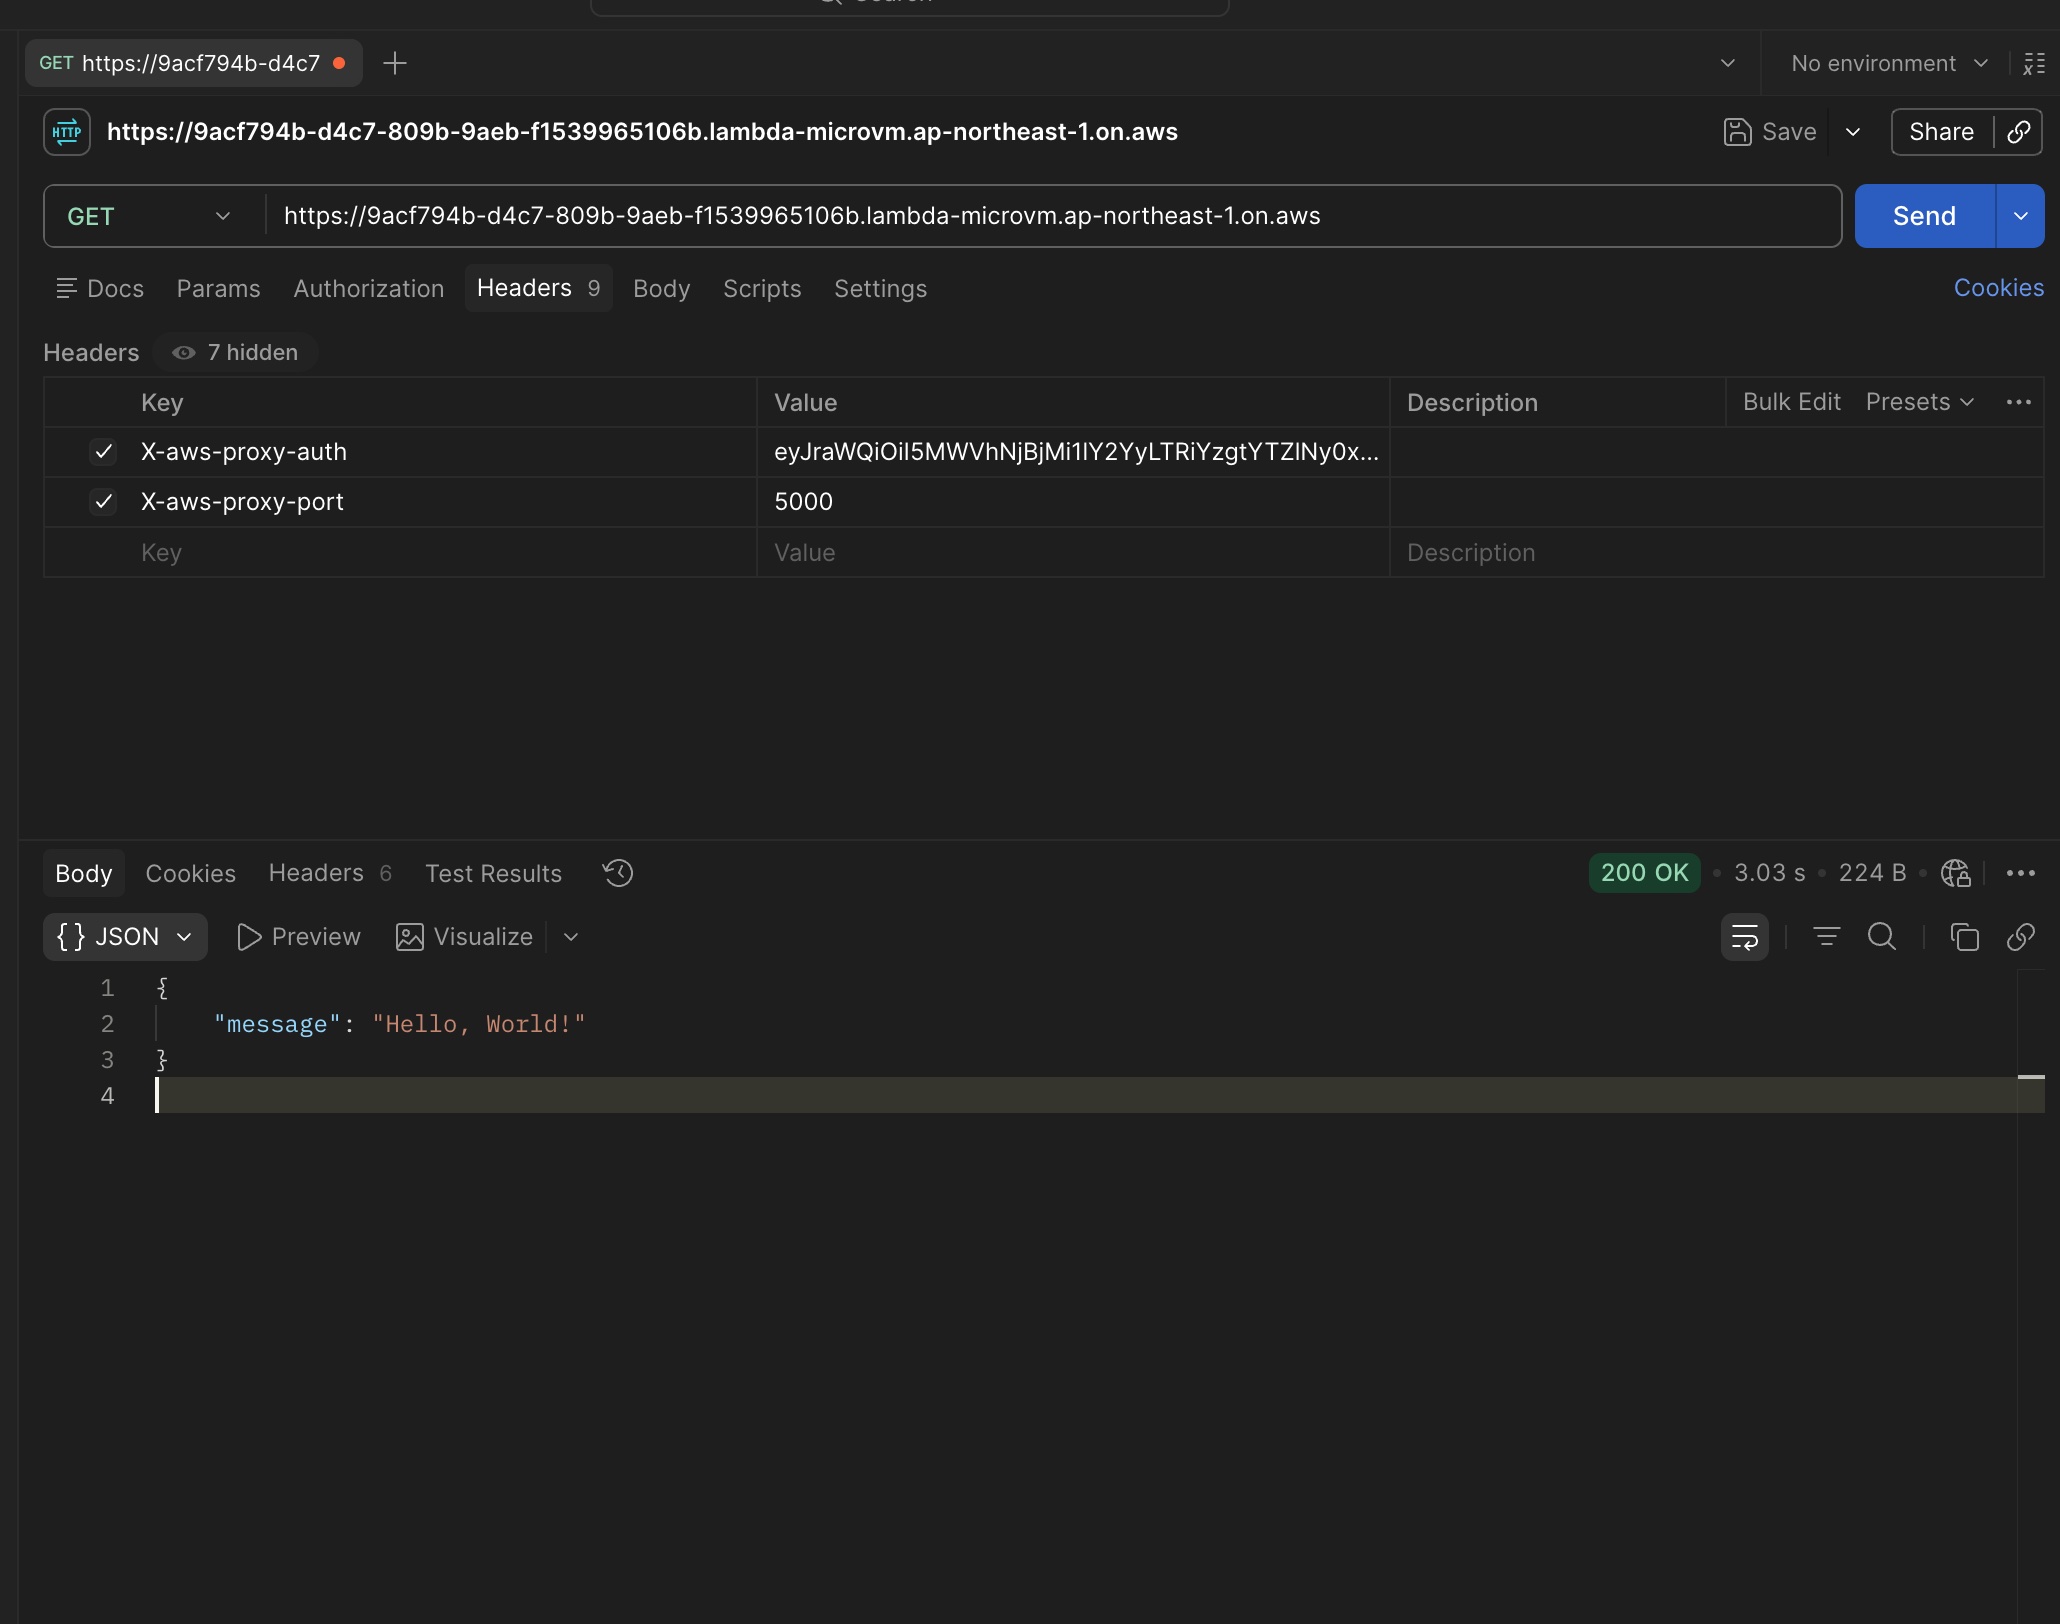
The request succeeded!! 🎉
Summary
Another interesting feature has appeared. This time I only did a quick verification, but there are also various other options supported, such as lifecycle management and network connectors, and it seems like there's quite a lot of depth to explore. I'd like to continue investigating it further.
References
- Run isolated sandboxes with full lifecycle control: AWS Lambda introduces MicroVMs | AWS News Blog
- AWS introduces Lambda MicroVMs for isolated execution of user and AI-generated code - AWS
- AWS Lambda MicroVMs - AWS Lambda
- aws-samples/sample-lambda-microvm-claude-managed-agents
- Self-hosted sandboxes - Claude API Docs