Using Backlog from Claude Code Without Issuing an API Key: Trying Out the OAuth Mode of Backlog MCP Server

This page has been translated by machine translation. View original
I'm Oguri, who loves whiskey, cigars, and pipes.
When using Backlog from Claude Code, the common approach is to set an API key in the Backlog MCP Server. However, I personally had concerns about leaving an API key with no expiration date in a local configuration file. The Backlog MCP Server can access the API using the Authorization Code Grant of OAuth 2.0, so this article summarizes the steps to access Backlog from Claude Code without using an API key.
- 認証と認可 | Backlog Developer API | Nulab
- Register Backlog application
- nulab/backlog-mcp-server - GitHub
- Connect Claude Code to tools via MCP - Claude Code Docs
What is the OAuth mode of the Backlog MCP Server?
The Backlog MCP Server is an official MCP server published by Nulab. Until now, the basic usage was that an MCP client such as Claude Code launched the MCP server via standard input/output (stdio) and called the Backlog API with an API key set in the environment variable BACKLOG_API_KEY. In this article, I call this the "API key method."
OAuth mode was added in v0.12.0 (released on June 6, 2026). In OAuth mode, you run the MCP server as an HTTP server, and each user grants access with their own Backlog account. No API key is needed. This article uses v0.23.3.
The differences between the two methods, in the order of the setup work, are summarized below.
| Item | API key method | OAuth mode |
|---|---|---|
| Preparation | Issue an API key in Backlog's personal settings | Register an application on the Backlog Developer site |
| Secret to be stored | API key | Client Secret (set together with the Client ID) |
| Starting the MCP server | Claude Code starts it automatically when needed | The user starts it in advance as an HTTP server |
| Claude Code settings | Startup command and API key | URL of the MCP server |
| Credentials used when calling the Backlog API | API key (no expiration) | Access token (valid for 1 hour, renewed automatically) |
An API key alone can access Backlog data. In OAuth mode, the Client Secret also remains on your machine, but the Client Secret alone cannot access anything; the user must also grant permission in the browser.
Authentication flow
In OAuth mode, the Backlog MCP Server itself also acts as an OAuth authorization server. Therefore, authentication takes place in the following two stages.
| Segment | Method | Notes |
|---|---|---|
| Between Claude Code and the MCP server | OAuth following the MCP authorization specification (DCR: Dynamic Client Registration) | Claude Code registers automatically |
| Between the MCP server and Backlog | Backlog's OAuth 2.0 (Authorization Code Grant) | Application registration in Backlog is required |
When you start authentication in Claude Code, processing proceeds in the order shown in the diagram below. There are three key points.
- Steps 1–4 and 10–13 are OAuth between Claude Code and the MCP server. Claude Code does this automatically, so no user configuration is needed.
- Steps 5–9 are OAuth 2.0 between the MCP server and Backlog. In step 5, the user grants access from the Backlog screen.
- As in steps 14–15, after authorization a different token is used for each segment. Claude Code receives only the token for the MCP server, and the Backlog token stays inside the MCP server.
Is administrator permission required to register an application?
Registering an application with Backlog is done on the Backlog Developer site, logged in with a Nulab account. The official documentation contains no statement limiting registration to space administrators. I am not a space administrator, but I registered an application and was able to use it without any problems.
Note that the permissions of a token obtained via OAuth are the same as those of the user who granted access. Even if a regular user registers the application, it never exceeds what that user can normally do in Backlog. Some companies may have internal rules about application registration, so it is safer to check beforehand.
Notes
- Tokens are stored only in memory. When you restart the MCP server, the client registration and tokens disappear, so you need to authorize again from Claude Code. The same applies when you restart your Mac.
- Only one Backlog space is supported. OAuth mode cannot be used together with the setting that switches between multiple spaces (multi-organization settings).
- Backlog's OAuth has no mechanism for restricting permissions (scopes). With the token, you can perform every operation that the user can perform in Backlog. If you want to limit access to read-only, prohibit write-type tools in the Claude Code settings described later.
- You need to keep the MCP server running. Unlike the API key method, Claude Code does not start it automatically, so you need to set up a way to keep it running at all times.
- It listens only within your own machine. The default value of the address it binds to (
MCP_HTTP_HOST) is127.0.0.1. In this case, the MCP server does not accept Host headers other than localhost. If you set it to0.0.0.0, it becomes reachable from other machines, so keep the default for personal use.
Let's try it
From here, we will actually configure everything.
Prerequisites
| Item | Details |
|---|---|
| OS | macOS |
| Node.js | 22 or later (specified in engines of package.json). Managed with nvm and set as the default version (nvm alias default) |
| pnpm | Used for the build |
| Claude Code | v2.1.322 |
| Backlog MCP Server | v0.23.3 |
Register an application in Backlog
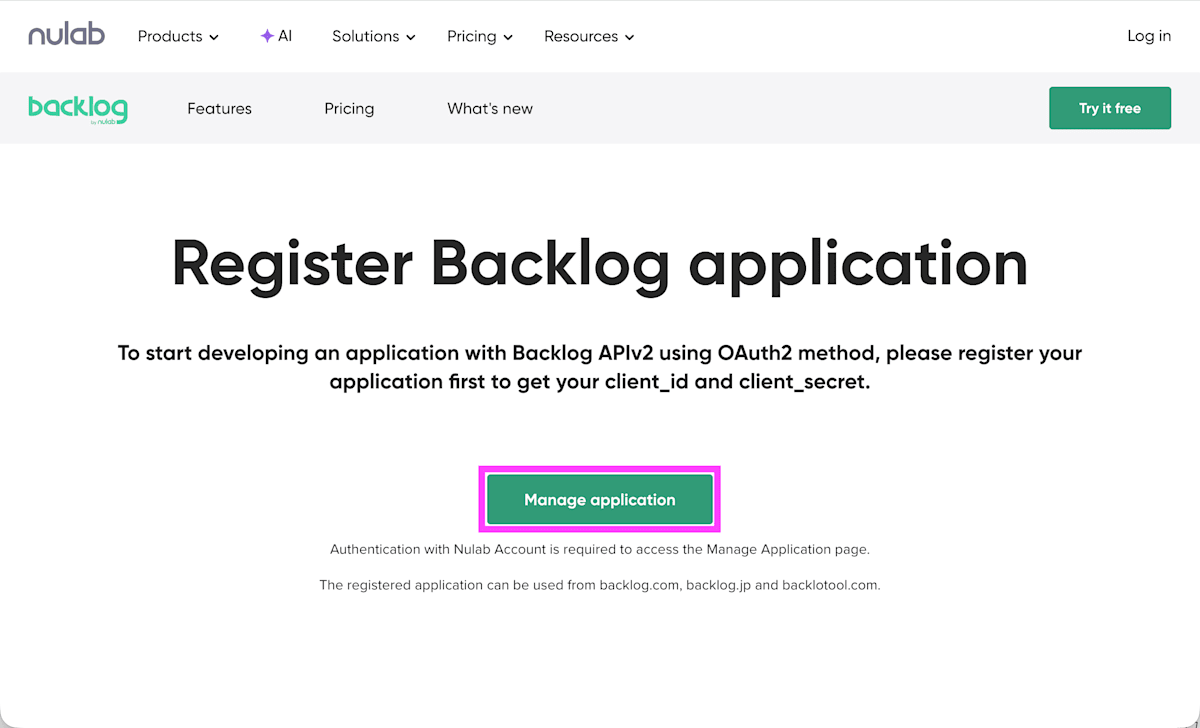
Open the application registration page on the Backlog Developer site, click Manage application, and log in with your Nulab account.
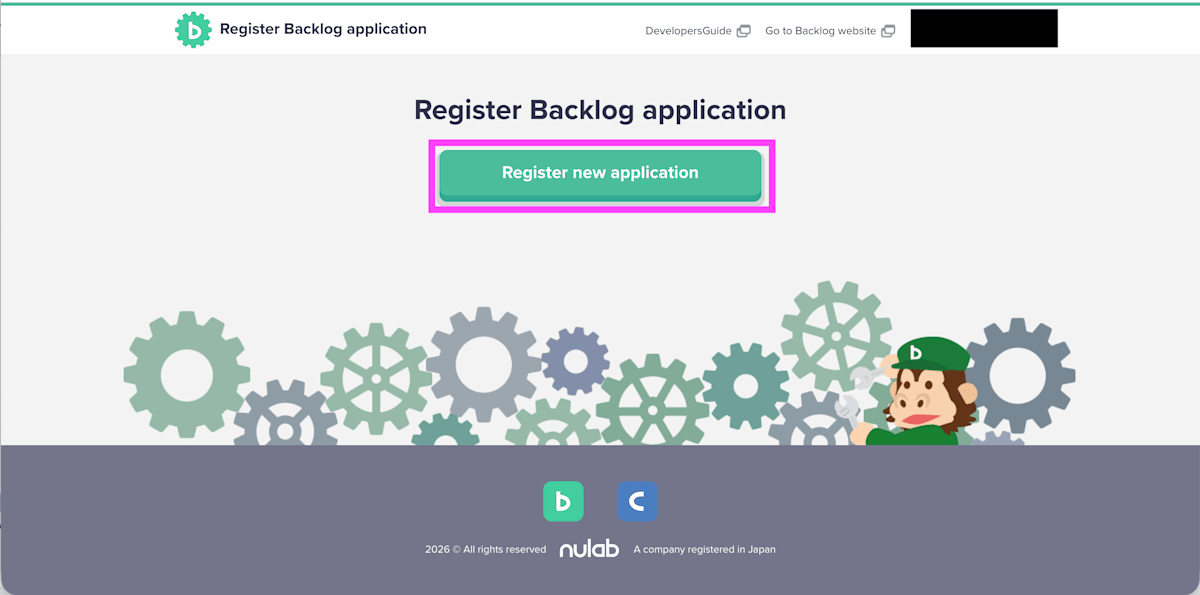
Click Register new application.
Enter the application information as follows and click Create.
| Item | Example input | Notes |
|---|---|---|
| Redirect URI | http://localhost:3333/callback |
Be sure to use exactly this form. It is the value of MCP_SERVER_BASE_URL (set later) with /callback appended |
| Image | None | Optional |
| Application name | Claude Code Backlog MCP |
Shown on Backlog's authorization screen. Use a name that you can recognize as your own |
| Description | Claude Code から Backlog MCP Server 経由で Backlog にアクセスするための個人用アプリ |
Optional description |
| Websites URL | https://github.com/nulab/backlog-mcp-server |
Optional |
There are fields for English and Japanese, but just one of them is enough. Delete the one you will not use with "Delete this language," and set the remaining one with "Set this language as a default."
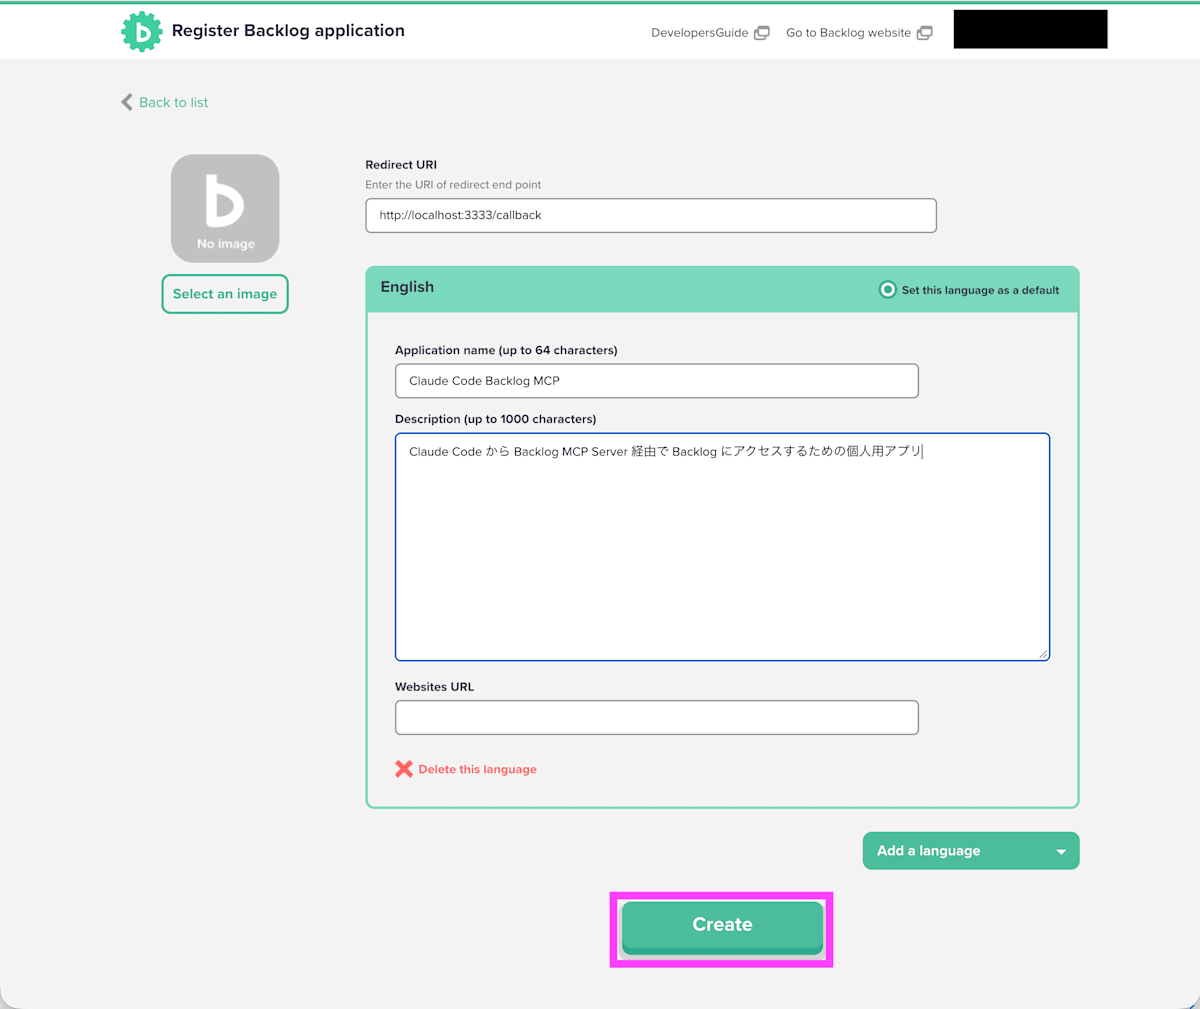
When you press "Create," the Client ID and Client Secret are displayed.
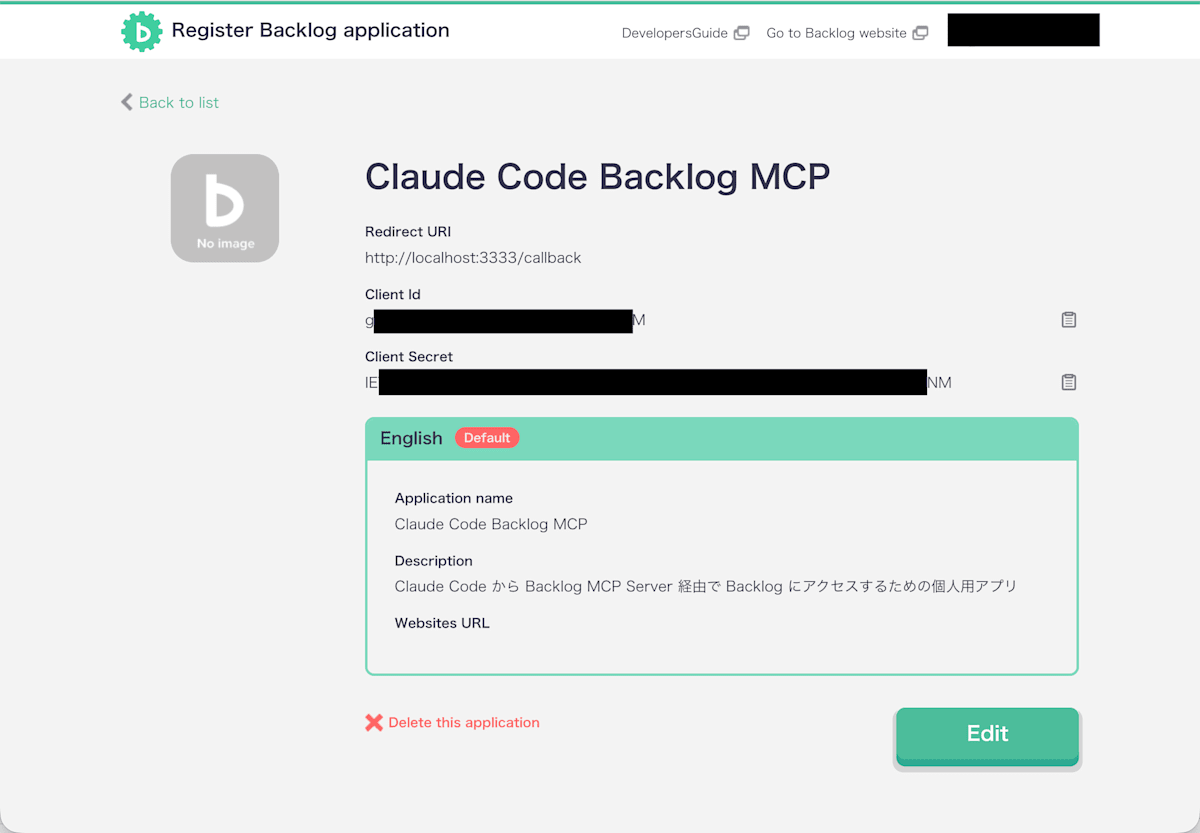
Treat the Client Secret like a password and keep it in a place where others cannot see it.
Get and build the Backlog MCP Server
The way to start HTTP mode described in the README is to get the source code, build it, and run it with node. Here, we fetch it under ~/src. If pnpm is not installed, install it first with something like npm install -g pnpm.
$ mkdir -p ~/src && cd ~/src
$ git clone https://github.com/nulab/backlog-mcp-server.git
$ cd backlog-mcp-server
$ pnpm install
$ pnpm run build
Prepare the configuration file
Put the values to pass to the MCP server together in an environment variable file. For BACKLOG_DOMAIN, write your space's domain without https://.
$ mkdir -p ~/.config/backlog-mcp
$ touch ~/.config/backlog-mcp/env
$ chmod 600 ~/.config/backlog-mcp/env
BACKLOG_DOMAIN=example.backlog.com
BACKLOG_OAUTH_CLIENT_ID=(登録したアプリケーションの Client ID)
BACKLOG_OAUTH_CLIENT_SECRET=(登録したアプリケーションの Client Secret)
MCP_SERVER_BASE_URL=http://localhost:3333
MCP_TRANSPORT=http
MCP_HTTP_HOST=127.0.0.1
MCP_HTTP_PORT=3333
ENABLE_TOOLSETS=space,project,issue,wiki,document
| Environment variable | Details |
|---|---|
BACKLOG_DOMAIN |
Domain of the Backlog space to connect to |
BACKLOG_OAUTH_CLIENT_ID |
Client ID of the registered application. Setting this enables OAuth mode |
BACKLOG_OAUTH_CLIENT_SECRET |
Client Secret of the registered application |
MCP_SERVER_BASE_URL |
URL of the MCP server. The value with /callback appended must match the Redirect URI |
MCP_TRANSPORT |
http enables HTTP mode (the default is stdio) |
MCP_HTTP_HOST / MCP_HTTP_PORT |
Address and port to listen on (defaults are 127.0.0.1 and 3333) |
ENABLE_TOOLSETS |
Groups of features to use (toolsets). The default is all |
For ENABLE_TOOLSETS, you can specify space, project, issue, wiki, git, document, and notifications. Here, I have excluded Git and notifications, assuming they will not be used. Change this as needed.
Next, create a script that loads these settings and starts the MCP server.
This article proceeds on the assumption that Node.js is managed with nvm. When started from launchd (described later), shell configuration files (such as ~/.zshrc) are not loaded, so the node command that works in the terminal cannot be found. Therefore, the script loads nvm so that node of nvm's default version can be used. Even if you update Node.js, you do not need to rewrite the script.
Make sure the default version is 22 or later.
$ nvm version default
v26.13.1
#!/bin/bash
set -euo pipefail

set -a
source "$HOME/.config/backlog-mcp/env"
set +a

# Load nvm and put the default version of node on the PATH
export NVM_DIR="$HOME/.nvm"
set +u
source "$NVM_DIR/nvm.sh"
set -u

exec node "$HOME/src/backlog-mcp-server/build/index.js"
The nvm loading process may reference undefined variables, so set +u (a setting that does not treat undefined variables as errors) is applied only while loading.
$ chmod 700 ~/.config/backlog-mcp/start.sh
Optional: Manage the Client Secret with 1Password
If you use the 1Password CLI (op), you can avoid writing the Client Secret to a file in plain text. If you do not use 1Password, you can skip this step.
First, check that the 1Password CLI is installed and where it is located.
$ op --version
2.42.0
$ which op
/opt/homebrew/bin/op
If you see something like op: command not found, install it by following the 1Password CLI documentation. With Homebrew, you can install it with brew install 1password-cli.
Next, confirm that you can access the vault. If you have enabled the integration between the 1Password app and the CLI, an authentication prompt appears here.
$ op vault list
ID                            NAME
a1b2c3d4e5f6g7h8i9j0k1l2m3    Employee
In the environment variable file, write 1Password references (op://vault/item/field) instead of values.
BACKLOG_DOMAIN=example.backlog.com
BACKLOG_OAUTH_CLIENT_ID=op://Private/backlog-oauth/username
BACKLOG_OAUTH_CLIENT_SECRET=op://Private/backlog-oauth/credential
MCP_SERVER_BASE_URL=http://localhost:3333
MCP_TRANSPORT=http
MCP_HTTP_HOST=127.0.0.1
MCP_HTTP_PORT=3333
ENABLE_TOOLSETS=space,project,issue,wiki,document
In the startup script, use op run instead of source to replace the references with the actual values and start the server. When started from launchd, op cannot be found on the PATH either, so specify it with an absolute path. Check the location with which op and replace /path/to/op.
#!/bin/bash
set -euo pipefail

# Load nvm and put the default version of node on the PATH
export NVM_DIR="$HOME/.nvm"
set +u
source "$NVM_DIR/nvm.sh"
set -u

exec /path/to/op run --env-file="$HOME/.config/backlog-mcp/env" -- \
  node "$HOME/src/backlog-mcp-server/build/index.js"
Verify startup
Before setting up always-on startup, start it manually and confirm that it works. If you configured 1Password, authentication will be required.
$ ~/.config/backlog-mcp/start.sh
From another terminal, check whether you can retrieve the OAuth metadata. (The output has been formatted with the jq command.)
$ curl -s http://localhost:3333/.well-known/oauth-authorization-server
{
  "issuer": "http://localhost:3333",
  "authorization_endpoint": "http://localhost:3333/authorize",
  "token_endpoint": "http://localhost:3333/token",
  "registration_endpoint": "http://localhost:3333/register",
  "response_types_supported": [
    "code"
  ],
  "grant_types_supported": [
    "authorization_code",
    "refresh_token"
  ],
  "token_endpoint_auth_methods_supported": [
    "client_secret_post",
    "none"
  ],
  "code_challenge_methods_supported": [
    "S256"
  ],
  "authorization_response_iss_parameter_supported": true
}
Once confirmed, stop it with Ctrl + C.
Always-on setup (macOS launchd)
On macOS, use launchd to start the MCP server automatically at login. Create the following file. In launchd configuration files, ~ and $HOME are not expanded, so replace USERNAME with your own username and write absolute paths.
<?xml version="1.0" encoding="UTF-8"?>
<!DOCTYPE plist PUBLIC "-//Apple//DTD PLIST 1.0//EN" "http://www.apple.com/DTDs/PropertyList-1.0.dtd">
<plist version="1.0">
<dict>
  <key>Label</key>
  <string>local.backlog-mcp</string>
  <key>ProgramArguments</key>
  <array>
    <string>/bin/bash</string>
    <string>/Users/USERNAME/.config/backlog-mcp/start.sh</string>
  </array>
  <key>RunAtLoad</key>
  <true/>
  <key>KeepAlive</key>
  <true/>
  <key>StandardOutPath</key>
  <string>/Users/USERNAME/Library/Logs/backlog-mcp.log</string>
  <key>StandardErrorPath</key>
  <string>/Users/USERNAME/Library/Logs/backlog-mcp.log</string>
</dict>
</plist>
| Key | Meaning |
|---|---|
RunAtLoad |
Starts when loaded (including at login) |
KeepAlive |
Restarts the process when it exits |
StandardOutPath / StandardErrorPath |
Log output destination |
Register and start it.
$ launchctl bootstrap gui/$(id -u) ~/Library/LaunchAgents/local.backlog-mcp.plist
Check the status.
$ launchctl print gui/$(id -u)/local.backlog-mcp | grep -E "state|pid"
        state = running
        pid = 83164
                state = active
                state = active
To restart after changing settings, or to stop and unregister, use the following commands.
# Restart
$ launchctl kickstart -k gui/$(id -u)/local.backlog-mcp

# Stop and unregister
$ launchctl bootout gui/$(id -u)/local.backlog-mcp
Even when it is restarted automatically by KeepAlive, the tokens have disappeared from memory. In that case, authorize again from Claude Code following the steps described later.
On Windows, you can do the same with Task Scheduler. I think you can prepare a PowerShell script that sets the environment variables and starts node, and register it as a task that runs at logon.
Register with Claude Code
If you have already registered the API-key-based Backlog MCP Server under the name backlog, remove it first.
$ claude mcp remove backlog
Register it as an HTTP MCP server. Here, --scope project is specified, which writes to the project's .mcp.json. If you are using it only for yourself, --scope user is fine too.
$ claude mcp add --transport http --scope project backlog http://localhost:3333/mcp
The following is written to .mcp.json. The API key does not appear anywhere.
{
  "mcpServers": {
    "backlog": {
      "type": "http",
      "url": "http://localhost:3333/mcp"
    }
  }
}
Start Claude Code and run /mcp. Select backlog from the list and choose "Authenticate" to open the browser.
❯ /mcp

──────────────────────────────────────────────────────────────────────────────────────────────────────────────────────────────────────────────────────────────────
  Backlog MCP Server

  Status:           ⚠ needs authentication
  Auth:             ✘ not authenticated
  URL:              http://localhost:3333/mcp
  Config location:  /path/to/.mcp.json

  ❯ 1. Authenticate
    2. Disable

  ↑/↓ to navigate · Enter to select · Esc to back
Backlog's authorization screen is displayed, so check the application name and grant permission.
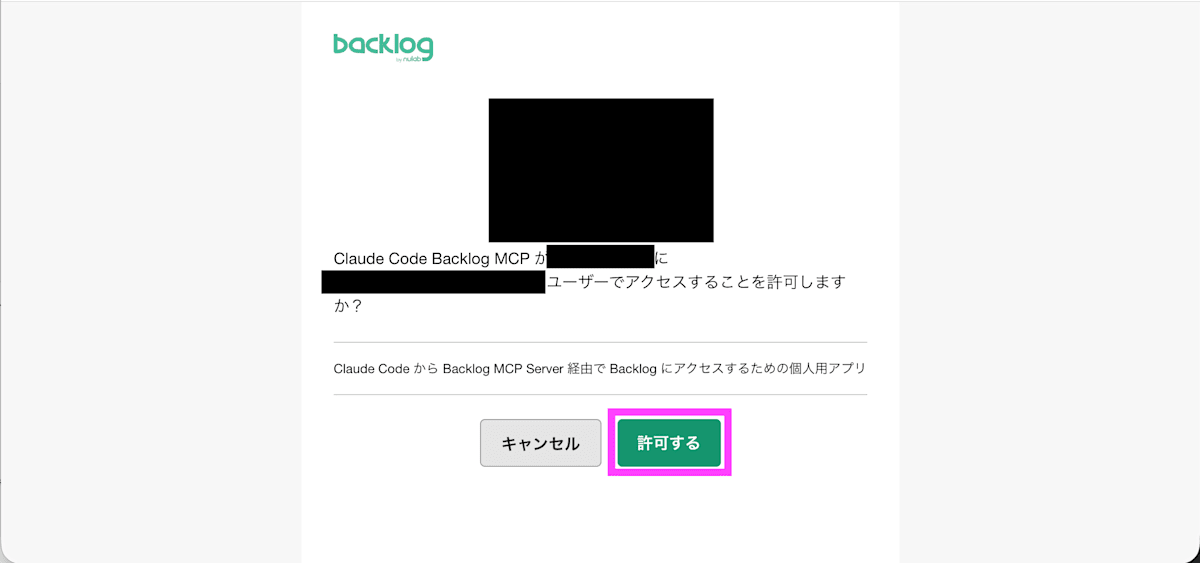
When the browser shows a completion message, return to Claude Code. If backlog shows connected, you are done.
❯ /mcp

──────────────────────────────────────────────────────────────────────────────────────────────────────────────────────────────────────────────────────────────────
  Backlog MCP Server

  Status:           ✔ connected
  Auth:             ✔ authenticated
  Protocol:         2026-07-28
  URL:              http://localhost:3333/mcp
  Config location:  /path/to/.mcp.json
  Capabilities: tools
  Tools: 50 tools

  ❯ 1. View tools
    2. Re-authenticate
    3. Clear authentication
    4. Reconnect
    5. Disable

  ↑/↓ to navigate · Enter to select · Esc to back
Setting up write prohibition
As mentioned in "Notes," Backlog's OAuth has no scopes, so you cannot restrict access to read-only on the Backlog side. In addition, the Backlog MCP Server has no read-only mode. You can narrow down the features with ENABLE_TOOLSETS, but you can only exclude things by toolset. The issue and wiki toolsets contain both read and write tools, so narrowing down toolsets alone cannot stop writes.
| Where to restrict | Granularity | Can it block only writes? |
|---|---|---|
| Backlog's OAuth | None (no scopes) | No |
ENABLE_TOOLSETS of the Backlog MCP Server |
Per toolset | No |
permissions.deny of Claude Code |
Per tool | Yes |
Therefore, we prohibit write-type tools one by one using Claude Code's permission settings (permissions.deny).
Since v0.20.6, the Backlog MCP Server attaches an annotation (readOnlyHint) to each tool indicating whether it is read-only. If you query the MCP server for the list of tools, you can identify the tools whose readOnlyHint is not true, that is, the write-type tools. Merely returning the list of tools does not connect to Backlog, so a dummy value is fine for the API key.
$ cd ~/src/backlog-mcp-server
$ { printf '%s\n' \
    '{"jsonrpc":"2.0","id":1,"method":"initialize","params":{"protocolVersion":"2025-06-18","capabilities":{},"clientInfo":{"name":"check","version":"0"}}}' \
    '{"jsonrpc":"2.0","method":"notifications/initialized"}' \
    '{"jsonrpc":"2.0","id":2,"method":"tools/list"}'; sleep 3; } \
  | BACKLOG_DOMAIN=example.backlog.com BACKLOG_API_KEY=dummy node build/index.js \
  | jq -r 'select(.id == 2) | .result.tools[] | select(.annotations.readOnlyHint != true) | .name'
add_project
update_project
add_issue
update_issue
delete_issue
add_issue_comment
update_issue_comment
add_related_issue
remove_related_issue
add_category
add_watching
update_watching
delete_watching
mark_watching_as_read
add_version_milestone
update_version_milestone
delete_version
add_wiki
update_wiki
add_pull_request
update_pull_request
add_pull_request_comment
update_pull_request_comment
add_document
reset_unread_notification_count
mark_notification_as_read
In v0.23.3, 26 of the 64 tools matched. These include tools that do not change the content of the data but do change state such as read status (mark_*, reset_*). Broken down by toolset, they are as follows.
| toolset | Write-type tools | Count |
|---|---|---|
| space | None | 0 |
| project | add_project, update_project |
2 |
| issue | add_issue, update_issue, delete_issue, add_issue_comment, update_issue_comment, add_related_issue, remove_related_issue, add_category, add_watching, update_watching, delete_watching, mark_watching_as_read, add_version_milestone, update_version_milestone, delete_version |
15 |
| wiki | add_wiki, update_wiki |
2 |
| git | add_pull_request, update_pull_request, add_pull_request_comment, update_pull_request_comment |
4 |
| document | add_document |
1 |
| notifications | reset_unread_notification_count, mark_notification_as_read |
2 |
| Total | 26 |
In Claude Code, MCP tools are named mcp__<server name>__<tool name>. Since we registered the server with the name backlog, write the following in .claude/settings.json (per project) or ~/.claude/settings.json (global).
{
  "permissions": {
    "deny": [
      "mcp__backlog__add_project",
      "mcp__backlog__update_project",
      "mcp__backlog__add_issue",
      "mcp__backlog__update_issue",
      "mcp__backlog__delete_issue",
      "mcp__backlog__add_issue_comment",
      "mcp__backlog__update_issue_comment",
      "mcp__backlog__add_related_issue",
      "mcp__backlog__remove_related_issue",
      "mcp__backlog__add_category",
      "mcp__backlog__add_watching",
      "mcp__backlog__update_watching",
      "mcp__backlog__delete_watching",
      "mcp__backlog__mark_watching_as_read",
      "mcp__backlog__add_version_milestone",
      "mcp__backlog__update_version_milestone",
      "mcp__backlog__delete_version",
      "mcp__backlog__add_wiki",
      "mcp__backlog__update_wiki",
      "mcp__backlog__add_pull_request",
      "mcp__backlog__update_pull_request",
      "mcp__backlog__add_pull_request_comment",
      "mcp__backlog__update_pull_request_comment",
      "mcp__backlog__add_document",
      "mcp__backlog__reset_unread_notification_count",
      "mcp__backlog__mark_notification_as_read"
    ]
  }
}
This setting has the following caveats.
- Even if write-type tools are added, they are not prohibited automatically.
- This is because tool names are specified one by one. When you update the Backlog MCP Server, check the write-type tools with the command above and review the deny list.
- If the server name or tool names change, the prohibition stops working.
- If you registered it in Claude Code under a name other than
backlog, or if you added a prefix to tool names with the Backlog MCP Server's--prefix(environment variablePREFIX), rewrite the names in the deny list accordingly.
- If you registered it in Claude Code under a name other than
- Only operations from Claude Code can be prohibited.
- If another MCP client connects to the same MCP server, it can still write.
Verify operation
Confirm that you can retrieve Backlog information from Claude Code and that writes are refused. Quit the running Claude Code once and start it again.
First, try retrieving information from Backlog.
> 自分に割り当てられている未完了の課題を一覧にしてください
As shown below, the issues can be confirmed without problems.
⏺ Backlog で大栗さんが担当している課題は全部で XX 件あり、そのうち完了していないものが XX 件 あります(未対応 X / 処理中 X / 処理済み X)。

  MCP_TEST_1234567(某プロジェクトの機材準備)XX 件

  ┌─────────────────────┬────────┬────────┬────────────┬────────────────────────────────────┐
  │      課題キー       │  状態  │ 優先度 │    期限    │  件名                │
  ├─────────────────────┼────────┼────────┼────────────┼────────────────────────────────────┤
  │ MCP_TEST_1234567-30 │ 処理中 │ 中     │ なし       │ ネットワーク環境                   │
  └─────────────────────┴────────┴────────┴────────────┴────────────────────────────────────┘

  気になる点

  - XXXX は 1件が期限切れです。
Next, request a write and confirm that it is refused by the prohibition configured in the previous step.
> 課題 XXX-1 に「確認しました」とコメントを追加してください
It reports that the write cannot be done.
⏺ コメントは追加できていません。XXX-1 は変更していません。

  追加できなかった理由

  コメント追加用の mcp__backlog__add_issue_comment を含め、Backlog MCP の書き込み系ツールは次の 2 つのファイルで permissions.deny
  に入っています。そのため、このセッションにツールが読み込まれません。

  - ~/.claude/settings.json
  - .claude/settings.json(このプロジェクト)

  書き込みを意図して止めている設定なので、curl で Backlog API を直接呼ぶような回避はしていません。

  コメントを追加する方法

  1. 両方のファイルの deny から "mcp__backlog__add_issue_comment" を外す: Claude Code を再起動するとツールが読み込まれ、私から「確認しました」
     を投稿できます。テストの後に deny へ戻すなら、そのときもお手伝いします。
  2. Backlog の画面から手で投稿する: 一度きりのテストならこちらが手軽です。

  どちらで進めるか教えてください。
Note that if you restart the MCP server, you need to authenticate again with /mcp.
Conclusion
I introduced the steps to access Backlog from Claude Code without issuing an API key, using the OAuth mode of the Backlog MCP Server.
There are parts that take more effort than the API key method, such as having to keep the MCP server running at all times and needing to re-authorize after every restart. Even so, not having to keep an API key with no expiration date on your machine is a welcome benefit. Combined with Claude Code's permission settings, you can use it with peace of mind as read-only.
If you want to reference Backlog issues and wikis from Claude Code, please give the OAuth mode a try.