
I purchased credits on Claude Console and issued an API key.

This page has been translated by machine translation. View original
When validating "ClaudeForFoundationModels", a library for using Apple's Foundation Models in iOS apps via the Claude API, a Claude API key was needed. When attempting to issue an API key in the Claude Console, it turned out that API credits needed to be purchased in advance.
This article introduces the steps for purchasing API credits in the Claude Console and issuing an API key.
Verification Environment
- Claude Console (Web version)
- Date confirmed: July 31, 2026
Prerequisites
- A Claude Console account must already be created
- Have a credit card ready for payment
Purchasing Credits
Step 1: Access the billing page
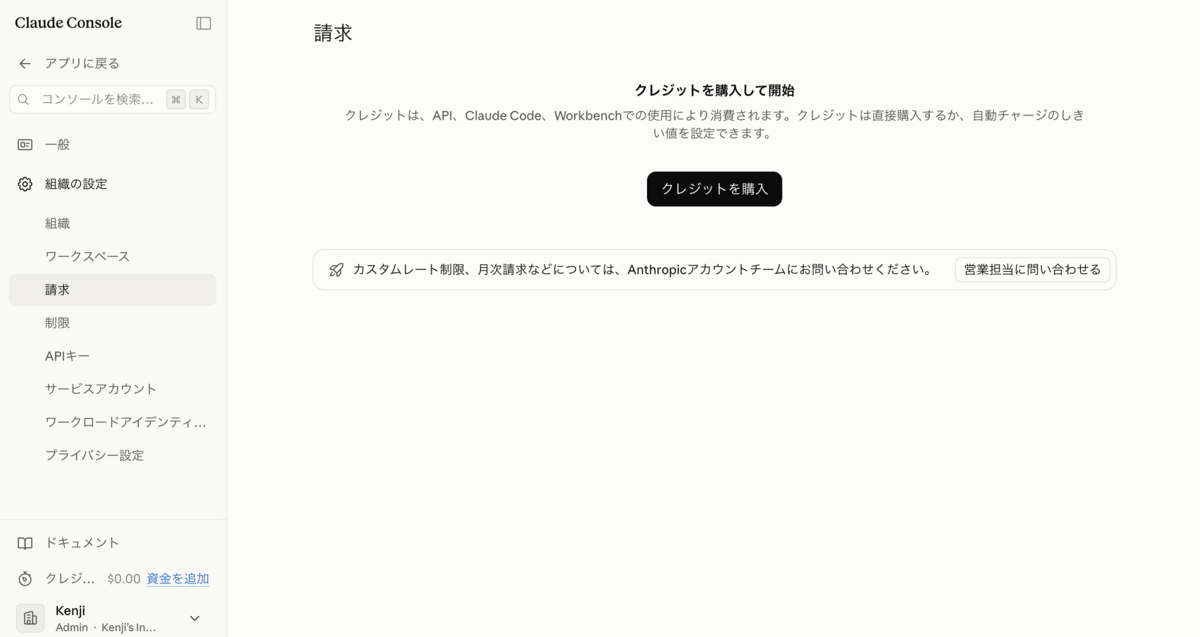
Accessing https://platform.claude.com/settings/billing will display the "Billing" screen. When no credits have been purchased yet, a "Purchase credits to get started" message is displayed along with a "Purchase credits" button.
Credits are consumed by usage in the API, Claude Code, and Workbench. You can purchase credits directly or set an auto-recharge threshold.
Step 2: Enter the amount and billing address
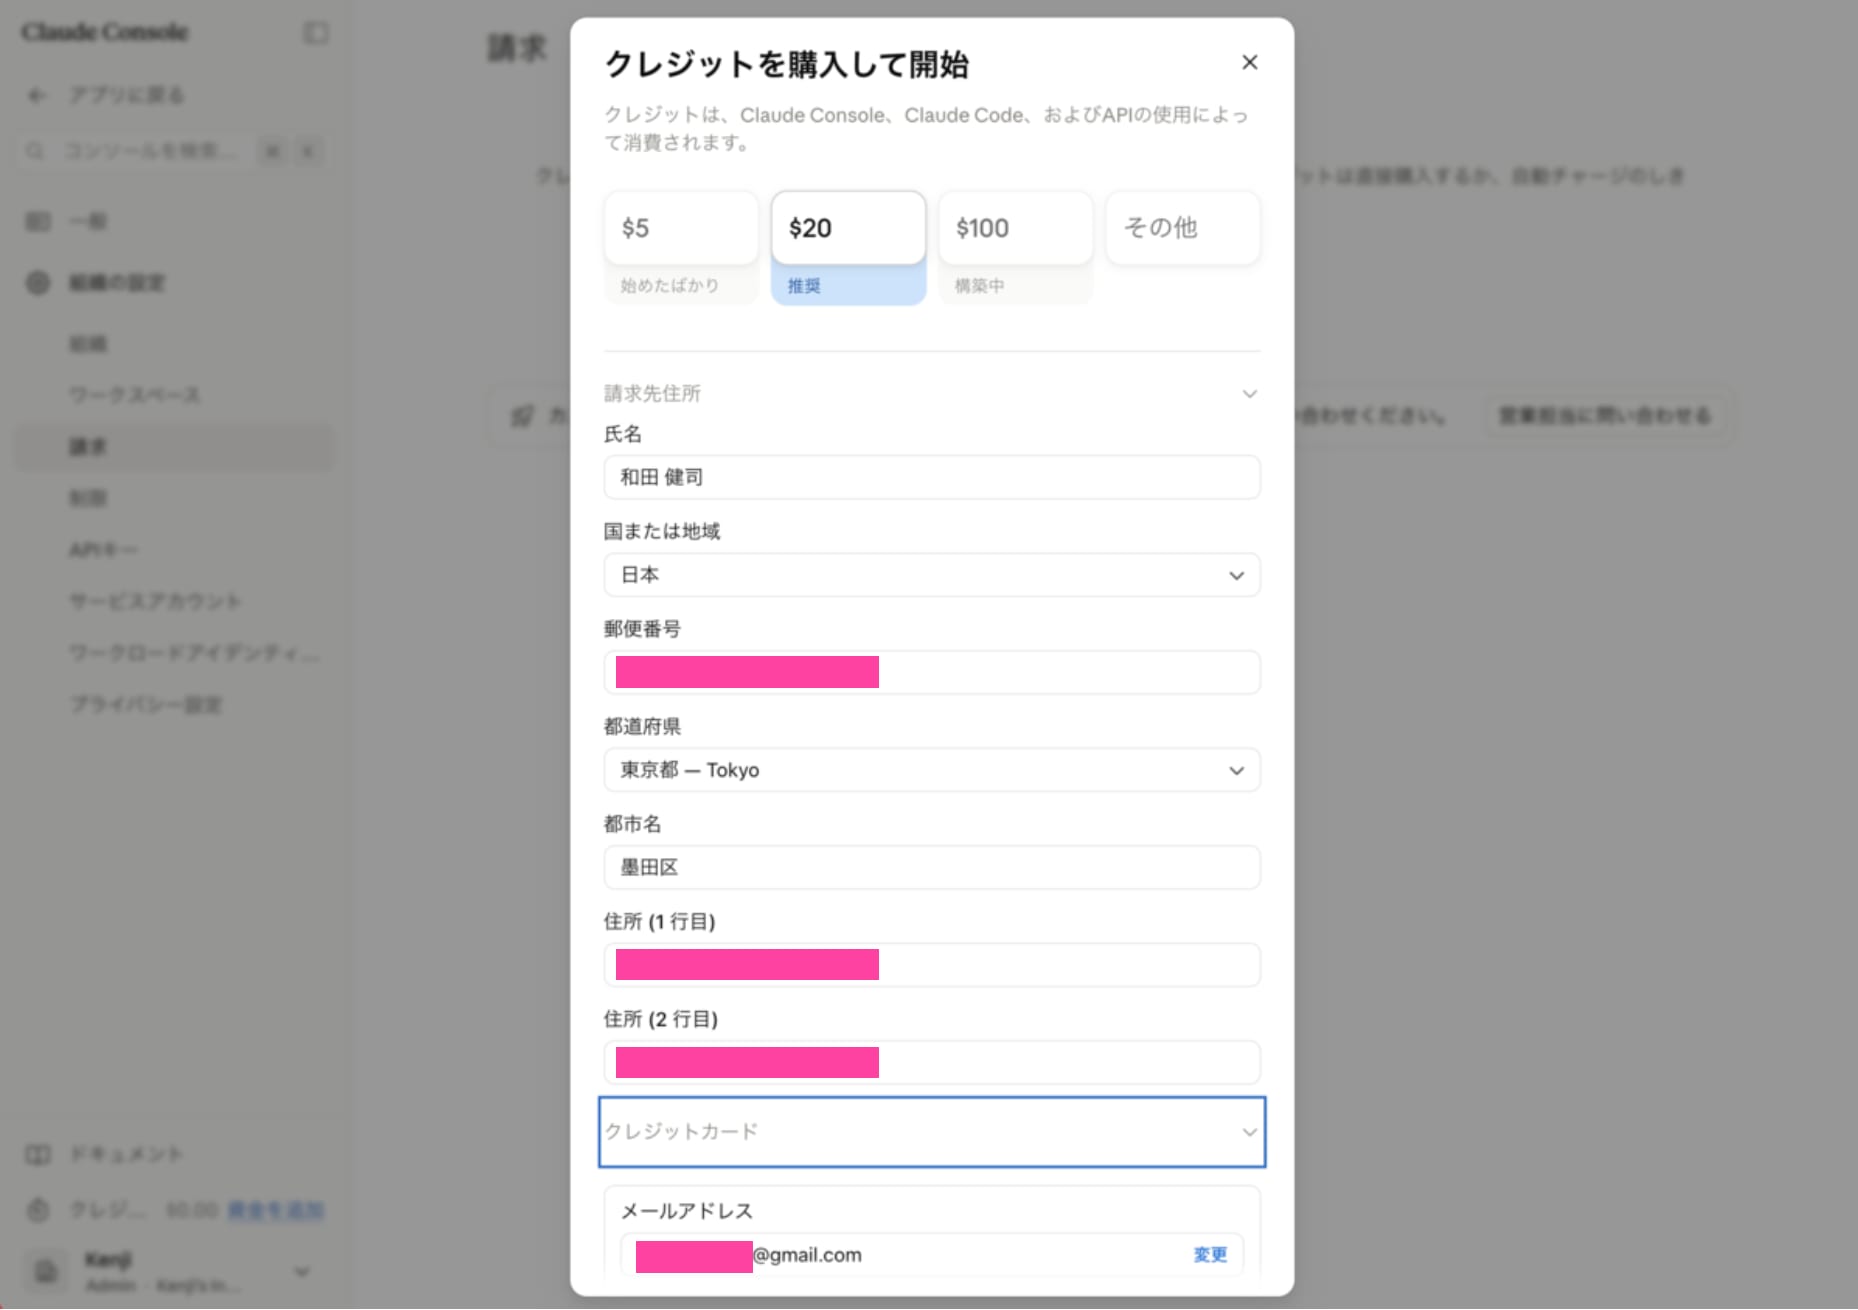
Pressing the "Purchase credits" button displays a modal.
The purchase amount can be selected from $5 / $20 / $100 / other, and this time $20, the recommended amount, was selected. Next, expand "Billing address" and enter the address.
Step 3: Enter card information and confirm the purchase details
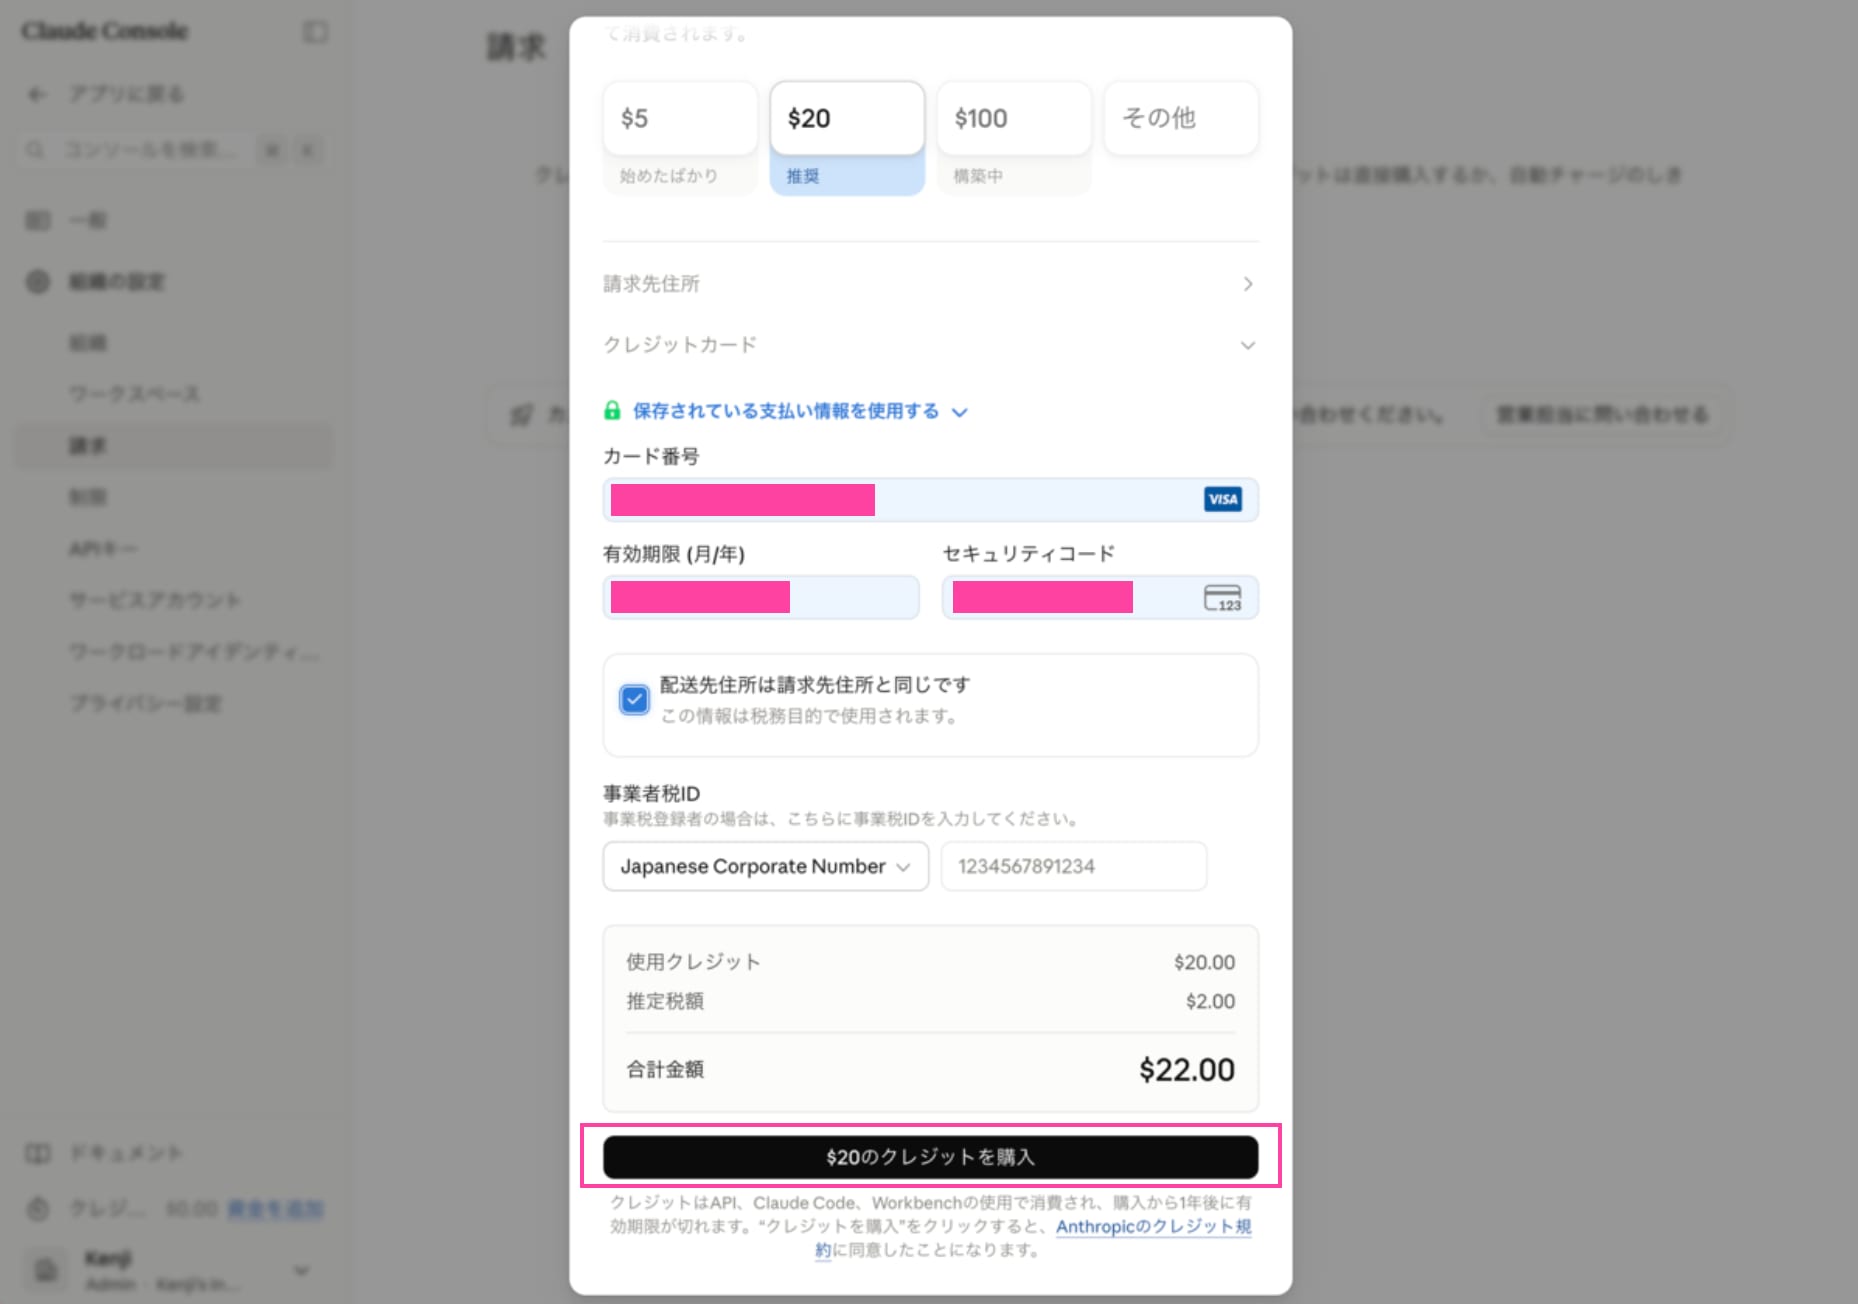
After entering the billing address, the card information input field expands. Enter the credit card information. "Shipping address is the same as billing address" is ON by default and is used for tax purposes. "Business tax ID" is an optional field; enter it here if you are a business tax registrant.
Once entry is complete, a summary of the purchase details is displayed.
- Credits used: $20.00
- Estimated tax: $2.00
- Total amount: $22.00
Confirm the details and press the "Purchase $20 of credits" button.
Step 4: Wait for the purchase to process
After pressing the purchase button, a modal saying "Processing purchase..." is displayed.

Step 5: Confirm purchase completion
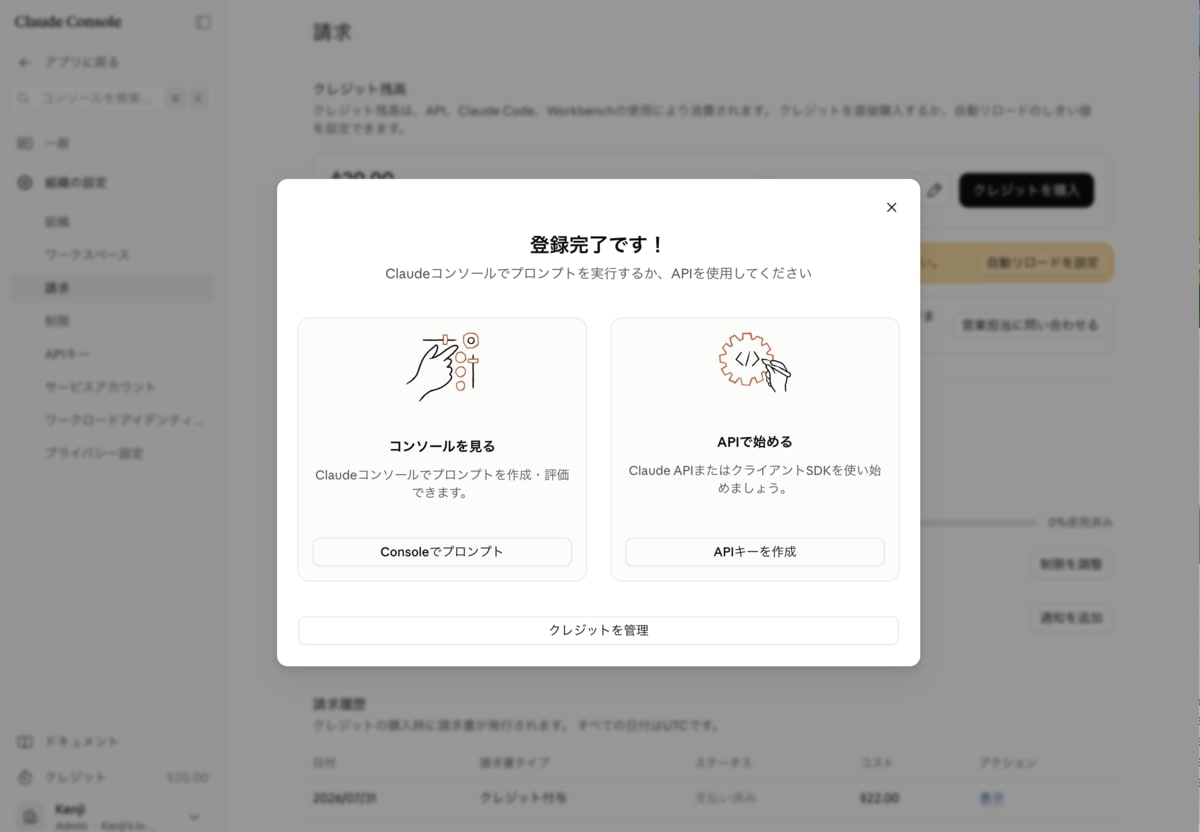
When processing is complete, a modal saying "You're all set!" is displayed. Selecting "View console" takes you to a screen where you can create and evaluate prompts in the Claude console, and selecting "Get started with API" takes you to a screen where you can start using the Claude API or client SDK.
The credit balance on the billing page is also reflected with the purchase amount ($20.00), and a purchase record ($22.00 · Paid) is added to the billing history.
Creating an API Key
Step 6: Navigate to the API keys page
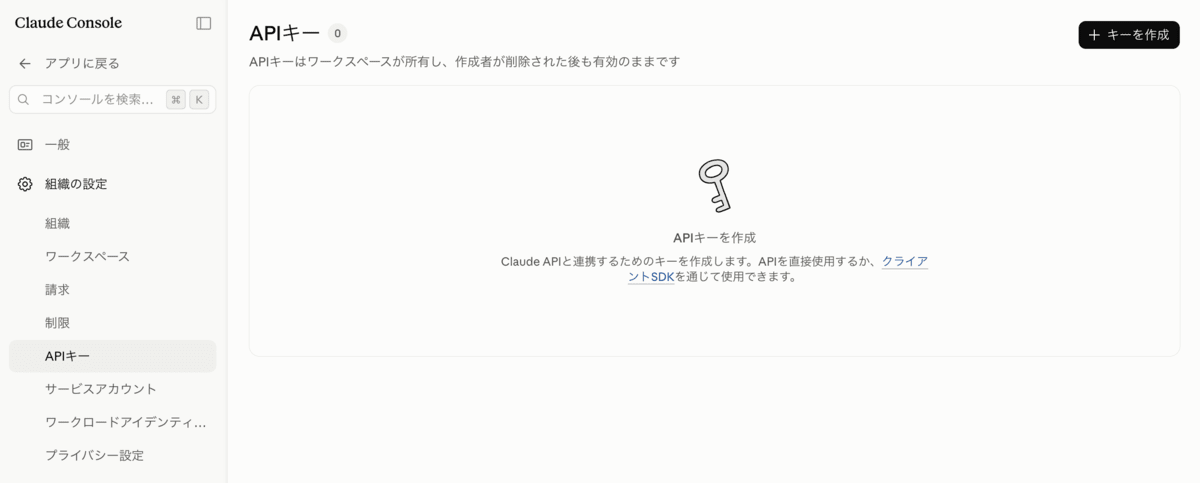
Opening "API Keys" from the left menu shows the state where no keys exist yet.
API keys are owned by the workspace and remain valid even after the creator is deleted
Proceed to creation from the "Create key" button in the upper right.
Step 7: Create an API key
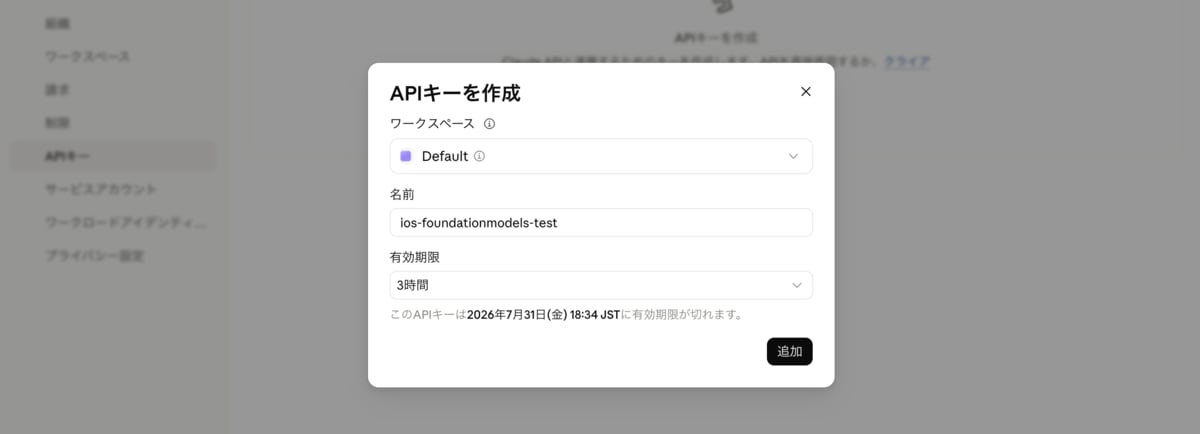
In the modal, select the workspace to associate the key with (in this case Default), set a name that indicates its purpose, and select the expiration period from the dropdown.
This time, for validation of this library, the name was set to ios-foundationmodels-test and the expiration was set to the short duration of "3 hours". Since it is not ideal from a security standpoint to keep issuing long-lived keys for validation purposes, it is recommended to set a short expiration so that the key expires as soon as the purpose is complete.
Step 8: Save the API key
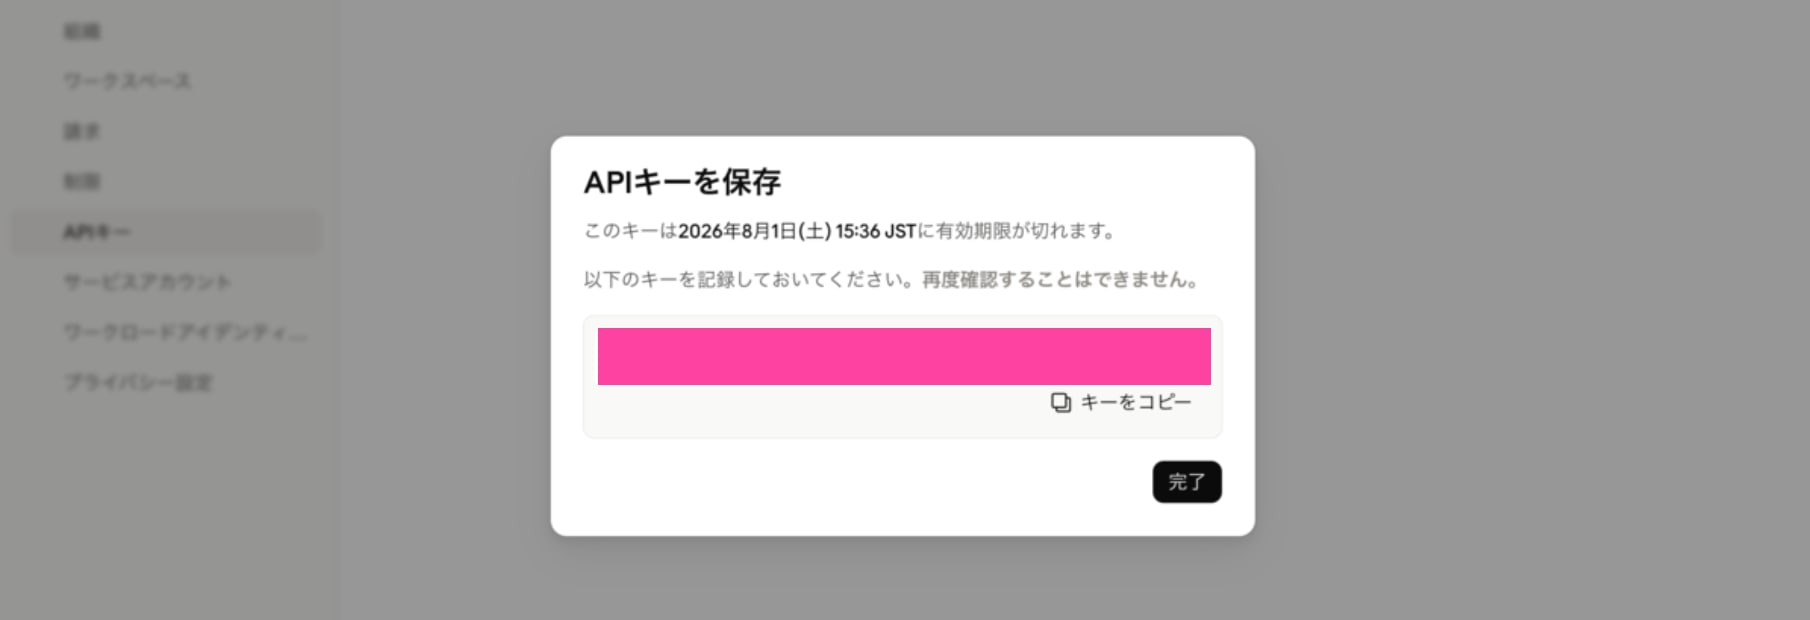
Pressing "Add" issues the key and displays the "Save your API key" modal. Once this modal is closed, the API key cannot be viewed again. Since the full key can only be viewed on this screen, be sure to copy it and store it in a safe place (such as 1Password or Keychain).
After viewing, close the modal with "Done".
Summary
The flow from purchasing credits to issuing an API key in the Claude Console is as follows.
- Purchase credits on the billing page (select amount → billing address → card information → confirm purchase)
- Create a key on the API keys page (workspace → name → expiration)
- Copy the key on the screen immediately after issuance and store it safely
For validation purposes, setting a short expiration on API keys provides peace of mind. I hope this serves as a helpful reference for anyone else struggling with issuing API keys in the Claude Console.