
I Tried Applying an Upload Preset with Cloudinary's Auto Upload

This page has been translated by machine translation. View original
This is Ito from Berlin.
At Classmethod Europe (the German entity), we provide pre-sales and implementation support for Cloudinary, one of our partner SaaS products.
This article describes our verification of Auto Upload, which automatically imports images from existing external storage into Cloudinary on first access, and of applying Upload Presets at the time of that import.
If a preset can apply format conversion and maximum size limits, the original image can be made lighter at the moment it is imported, which also helps reduce storage consumption.
What is Auto Upload?
To use Auto Upload, you configure a mapping that associates a folder (prefix) on Cloudinary with the URL of an external server.
When a request comes in for a URL on that path, Cloudinary looks for the asset in your account. If the asset does not exist yet, Cloudinary fetches it from the remote source, stores it in your account, applies transformations, and delivers it.
The advantage is that you don't need to migrate assets in advance, and only the assets that are actually accessed are imported lazily.
👉🏻 The basic setup procedure (an example using S3 as the remote source) is explained in this article.
What are Upload Presets?
They are a "configuration template feature" that lets you predefine how assets are processed when uploaded to Cloudinary (destination folder, resizing, naming rules, format conversion, and so on).
Just by specifying the preset name when uploading via the API, the Media Library, and so on, you can apply the whole set of settings.
👉🏻 Concrete use cases and the difference between Signed and Unsigned are explained in this article.
How to configure Auto Upload Mapping
Add it from Settings → Upload → Auto Upload Mapping in the Console. To verify two methods this time, I set up two mappings with different target folders.
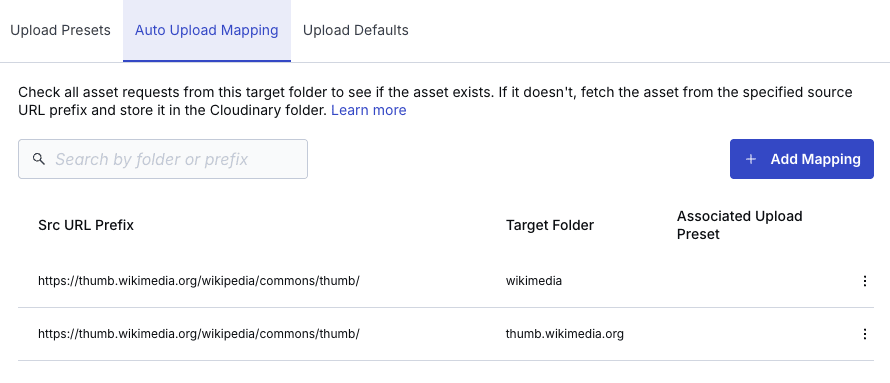
The target folder affects the image URL you call.
| Item | Src URL prefix | Target folder |
|---|---|---|
| Setting 1 | https://thumb.wikimedia.org/wikipedia/commons/thumb/ |
wikimedia |
| Setting 2 | Same as above | thumb.wikimedia.org |
How to apply a preset to Auto Upload
There are two ways to apply a preset to images imported via Auto Upload.
Method 1: A preset with the same name as the target folder
If you give a preset (created as Unsigned) the same name as the mapping's Target Folder, it is automatically applied to imports through that mapping.
Conversely, you cannot choose and specify a preset with a different name. Simply creating a preset with the same name makes it appear under "Associated Upload Preset" on the Auto Upload Mapping settings screen shown earlier, and it is applied automatically.
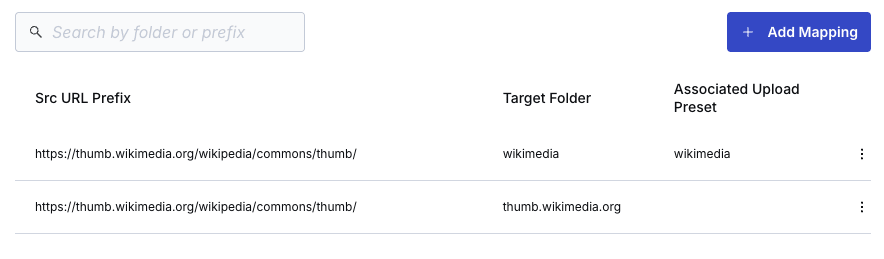
If you want to apply a common preset to a large number of Auto Upload mappings, the next method is more suitable than this one.
Method 2: The API default preset
In Settings → Upload → Upload Defaults, you can specify a default upload preset for each of image, video, and raw.
By setting the default preset for API Image this time, it is applied by default not only to API uploads but also to Auto Upload images.
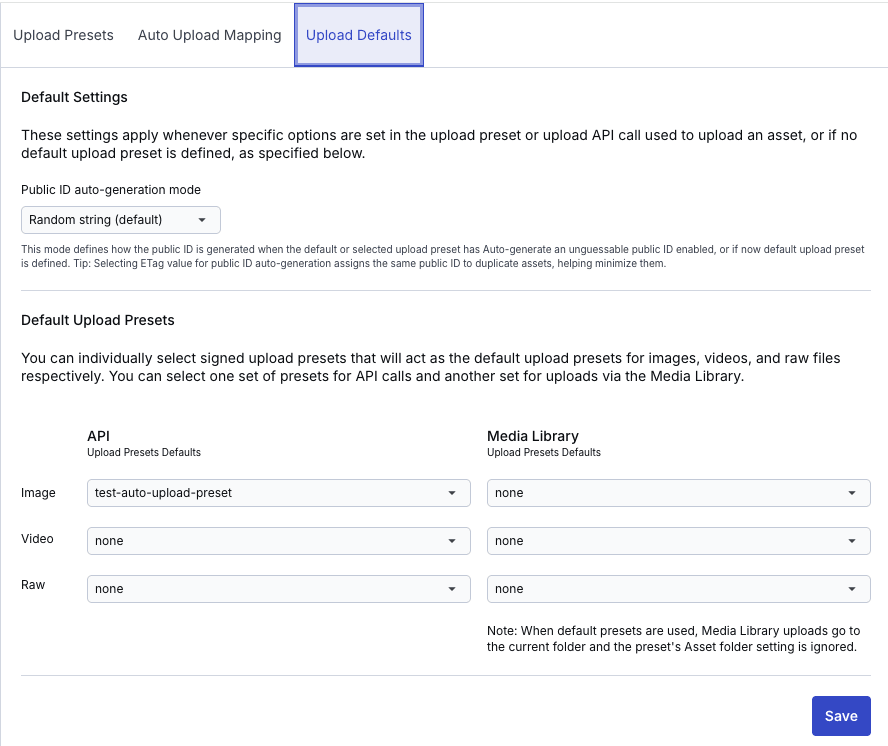
Next, let's verify whether the preset is actually applied to Auto Upload with each method.
Verification
Method 1: A preset per mapping
Since the preset name must be the same as the Target folder, I created a preset named "wikimedia" this time.
With this method, you must select Unsigned as the Signing mode.
The import settings are as follows. To match normal Auto Upload behavior, the file name is used as the public ID, and no unique random suffix is added.
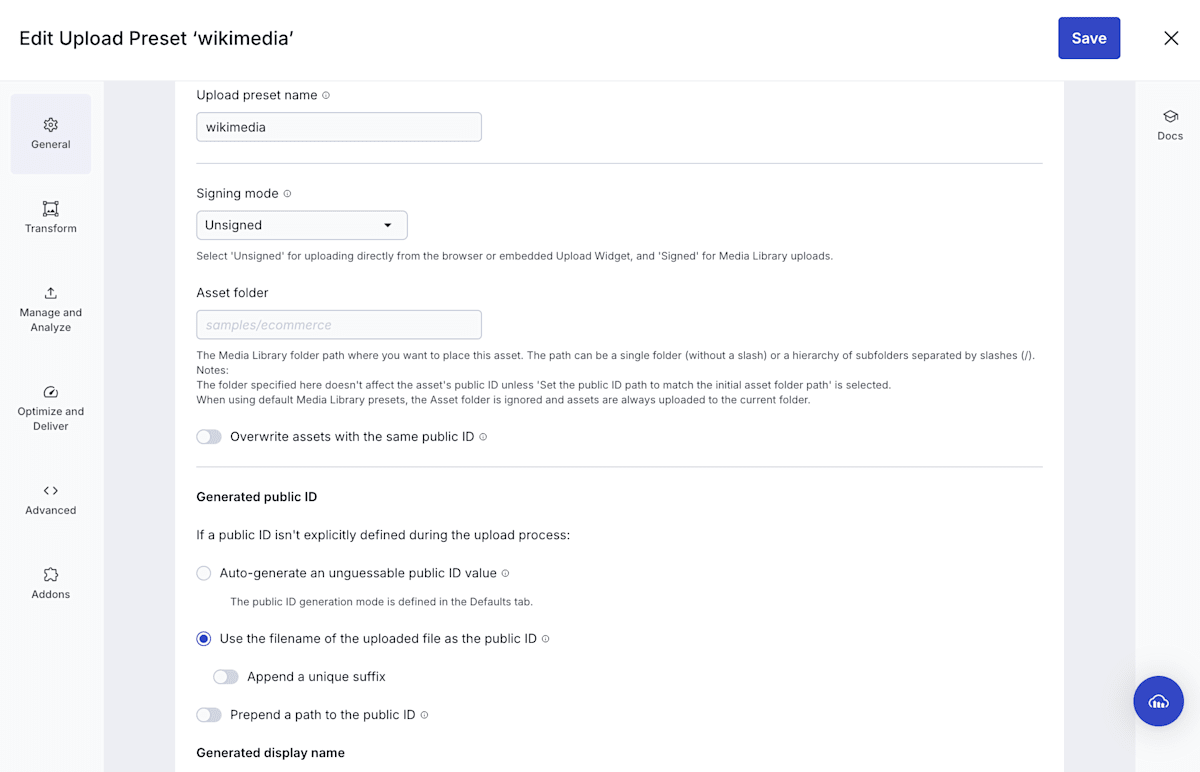
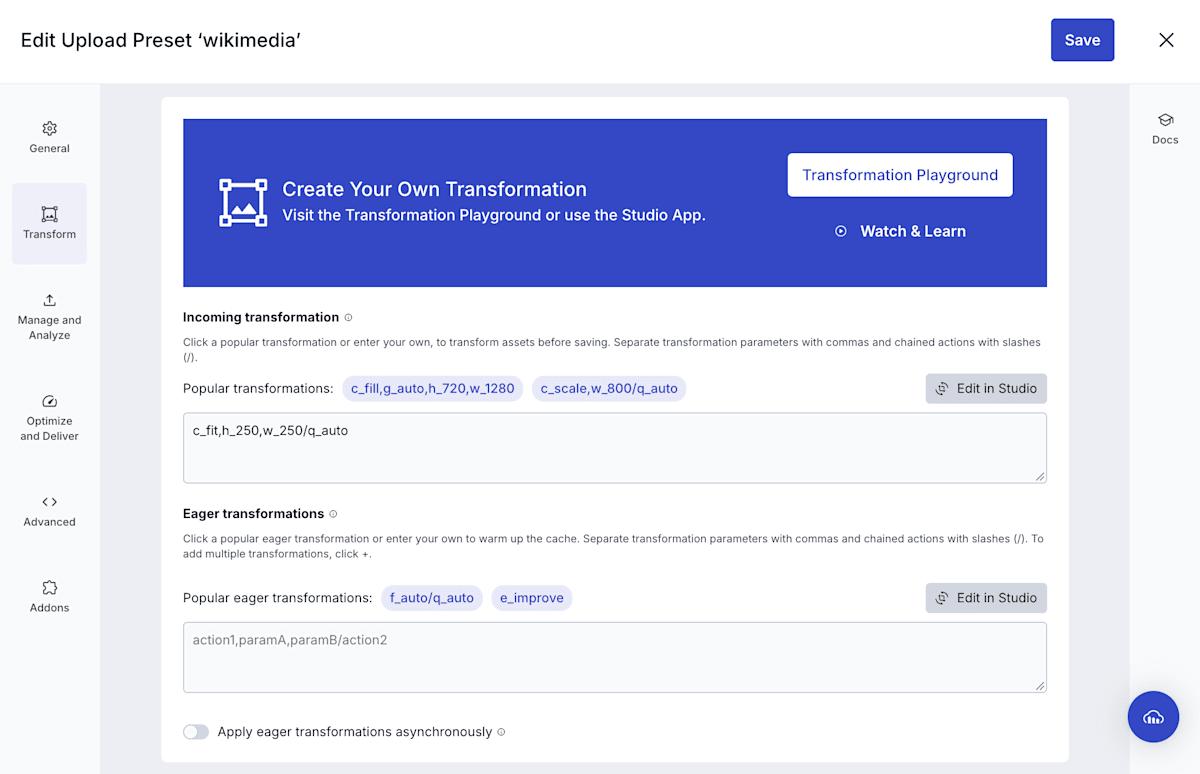
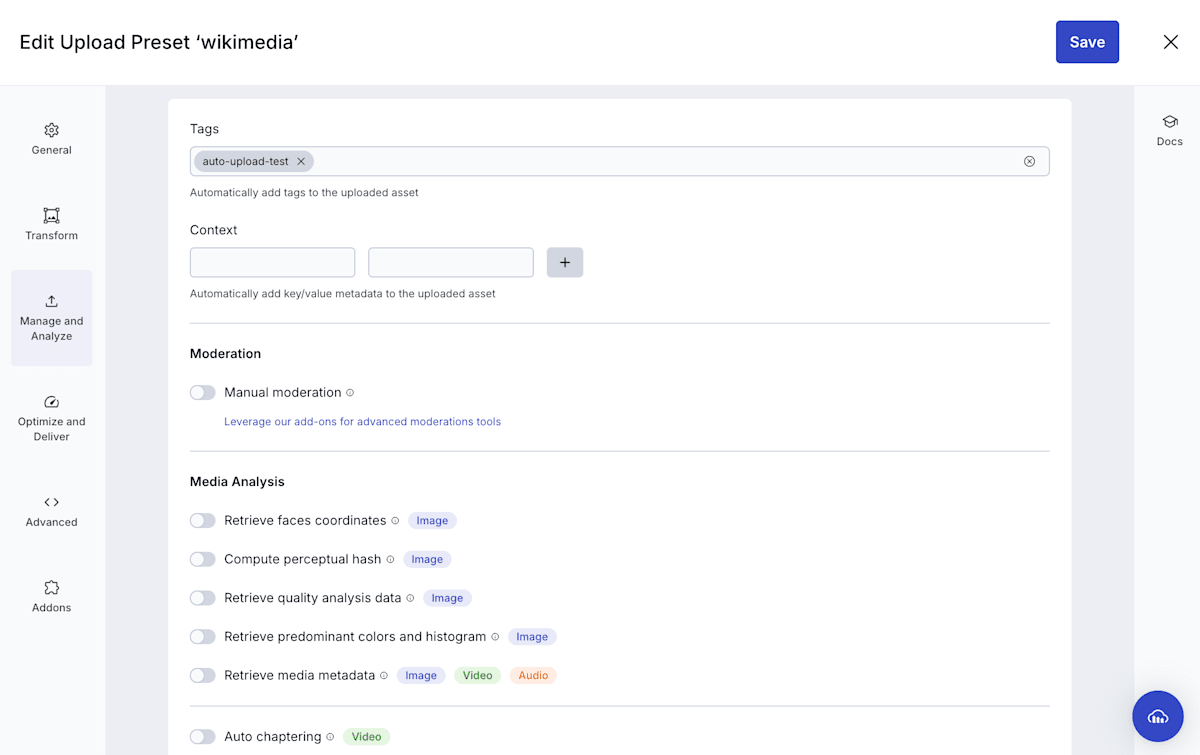
Set the following for the transformation and tags, then save.
- Transform → Incoming transformation:
c_fit,h_250,w_250/q_auto - Manage and Analysis → Tags:
auto-upload-test
As a result, at the point of import into Cloudinary, a transformation that limits width and height to 250px or less and optimizes quality is applied, and the tag is added.
◼️ Checking the delivered image
The image URL called on Cloudinary has the following format.
https://res.cloudinary.com/<cloud_name>/image/upload/- Cloudinary's domain and pathwikimedia/- The target folder specified in the mappingpath/to/image.jpg- The path after the mapped prefix
I used samples from Wikimedia Commons as the remote test images. The first access triggers fetching and storing. The ?utm_... at the end of the URL is a tracking parameter, so remove it.
# Wikipedia 上の画像URL:
https://thumb.wikimedia.org/wikipedia/commons/thumb/5/58/Shiba_inu_taiki.jpg/960px-Shiba_inu_taiki.jpg?utm_source=de.wikipedia.org&utm_campaign=imageinfo&utm_content=thumbnail
→ サイズは 960 x 1131px、159.95 KiB

https://thumb.wikimedia.org/wikipedia/commons/thumb/7/78/Kamikochi_Marsh.jpg/960px-Kamikochi_Marsh.jpg?utm_source=de.wikipedia.org&utm_campaign=imageinfo&utm_content=thumbnail
→ サイズは 960 x 984px、333.98 KiB

# Cloudinary Auto Upload で指定する画像URL:
https://res.cloudinary.com/<cloud_name>/image/upload/wikimedia/5/58/Shiba_inu_taiki.jpg/960px-Shiba_inu_taiki.jpg

https://res.cloudinary.com/<cloud_name>/image/upload/wikimedia/7/78/Kamikochi_Marsh.jpg/960px-Kamikochi_Marsh.jpg
When I opened the Cloudinary image URLs, both were displayed transformed to a maximum of 250px in width and height.
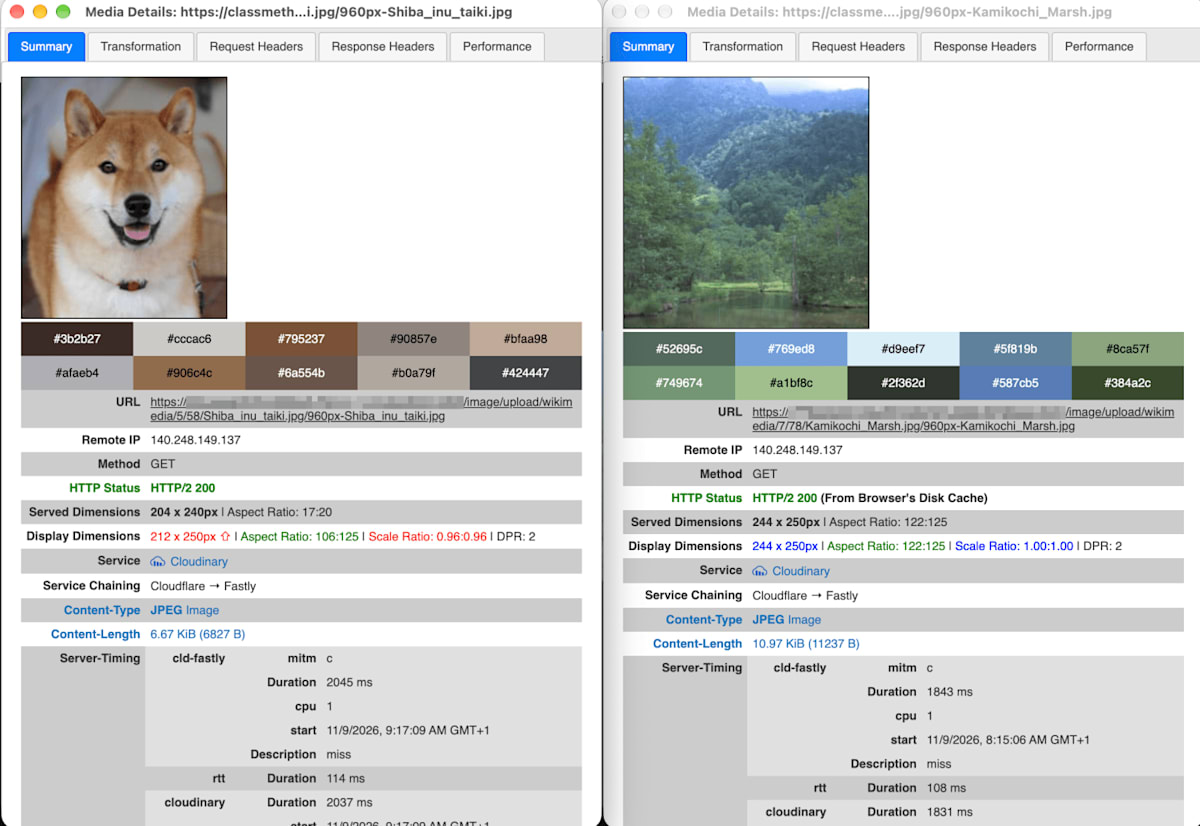
※ I used Cloudinary's Media Inspector (Chrome extension) for the check.
◼️ Checking the Media Library
On Cloudinary, under the wikimedia folder, I confirmed that the imported originals had been converted to 250px or less and that the auto-upload-test tag had been added.
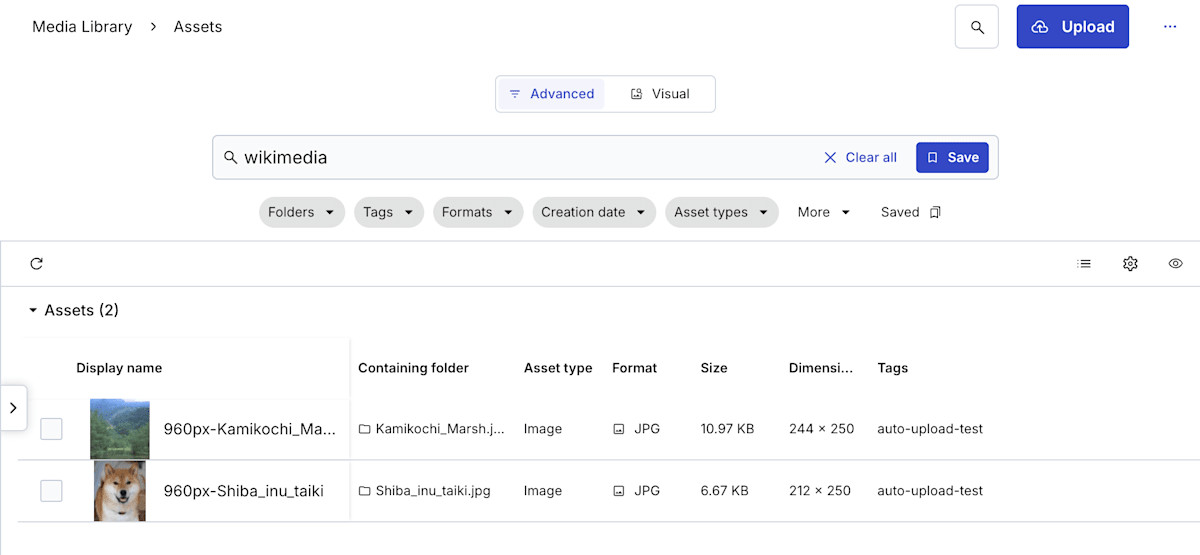
The verification confirmed that the preset was applied as intended, and that the original image was made lighter at the same time it was imported.
Method 2: The default preset
I prepared a preset with the same transformation and tags as in Method 1. However, only Signed presets can be used as the default preset, so this one is created with the Signing mode set to Signed. The preset name is arbitrary.
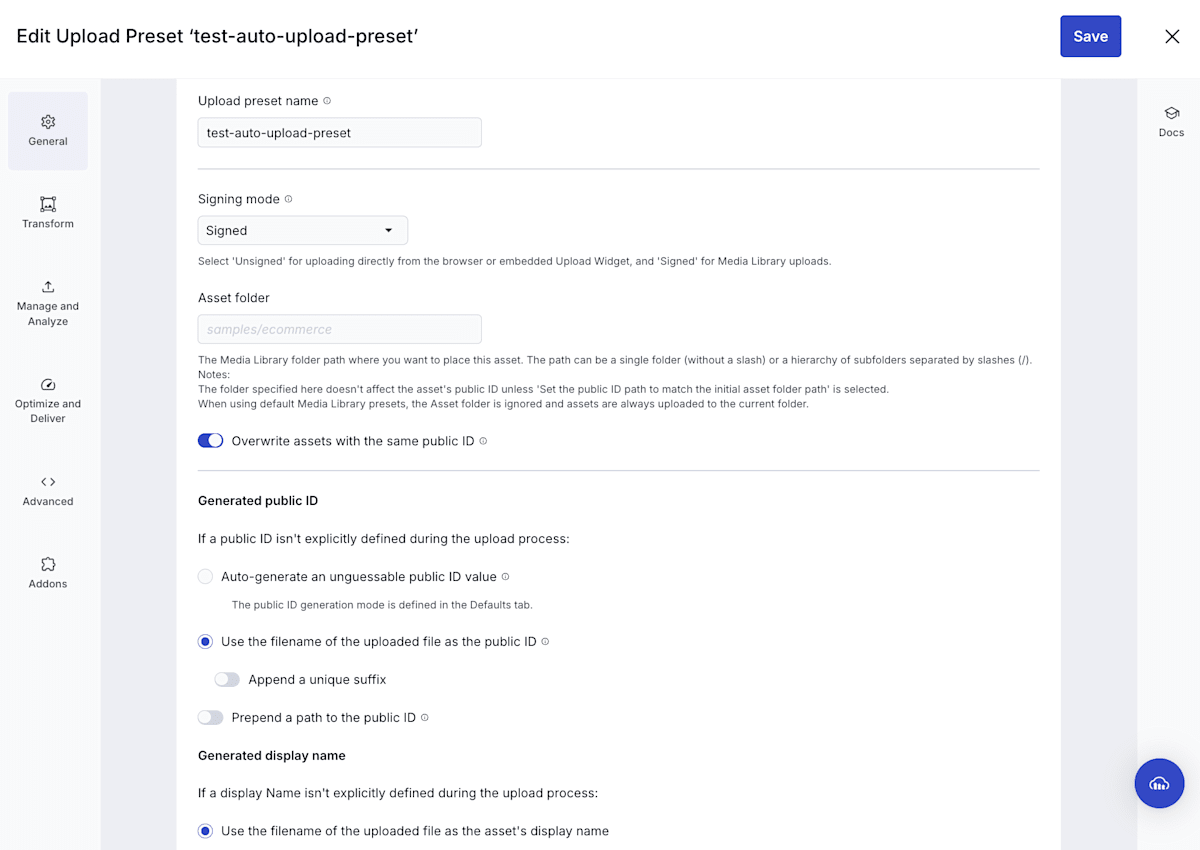
After creating it, specify it as the API image default in Settings → Upload → Upload Defaults.
◼️ Checking the delivered image
To verify the Setting 2 mapping, I access the images via the target folder thumb.wikimedia.org.
# Cloudinary Auto Upload で指定する画像URL:
https://res.cloudinary.com/<cloud_name>/image/upload/thumb.wikimedia.org/5/58/Shiba_inu_taiki.jpg/960px-Shiba_inu_taiki.jpg

https://res.cloudinary.com/<cloud_name>/image/upload/thumb.wikimedia.org/7/78/Kamikochi_Marsh.jpg/960px-Kamikochi_Marsh.jpg
Because the same Incoming Transformation was set, the result in the browser was the same as before.
◼️ Checking the Media Library
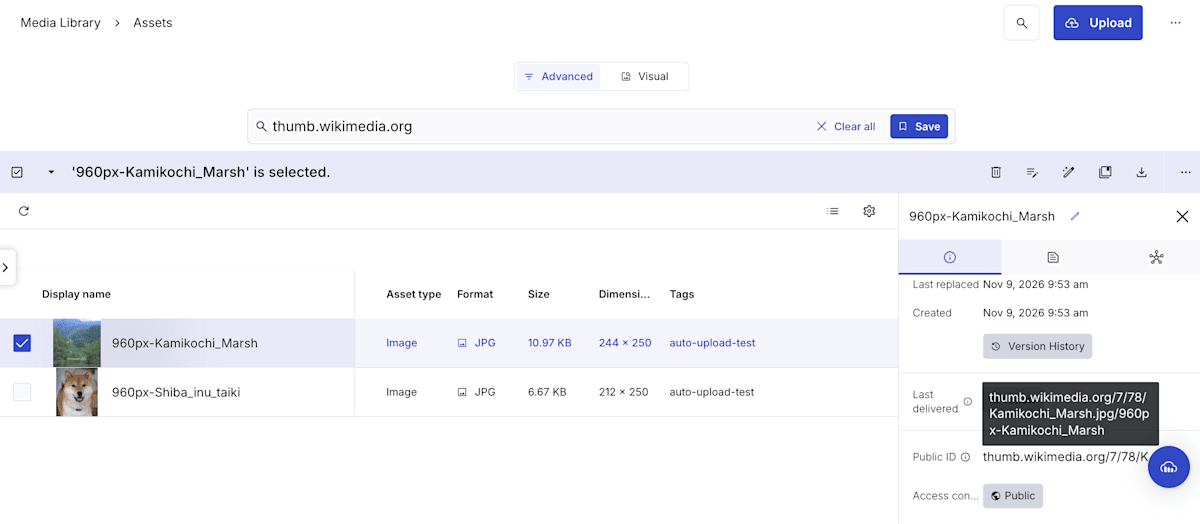
This time, under the thumb.wikimedia.org folder, I could confirm the size and tags just as before.
◼️ Checking an API upload
To confirm the behavior as the default preset, I also tried a normal API upload.
import pprint
import cloudinary
import cloudinary.uploader
cloudinary.config(
    cloud_name="xxxxx",
    api_key="123456789012345",
    api_secret="xxxxxxxxxxxxxxxxxxxxxxxxxxx",
    secure=True
    )
SOURCE = "https://thumb.wikimedia.org/wikipedia/commons/thumb/7/78/Kamikochi_Marsh.jpg/960px-Kamikochi_Marsh.jpg?utm_source=de.wikipedia.org" # 960 x 984px
res = cloudinary.uploader.upload(SOURCE)

pprint.pprint(res)
As a result, I confirmed that an image with width/height of 250px or less and with the tag added had been uploaded.
{'access_mode': 'public',
 'api_key': '376847451446853',
 'asset_folder': '',
 'asset_id': 'f3db1eb3deabd85fb5ddd955aef624b3',
 'bytes': 11237,
 'created_at': '2026-11-09T09:27:59Z',
 'display_name': '960px-Kamikochi_Marsh',
 'etag': 'b42a359c9f69c1f2df09c0a2411bb559',
 'format': 'jpg',
 'height': 250,
 'info': {'visual_search': {'clip': {'status': 'pending'}}},
 'original_filename': '960px-Kamikochi_Marsh',
 'pages': 1,
 'placeholder': False,
 'public_id': '960px-Kamikochi_Marsh.jpg',
 'request_id': 'e3bf16b0a60e67a78c1952fa39af3e49',
 'resource_type': 'image',
 'secure_url': 'https://res.cloudinary.com/<cloud_name>/image/upload/v1794216479/960px-Kamikochi_Marsh.jpg.jpg',
 'signature': 'dbbf55235248d763a8dd80fe01f734a6d65edb0c',
 'tags': ['auto-upload-test'],
 'type': 'upload',
 'url': 'http://res.cloudinary.com/<cloud_name>/image/upload/v1794216479/960px-Kamikochi_Marsh.jpg.jpg',
 'version': 1794216479,
 'version_id': 'd37641719d1fa97e17d0c4f4bab548ff',
 'width': 244}
The verification confirmed that even for a mapping with no associated same-name preset, the default preset is applied to Auto Upload imports.
The difference from Method 1 is that you don't need to prepare a preset for each mapping; a single default setting can be applied across the board (on the other hand, it affects all API image uploads with no preset specified, so be careful about the scope of impact).
Effects of applying a preset
If you only want to transform imported images when delivering them, you can also achieve that by embedding transformation parameters in the delivery URL, like this:
https://res.cloudinary.com/<cloud-name>/image/upload/c_fit,h_250,w_250/q_auto/wikimedia/5/58/Shiba_inu_taiki.jpg/960px-Shiba_inu_taiki.jpg
However, with this method, the original stored in Cloudinary stays at its original size, and it consumes more storage than necessary.
On the other hand, if you transform with the preset's Incoming transformation, the stored original itself is shrunk, which reduces storage.
In this verification, the transformation at import time saved a total of 476.59 KiB of Cloudinary storage.
| Original | After conversion | Effect | |
|---|---|---|---|
| Image 1 | 960 x 1131px, 159.95 KiB | 212 x 250 px, 6.67 KiB | 153.28 KiB saved |
| Image 2 | 960 x 984px, 333.98 KiB | 244 x 250 px, 10.67 KiB | 323.31 KiB saved |
The larger the remote source image, the greater the reduction effect.
One caveat: if the same image is also used for other purposes, keep the Incoming transformation to a larger size that covers all use cases, and re-transform to the required size at delivery. If you shrink it too much at import, you cannot restore it if a larger size is needed later.
Conclusion
With Auto Upload Mapping, you can import existing assets into Cloudinary in order of access, without migrating them all at once. Furthermore, by combining it with presets, you can automatically apply transformations, tags, moderation, and more at the same time as the import.
If you apply optimization, format unification, and size limits as we did here, you can design for storage reduction and save on units.
I hope this is helpful for anyone who wants to similarly deliver a large number of existing images from Cloudinary.
At Classmethod Europe, we support media delivery and back-office operations at European sites, including Cloudinary, based on our own practical operational knowledge. Please feel free to contact us.