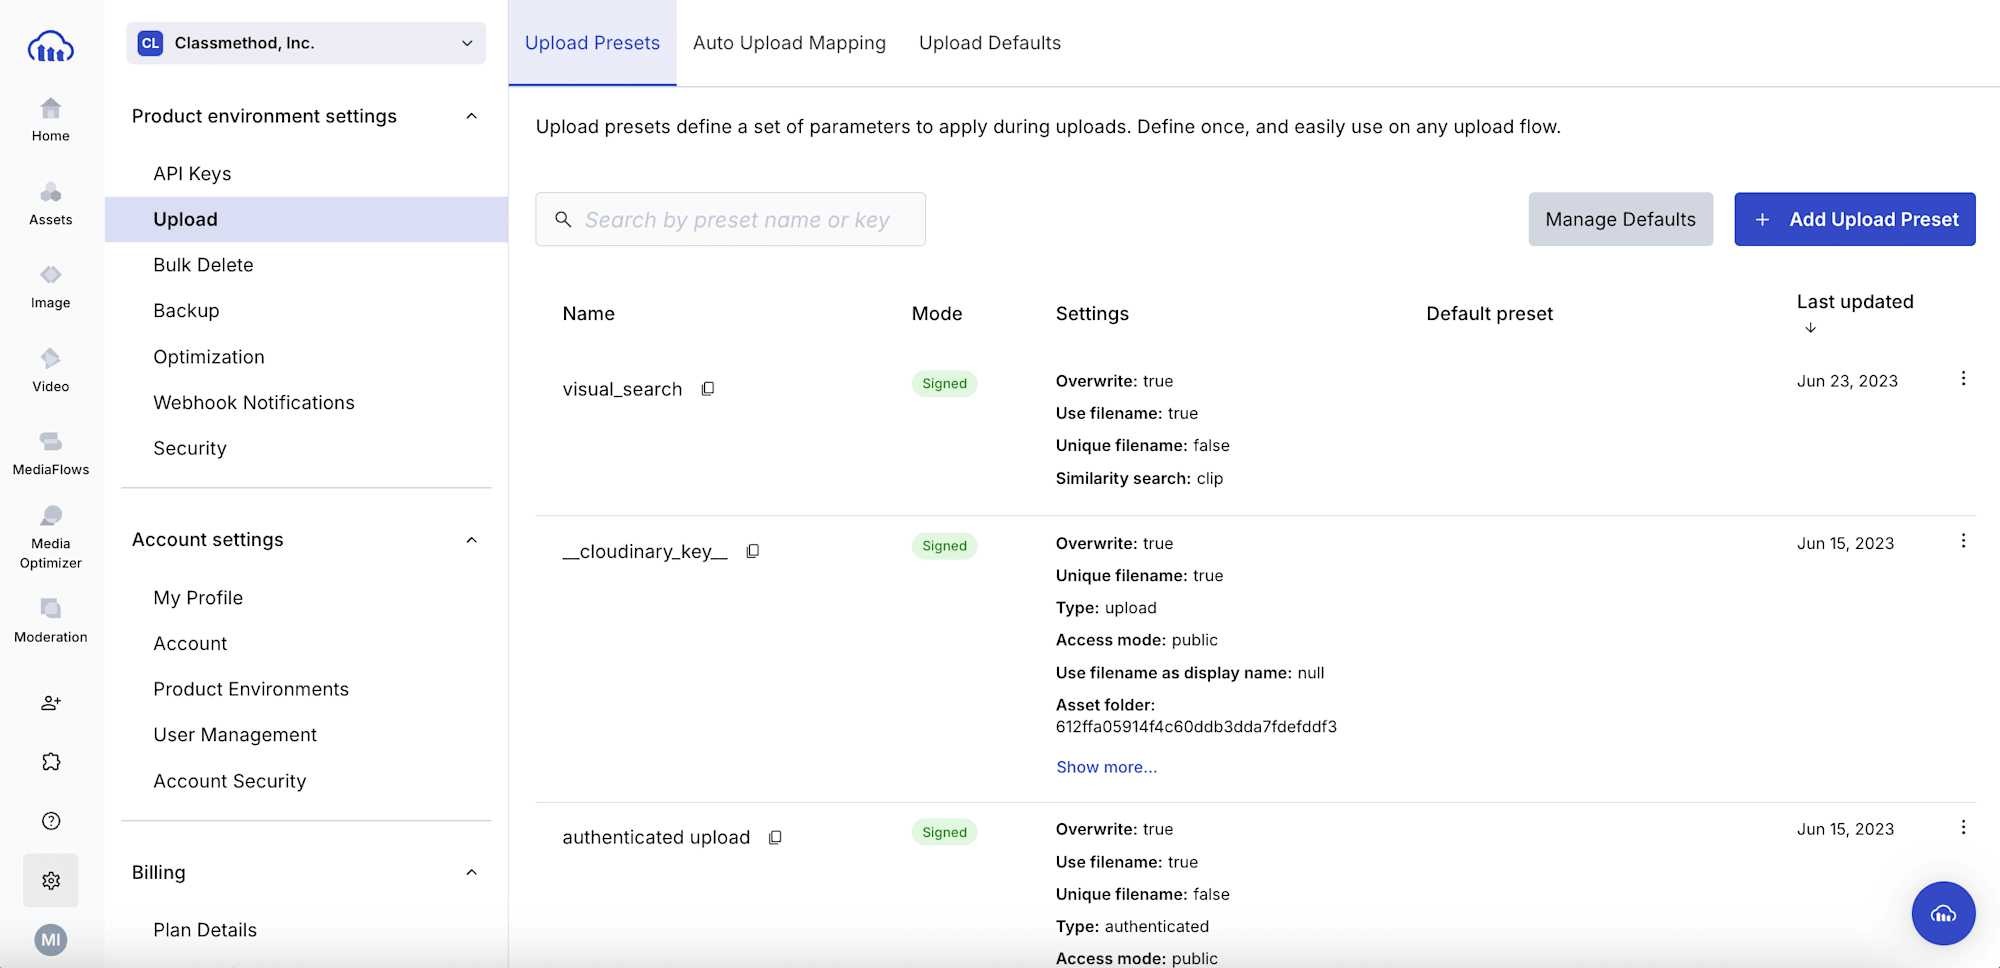
Centrally manage upload settings with Cloudinary Upload Presets
This page has been translated by machine translation. View original
This is Ito from Berlin.
When using Cloudinary, you may encounter situations like:
"It's tedious to specify folders, tags, and metadata every time I upload"
"I want to pre-generate transformations to improve delivery speed"
"I want users to upload compressed user-generated content"
The feature that solves all of these at once is Upload Presets. In this article, I'll cover everything from the concept of presets, to practical use cases, to how to choose between Signed and Unsigned.
What you'll learn from this article
- What upload presets are
- Common use cases
- The difference between Signed and Unsigned
- How to create presets and key configuration points
- Things to watch out for during implementation
What Are Upload Presets
This is a feature that allows you to pre-define a collection of settings to be applied at upload time. Once you create a preset, you simply specify the preset name when uploading, and all the defined settings will be applied automatically.
The main settings that can be included in a preset are as follows:
- Storage location: Folder, public ID naming rules, overwrite policy
- Tags & metadata: Tags, context metadata, structured metadata
- Incoming Transformations: Transformations applied to the original before saving, such as format and size
- Eager Transformations: Pre-generate transformed assets at upload time
- Asset control: Access management, allowed formats, etc.
- Notifications: Webhook notifications upon upload completion
Calling Upload Presets
Created presets can be called from any Cloudinary upload path.
| Path | How to specify the preset |
|---|---|
| Upload API / CLI | Include upload_preset in the request parameters |
| Console (Media Library) | Select the preset when uploading |
| Upload Widget | Specify with the uploadPreset option |
| Auto Upload | Create a preset with the same name as the Auto Upload mapping setting |
| Default settings for API and console | Configure individually from Console Settings > Upload > Upload Defaults |
When uploading from the console's Media Library:

Default settings:
You can specify default presets for API and console uploads separately, by image, video, or other file types.

By specifying a preset you've created once, you can unify server-side/client-side uploads, GUI manual uploads, and automatic ingestion from existing systems all under the same settings.
Preset Use Cases
1. Standardizing Asset Names and Storage Locations
When uploading to Cloudinary from multiple developers or multiple applications, there are many cases where you want the same folder structure, naming conventions, and tagging regardless of the upload path. For example, by creating a preset like the one below and setting it as the default preset for both the console and API, it will be automatically applied even to uploads that don't explicitly specify upload_preset.
- Fix the folder to
products/2026/ - Use the original filename as the public ID
- Tag all assets with
production
2. Adjusting Format and Size During Migration
When migrating a large number of existing assets to Cloudinary, you may encounter a mix of formats that cannot be displayed directly in browsers (TIFF, BMP, HEIC, RAW, etc.), or high-resolution images of tens of megabytes taken with older cameras.
By specifying Incoming Transformations in the preset, you can force conversions before saving.
For example, setting f_jpg,c_limit,w_3000,h_3000,q_auto:best will:
f_jpg: Normalize to browser-friendly JPEGc_limit,w_3000,h_3000: Limit the maximum size to 3000pxq_auto:best: Reduce bitrate while preserving visual quality
Since the original is saved in a lightened state, this has the effect of reducing storage consumption itself.
In UGC applications as well, images and videos uploaded by users may include oversized files or unexpected formats, so applying settings like these allows you to forcibly normalize them server-side before saving.
For videos, du_60 (trim to a maximum of 60 seconds) is also handy.
3. Applying AI Automatic Logic with Add-ons
Rather than specifying fixed tags, you can also run automated processing using Add-ons, such as AI-based automatic tagging.
- Automatic tagging: Automatically tag subjects using Google or Amazon Rekognition
- Moderation: Automatically review inappropriate content with Cloudinary Moderation or Amazon Rekognition AI Moderation
- Background removal: Automatically make backgrounds transparent with Cloudinary AI Background Removal
- Face detection: Detect face positions and attributes with Advanced Facial Attributes Detection for use in smart cropping, etc.
- OCR: Extract text from images and convert it to metadata
- Auto-captioning: Generate image descriptions with AI
The full list of available Add-ons can be found at Cloudinary Add-ons. The advantage is that you can apply the same processing to all upload paths without writing logic on the code side.
4. Dynamic Judgment at Upload Time with the eval Parameter
There are also cases where, rather than completely fixing the behavior of a preset, you want to dynamically change behavior based on the content of the uploaded asset. For example...
- Only resize images with a width exceeding 4000px and add a
large-sourcetag - Smart crop only images where face detection finds people, centered on the face
- Apply automatic brightness correction only to images that are too dark
- Do not apply Incoming transformation for specific formats
The eval parameter is what makes this possible. It allows you to reference analysis results at upload time (width, height, faces, etc.) in a JavaScript expression and adjust upload settings on the fly.
// Extract a value from the filename and specify it in the metadata
var parts = (resource_info.filename || "").split("_");
if (parts.length > 1) {
  upload_options.metadata = "year=" + parts[1].split(".")[0];
}
5. Improving Delivery Performance with Eager Transformations
For heavy transformations like video, on-the-fly dynamic transformation via URL parameters causes latency on the first request, so Eager Transformations for pre-generating transformations are recommended. By building them into a preset, you can pre-generate transformations at upload time.
6. Separating Settings by Project and Environment
When you want different behavior for multiple projects or environments (dev / staging / production), create multiple presets and use them accordingly. For example...
- ugc-images: For UGC, 2000px limit with Incoming Transformation, automatic moderation
- cms-articles: For CMS content entry, fixed
articles/folder, WebP generation with Eager - dev-testing: For development,
dev/folder, with auto-deletion tag
Signed and Unsigned Settings
When creating an upload preset, you choose either Signed or Unsigned.

- Signed: Used for authenticated uploads from the backend, or uploads via the Admin API or Media Library. This is also the one to use as the default upload setting.
- Unsigned: Used when you want to allow direct uploads from client-side browser or mobile apps without authentication, when using the Upload Widget, or for Auto Upload settings.
With Unsigned, anyone can upload without authentication simply by specifying the preset name, so for security reasons, the parameters available in the upload method are restricted, and appropriate pre-configuration on the preset side is required.
Note that even if the preset name becomes known, editing, deleting, or vandalizing existing assets is not possible.
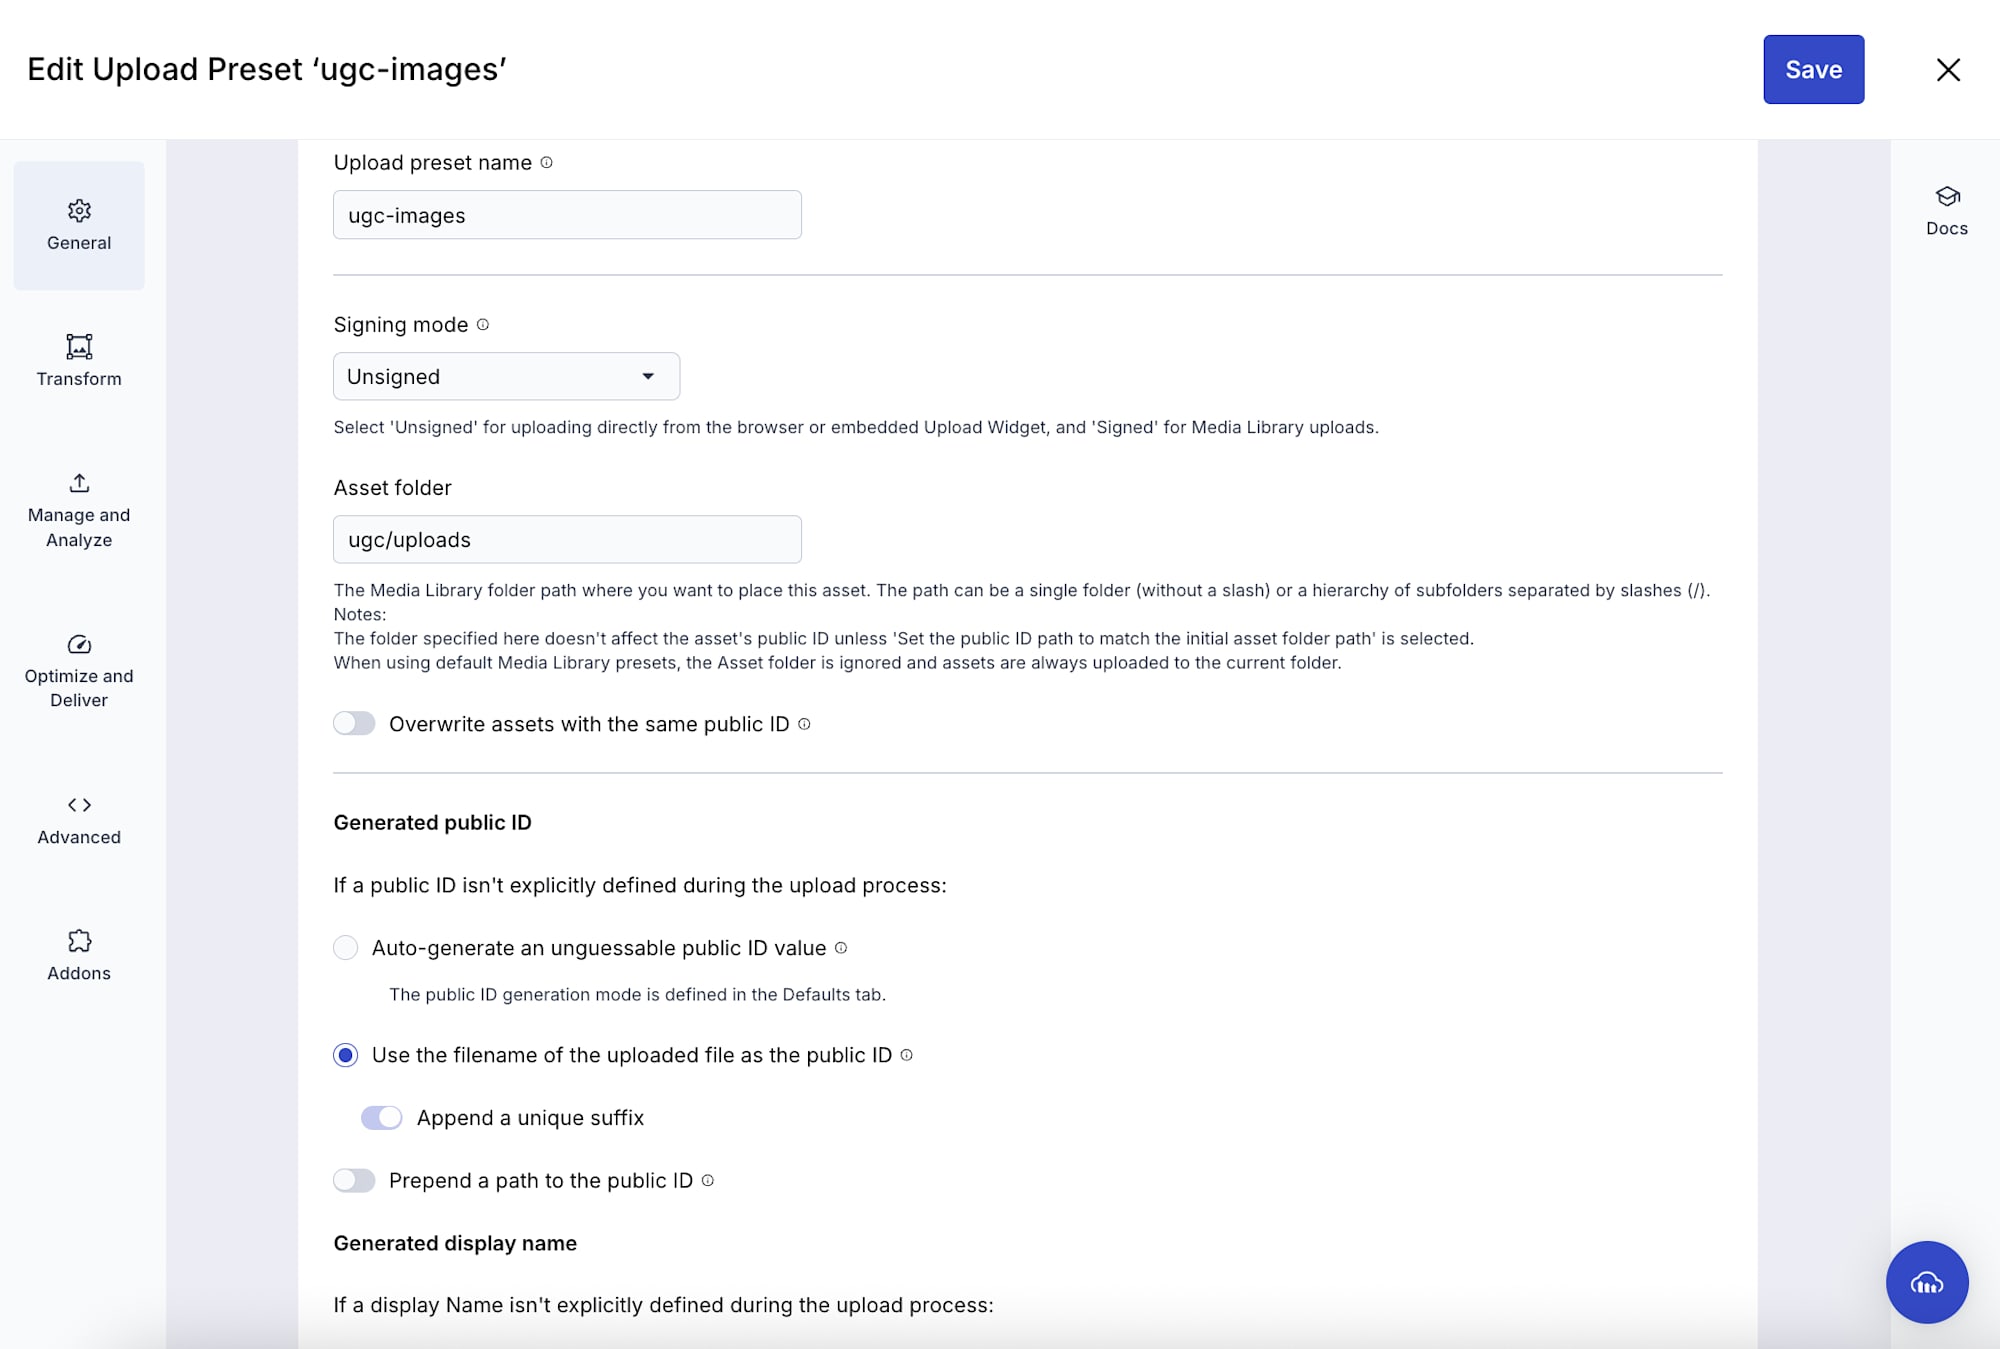
Creating One in Practice
From the console
You can easily create one from Settings → Upload → Upload Presets → Add upload preset.
From the API
You can create one using the upload_presets method of the Admin API. This is useful when you want to reproduce the same preset configuration across multiple environments.
// Node.js SDK example
cloudinary.v2.api
.create_upload_preset({
  name: 'ugc-images',
  unsigned: true,
  asset_folder: 'ugc/uploads',
  disallow_public_id: true,
  use_filename: true,
  use_filename_as_display_name: true,
  transformation: [
    { width: 2000, height: 2000, crop: 'limit' },
    { quality: 'auto:best'}
  ],
  categorization: "aws_rek_tagging",
  auto_tagging: 0.75,
  allowed_formats: "jpg,png,webp"})
.then(result=>console.log(result));
Example of running an upload using a preset
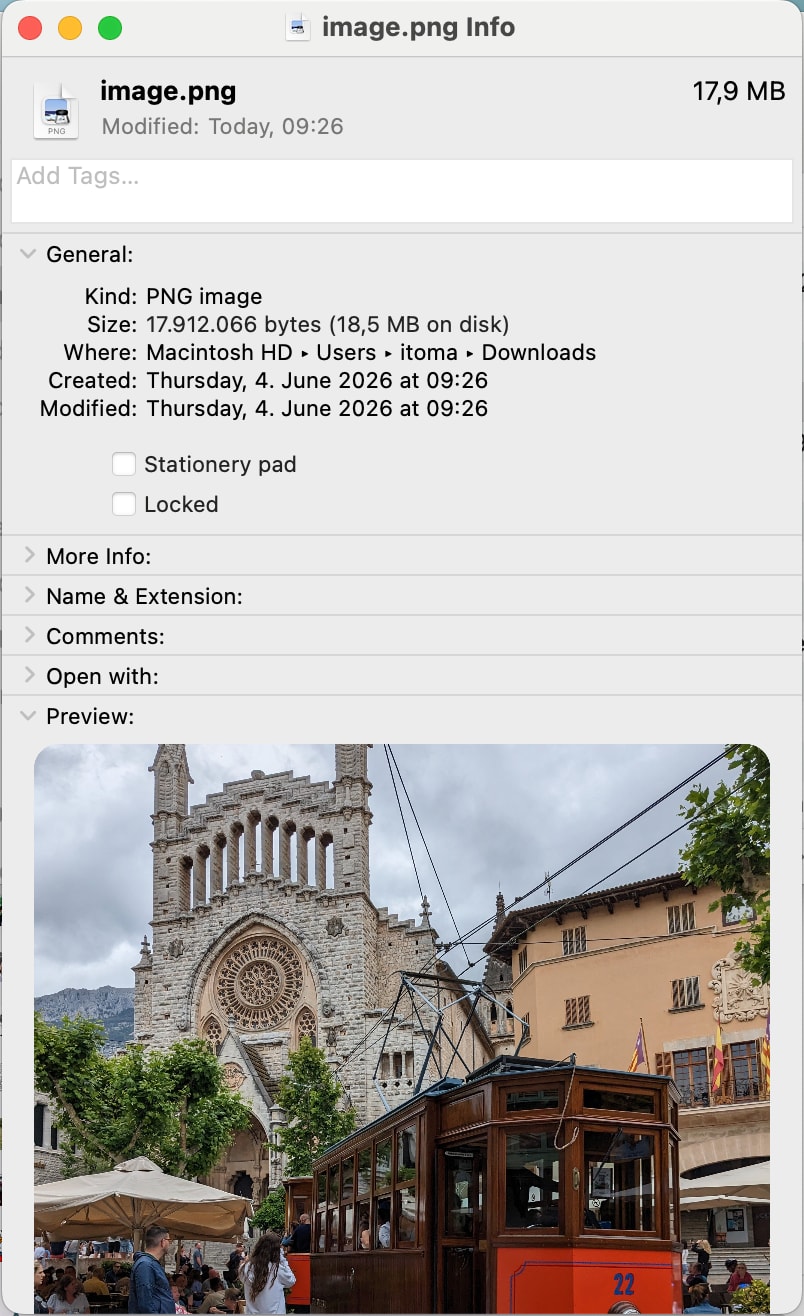
I tried uploading using the preset created above. The image used for the upload was as follows.
Using the unsigned_upload method, I specify the preset.
In this case, I also specified a public ID as an option.
cloudinary.v2.uploader
.unsigned_upload("image.png", "ugc-images", {public_id: "test"})
.then(callback);
The uploaded image had the following results:
- The folder and public ID matched the preset specification, and tags were applied
- Because
disallow_public_idis enabled in the preset, the public ID specified in the request was ignored - The transformation was applied, changing the size and file size
- Size: 3024 × 3024 px → 2000 x 2000 px
- File size: 17.9 MB → 8.09 MB
{'resources': [{'access_mode': 'public',
                'asset_folder': 'ugc/uploads',
                'asset_id': '71d5e8d406a40594a9bde0fac750b5e7',
                'backup': True,
                'bytes': 8095771,
                'created_at': '2026-06-04T07:29:58Z',
                'display_name': 'image',
                'format': 'png',
                'height': 2000,
                'public_id': 'image_cv3nuj',
                'resource_type': 'image',
                'secure_url': 'https://res.cloudinary.com/<cloud-name>/image/upload/v1780558198/image_cv3nuj.png',
                'tags': ['arch',
                         'bus',
                         'cable car',
                         'person',
                         'shoe',
                         'vehicle'],
                'type': 'upload',
                'url': 'http://res.cloudinary.com/<cloud-name>/image/upload/v1780558198/image_cv3nuj.png',
                'version': 1780558198,
                'width': 2000}]}
Things to Watch Out for During Implementation
f_auto in Eager Transformations
f_auto (a transformation parameter for format optimization) is a feature that dynamically selects the optimal format by detecting the requesting browser at delivery time, so it cannot be specified in Eager/Incoming transformations.
If you want to pre-generate transformations that include f_auto, you need to explicitly specify each format in Eager.
Please refer to Using automatic format (f_auto) in eager transformations for details.
Separate presets for images and videos when applying transformations
When including Incoming/Eager Transformations in a preset, either use only parameters that make sense for both images and videos, or create separate presets for each resource type. For example, applying a preset that includes sp_auto, which is specific to video, to an image upload will result in an error.
Security of Unsigned Presets
Given that the Unsigned preset name is exposed on the client side and third parties can upload, the overwrite option is always treated as false (even if true is specified in a request or preset, it is ignored). This is a security specification to prevent unintended overwrites.
In addition to this, the following controls can be considered:
allowed_formats: Restrict the file formats allowed for upload (e.g.,jpgonly)max_file_size: Maximum file size limit- Apply Incoming Transformations to forcibly convert before saving
disallow_public_id: Disable public_id specification during Unsigned uploads to prevent overwritesaccess_mode: Change asset delivery after upload frompublic(anyone can access via URL) toauthenticated(authentication required)
By combining these, Unsigned presets can be operated safely.
Parameter Priority
The settings in an upload preset can also be specified as options in the upload request. Therefore, when both have values, how they are applied differs depending on the Signed/Unsigned mode and the specified parameter.
| Scenario | Behavior |
|---|---|
| Signed × eager / incoming transformations | Both merged (both preset and request are applied) |
| Signed × other parameters | Request side takes priority |
Unsigned × context / metadata |
Both merged (both preset and request are applied) |
Unsigned × filename_override, public_id |
Request side takes priority (except when disallow_public_id: true is set in the preset) |
| Unsigned × other parameters | Preset side takes priority |
Differences in Behavior by Folder Mode
Depending on the account environment, Cloudinary has the following two folder modes:
- Fixed: Folder & asset path = public ID (the asset path used in the delivery URL)
- Dynamic: Default since 2024. The asset storage location and public ID are separated
Some available parameters differ depending on this mode, so caution is required.
| Dynamic | Fixed | |
|---|---|---|
| Specifying public ID naming | Specify explicitly with public_id, use the asset's filename by setting use_filename to true, or append a random string to the filename by setting unique_filename to true. Default is a random string. |
Same as Dynamic |
| Folder specification and public ID | Specify the storage location with asset_folder. Does not affect the public ID (URL). If migrating from a Fixed environment and you want to include the folder in the public ID as in Fixed, set use_asset_folder_as_public_id_prefix to true, or specify the same storage location with public_id_prefix. However, unlike Fixed environments, if the folder is moved afterward, the public ID is maintained. |
Specify the storage location with folder. This is also reflected in the public ID (URL), becoming the specified value + the value specified above. |
| Display name specification | Use the filename by setting use_filename_as_display_name to true, or use the last part of the public ID by setting it to false (e.g., ugc/uploads/img01 → "img01") |
Fixed does not have a display name feature; the console shows the last part of the public ID. |
Summary
Upload presets are an extremely useful feature for running Cloudinary in production!
- Centralized management of upload settings, allowing behavior changes without code modifications
- Using Signed / Unsigned appropriately handles both server-side and direct client uploads
- Incoming / Eager Transformations for normalization and performance improvement
- Automatic Add-on execution makes it easy to leverage AI features
- Multiple presets allow separation of behavior by environment and use case
We recommend starting small by creating one from the console and trying it out.
Classmethod provides support for Cloudinary implementation. Please feel free to contact us for consultations on design and migration, including upload preset configuration.
I hope you found this helpful!