![[Update] You can now easily connect to containers with ECS Exec from the AWS Management Console](https://images.ctfassets.net/ct0aopd36mqt/wp-thumbnail-6d4fdf3578638cab4e6e4655b3d692aa/15a803840d72679e6593006354d5766b/amazon-elastic-container-service)
[Update] You can now easily connect to containers with ECS Exec from the AWS Management Console

I want to quickly connect to containers with ECS Exec
Hello, I'm nonpi (@non____97).
Have you ever wanted to quickly connect to a container with ECS Exec? I have.
ECS Exec is very convenient for accessing containers to perform troubleshooting.
When using ECS Exec to access a shell in an ECS task container, you need to specify the connection information as follows:
			> aws ecs execute-command \
    --cluster <cluster name> \
    --task <task ID> \
    --container <container name> \
    --interactive \
    --command '/bin/sh'
Assembling these details for the container you want to connect to can be subtly difficult. I've also experienced not noticing copy-paste mistakes and failing to connect.
To reduce this hassle, some people use tools like sssh introduced in the article below.
Now, with a recent update, you can connect to containers using ECS Exec directly from the AWS Management Console.
This frees us from the hassle of manually constructing ECS Exec commands.
According to What's New, it seems connections from the AWS Management Console are made through CloudShell:
Once enabled, simply navigate to a task details page, select a container, and click "Connect" to open an interactive session through CloudShell. The console also displays the underlying AWS CLI command, which you can customize or copy to use in your local terminal.
I decided to try it out.
Hands-on Trial
Test Environment
My test environment is as follows:
![[Update] AWS Management Console can now connect to containers with ECS Exec test environment diagram.png](https://devio2024-2-media.developers.io/upload/0RqxpJ2Gm3nEdxVLGKLWmq/2025-09-05/IHBEJxFuXt3i.png)
I'm reusing the VPC that I used for BIG-IP testing in the article below.
https://dev.classmethod.jp/articles/big-ip-multi-az-ha-cluster-cloudformation/### Deploying ECS Tasks
We will deploy ECS tasks.
For deployment, we'll use the code prepared in the following article.
The parameters to specify when deploying with AWS CDK are as follows:
			export const ecsFargateBastionStackParams: EcsFargateBastionStackParams = {
  env: {
    account: process.env.CDK_DEFAULT_ACCOUNT,
    region: process.env.CDK_DEFAULT_REGION,
  },
  property: {
    vpcId: "vpc-0287f01407d1276f0",
    vpcEndpointParams: {
      vpcEndpointSubnetSelection: {
        subnetType: cdk.aws_ec2.SubnetType.PRIVATE_ISOLATED,
        availabilityZones: ["us-east-1a"],
      },
      shouldCreateEcrVpcEndpoint: true,
      shouldCreateSsmVpcEndpoint: true,
      shouldCreateLogsVpcEndpoint: true,
      shouldCreateS3VpcEndpoint: false,
    },
    ecsFargateParams: {
      ecsFargateSubnetSelection: {
        subnetType: cdk.aws_ec2.SubnetType.PRIVATE_ISOLATED,
        availabilityZones: ["us-east-1a"],
      },
      clusterName: "ecs-fargate-bastion",
      ecrRepositoryPrefix: "ecr-public-pull-through",
      repositoryName: "ecr-public-pull-through/docker/library/busybox",
      imagesTag: "stable-musl",
      desiredCount: 1,
      inboundFromEcsServiceAllowedSecurityGroupId: [
        {
          securityGroupId: "sg-0691659b4f2310e1a",
          ports: [cdk.aws_ec2.Port.allTcp(), cdk.aws_ec2.Port.allIcmp()],
        },
      ],
    },
  },
};
After successful deployment with AWS CDK, the ECS task was up and running as shown below.
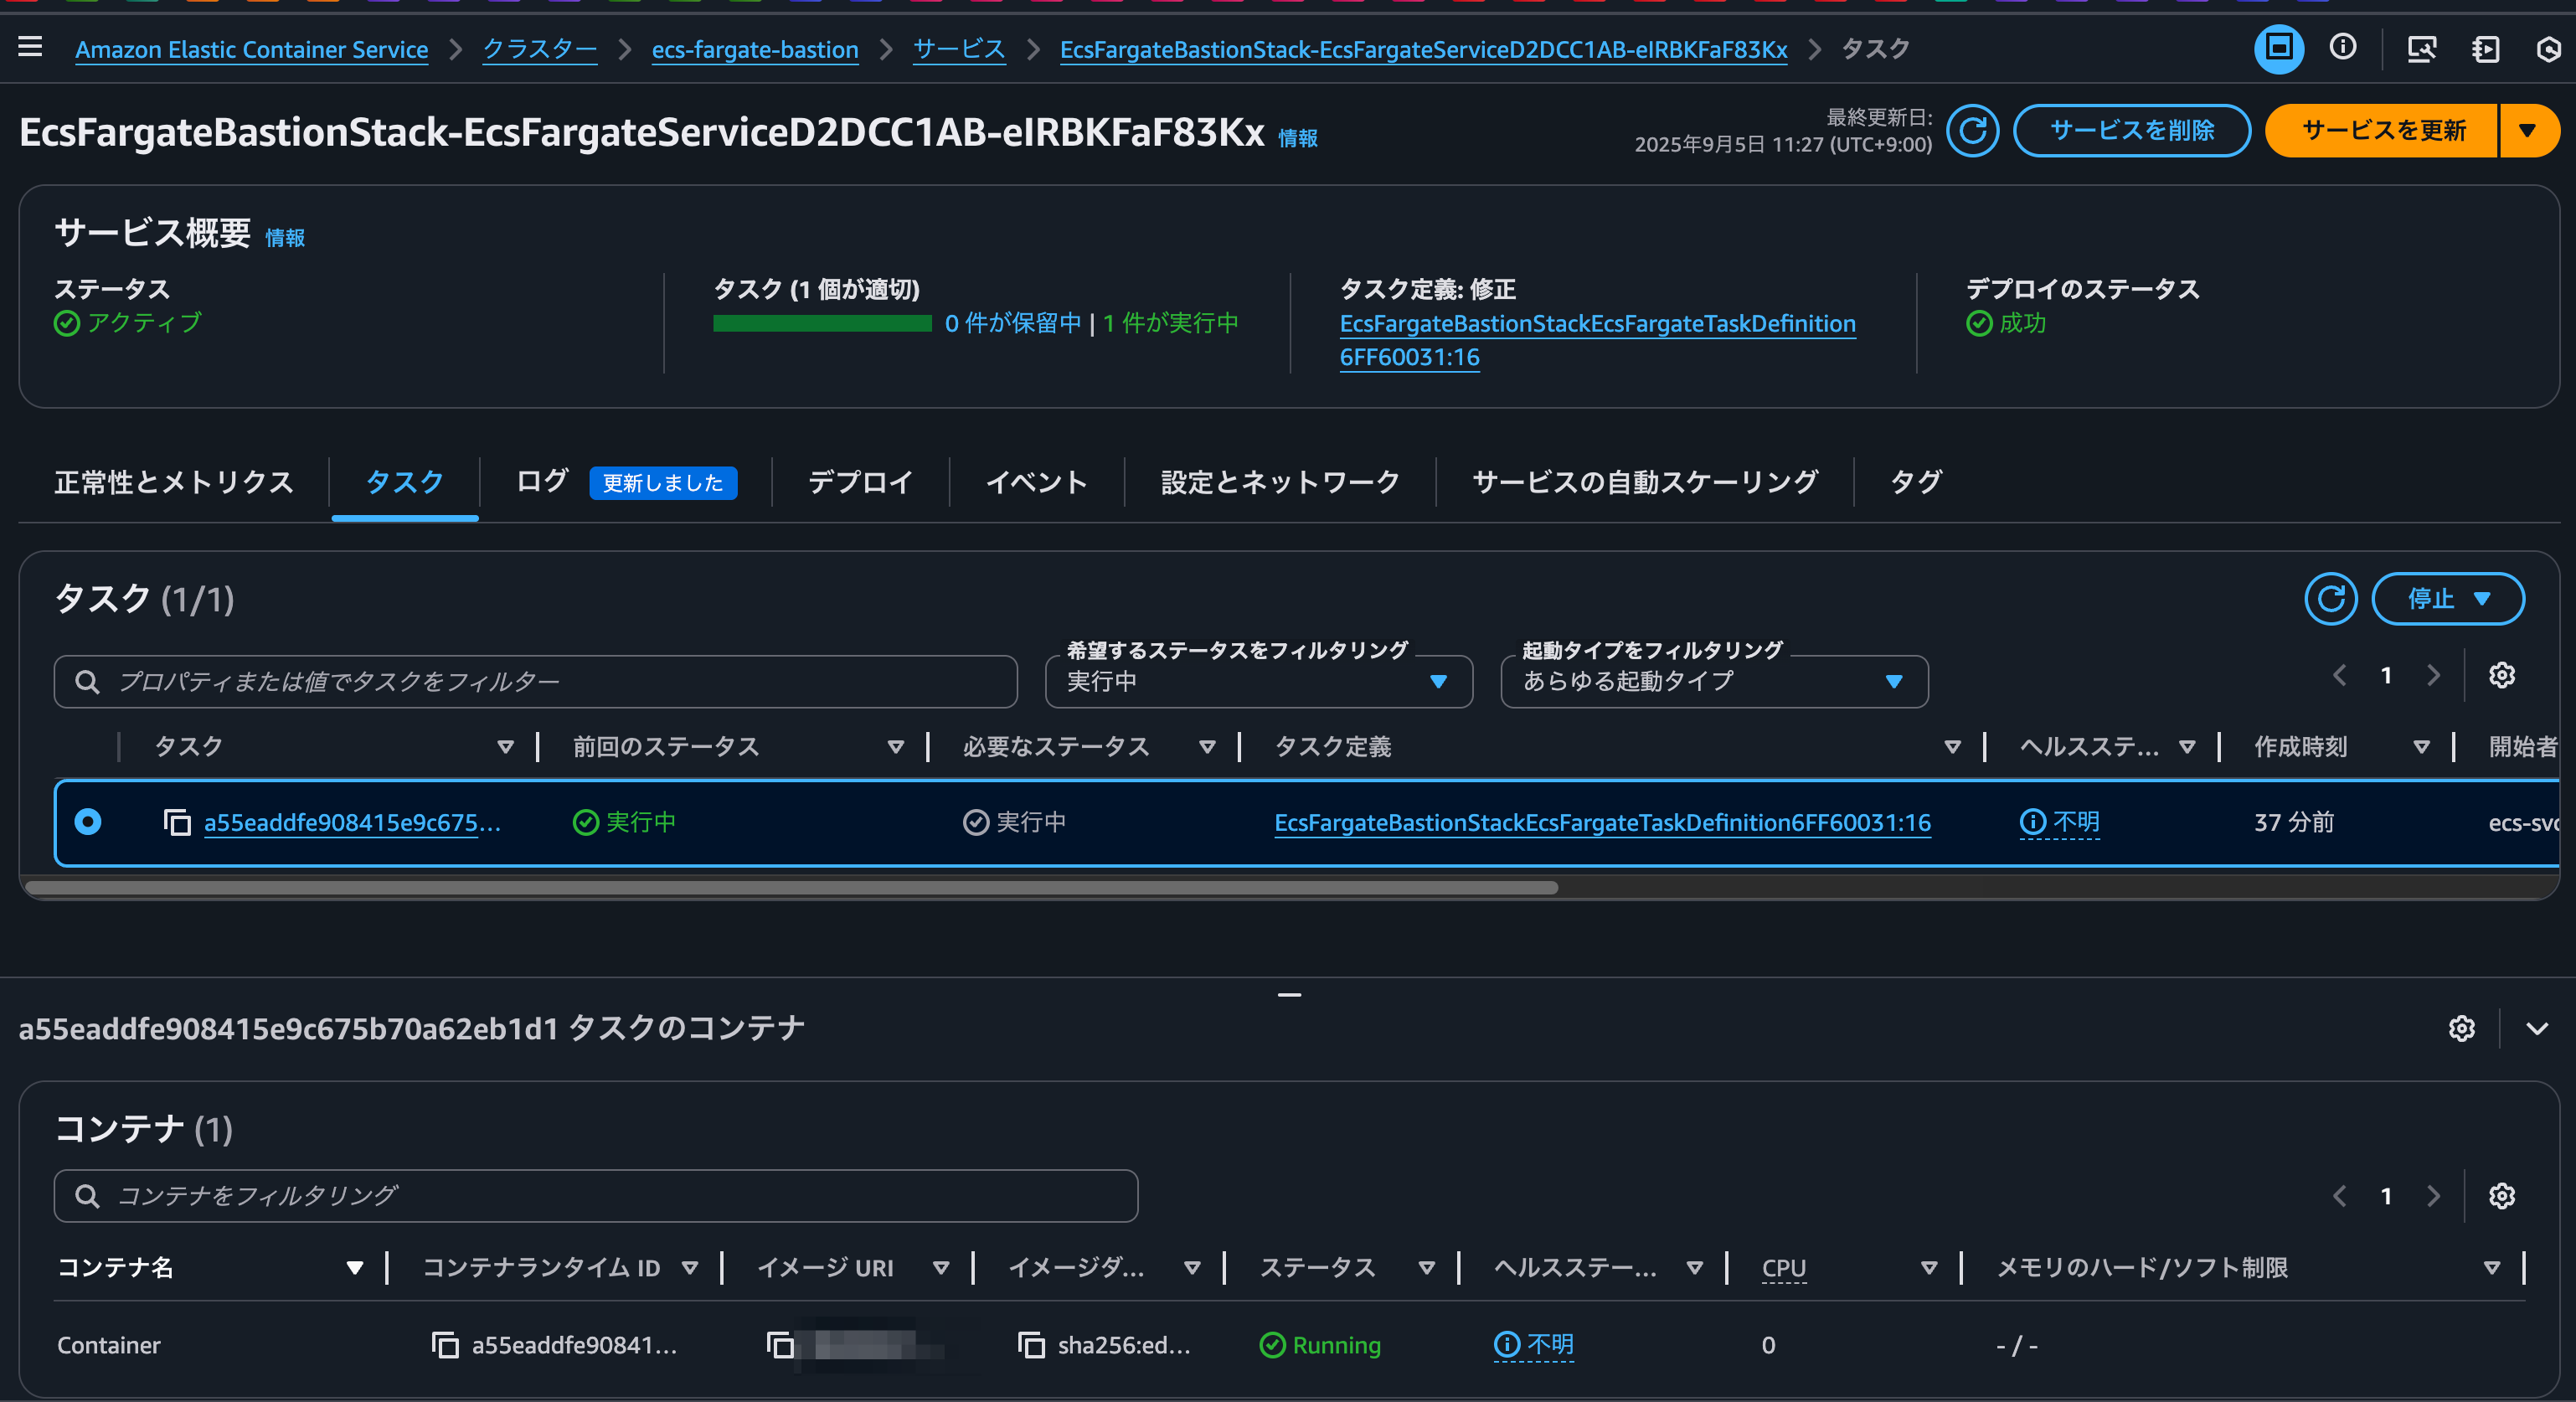
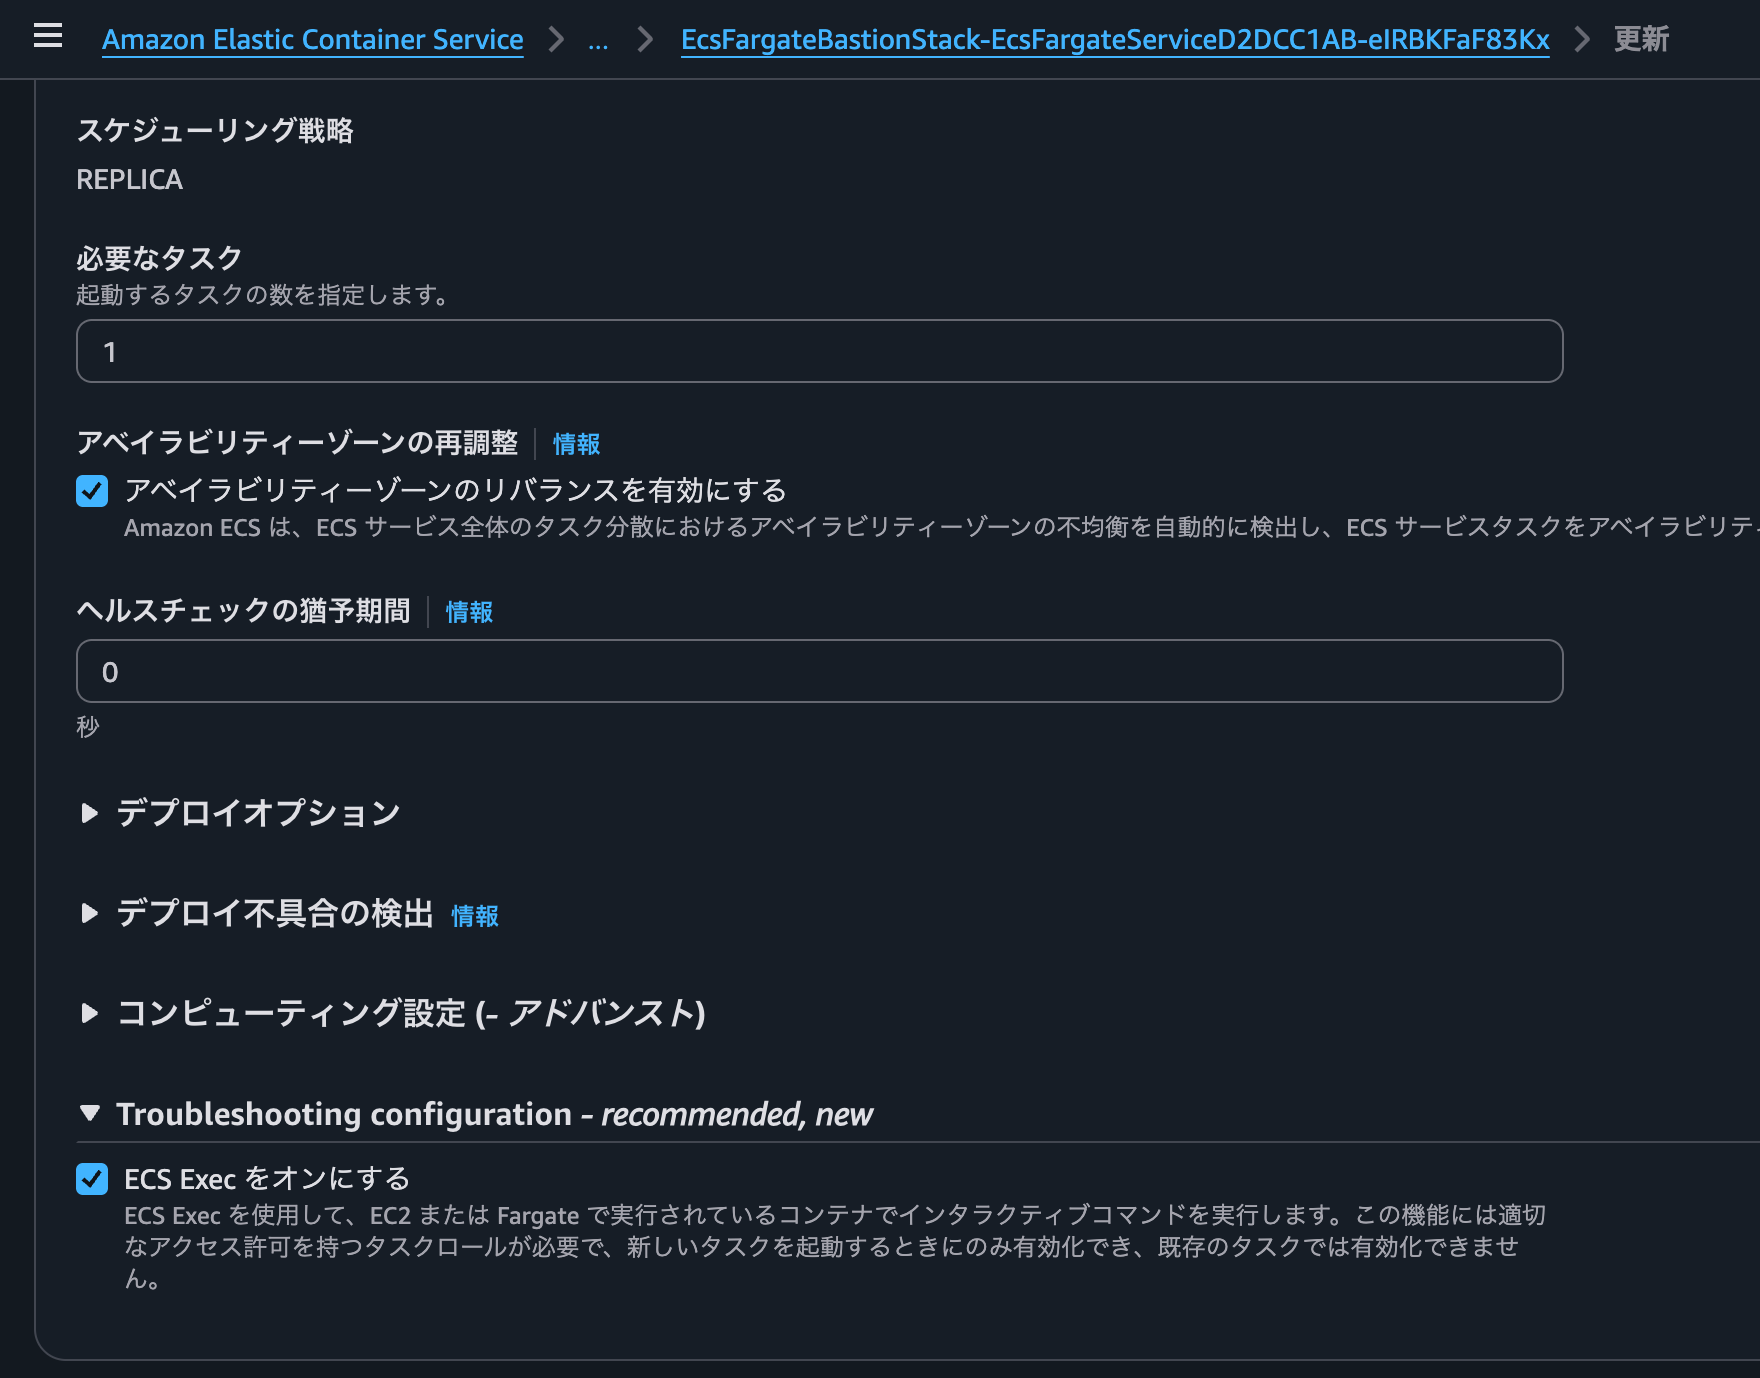
Also, I was able to check whether ECS Exec is enabled in the ECS service configuration screen.
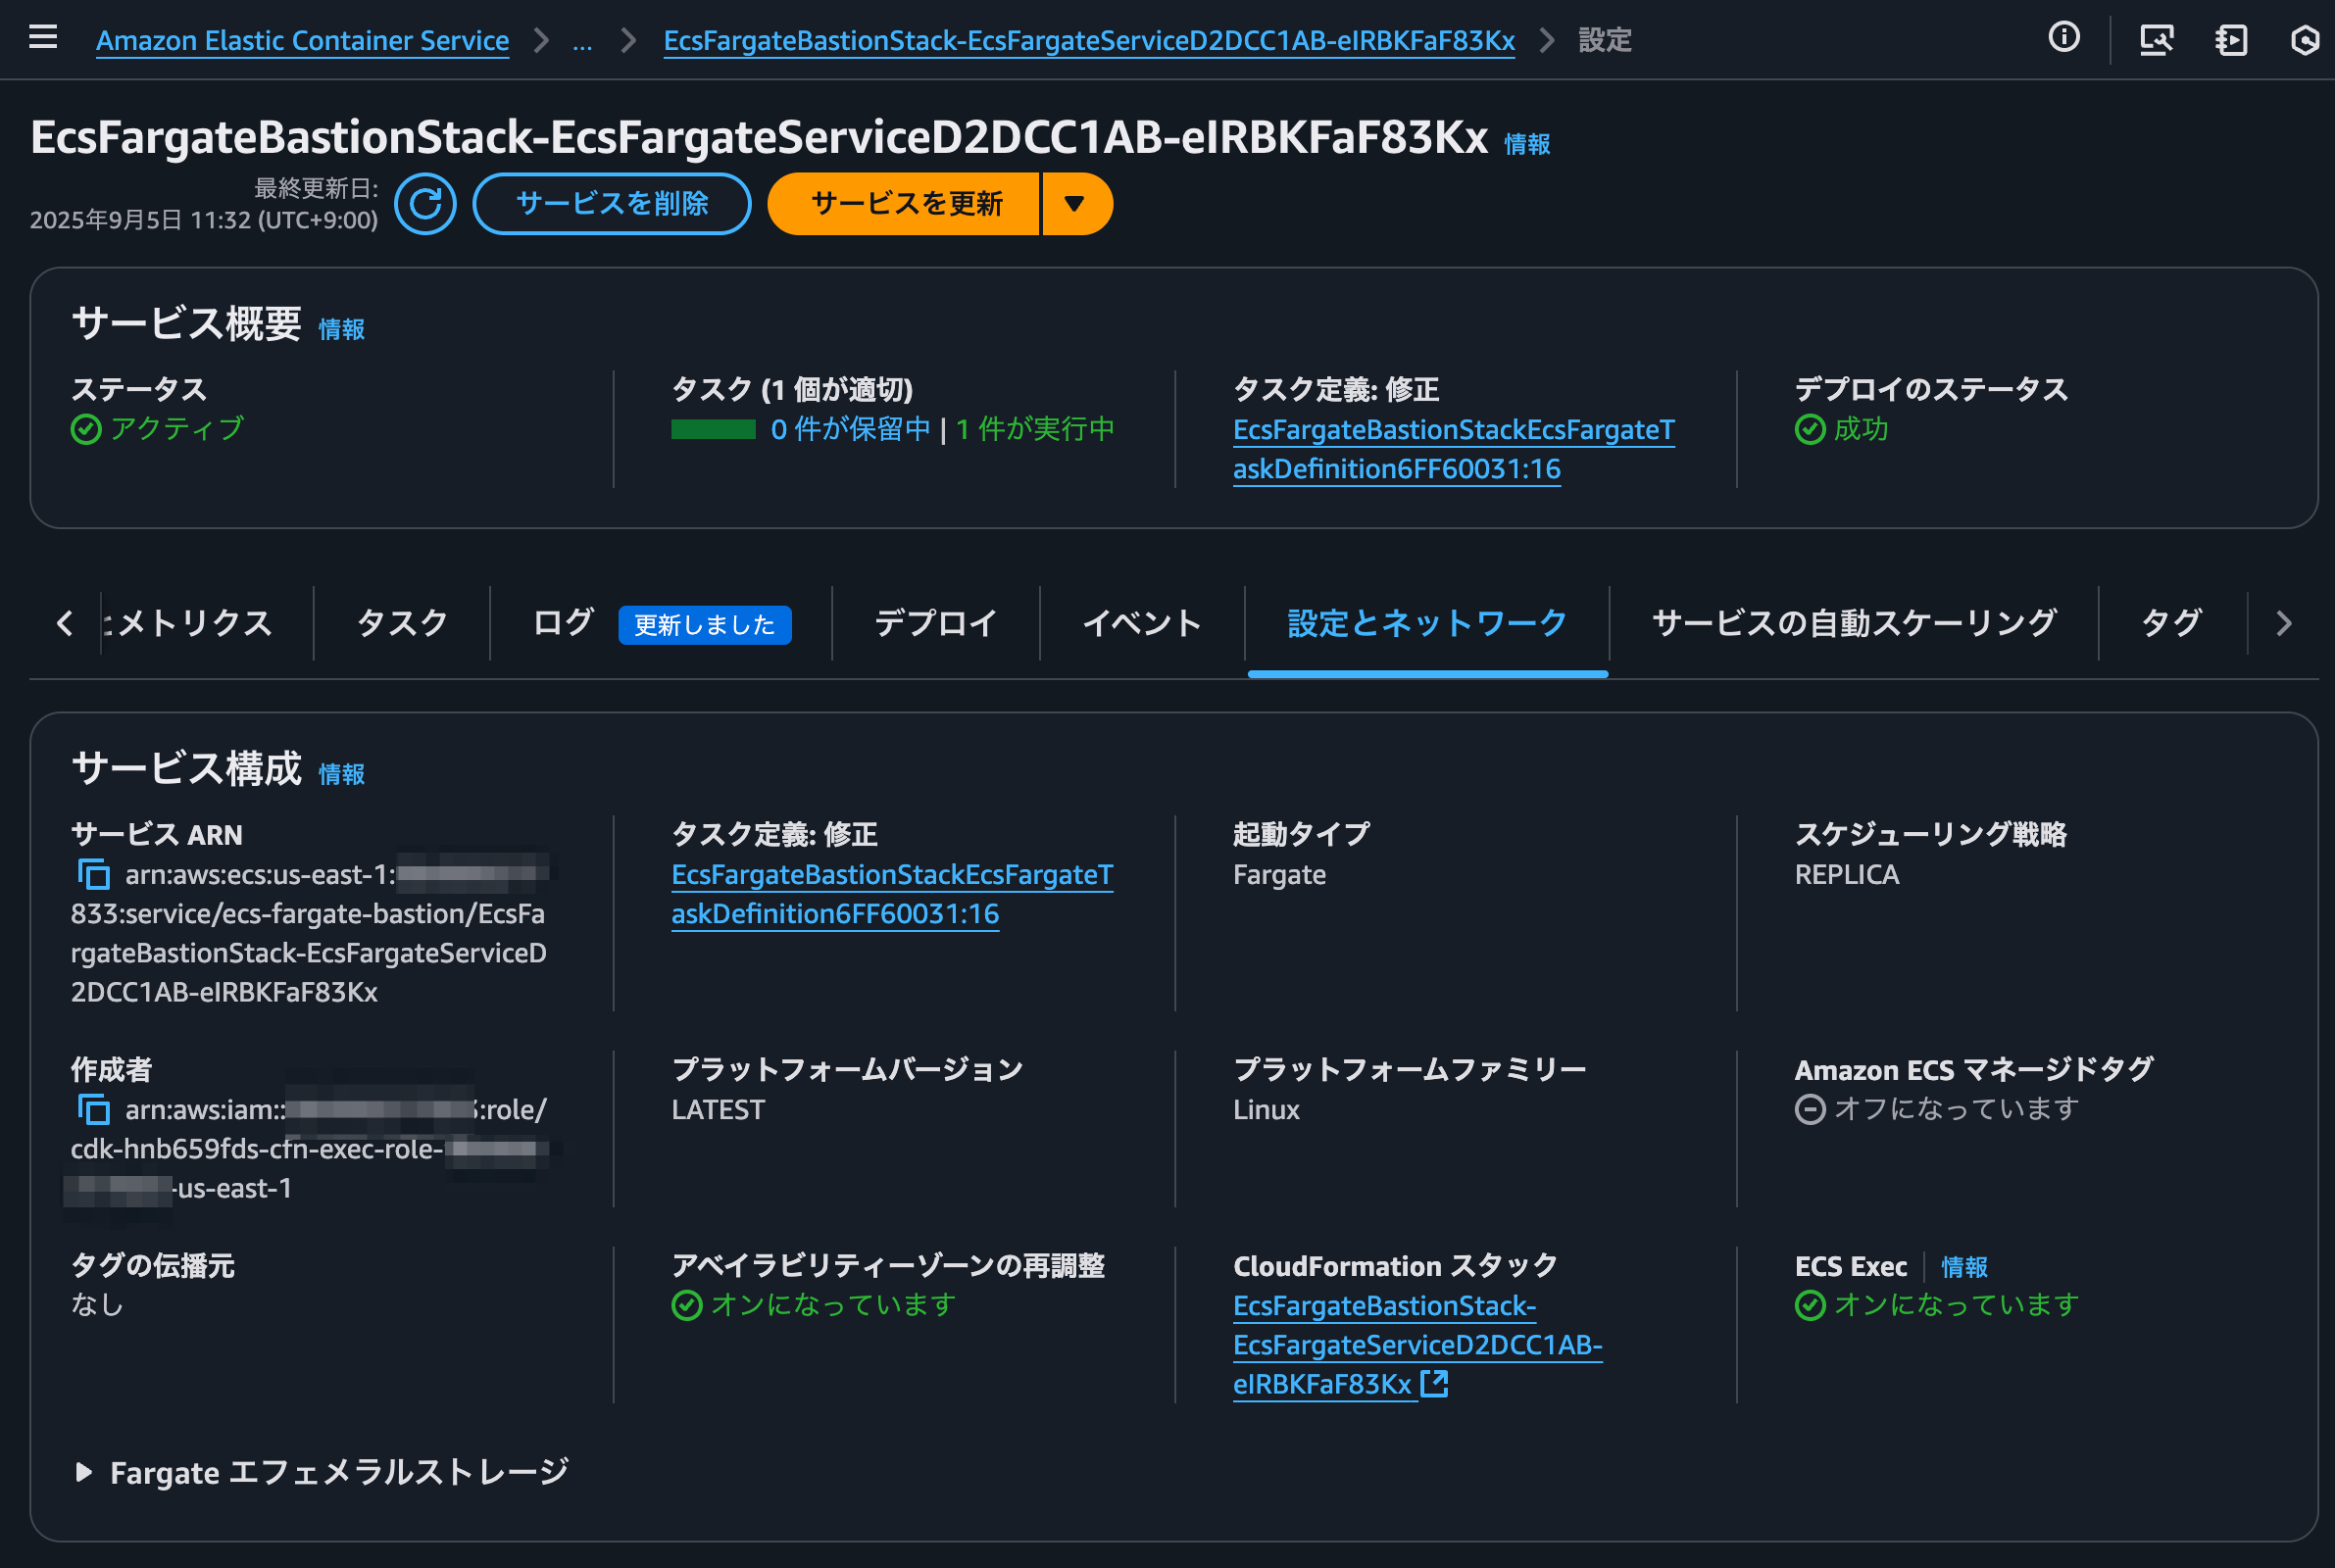
It seems that enabling/disabling ECS Exec can be easily toggled.
 ### Connecting with ECS Exec
Now, let's actually connect using ECS Exec.
When you scroll down to the container list of the ECS task you want to connect to, you'll notice a new Connect button.
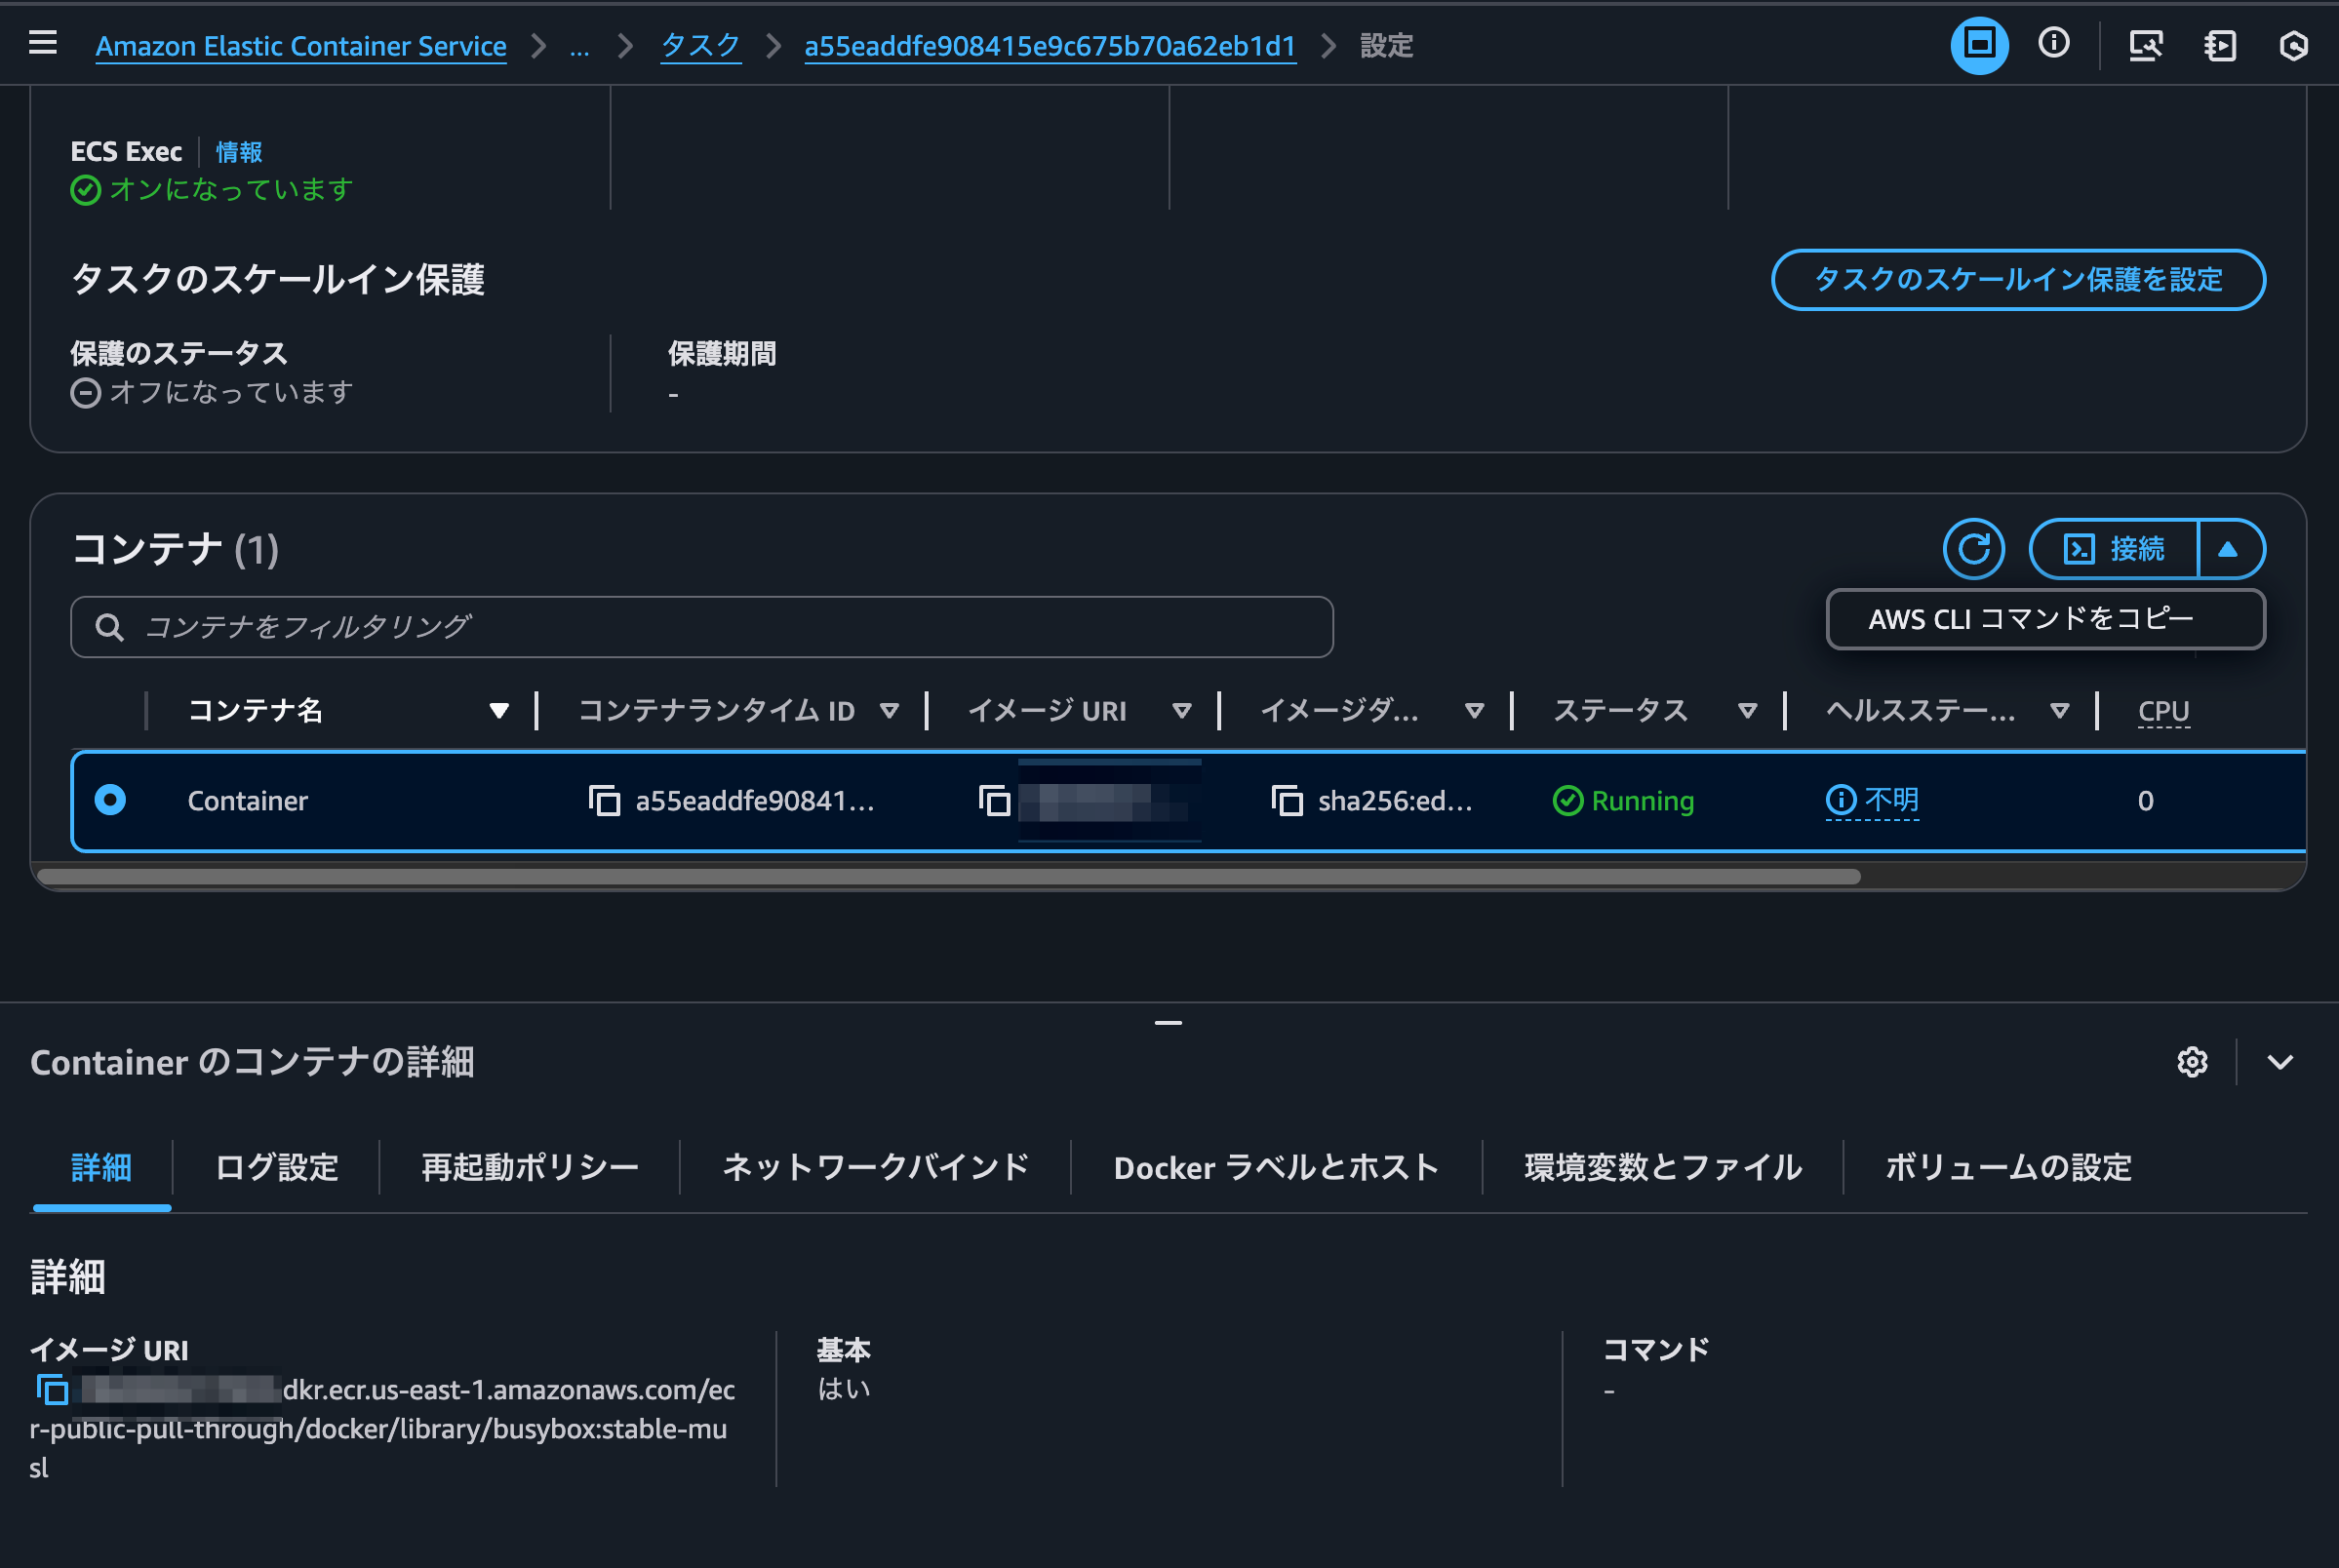
Let's try clicking on Copy AWS CLI command which appears when you open the toggle next to Connect.
This displays the command to connect via ECS Exec using the AWS CLI, as shown below:
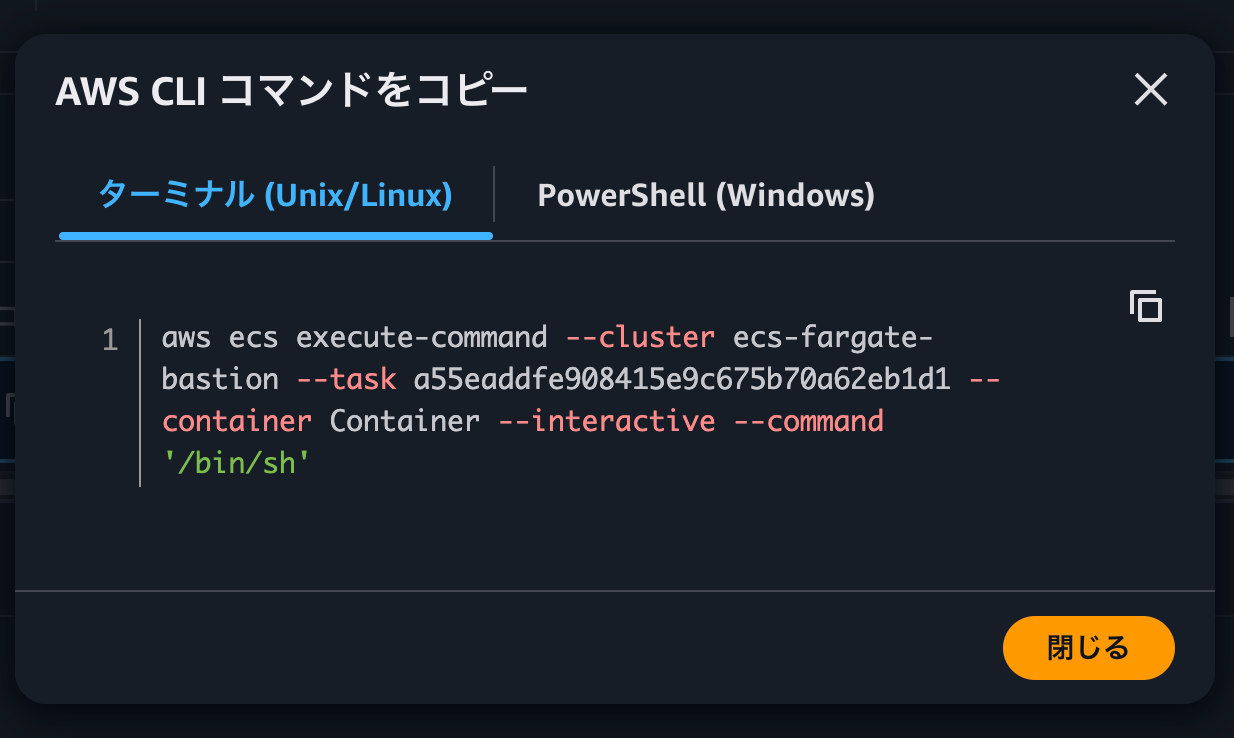
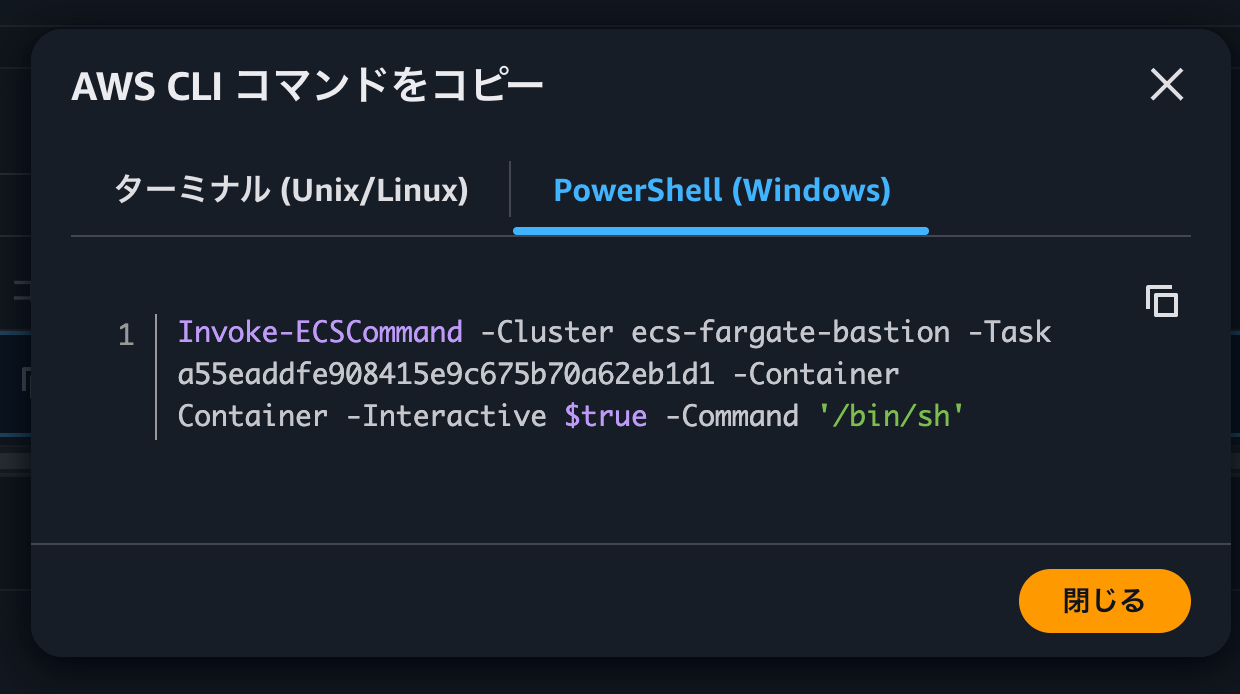
It's helpful that all the necessary information like the task ID is already filled in. If you want to operate from your own terminal, copy and paste this command.
Next, click on Connect.
This launches a CloudShell terminal with the message "A new environment is being created to run this command" along with the AWS CLI command for connecting via ECS Exec.
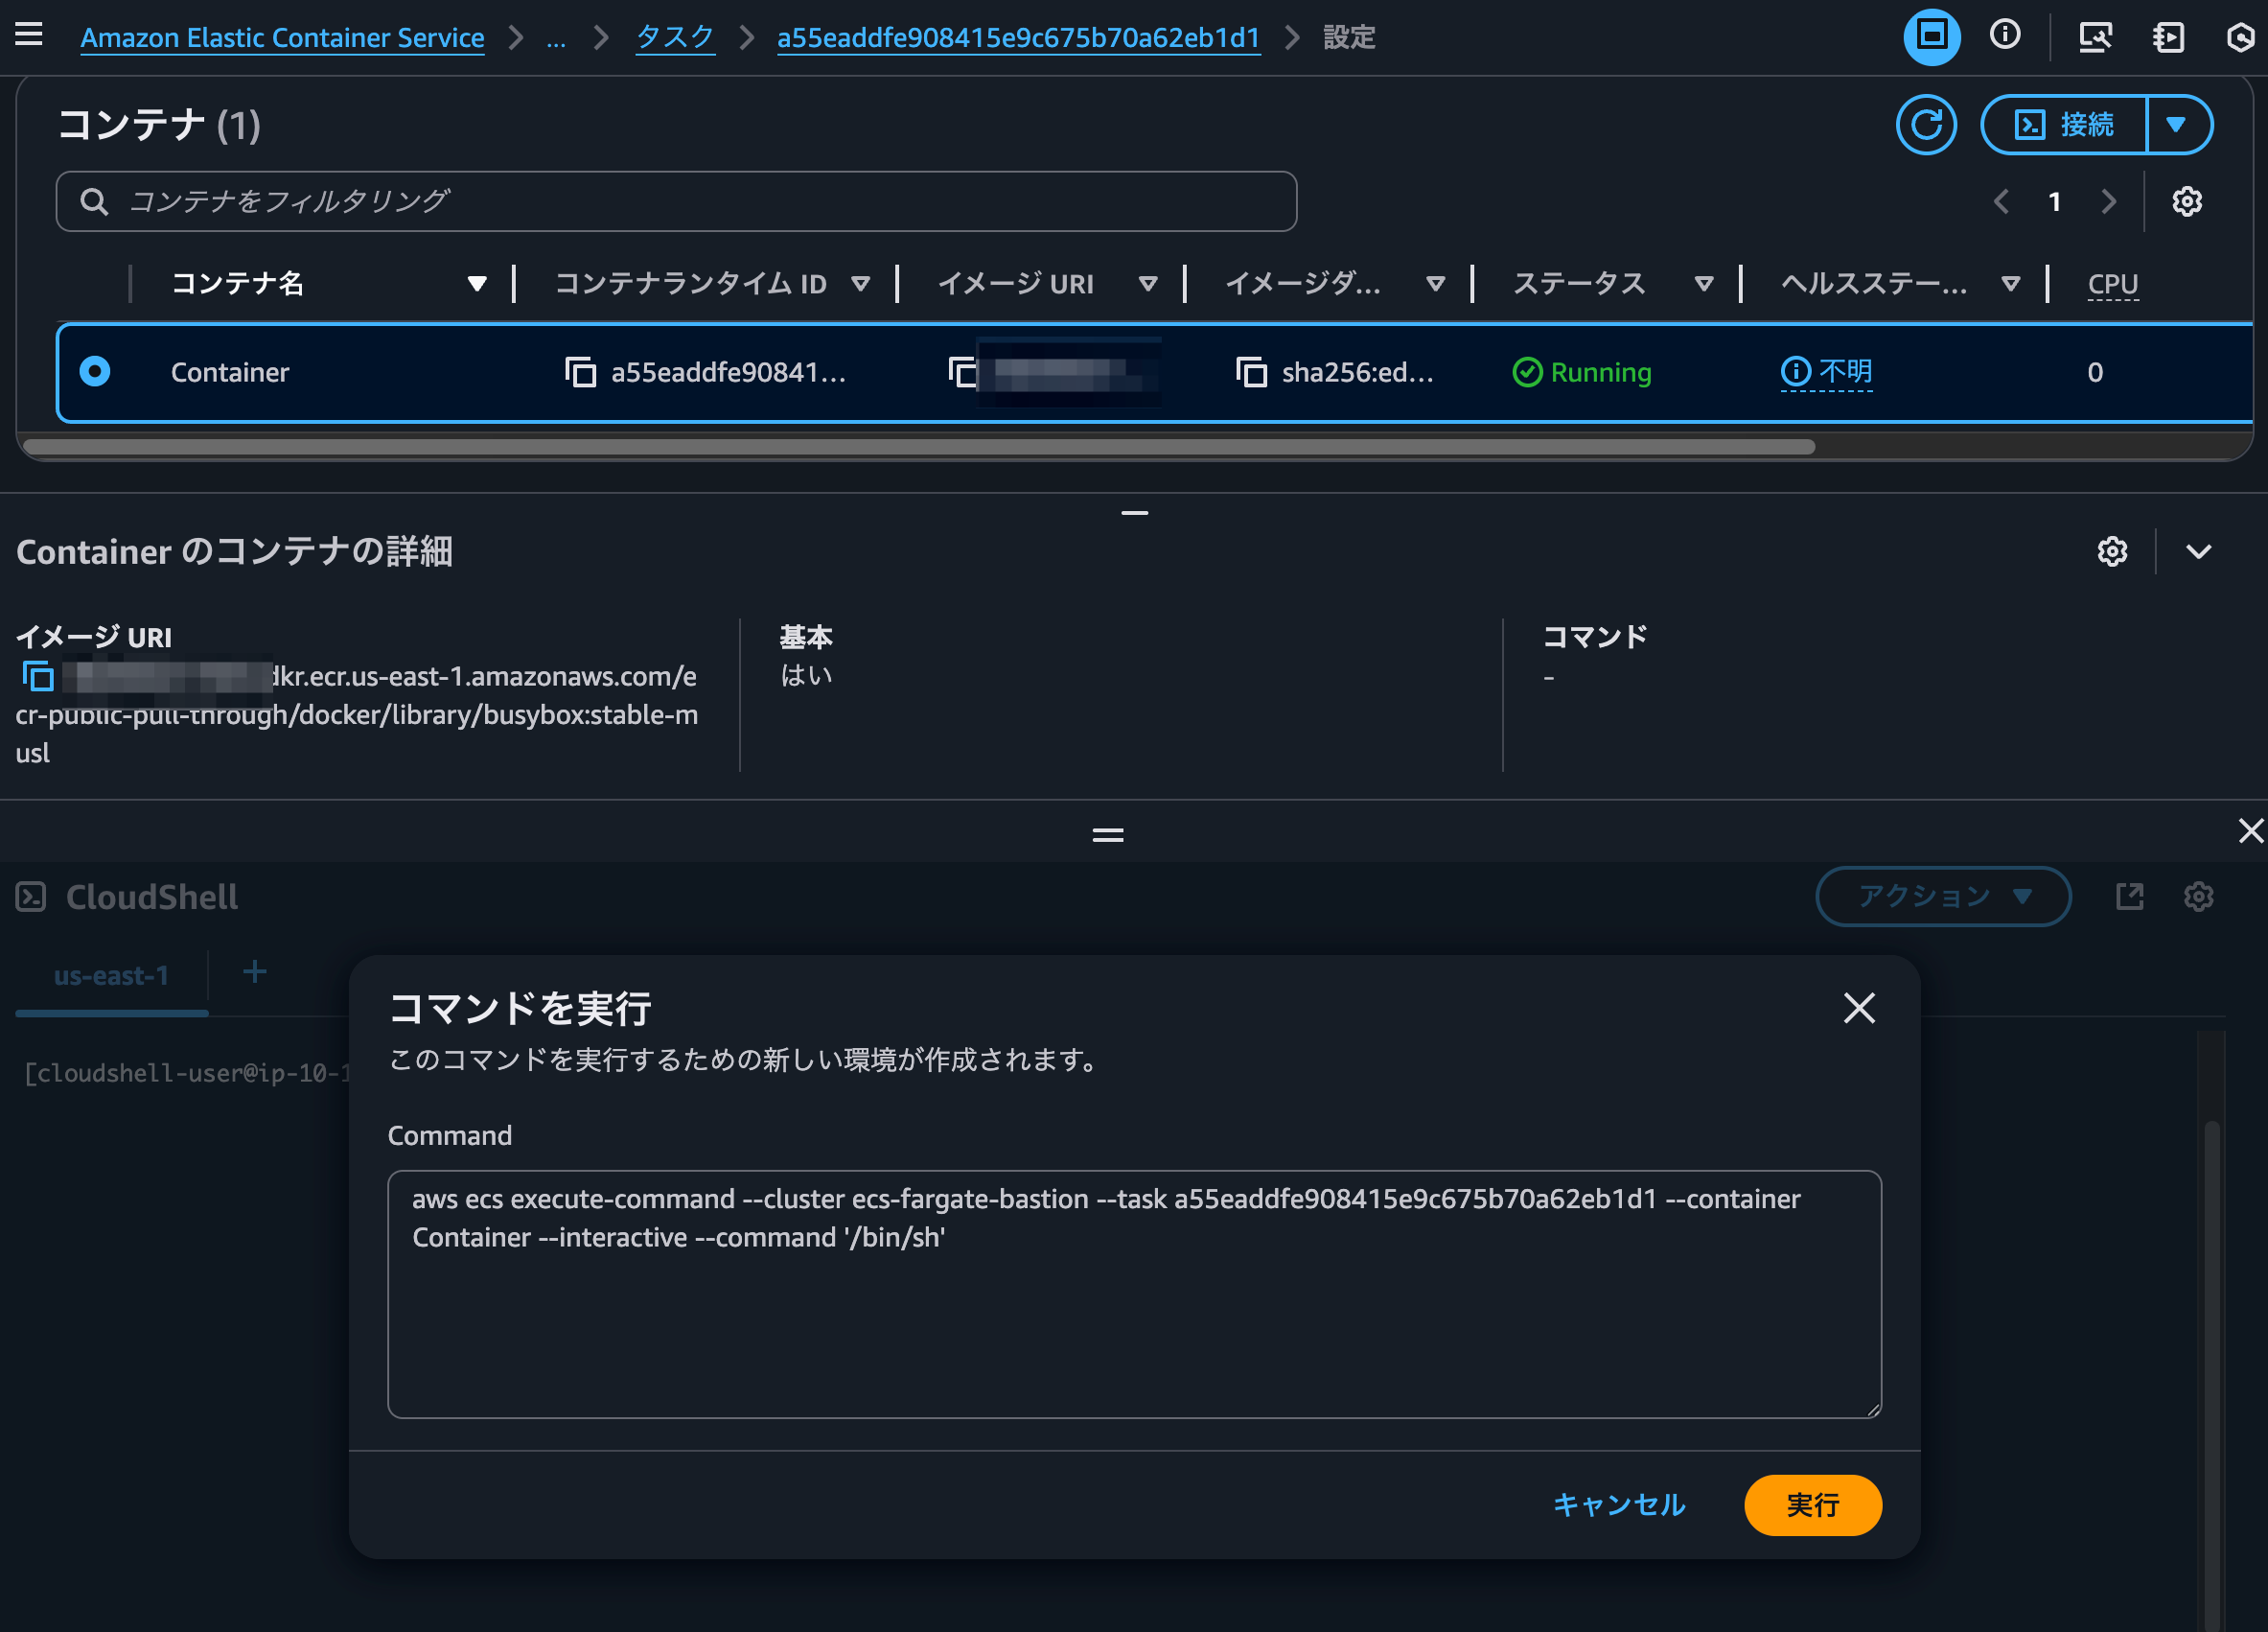
When executed, a new CloudShell tab opens and the ECS Exec session begins.
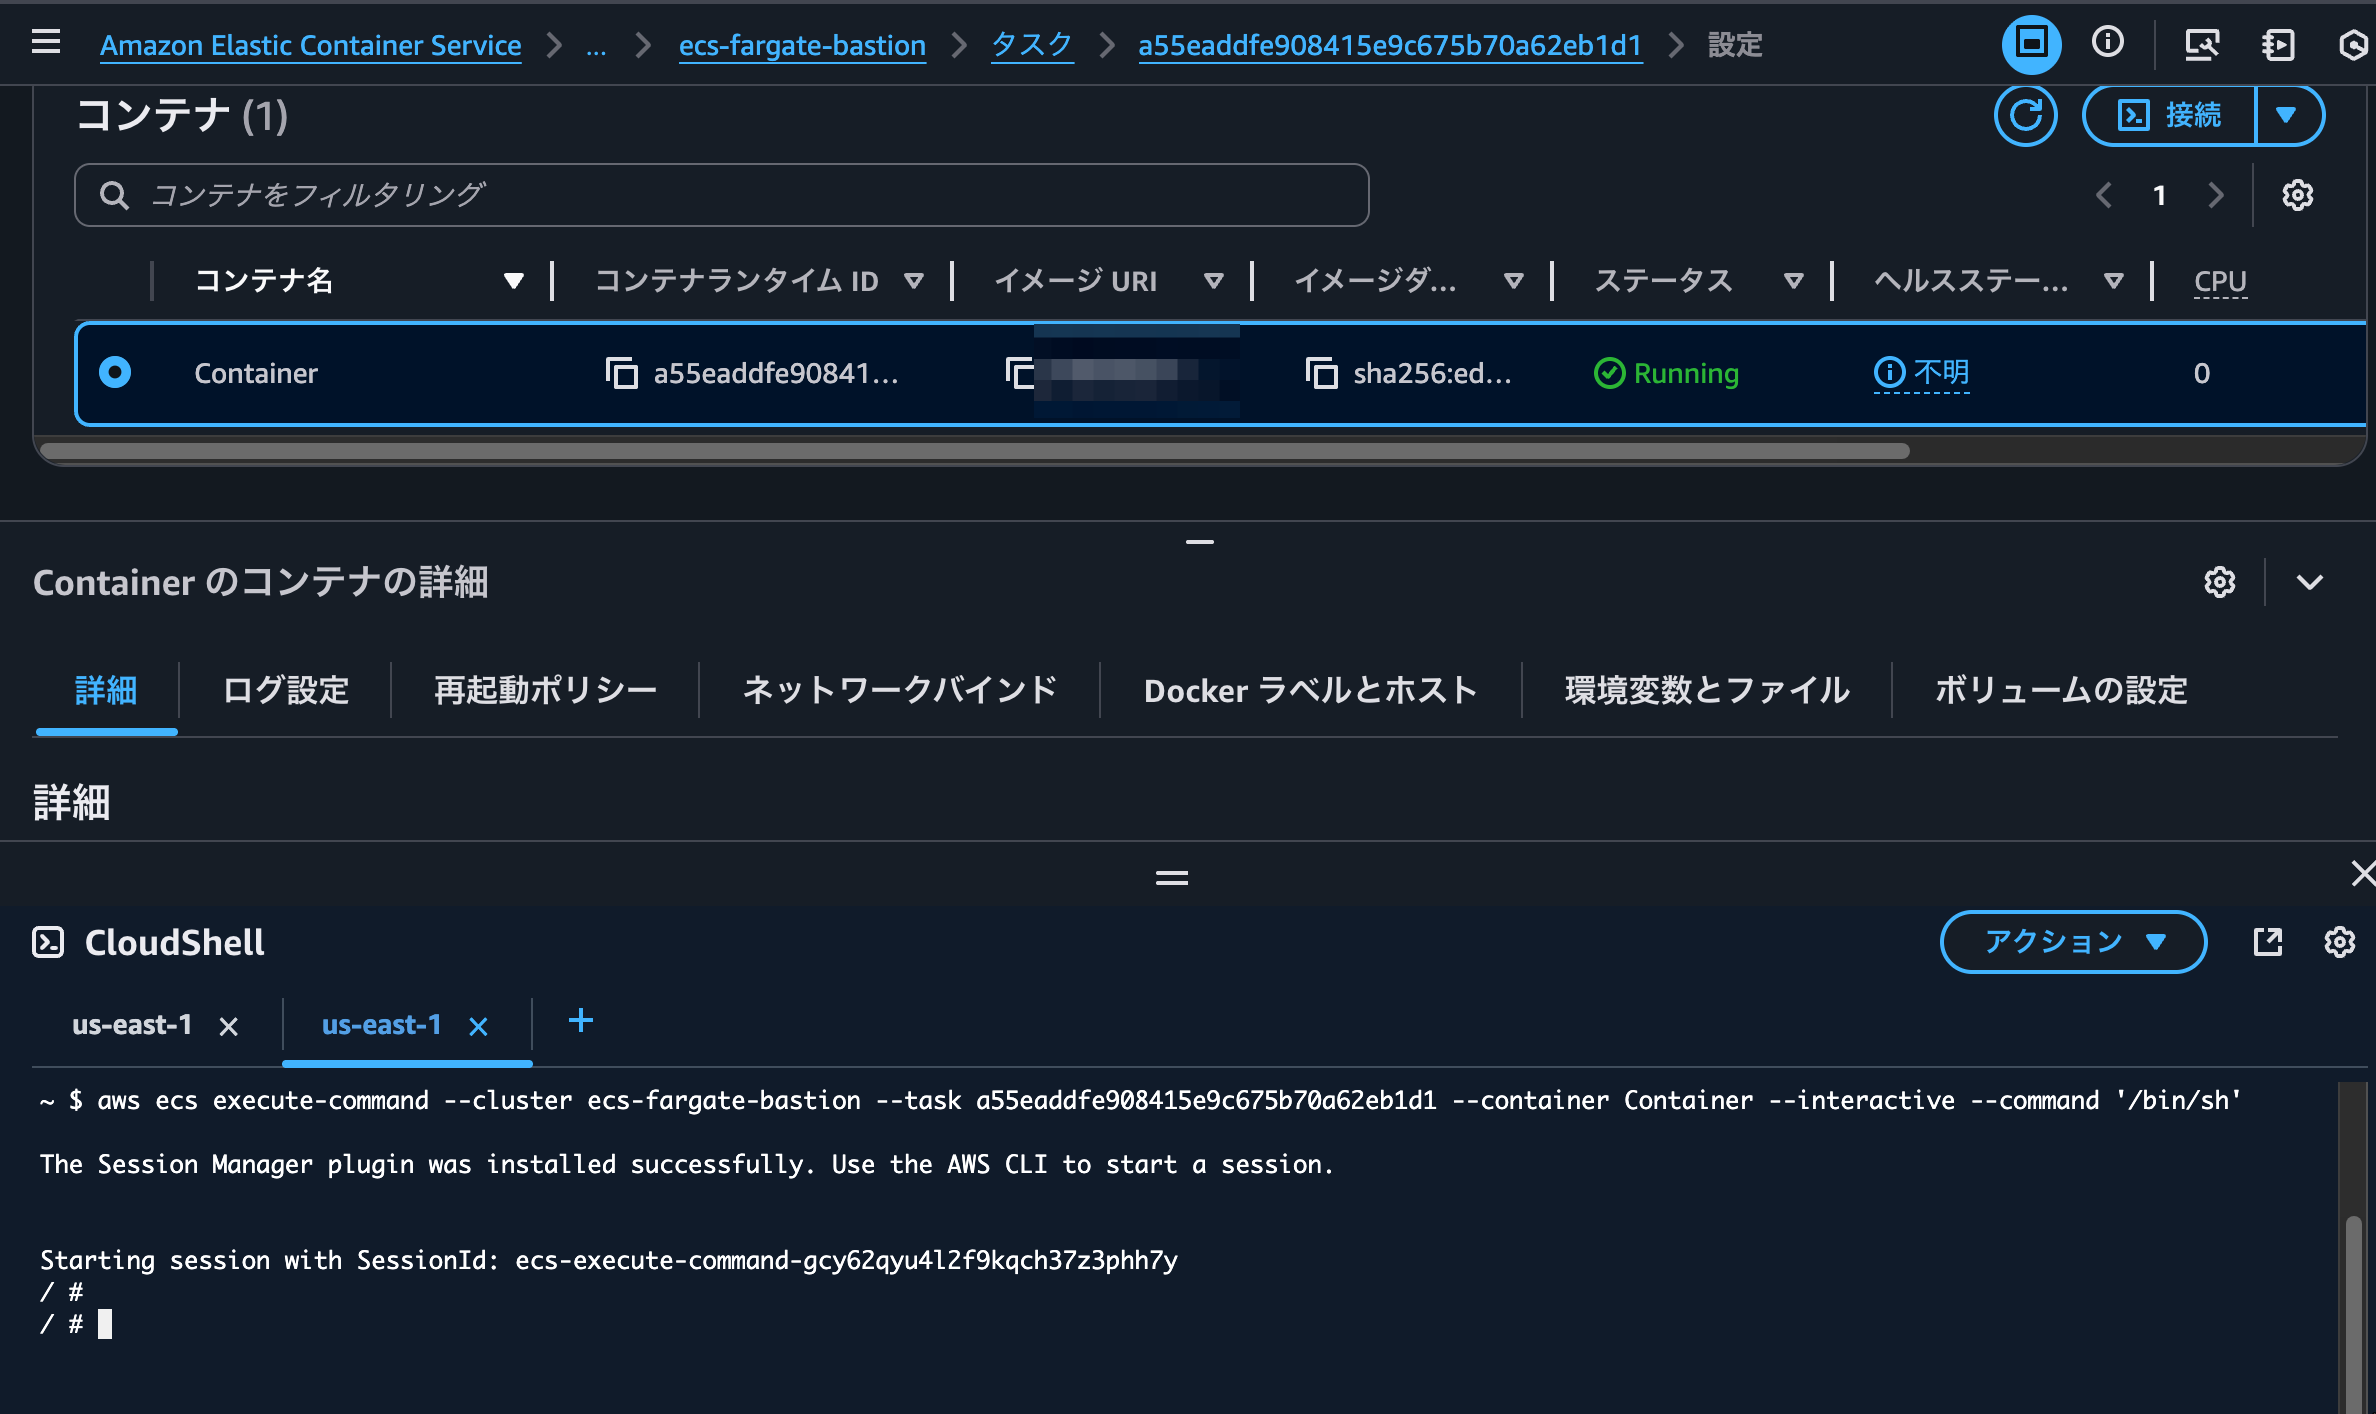
That looks good.
Let's run some commands:
			/ # whoami
root
/ #
/ # hostname
ip-10-0-3-48.ec2.internal
/ #
/ # df -hT
Filesystem           Type            Size      Used Available Use% Mounted on
overlay              overlay        29.4G      9.3G     18.5G  34% /
tmpfs                tmpfs          64.0M         0     64.0M   0% /dev
shm                  tmpfs         460.6M         0    460.6M   0% /dev/shm
tmpfs                tmpfs         460.6M         0    460.6M   0% /sys/fs/cgroup
/dev/nvme0n1p1       ext4            4.8G      2.0G      2.7G  43% /dev/init
/dev/nvme1n1         ext4           29.4G      9.3G     18.5G  34% /etc/hosts
/dev/nvme1n1         ext4           29.4G      9.3G     18.5G  34% /etc/resolv.conf
/dev/nvme1n1         ext4           29.4G      9.3G     18.5G  34% /etc/hostname
/dev/nvme0n1p1       ext4            4.8G      2.0G      2.7G  43% /managed-agents/execute-command/amazon-ssm-agent
/dev/nvme0n1p1       ext4            4.8G      2.0G      2.7G  43% /managed-agents/execute-command/ssm-agent-worker
/dev/nvme0n1p1       ext4            4.8G      2.0G      2.7G  43% /managed-agents/execute-command/ssm-session-worker
/dev/nvme0n1p1       ext4            4.8G      2.0G      2.7G  43% /managed-agents/execute-command/certs
/dev/nvme0n1p1       ext4            4.8G      2.0G      2.7G  43% /managed-agents/execute-command/configuration
tmpfs                tmpfs         460.6M         0    460.6M   0% /proc/acpi
tmpfs                tmpfs          64.0M         0     64.0M   0% /proc/kcore
tmpfs                tmpfs          64.0M         0     64.0M   0% /proc/keys
tmpfs                tmpfs          64.0M         0     64.0M   0% /proc/timer_list
tmpfs                tmpfs          64.0M         0     64.0M   0% /proc/sched_debug
tmpfs                tmpfs         460.6M         0    460.6M   0% /sys/firmware
tmpfs                tmpfs         460.6M         0    460.6M   0% /proc/scsi
/ #
/ # ps auxf
PID   USER     TIME  COMMAND
    1 root      0:00 /dev/init -- sh
    7 root      0:00 sh
    8 root      0:00 /managed-agents/execute-command/amazon-ssm-agent
   23 root      0:00 /managed-agents/execute-command/ssm-agent-worker
  105 root      0:00 /managed-agents/execute-command/ssm-session-worker ecs-execute-command-gcy62qyu4l2f9kqch37z3phh7y
  115 root      0:00 /bin/sh
  126 root      0:00 ps auxf
```It feels like "It's ECS Exec."

## To reduce troubleshooting effort

I introduced an update that allows you to connect to containers with ECS Exec from the AWS Management Console.

This seems very helpful for reducing troubleshooting effort. Let's use it actively.

I hope this article helps someone.

This was nonpi ([@non____97](https://twitter.com/non____97)) from the Consulting Department, Cloud Business Division!