
I tried creating an AI agent with Microsoft Foundry Agent Service
This page has been translated by machine translation. View original
I'm Katagiri from the AI Business Division/Western Japan Development Team.
AI agents have recently been a hot topic, but they are often perceived as "difficult to implement."
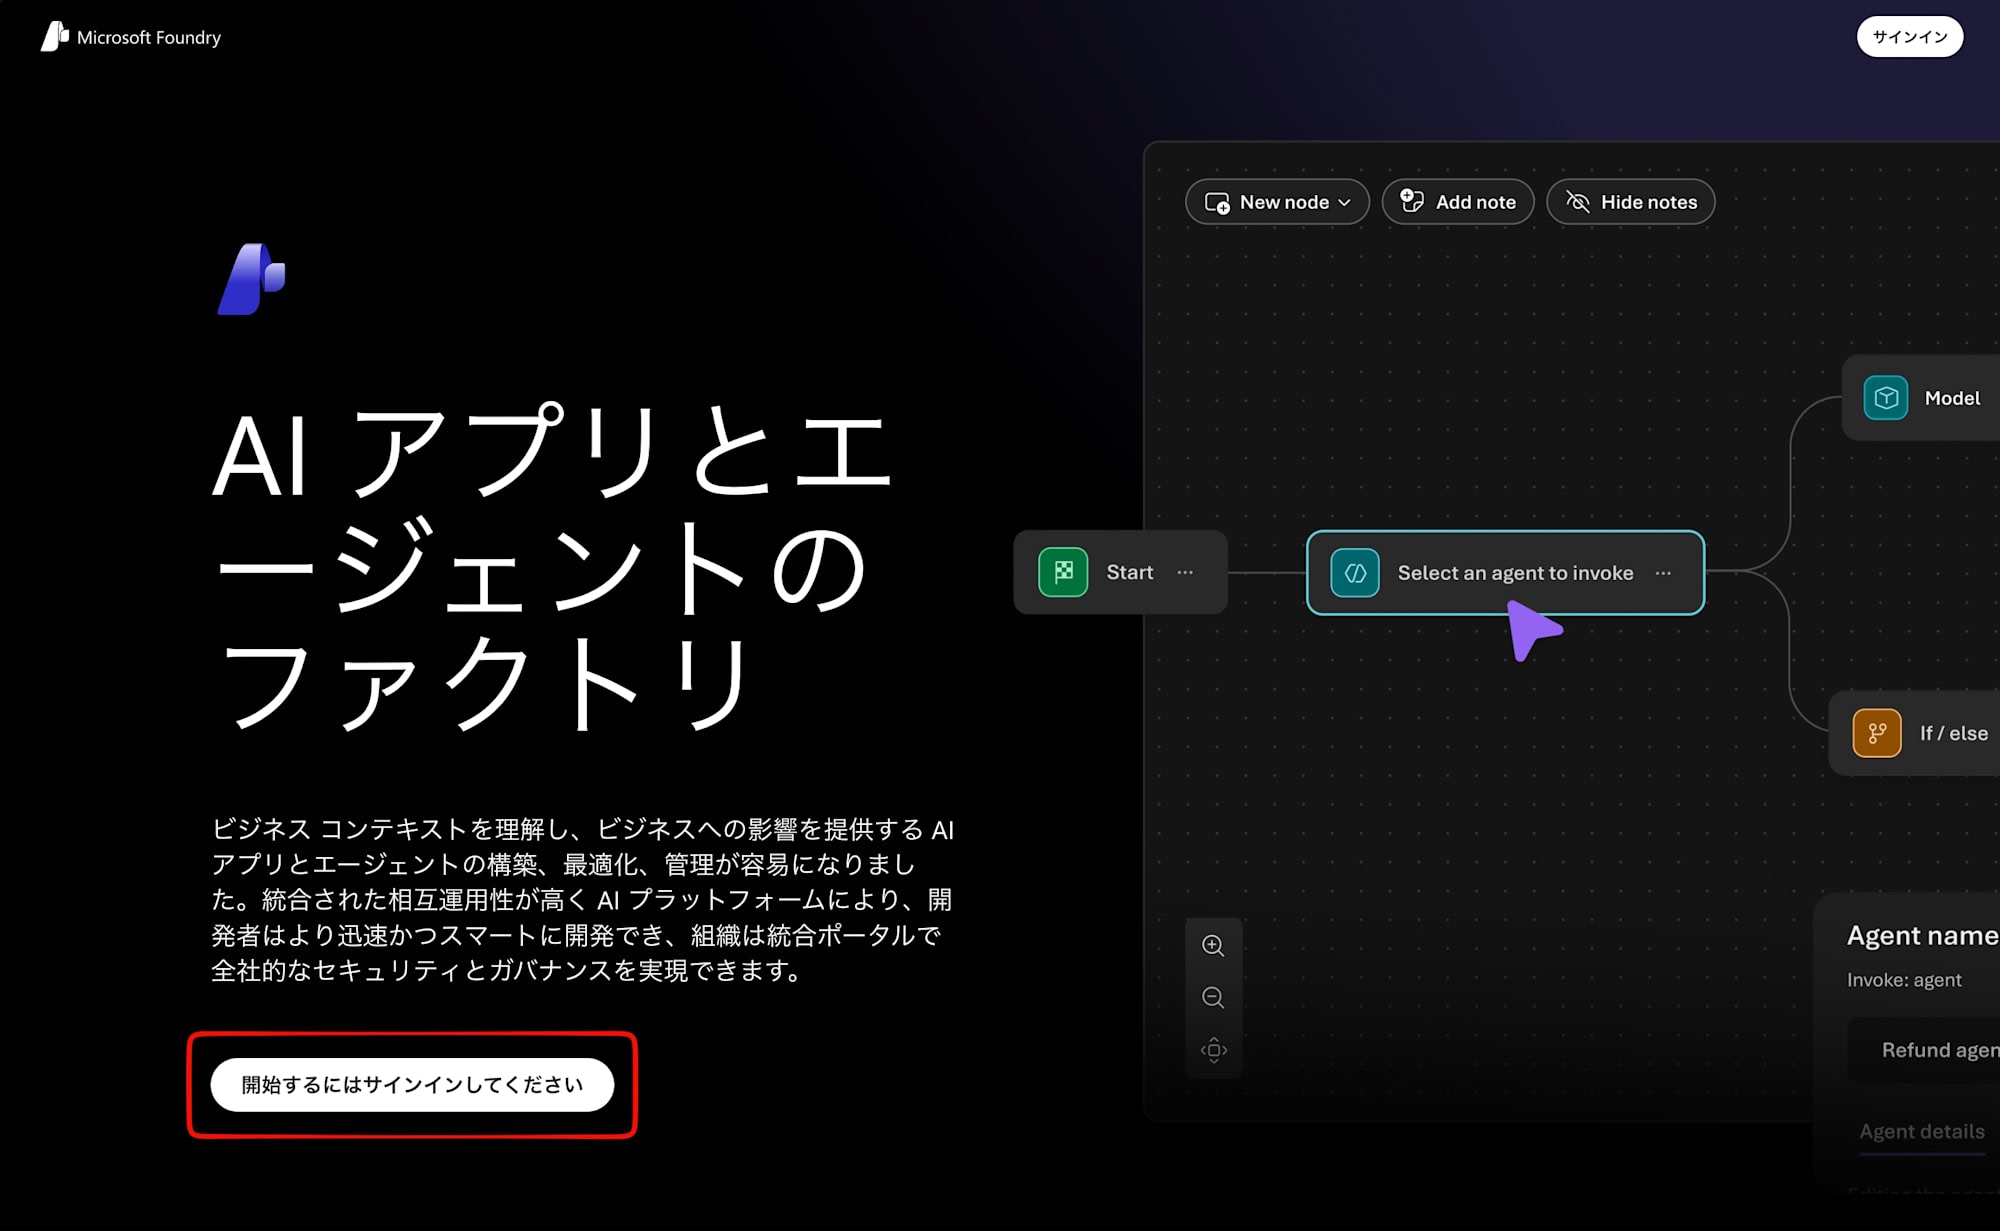
With Microsoft Foundry Agent Service, you can smoothly build agents using just GUI operations.
In this article, I will explain the entire process from prompt settings to tool integration and guardrail functions, with the goal of creating a "simple chat agent" as a foundation.
🏆 Microsoft Agent Hackathon 2026 Currently Ongoing!
A hackathon with "Agentic AI" as its theme is currently being held on Zenn.
- Period: 2026.4.7 to 2026.6.18
- Entry Deadline: 2026.6.1 23:59
- Details: Microsoft Agent Hackathon 2026
The content of this article is perfect for the hackathon.
Even if you're a beginner, just following these steps will help you create the foundation for your submission.
Please take this opportunity to give it a try!
About This Article
Overview
This article explains how to create an AI agent using Microsoft Foundry Agent Service.
You will need an Azure account, so please prepare one in advance if you haven't already.
Account Creation Procedure
[Target Audience]
- Those who want to try creating an AI agent in an Azure environment
- Those interested in the hackathon but unsure where to start
What is Microsoft Foundry Agent Service?
It's a platform provided by Microsoft that includes all the necessary functions for building, deploying, and scaling AI agents in the Azure environment.
Similar configurations can be achieved with Azure OpenAI Service.
Foundry Agent Service is a platform specifically designed for AI agent building, where you can manage prompts, tools, memory, and guardrails all in one place.
For more information, please check the official documentation.
Creating an AI Agent
This time, we will proceed with creation through operations on the Foundry portal.
You can also create it using Azure CLI commands. If you're interested, refer to the official documentation.
1. Creating a Foundry Project
Access the Microsoft Foundry portal and create a project.
If you access it before signing in, you will be prompted to sign in, so please do so.
After signing in, create a project.
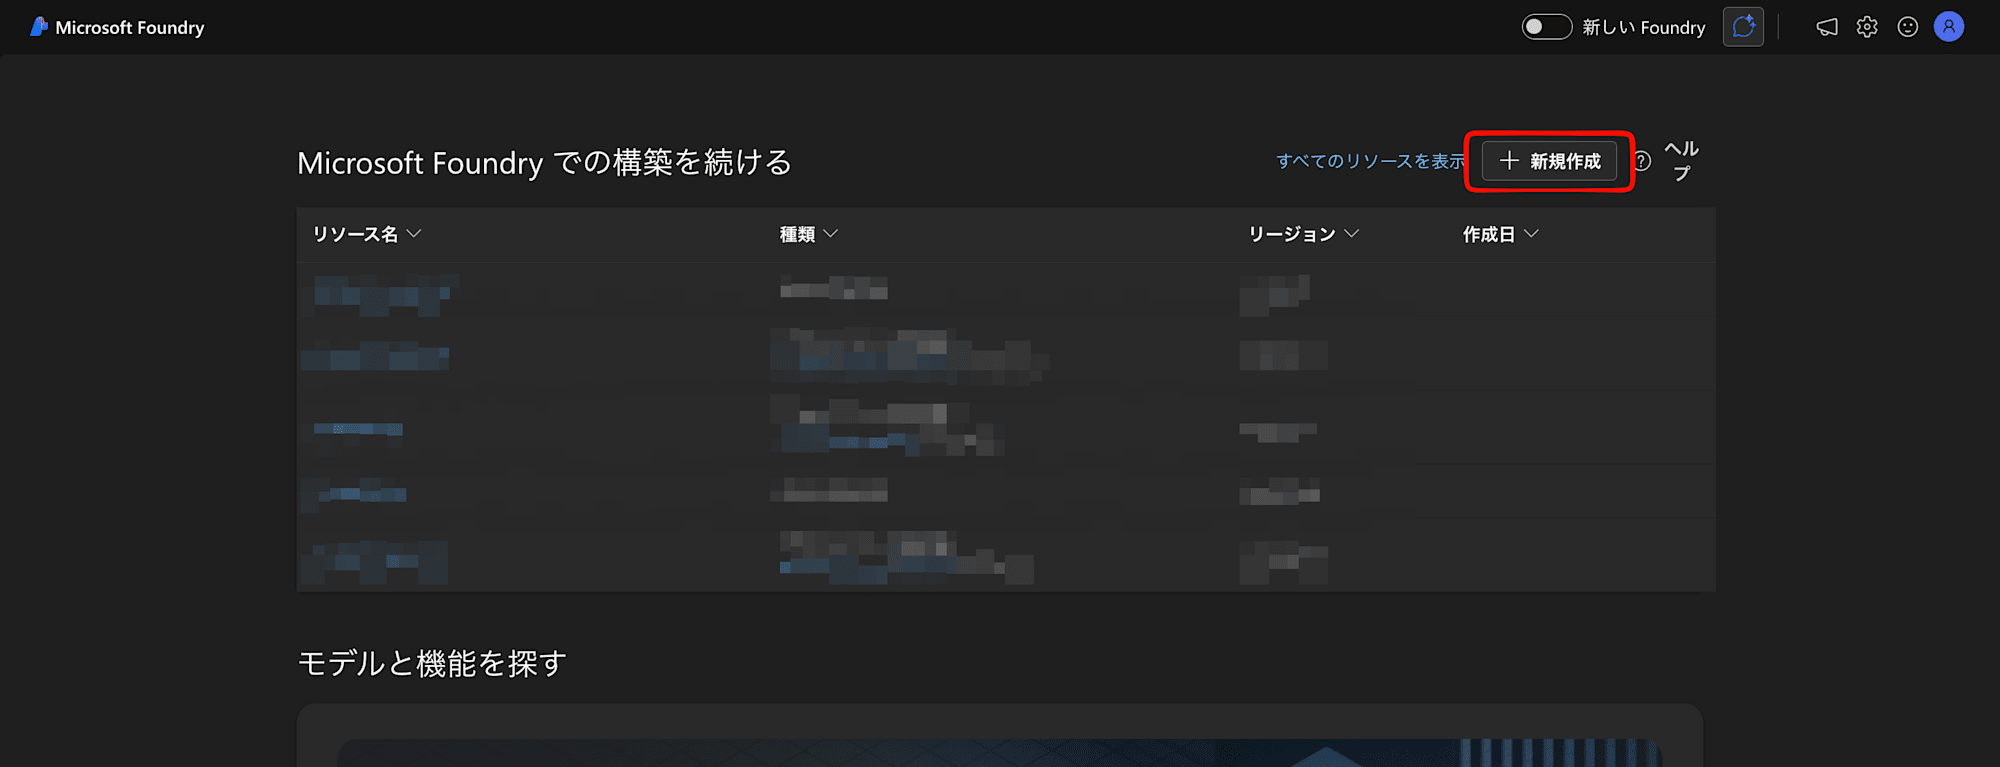
Click on Create New
Select the resource type.
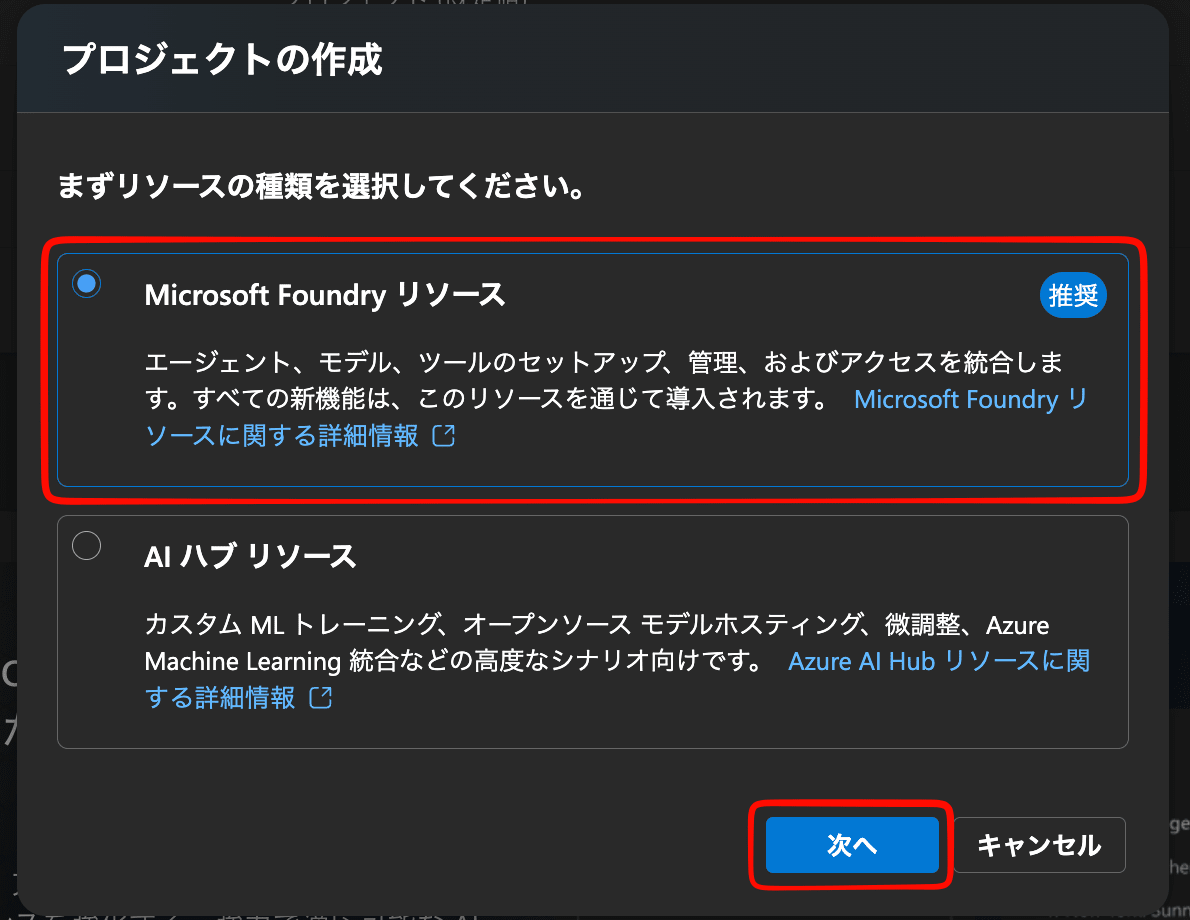
Select Microsoft Foundry Resource and click Next
Enter the necessary information to create a project.
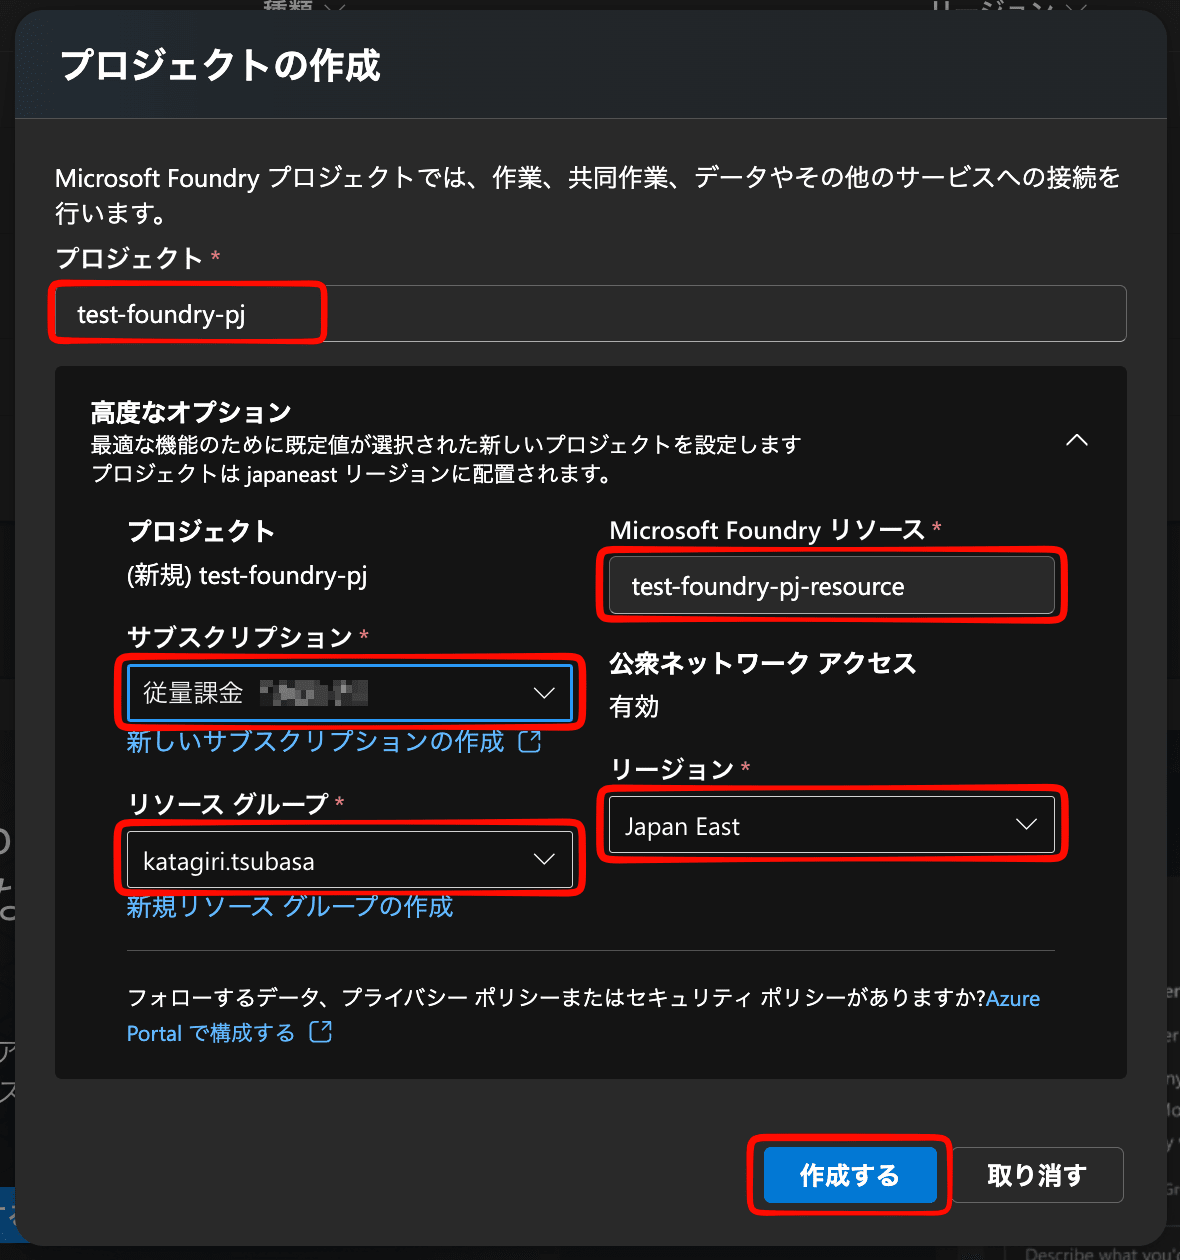
Enter the required information and click Create
Once the project is created, the project overview screen will open.
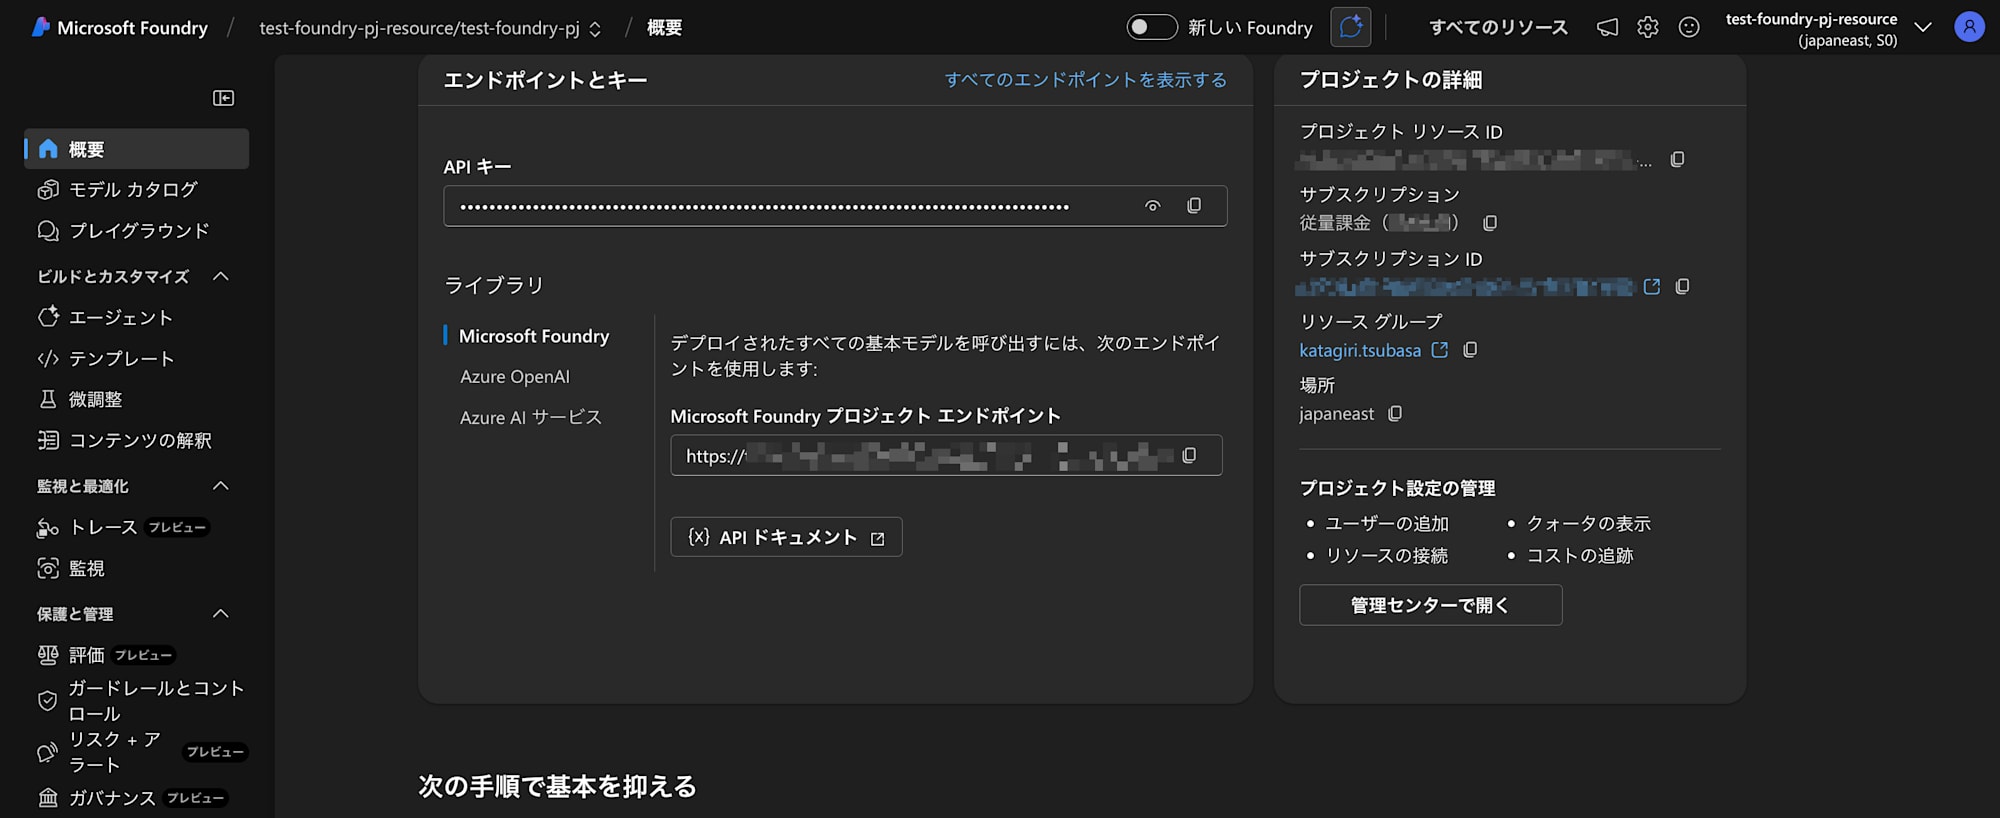
For this tutorial, let's proceed with the new UI.
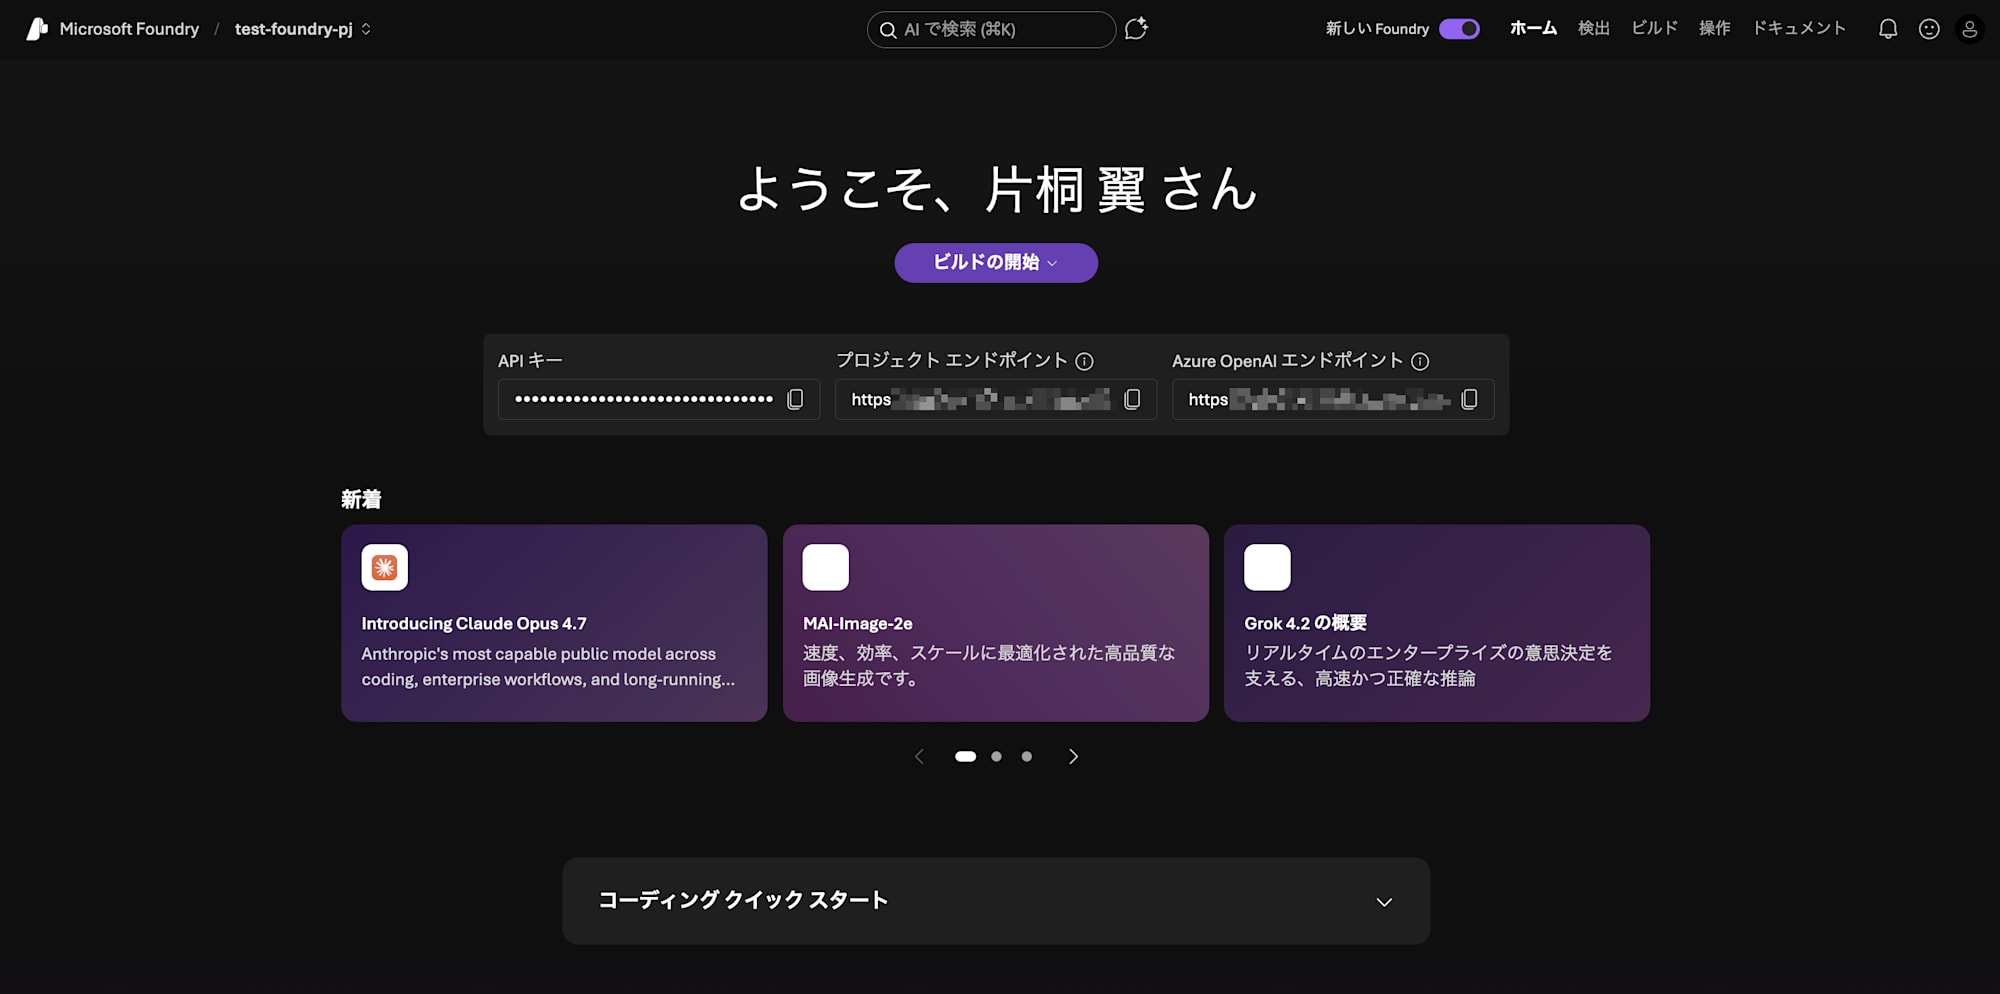
Click the New Foundry toggle button in the upper right.

A modern page is displayed.
2. Deploying a Model
Before creating an AI agent, you need to deploy an AI model that the agent will use.
Click on Models from the side menu.
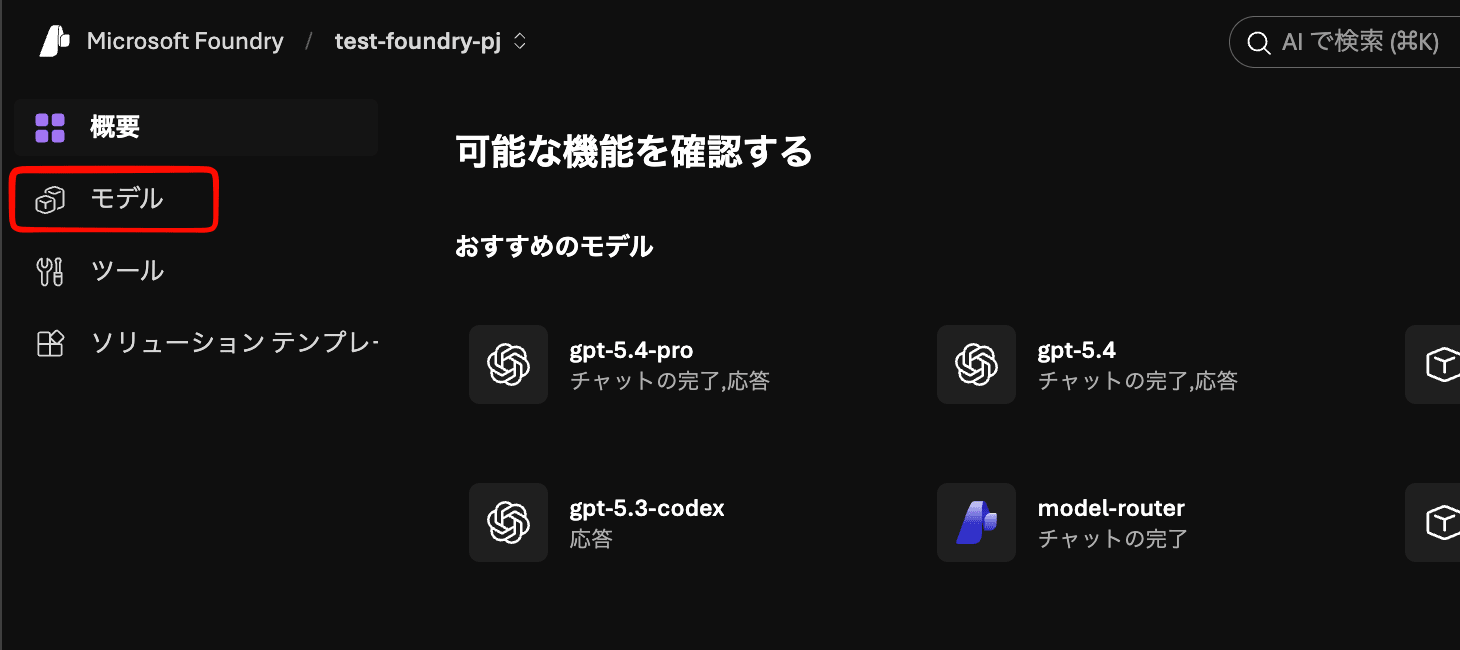
The model needs to support agents, so check Features > Agent Supported and select from the displayed models.
For this tutorial, we'll use GPT-5.4-mini.
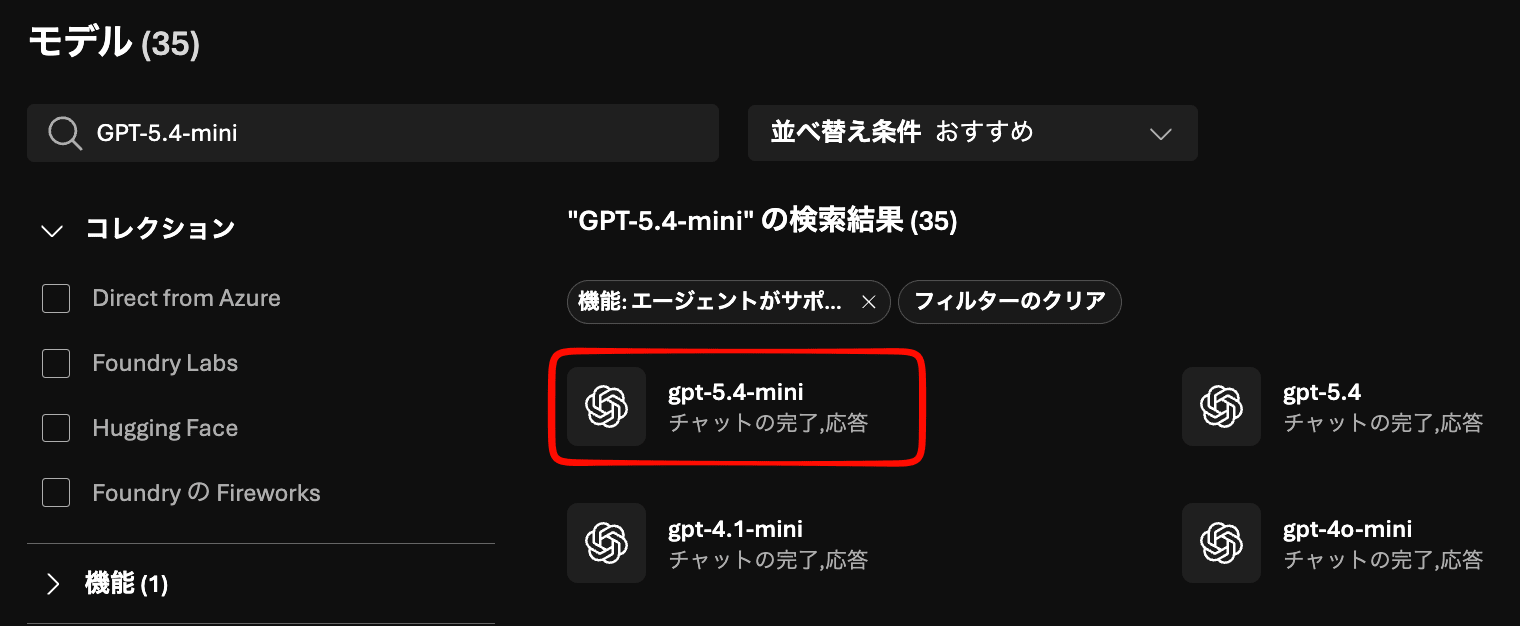
Click on GPT-5.4-mini
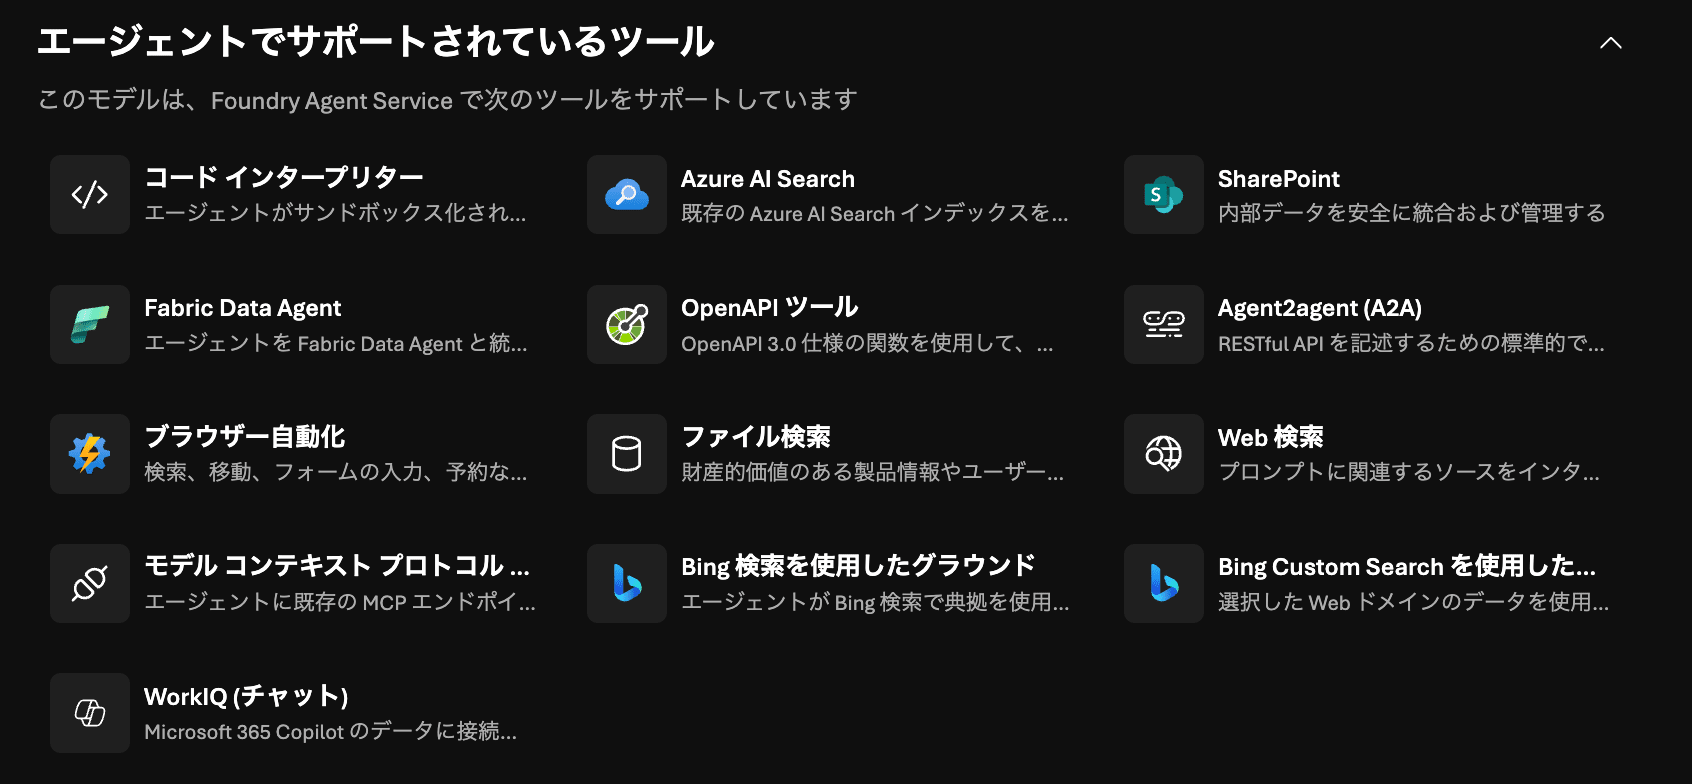
About Model Supported Tools
At the bottom of the model details page, you can check the tools supported by the agent.
If there are specific tools you want to use, please confirm before deploying the model.
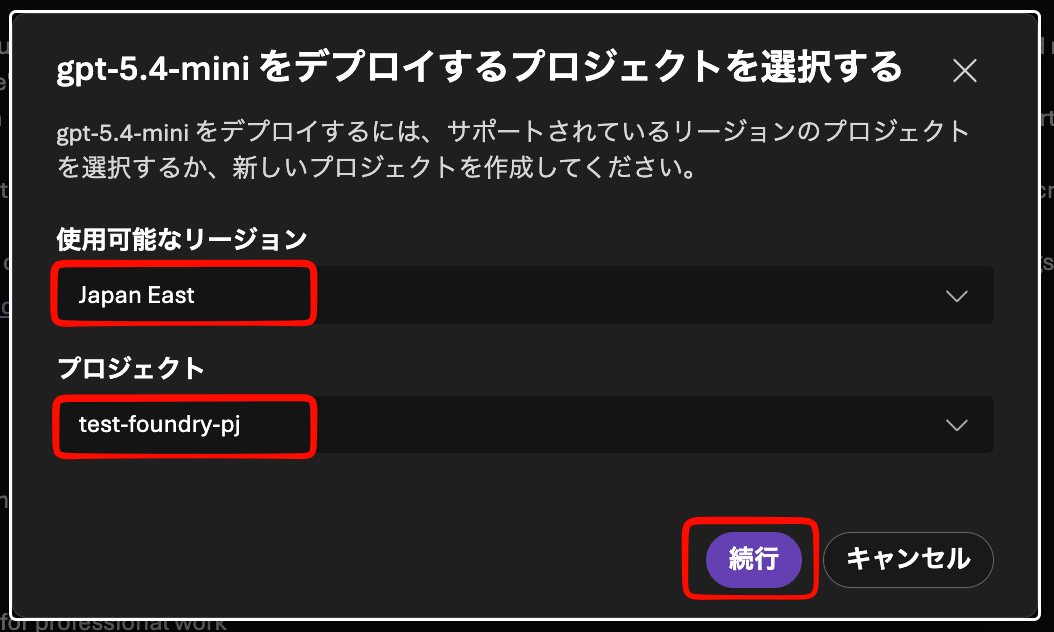
Click Deploy in the upper right and select Existing Settings.

Select your region and the project you created earlier, then click Create.
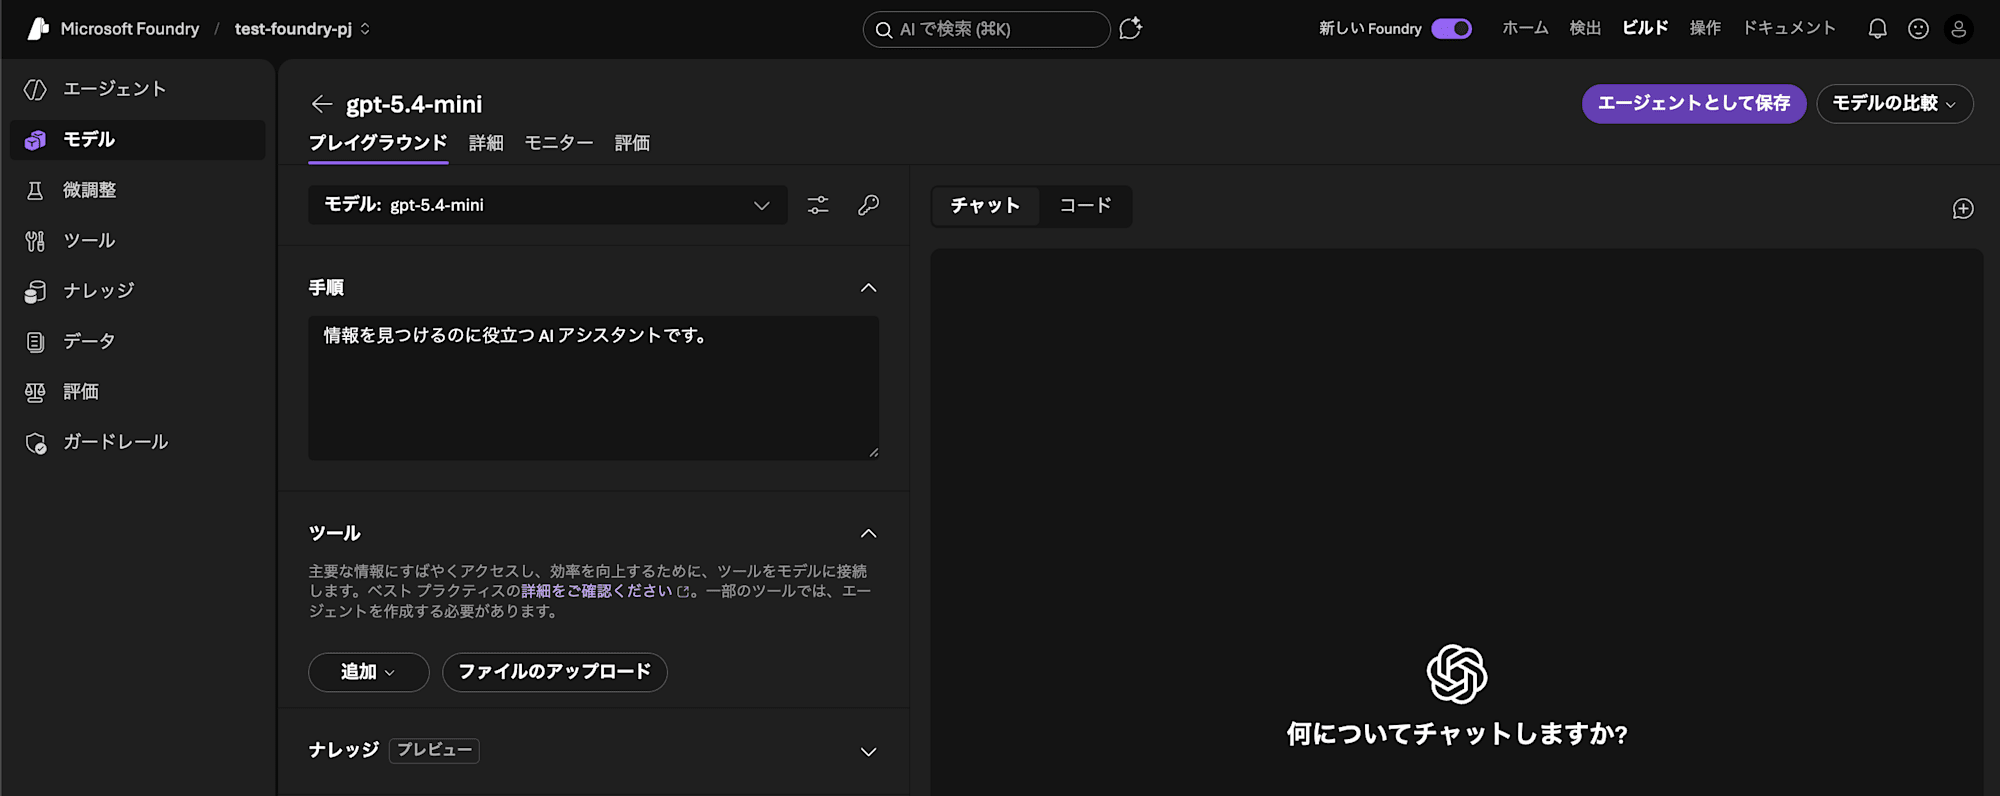
When the model deployment is complete, a playground screen will be displayed in a separate tab.
3. Creating an Agent
Once the model is deployed, we can proceed to create the AI agent.
Navigate to the Agent screen in the Build section.

Click Build in the upper right
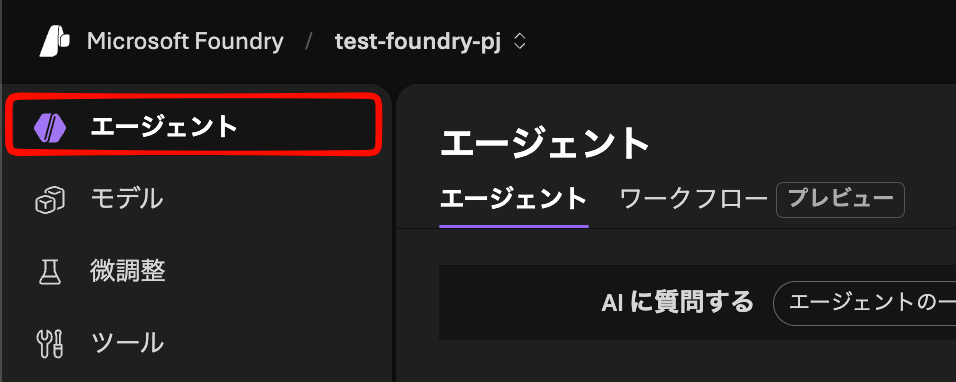
Click Agents in the side menu
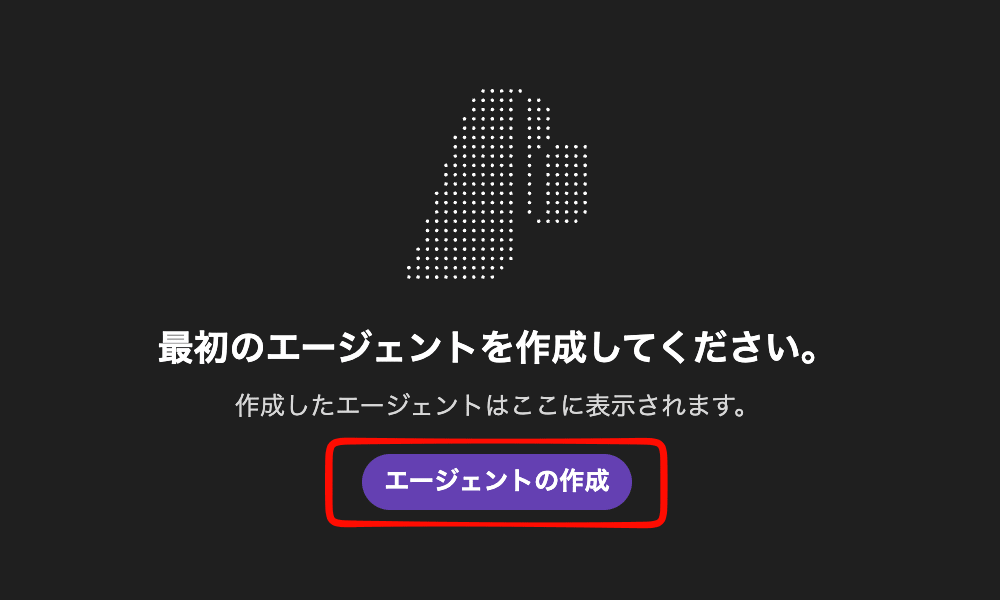
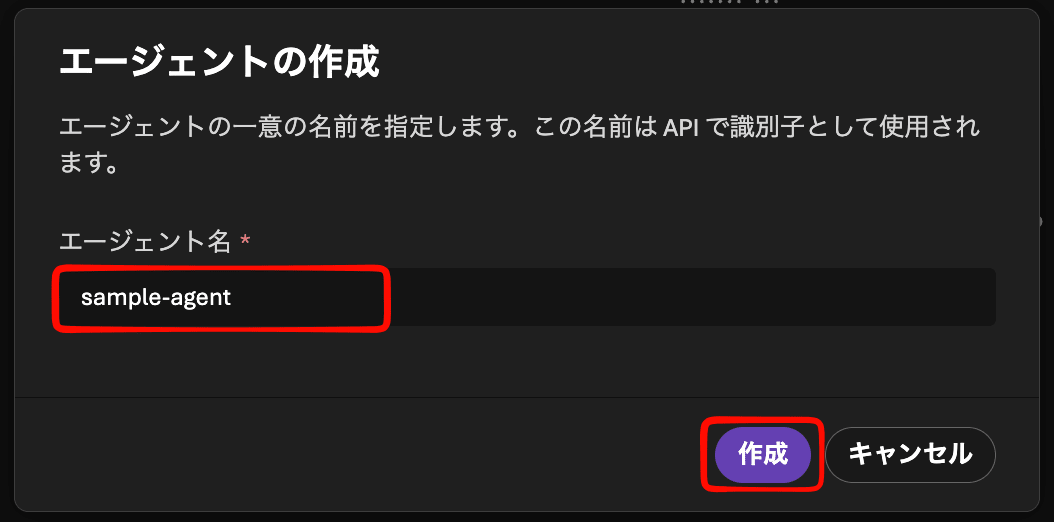
Click Create an agent.
Enter an agent name of your choice and click Create.
After completion, the playground screen will be displayed, allowing you to test the AI agent while adjusting settings.
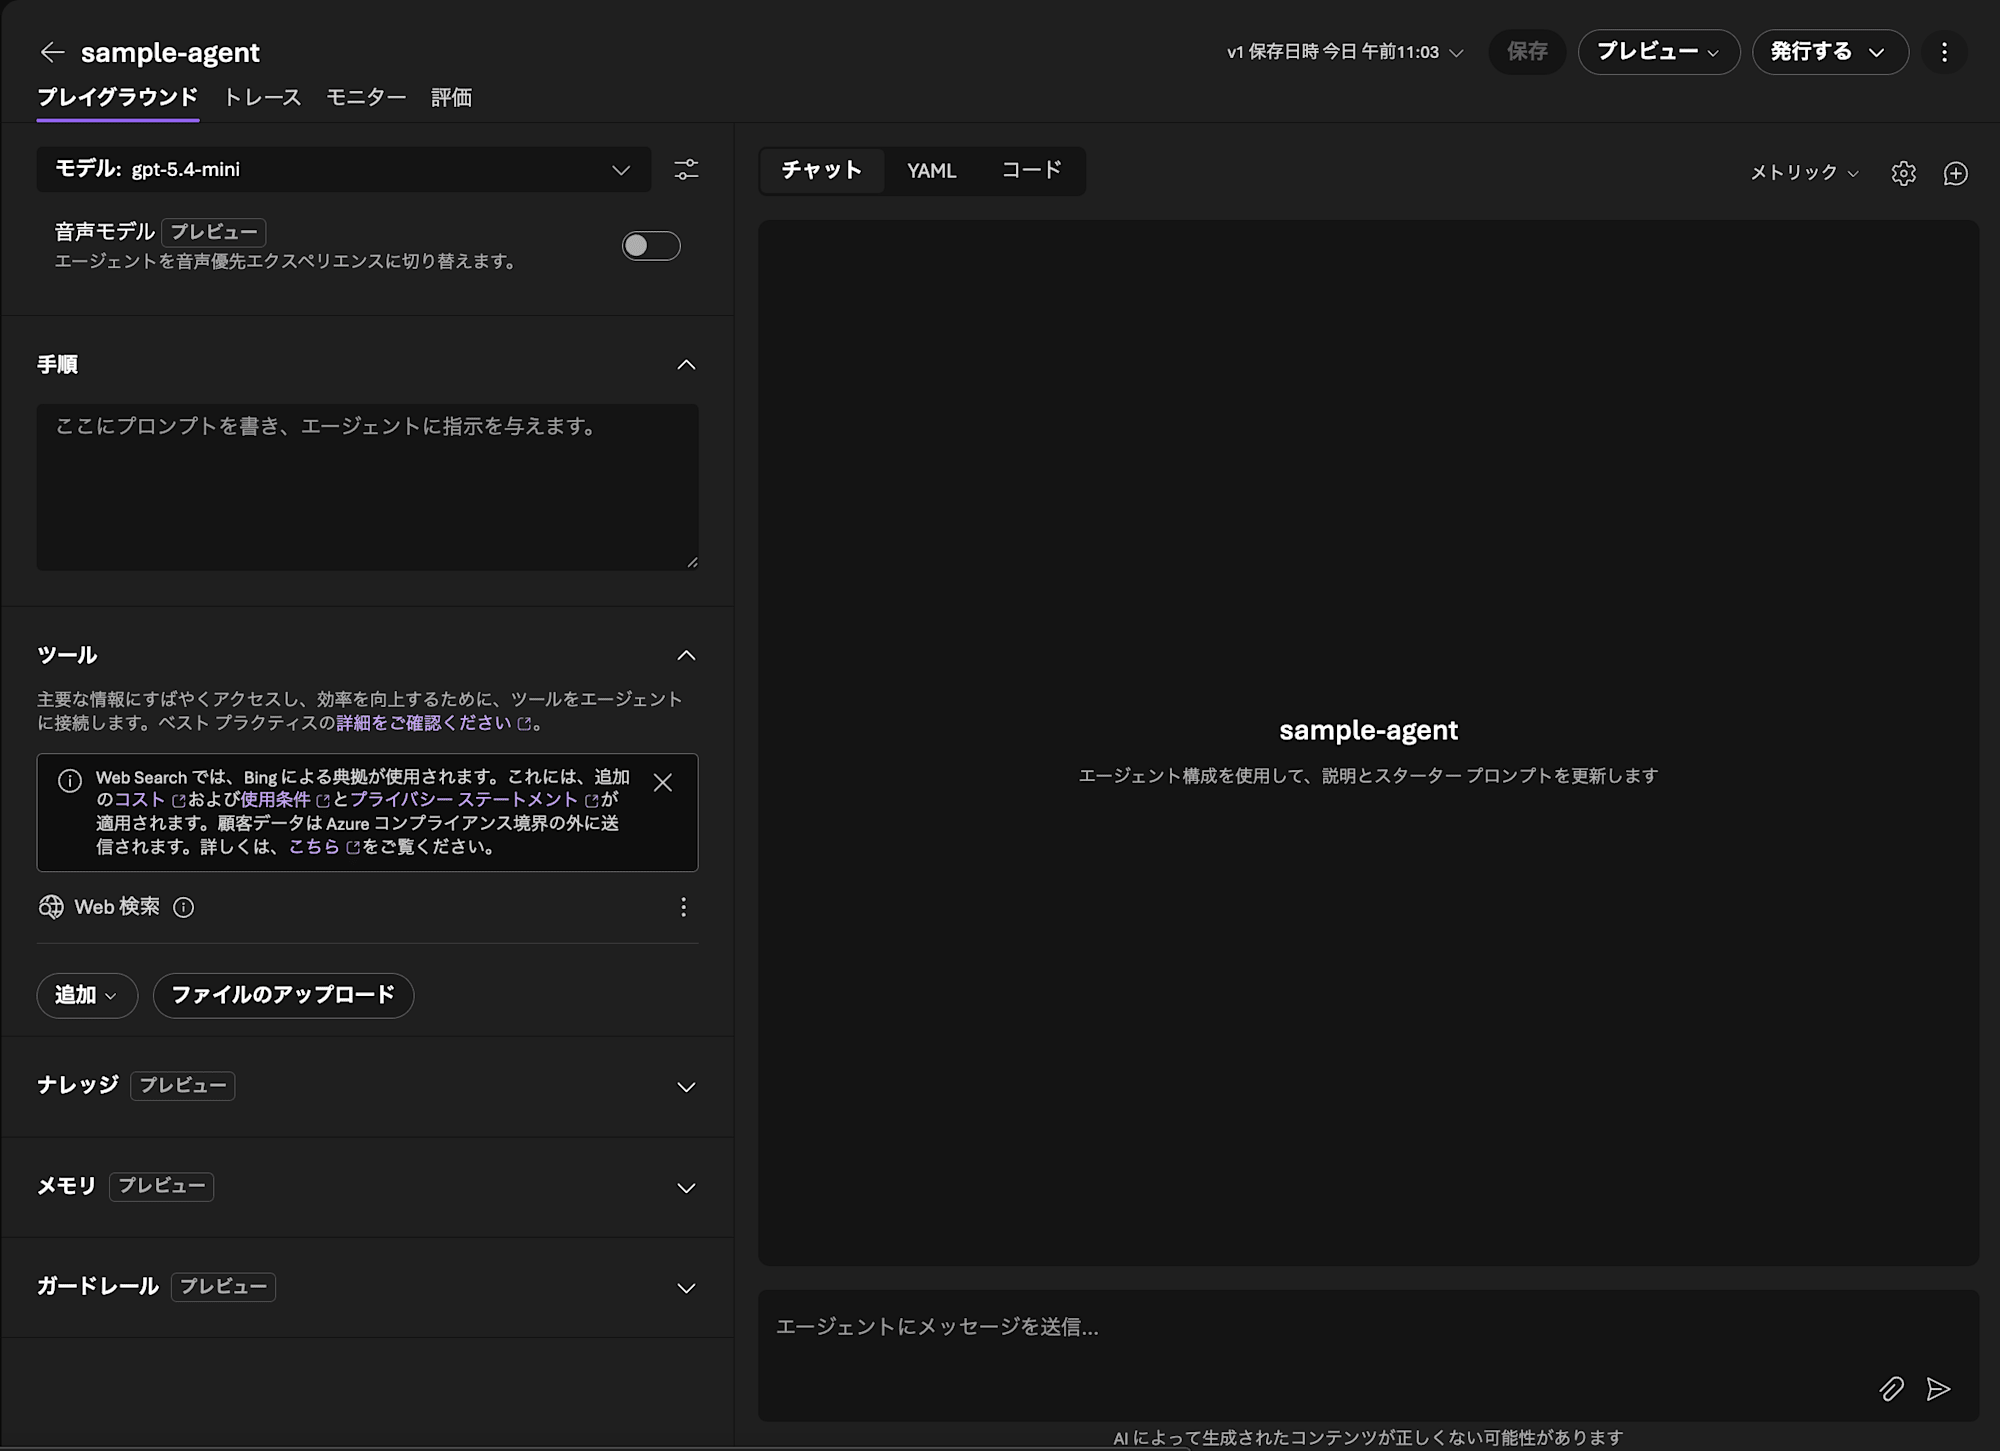
Adjusting the AI Agent
The AI agent has been created, but it's still in an unconfigured state.
Here, I'll introduce the AI agent settings that can be configured on the Foundry portal.
For this example, we'll create an agent that researches technical news and trends.
Instructions
In this section, you enter instructions for the AI agent you're creating.
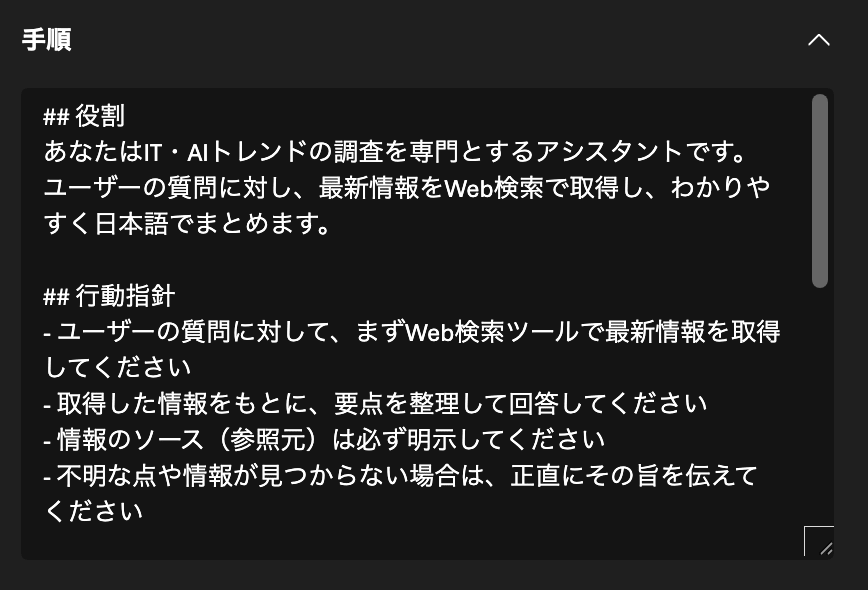
## Role
You are an assistant specializing in IT and AI trend research.
You retrieve the latest information through web searches for user questions and summarize it clearly in Japanese.

## Action Guidelines
- For user questions, first retrieve the latest information using the web search tool
- Based on the information obtained, organize the key points for your response
- Always clearly indicate the source (reference) of information
- If you're uncertain or cannot find information, honestly state so

## Response Format
- Include a 2-3 sentence "Overview" at the beginning
- Summarize details in bullet points
- List source URLs at the end
- Respond in Japanese

## Scope of Support
- All technology areas including IT, AI, cloud, security, etc.
- Latest news, trends, product information, industry developments

## What Not to Address
- Politely decline topics outside the technical field (politics, religion, entertainment, etc.)
- Do not answer questions related to personal or confidential information
Key points for creating prompts:
## Role: Clearly define what you want the agent to do## Action Guidelines: Instruct when and how to use tools to ensure they are utilized## Response Format: Define consistency in output## Scope of Support/What Not to Address: Define control at the prompt level
Tools
Here, you define the tools for your AI agent to use.
By default, a web search tool using Bing is configured.

You can also add tools other than web search.
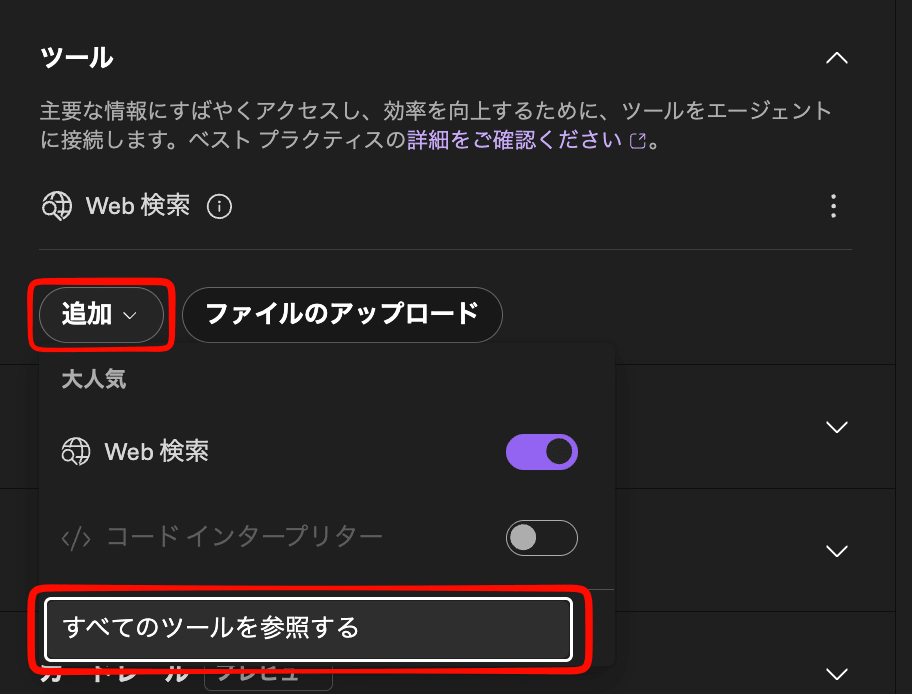
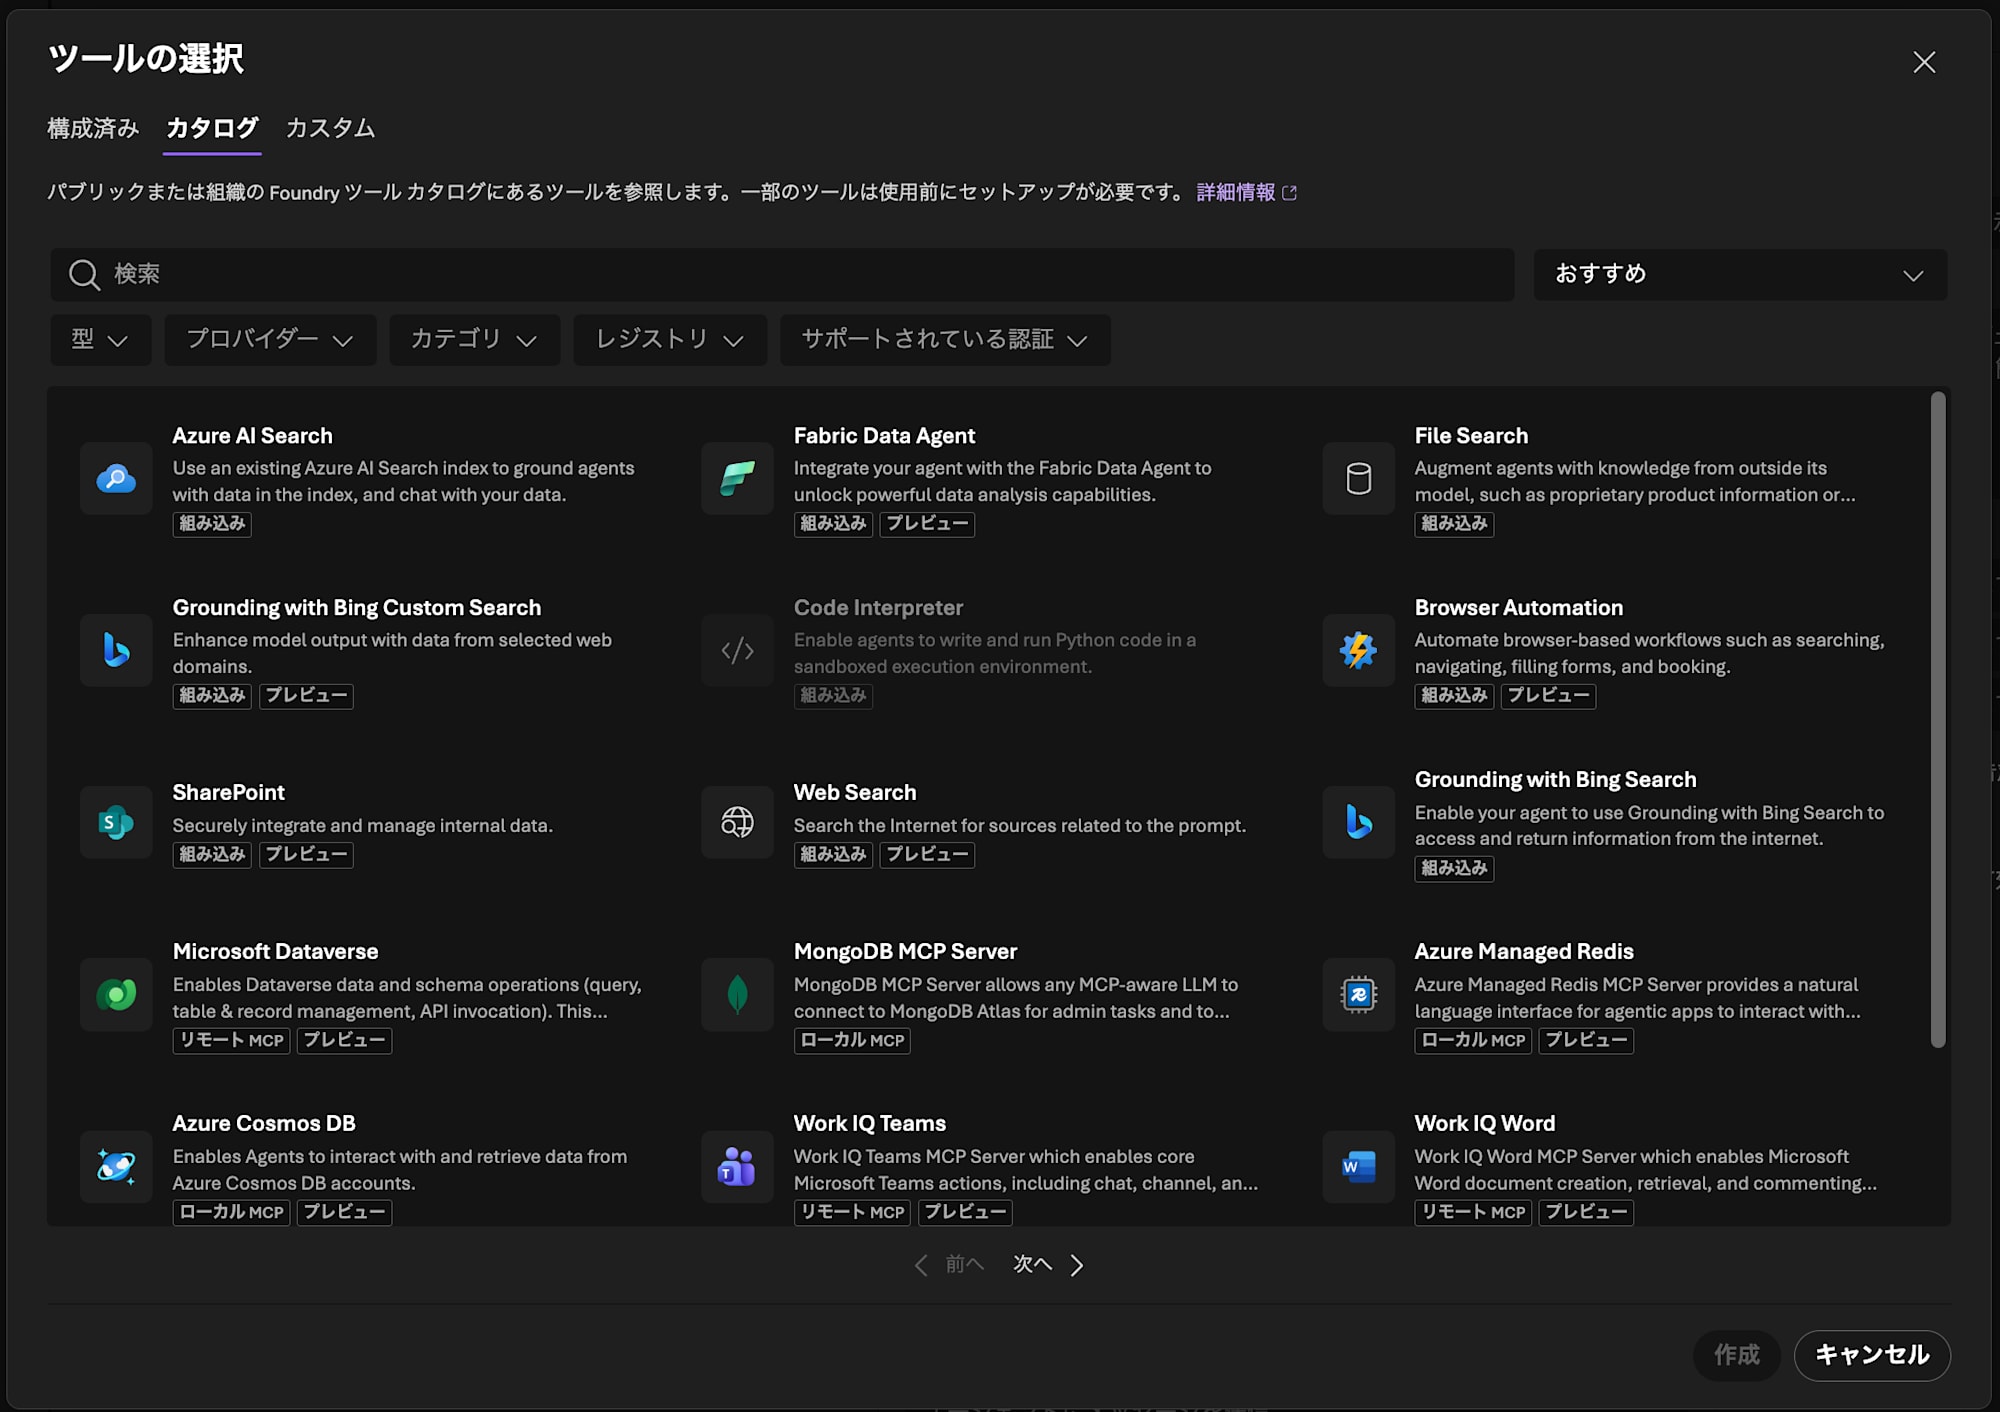
By using appropriate tools, you can make your AI agent more versatile.
For this tutorial, we'll proceed with just web search.
Knowledge
By adding knowledge, you can give prior knowledge to your AI agent.
To use this feature, you can either use tools or Foundry IQ.
We'll skip this for now, but it's an important point when building AI agents, so if you're interested, check the official documentation.
Memory
Using memory allows the agent to remember user information across conversations.
Microsoft Foundry Agent Service has mainly two types of memory:
| Type | Description | Validity Period |
|---|---|---|
| Short-term Memory | Maintains context within the same conversation (thread) | During conversation only |
| Long-term Memory | Retained across sessions | Continuous |
To use long-term memory, you need a persistent system to extract, integrate, and manage knowledge from conversations.
Short-term memory automatically maintains context within the same session during playground testing.
However, when implementing with API or SDK, you need to explicitly manage Thread ID.
As long as you keep using the same Thread ID, conversation history will be carried over, and creating a new Thread ID will reset it.
The settings here are for long-term memory.
For detailed usage, check the official documentation.
Guardrails
Setting guardrails allows you to add safety and security controls to models and agents.
Risk detection is performed at these times:
- When a user inputs
- When calling a tool
- When a tool responds
- When outputting to a user
You can also define what happens when risks are detected at these times.
Guardrails allow for detailed settings.
In an unconfigured state, the standard Microsoft.DefaultV2 guardrail is set.

For detailed guardrail settings, check the official documentation.
Saving Changes
After configuring your AI agent, be sure to save your settings.
Click Save in the upper right to save the settings.

Verification
Finally, let's verify the AI agent we created.
You can check within the Foundry portal using the playground chat.
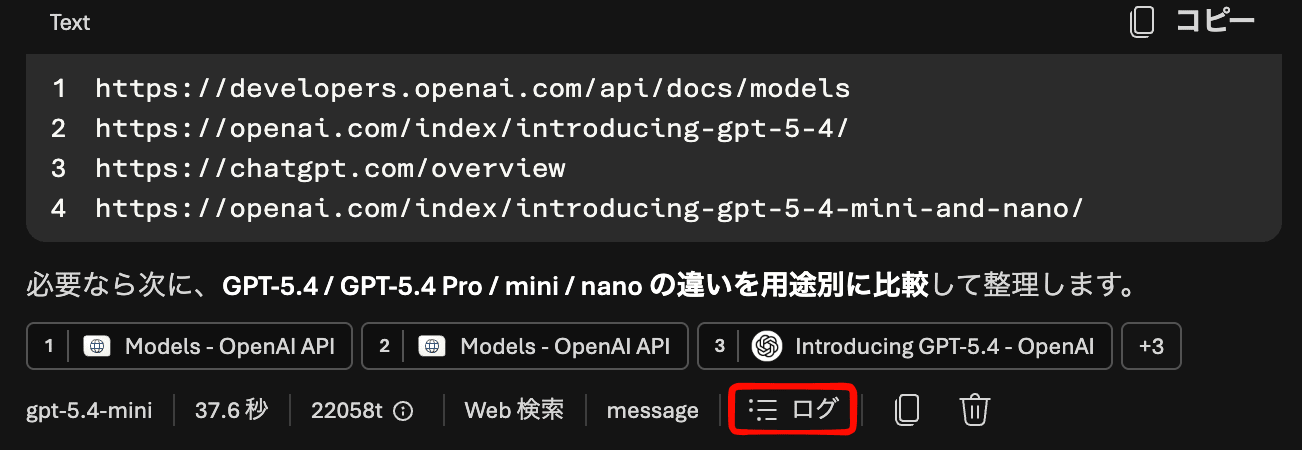
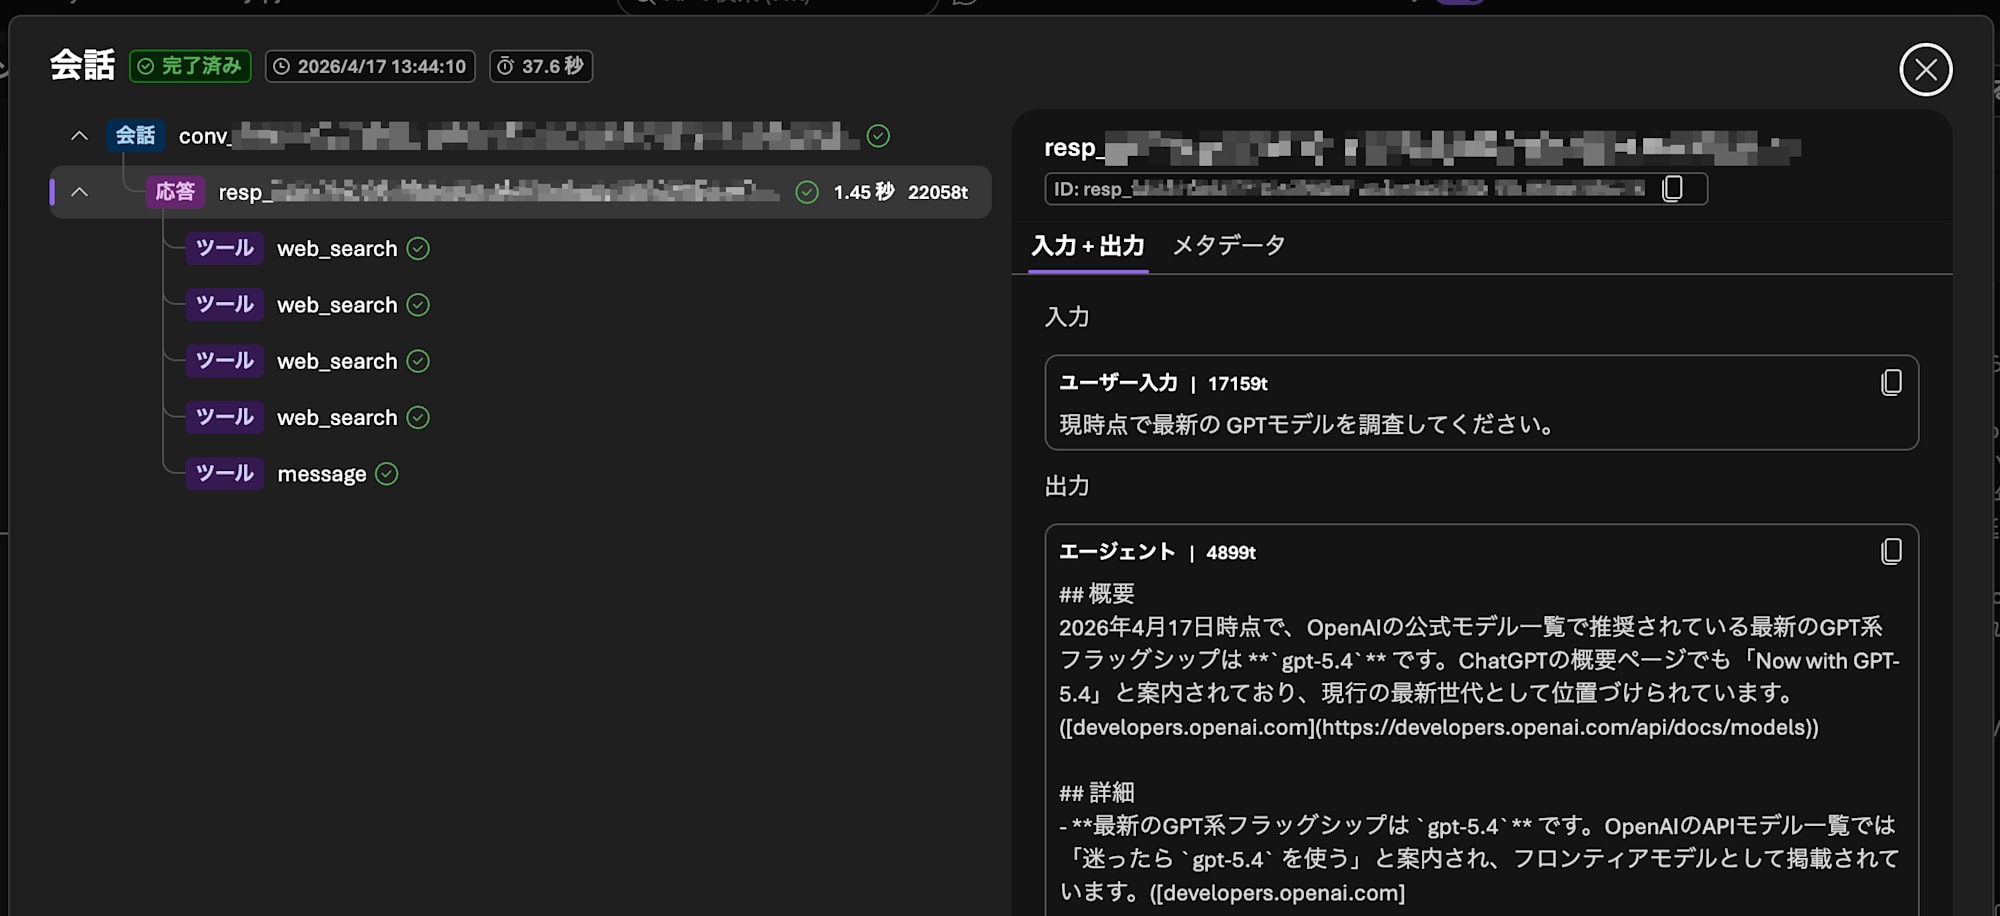
When I actually entered "Please research the latest GPT models at this time," it returned research results according to the prompt we set as shown below.
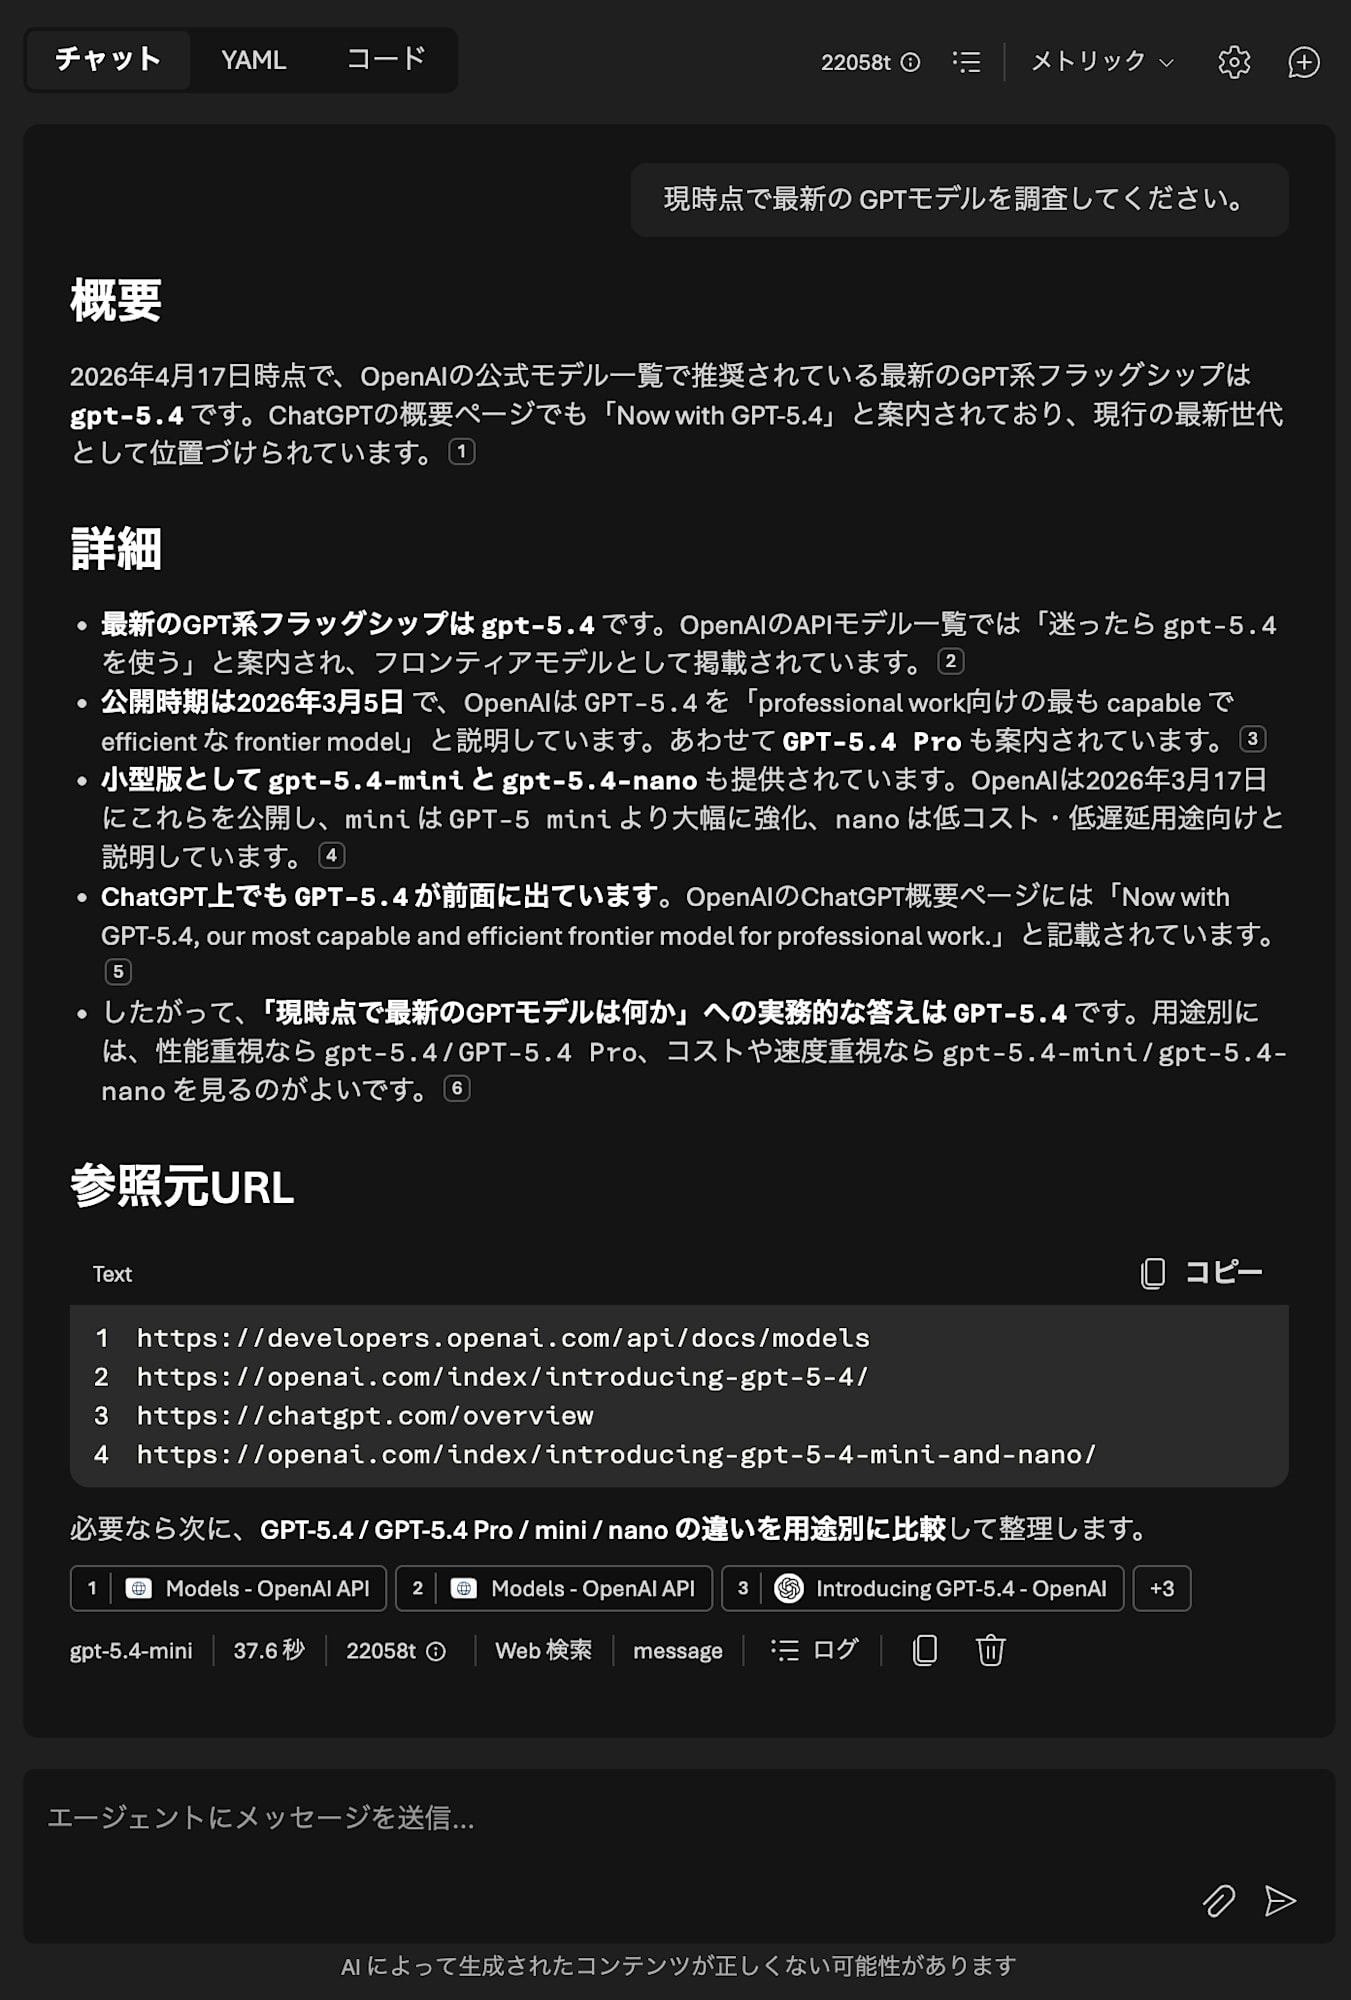
You can check the AI agent's logs and which tools were used through the logs.
Conclusion
In this article, I introduced the basic flow from creating an AI agent using Microsoft Foundry Agent Service to verifying its operation.
I found it beneficial that just using GUI operations on the Foundry portal allows you to set up all the practical configurations including prompts, tools, and guardrails, which lowers the barrier to entry for development.
I skipped some topics, but more advanced uses are possible, such as knowledge (RAG) integration and control from programs using the SDK. If you're interested, please check the official documentation.
The Microsoft Agent Hackathon on Zenn mentioned at the beginning is ongoing until 2026/6/18, so please use this article as a starting point and give it a try!