I participated in NVIDIA Japan's NPN Partner Agentic AI Bootcamp.
This page has been translated by machine translation. View original
Introduction
Hello, I'm Morishige from Classmethod's Manufacturing Business Technology Department.
On June 17, 2026, I attended the "Japan NVIDIA NPN Partner Agentic AI Bootcamp" hosted by NVIDIA Japan and Macnica. This was a closed, full-day hands-on event exclusively for employees of NVIDIA NPN (NVIDIA Partner Network) partner companies. It had a fairly dense structure where you touched MCP, NVIDIA NIM, LangGraph, and NeMo Agent Toolkit all in one day, with a Challenge session at the end to verify your level of understanding.
Some of you may be thinking "I couldn't attend since it was NPN-only," but the materials themselves are publicly available under the Apache 2.0 license at openhackathons-org/agentic-ai-bootcamp. Since Japanese-localized notebooks are also included, just copying them out for an internal study session seems well worth it.
In this article, I'll summarize the day's agenda, key points covered in each Lab, the structure of the Challenge, and the moments that left a strong impression on me, as a participation report.
In a Nutshell
Overall, the structure took you through cloud and local NIM first, then MCP, LangGraph, and NeMo Agent Toolkit in sequence over the course of one day — a composition that lets you experience the "layers" of agent development firsthand. The finishing Challenge was story-driven, tasking you with extending the customer support for a fictional record EC store called "Harmony Records" using MCP, requiring you to mobilize everything you'd touched in the morning layers. Since the materials repository itself is publicly available on GitHub, those who couldn't attend should be able to reproduce it as an internal hands-on session.
Event Overview
The event was structured in two parts: Day 0 (online Dry Run) and Day 1 (in-person hands-on main session).
- Date: June 17, 2026, 9:30–19:30 (JST)
- Venue: Macnica Shinagawa Office
- Target Participants: NVIDIA NPN partner employees
- Organizers: NVIDIA Japan + Macnica + OpenACC organization
Here are the materials repository and the API Catalog used as the NVIDIA-side endpoint.
The execution environment was a shared GPU instance set up on Brev, distributed in advance, with the format being to call NIM endpoints from the API Catalog via Jupyter Notebook. Environment verification was supported in the pre-event briefing as well, so it was reassuring that issues like "spent half the day on environment setup" were unlikely to occur on the day.
Day-of Agenda
The agenda for the main hands-on session was approximately as follows.
| Time | Session |
|---|---|
| 10:00 - 10:30 | Introduction and Cluster |
| 10:30 - 11:50 | Lab 1: Using NVIDIA NIM via Cloud and Local |
| 12:35 - 13:20 | Lab 2: Introduction to Model Context Protocol (MCP) |
| 13:20 - 13:50 | Lab 3: Low-Level MCP Server Implementation |
| 14:00 - 14:55 | Lab 4: Building Agentic Workflows with LangGraph |
| 15:05 - 16:45 | Challenge Description and Self-Style Challenge |
| 16:55 - 17:25 | Challenge Solution (Interactive Session) |
In the materials repository under tutorial/jupyter_notebook/, notebooks are lined up from 01_inference_endpoint_ja.ipynb through 06_challenge_ja.ipynb, and the style was essentially to work through each notebook one by one in order.
From here, I'll look back at what each Lab covered and the points that left an impression on me.
Lab 1: Calling NIM from Cloud and Local
The first Lab was a warm-up with NVIDIA NIM (NVIDIA Inference Microservices). The content involved using the requests library to call the OpenAI-compatible API for both the NIM endpoint hosted on build.nvidia.com's API Catalog and a NIM instance running locally in Docker, performing inference against both.
The key point is that NIM speaks the OpenAI-compatible schema. Both the cloud endpoint and the local Docker endpoint work with the exact same client code — you just switch the URL and model name. This connects to what comes up in later Labs with NeMo Agent Toolkit: by simply swapping base_url, you can achieve a configuration like "large cloud model during development, in-house GPU NIM in production."
As someone who had been vaguely troubled by wanting to "test while switching between local LLM and cloud LLM," I think it made sense to nail this down first as an entry point.
Lab 2: Getting Started with FastMCP
Lab 2 was an introduction to MCP (Model Context Protocol), walking through how to define tools with FastMCP, the high-level SDK. The appeal is how simply you can turn a function into an MCP tool with a single decorator — the tutorial's mcp_server.py is written with roughly this level of code.
# Source: openhackathons-org/agentic-ai-bootcamp tutorial/jupyter_notebook/mcp_server.py
from mcp.server.fastmcp import FastMCP

mcp = FastMCP("simple-math")

@mcp.tool()
def add(a: int, b: int) -> int:
    """Add two numbers together."""
    return a + b

if __name__ == "__main__":
    mcp.run(transport="stdio")
On the client side, you go through the basic operations in order: establishing a ClientSession from the mcp Python SDK via stdio_client, retrieving the tool list with list_tools(), and calling tools with call_tool(). Many people probably have a vague awareness of MCP as "that new protocol from Anthropic," but when the server-side code is this simple, it starts to feel like something you could write yourself — so it's designed to lower that initial psychological barrier.
Lab 3: Writing a Low-Level SDK and HTTP MCP Server
Lab 3 covered implementation with the MCP low-level SDK. This Lab peeled back the abstraction layer of FastMCP, and focused on understanding the raw behavior of MCP: manually writing JSON Schema with @server.list_tools(), then validating arguments in @server.call_tool() before passing them to processing logic.
# Source: openhackathons-org/agentic-ai-bootcamp tutorial/jupyter_notebook/mcp_server_low_level.py
server = Server("simple-math")

@server.list_tools()
async def handle_list_tools() -> list[types.Tool]:
    return [
        types.Tool(
            name="add",
            description="Add two numbers together",
            inputSchema={
                "type": "object",
                "properties": {
                    "a": {"type": "number"},
                    "b": {"type": "number"},
                },
                "required": ["a", "b"],
            },
        ),
    ]

@server.call_tool()
async def handle_call_tool(name: str, arguments: dict | None):
    if not arguments or "a" not in arguments or "b" not in arguments:
        raise ValueError("Missing required arguments: a, b")
    return [types.TextContent(type="text", text=str(arguments["a"] + arguments["b"]))]
In the second half, the same tools are placed on top of Starlette + Uvicorn and exposed via HTTP (Streamable HTTP). The reasoning behind the distinction — stdio for local development as a subprocess, HTTP for production microservices — suddenly became crystal clear. Since the Challenge involves implementing an HTTP MCP server, quietly getting this structure into your head here pays off later.
Lab 4: Building State / Node / Edge with LangGraph
Lab 4 was the LangGraph section. Using StateGraph, you build out State (a shared information bulletin board), Nodes (units of processing), and Edges (connections), and go all the way to creating a ReAct agent with tool calls.
The technical highlights that left an impression were:
- Holding conversation history in State with
Annotated[list, add_messages] - Forcing LLM output into JSON with
with_structured_output(Pydantic schema)and placing it at the entrance of an Intent Classifier - Maintaining multi-turn conversation per
thread_idby passingInMemorySaveras a CheckPointer - Inserting a human confirmation step mid-graph with
interrupt(Human-in-the-loop)
The tutorial was thoughtfully staged so that "what's actually useful about seriously using LangGraph's interrupt" becomes concretely clear through the Challenge's refund flow (a step that asks the user "Are you sure you want a refund?"). The explanation that uses "bulletin board" as a metaphor for State really clicked for me, and I'm considering borrowing it when explaining things at internal study sessions.
Lab 5: Trying NeMo Agent Toolkit's YAML and Phoenix
Lab 5 covered the operational features of NeMo Agent Toolkit (NAT). NAT is a higher-level layer on top of LangGraph, providing a set of features that come into play when running agents in production — like "being able to swap tools, models, and Workflows in and out via YAML" and "visualizing traces with Phoenix (Arize)."
Excerpting from the tutorial's movie_workflow.yml, it has a structure like this:
# Source: openhackathons-org/agentic-ai-bootcamp tutorial/jupyter_notebook/movie_workflow.yml
function_groups:
  mcp_movies:
    _type: mcp_client
    server:
      transport: streamable-http
      url: 'http://127.0.0.1:${MCP_PORT}/mcp/'

llms:
  nim_llm:
    _type: nim
    model_name: nvidia/nemotron-3-nano-30b-a3b
    base_url: https://integrate.api.nvidia.com/v1
    api_key: ${NVIDIA_API_KEY}

workflow:
  _type: react_agent
  tool_names: [mcp_movies]
  llm_name: nim_llm
When you replace the MCP client code written in LangGraph with NAT, tool connections and LLM swapping are handled in just a few lines of YAML. Add a telemetry section and traces flow to Phoenix, letting you visually track which tools the agent called in which order.
Honestly, during the hands-on I found it hard to see the motivation for rewriting something you'd written in LangGraph into NAT, but the instructor's added comment — "when you want to roll out a configuration that worked for the sales department to the engineering department, you just swap the YAML" — finally made it click. When you consider the whole picture including "rolling out agents to customers," the desire to peel the operational layer away from hardcoded LangGraph starts to make sense.
The Harmony Records Customer Support MCP Extension Challenge
The afternoon Challenge session had a story-driven setup: extending the customer support agent for a fictional record EC store called "Harmony Records" using MCP. Skeletons are provided under the challenge/ directory in the materials repository, divided into four sub-tasks. There was about an hour and a half of independent work time, but completing all four consecutively was more challenging than expected — it made for a good rehearsal reassembling everything from the morning's Labs in a practical setting.
- Invoice MCP Server: Expose
search_invoicesandprocess_refundagainst the Chinook SQLite DB using Low-level MCP SDK + Streamable HTTP - QnA Agent Skill: Write an Agent Skill (
SKILL.md) using the Progressive Disclosure pattern to assist with generating SQL queries for Music / Artist / Album / Track information - LLM Workflow: Use LangGraph to build an Intent Classifier → QnA / Refund agent pipeline, connect it to the Invoice MCP server, and insert a refund confirmation with
interrupt - NAT Workflow: Declare the same configuration in
workflow.yamland make it runnable withnat run
Here's a rough diagram of the overall picture:
One implementation pitfall to watch out for: the inputSchema in low-level MCP requires you to write raw JSON Schema by hand, so if a type is off there, you'll get mysterious validation errors on the client side with no clear cause. I initially wrote invoice_id in process_refund as string, which caused endless looping when called from LangGraph. Since error messages tend to get swallowed at the MCP layer, it's faster to first verify the raw response with the nat mcp client CLI before integrating into LangGraph.
Points That Left a Strong Impression
After attending, there were four points that helped clarify things in my mind.
The first is the division of roles between MCP and Agent Skills. The lecture introduced a framework where MCP is the layer for "what tools are available" — the tool specification layer — while Agent Skills are the layer for "how to combine and use them" — the task procedure layer. When you think of both at the same layer, you end up with confusions like "should I also pack SQL query patterns into MCP?" but being conscious of the layer separation lets you offload that to the Skill side, which seemed to reduce my own design ambiguities.
The second is the positioning of NeMo Agent Toolkit. If you try to deliver an agent built in LangGraph directly to a customer, you'll need to rewrite Python code every time the configuration changes. By declaratively swapping "MCP client," "LLM endpoint," and "Workflow" in NAT's YAML, you can avoid touching Python when rolling out to new use cases. The explanation that "LangGraph and NAT aren't competitors — they operate at different layers" quietly hit home.
The third is the quality of the materials. With the Brev cluster dry run included, materials that let you touch NIM → MCP → LangGraph → NAT → Phoenix just by working through notebooks in order seem highly reusable as introductory materials for in-house agent development. "Excessive expectations aside," I think there's quite a lot of reuse value here as material for internal hands-on sessions.
The fourth is something the instructor said at the start about "the significance of writing agents yourself." The point was: nowadays agents themselves can be written by AI agents, but when you want to customize for a customer, insert sub-agents, or increase control, whether or not you truly understand what's happening under the hood makes a huge difference in what you can produce. As someone who usually delegates most of my code to AI agents, I strongly agreed with this concern. The real difference in agent development seems to lie between "being able to make something that works" and "being able to make something that works with a genuine understanding of its internals."
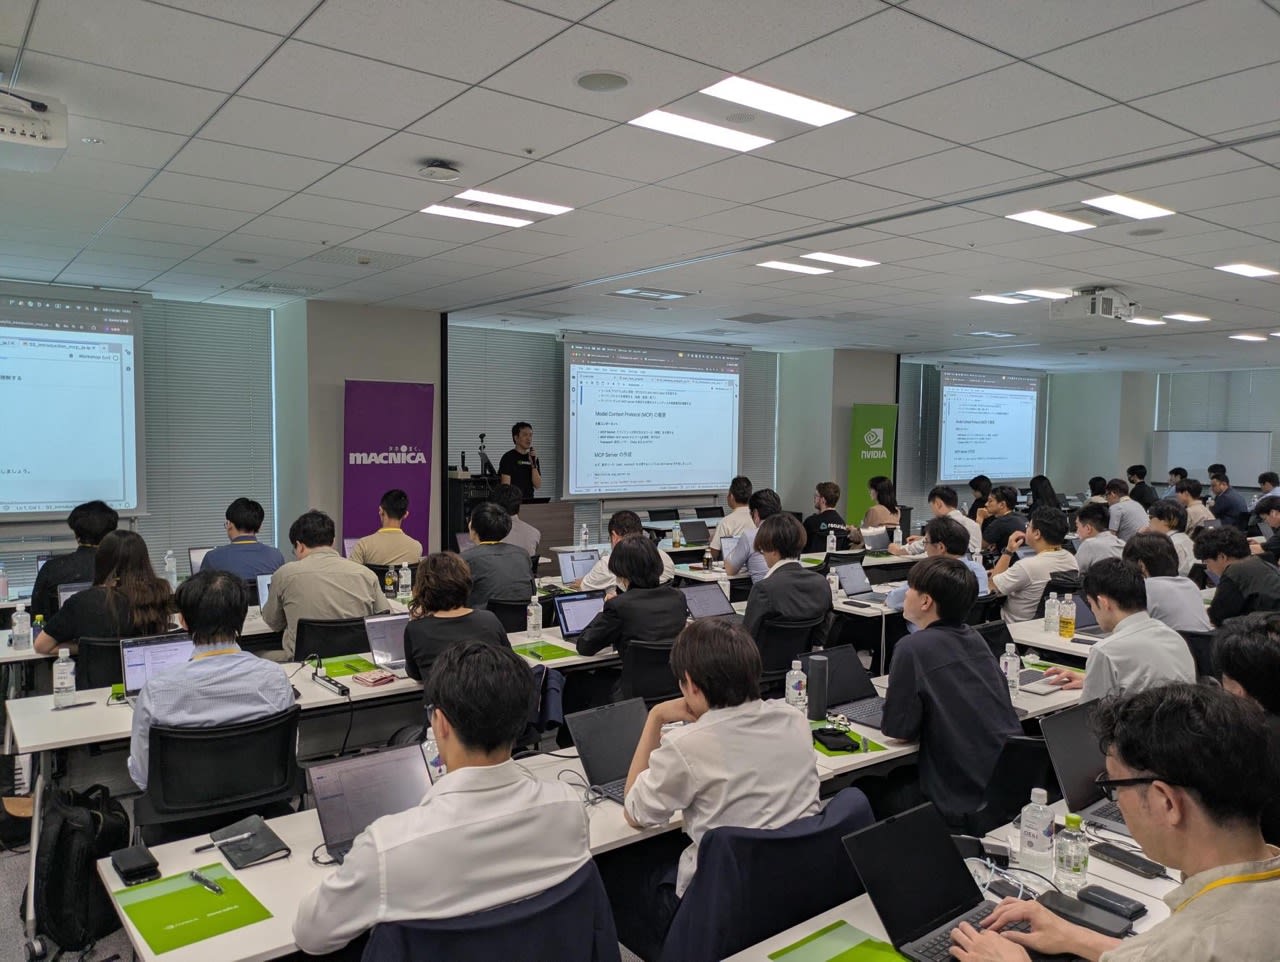
As for the atmosphere at the venue, many teams attended with multiple people from their respective companies, and it had the feel of a good offline study session where people helped each other along. TAs were also on hand throughout, and it was reassuring to know you could get answers quickly whenever you got stuck.
Summary
The Agentic AI Bootcamp was a rare hands-on event that let you connect and touch individually trending technologies — NIM, MCP, LangGraph, and NeMo Agent Toolkit — all in a single day. The Challenge was also at a difficulty level that required real effort to get through within the independent work time, making it an event where you came away with not just lecture knowledge but a real sense of implementation. Even if it's NPN partner-only, since the materials are publicly available on GitHub, it seems more than feasible to cover as a topic for internal study sessions.
Since I have a DGX Spark, my next plan is to reproduce the local NIM portion from Lab 1 on my own machine, and then rewrite the Challenge from scratch in plain Python. A follow-up Bootcamp was announced with reinforcement learning as its theme, so I'm hoping to write that up as an article as well.
Reference Links
- Materials Repository (Apache 2.0)
- NVIDIA NIM / API Catalog
- Model Context Protocol Official
- LangGraph Documentation
- NVIDIA NeMo Agent Toolkit
- Related past articles by me
Code snippets in this article were quoted from openhackathons-org/agentic-ai-bootcamp (Apache License 2.0).