I tried integrating Snowflake with a self-hosted GitLab repository via PrivateLink

Introduction
In Snowflake, you can integrate remote repositories with Snowflake by creating a special type of stage called a repository stage.
Repository stages are read-only, but in the currently previewed Workspace, by integrating with Git repositories, you can directly make changes (commits, pushes, etc.) from the Snowflake side.
Additionally, if you have Business Critical edition or higher, you can configure Snowflake to access Git repositories over a private network by combining it with outbound private connectivity functionality.
I tried this using the self-hosted version of GitLab, so I've written an article about the setup procedure.
Prerequisites
I am using the following environment.
- Snowflake
- Business Critical
- Business Critical edition or higher is required for PrivateLink configuration
- Cloud Region: AWS_US_EAST_1
- Business Critical
- GitLab
- GitLab Self-Managed Enterprise Edition
- Network
- Built in a private subnet
- An ALB is prepared in front, and HTTPS requests terminate at the ALB through SSL offloading, communicating with the GitLab instance via HTTP
- Certificate obtained with ACM
- Resources such as ALB have already been created
- Verification DNS host zone created in Route53
- Others
- HTTPS must be used for the URL during repository stage integration
Here, we are verifying with the configuration shown in the diagram below.
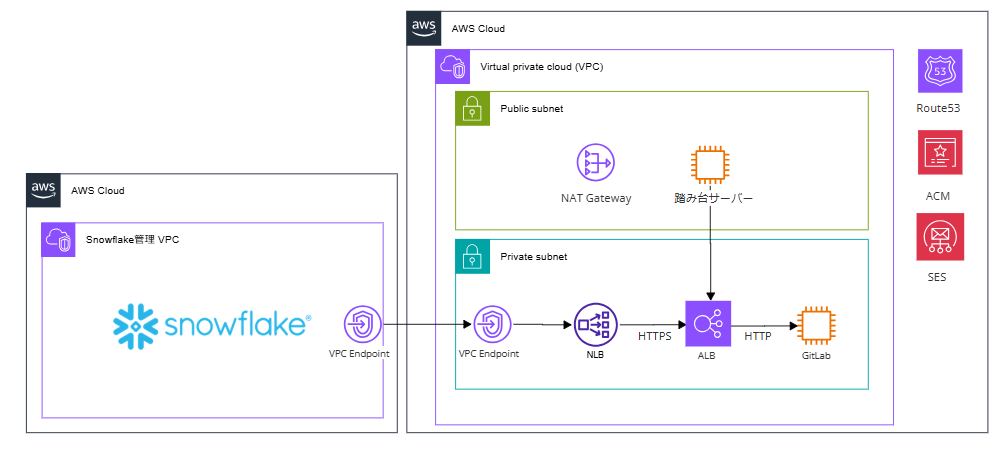
Also, GitLab is already installed and accessible from a bastion server (Windows Server) via ALB.
For GitLab installation instructions, please refer to the following article.
Preparation
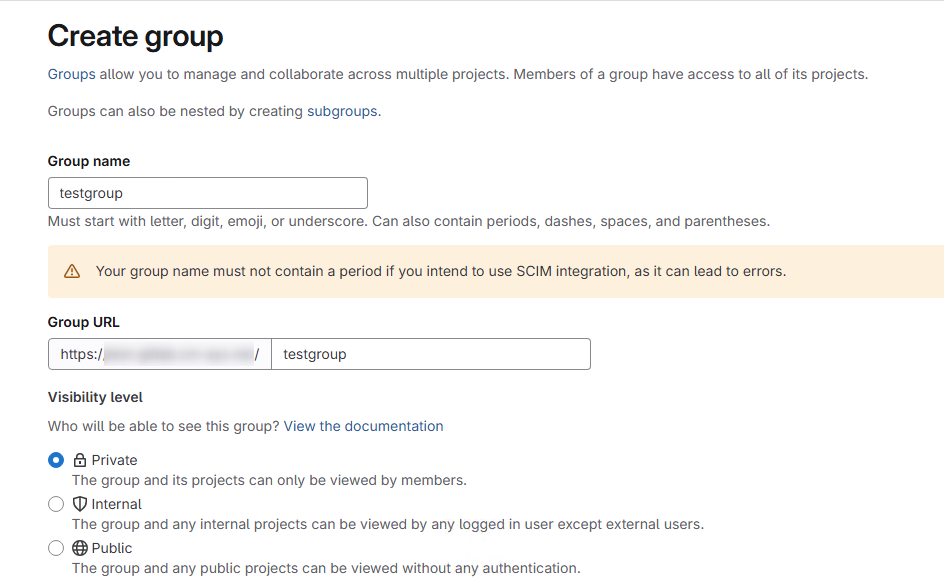
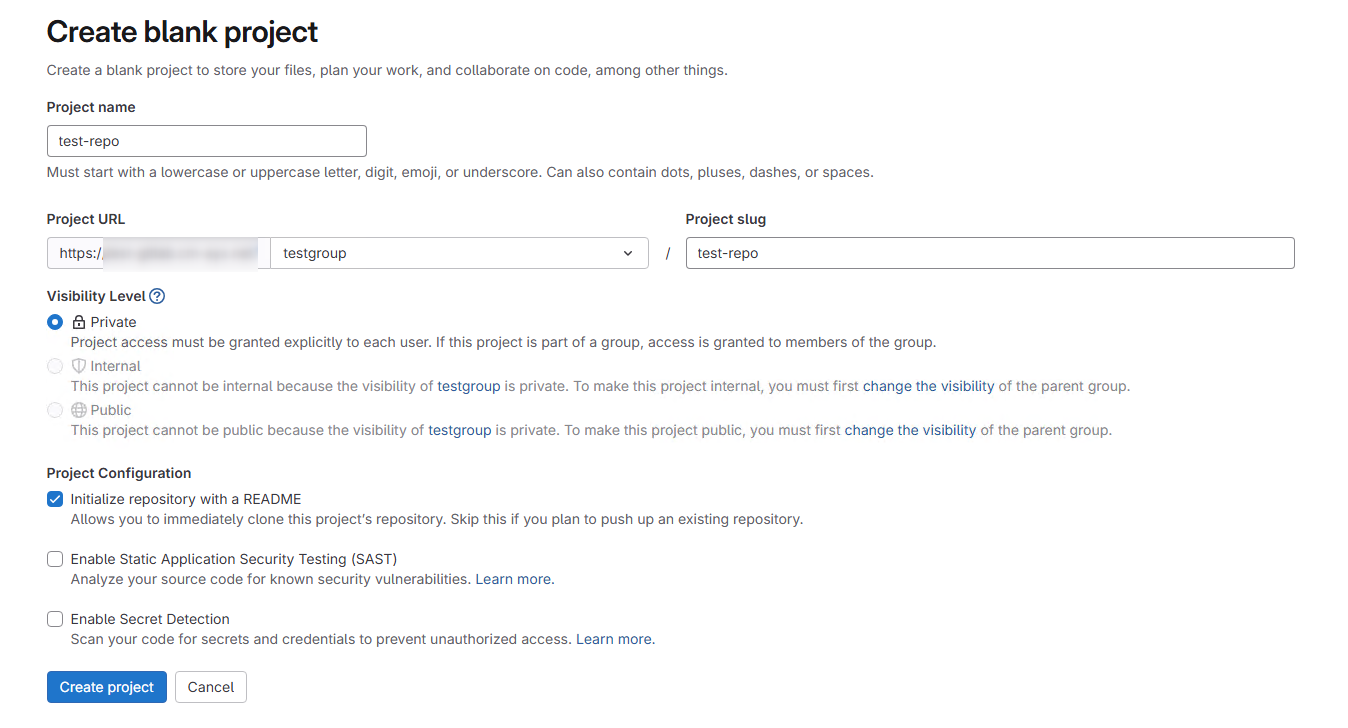
Log in to GitLab from the bastion server and create a group and project. Include a Readme in the project, and we will synchronize this project with Snowflake.
Creating an empty project
 ## PrivateLink Settings
Assuming that the ALB configuration is already complete as a prerequisite, we will proceed with the NLB settings. In the ALB security group, allow HTTPS communication from the bastion server and the security group associated with the NLB.
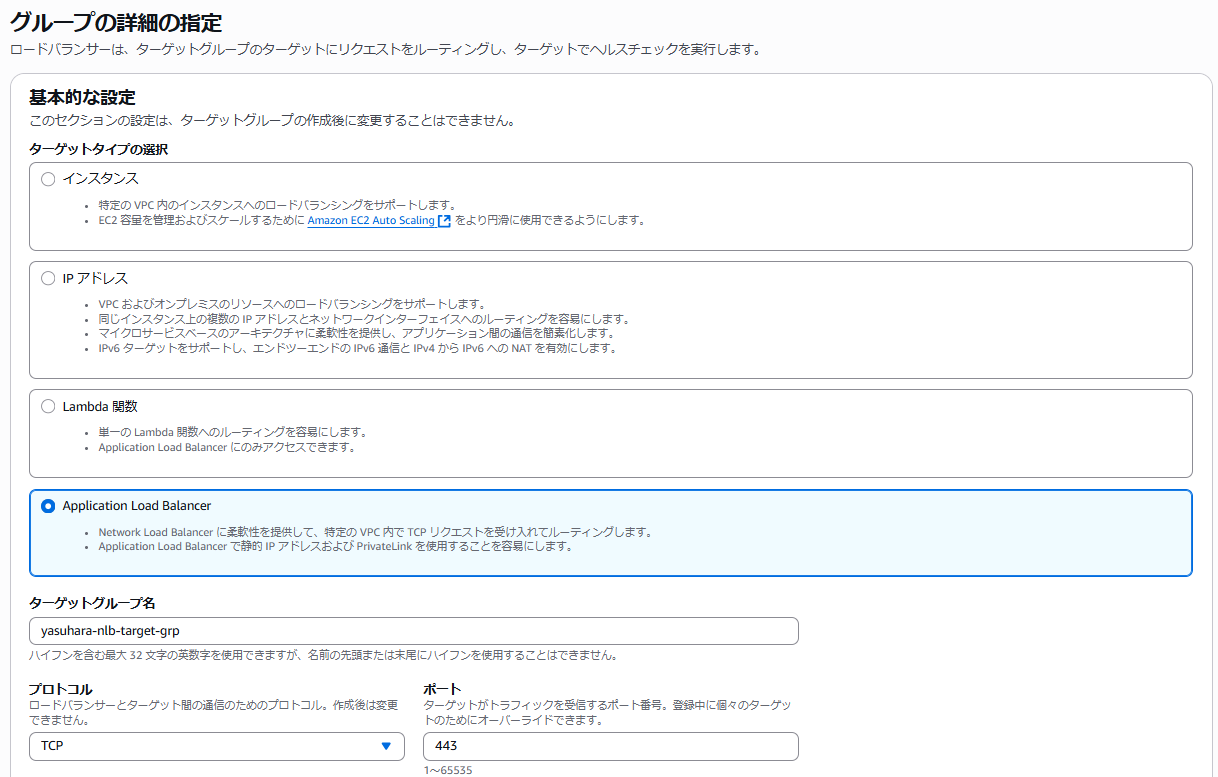
Creating Target Group for NLB
Create a target group that targets the ALB as shown in the figure below.
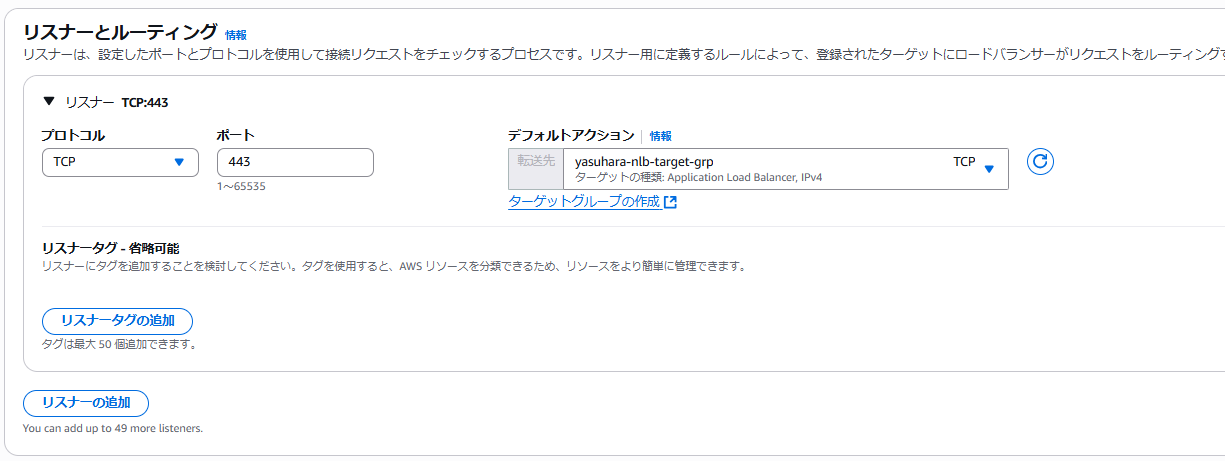
Creating NLB
Create an internal load balancer.
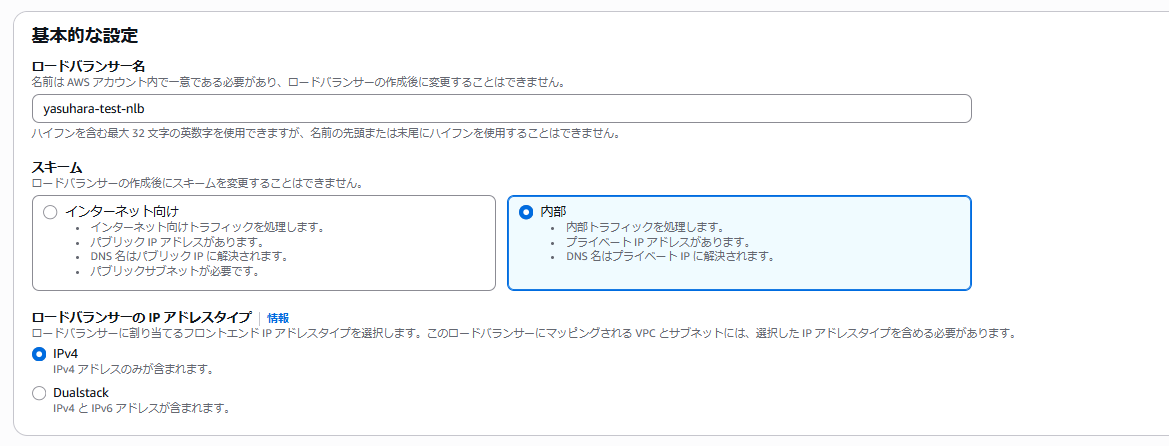
Specify HTTPS for the listener port.
In the NLB security group, set an inbound rule that allows HTTPS (TCP 443) from 0.0.0.0/0.
Creating VPC Endpoint Service
Next, create an endpoint service on the AWS side. Click [Create endpoint service] from the endpoint service menu and configure the following settings:
- Load balancer type: Network
- Load balancer: Select the NLB created in the steps above
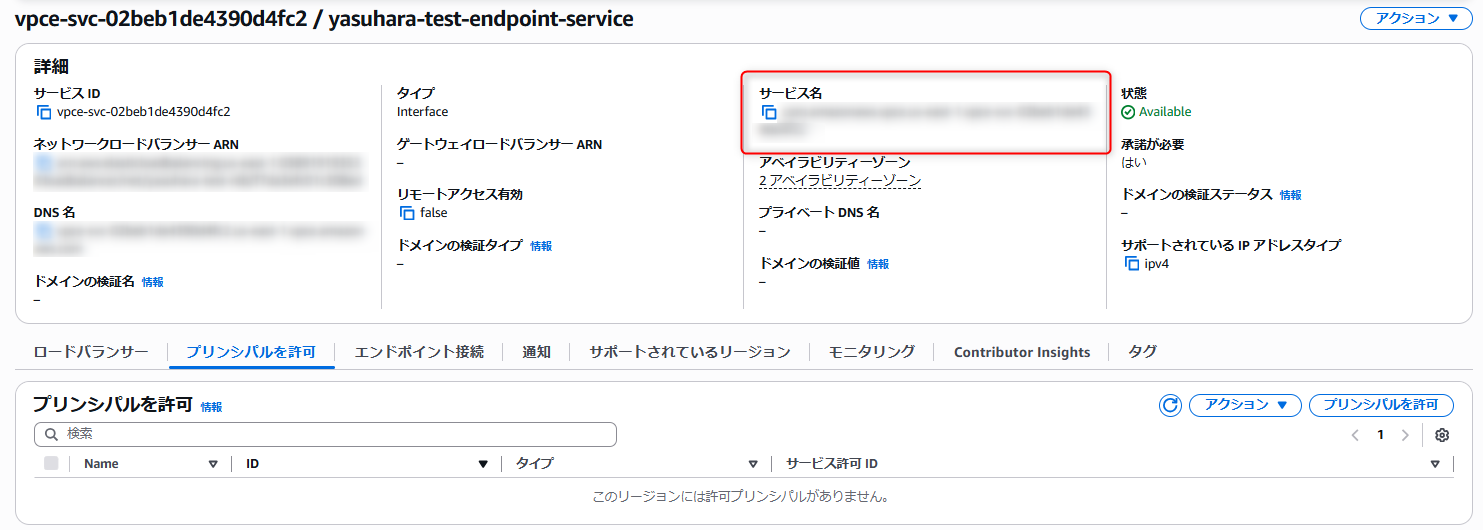
After creating the endpoint service, note the service name as it will be used on the Snowflake side.
Snowflake Side: Confirm privatelink-account-principal
Log in to your Snowflake account and execute the following with ACCOUNTADMIN privileges:
SELECT SYSTEM$GET_PRIVATELINK_CONFIG();
Note the value of privatelink-account-principal from the output.
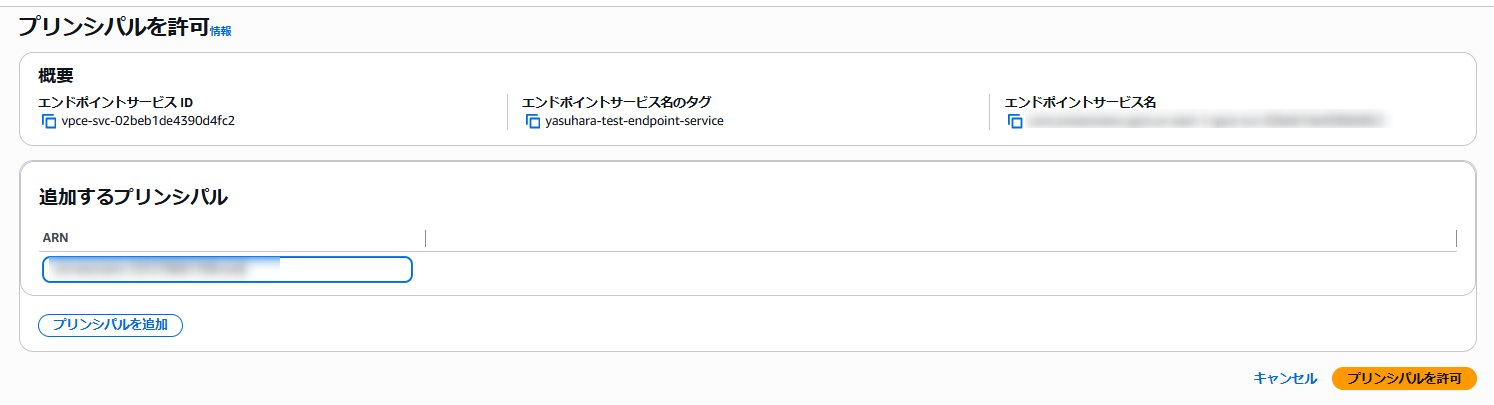
AWS Side: Allow Principal
Return to the AWS side, select [Actions > Allow principals] from the created endpoint service menu, enter the privatelink-account-principal value obtained from Snowflake in "Principal to add" and click [Allow principal].
Snowflake Side: Provision Private Endpoint
After the above settings, provision the private endpoint with the following command:
USE ROLE ACCOUNTADMIN;
SELECT SYSTEM$PROVISION_PRIVATELINK_ENDPOINT(
'com.amazonaws.vpce.us-east-1.vpce-svc-xxxxx', --Endpoint service DNS name
'GitLab instance FQDN'
);
```### **AWS Side: Accepting Endpoint Connection Request**
After provisioning the endpoint on the Snowflake side, you'll see the ID of the endpoint created by Snowflake displayed in the "Endpoint Connections" tab of the AWS endpoint service screen. Select this and click [Actions > Accept endpoint connection request].

After acceptance, the status will appear as shown below.

This completes the AWS integration configuration.
## Issue Access Token on GitLab Side
To allow Snowflake to access GitLab, you need to issue an access token.
https://docs.gitlab.com/user/profile/personal_access_tokens/
From "Edit Profile > Access tokens," specify the token name and scope. Since I wanted to try write operations from Snowflake, I simply specified the "api" scope.

After issuing the token, make note of its value.
## Create Objects on Snowflake Side
Finally, use the configurations set up so far to establish integration with the Git repository on the Snowflake side.
The basic process is the same as described in the following article, with the addition of PrivateLink settings.
https://dev.classmethod.jp/articles/snowflake-git-stage-jinja2/
### Creating Database, Schema, and Role for Object Storage
First, I created a database, schema, and role for object storage using the following steps:
```sql
--Create database
USE ROLE sysadmin;
----Create DB and schema for secret management
CREATE DATABASE IF NOT EXISTS governance;
CREATE SCHEMA IF NOT EXISTS integrations;
--Create management role
USE ROLE useradmin;
CREATE ROLE IF NOT EXISTS git_admin;
--Grant permission to create secrets in the schema
USE ROLE securityadmin;
GRANT CREATE SECRET ON SCHEMA governance.integrations TO ROLE git_admin;
--Grant USAGE permission on target database and schema as needed
GRANT USAGE ON DATABASE governance TO ROLE git_admin;
GRANT USAGE ON SCHEMA governance.integrations TO ROLE git_admin;
--Define role hierarchy
GRANT ROLE git_admin TO ROLE sysadmin;
--Grant CREATE INTEGRATION permission
USE ROLE ACCOUNTADMIN;
GRANT CREATE INTEGRATION ON ACCOUNT TO ROLE git_admin;
```### Creating API Integration
Create an API integration object that stores information about a service accessed through HTTPS API.
https://docs.snowflake.com/en/sql-reference/sql/create-api-integration#id3
We used the following command here. The key point is setting `USE_PRIVATELINK_ENDPOINT = TRUE`, which is required when accessing a remote Git repository through an outbound private connection.
```sql
--Create API integration
USE ROLE git_admin;
USE SCHEMA governance.integrations;
CREATE OR REPLACE API INTEGRATION git_api_integration
API_PROVIDER = git_https_api
API_ALLOWED_PREFIXES = ('https://<GitLab FQDN>')
ALLOWED_AUTHENTICATION_SECRETS = all
USE_PRIVATELINK_ENDPOINT = TRUE
ENABLED = TRUE;
Creating a Secret
Sensitive information such as access tokens can be stored in secret objects. This allows them to be used securely in other Snowflake objects.
Here, we executed the following to store the access token obtained in the previous step.
			--Set context (switch to secret creation role, specify schema)
USE ROLE git_admin;
USE SCHEMA governance.integrations;

--Create secret
CREATE OR REPLACE SECRET git_secret
  TYPE = password
  USERNAME = '<Username on GitLab>'
  PASSWORD = '<Token>';
```### Creating a repository stage

As a repository stage, we create a stage where Snowflake can read from the remote repository. Specify the URL of the repository you created in ORIGIN.

```sql
--Create a GIT REPOSITORY stage
CREATE OR REPLACE GIT REPOSITORY snowflake_extensions
  API_INTEGRATION = git_api_integration
  GIT_CREDENTIALS = git_secret
  ORIGIN = 'https://<GitLabFQDN>/testgroup/test-repo';
If created successfully, you can also check the contents from Snowflake.
ls @snowflake_extensions/branches/main;
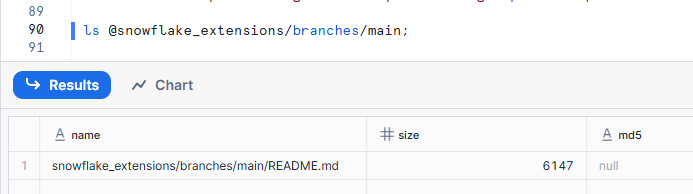
You can see the README that was added to the project.
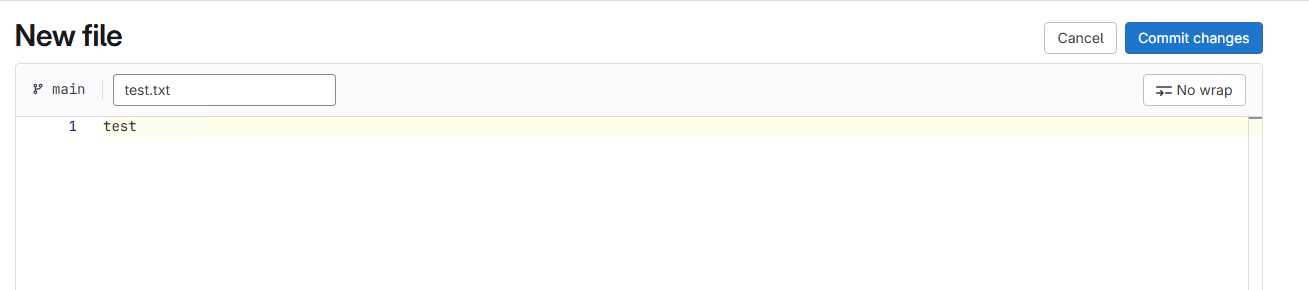
Let's add a file to the project on the GitLab side.
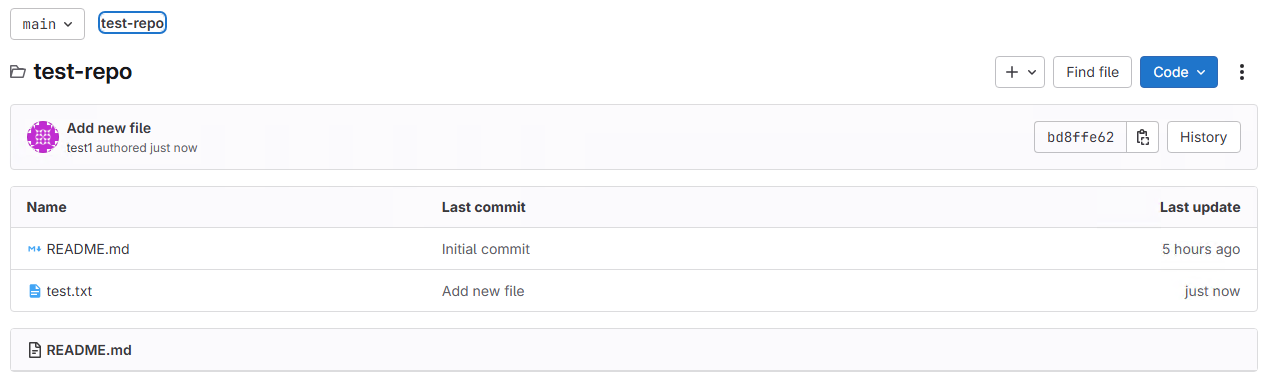
When there are changes to the remote repository, you can use the ALTER GIT REPOSITORY command to reflect those changes in the repository stage.
ALTER GIT REPOSITORY <repository_stage_name> FETCH;
After updating, when you check from Snowflake, you can confirm the file addition.

Try write operations from Workspace
In the Workspace preview at the time of writing, you can directly make changes (commit, push, etc.) from the Snowflake side. Let's try this.
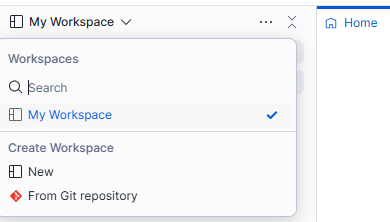
Create a Workspace from a Git repository
Click on "From Git repository" from the Workspace menu as shown below.
In the screen below, specify the repository URL and connection information (API integration object, access method).
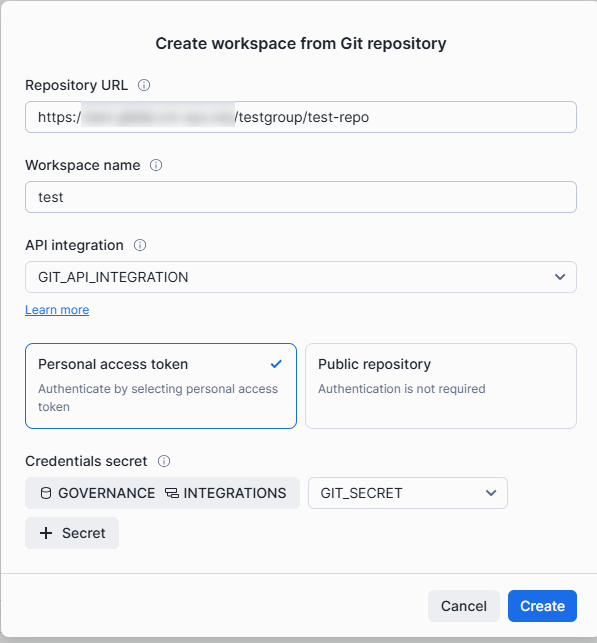
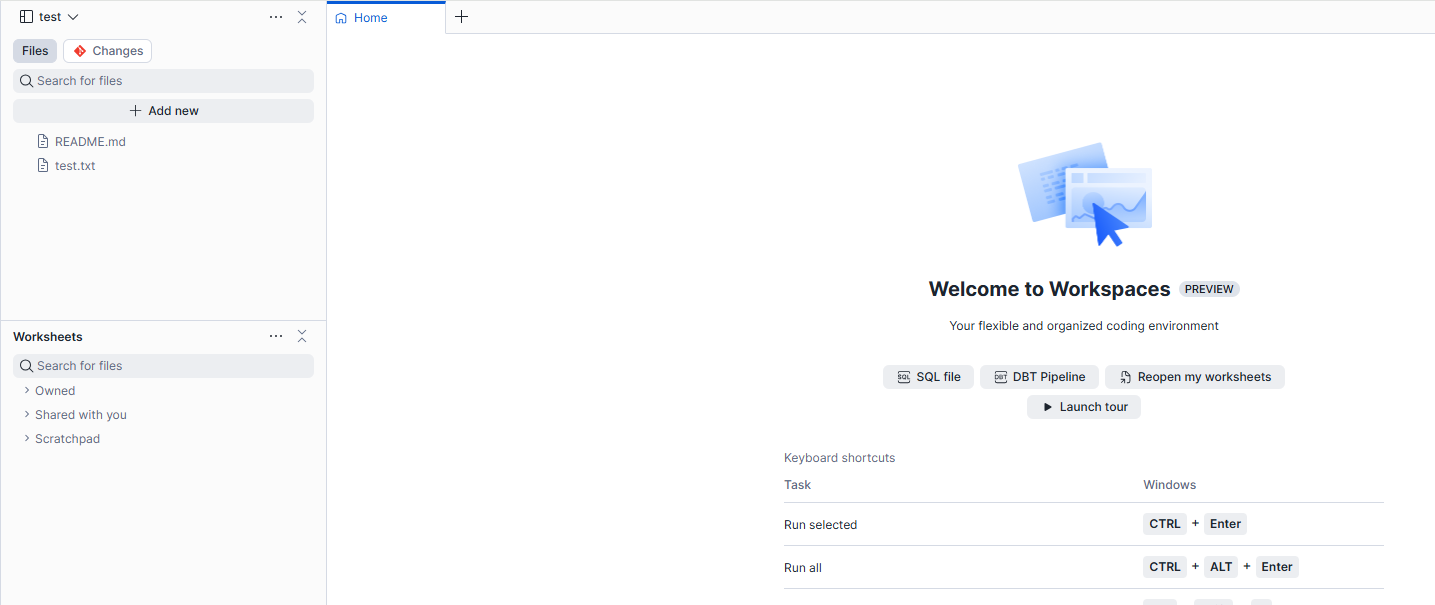
If there are no issues, you can create the Workspace. Since it is syncing with the same repository, the file added in the previous steps will be displayed.
 ### Trying the basic operations
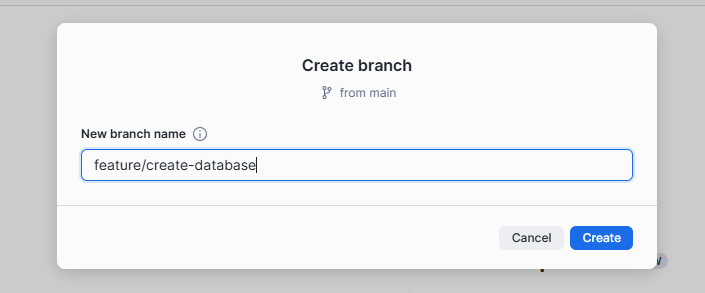
Let's try the process from creating a branch to merging into the main branch.
Creating a branch.
I created a SQL file with the content shown below.
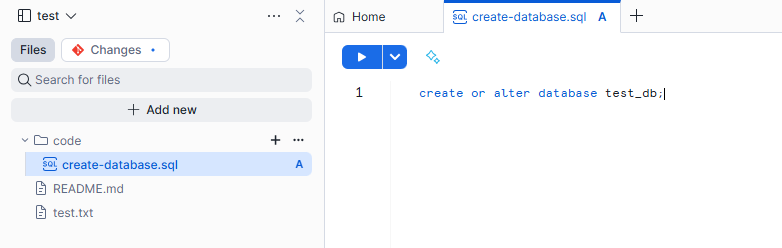
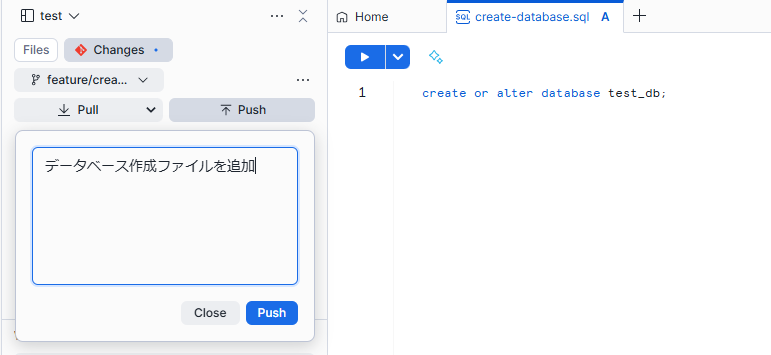
You can push from the Workspace.
Checking on the GitLab side.
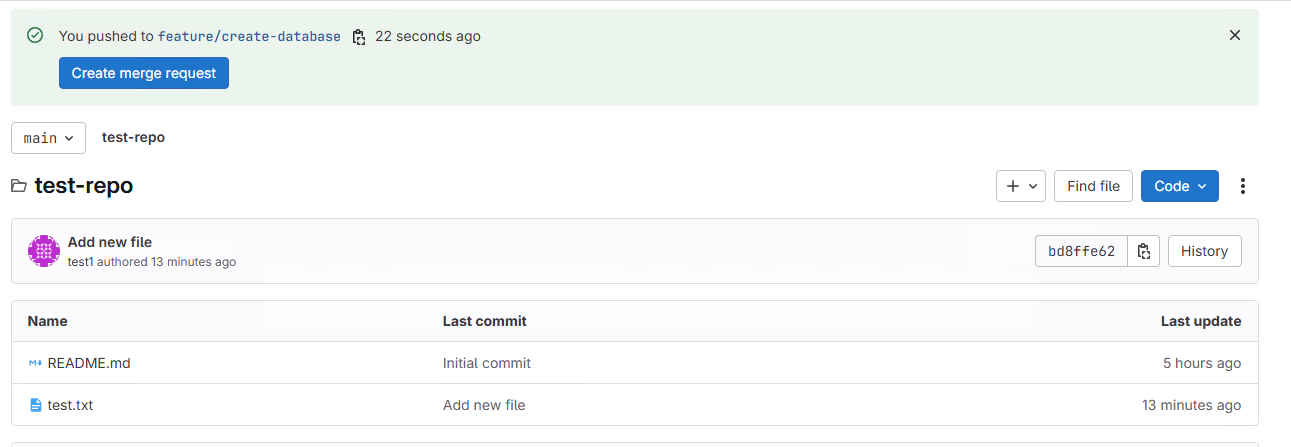
Creating a merge request and reflecting the changes to the main branch.
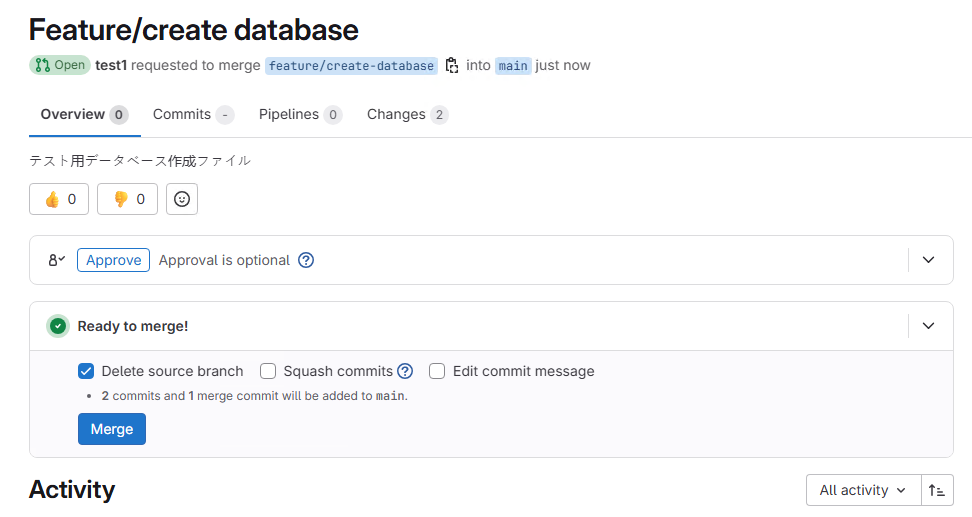
I was able to complete the whole workflow without any issues.
Now, let's update the repository stage created in the previous steps and check the contents.
			ALTER GIT REPOSITORY snowflake_extensions FETCH;
ls @snowflake_extensions/branches/main;
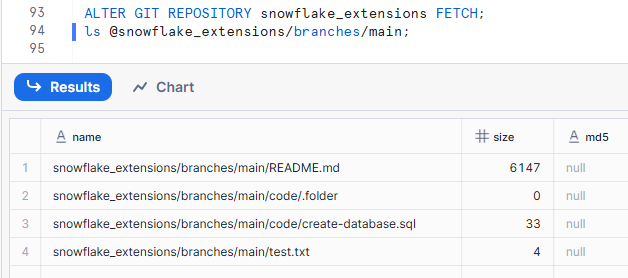
Since we're referencing the same repository, we can confirm the changes here as well.
Let's execute the SQL file and deploy the object.
EXECUTE IMMEDIATE FROM @snowflake_extensions/branches/main/code/create-database.sql;
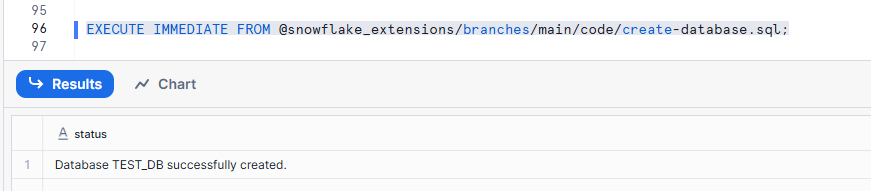
The database was successfully created.
Conclusion
I tried using the self-hosted version of GitLab with Snowflake's outbound private connection.
With the emergence of Workspace and other features, integration between Snowflake accounts and remote Git repositories will likely increase. There may be cases where this configuration is necessary due to security requirements, so I hope this information can be useful as a reference.
References


