
Using the Amazon Location Service Plugin in QGIS for Map Display, Geocoding, and Route Finding
This page has been translated by machine translation. View original
I want to try location services, but writing code seems difficult... Have you ever felt that way?
Amazon Location Service lets you quickly try map display, place search, and route calculation just by obtaining an API key.
Using the Amazon Location Service plugin for QGIS, an open-source desktop GIS software, you can experience AWS location services through a GUI interface without writing a single line of code. In this article, I tried three use cases with this plugin: map display, geocoding, and route search.
Please also check our company blog for an overview of Amazon Location Service.
What is Amazon Location Service?
Amazon Location Service is a fully managed location service provided by AWS. It offers five functions: map display (Maps), place search (Places), route calculation (Routes), geofences (Geofences), and trackers (Trackers).
Pricing
Amazon Location Service uses a pay-as-you-go model based on the number of requests. For details, please see the official documentation.
What is the QGIS Amazon Location Service plugin?
QGIS is an open-source desktop GIS software that can display, edit, and analyze map data.
The Amazon Location Service plugin for QGIS is developed and published as open source by MIERUNE. It allows you to use Maps, Places, and Routes functions of Amazon Location Service through the QGIS GUI.
The plugin provides the following five menus:
| Menu | Function |
|---|---|
| Config | Region and API key settings |
| Map | Display map styles (vector tiles or raster tiles) |
| Place | Place search from address or landmark name (geocoding) |
| Routes | Route calculation between two points |
| Terms | Amazon Location Service terms of use link |
Prerequisites
This article assumes the following environment:
- An AWS account has been created
- QGIS 3.x (LTR version) is installed
- Region used:
ap-northeast-1(Tokyo)
AWS Setup: Creating an API Key
First, create an Amazon Location Service API key in the AWS Management Console.
1. Open the Amazon Location Service Console
Log in to the AWS Management Console and search for "Location Service" in the search bar to open the console.

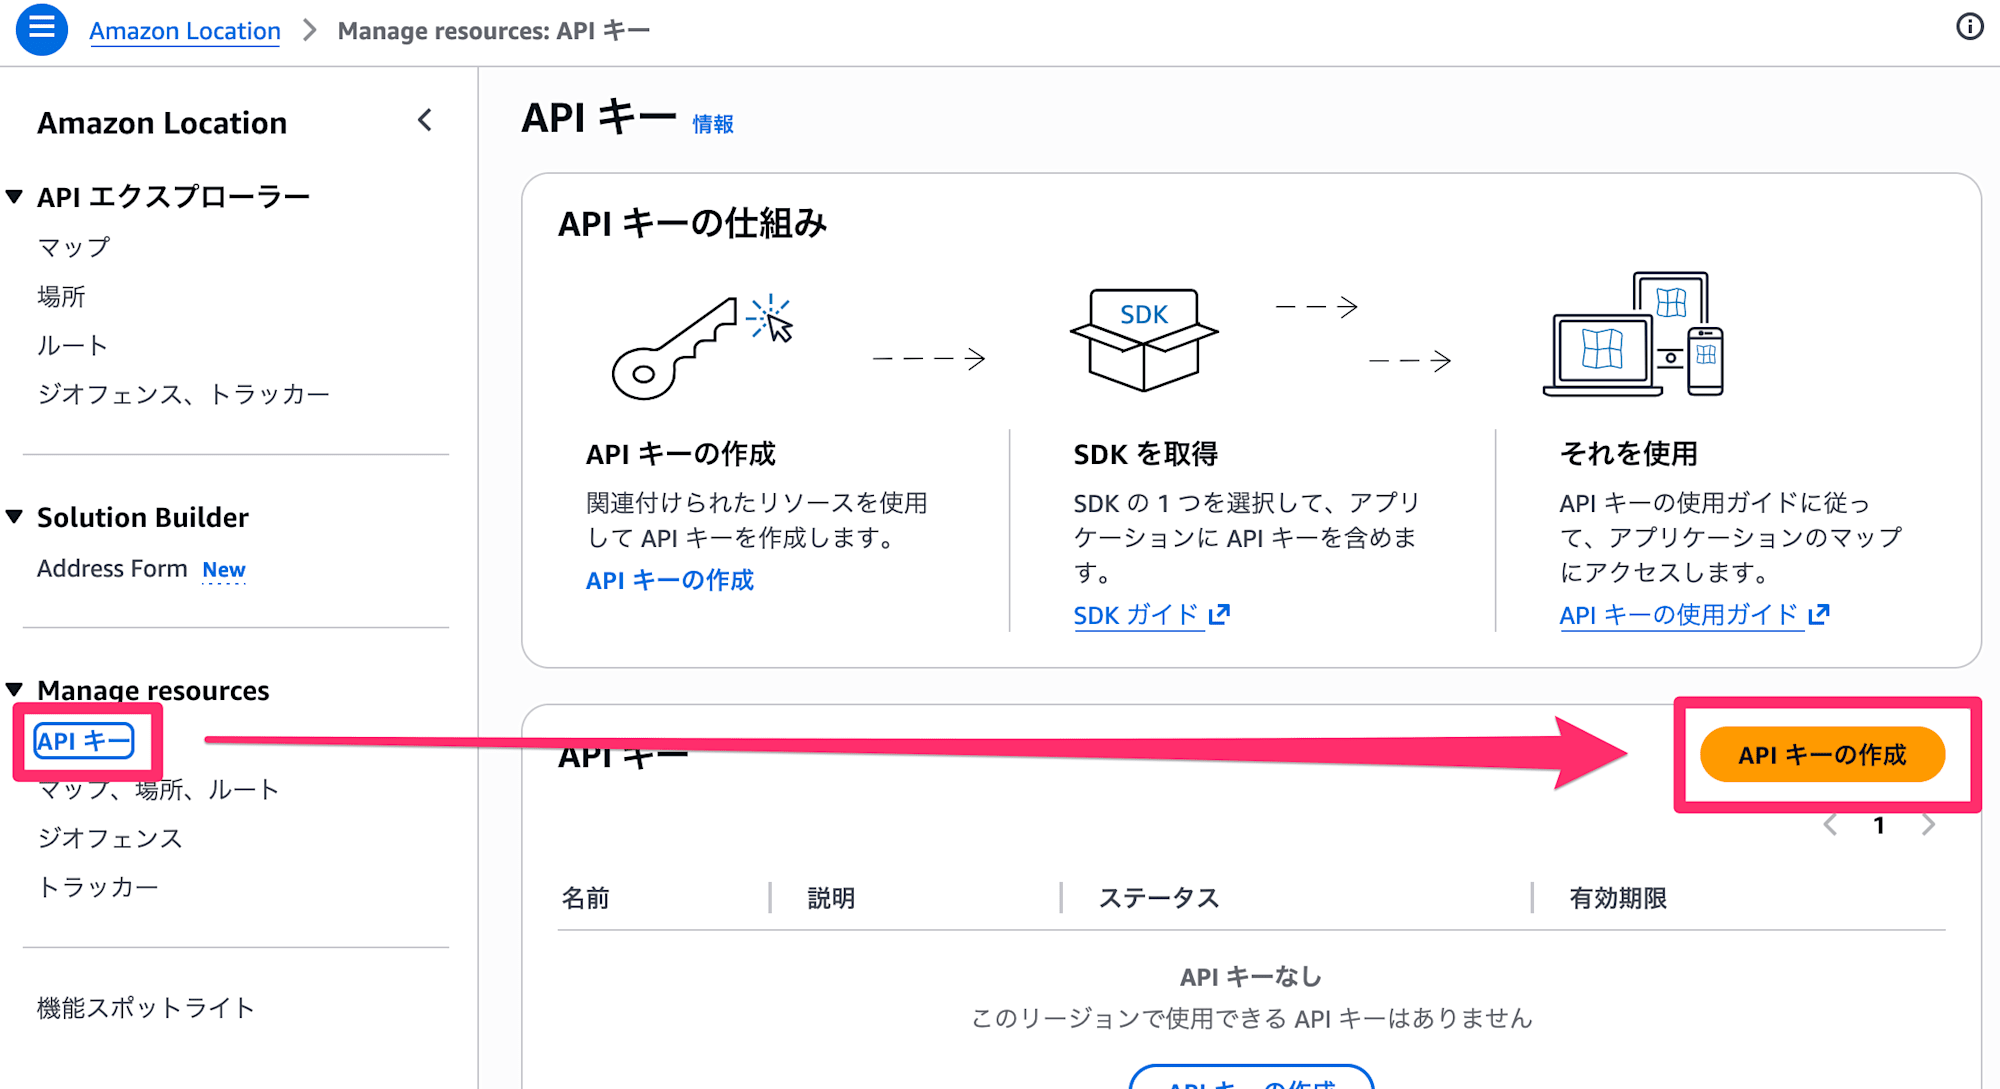
2. Create an API Key
Select "API Keys" from the left menu and click the "Create API key" button.
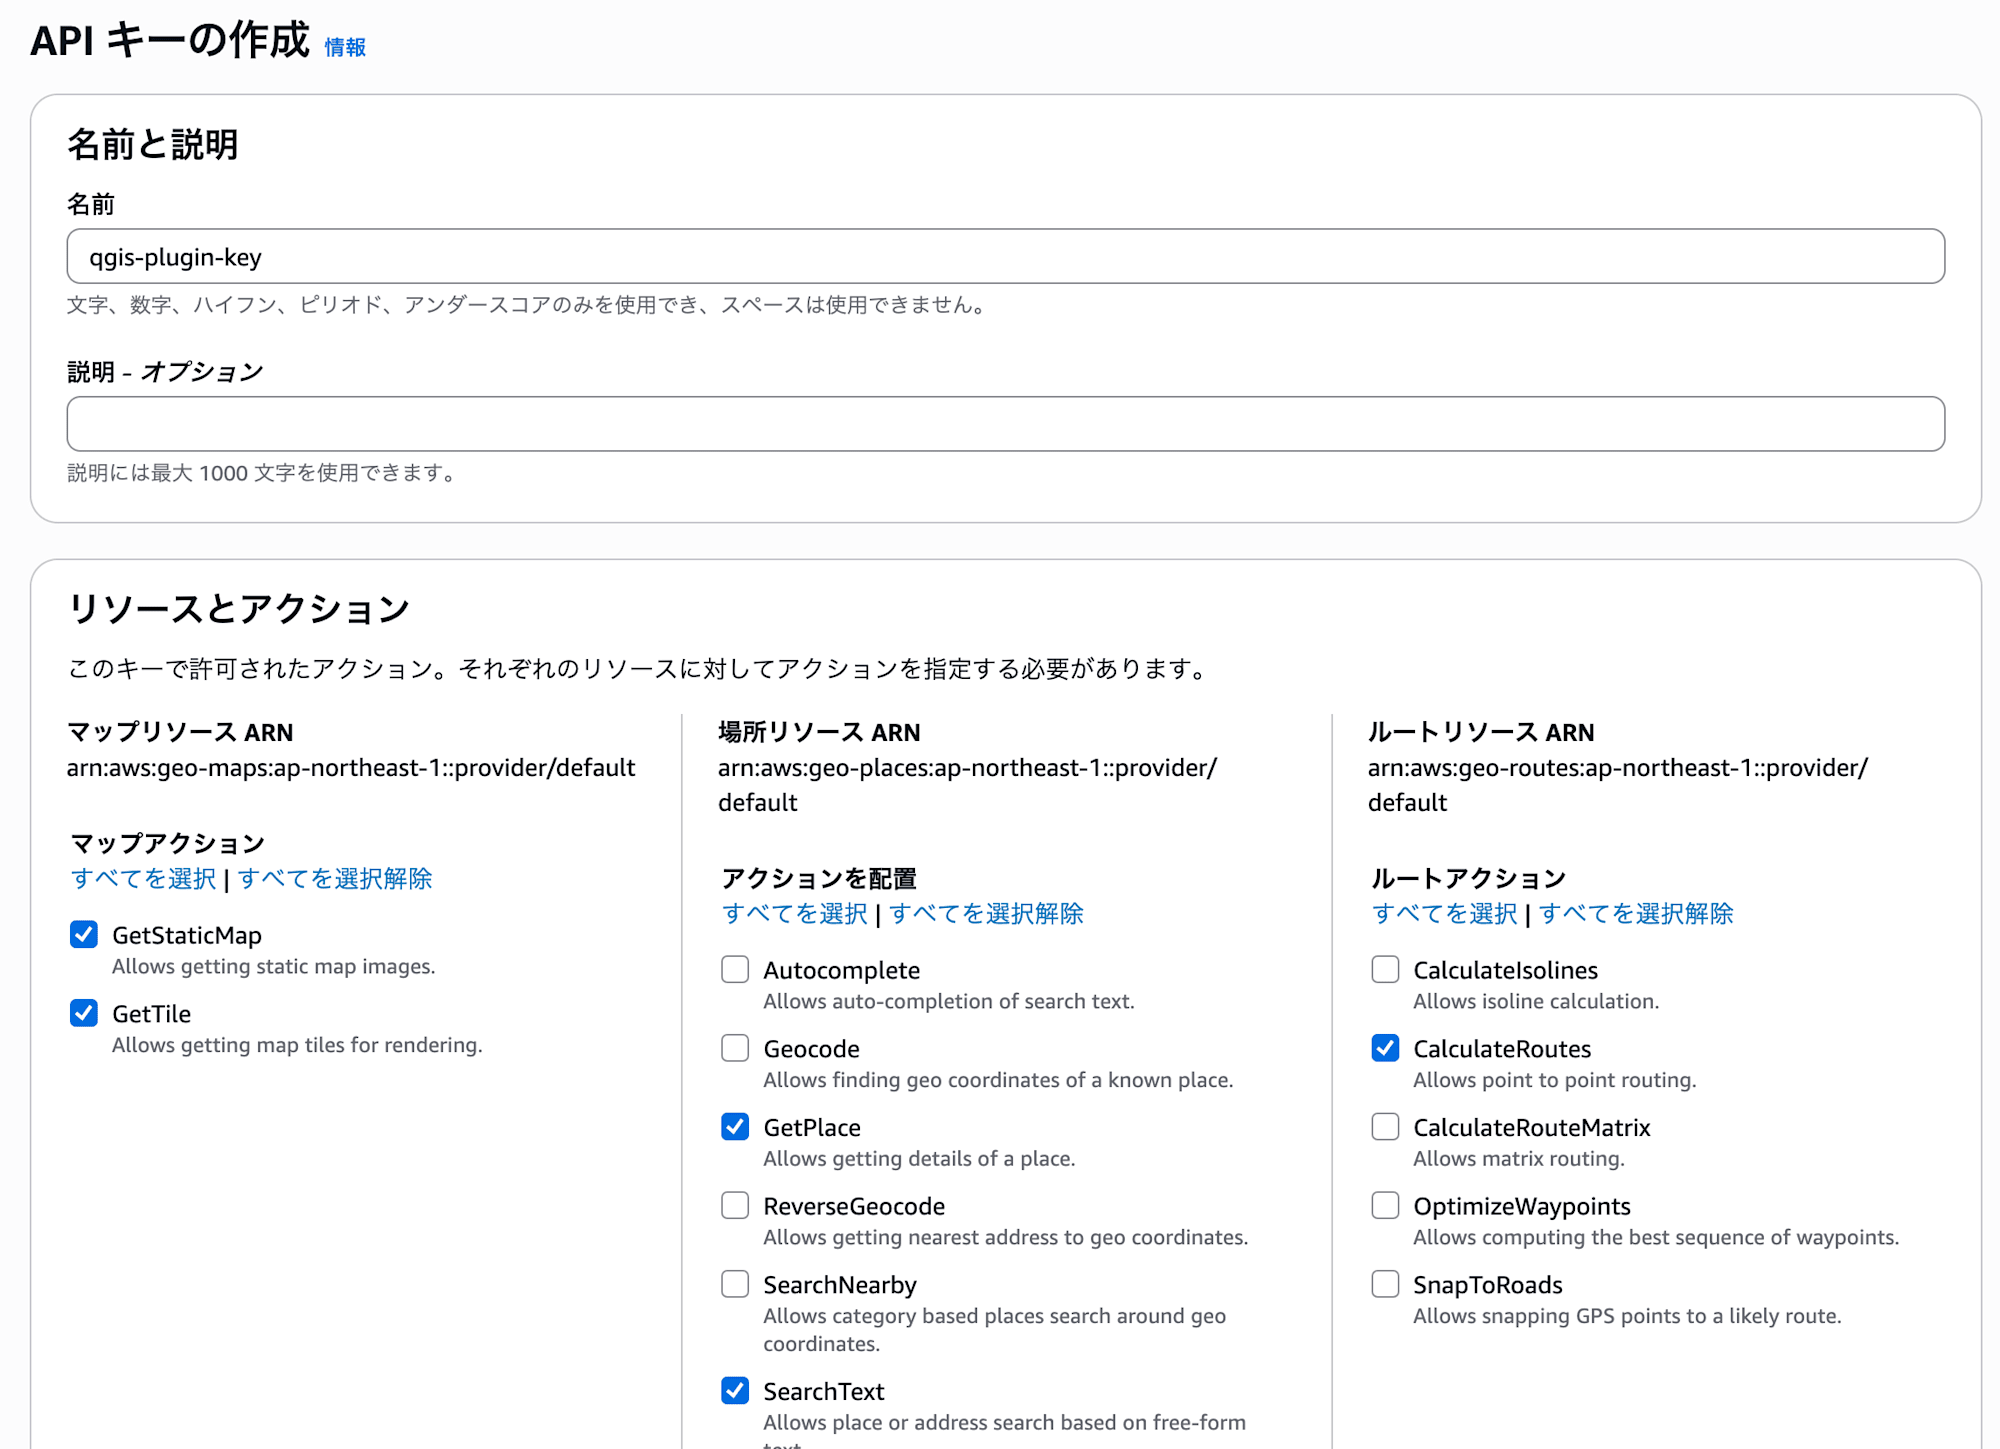
Configure the following settings:
| Item | Value |
|---|---|
| Name | Any name (e.g., qgis-plugin-key) |
| Expiration | Optional (no expiration date by default) |
| Actions | Refer to the table below |
Action Selection
Select the actions corresponding to the three features we'll use:
| Feature | Required Actions |
|---|---|
| Map (map display) | geo-maps:GetTile, geo-maps:GetStaticMap |
| Place (place search) | geo-places:SearchText, geo-places:GetPlace |
| Routes (route calc.) | geo-routes:CalculateRoutes |
When you click "Create API key," the API key value will be displayed. This value can only be viewed at creation time, so be sure to copy it and store it in a safe place.

Installing the QGIS Plugin
Next, install the Amazon Location Service plugin for QGIS.
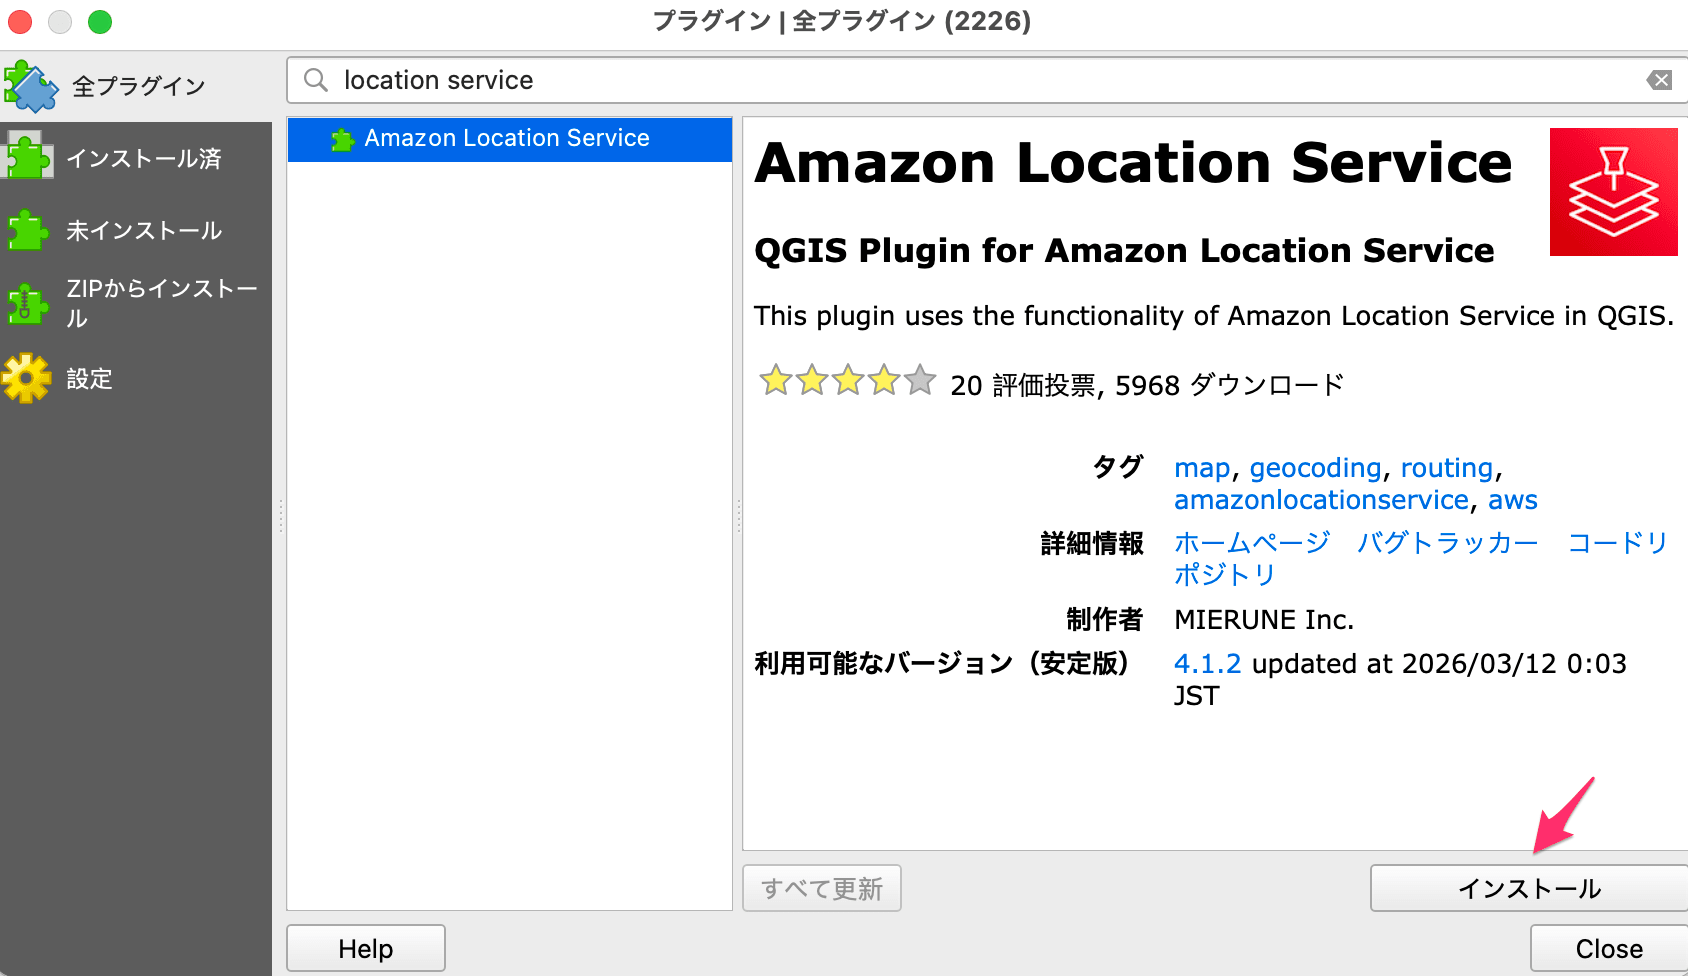
- Start QGIS and open "Plugins" → "Manage and Install Plugins" from the menu bar
- Enter "Amazon Location Service" in the search field
- Select the "Amazon Location Service" plugin and click "Install Plugin"
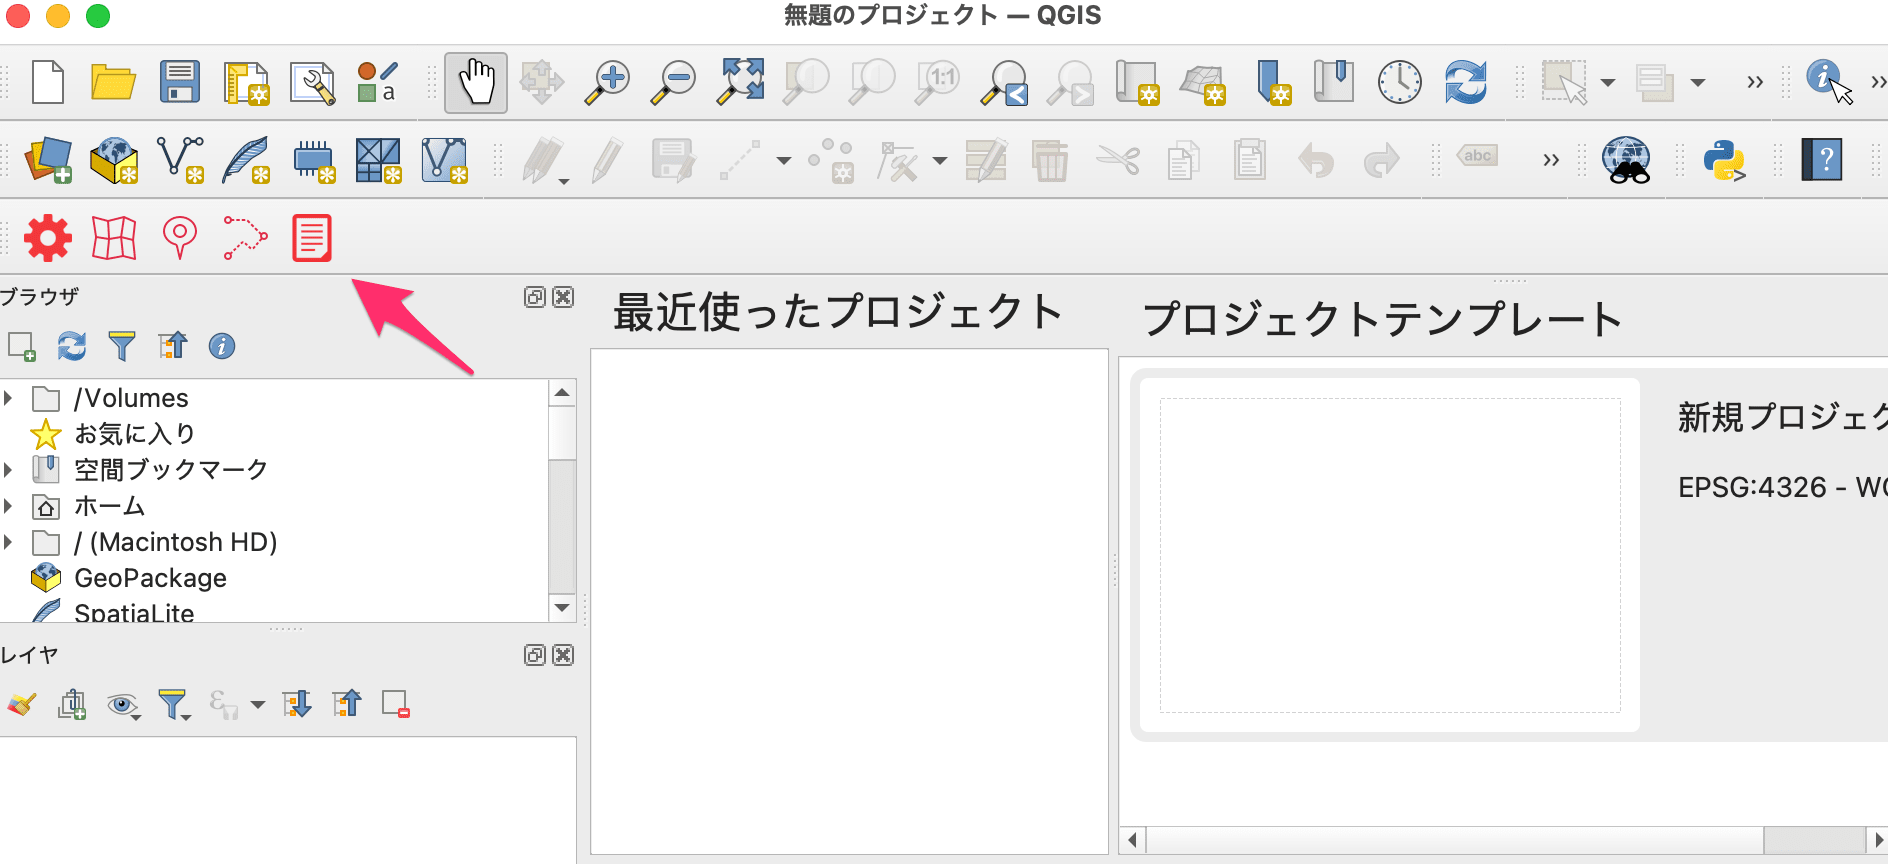
After installation is complete, an "Amazon Location Service" menu will be added to the menu bar.
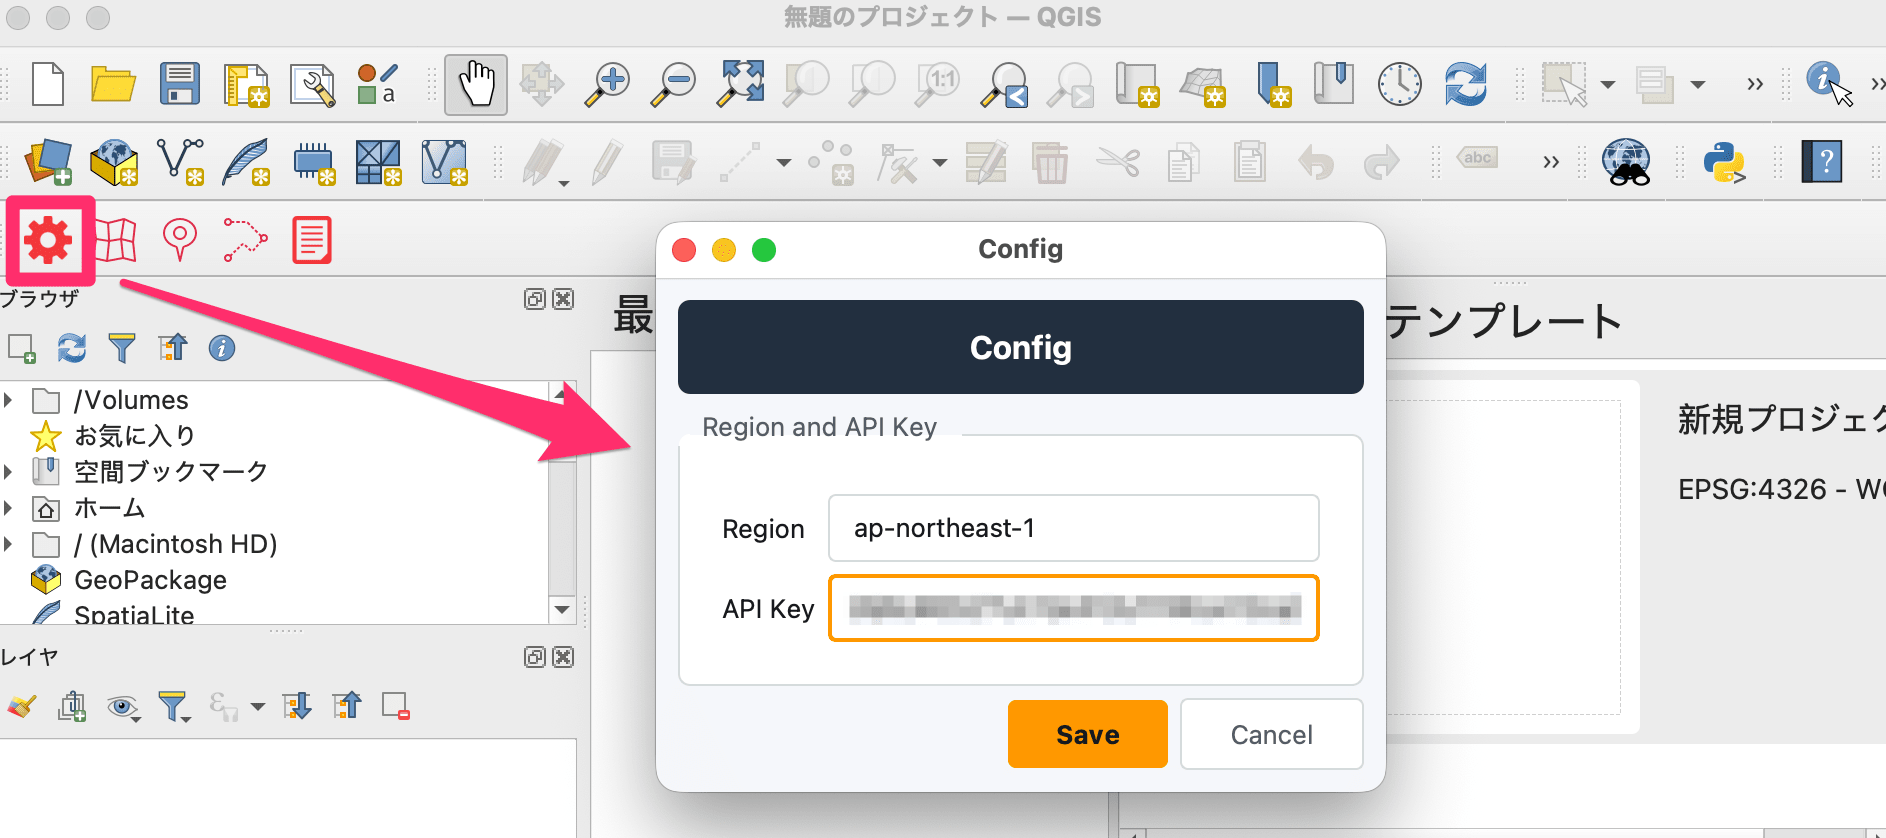
Plugin Initial Setup (Config)
Open "Amazon Location Service" → "Config" from the menu bar and enter the following settings:
| Item | Value |
|---|---|
| Region | ap-northeast-1 |
| API Key | The API key value you created |
After entering, click "Save" to save the settings.
That's all for the setup. Now let's try each use case.
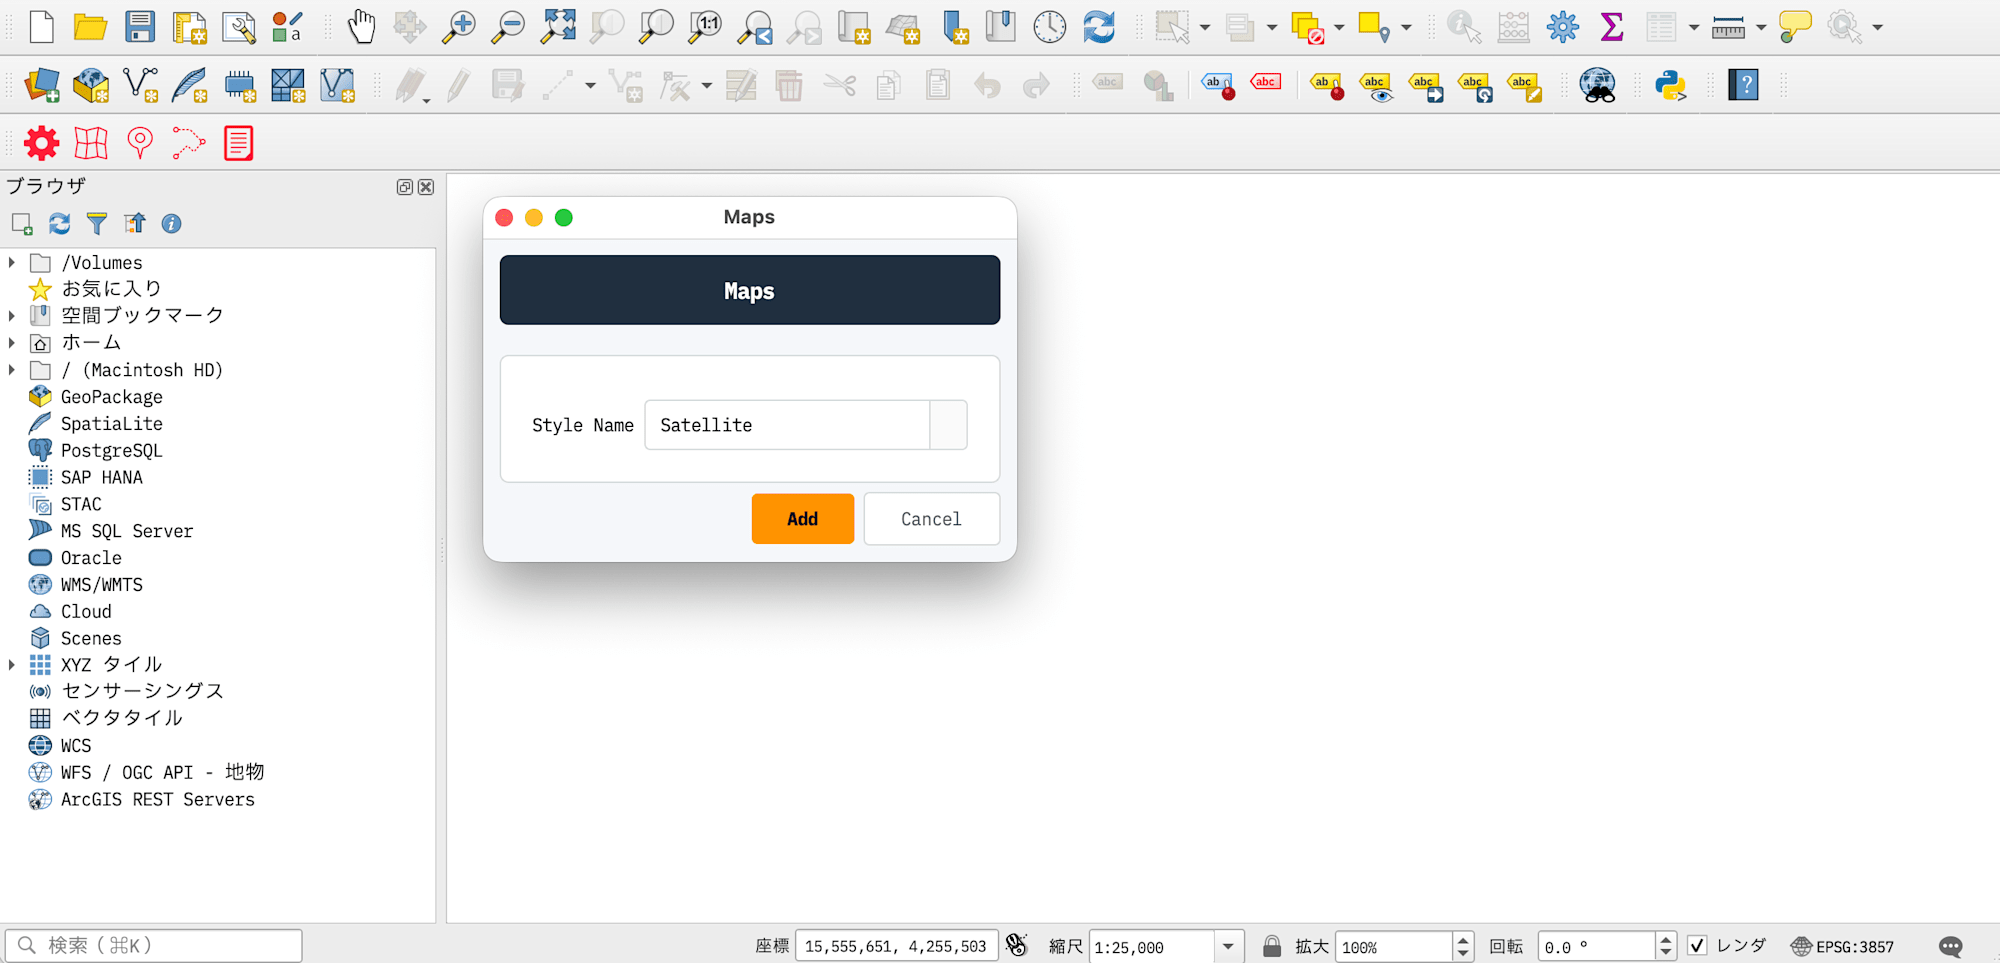
Use Case 1: Display and Compare Map Styles
Open "Amazon Location Service" → "Map" from the menu bar.
There are four map style options:
| Style | Features |
|---|---|
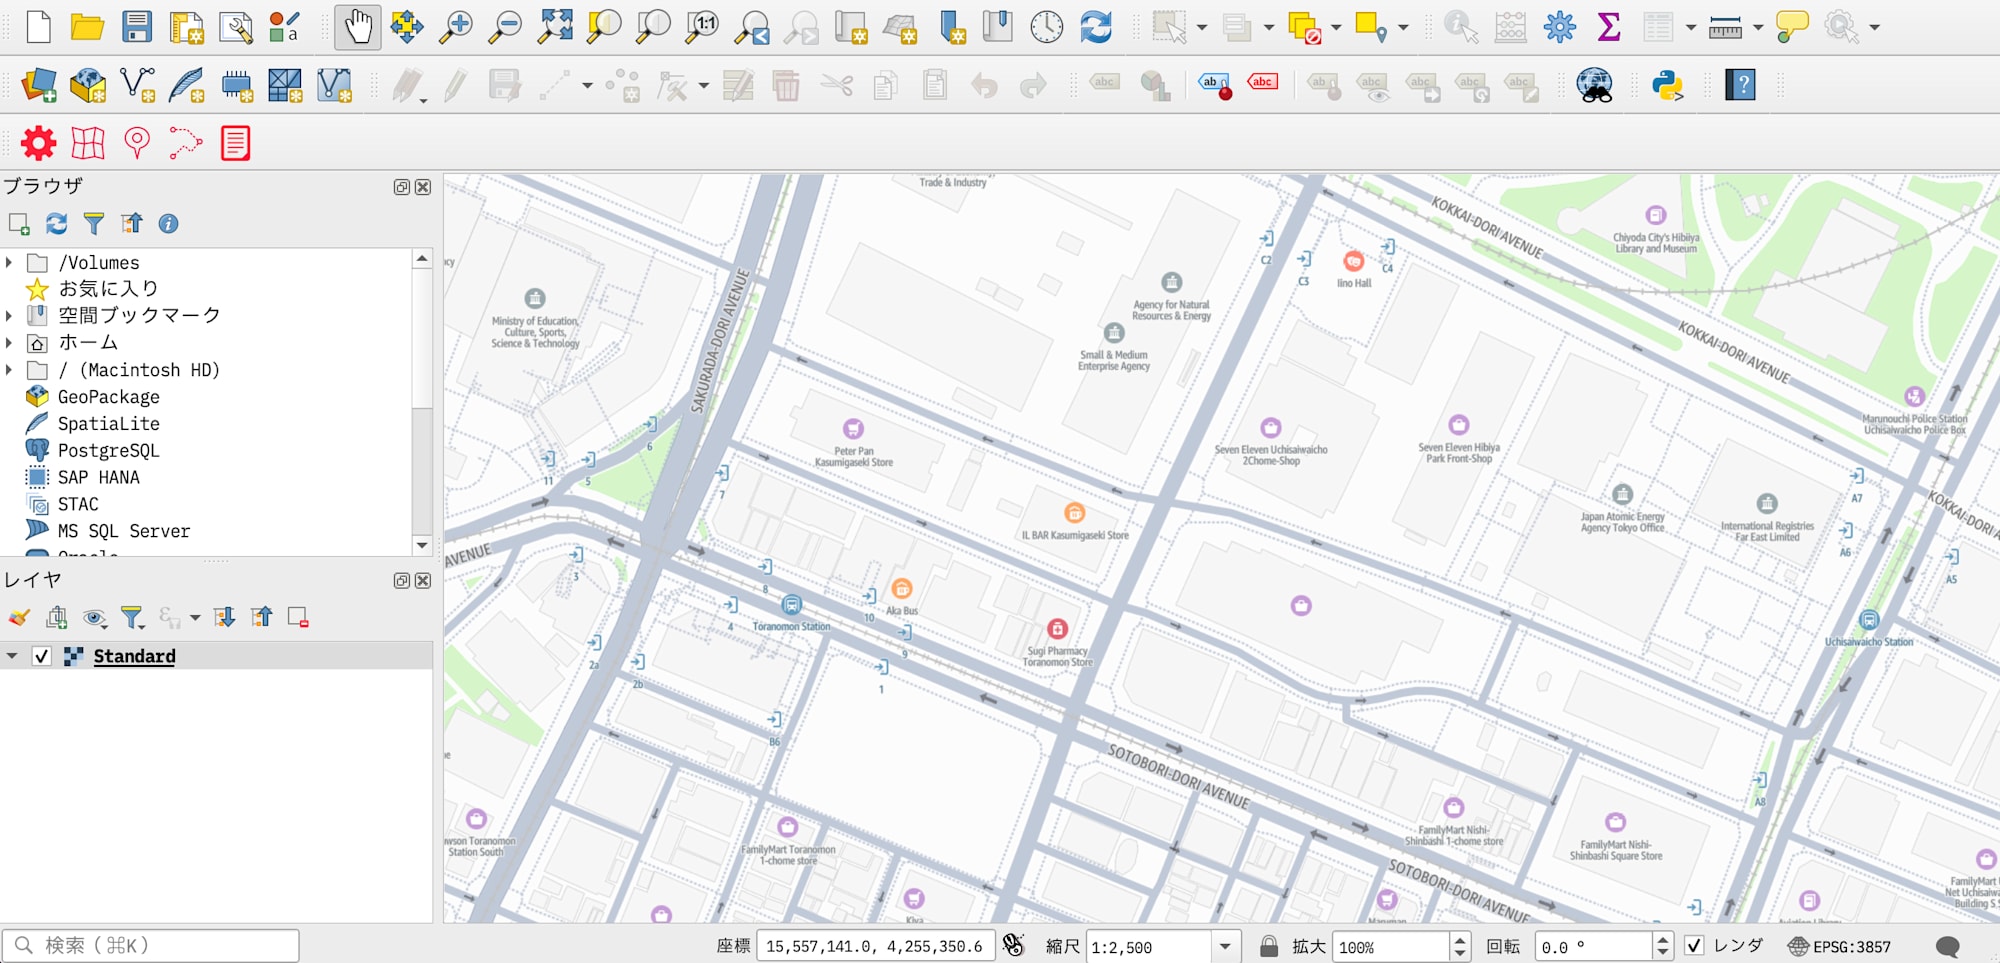
| Standard | General map with labels and POIs (facility names, etc.) |
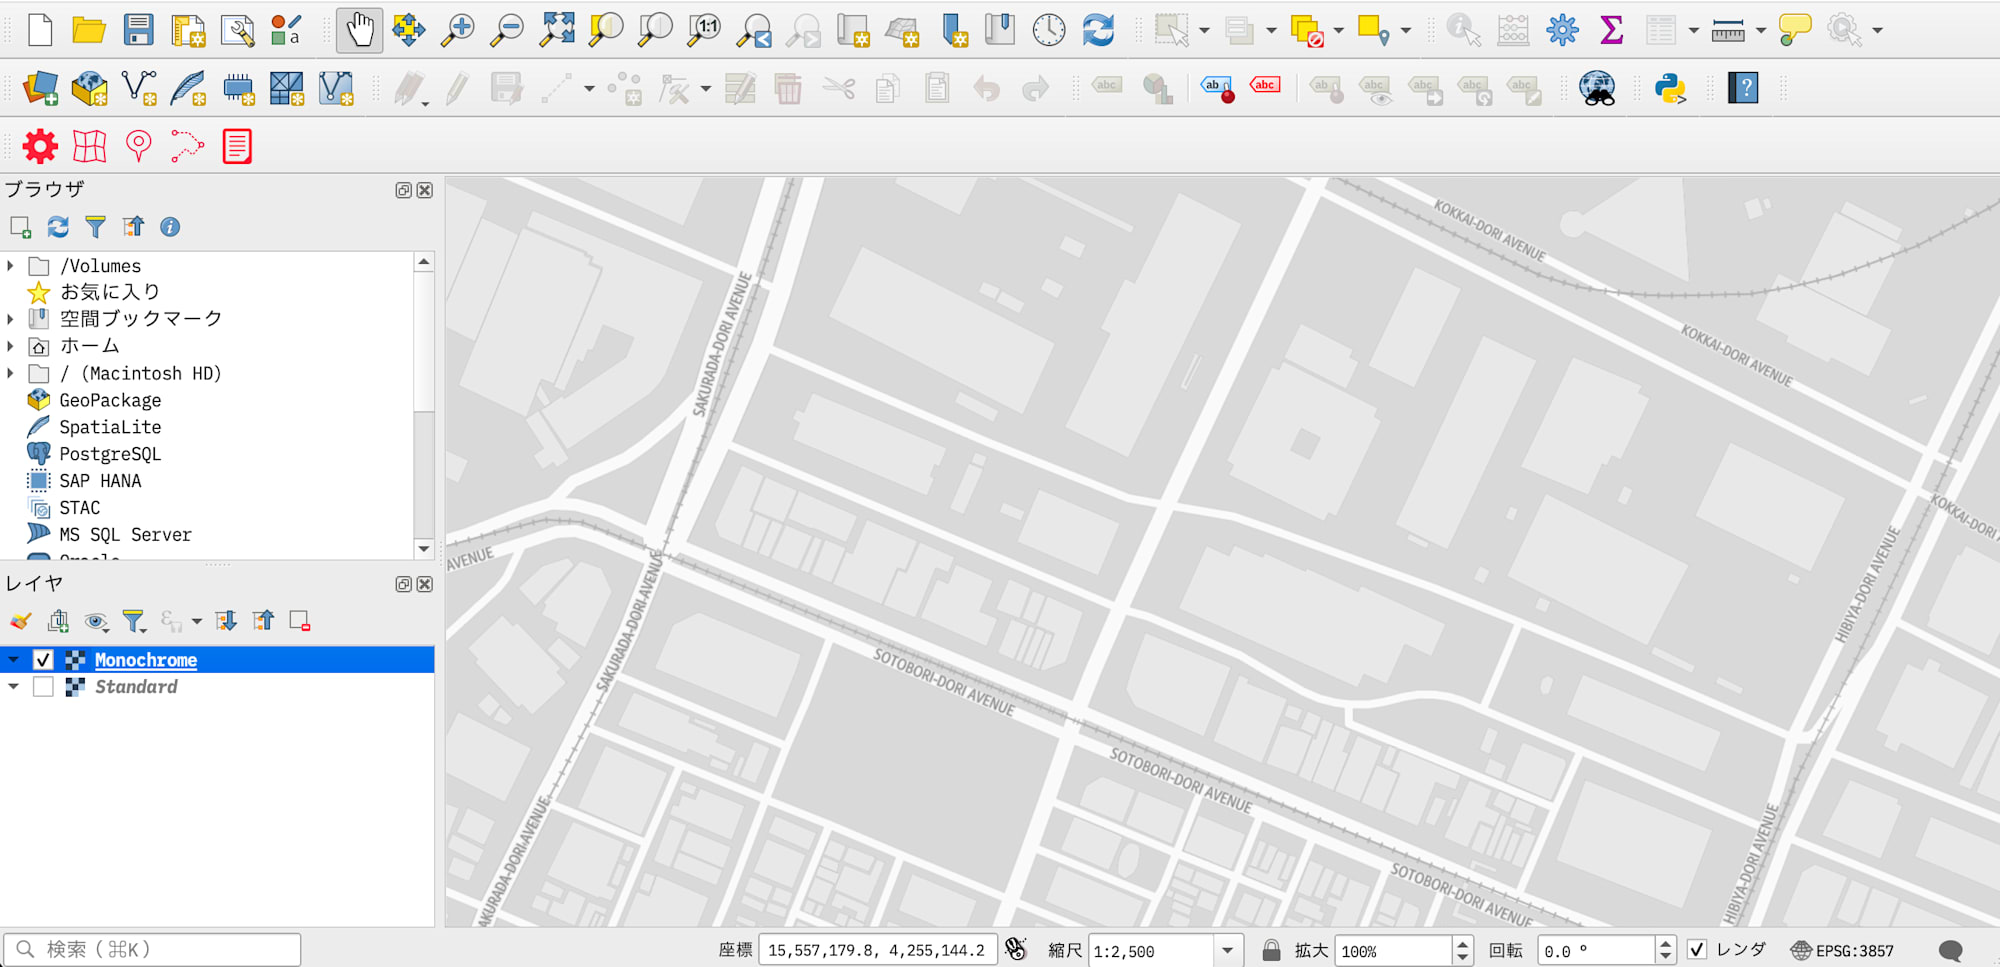
| Monochrome | Monochrome style, ideal as a base map for data visualization |
| Hybrid | Satellite imagery + labels, balancing real image visibility with labels |
| Satellite | Satellite imagery only, no labels |
Select a style and click the "Add" button to add a map layer to the QGIS map canvas.
Let's look at the area around Classmethod's Hibiya office with each map style.
Standard Style
A general map style that displays labels such as road names and facility names.
Monochrome Style
A monochrome style that can be used as a base map for visualizing custom data.
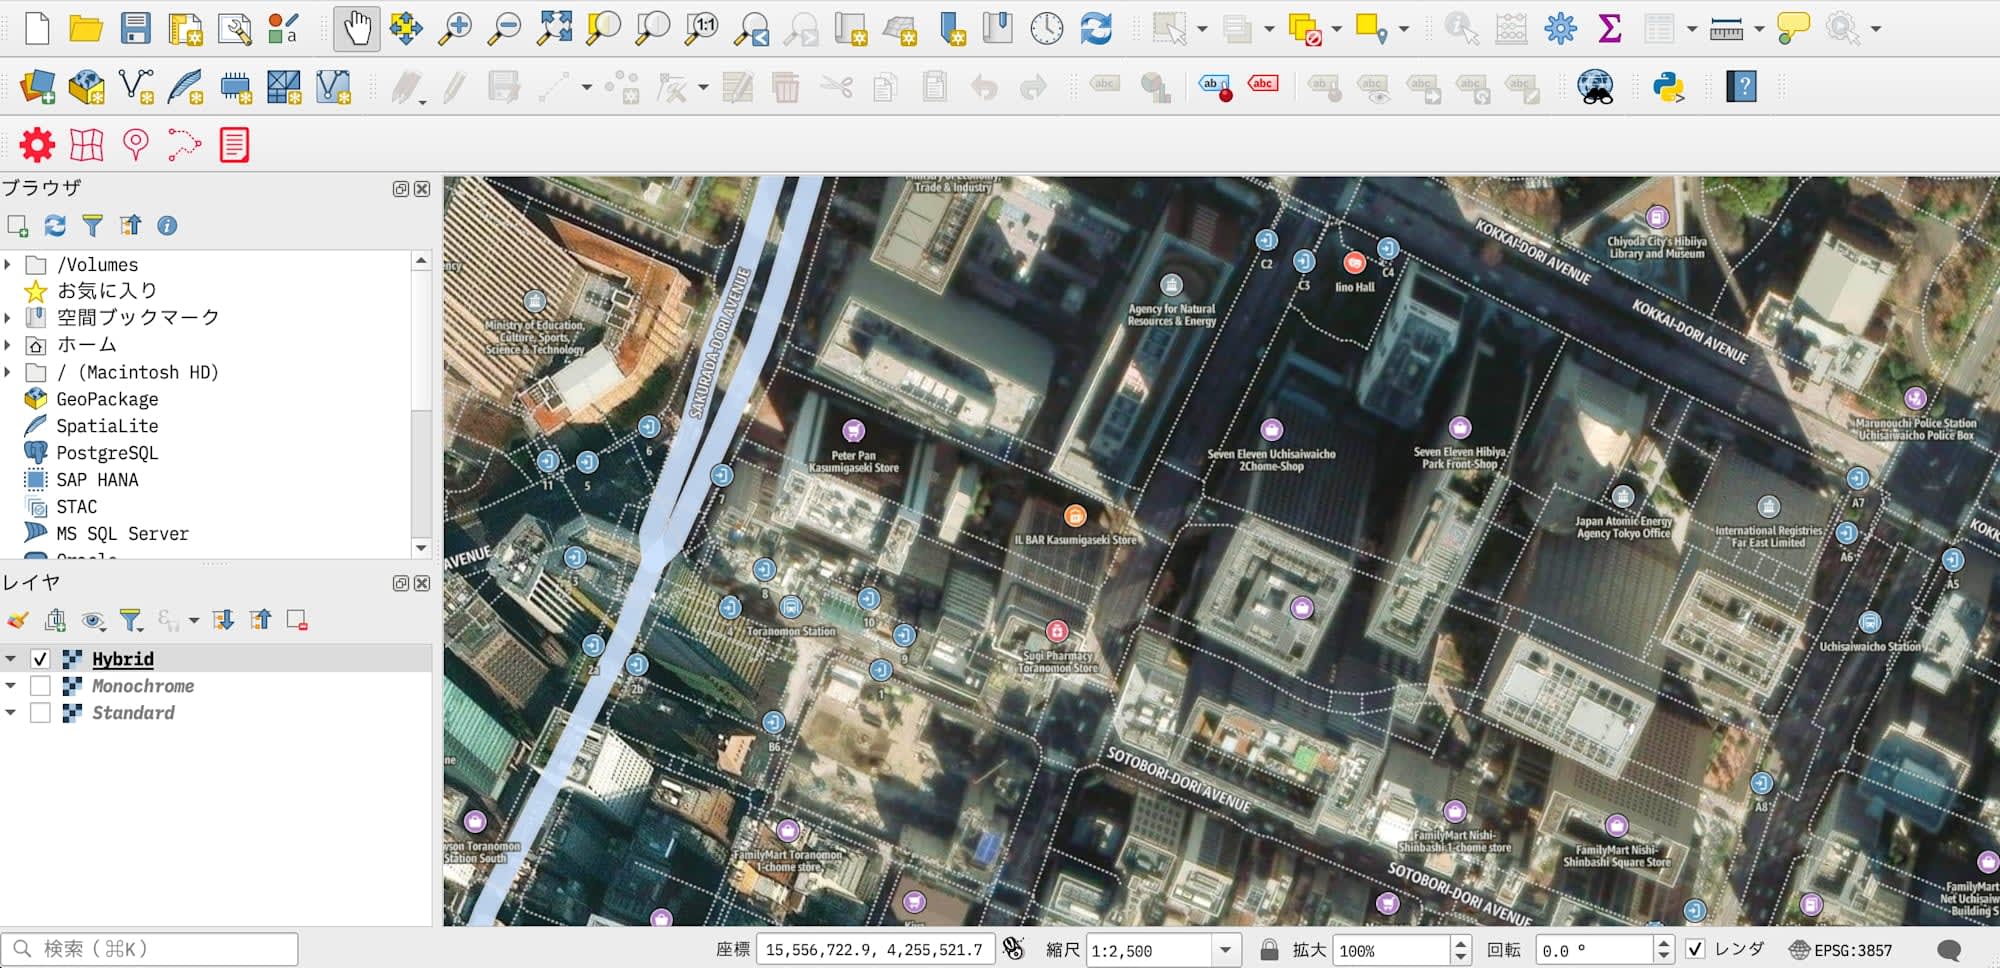
Hybrid Style
Labels are overlaid on satellite imagery. Useful when you want to identify locations while checking actual terrain and buildings.
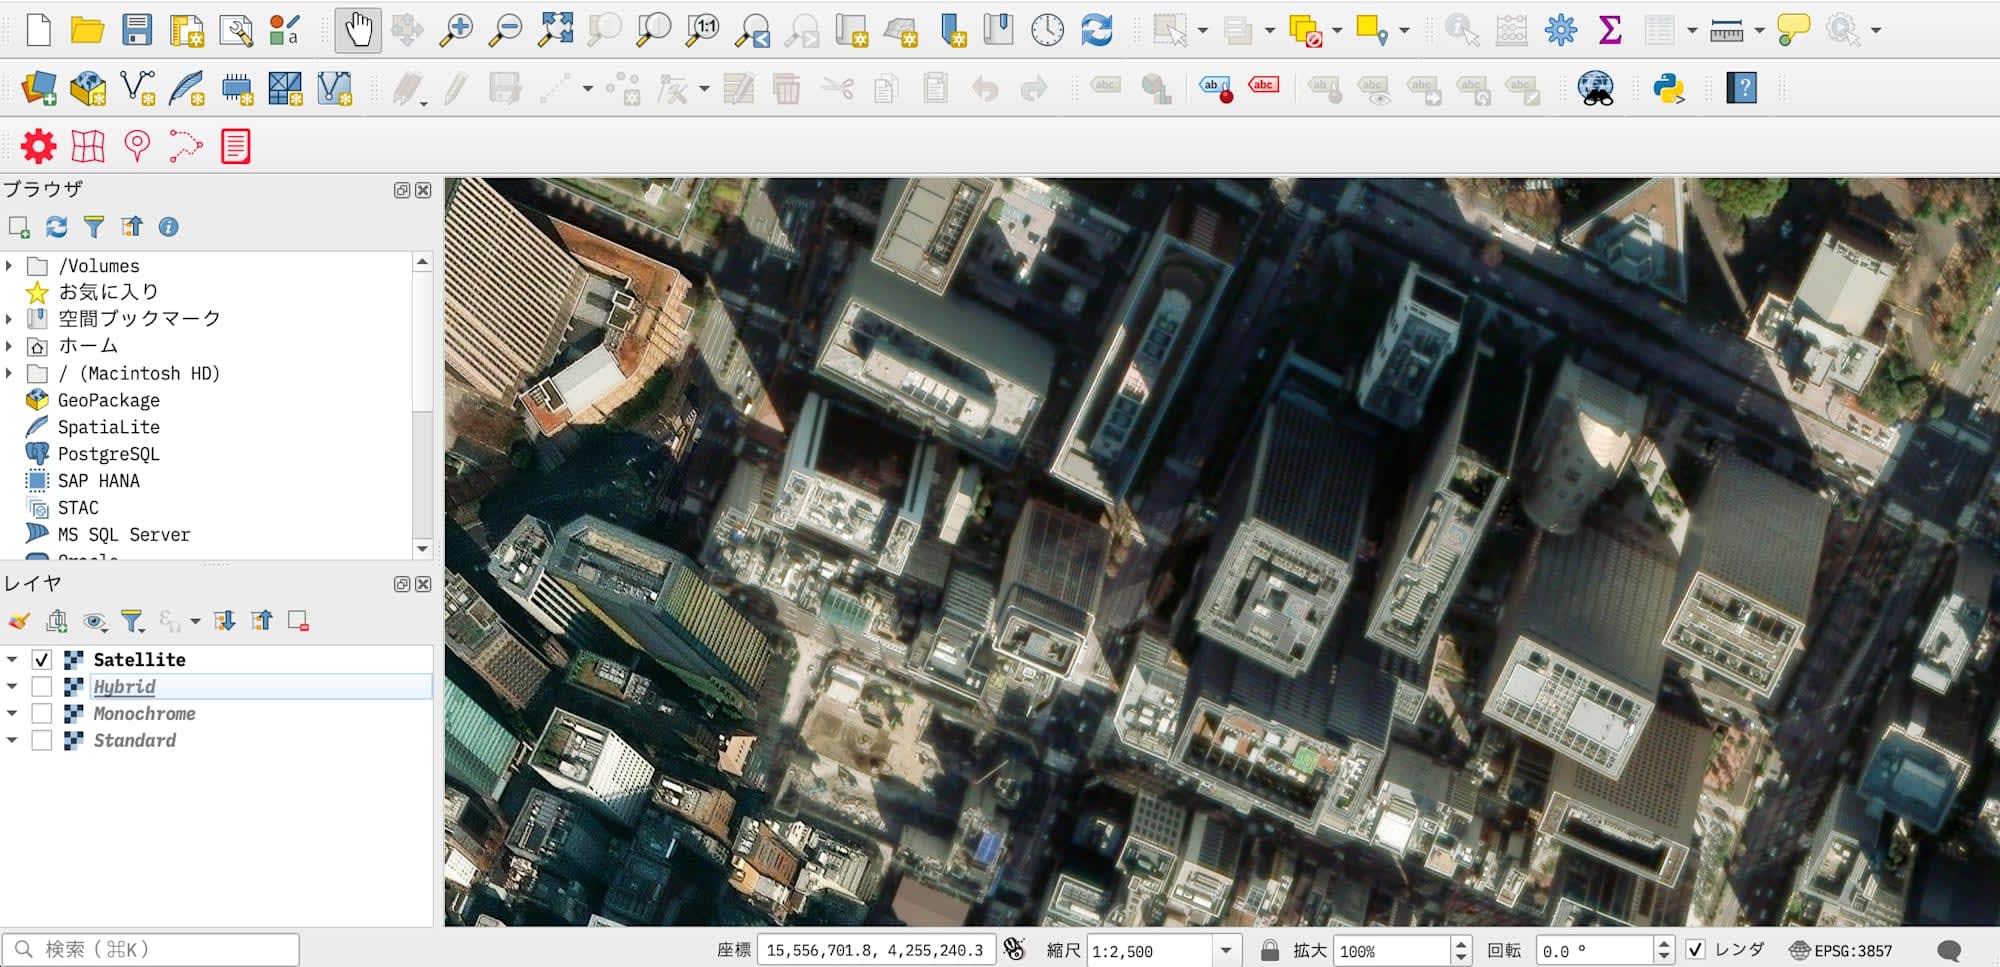
Satellite Style
Satellite imagery only style without labels, allowing you to see the exact shape of geographical features.
Use Case 2: Search for Places with Geocoding
Geocoding is the process of obtaining latitude and longitude from text such as addresses or landmark names.
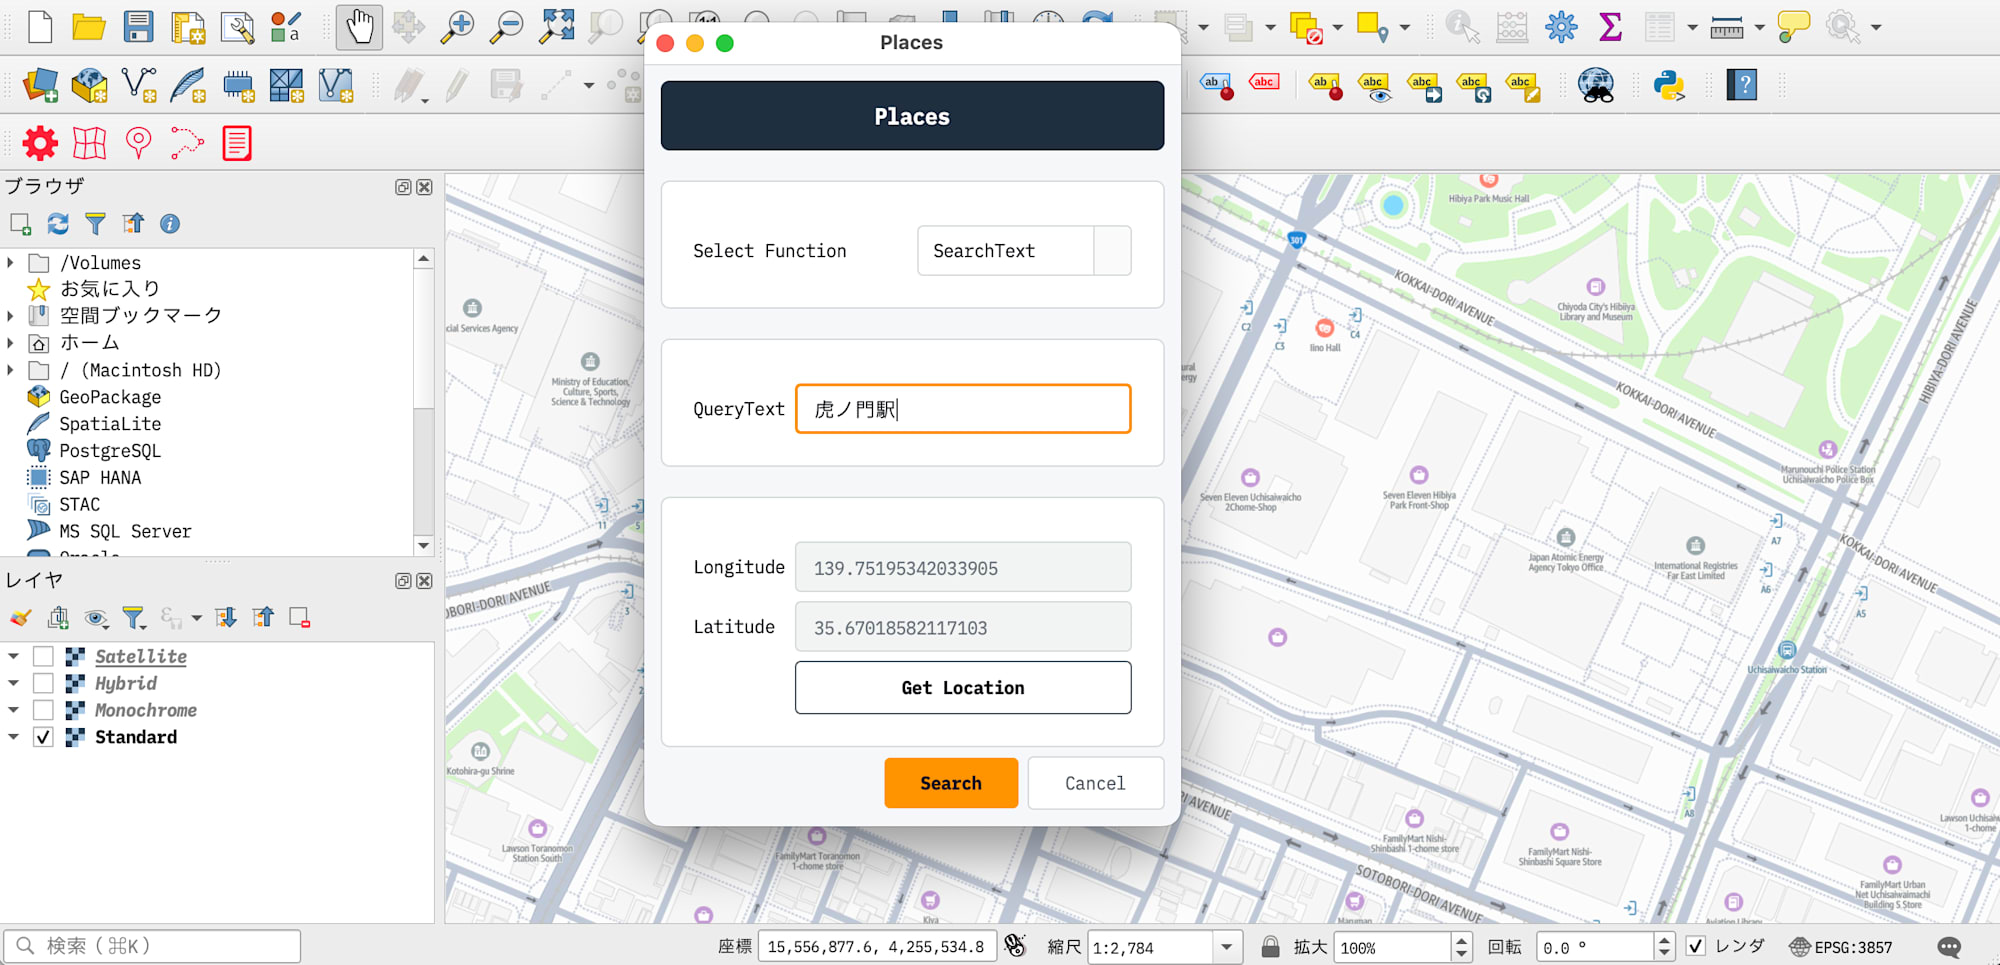
Open "Amazon Location Service" → "Place" from the menu bar.
- Select "SearchText"
- Enter the place you want to search for in the text box (e.g., "Tokyo Tower", "Osaka Castle")
- Click the "Get Location" button and click on the map to specify the point you want to use as a reference for the search (the coordinates will be automatically entered in Latitude and Longitude from the GUI)
- Click the "Search" button
- Reference: Places - Amazon Location Service
The search results will be added to the QGIS map canvas as a point layer.
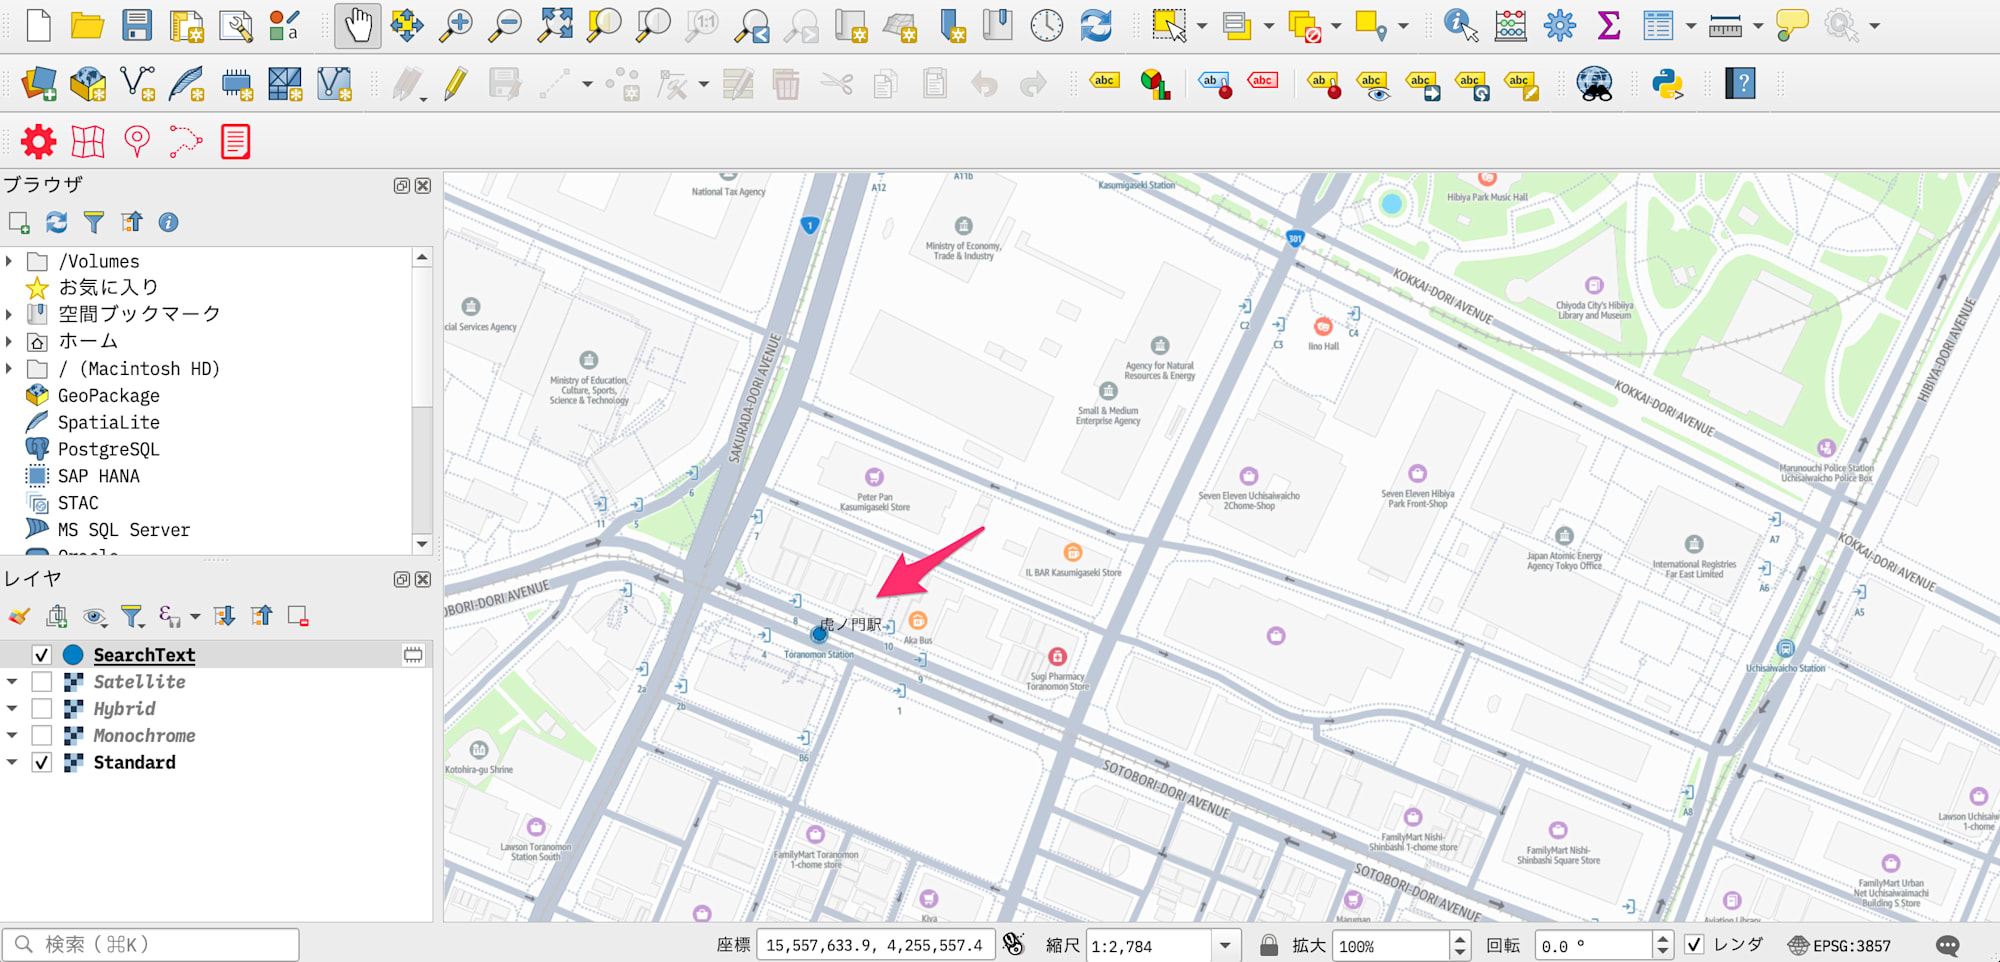
Select the layer and open the attribute table to view the information obtained (name, address, coordinates, etc.).
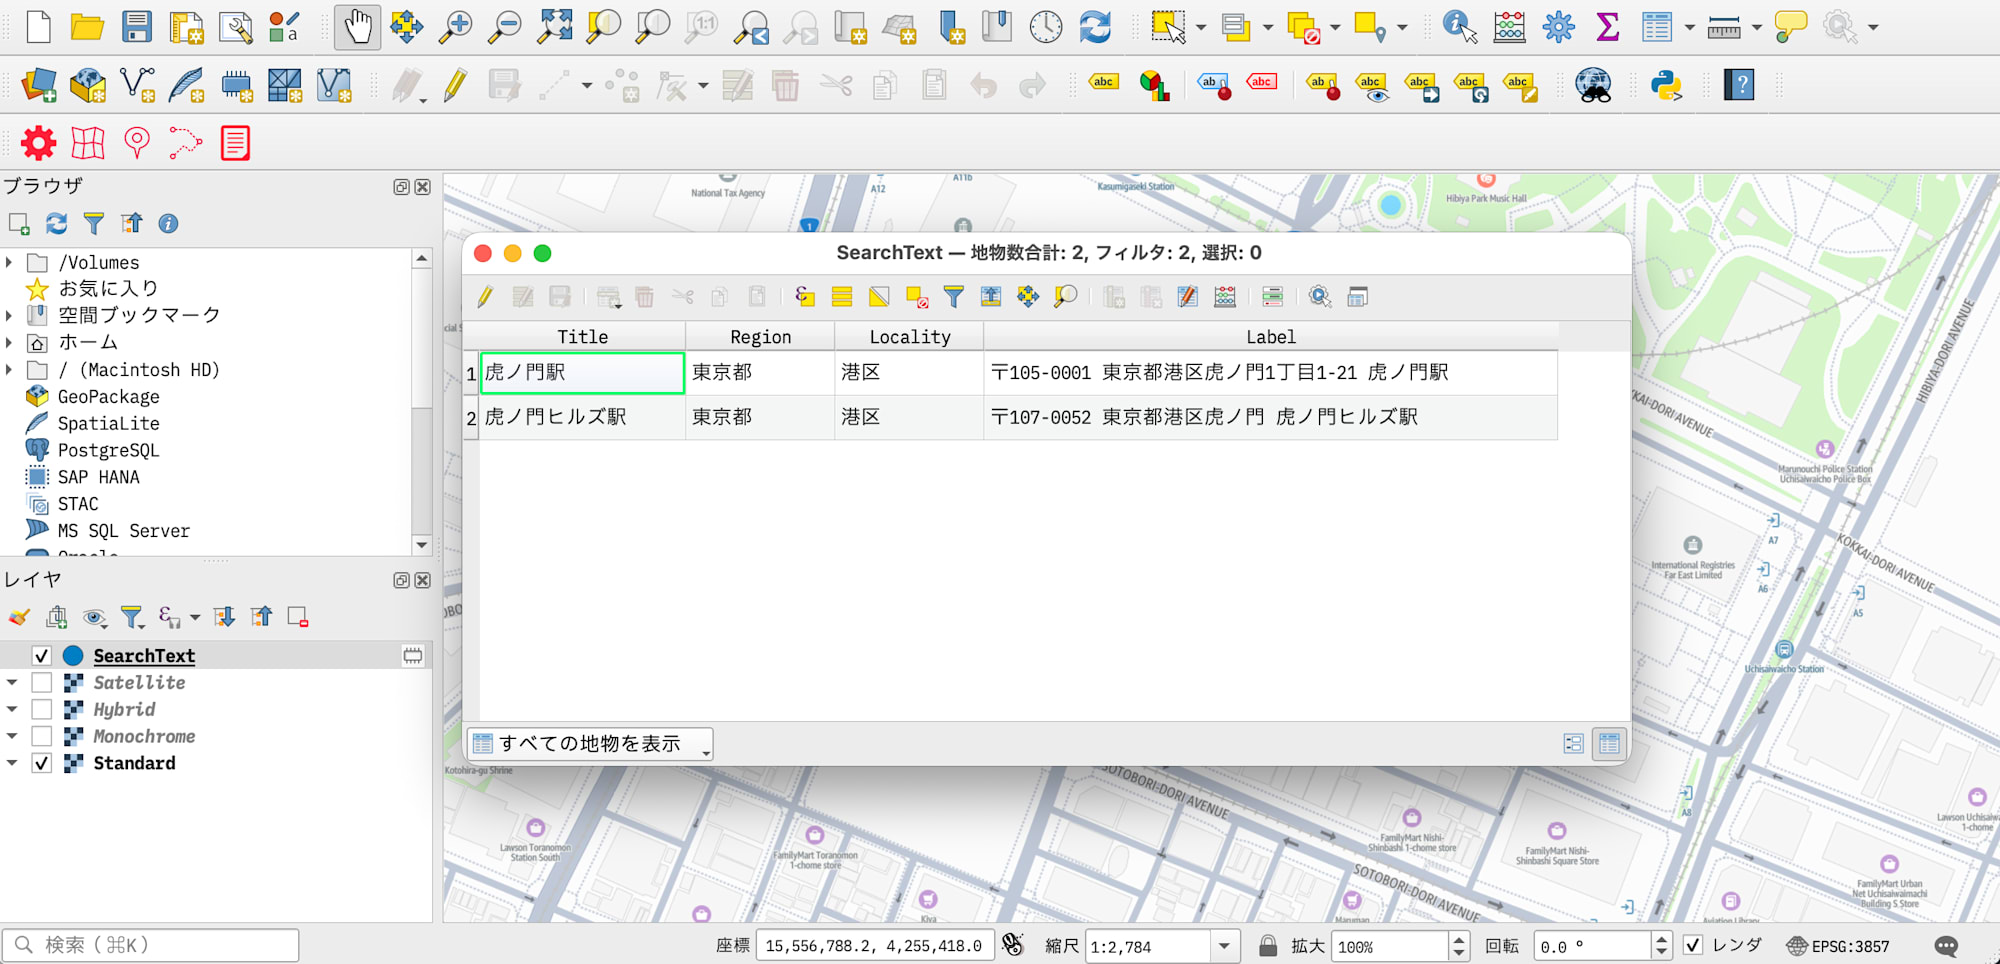
You can search using Japanese place names and landmarks, making it easy to find locations in Japan.
Use Case 3: Route Search Between Two Points
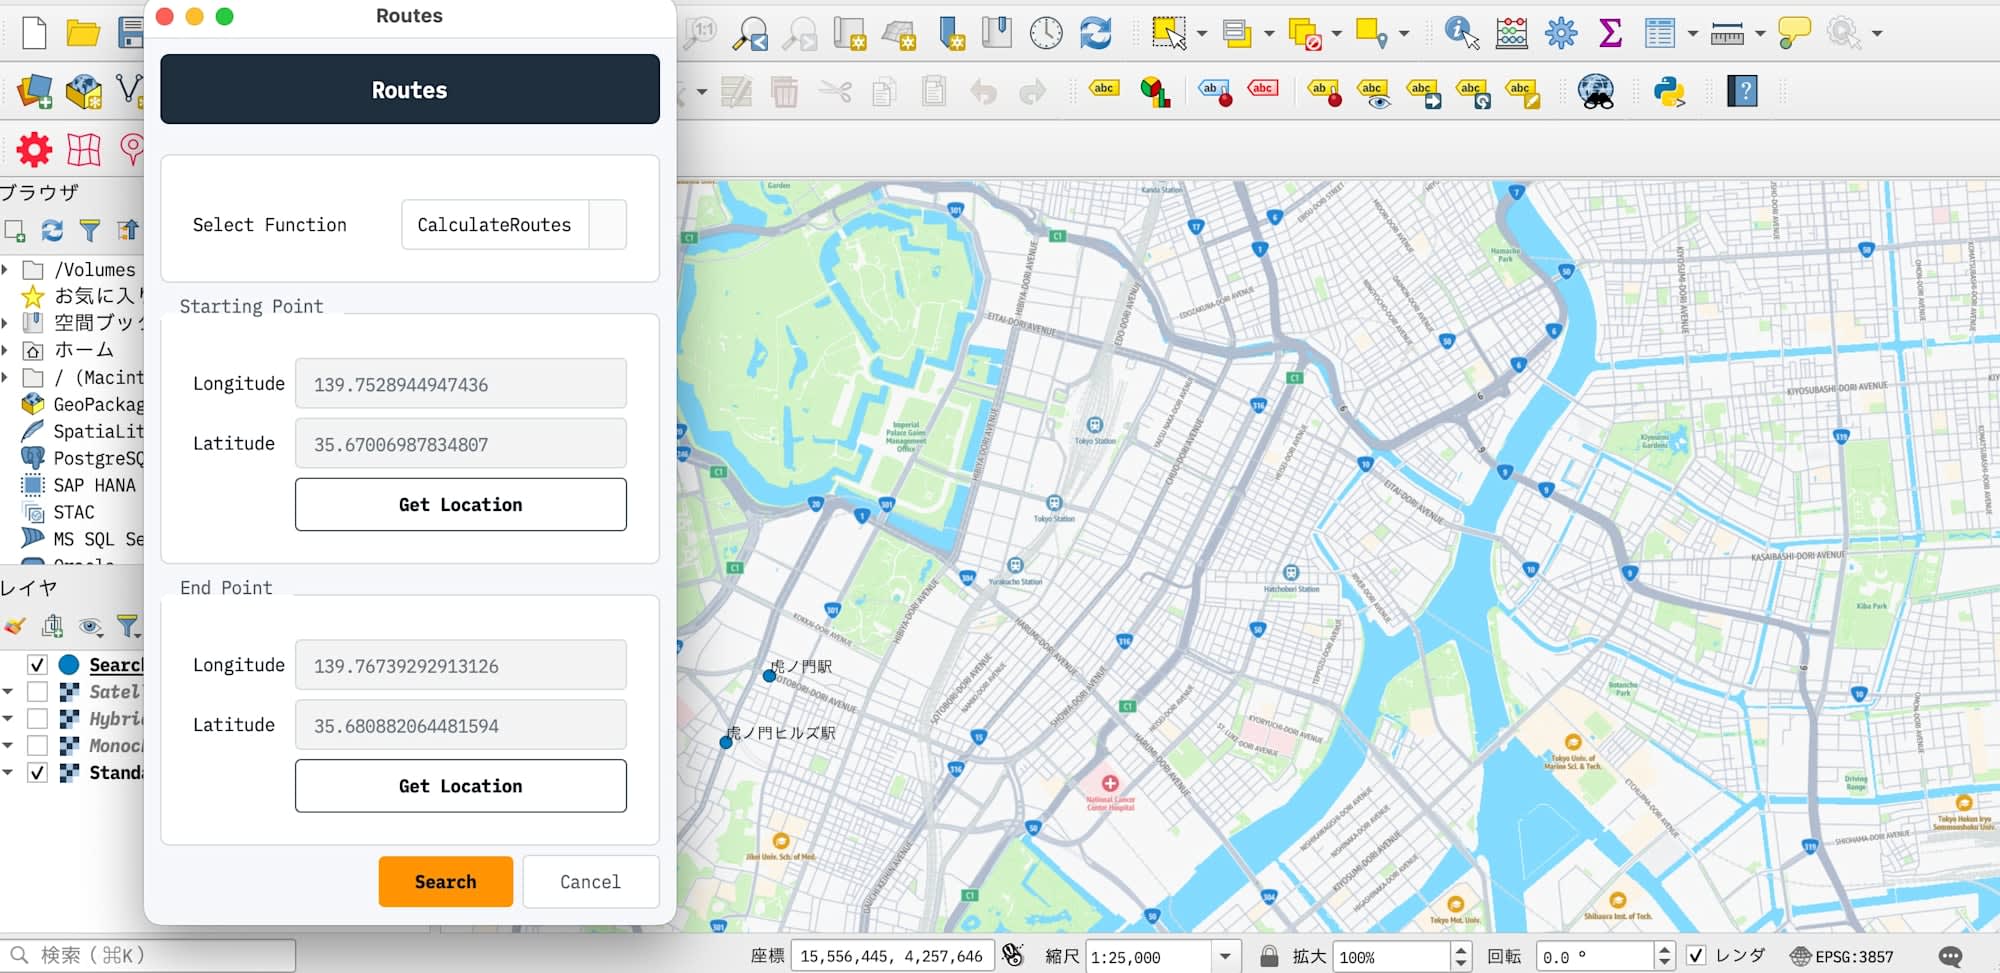
Open "Amazon Location Service" → "Routes" from the menu bar.
- Select "CalculateRoutes"
- Click the "Get Location (Starting Point)" button and click on the map to specify the starting point
- Click the "Get Location (End Point)" button and click on the map to specify the destination
- Click the "Search" button to search for a route
- Reference: Routes - Amazon Location Service
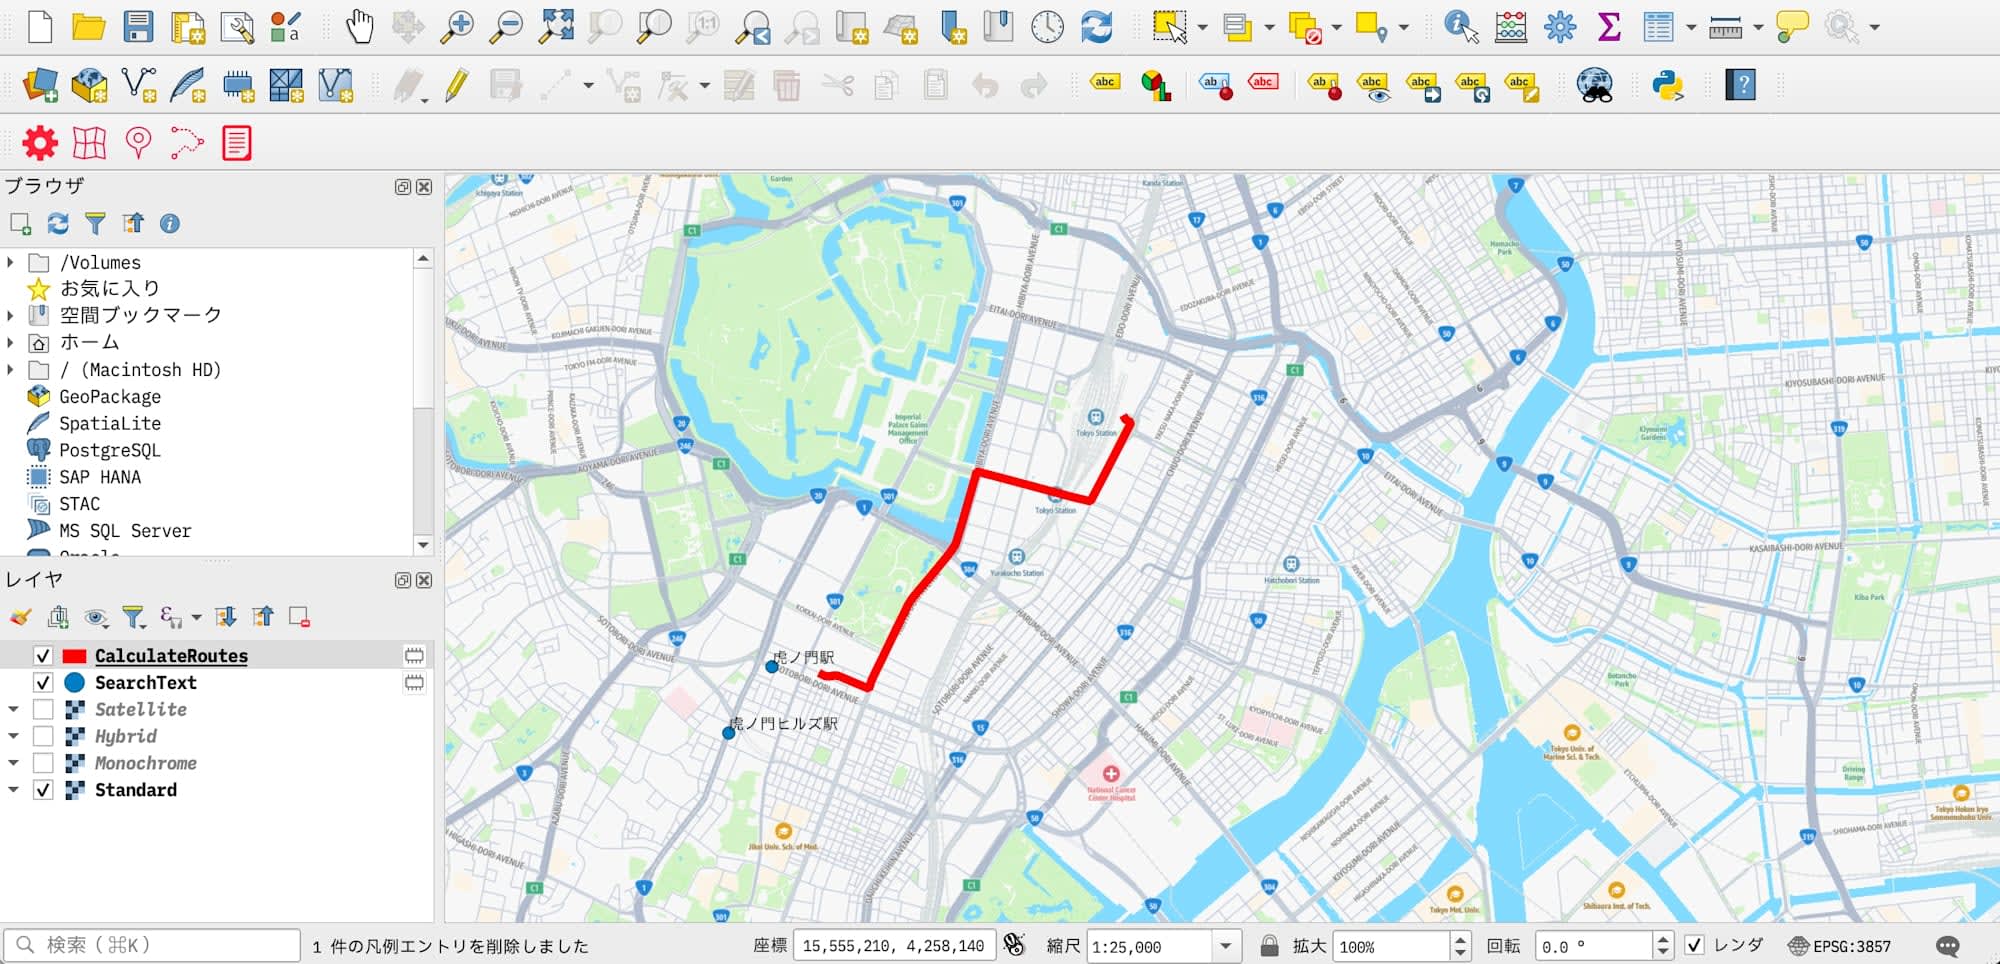
The search results will be added to the QGIS map canvas as a line layer.
Notes
This plugin does not implement all Amazon Location Service features.
Currently, it only supports the three functions of Maps, Places, and Routes, and more features are planned for the future.
Conclusion
I tried three features using the Amazon Location Service plugin for QGIS: map display, geocoding, and route search.
You can get started just by obtaining an API key, and thanks to the QGIS plugin, you can experience AWS location services through GUI operations without writing a single line of code. It's very convenient to use as a base map for simple data analysis.