I tried querying documents imported with the SharePoint connector in Snowflake Openflow from Snowflake Intelligence
This page has been translated by machine translation. View original
Hello, this is Kitagawa from the Data Business Department.
Today, I'll summarize the procedure for verifying the connection of Snowflake Openflow's SharePoint connector, which I recently tested.
Snowflake Openflow is a fully managed data integration service for building and managing data pipelines on Snowflake, based on Apache NiFi. It features a rich set of connectors and can ingest not only structured data but also unstructured data such as images, audio, and video. Another key point is that it supports both batch and streaming processing.
This blog focuses on SharePoint / Entra ID configuration and introduces the workflow from Openflow connector setup to querying with Snowflake Intelligence.
The following articles are helpful for Openflow setup and details about the SharePoint connector. Please refer to these articles for parts omitted in this blog.
For basic Snowflake setup (creating Deployment and runtime), see here:
For details on Openflow UI operations and connector parameters, see here:
Prerequisites
The following resources are assumed to be already available:
- Snowflake commercial account (Openflow cannot be used with trial accounts)
- SharePoint site for ingestion
- Azure Entra ID
We'll also assume that Openflow Deployment and runtime are already created. If not, please refer to the "Snowflake Preparation" section in the devio article mentioned above. However, you'll need to adjust the domains specified in the network rule for SharePoint (explained later).
For Openflow deployment, you can choose between Openflow - Snowflake Deployments (SPCS) and BYOC. Here, we'll deploy to SPCS.
For the official documentation of the SharePoint connector, please refer to:
Overall Flow
The configuration will follow these general steps. Skip any steps for resources that are already created.
- SharePoint / Entra ID Configuration
- Register a Microsoft Graph application
- Grant application permissions to the target site
- Create a client secret
- Note the values to pass to Openflow
- Snowflake Configuration
- Create a network rule / EAI for SharePoint
- Openflow SharePoint Connector Configuration
- Add the connector to runtime
- Configure Parameters
- Enable Controller Services and Start
- Verification
- Query with Snowflake Intelligence
SharePoint / Entra ID Configuration
Register a Microsoft Graph application
Register a Microsoft Graph application by referring to the following:
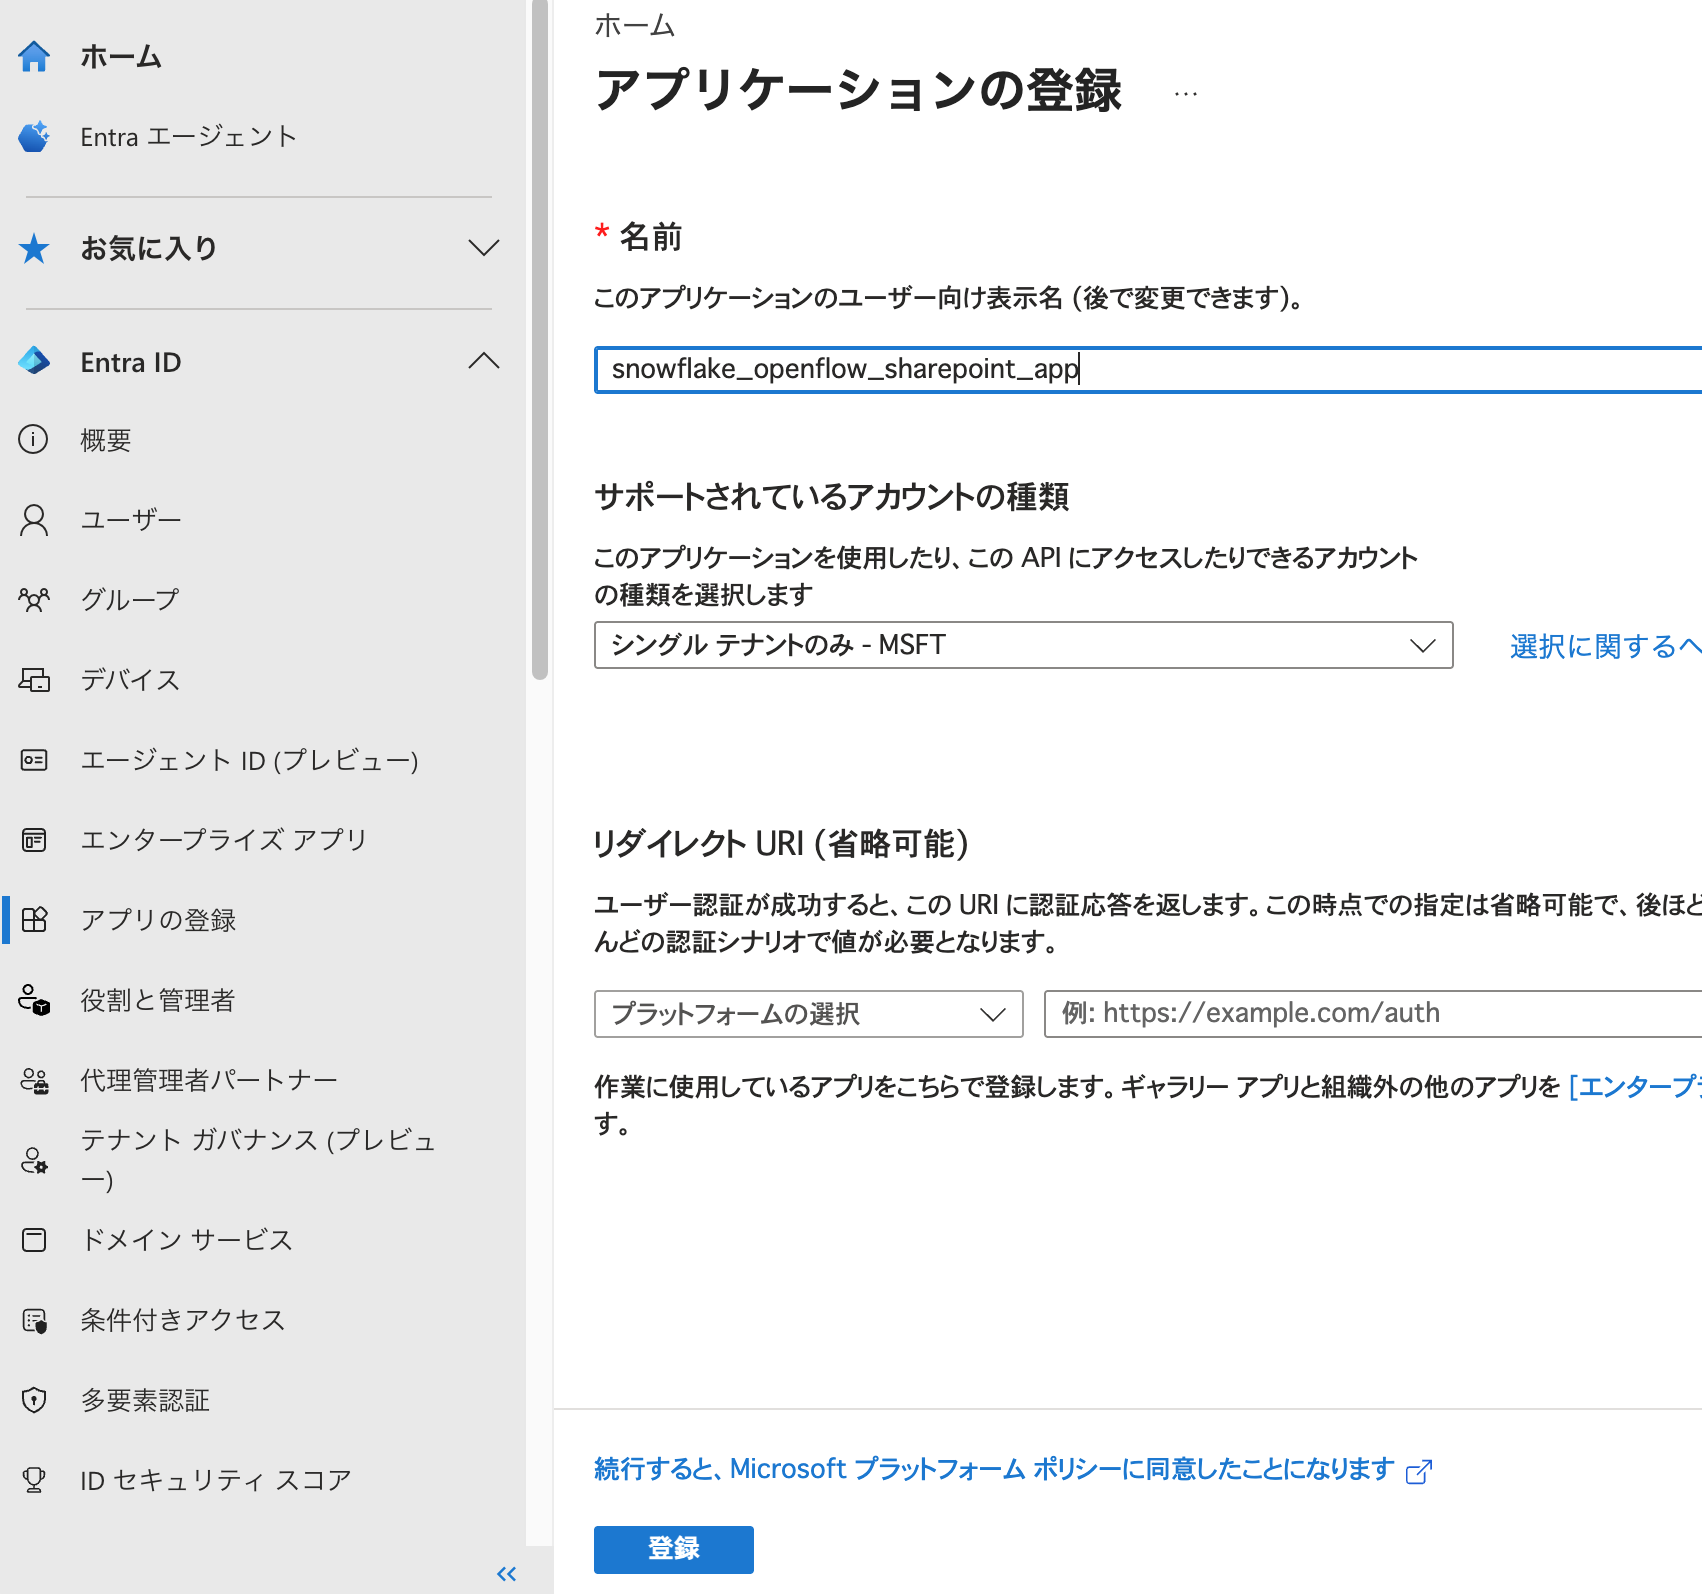
From the Microsoft Entra admin center, select App registrations > New registration.
Set "Name" and "Supported account types" and click "Register". Leave the redirect URI blank.
Next, grant permissions to the registered app. The required permissions vary depending on the type of SharePoint connector.
Here, we'll use the Cortex Search, no document ACLs connector, so we only need to grant Sites.Selected to the application.
From the home screen of the registered app, go to API permissions > Add a permission > Microsoft Graph > Application permissions. Type Sites.Selected in the search box, select Sites.Selected, and click "Add permissions". You'll see a notice that administrator consent is required, so click the consent button.
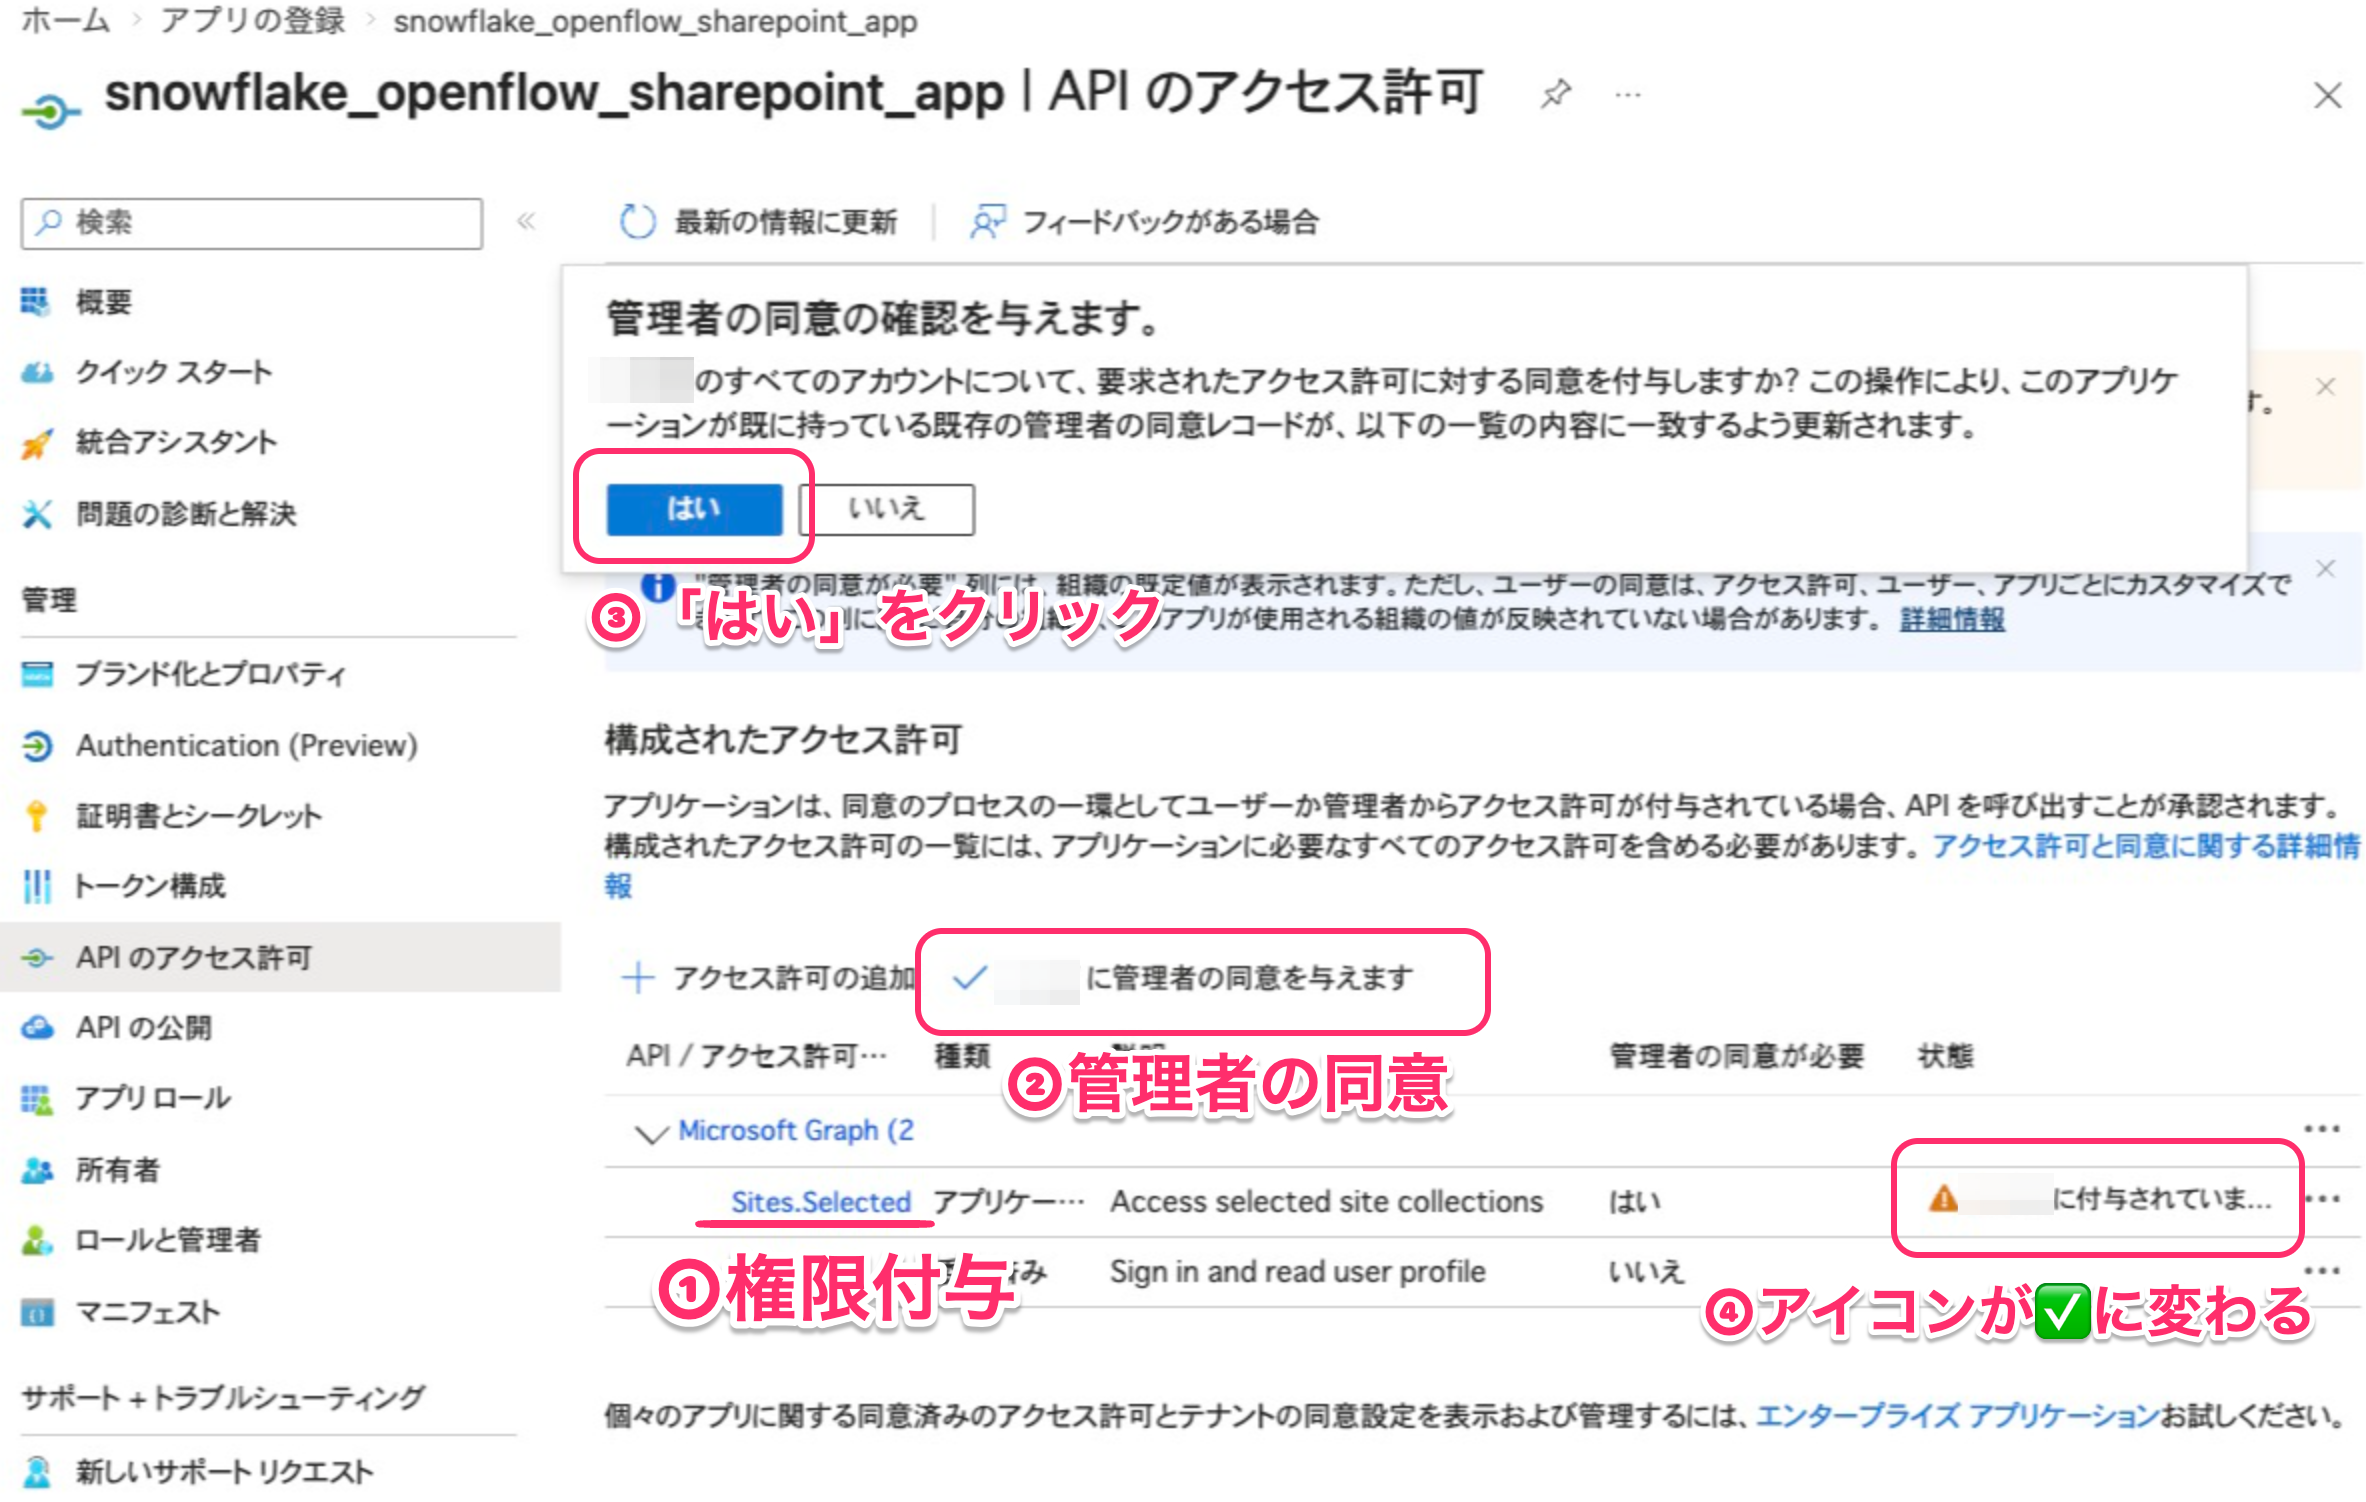
The "Status" column should show a green checkmark when done.
Grant application permissions to the target site
Next, grant permissions to allow this application to access the target SharePoint site. Snowflake recommends the fullcontrol role. Role assignment can be done using PnP PowerShell or Microsoft Graph's site permission endpoint. Here, we'll use the Graph API.
It's convenient to use Graph Explorer to execute Graph API calls. To manage site permissions, you need Sites.FullControl.All on Microsoft Graph. If you encounter permission errors during setup, check the executing user's permissions.
To grant permissions, first get the siteId of the target site. For example, you can get site information with a request like:
GET https://graph.microsoft.com/v1.0/sites/contoso.sharepoint.com:/sites/Finance
The id in the response is the siteId of the target site. It looks like "id": "contoso.sharepoint.com,2C712604-1370-44E7-A1F5-426573FDA80A,2D2244C3-251A-49EA-93A8-39E1C3A060FE".
Once you have the siteId, grant application permissions to the site using POST /sites/{siteId}/permissions:
You can find the app's Client ID and Display Name on the app overview screen.
POST https://graph.microsoft.com/v1.0/sites/{siteId}/permissions
Content-Type: application/json

{
  "roles": ["fullcontrol"],
  "grantedToIdentities": [
    {
      "application": {
        "id": "<Target app's Client ID>",
        "displayName": "<Target app name>"
      }
    }
  ]
}
On success, you'll get a 201 Created response with the permission object.
After granting, you can check the result with GET /sites/{siteId}/permissions. If roles includes fullcontrol, it's good.
Create a client secret
Finally, create a client secret.
From the app home screen, go to Certificates & secrets > Client secrets > New client secret.
Enter a description and set an expiration date as needed, then click "Add".
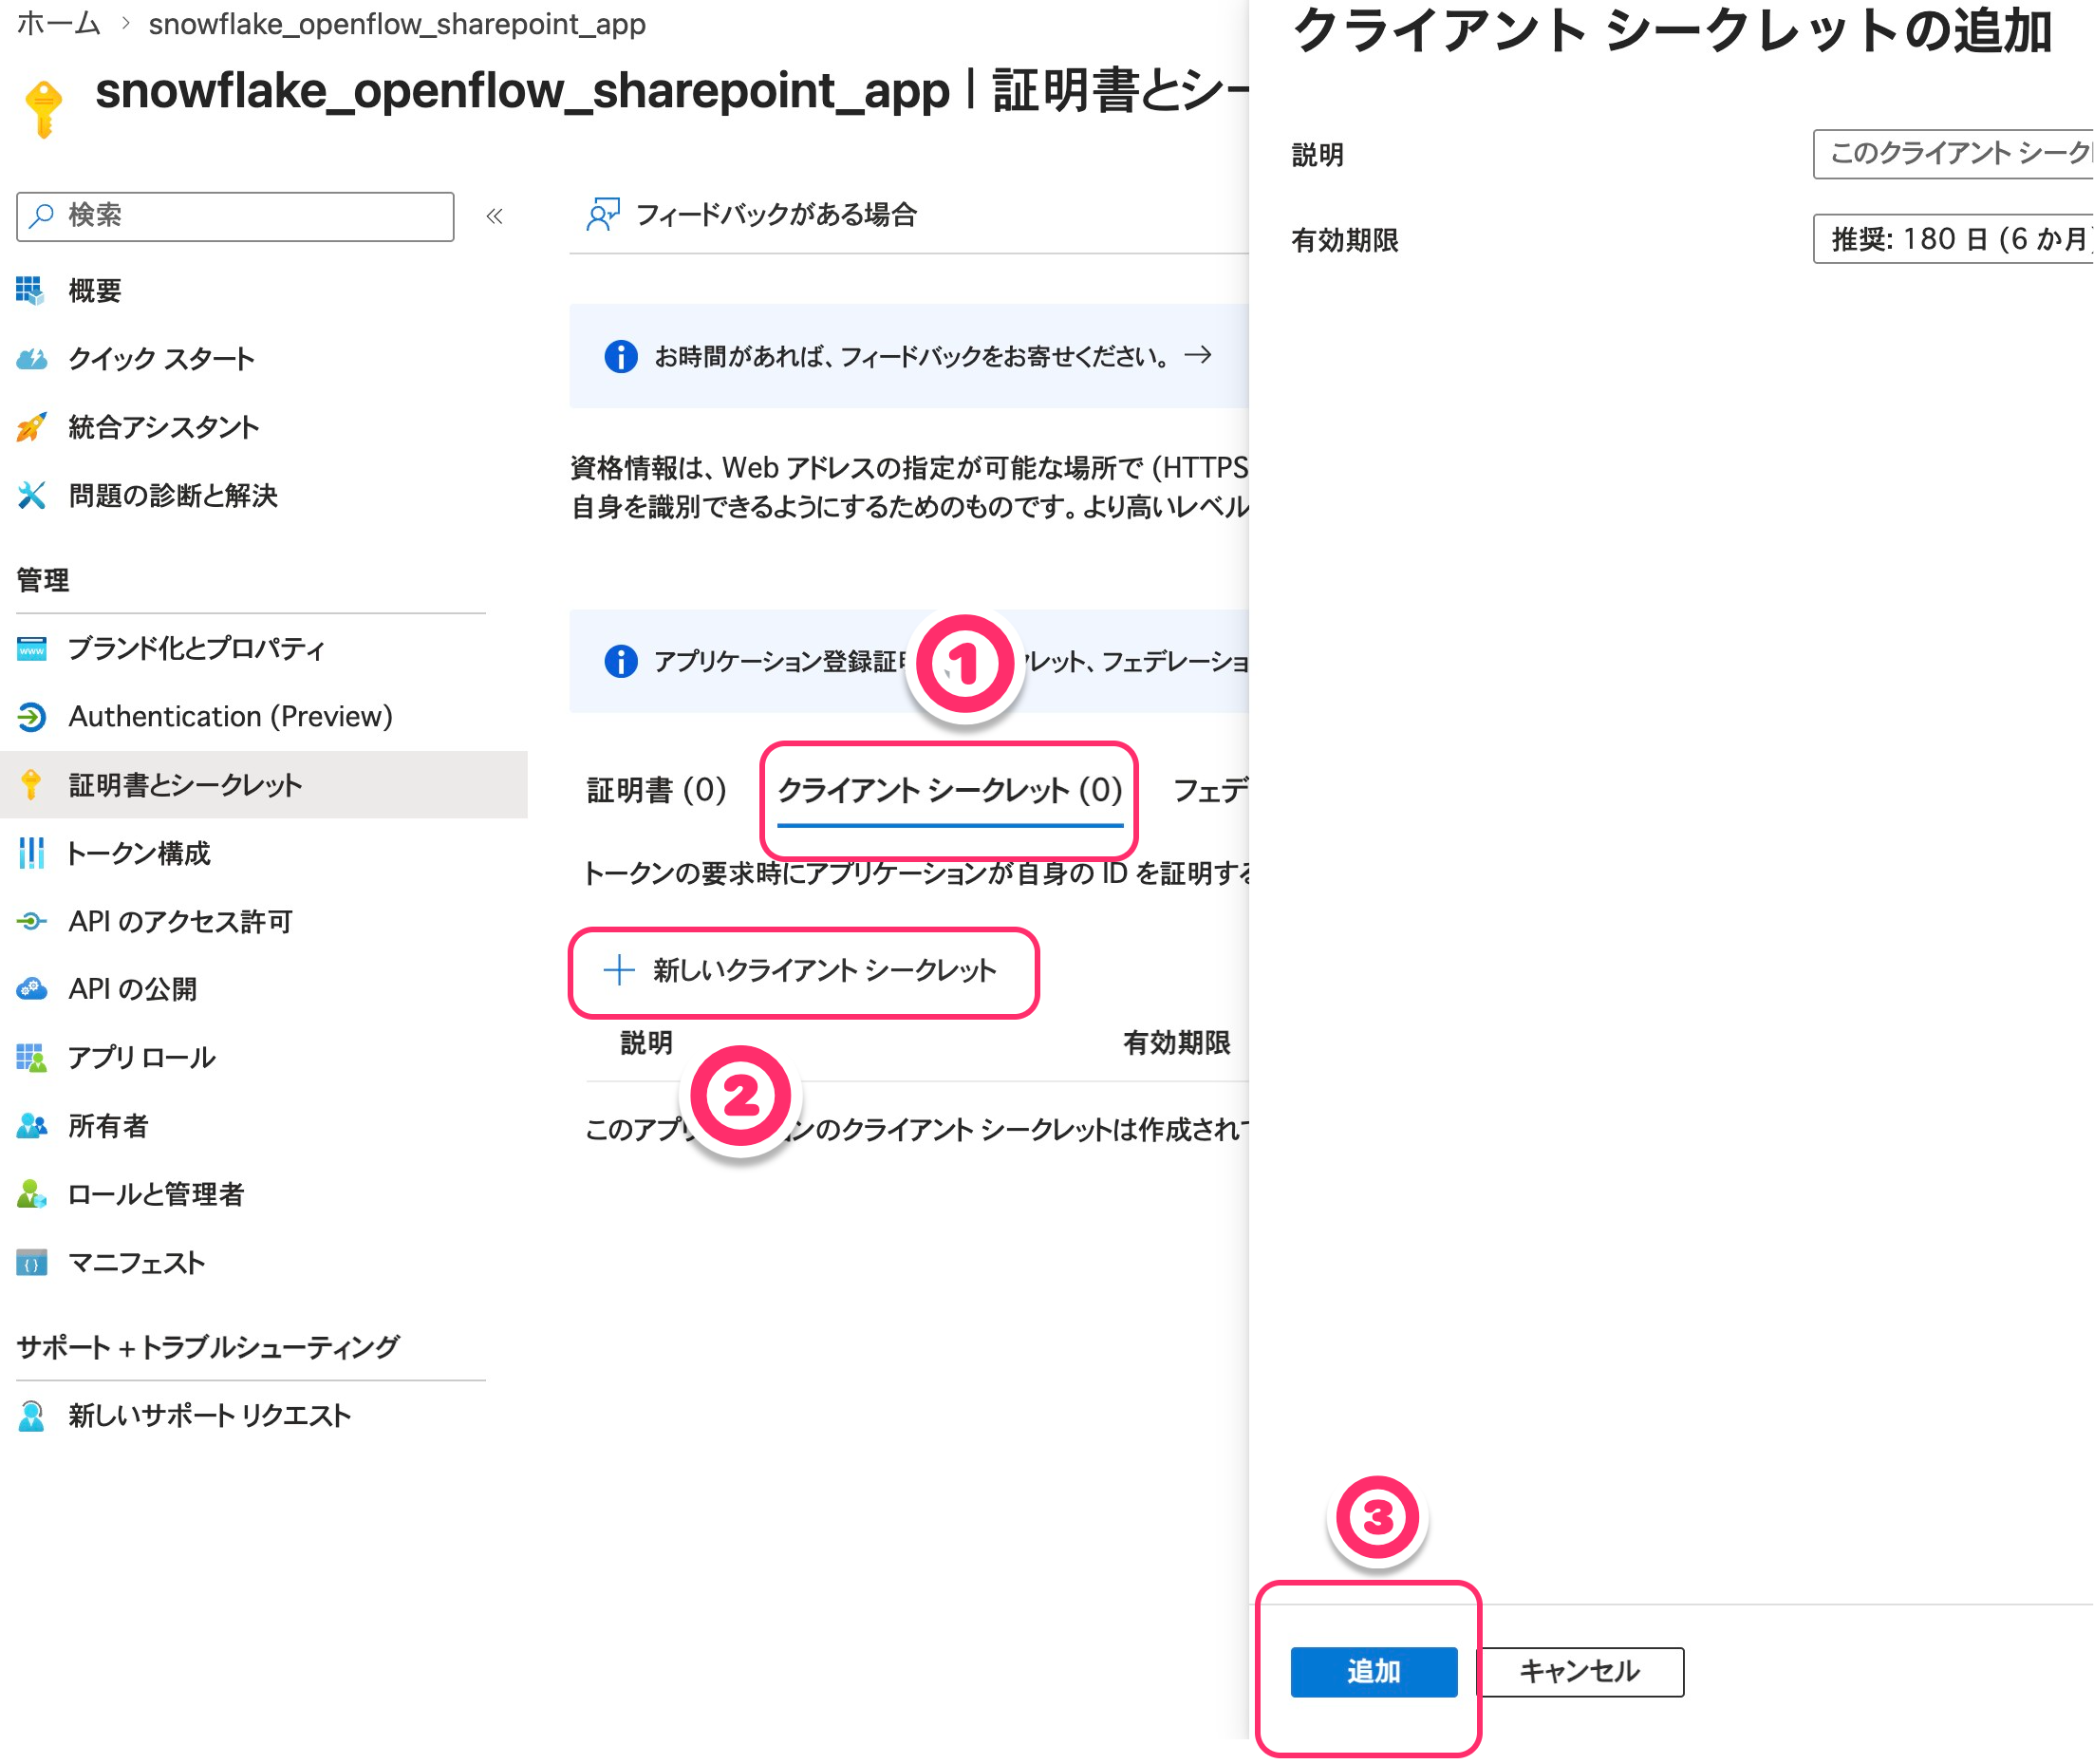
Copy and store the value of the created secret. Note that this value can never be viewed again after closing the page.
Note the values to pass to Openflow
The Graph app setup is now complete.
Note the following information to pass to Openflow:
- App client ID
- App client secret
- App tenant ID
- SharePoint site URL (example:
https://yourtenant.sharepoint.com/sites/YourSite)
Snowflake Configuration
For steps to create Openflow Deployment and runtime, refer to the "Snowflake Preparation" section in this article.
Here, we'll explain SharePoint-specific settings: creating a network rule and an external access integration (EAI).
Create a network rule / EAI for SharePoint
Create a network rule and EAI to allow the SharePoint connector to communicate with external Microsoft services. Change the domains specified in the network rule creation in the above blog to SharePoint-specific ones. The domains that need to be allowed are the following four, as stated in Snowflake's official documentation:
company-domain.sharepoint.comgraph.microsoft.com:80graph.microsoft.com:443login.microsoftonline.com
Here's an example SQL:
-- Create schema for network rules
USE ROLE ACCOUNTADMIN;
CREATE SCHEMA IF NOT EXISTS KITAGAWA_TEST_DB.NETWORKS;

-- Create network rule for SharePoint
CREATE OR REPLACE NETWORK RULE sharepoint_network_rule
  MODE = EGRESS
  TYPE = HOST_PORT
  VALUE_LIST = (
    'company-domain.sharepoint.com',
    'graph.microsoft.com:80',
    'graph.microsoft.com:443',
    'login.microsoftonline.com'
  );

-- Create external access integration with network rules
CREATE OR REPLACE EXTERNAL ACCESS INTEGRATION quickstart_access
  ALLOWED_NETWORK_RULES = (sharepoint_network_rule)
  ENABLED = TRUE;

-- Grant usage to runtime role
GRANT USAGE ON INTEGRATION quickstart_access TO ROLE QUICKSTART_ROLE;
Openflow SharePoint Connector Configuration
From here, we'll operate in the Openflow console.
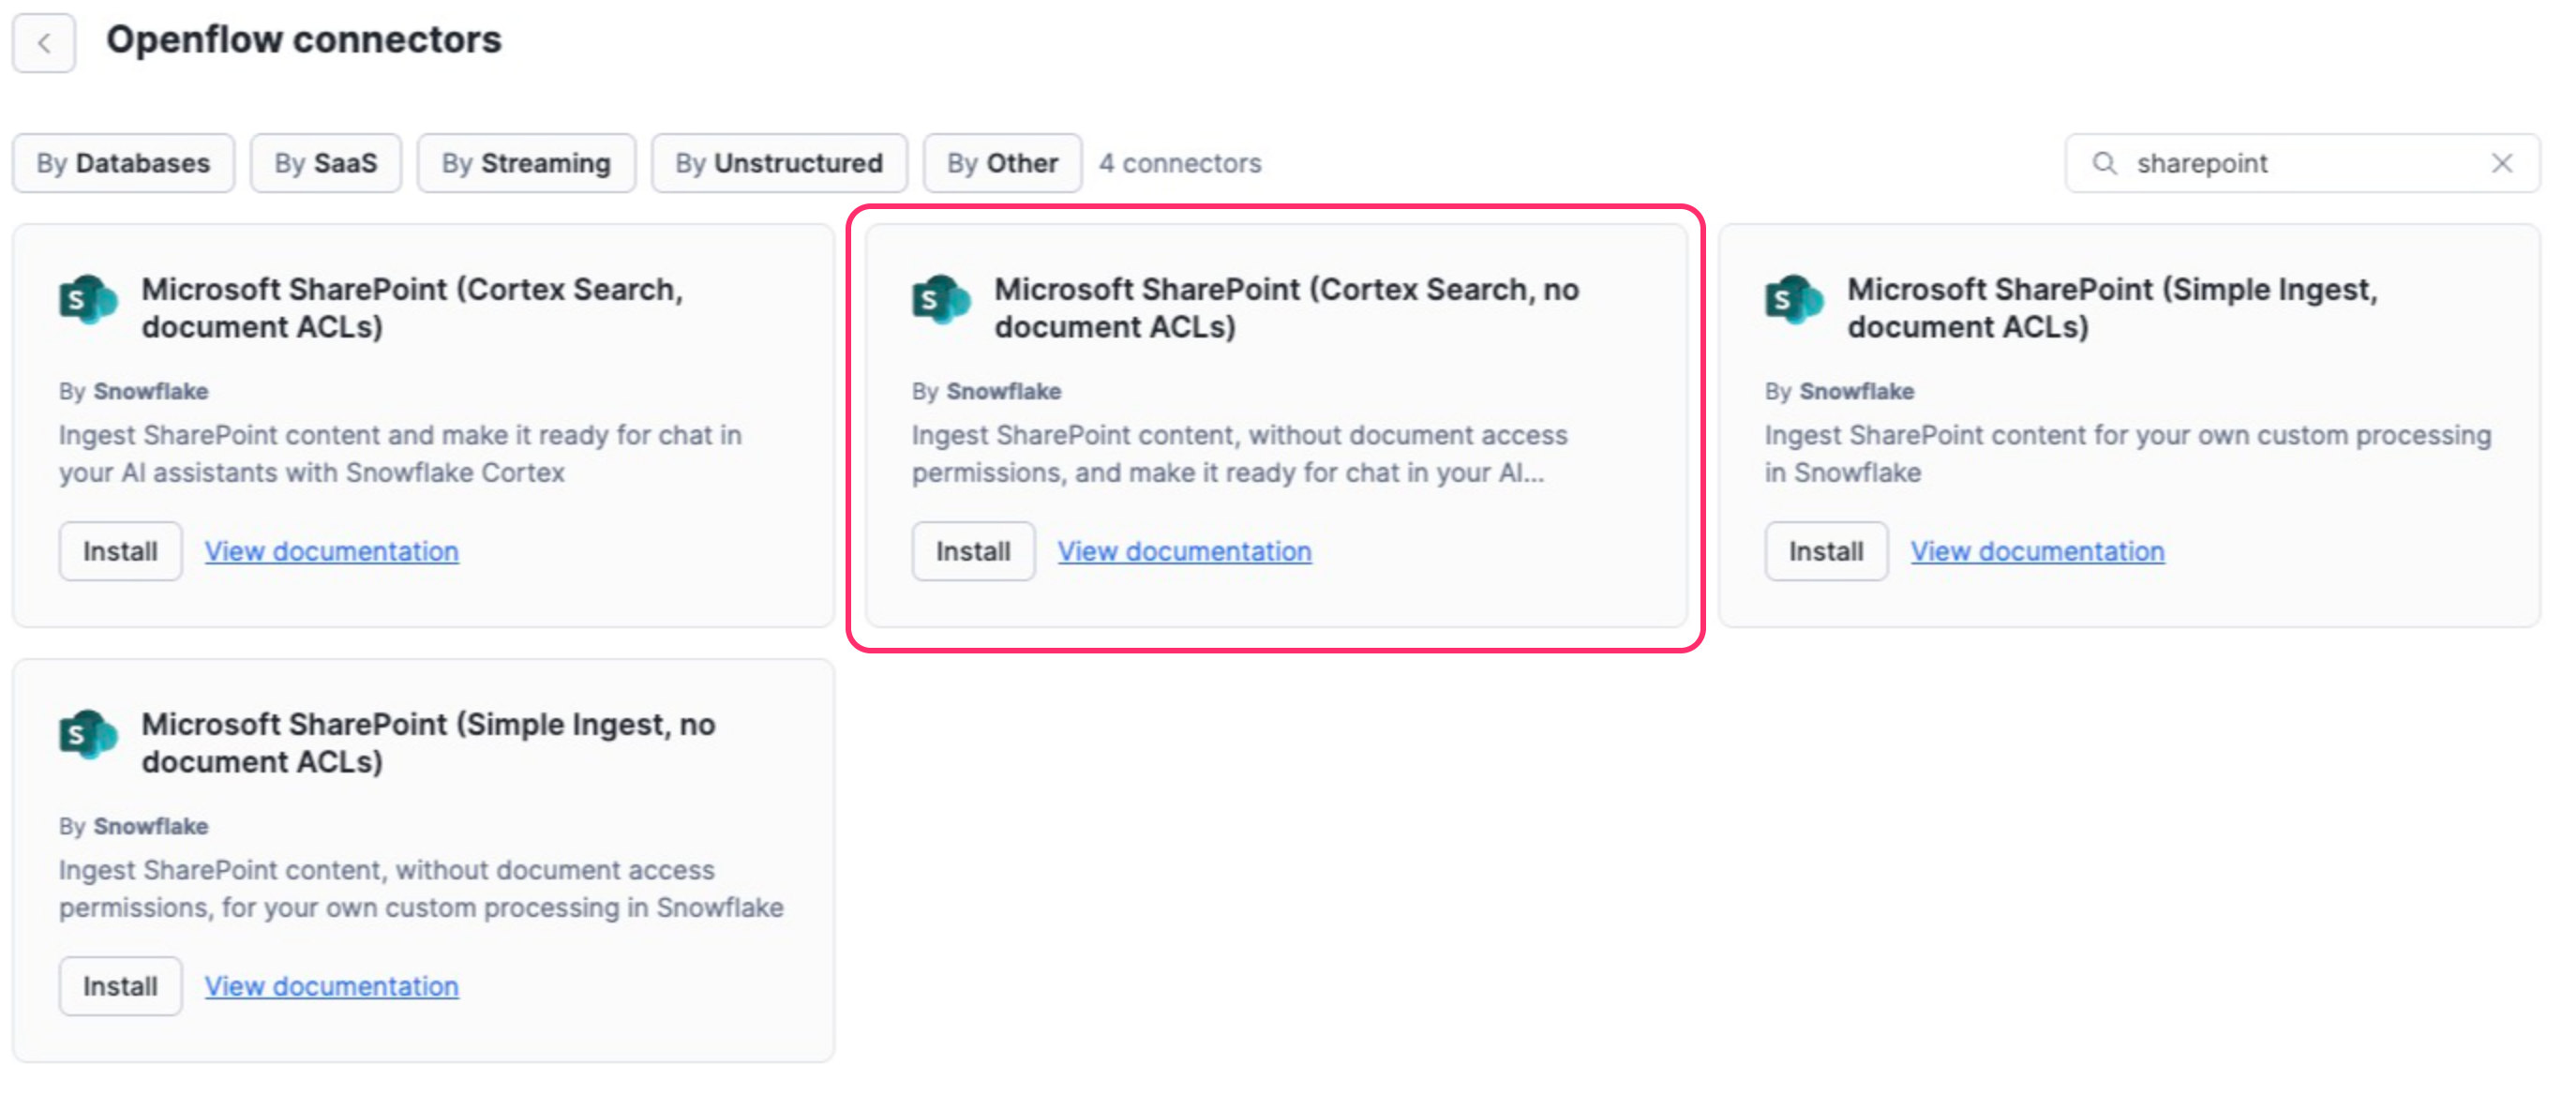
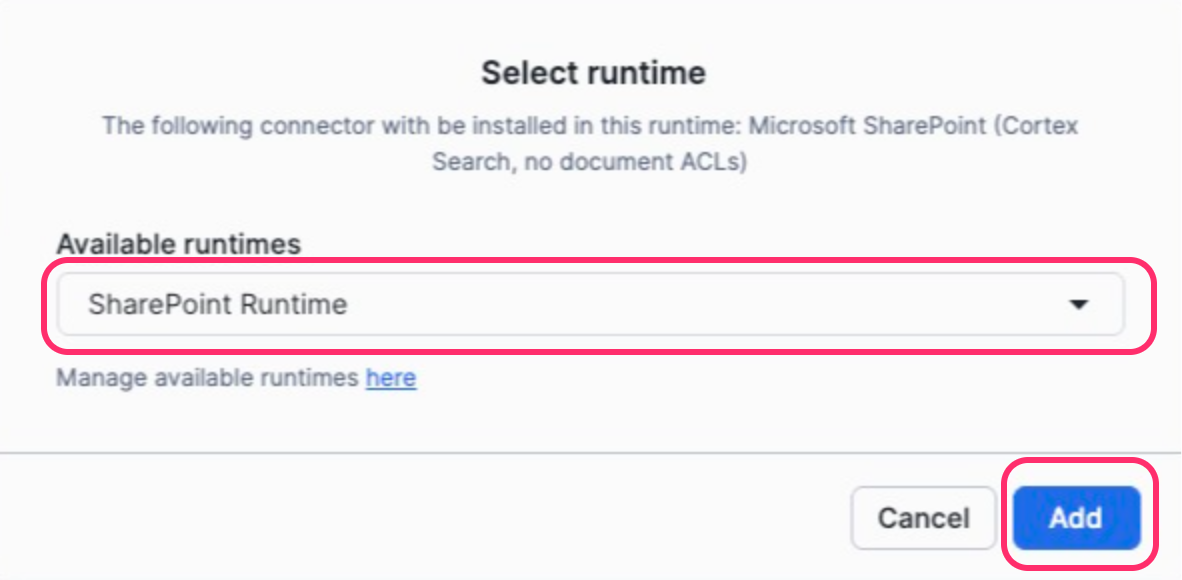
Add the connector to runtime
Search for the SharePoint connector and install Cortex Search, no document ACLs on your runtime.
Configure Parameters
Enter the connector parameters. For a complete view of parameters and details of each item, refer to the Zenn article. Here, we'll focus on mapping the Entra ID values you noted earlier.
Enter the values you noted from Entra ID into the following parameters:
| Value noted from Entra ID | Openflow parameter |
|---|---|
| client ID | SharePoint Client ID |
| client secret | SharePoint Client Secret |
| tenant ID | SharePoint Tenant ID |
| SharePoint site URL | SharePoint Site URL |
Also, set data destination (Destination Database / Schema, Snowflake Role / Warehouse, etc.) and ingestion settings (SharePoint Source Folder, File Extensions To Ingest, OCR Mode, etc.) according to your environment.
Enable Controller Services and Start
After configuration, run Enable all Controller Services on the canvas, then Start the process group. If the parameters are set correctly, tables should be created in the specified schema on Snowflake.
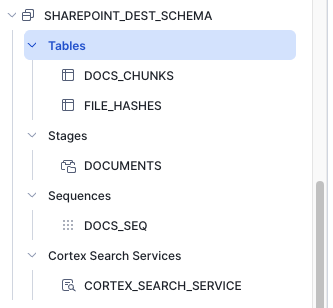
The DOCS_CHUNKS table contains chunked document data, and the FILE_HASHES table stores file hashes and document IDs. Since we're using a connector that supports Cortex Search, a Cortex Search Service has also been created.
Verification
Query with Snowflake Intelligence
Let's query documents ingested from SharePoint using natural language with Snowflake Intelligence. Create roles for Snowflake Intelligence and grant USAGE permissions on the target DB, schema, and Cortex Search as needed.
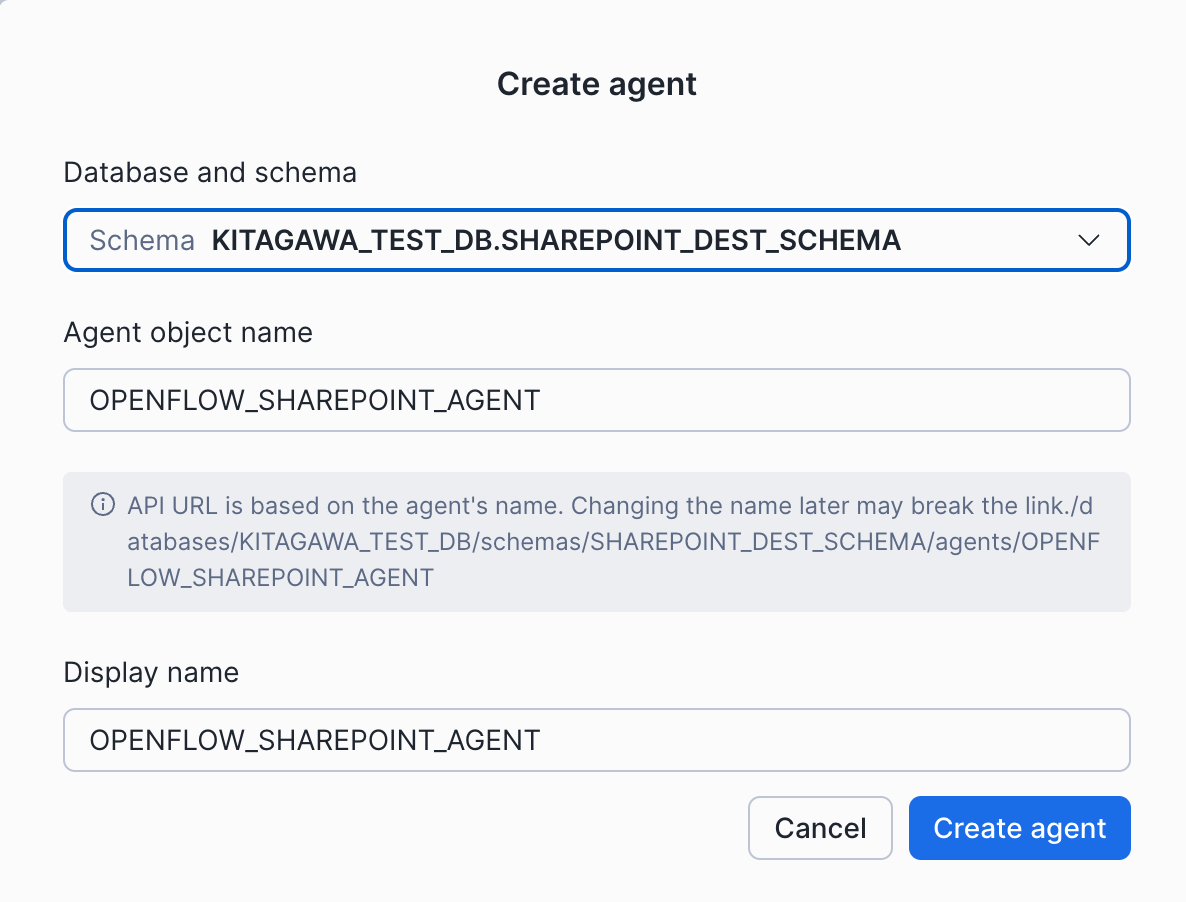
To call Cortex Search from Snowflake Intelligence, you first need to create an Agent. Go to AI & ML > Agents in Snowsight and click "Create Agent". Select the database and schema you configured as the Openflow data destination, enter a name for the Agent, and click "Create Agent".
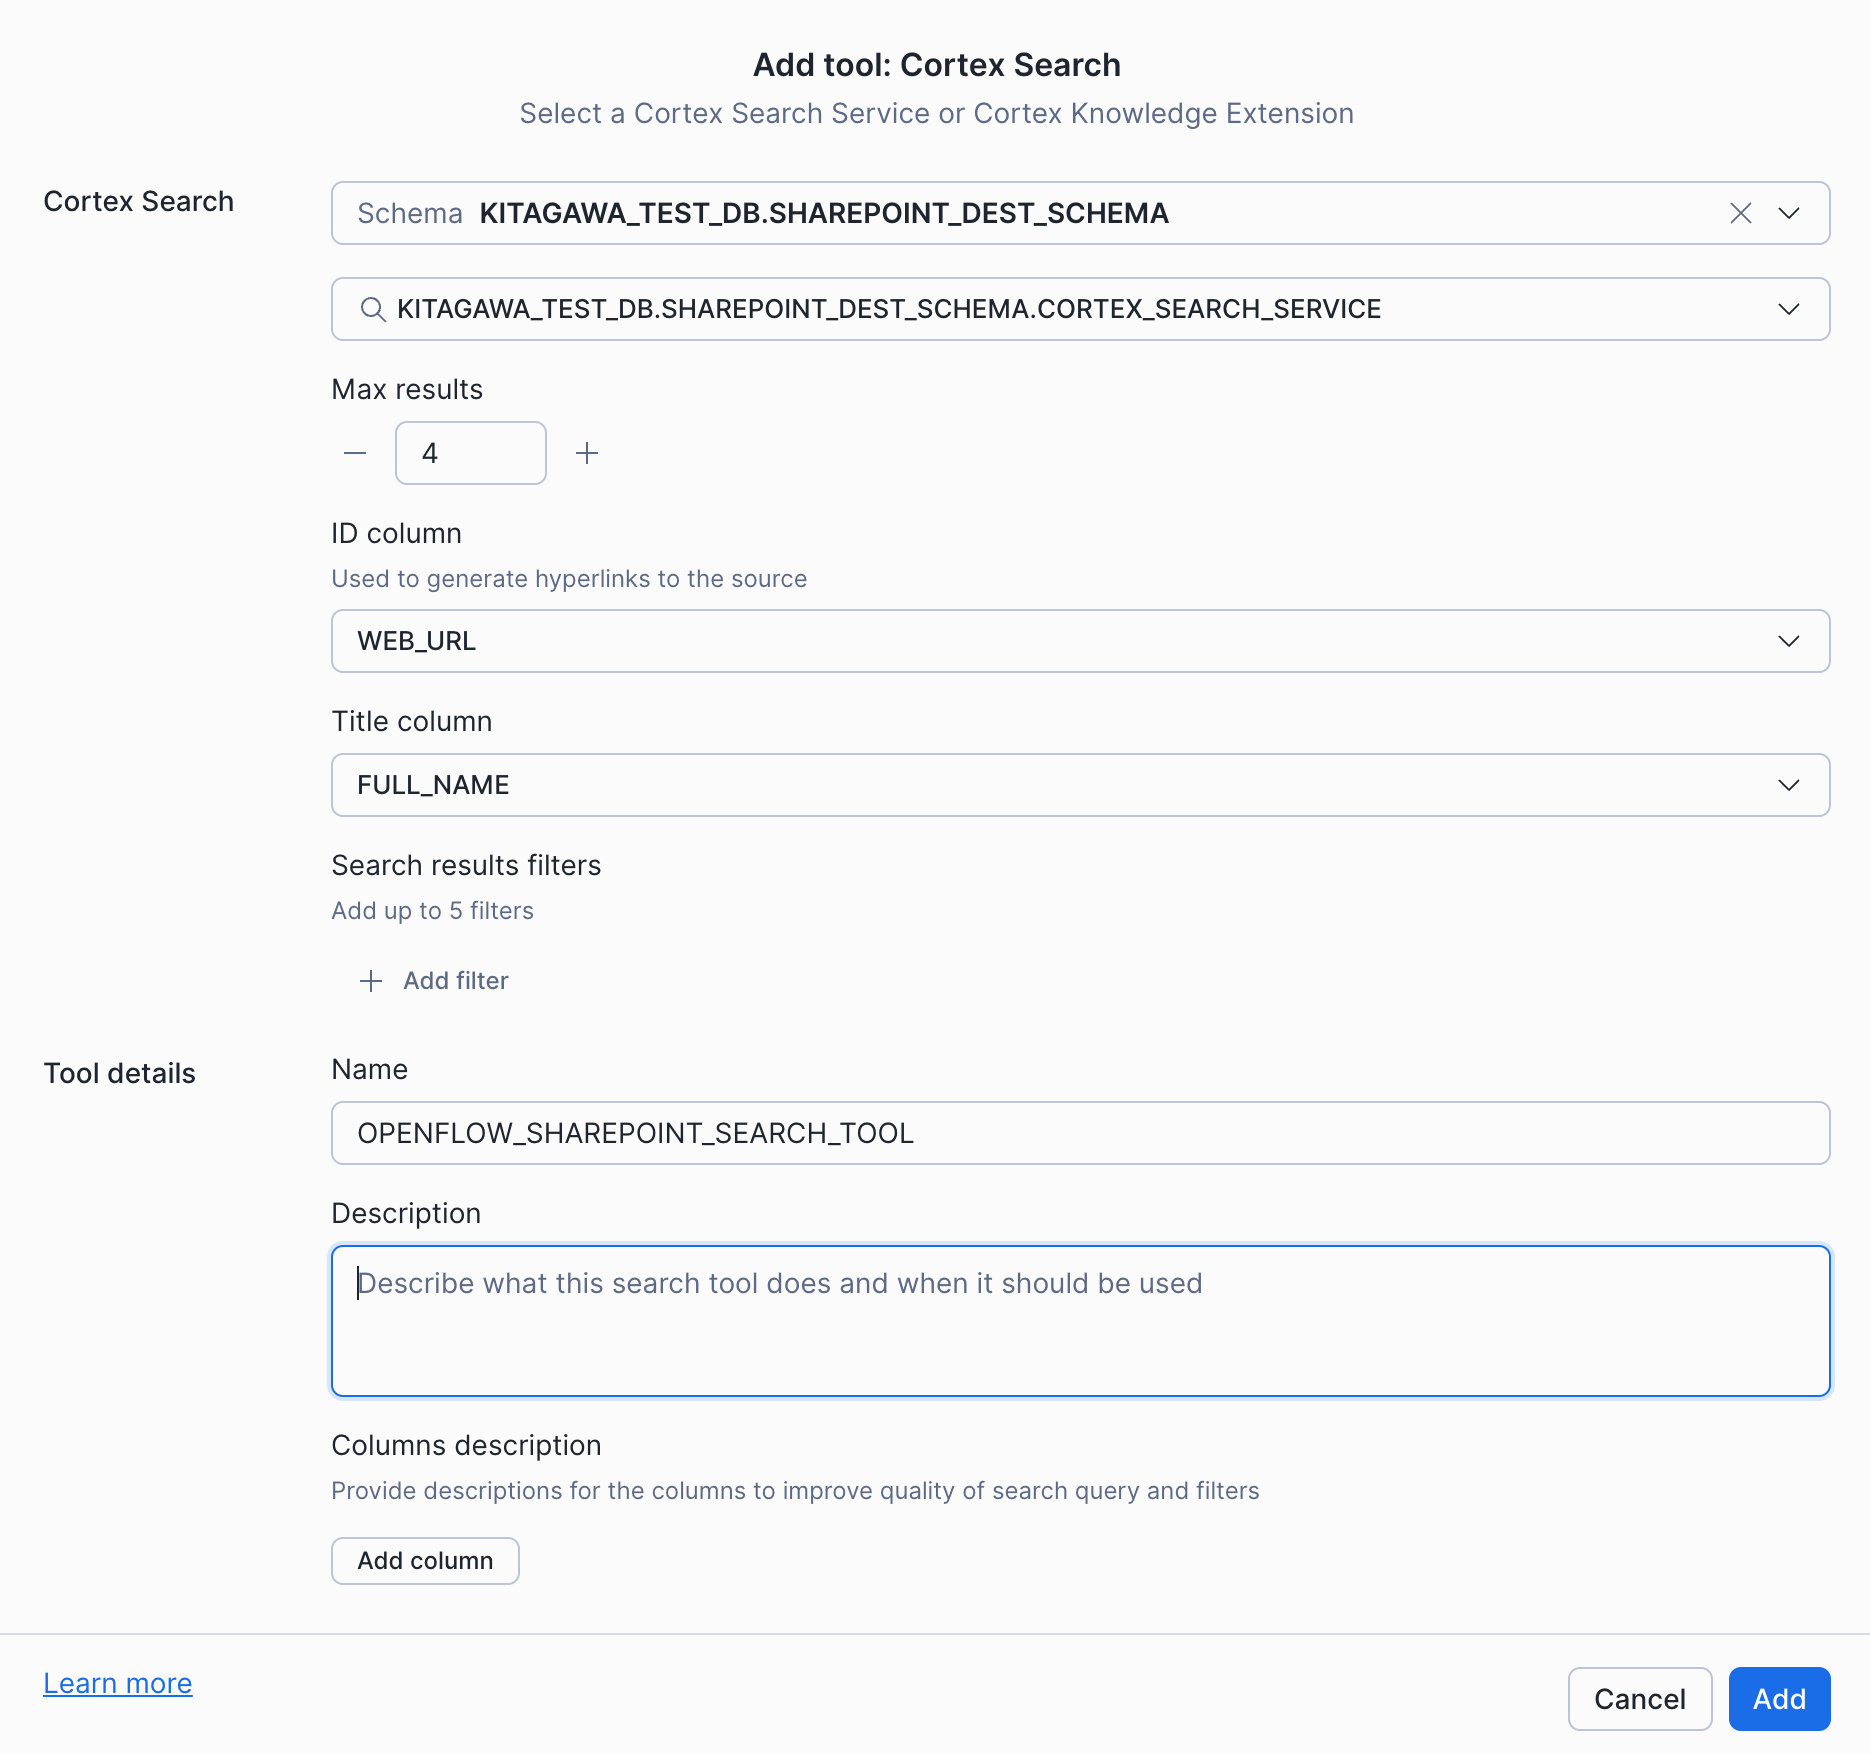
Once the Agent is created, select Cortex Search from the Tools tab and click "Create Cortex Search". Select the Cortex Search Service automatically created by Openflow and click "Add".
I selected WEB_URL for the ID Column and FULL_NAME for the Title Column.
Now the created Agent can use the Cortex Search Service created by Openflow.
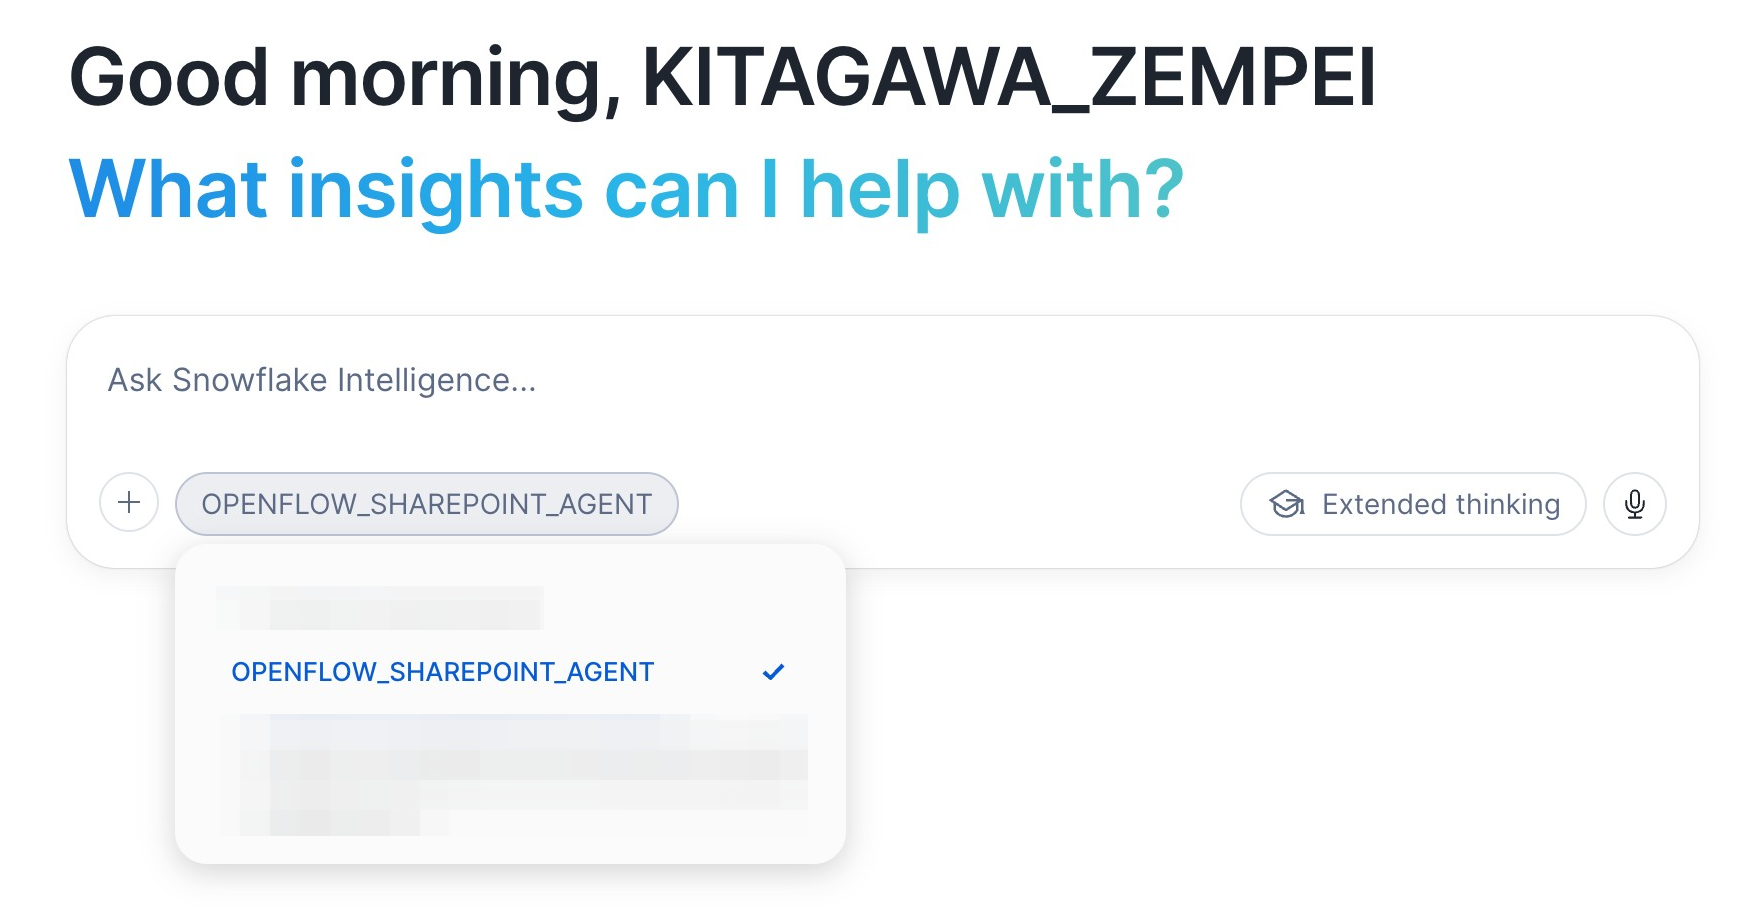
Next, go to AI & ML > Snowflake Intelligence in Snowsight. There's an Agent selection button at the bottom of the chat input area; select the Agent you created.
Let's try a query:
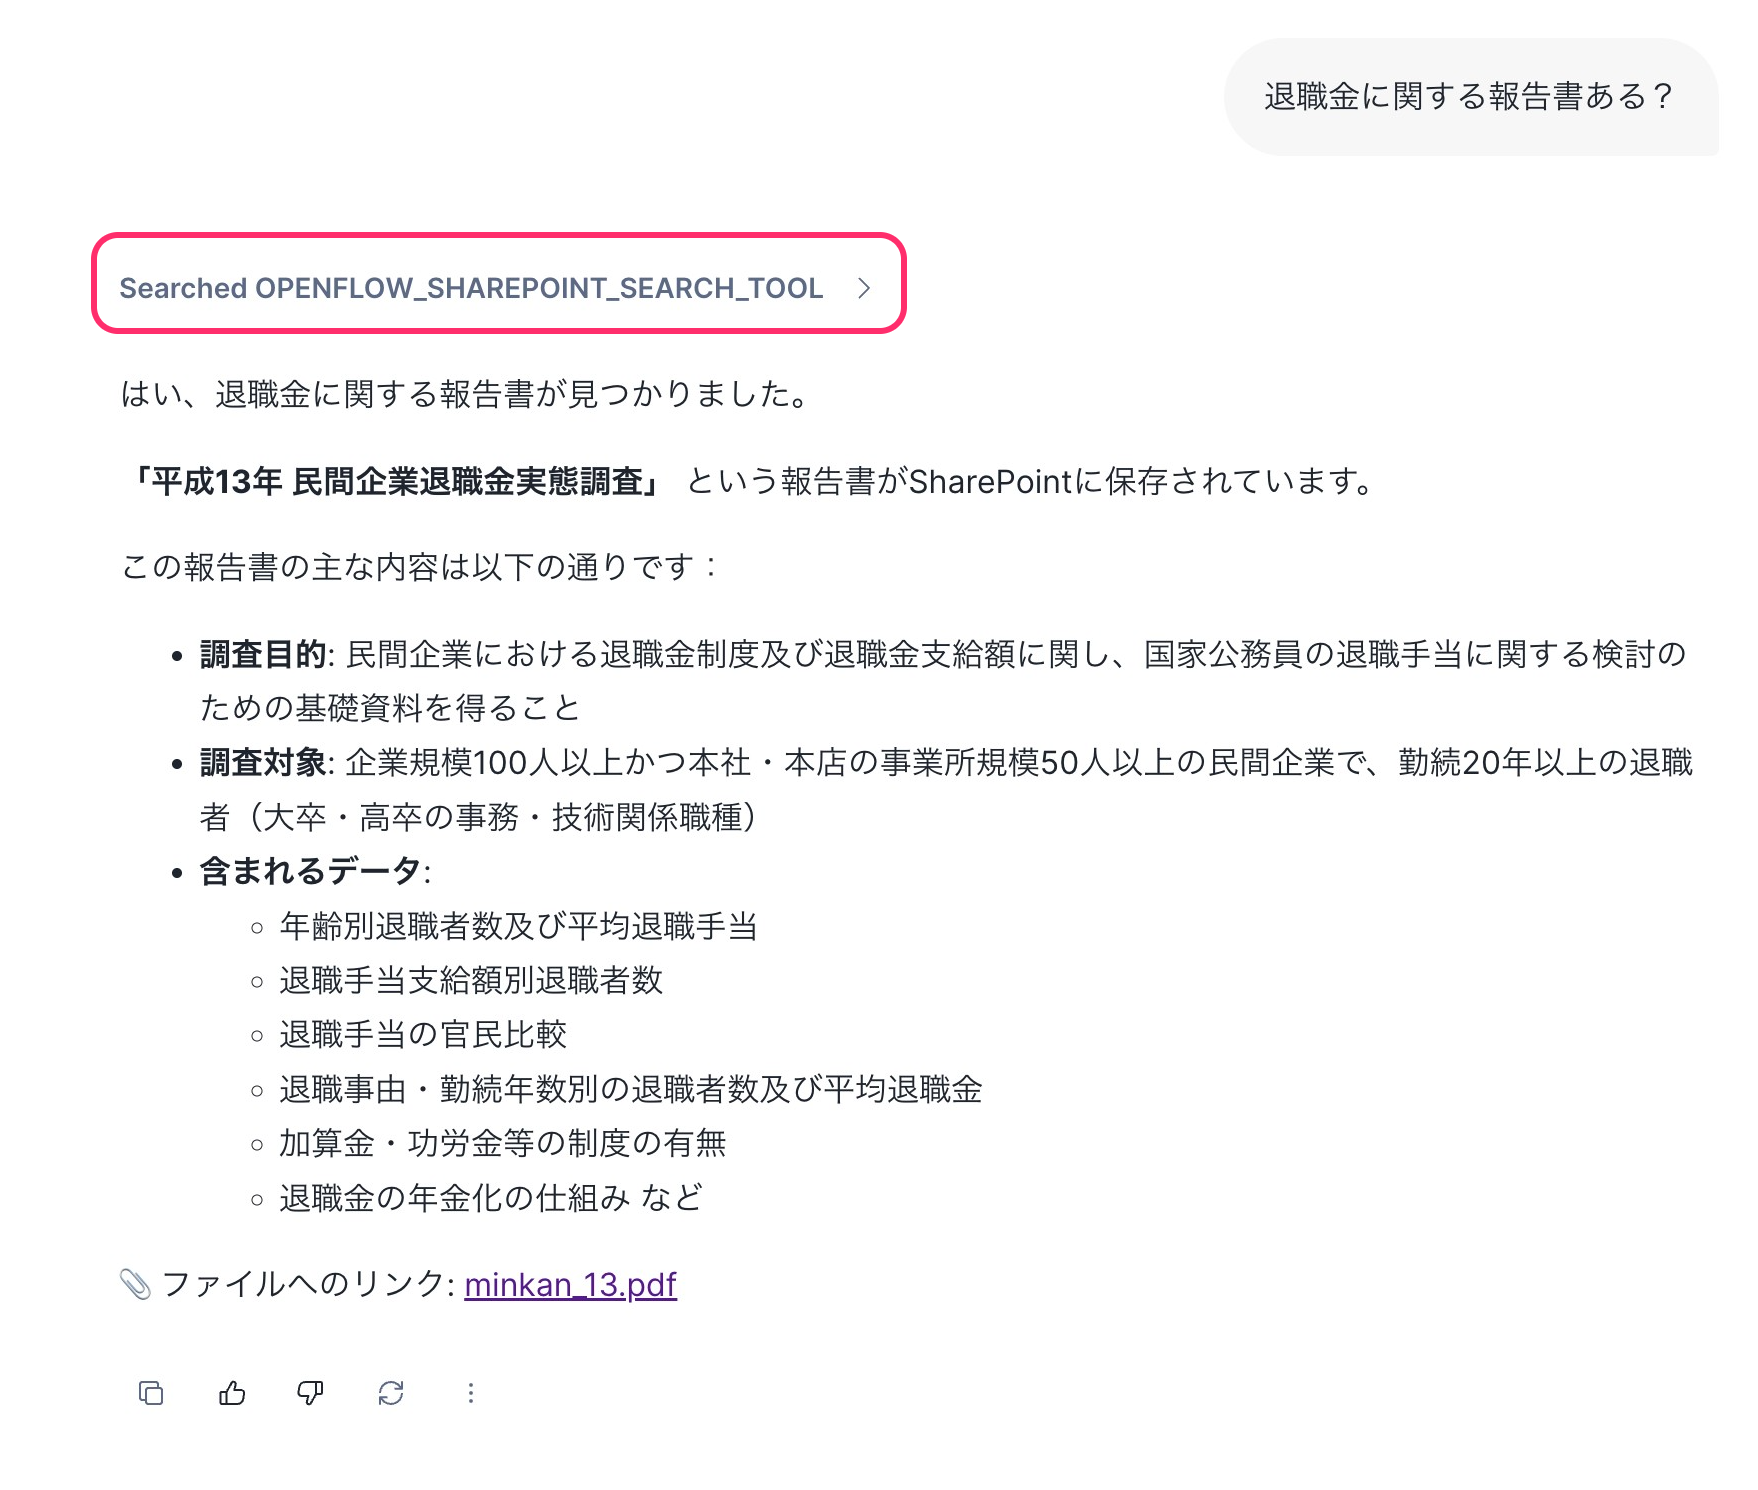
Cortex Search was successfully called, and information about the SharePoint document was retrieved. (For reference, I uploaded the 2001 Private Company Retirement Benefit Survey downloaded from the government statistics site e-stat to SharePoint and ingested it. There's no particular deep intention here.)
Since we set WEB_URL as the ID Column when configuring the Agent's Cortex Search Service, the answer also displays hyperlinks to the file URLs, which you can click to directly view the SharePoint documents.
Summary
I introduced the flow from ingesting SharePoint site documents into Snowflake using the Openflow SharePoint connector to querying them with Snowflake Intelligence.
Most of the configuration is on the Entra ID side, with Graph app registration and site permission granting. Once you understand this, the Openflow side configuration should go smoothly. Please also refer to the related articles mentioned at the beginning for basic Openflow setup and connector parameter details.
See you in the next article.
References