![[Summer Vacation Free Research Relay]
I Investigated How to Use Chronos-2 with SageMaker AI Real-Time Inference](https://devio2024-media.developers.io/image/upload/f_auto,q_auto,w_3840/v1785561662/user-gen-eyecatch/bbzgx3tmuftwdnp9smtb.png)
[Summer Vacation Free Research Relay] I Investigated How to Use Chronos-2 with SageMaker AI Real-Time Inference

This page has been translated by machine translation. View original
Hello, I'm Suzuki from the Data Business Division.
This article is the 8th entry in the 'Summer Vacation Independent Research Relay' by Classmethod volunteers.
This blog relay series is a project where members who regularly follow cloud and AI not only output "tried it" content, but also "built it" and "researched/studied it" content.
We hope this will not only provide new insights, but also contribute to the development of our company and community, so we hope you'll join us.
Let's get right into it. This article is about 'Researching How to Use Chronos-2 with SageMaker AI Inference Endpoints.'
Chronos-2, Amazon's time series foundation model, can be deployed on SageMaker infrastructure via AutoGluon-Cloud or SageMaker JumpStart.
In this article, I tried deploying inference endpoints with AutoGluon-Cloud and JumpStart, and went through the process of actually performing inference.
About Chronos-2
Chronos-2 is a pre-trained model capable of zero-shot time series forecasting. It supports not only univariate but also multivariate and covariate-based forecasting. In particular, Chronos-2's strength lies in cross-learning, which shares information across multiple univariate time series to achieve more accurate predictions. By inputting similar series alongside the target series for prediction, more accurate forecasting is expected even in cold-start scenarios.
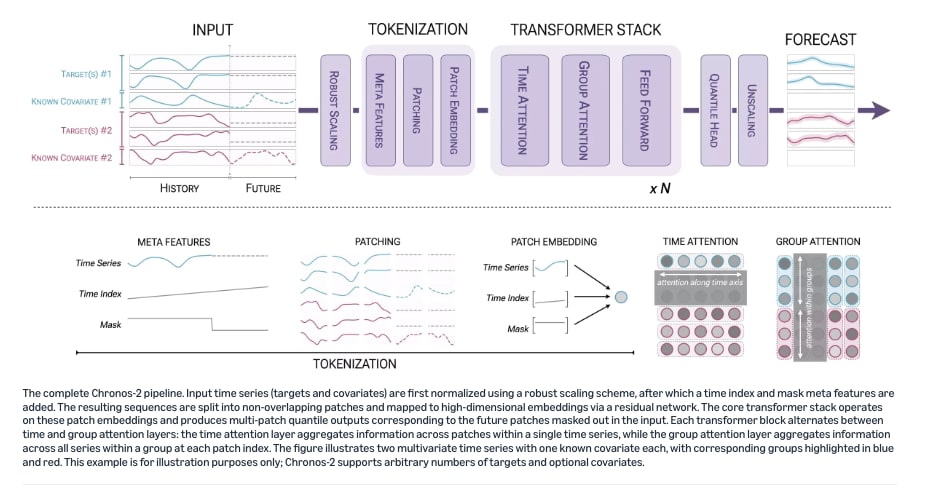
(Cited from "Introducing Chronos-2: From univariate to universal forecasting" on 2026/8/1)
As of October 2025, forecasting performance has been reported to significantly surpass existing time series foundation models (TSFMs) on the fev-bench time series benchmark.
Amazon SageMaker AI is also introduced on the HuggingFace page as the infrastructure for Chronos-2 in production use.
AutoGluon-Cloud and SageMaker JumpStart are introduced as deployment methods, with the former being recommended. First, I checked how each mechanism enables deployment to SageMaker AI.
Prerequisites
1. Designing the Verification Method
Using the Quick Start of Prophet, a well-known time series forecasting tool, as a reference, I verified the forecasting workflow by predicting one year's worth of values from historical Peyton Manning Wikipedia page view data.
The following conditions were used.
- Input uses 2 columns:
ds(date) andy(numeric value) - The last 365 days of the data are held out as test data
- Training data covers the two years immediately before that period
- Evaluation metrics are compared using MAE / RMSE / MASE
- Days with missing values in the training data are linearly interpolated within the training data
- If a date in the test data does not have a corresponding inference result, it is excluded from the evaluation metric calculation
The training and test periods are as follows.
| Training Period | Training Data Days | Test Period | Test Data Days |
|---|---|---|---|
| 2013-01-20 〜 2015-01-20 | 731 days | 2015-01-21 〜 2016-01-20 | 365 days |
2. Setting Up SageMaker Studio
Since I wanted to run Python programs for AutoGluon-Cloud and operate SageMaker JumpStart in SageMaker Studio, I created a SageMaker Studio domain using the quick start.
Let's Try It
1. Deploying with AutoGluon-Cloud
First, I tried deploying with AutoGluon-Cloud.
This is the recommended method for Chronos-2.
This time, I launched a Jupyter Lab space from SageMaker Studio and executed a Python program.
# pyarrow was required for AutoGluon inference payload,
# but since a PyExtensionType error occurred, a specific version was specified.
!pip uninstall -y pyarrow
!pip install -U "autogluon.cloud>=0.5.0" "pandas[pyarrow]" "pyarrow>=17,<20"

# Common settings
from autogluon.cloud import bootstrap
from autogluon.cloud import TimeSeriesFoundationModel, TimeSeriesEndpoint
import warnings
from pathlib import Path
import matplotlib.pyplot as plt
import pandas as pd
warnings.filterwarnings("ignore", category=FutureWarning)

INSTANCE_TYPE = "ml.c5.xlarge" # For this verification, the least expensive supported instance type
REGION = "ap-northeast-1"
HISTORY_YEARS = 3   # Duration of historical data to use
PERIODS = 365        # Forecast period = test period (days)
FREQ = "D"
SEASONAL_PERIOD = 7  # For MASE calculation (weekly seasonality of daily data)

# Create required resources, first time only
bootstrap()

# Load verification data
df = pd.read_csv(
    "https://raw.githubusercontent.com/facebook/prophet/main/examples/example_wp_log_peyton_manning.csv"
)
df["ds"] = pd.to_datetime(df["ds"])
df = df.sort_values("ds")

# Narrow down to the most recent HISTORY_YEARS years (training is approximately 2 years when the last PERIODS days are used for testing)
history_start = df["ds"].max() - pd.DateOffset(years=HISTORY_YEARS)
df = df[df["ds"] >= history_start].reset_index(drop=True)

# Split the last PERIODS days as test data (for evaluation)
df_train = df.iloc[:-PERIODS].reset_index(drop=True)
df_test = df.iloc[-PERIODS:].reset_index(drop=True)

# Deploy Chronos-2 to a new real-time endpoint
model = TimeSeriesFoundationModel(model_id="chronos-2")
endpoint = model.deploy(instance_type=INSTANCE_TYPE)

# Format into AutoGluon format (item_id / timestamp / target)
df_chronos = df_train.rename(columns={"ds": "timestamp", "y": "target"}).copy()
df_chronos["item_id"] = "peyton_manning"

# Align to daily frequency since freq cannot be inferred if there are missing dates
full_idx = pd.date_range(
    df_chronos["timestamp"].min(),
    df_chronos["timestamp"].max(),
    freq=FREQ,
)
df_chronos = (
    df_chronos.set_index("timestamp")
    .reindex(full_idx)
    .assign(item_id=lambda d: d["item_id"].fillna("peyton_manning"))
)
df_chronos["target"] = df_chronos["target"].interpolate(limit_direction="both")
df_chronos = df_chronos.reset_index(names="timestamp")

# Run inference
predictions = endpoint.predict(
    data=df_chronos,
    target="target",
    id_column="item_id",
    timestamp_column="timestamp",
    prediction_length=PERIODS,
)
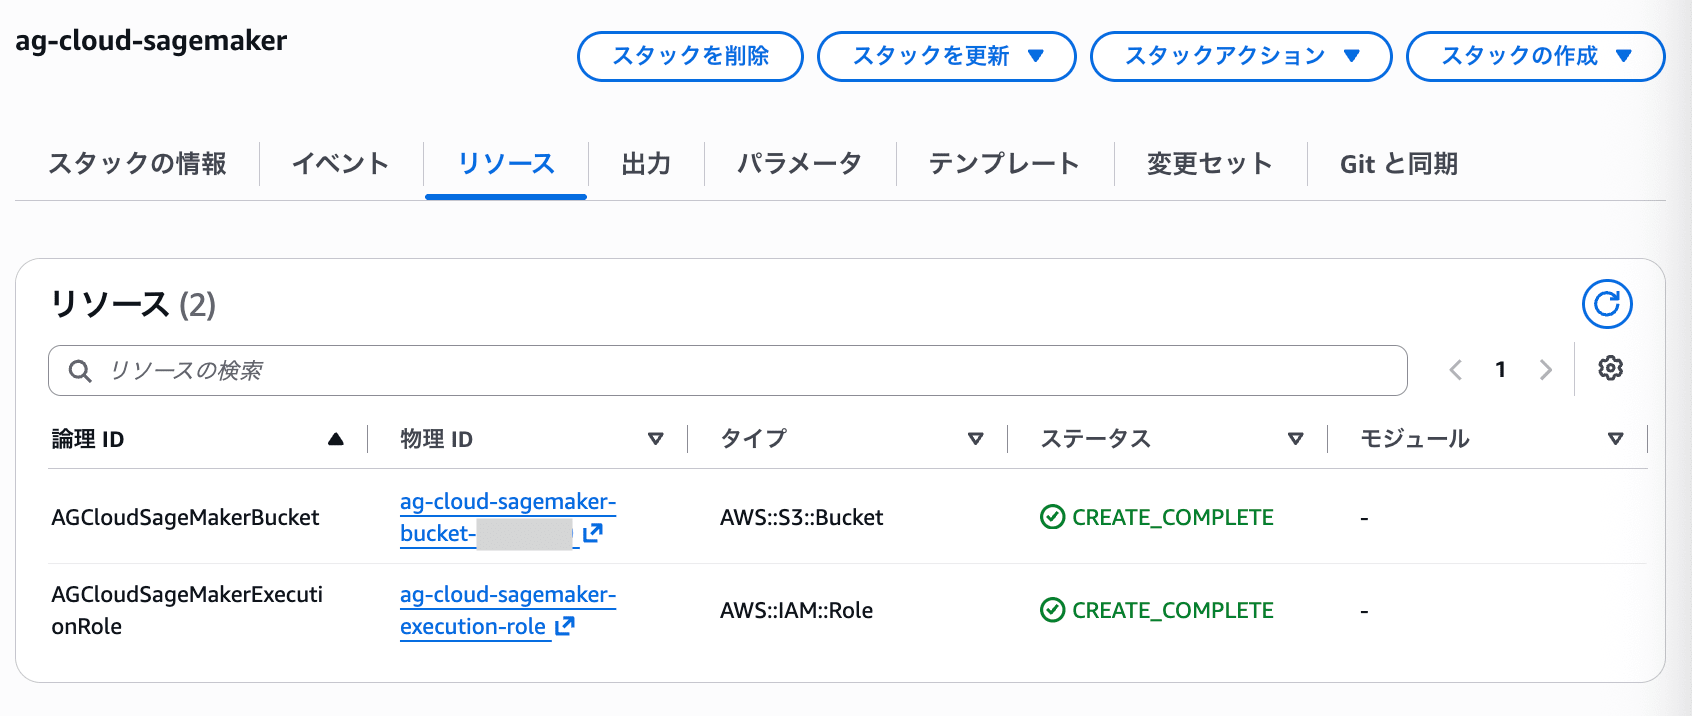
bootstrap() creates the IAM role and S3 bucket required for endpoint deployment and records them in a local configuration file.
▼Local configuration file

▼Stack created
▼Policy of the created IAM role
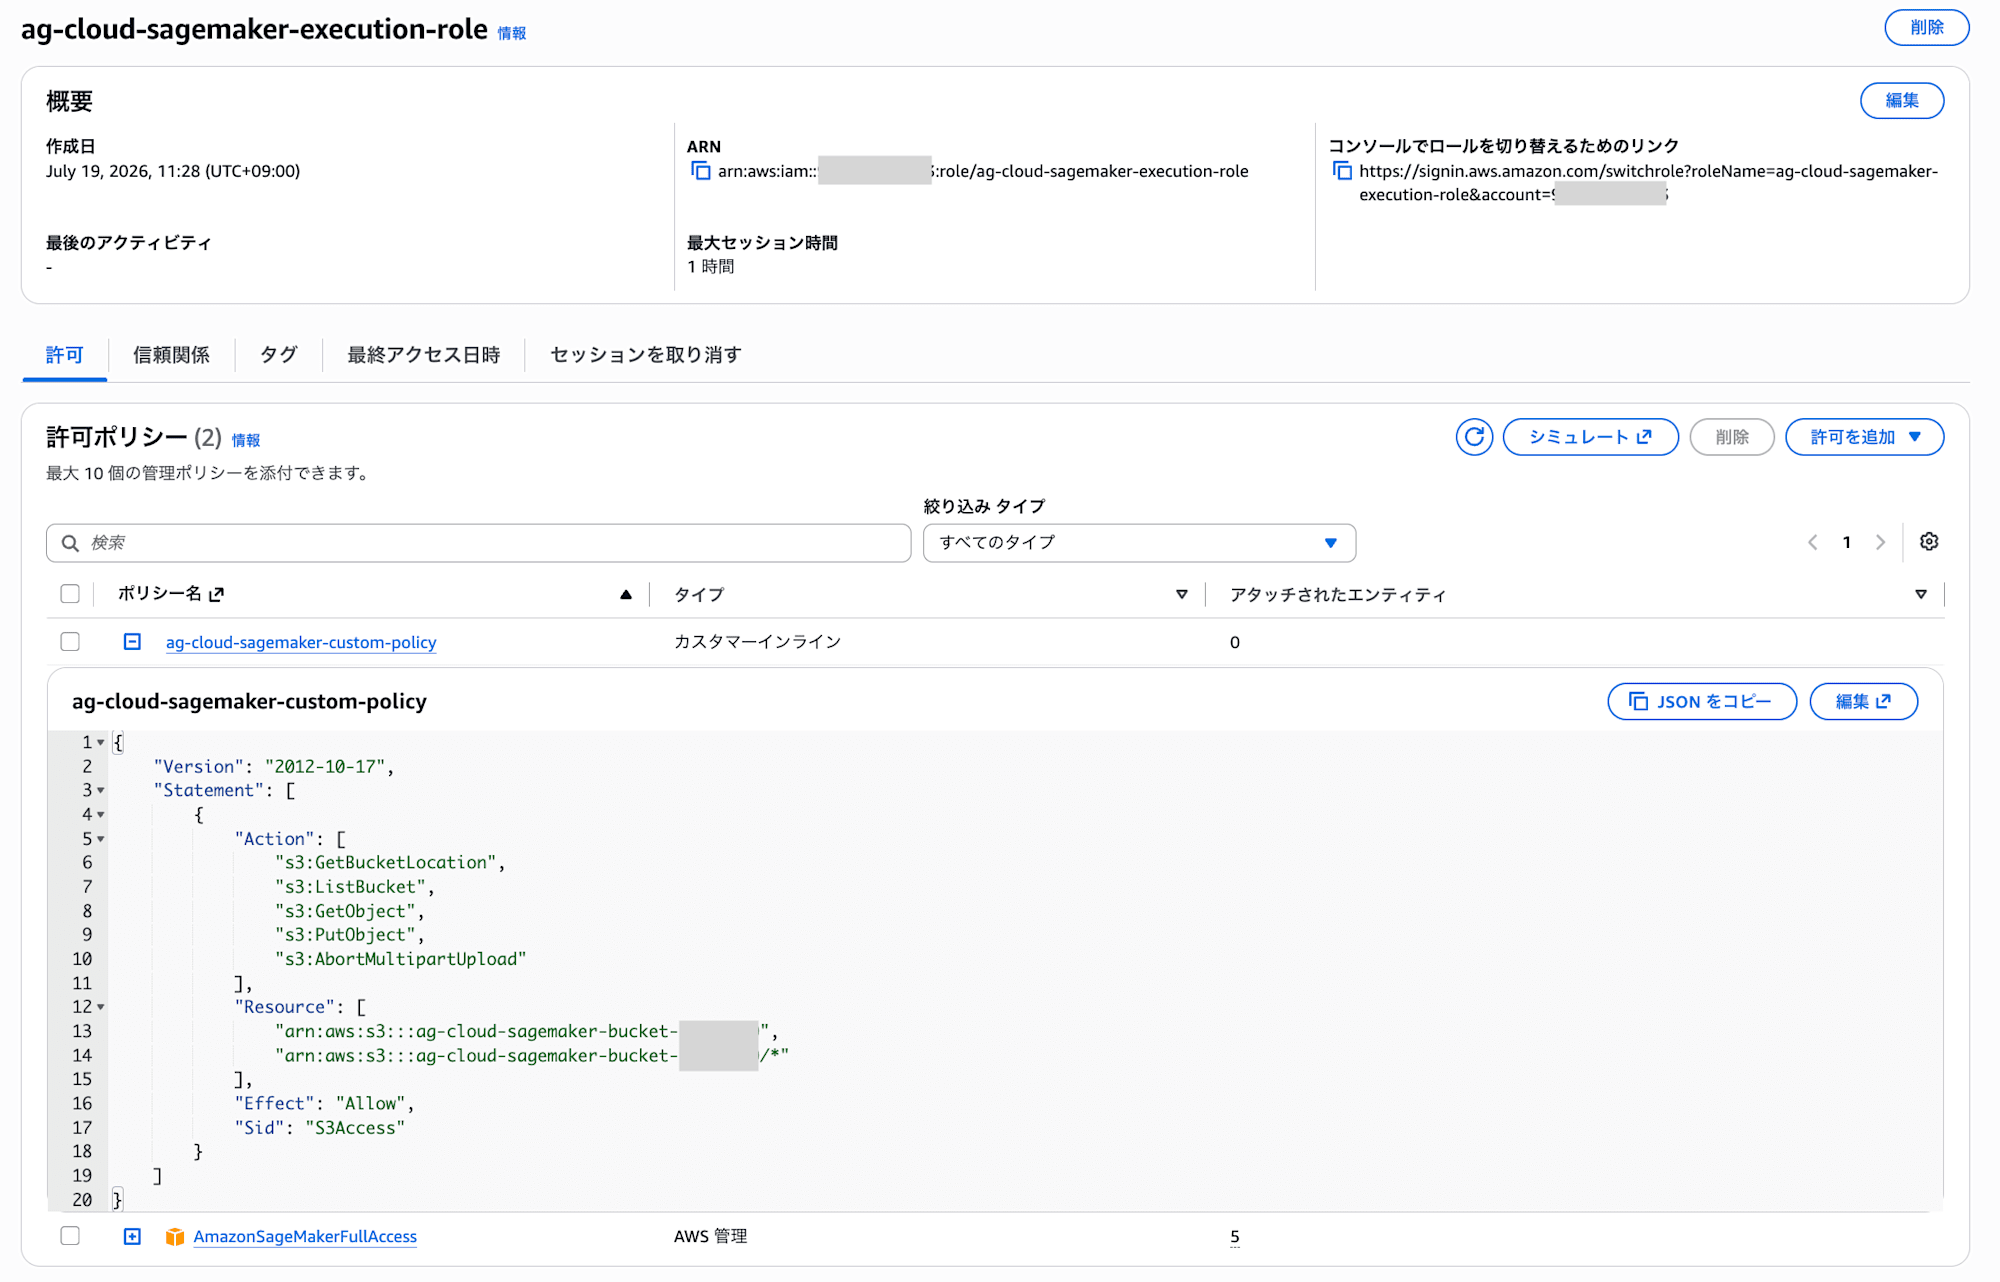
Since resources are created with CloudFormation, implementing it as described above requires granting policies related to CloudFormation stack creation and IAM role/S3 bucket creation to the SageMaker Studio execution role. If the permissions feel a bit too broad, it is recommended to run bootstrap() separately in advance and configure using register().
from autogluon.cloud import register

SAGEMAKER_ROLE = "" # IAM role ARN created in advance
S3_BUCKET = "" # S3 bucket name created in advance

register(
    role=SAGEMAKER_ROLE,
    bucket=S3_BUCKET,
    region=REGION,
)
With deploy() of TimeSeriesFoundationModel, the model was successfully deployed to a SageMaker AI real-time endpoint.
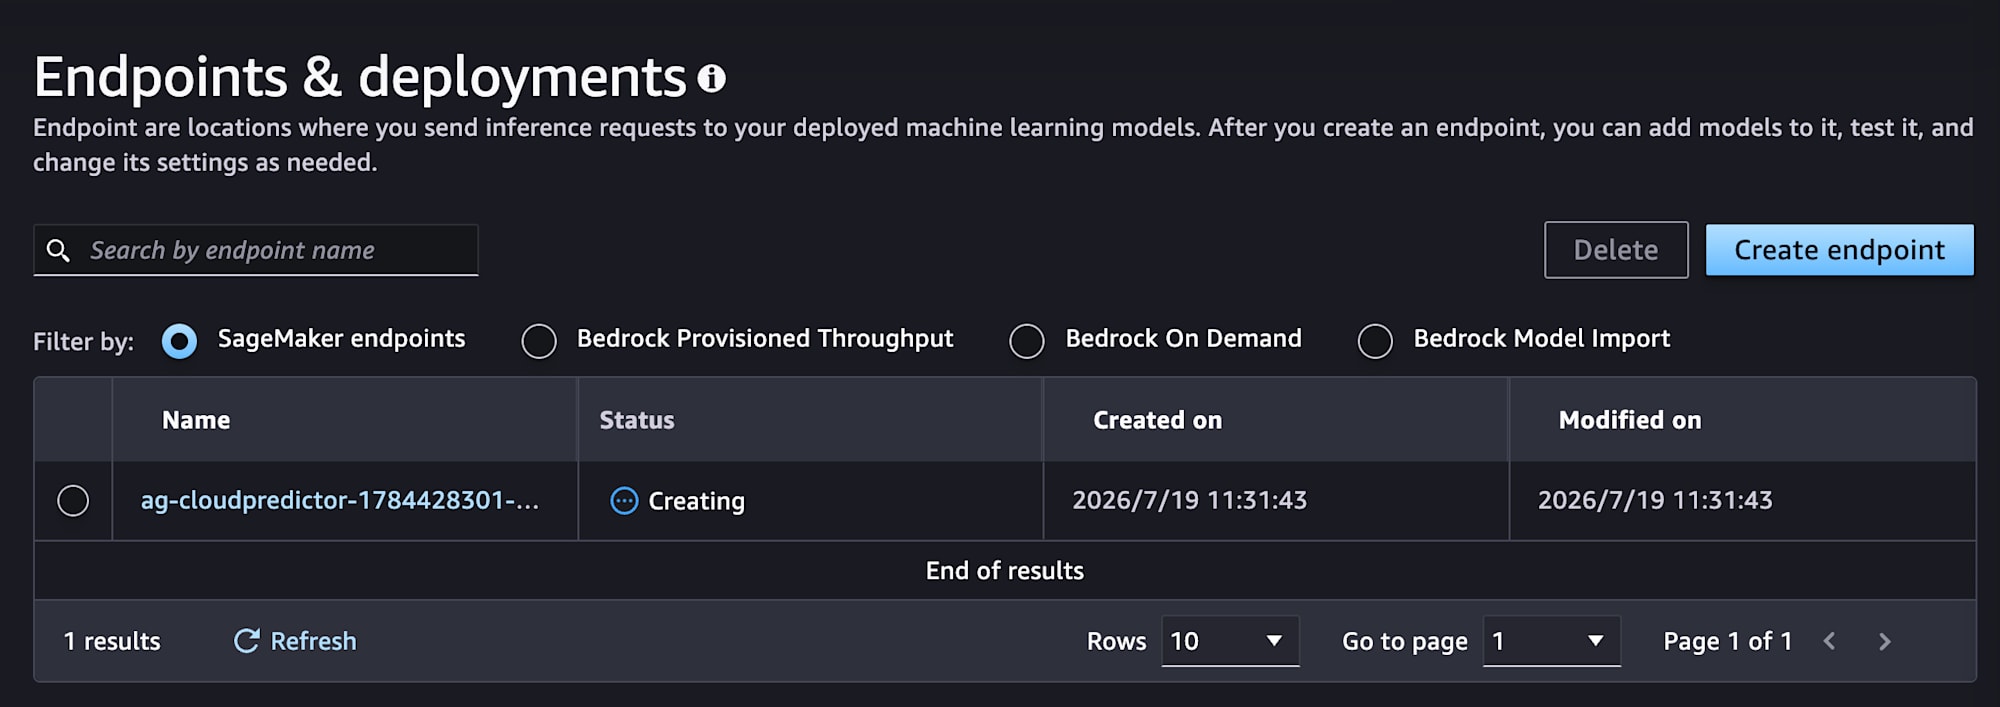
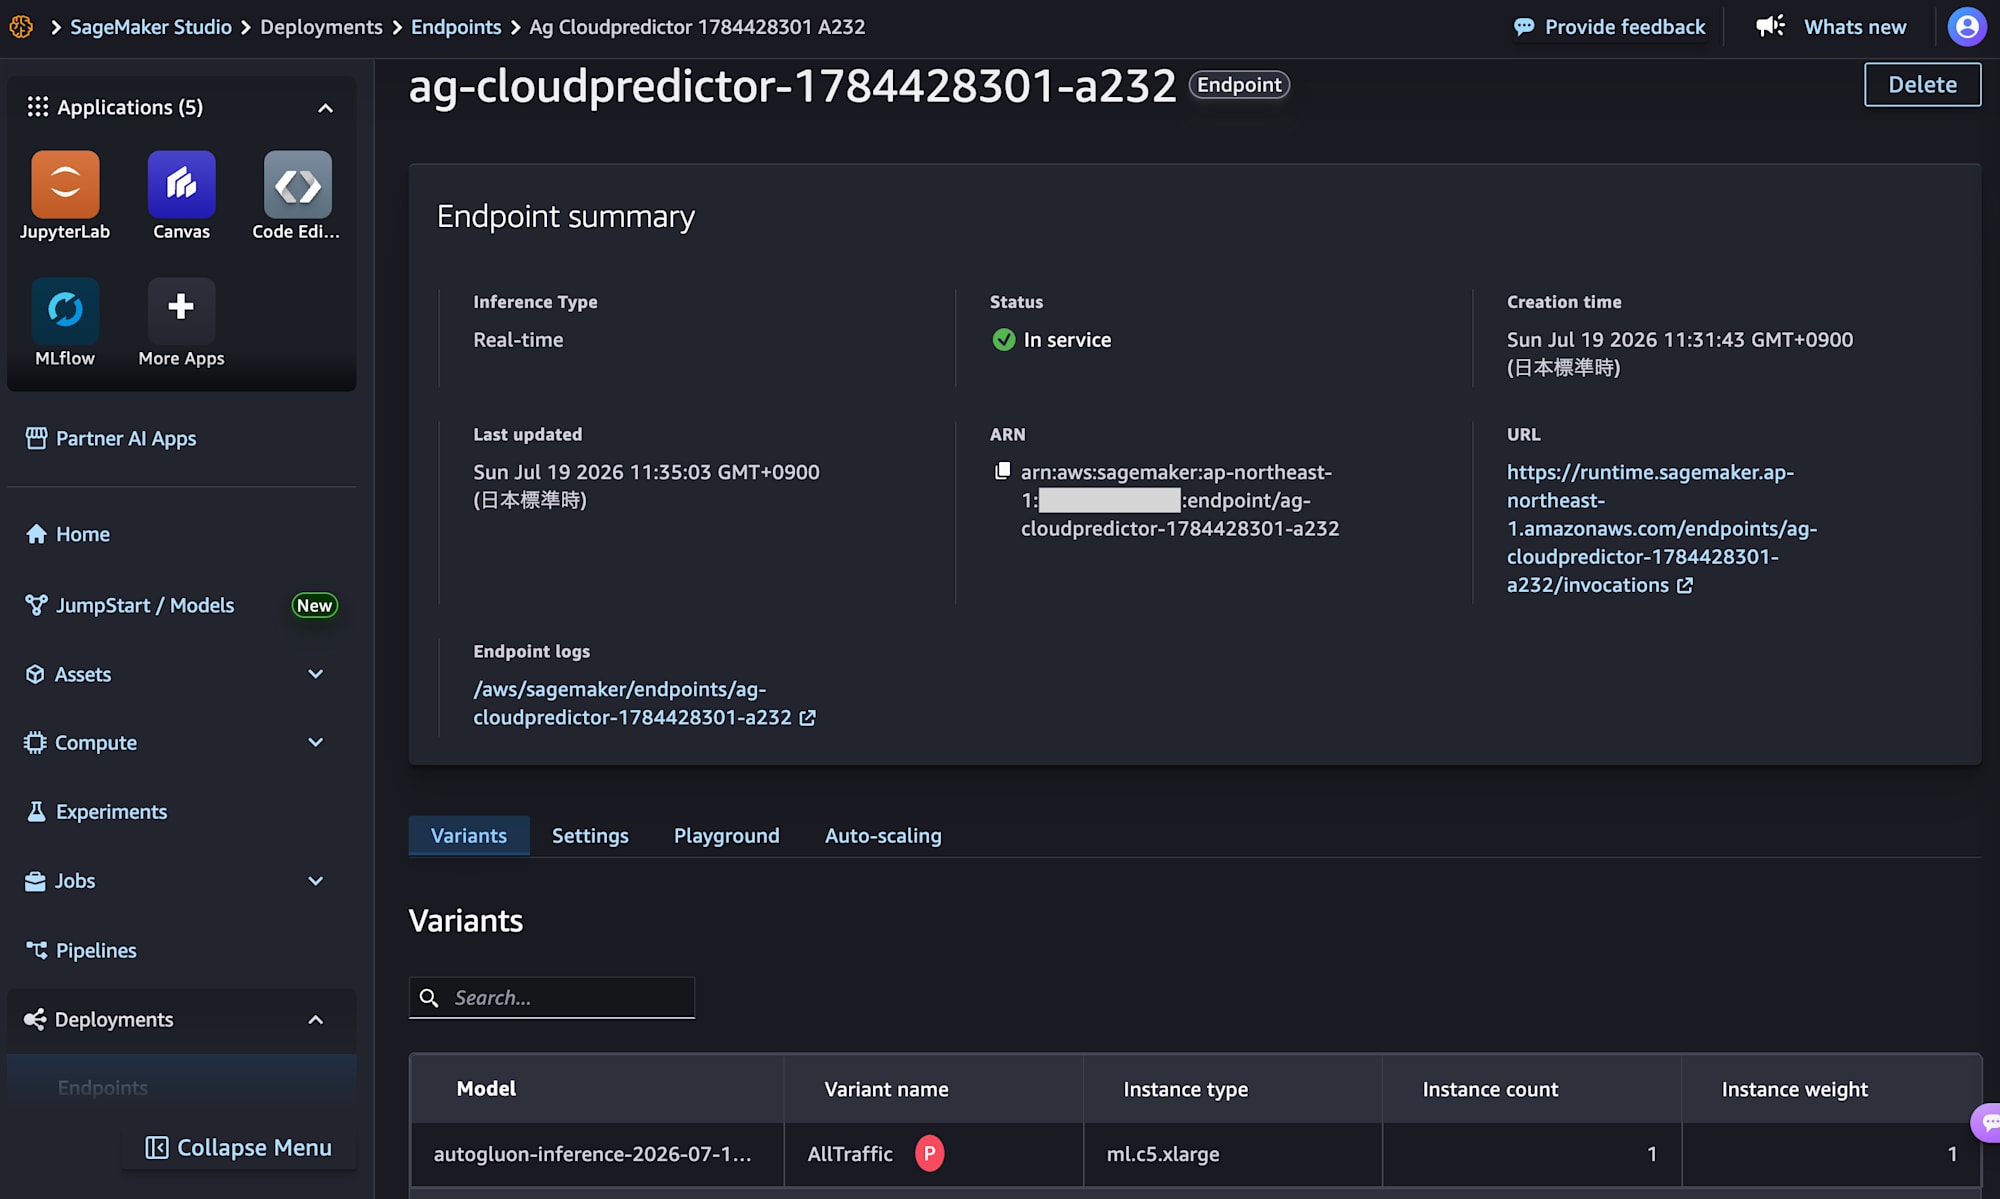
Using predict(), a request was sent to the deployed endpoint and forecast results for the specified interval were successfully obtained.
▼Visualization of the input series, ground truth data, and forecast results
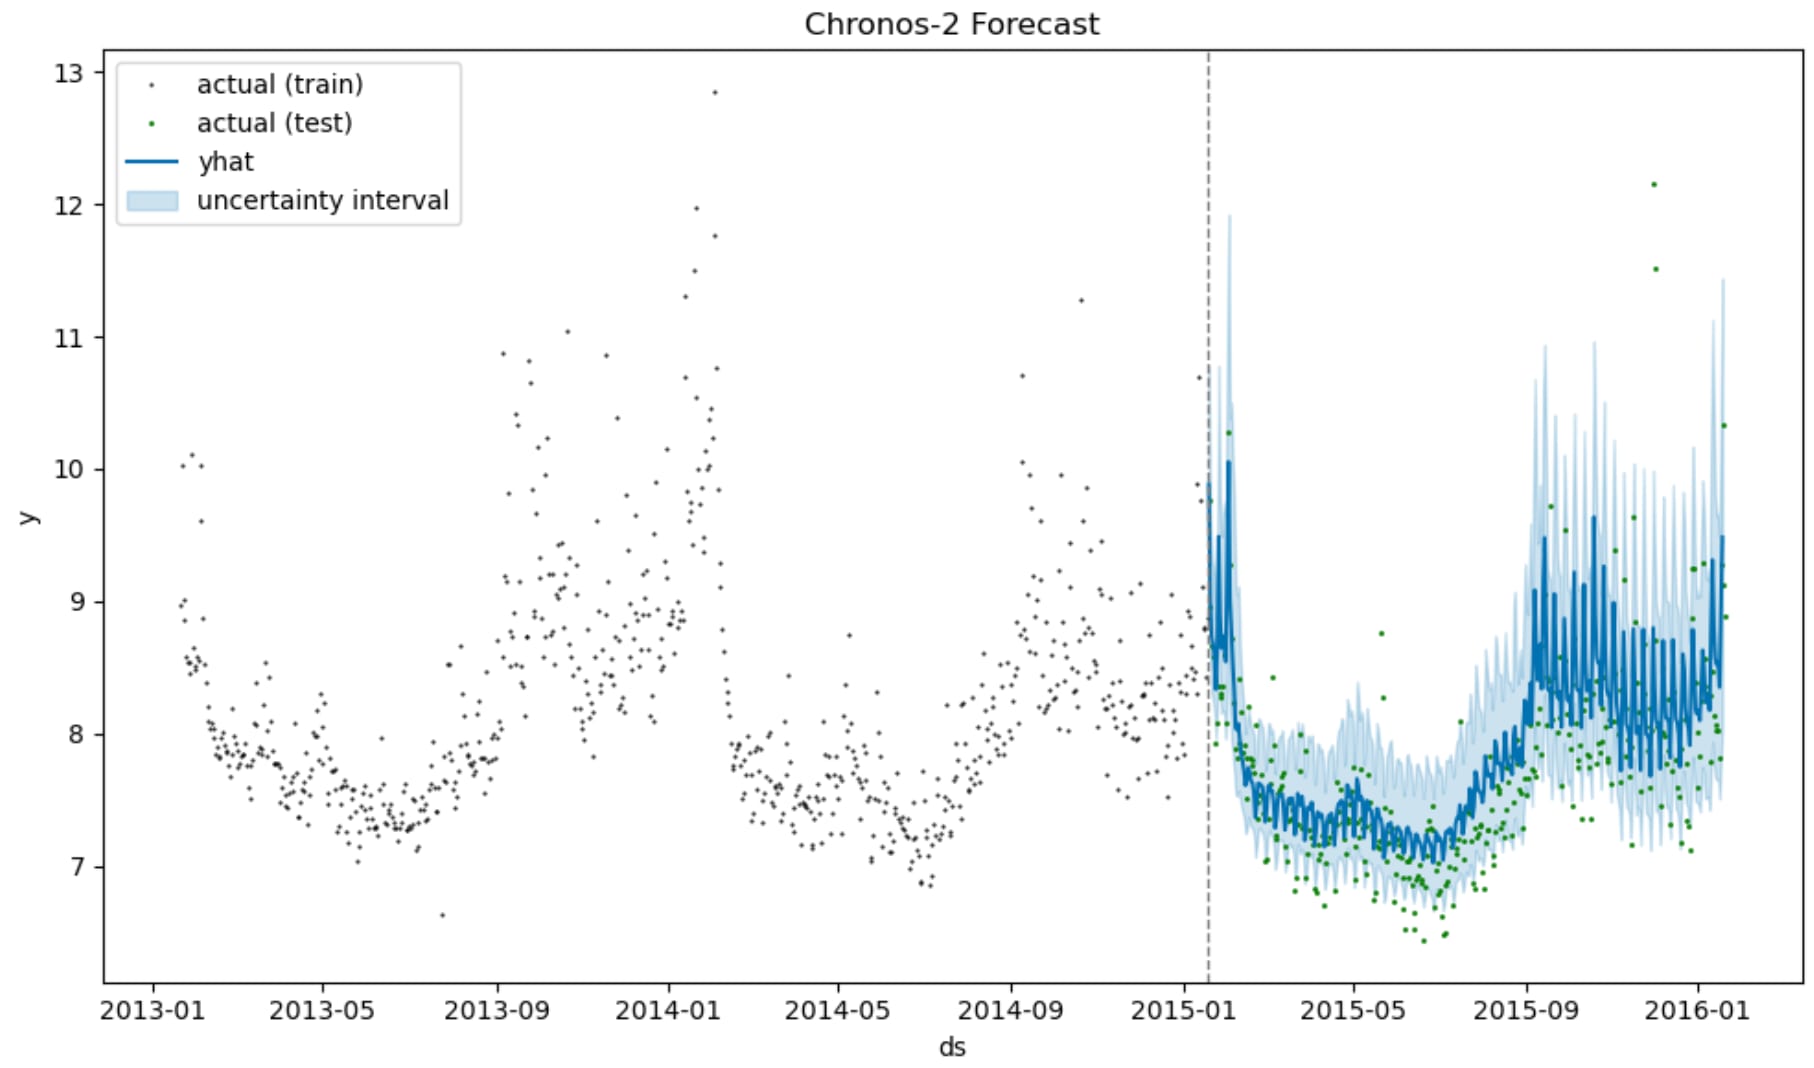
▼Accuracy metrics
| MAE | RMSE | MASE |
|---|---|---|
| 0.3338 | 0.4617 | 0.8737 |
The advantage of AutoGluon-Cloud is that a single library supports all three of real-time inference, serverless inference, and batch transformation. It also supports Pandas DataFrames as input.
An API for fine-tuning is also available.
2. Deploying with SageMaker JumpStart
Next, I also deployed Chronos-2 with JumpStart. This approach completes everything up to endpoint deployment through the UI.
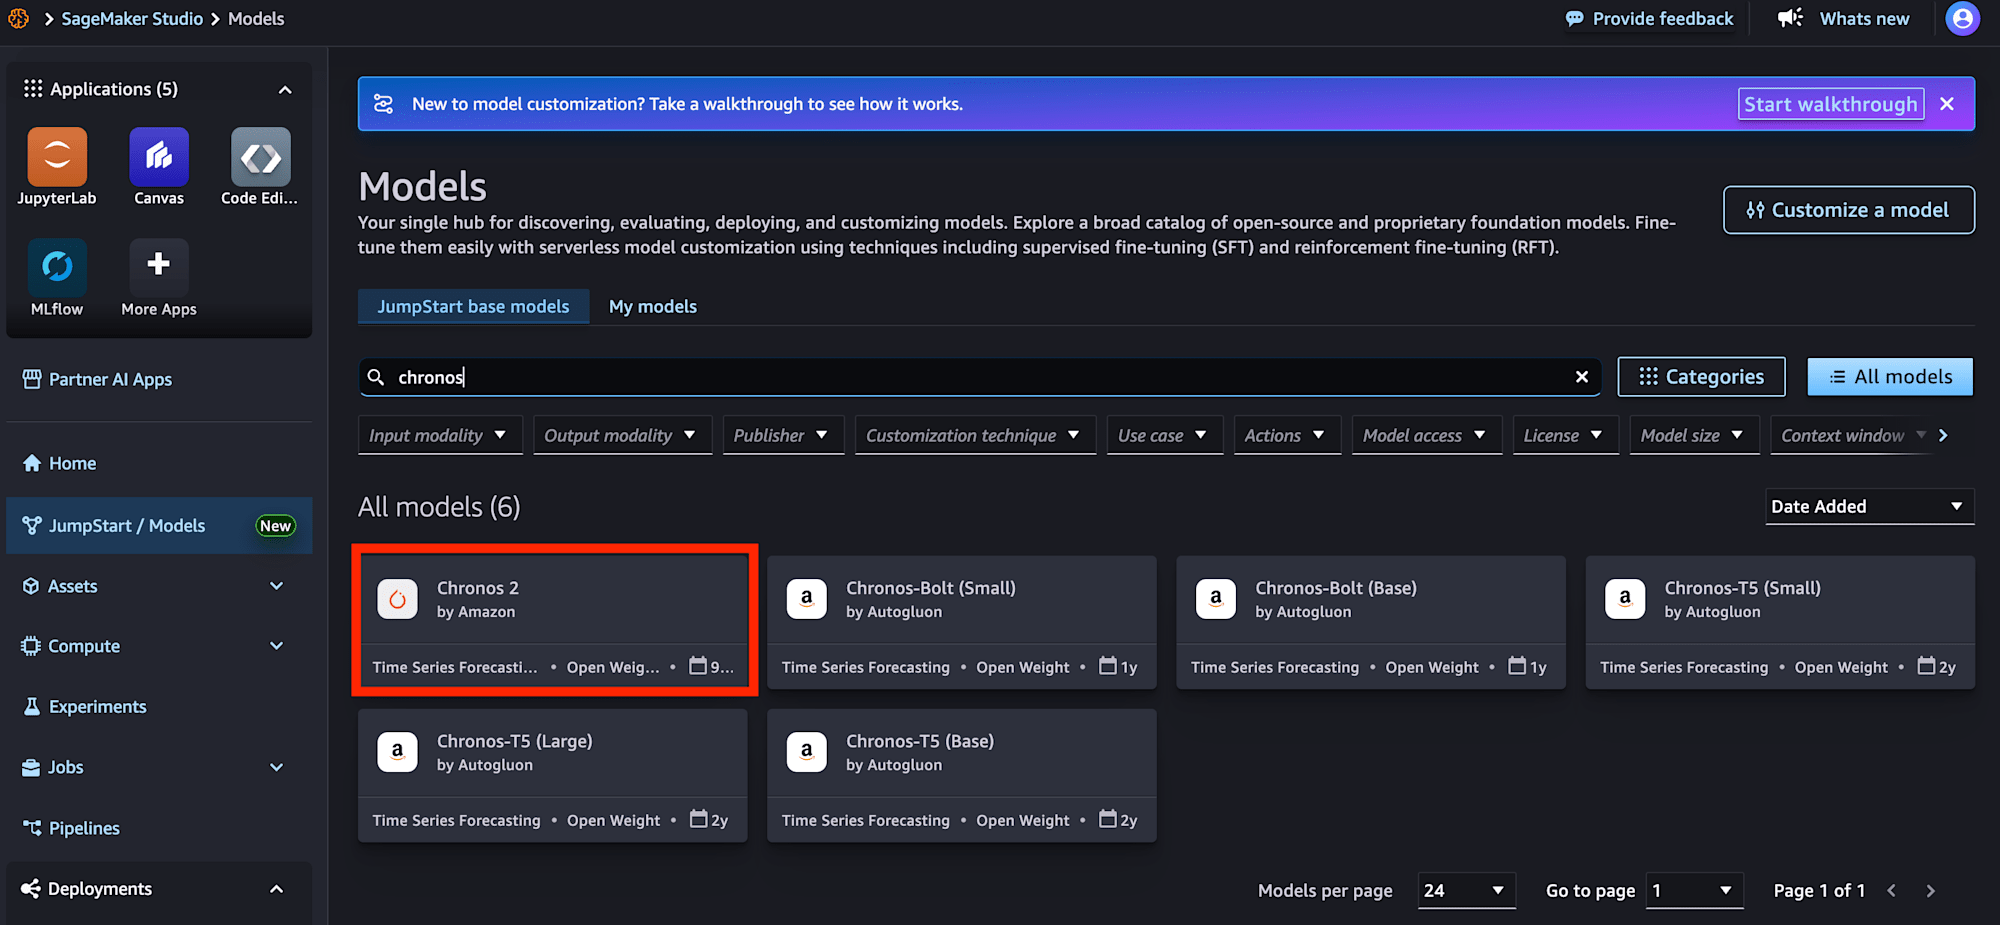
I opened JumpStart from the SageMaker Studio console, searched for chronos-2, and selected it.
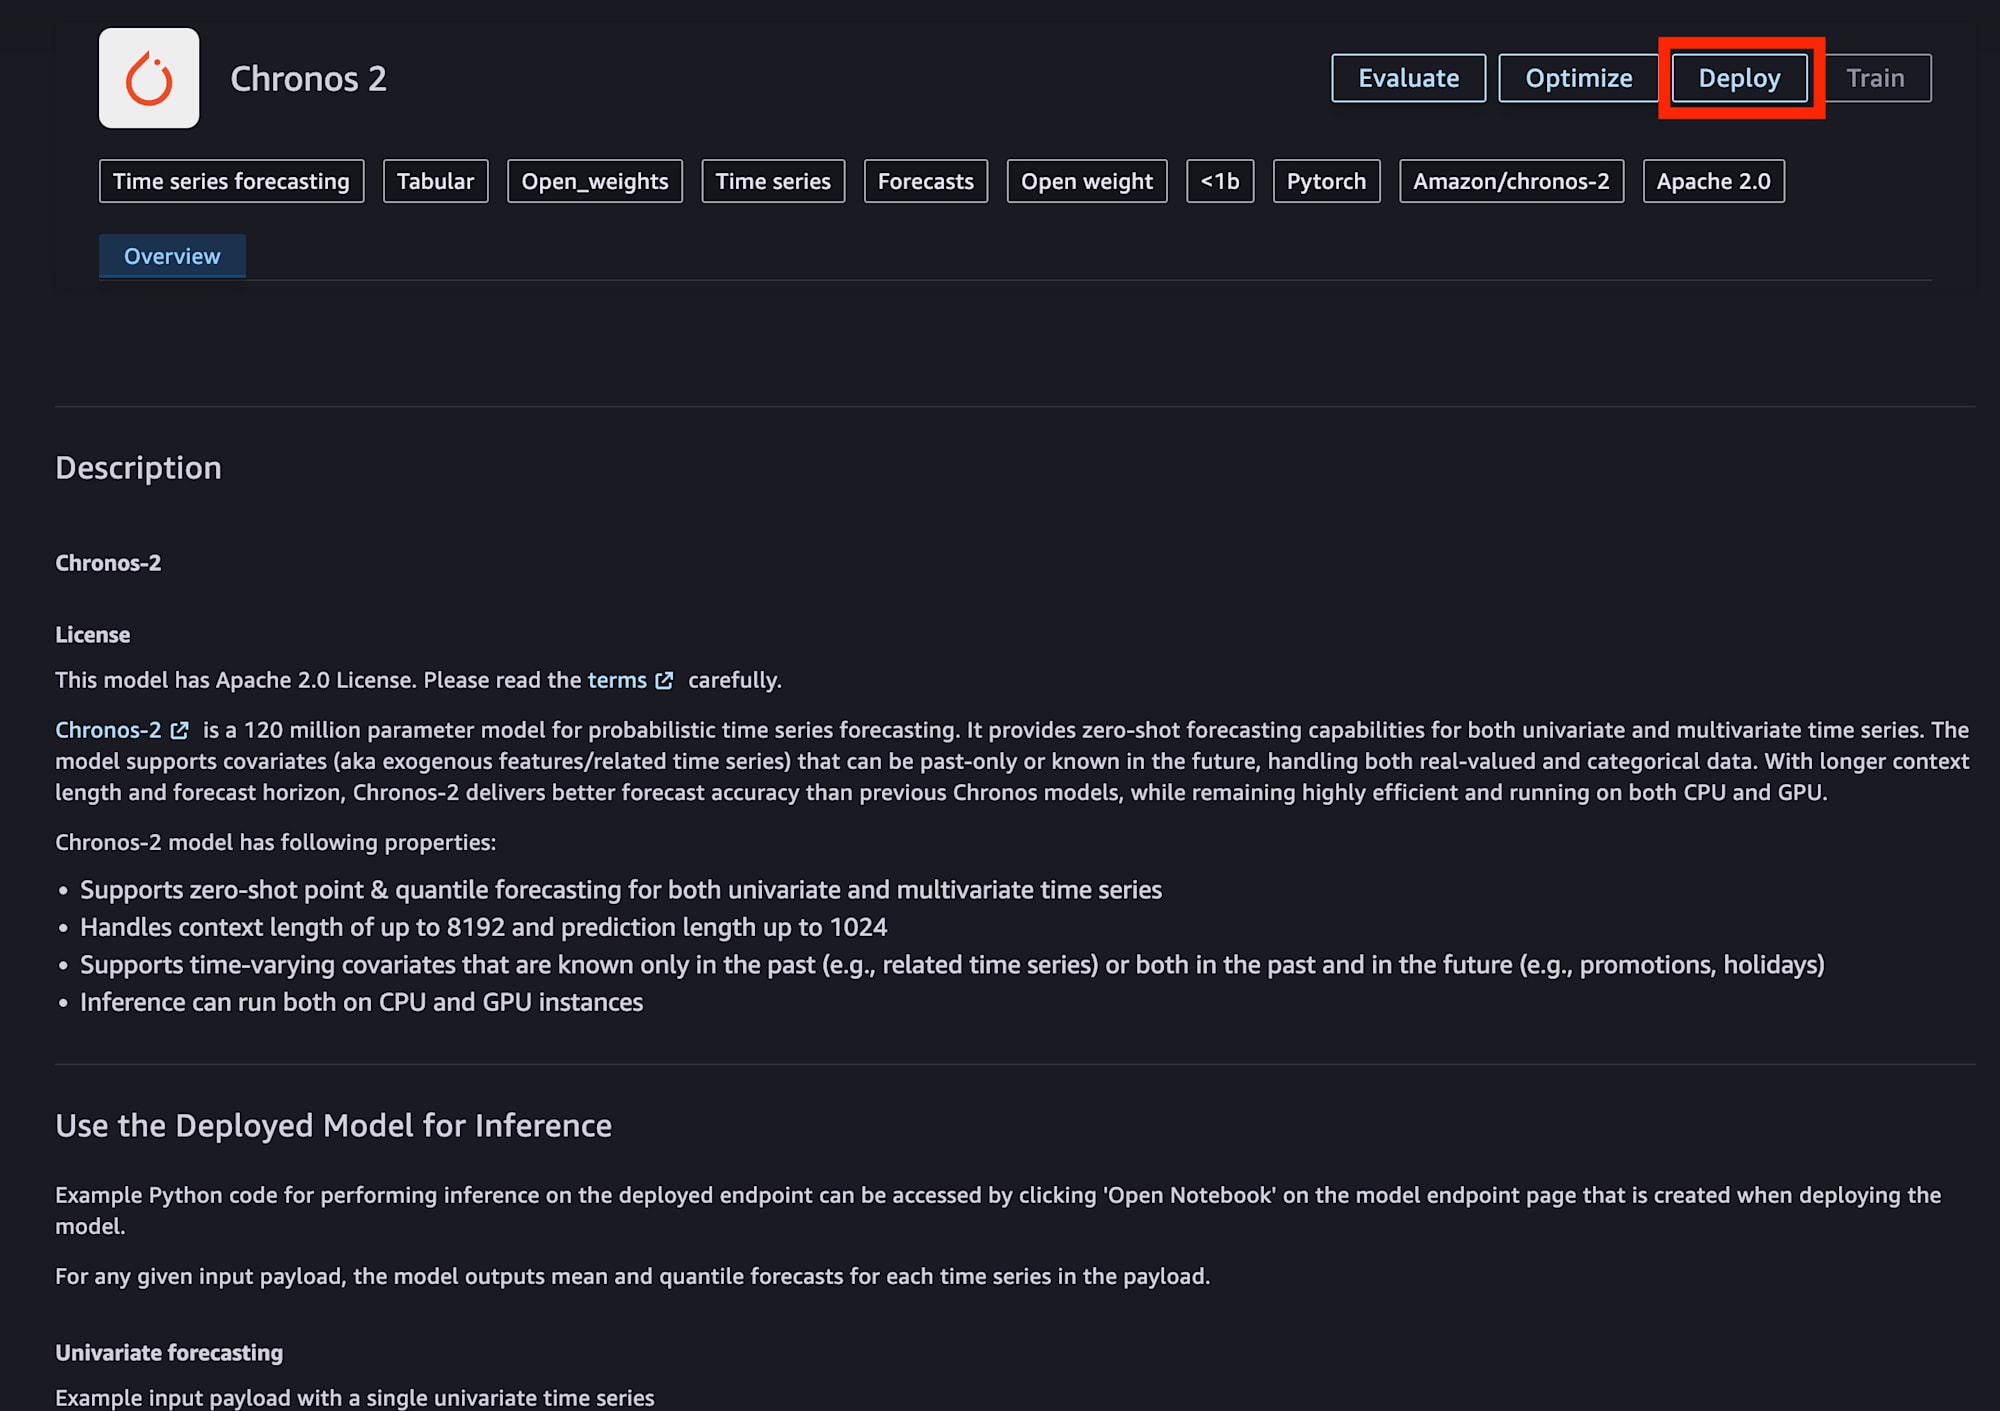
I clicked the Deploy button.
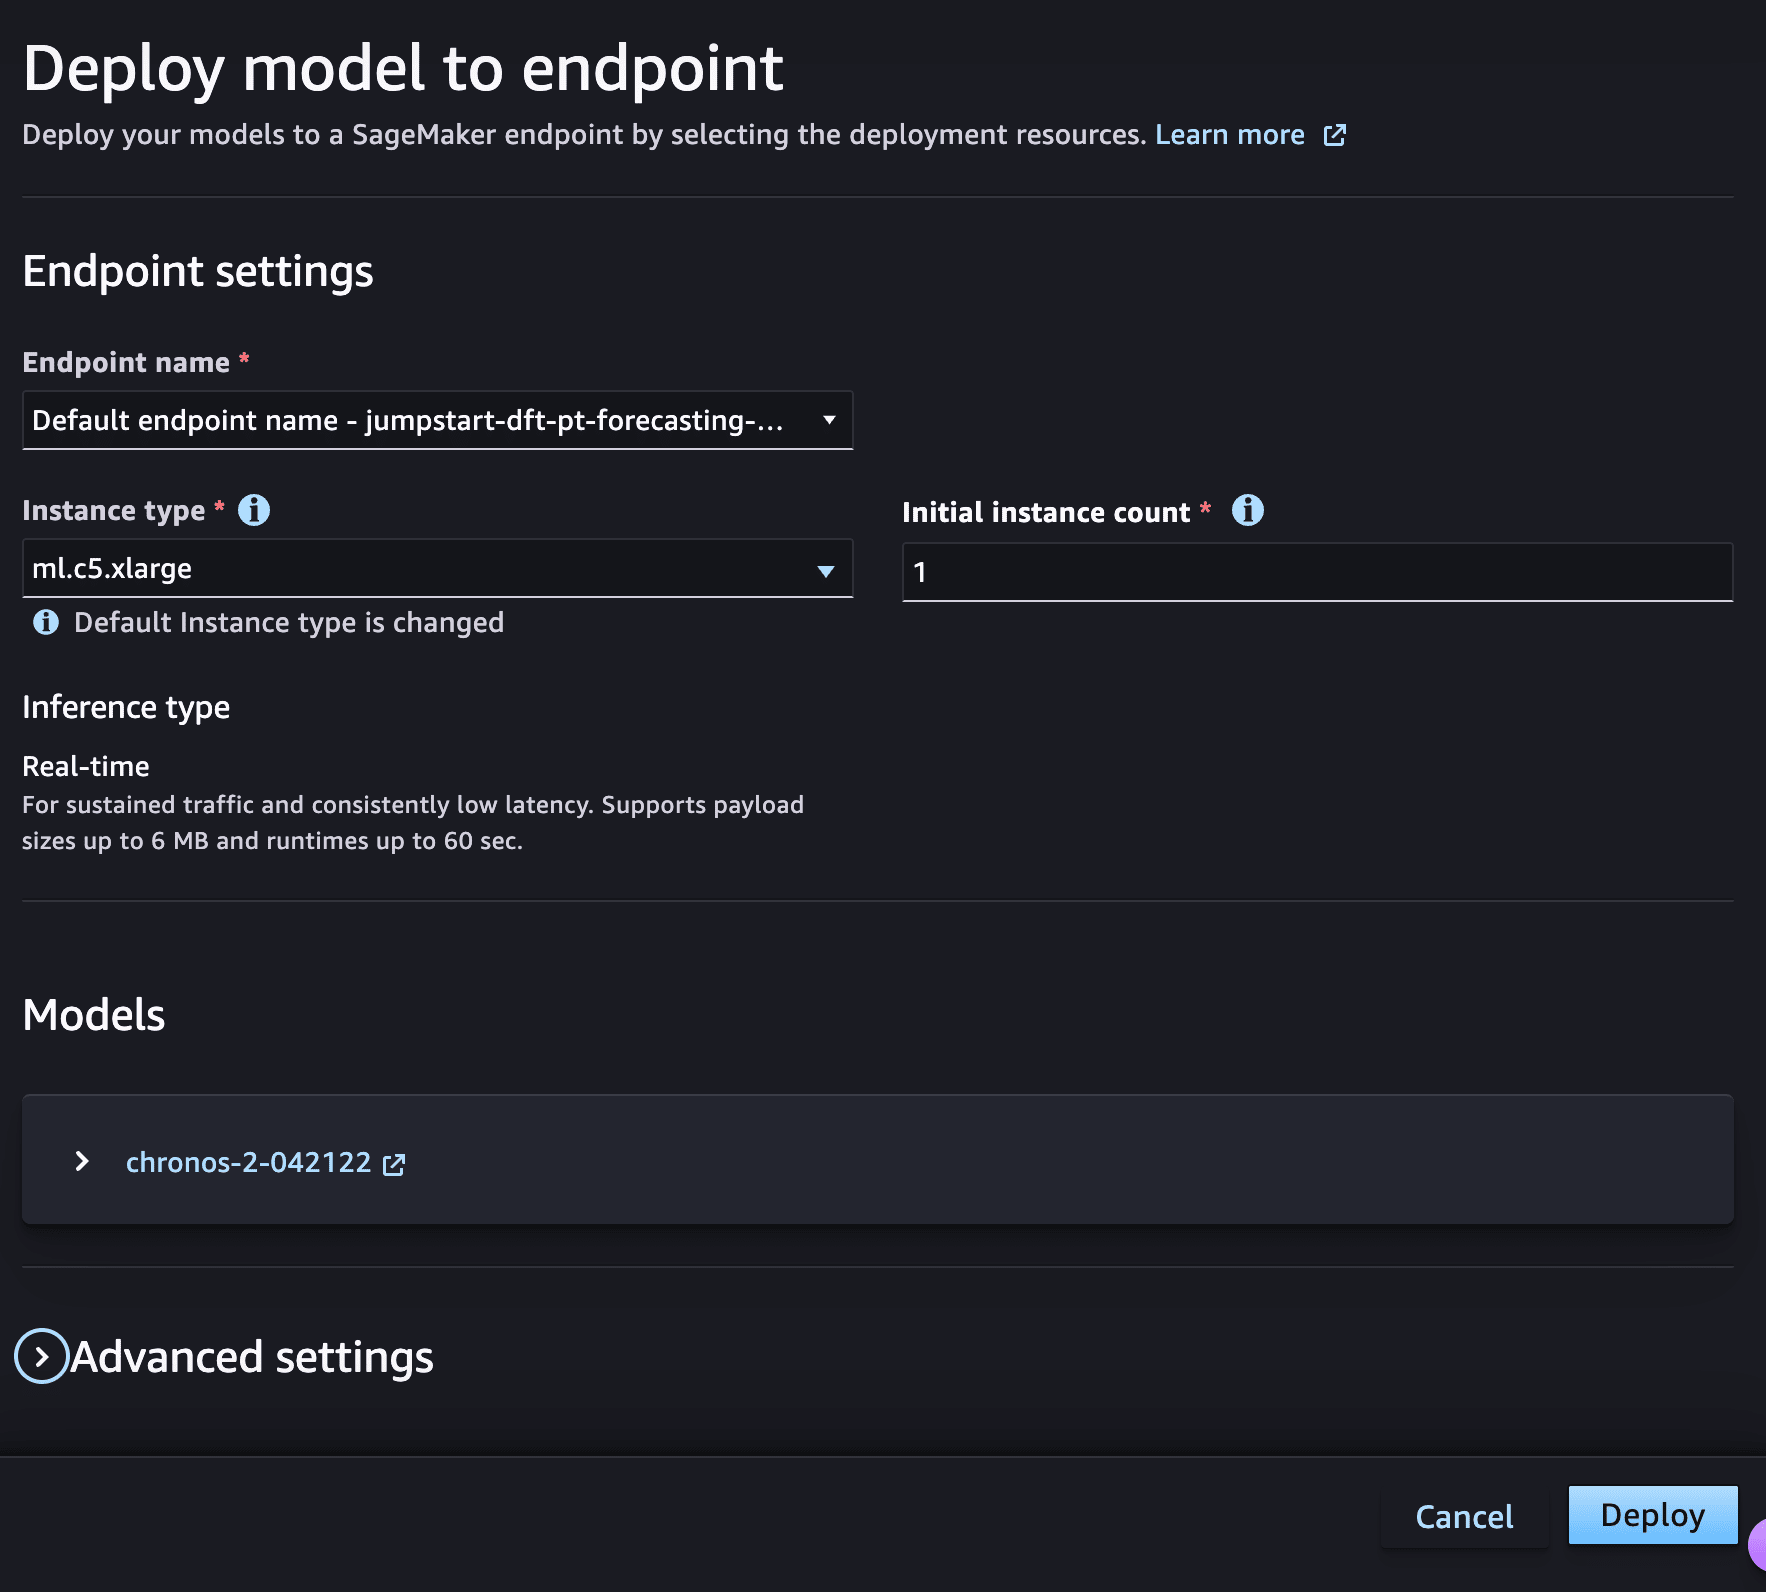
For the endpoint configuration, I chose ml.c5.xlarge, the least expensive among the supported options. For higher throughput, it was also possible to increase the instance size or select an instance with an accelerator.
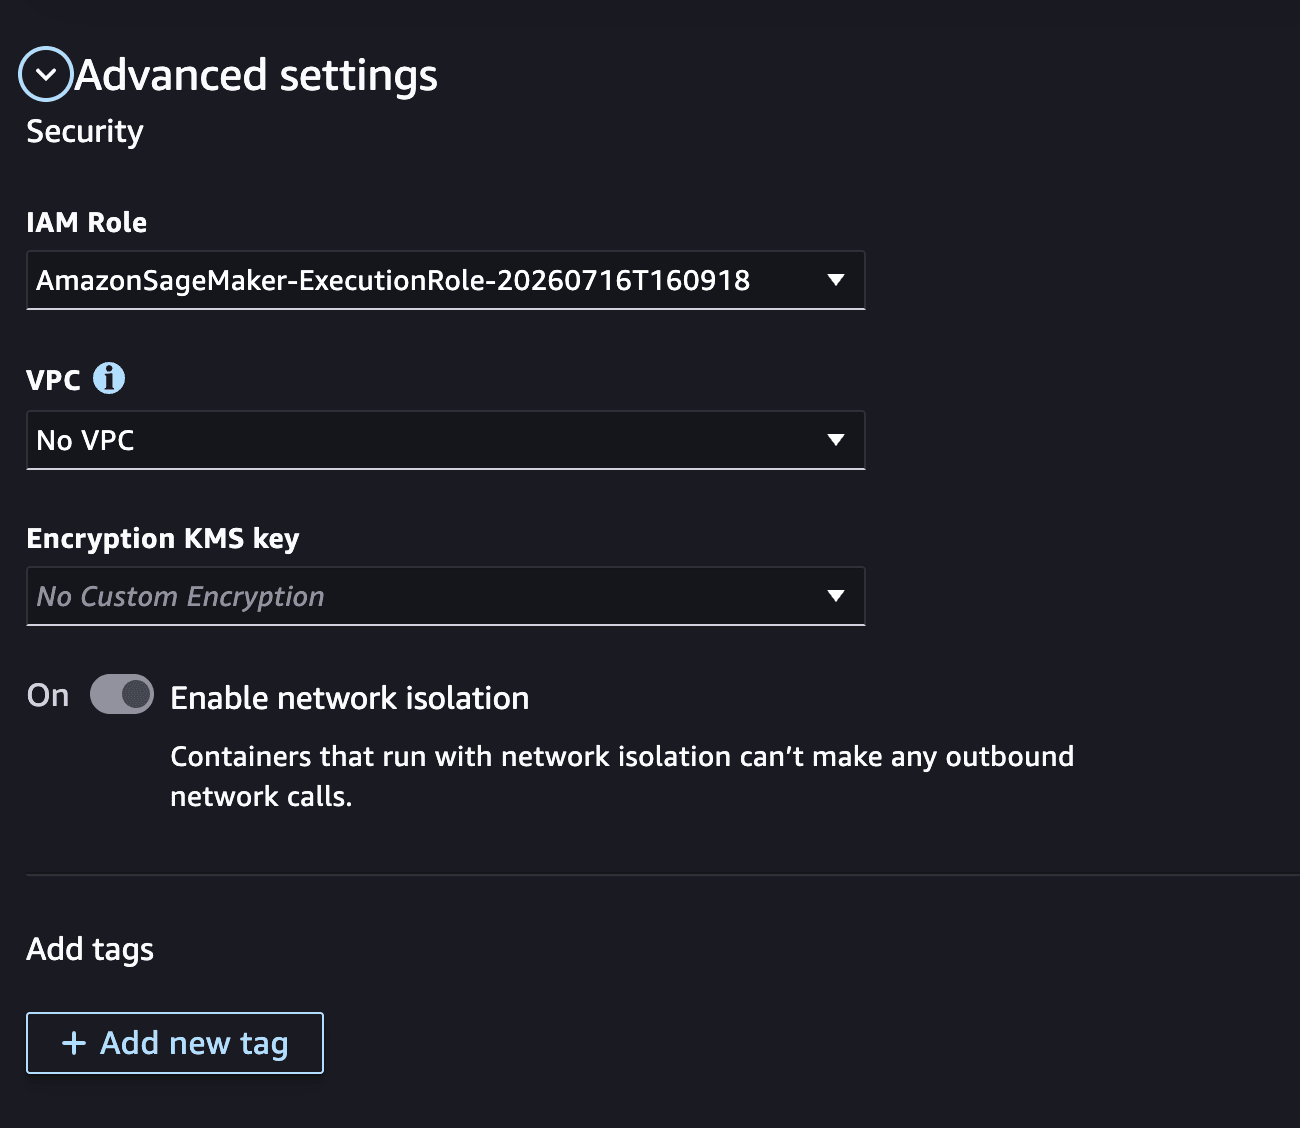
IAM Role and network settings were also available from the Advanced settings if needed, but since there were no particular requirements this time, I left them as defaults.
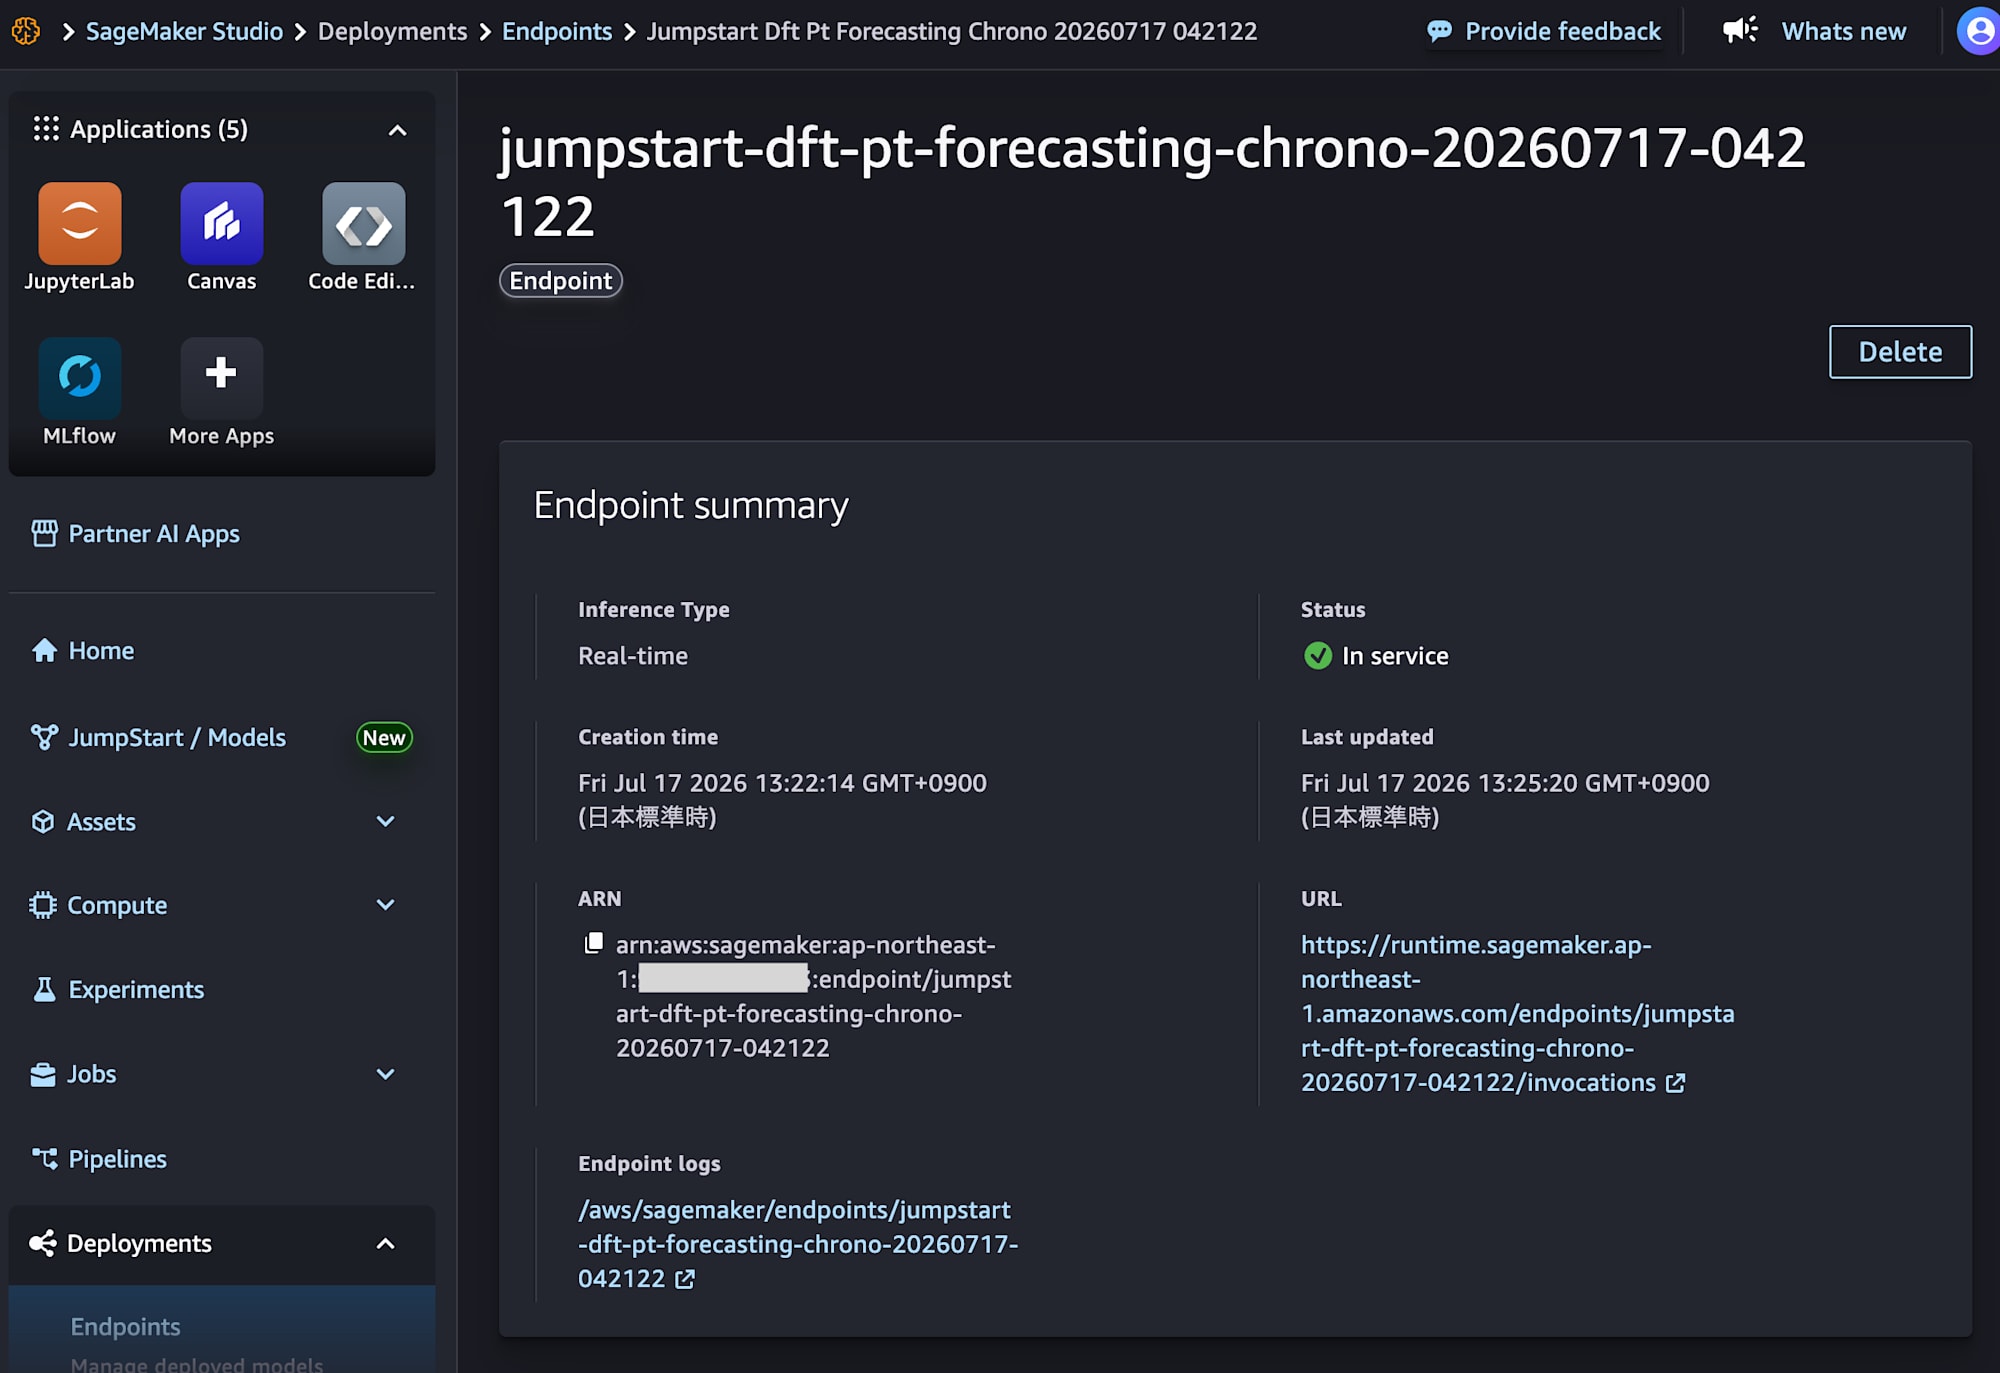
I clicked the Deploy button at the bottom of the page to deploy.
After a while, I was able to confirm from Endpoints that the endpoint had been deployed.
I launched a JupyterLab space and ran inference in Python from a Jupyter Notebook.
Since Chronos-2 is a pre-trained model, I sent the target series to the endpoint.
import json
import warnings
from pathlib import Path

import boto3
import matplotlib.pyplot as plt
import pandas as pd
# Import for use in subsequent verification
from prophet import Prophet

warnings.filterwarnings("ignore", category=FutureWarning)

ENDPOINT_NAME = "" # Deployed endpoint name
REGION = "ap-northeast-1"
HISTORY_YEARS = 3    # Duration of historical data to use
PERIODS = 365        # Forecast period = test period (days)
FREQ = "D"
SEASONAL_PERIOD = 7  # For MASE calculation (weekly seasonality of daily data)

# Prepare training and test data
df = pd.read_csv(
    "https://raw.githubusercontent.com/facebook/prophet/main/examples/example_wp_log_peyton_manning.csv"
)
df["ds"] = pd.to_datetime(df["ds"])
df = df.sort_values("ds")

# Narrow down to the most recent HISTORY_YEARS years (training is approximately 2 years when the last PERIODS days are used for testing)
history_start = df["ds"].max() - pd.DateOffset(years=HISTORY_YEARS)
df = df[df["ds"] >= history_start].reset_index(drop=True)

# Split the last PERIODS days as test data (for evaluation)
df_train = df.iloc[:-PERIODS].reset_index(drop=True)
df_test = df.iloc[-PERIODS:].reset_index(drop=True)

print(f"All:   {df['ds'].min().date()} 〜 {df['ds'].max().date()} ({len(df)} days)")
print(f"Train: {df_train['ds'].min().date()} 〜 {df_train['ds'].max().date()} ({len(df_train)} days)")
print(f"Test:  {df_test['ds'].min().date()} 〜 {df_test['ds'].max().date()} ({len(df_test)} days)")
df_train.head()

# Run inference with Chronos-2
client = boto3.client("sagemaker-runtime", region_name=REGION)

payload = {
    "inputs": [
        {
            "target": df_train["y"].tolist(),
            "item_id": "peyton_manning",
            "start": df_train["ds"].iloc[0].strftime("%Y-%m-%d"),
        }
    ],
    "parameters": {
        "prediction_length": PERIODS,
        "freq": FREQ,
        "quantile_levels": [0.1, 0.5, 0.9],
    },
}

response = client.invoke_endpoint(
    EndpointName=ENDPOINT_NAME,
    ContentType="application/json",
    Body=json.dumps(payload),
)
result = json.loads(response["Body"].read().decode("utf-8"))
▼Visualization of the input series, ground truth data, and forecast results
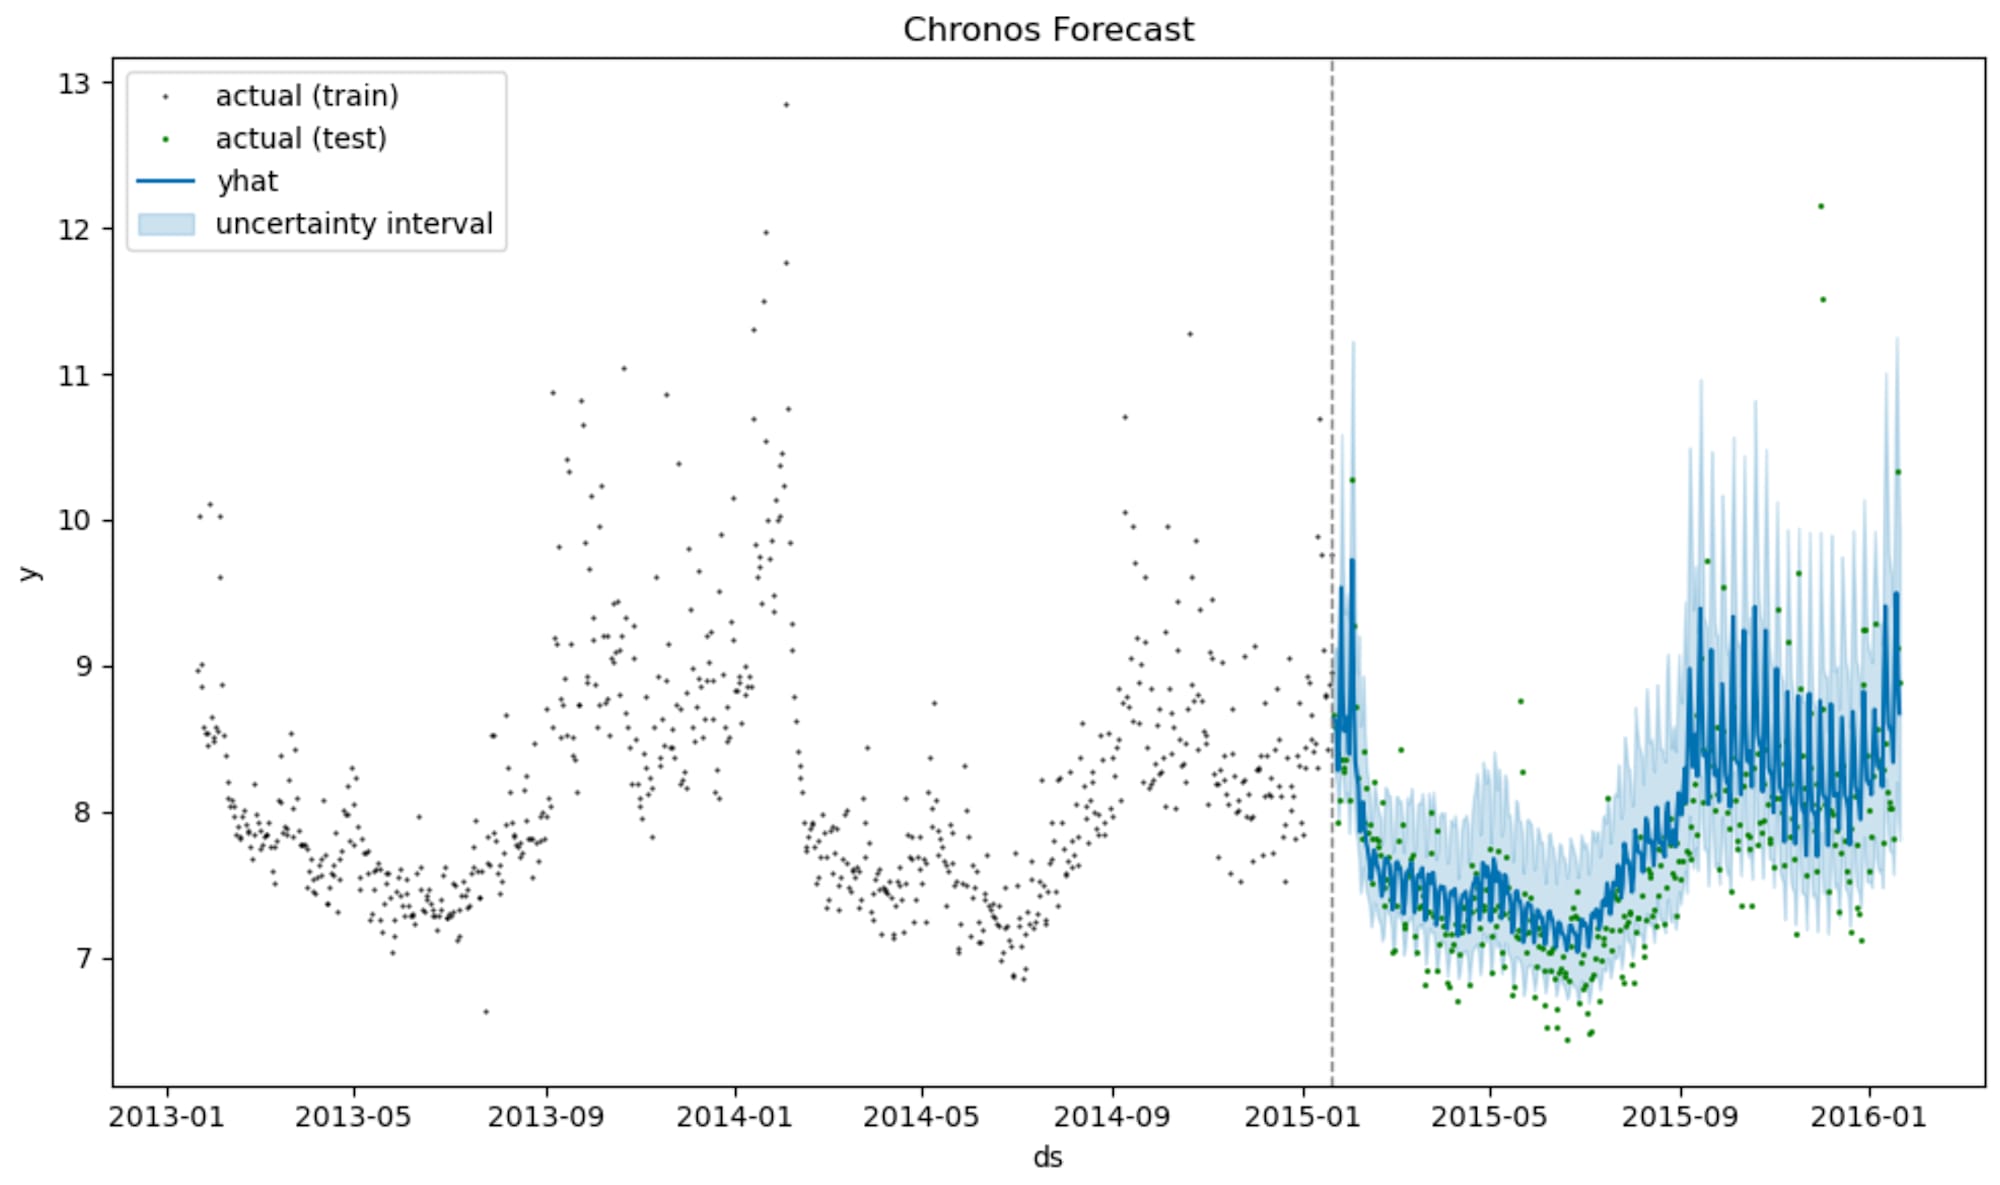
▼Accuracy metrics
| MAE | RMSE | MASE |
|---|---|---|
| 0.3394 | 0.4644 | 0.8852 |
The major advantage of JumpStart is how easily it can be operated from the UI. The process was simple and intuitive. It also works well when sending requests from boto3. Performance did not differ significantly at the time of verification.
Closing Thoughts
I confirmed the workflow for deploying Chronos-2 to a SageMaker AI real-time inference endpoint from both SageMaker JumpStart and AutoGluon-Cloud, and performing inference.
This was my first time using a time series foundation model with Chronos-2, and I was surprised by how easily it could be used thanks to SageMaker AI. The fact that no model training is needed if customization is not required, and that there is no need to manage the model, is an extremely powerful advantage when integrating time series forecasting into a system. It also seems to shine in cold-start scenarios where sufficient data has not yet been collected.
That's all for the 8th entry of the 'Summer Vacation Independent Research Relay': 'Researching How to Use Chronos-2 with SageMaker AI Inference Endpoints.'
Next time, Kawanago-san is scheduled to present "Analyzing 5 Years of Sleep Tracking Data with Statistics and Gemini." Stay tuned!!