From launching an Amazon Timestream for InfluxDB instance to using it in an application (InfluxDB 3, single instance)

This page has been translated by machine translation. View original
Introduction
I used Amazon Timestream for LiveAnalytics (the former Timestream) in a project, and it sparked my interest, so I decided to try the InfluxDB version (the new Timestream) as well.
※ It has been announced that Amazon Timestream for LiveAnalytics (the former Timestream) will no longer be available for new launches as of June 20, 2025.
Roadmap
- Launch from the managed console
- CDK implementation
- Create a sample application
- Connection verification
Launching from the Managed Console
-
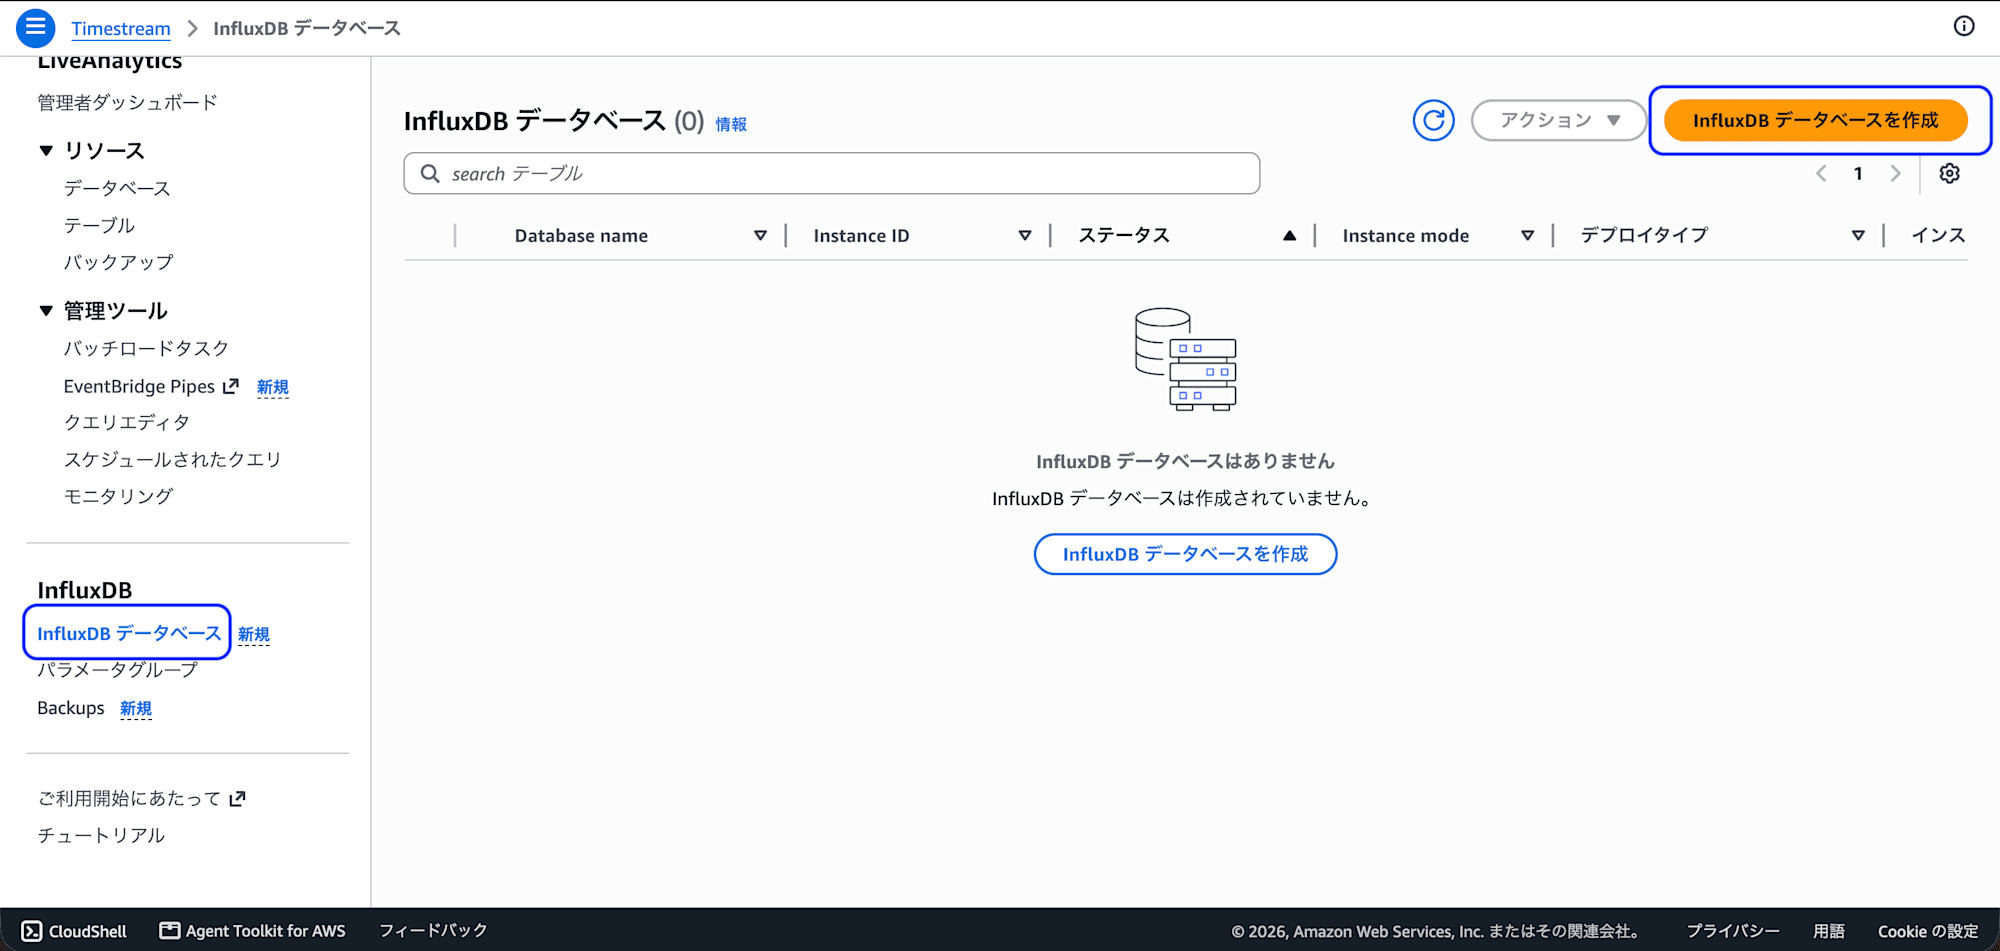
On the Timestream > InfluxDB databases page, click Create InfluxDB database.
-
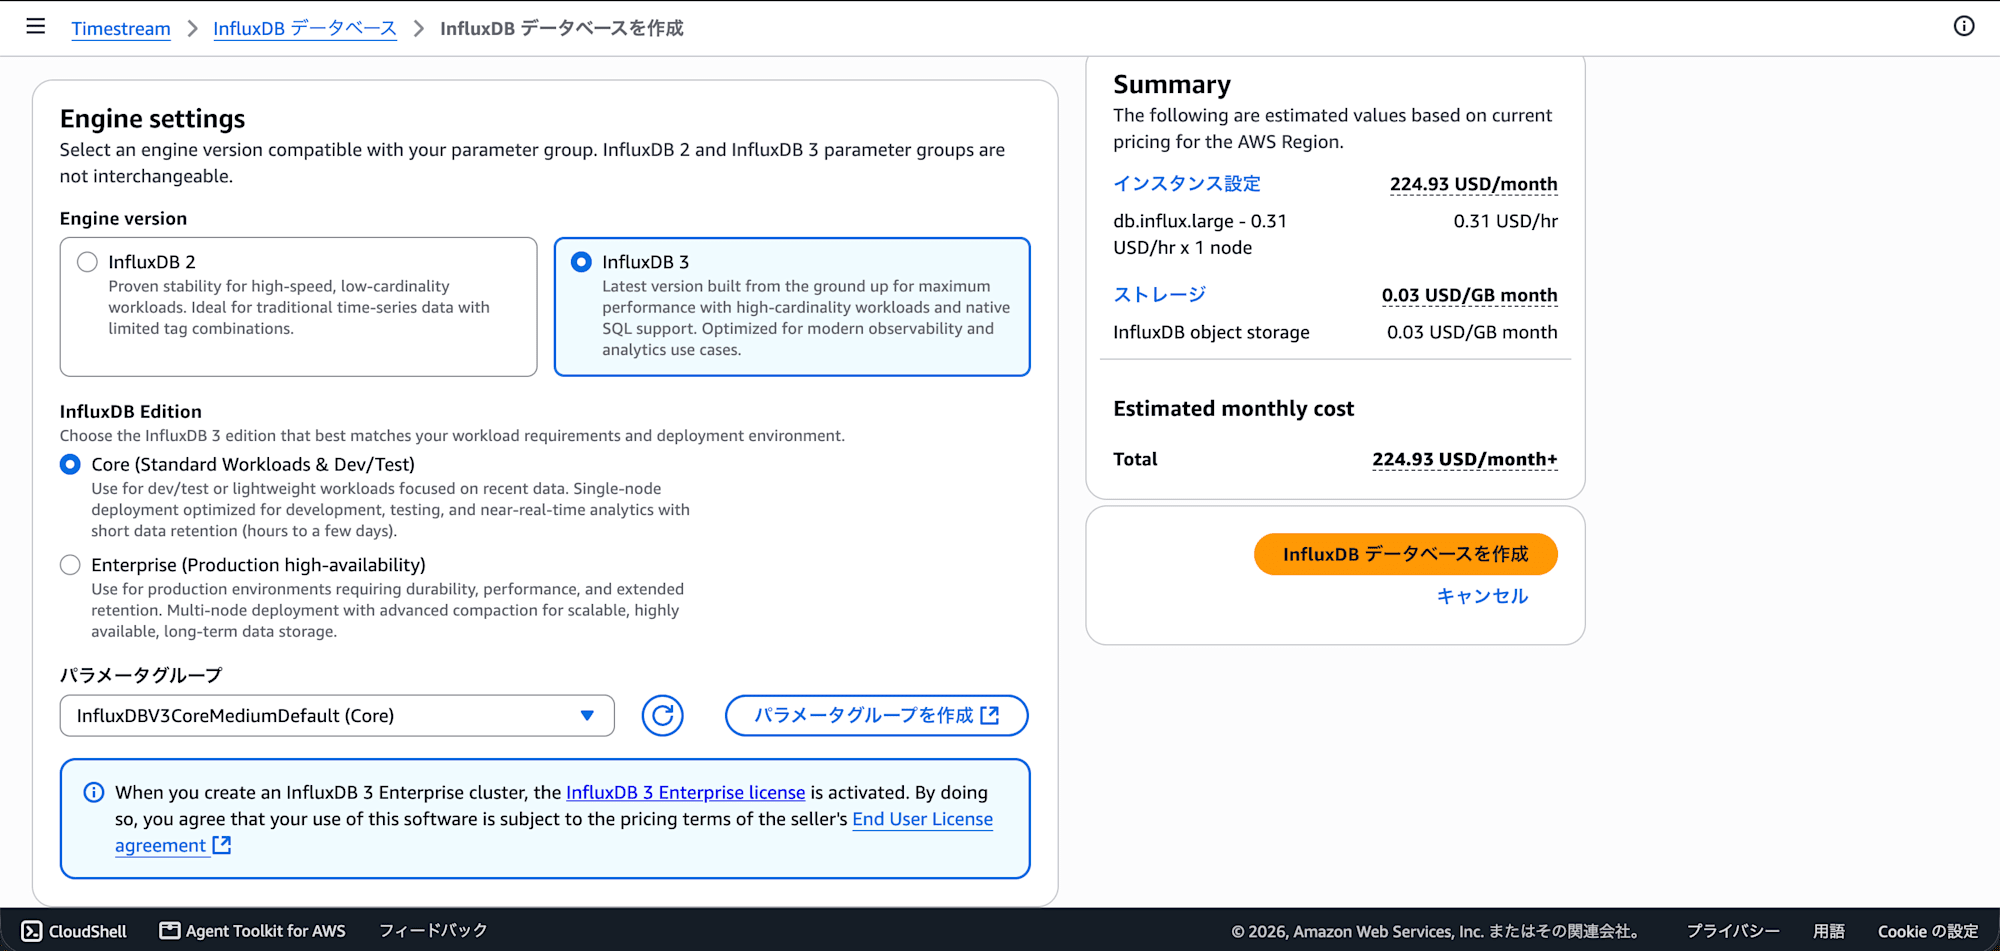
For Engine settings, select Engine version = [InfluxDB 3] and InfluxDB Edition = [Core (Standard Workloads & Dev/Test)] as shown in the attached image, and set the parameter group to InfluxDBV3CoreMediumDefault.
-
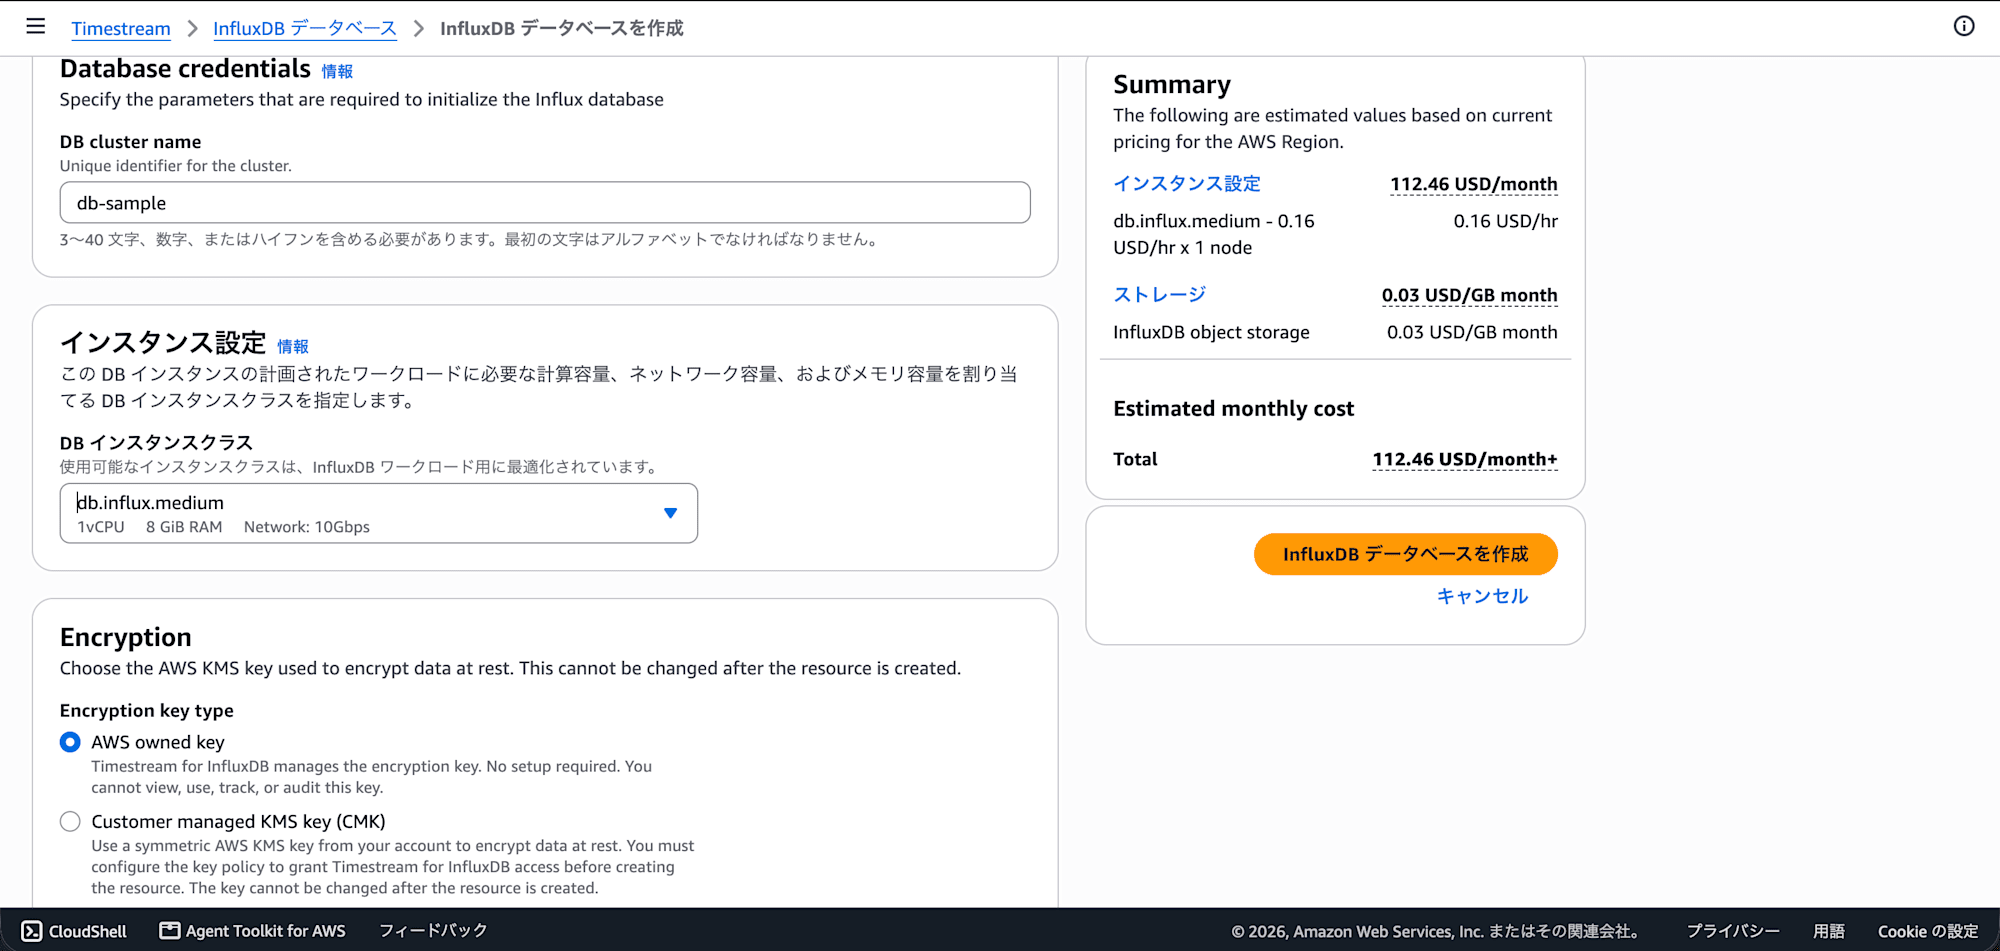
Set the DB name as desired, create the instance with medium size. Use the managed key.
-
Leave the remaining settings as-is and click Create InfluxDB.
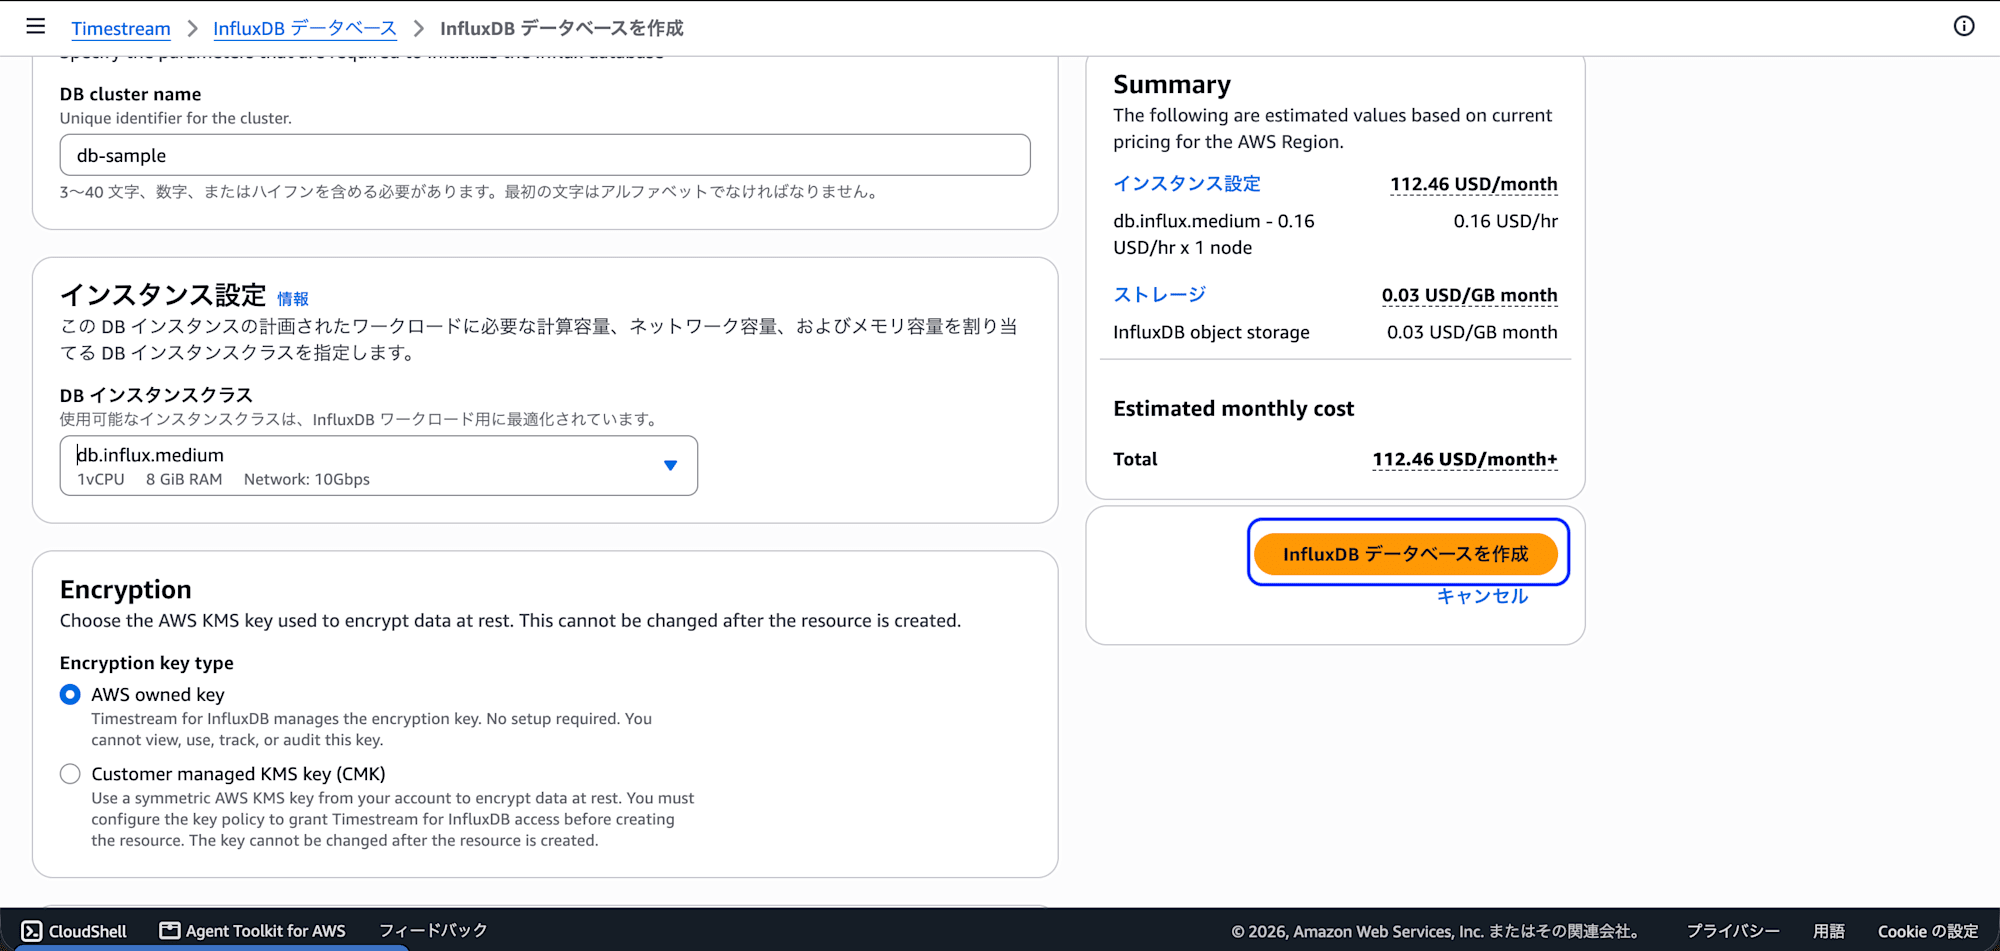
※ Note: The VPC where you place the private Timestream for InfluxDB must have an S3 endpoint associated with it.
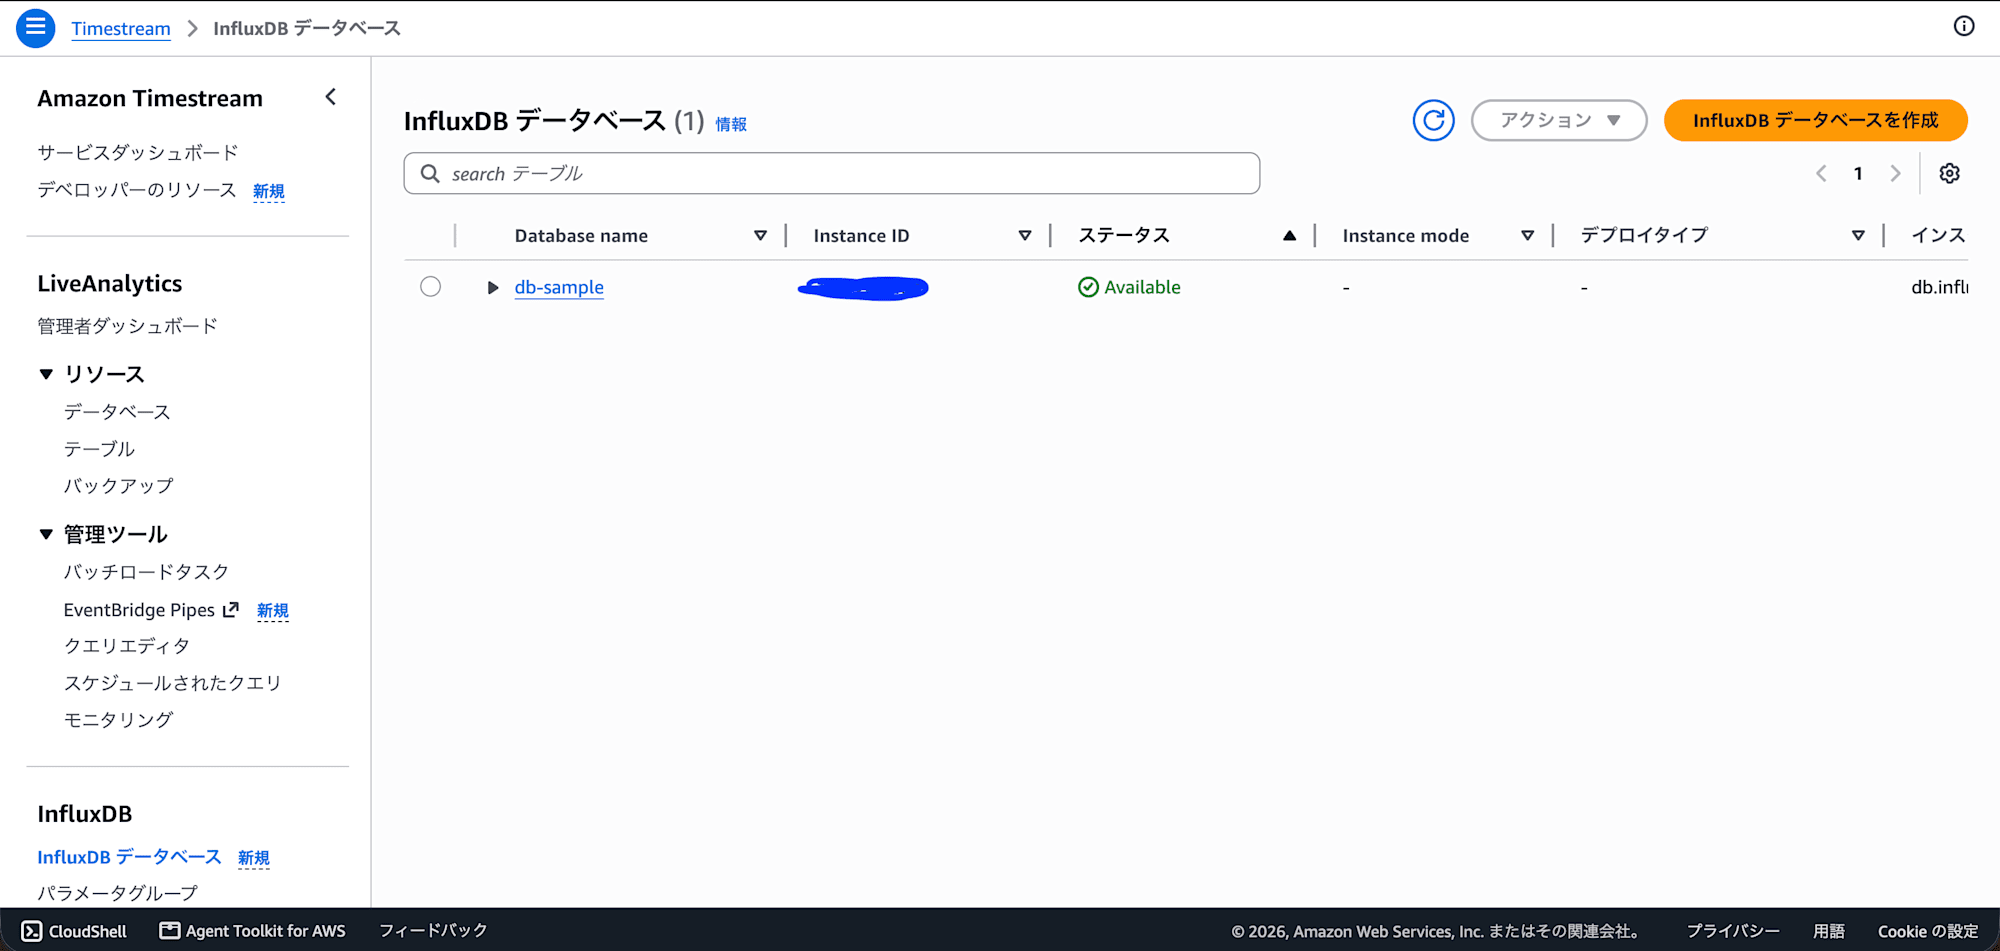
With this, we were able to launch a new Timestream for InfluxDB. (I'm not sure whether it needs to be hidden, but I've hidden the ID just in case.)
CDK Implementation
We will implement the Timestream for InfluxDB built in the management console so that it can be reproduced with AWS CDK (TypeScript).
Project Initialization
First, create the CDK project. Since we want to use pnpm, we delete node_modules and package-lock.json and reinstall with pnpm.
cdk init app --language typescript
rm -rf node_modules package-lock.json
pnpm install
pnpm update aws-cdk --latest
CDK Support Status for Timestream for InfluxDB
Currently, Timestream for InfluxDB only has L1 constructs (CfnInfluxDBInstance, CfnInfluxDBCluster) available in the aws-timestream module of aws-cdk-lib (confirmed with aws-cdk-lib 2.265.0 on hand). L2 constructs are not yet provided, and L1 must be used directly. There is also no CloudFormation resource yet for creating parameter groups themselves, and the related issue in the CDK repository is labeled needs-cfn (waiting for CloudFormation support).
Preparing the Network and Secrets
As noted during the management console setup, private subnets require an S3 gateway endpoint. We create a new VPC with CDK and also create the endpoint alongside it.
Since we don't want to write the initial password in plaintext, we auto-generate it with Secrets Manager and inject it into the instance using CloudFormation dynamic references.
const vpc = new ec2.Vpc(this, 'InfluxVpc', {
  maxAzs: 2,
  natGateways: 0,
  subnetConfiguration: [
    { name: 'influx-private', subnetType: ec2.SubnetType.PRIVATE_ISOLATED, cidrMask: 24 },
  ],
});

vpc.addGatewayEndpoint('S3Endpoint', {
  service: ec2.GatewayVpcEndpointAwsService.S3,
});

const securityGroup = new ec2.SecurityGroup(this, 'InfluxSecurityGroup', {
  vpc,
  description: 'Allow InfluxDB client access from within the VPC',
  allowAllOutbound: true,
});
securityGroup.addIngressRule(
  ec2.Peer.ipv4(vpc.vpcCidrBlock),
  ec2.Port.tcp(8086),
  'InfluxDB API access from within the VPC',
);

const adminPassword = new secretsmanager.Secret(this, 'InfluxAdminPassword', {
  generateSecretString: { excludePunctuation: true, passwordLength: 24 },
});
About Specifying the Parameter Group
CfnInfluxDBInstance has a property called dbParameterGroupIdentifier, which should allow you to explicitly associate a parameter group like InfluxDBV3CoreMediumDefault that appeared in the management console screen. However, there is no CloudFormation resource yet to create a Timestream for InfluxDB parameter group (aws/aws-cdk#31862 has a similar response from the AWS side).
In practice, when I tried deploying with InfluxDBV3CoreMediumDefault explicitly specified in dbParameterGroupIdentifier as shown in the management console, it intermittently resulted in CREATE_FAILED with the error "The parameter group with id does not exist". The same value sometimes succeeded and sometimes failed, and I was unable to clearly identify the cause, so I've decided to omit the dbParameterGroupIdentifier specification this time. The AWS official documentation also states that "if you create a DB instance without specifying a DB parameter group, the InfluxDB engine defaults will be used," and this approach allows for stable creation.
Final Stack
import * as cdk from 'aws-cdk-lib/core';
import * as ec2 from 'aws-cdk-lib/aws-ec2';
import * as secretsmanager from 'aws-cdk-lib/aws-secretsmanager';
import * as timestream from 'aws-cdk-lib/aws-timestream';
import { Construct } from 'constructs';

export class TimestreamInfluxDemoStack extends cdk.Stack {
  constructor(scope: Construct, id: string, props?: cdk.StackProps) {
    super(scope, id, props);

    const vpc = new ec2.Vpc(this, 'InfluxVpc', {
      maxAzs: 2,
      natGateways: 0,
      subnetConfiguration: [
        { name: 'influx-private', subnetType: ec2.SubnetType.PRIVATE_ISOLATED, cidrMask: 24 },
      ],
    });

    vpc.addGatewayEndpoint('S3Endpoint', {
      service: ec2.GatewayVpcEndpointAwsService.S3,
    });

    const securityGroup = new ec2.SecurityGroup(this, 'InfluxSecurityGroup', {
      vpc,
      description: 'Allow InfluxDB client access from within the VPC',
      allowAllOutbound: true,
    });
    securityGroup.addIngressRule(
      ec2.Peer.ipv4(vpc.vpcCidrBlock),
      ec2.Port.tcp(8086),
      'InfluxDB API access from within the VPC',
    );

    const adminPassword = new secretsmanager.Secret(this, 'InfluxAdminPassword', {
      generateSecretString: { excludePunctuation: true, passwordLength: 24 },
    });

    const instance = new timestream.CfnInfluxDBInstance(this, 'InfluxInstance', {
      name: 'db-sample-cdk',
      username: 'admin',
      password: adminPassword.secretValue.unsafeUnwrap(),
      organization: 'test',
      bucket: 'demo',
      dbInstanceType: 'db.influx.medium',
      dbStorageType: 'InfluxIOIncludedT1',
      allocatedStorage: 20,
      deploymentType: 'SINGLE_AZ',
      networkType: 'IPV4',
      publiclyAccessible: false,
      vpcSecurityGroupIds: [securityGroup.securityGroupId],
      vpcSubnetIds: vpc.isolatedSubnets.map((subnet) => subnet.subnetId),
    });

    new cdk.CfnOutput(this, 'InfluxEndpoint', { value: instance.attrEndpoint });
    new cdk.CfnOutput(this, 'InfluxAdminPasswordSecretArn', { value: adminPassword.secretArn });
  }
}
After running cdk deploy, the DB instance was successfully created.
Creating a Sample Application
The third item on the roadmap: creating a sample application. The structure is simple, consisting of the following two components.
- edge: A container simulating an IoT device. It generates dummy temperature and humidity data every 5 seconds and writes it to InfluxDB.
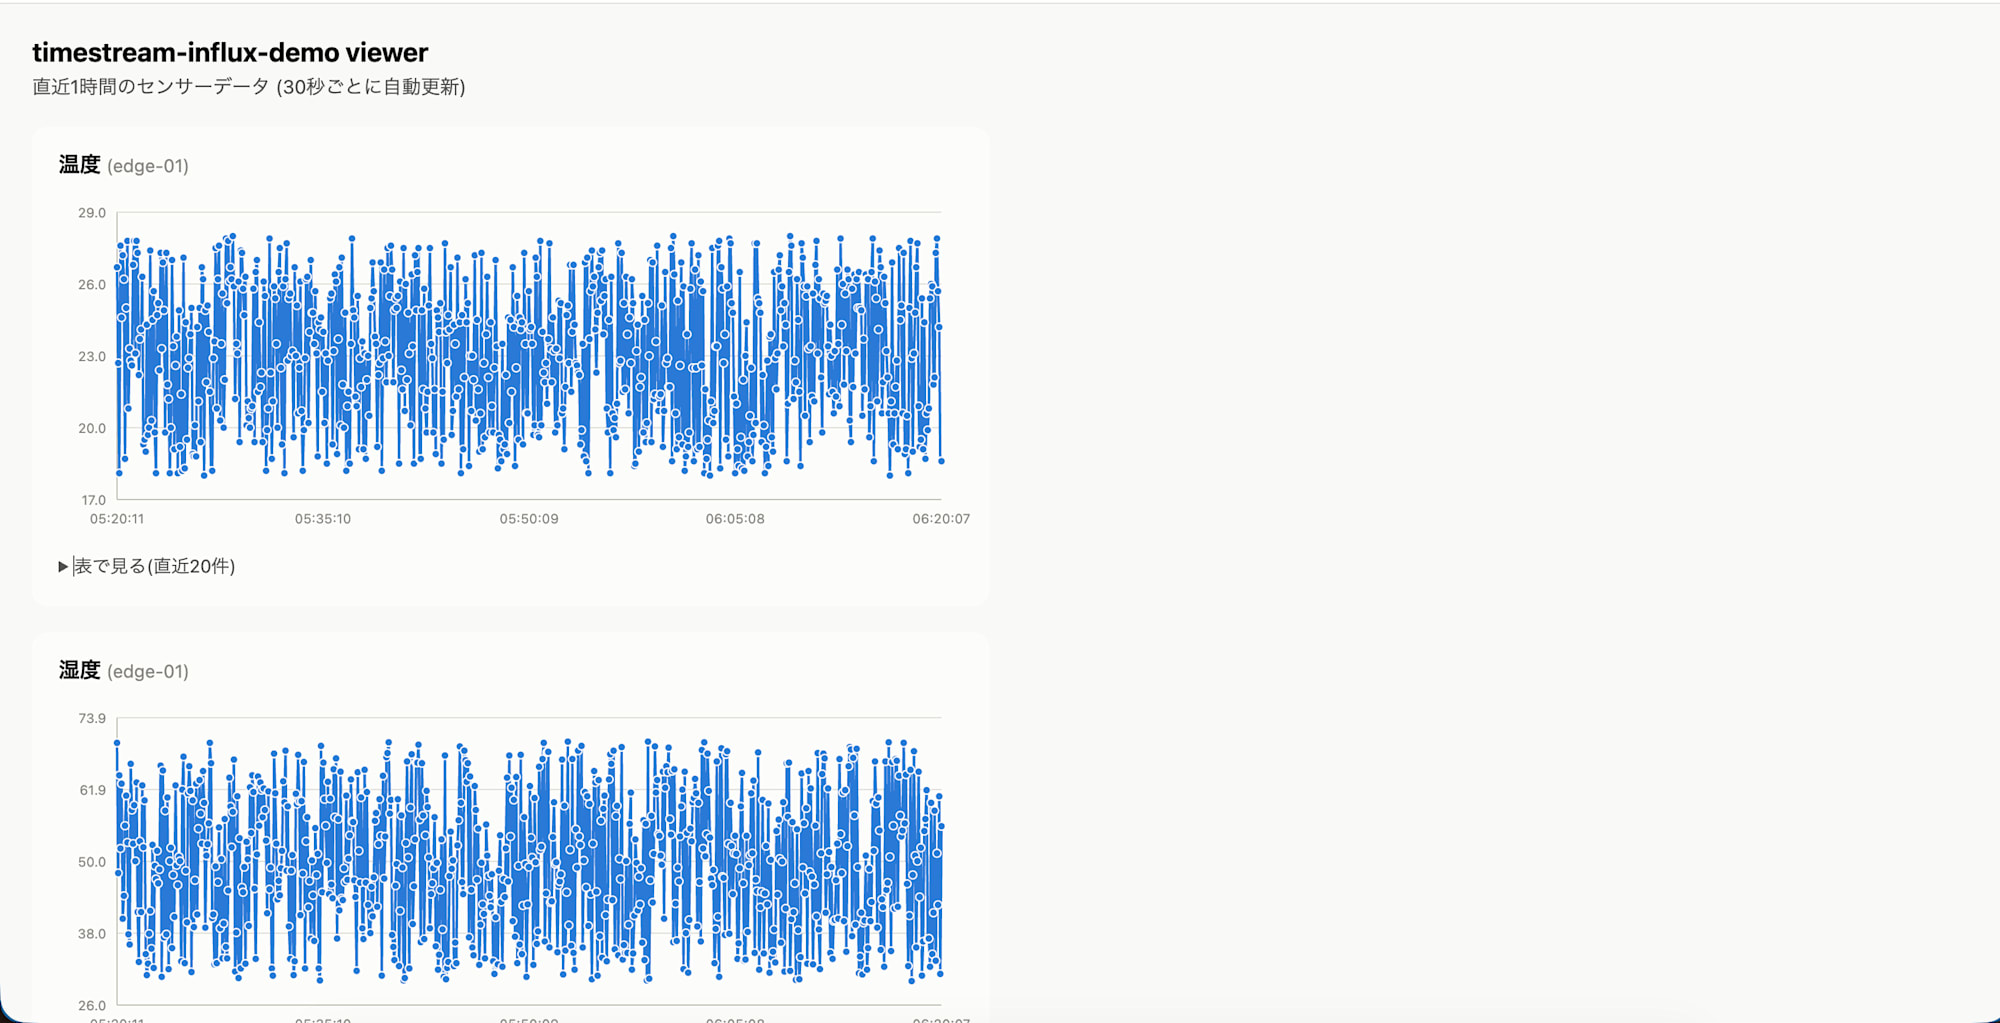
- viewer: A web application that aggregates the written data and displays it as a graph. It will be accessible from a browser via ALB.
Both will run on ECS Fargate.
edge: Writing Sensor Data
const ENDPOINT = process.env.INFLUX_ENDPOINT as string;
const BUCKET = process.env.INFLUX_BUCKET as string;
const ORGANIZATION = process.env.INFLUX_ORG as string;
const TOKEN = process.env.INFLUX_TOKEN as string;
const DEVICE_ID = process.env.DEVICE_ID || 'edge-01';
const INTERVAL_MS = Number(process.env.WRITE_INTERVAL_MS || 5000);

function randomInRange(min: number, max: number): number {
  return Math.round((min + Math.random() * (max - min)) * 10) / 10;
}

async function writePoint(): Promise<void> {
  const temperature = randomInRange(18, 28);
  const humidity = randomInRange(30, 70);
  const timestamp = Math.floor(Date.now() / 1000);
  const line = `sensor,device_id=${DEVICE_ID} temperature=${temperature},humidity=${humidity} ${timestamp}`;

  const url = `https://${ENDPOINT}:8086/api/v2/write?org=${encodeURIComponent(ORGANIZATION)}&bucket=${encodeURIComponent(BUCKET)}&precision=s`;
  const res = await fetch(url, {
    method: 'POST',
    headers: {
      Authorization: `Bearer ${TOKEN}`,
      'Content-Type': 'text/plain; charset=utf-8',
    },
    body: line,
  });

  const text = await res.text();
  if (!res.ok || text.trimStart().startsWith('<')) {
    console.error(`write failed: ${res.status} ${text.slice(0, 500)}`);
    return;
  }
  console.log(`wrote point: ${line}`);
}

setInterval(() => {
  writePoint().catch((err) => console.error('write error', err));
}, INTERVAL_MS);
Timestream for InfluxDB has two types of resources: CfnInfluxDBInstance (DB Instance, the single instance used this time) and CfnInfluxDBCluster (DB Cluster, for Enterprise multi-node configurations). Writing data to your Timestream for InfluxDB 3 cluster introduces the native Line Protocol write API (/api/v3/write_lp), but as the name suggests, this is documentation for DB Cluster. On the other hand, Creating and connecting to a Timestream for InfluxDB instance, the tutorial for creating and connecting to a DB Instance, only introduces the procedure of using Telegraf's InfluxDB v2 compatible output plugin (outputs.influxdb_v2) for writing, with no mention of the v3 native API.
In practice, when I sent a request to /api/v3/write_lp against the DB Instance created this time (Core, single instance), only the InfluxDB UI (SPA) HTML was returned with status 200, and no data was written. If you only check the status code for success, you won't notice this state.
viewer: Aggregating and Displaying as a Graph
The viewer is a web application that aggregates data written to InfluxDB and displays it as a graph viewable from a browser. The same applies to the query side — when I sent requests to the v3 native SQL API (/api/v3/query_sql) or InfluxQL API (/api/v3/query_influxql) introduced in Querying data from Timestream for InfluxDB 3, only the SPA HTML was returned, just like with the write API. On the other hand, the v2 compatible Flux query API (/api/v2/query) returned the expected results, so I'm using that this time.
import * as http from 'http';

const ENDPOINT = process.env.INFLUX_ENDPOINT as string;
const BUCKET = process.env.INFLUX_BUCKET as string;
const ORGANIZATION = process.env.INFLUX_ORG as string;
const TOKEN = process.env.INFLUX_TOKEN as string;
const PORT = Number(process.env.PORT || 8080);

const BASE_URL = `https://${ENDPOINT}:8086`;

const FLUX_QUERY = `
from(bucket: "${BUCKET}")
  |> range(start: -1h)
  |> filter(fn: (r) => r._measurement == "sensor")
  |> filter(fn: (r) => r._field == "temperature" or r._field == "humidity")
  |> keep(columns: ["_time", "_value", "_field", "device_id"])
  |> sort(columns: ["_time"])
`;

interface Point {
  time: number; // epoch ms
  value: number;
}

type SeriesByDevice = Record<string, Point[]>;
type SeriesByField = Record<string, SeriesByDevice>;

async function fetchSeries(): Promise<{ ok: true; data: SeriesByField } | { ok: false; status: number; body: string }> {
  const url = `${BASE_URL}/api/v2/query?org=${encodeURIComponent(ORGANIZATION)}`;
  const res = await fetch(url, {
    method: 'POST',
    headers: {
      Authorization: `Bearer ${TOKEN}`,
      'Content-Type': 'application/vnd.flux',
      Accept: 'application/csv',
    },
    body: FLUX_QUERY,
  });

  const text = await res.text();
  if (!res.ok || text.trimStart().startsWith('<')) {
    return { ok: false, status: res.status, body: text.slice(0, 2000) };
  }
  return { ok: true, data: parseAnnotatedCsv(text) };
}

function parseAnnotatedCsv(text: string): SeriesByField {
  const lines = text.split('\n').map((l) => l.trimEnd());
  const dataLines = lines.filter((l) => l.length > 0 && !l.startsWith('#'));
  const result: SeriesByField = {};
  if (dataLines.length === 0) return result;

  const header = dataLines[0].split(',');
  const timeIdx = header.indexOf('_time');
  const valueIdx = header.indexOf('_value');
  const fieldIdx = header.indexOf('_field');
  const deviceIdx = header.indexOf('device_id');
  if (timeIdx < 0 || valueIdx < 0 || fieldIdx < 0 || deviceIdx < 0) return result;

  for (let i = 1; i < dataLines.length; i++) {
    const line = dataLines[i];
    if (line === dataLines[0]) continue;
    const cols = line.split(',');
    const time = Date.parse(cols[timeIdx]);
    const value = Number(cols[valueIdx]);
    const field = cols[fieldIdx];
    const device = cols[deviceIdx];
    if (!field || !device || Number.isNaN(time) || Number.isNaN(value)) continue;

    if (!result[field]) result[field] = {};
    if (!result[field][device]) result[field][device] = [];
    result[field][device].push({ time, value });
  }
  return result;
}
// ...Continuing with line graph rendering using SVG and HTTP server implementation
Since temperature and humidity have different units, instead of forcing them into a single graph, they are displayed as two separate line graphs with separate axes.
Issuing an API Token
For edge/viewer to write to and query InfluxDB, an API token separate from the initial setup username/password is required. Since I didn't want to paste it directly into the code, I configured it so that a Lambda (custom resource) issues an API token at deploy time and stores it in Secrets Manager.
import {
  SecretsManagerClient,
  GetSecretValueCommand,
  PutSecretValueCommand,
} from '@aws-sdk/client-secrets-manager';

const secretsClient = new SecretsManagerClient({});

export const handler = async (event: CloudFormationCustomResourceEvent) => {
  if (event.RequestType === 'Delete') {
    return { PhysicalResourceId: event.PhysicalResourceId };
  }

  const { Endpoint, Username, PasswordSecretArn, Organization: OrgName, Bucket: BucketName, ApiTokenSecretArn } =
    event.ResourceProperties;

  const passwordResp = await secretsClient.send(
    new GetSecretValueCommand({ SecretId: PasswordSecretArn }),
  );
  const password = passwordResp.SecretString;

  const baseUrl = `https://${Endpoint}:8086`;

  // Start a session using the v2 compatible signin API
  const signinResp = await fetch(`${baseUrl}/api/v2/signin`, {
    method: 'POST',
    headers: {
      Authorization: `Basic ${Buffer.from(`${Username}:${password}`).toString('base64')}`,
    },
  });
  const cookie = signinResp.headers.get('set-cookie');
  const sessionCookie = cookie!.split(';')[0];

  // Resolve the orgID from the organization name
  const orgsResp = await fetch(`${baseUrl}/api/v2/orgs`, {
    headers: { Cookie: sessionCookie },
  });
  const orgsBody = (await orgsResp.json()) as { orgs?: { id: string; name: string }[] };
  const org = (orgsBody.orgs || []).find((o) => o.name === OrgName)!;

  // Resolve the bucket ID from the bucket name. If resource.id is not specified,
  // all resources of that type (all buckets under this organization) will be targeted
  const bucketsResp = await fetch(`${baseUrl}/api/v2/buckets?org=${encodeURIComponent(OrgName)}`, {
    headers: { Cookie: sessionCookie },
  });
  const bucketsBody = (await bucketsResp.json()) as { buckets?: { id: string; name: string }[] };
  const bucket = (bucketsBody.buckets || []).find((b) => b.name === BucketName)!;

  // Issue a token with only read/write permissions for the target bucket
  const authResp = await fetch(`${baseUrl}/api/v2/authorizations`, {
    method: 'POST',
    headers: { Cookie: sessionCookie, 'Content-Type': 'application/json' },
    body: JSON.stringify({
      status: 'active',
      description: 'timestream-influx-demo edge/viewer token',
      orgID: org.id,
      permissions: [
        { action: 'read', resource: { type: 'buckets', id: bucket.id, orgID: org.id } },
        { action: 'write', resource: { type: 'buckets', id: bucket.id, orgID: org.id } },
      ],
    }),
  });
  const authBody = (await authResp.json()) as { token?: string };

  await secretsClient.send(
    new PutSecretValueCommand({ SecretId: ApiTokenSecretArn, SecretString: authBody.token }),
  );

  return { PhysicalResourceId: `token-provisioning-${BucketName}` };
};
We start a session using the v2 compatible signin API and look up the orgID from the organization name. Since the InfluxDB v2 compatible authorization API targets the entire resource type (all buckets under this organization in this case) if resource.id is omitted, we also resolve the bucket ID from the bucket name and issue a token with read/write permissions scoped to only that bucket.
Running on ECS Fargate
Both edge and viewer run on ECS Fargate. Since InfluxDB remains in the private subnet, Interface endpoints (ECR, CloudWatch Logs, Secrets Manager) for image retrieval, log sending, and Secrets Manager access were also added to the VPC. The viewer's aggregated results are published via a public ALB so they can be viewed from a browser.
const vpc = new ec2.Vpc(this, 'InfluxVpc', {
  maxAzs: 2,
  natGateways: 0,
  subnetConfiguration: [
    { name: 'influx-private', subnetType: ec2.SubnetType.PRIVATE_ISOLATED, cidrMask: 24 },
    { name: 'alb-public', subnetType: ec2.SubnetType.PUBLIC, cidrMask: 24 },
  ],
});

const interfaceEndpointSubnets = { subnetType: ec2.SubnetType.PRIVATE_ISOLATED };
vpc.addInterfaceEndpoint('EcrApiEndpoint', { service: ec2.InterfaceVpcEndpointAwsService.ECR, subnets: interfaceEndpointSubnets });
vpc.addInterfaceEndpoint('EcrDkrEndpoint', { service: ec2.InterfaceVpcEndpointAwsService.ECR_DOCKER, subnets: interfaceEndpointSubnets });
vpc.addInterfaceEndpoint('CloudWatchLogsEndpoint', { service: ec2.InterfaceVpcEndpointAwsService.CLOUDWATCH_LOGS, subnets: interfaceEndpointSubnets });
vpc.addInterfaceEndpoint('SecretsManagerEndpoint', { service: ec2.InterfaceVpcEndpointAwsService.SECRETS_MANAGER, subnets: interfaceEndpointSubnets });

// Match the CPU architecture of the Mac used for building with finch/Docker (arm64) to the task execution architecture
const runtimePlatform: ecs.RuntimePlatform = {
  cpuArchitecture: ecs.CpuArchitecture.ARM64,
  operatingSystemFamily: ecs.OperatingSystemFamily.LINUX,
};

const cluster = new ecs.Cluster(this, 'SampleAppCluster', { vpc });

const edgeTaskDefinition = new ecs.FargateTaskDefinition(this, 'EdgeTaskDefinition', { cpu: 256, memoryLimitMiB: 512, runtimePlatform });
edgeTaskDefinition.addContainer('EdgeContainer', {
  image: ecs.ContainerImage.fromAsset(path.join(__dirname, '../apps/edge')),
  logging: ecs.LogDrivers.awsLogs({ streamPrefix: 'edge' }),
  environment: { INFLUX_ENDPOINT: instance.attrEndpoint, INFLUX_BUCKET: 'demo', INFLUX_ORG: 'test', DEVICE_ID: 'edge-01' },
  secrets: { INFLUX_TOKEN: ecs.Secret.fromSecretsManager(apiTokenSecret) },
});

const viewerTaskDefinition = new ecs.FargateTaskDefinition(this, 'ViewerTaskDefinition', { cpu: 256, memoryLimitMiB: 512, runtimePlatform });
const viewerContainer = viewerTaskDefinition.addContainer('ViewerContainer', {
  image: ecs.ContainerImage.fromAsset(path.join(__dirname, '../apps/viewer')),
  logging: ecs.LogDrivers.awsLogs({ streamPrefix: 'viewer' }),
  environment: { INFLUX_ENDPOINT: instance.attrEndpoint, INFLUX_BUCKET: 'demo', INFLUX_ORG: 'test', PORT: '8080' },
  secrets: { INFLUX_TOKEN: ecs.Secret.fromSecretsManager(apiTokenSecret) },
});
viewerContainer.addPortMappings({ containerPort: 8080 });

const viewerService = new ecs.FargateService(this, 'ViewerService', {
  cluster,
  taskDefinition: viewerTaskDefinition,
  desiredCount: 1,
  vpcSubnets: { subnetType: ec2.SubnetType.PRIVATE_ISOLATED },
  securityGroups: [viewerSecurityGroup],
  assignPublicIp: false,
});

const viewerAlb = new elbv2.ApplicationLoadBalancer(this, 'ViewerAlb', {
  vpc,
  internetFacing: true,
  securityGroup: albSecurityGroup,
  vpcSubnets: { subnetType: ec2.SubnetType.PUBLIC },
});

const viewerListener = viewerAlb.addListener('ViewerListener', { port: 80, open: false });
viewerListener.addTargets('ViewerTarget', {
  port: 8080,
  protocol: elbv2.ApplicationProtocol.HTTP,
  targets: [viewerService],
  healthCheck: { path: '/health', interval: cdk.Duration.seconds(30) },
});

new cdk.CfnOutput(this, 'ViewerUrl', { value: `http://${viewerAlb.loadBalancerDnsName}` });
After deploying edge/viewer and the ALB with cdk deploy, the sensor data written by edge is reflected in real time on the viewer's graph. Opening the ALB URL in a browser lets you view the temperature and humidity trends for the past hour as a graph.
Conclusion
- In this verification, there are some areas noted as "might actually be possible, but doesn't seem feasible based on what was observed." I will add updates as new primary information or changes become available.