Amazon Timestream for InfluxDB のインスタンス起動からアプリでの利用まで (InfluxDB 3、単一インスタンス)

はじめに
案件でAmazon Timestream for LiveAnalytics (旧Timestream) を使ってみて、興味が湧いたのでInfluxDB版 (新Timestream) も使ってみようと思い立ちました。
※ Amazon Timestream for LiveAnalytics (旧Timestream) については、2025年6月20日で新規の立ち上げができなくなると発表されています。
ロードマップ
- マネージドコンソールから立ち上げ
- CDK化
- サンプルアプリを作る
- 疎通確認
マネージドコンソールから立ち上げ
-
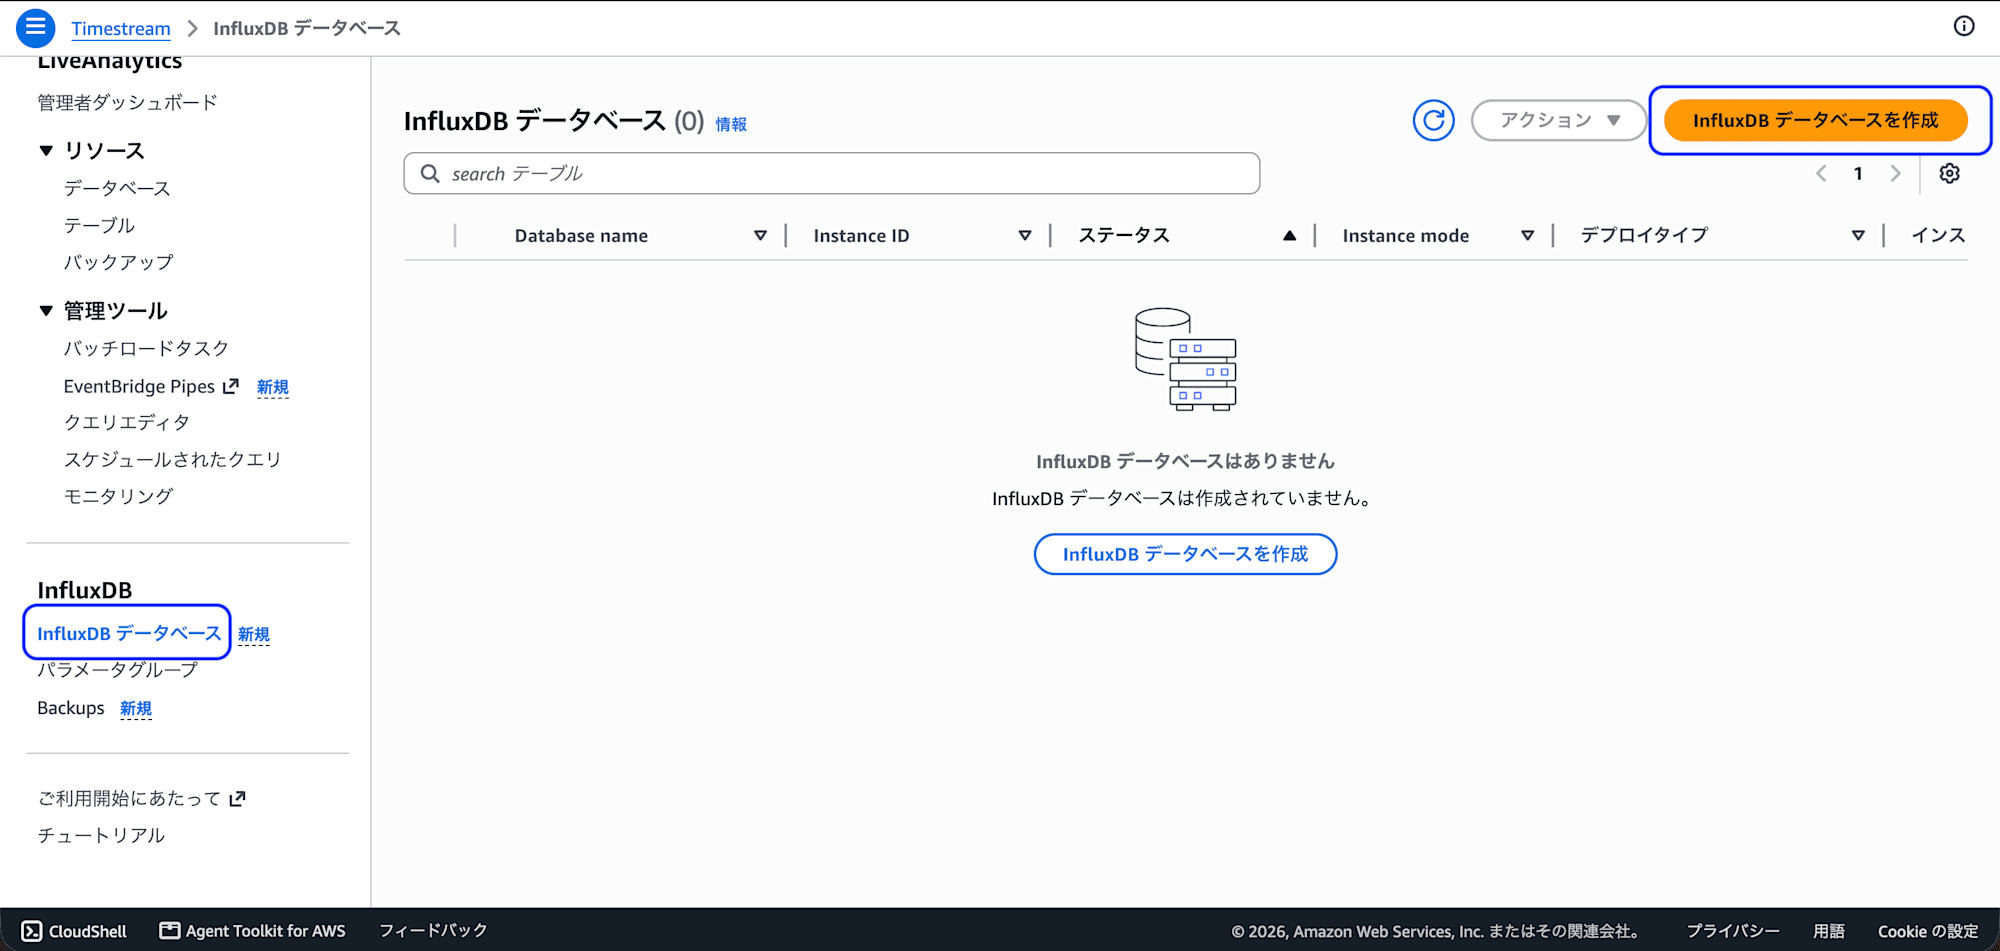
Timestream > InfluxDB データベース のページで、InfluxDB データベースを作成 を押下します。
-
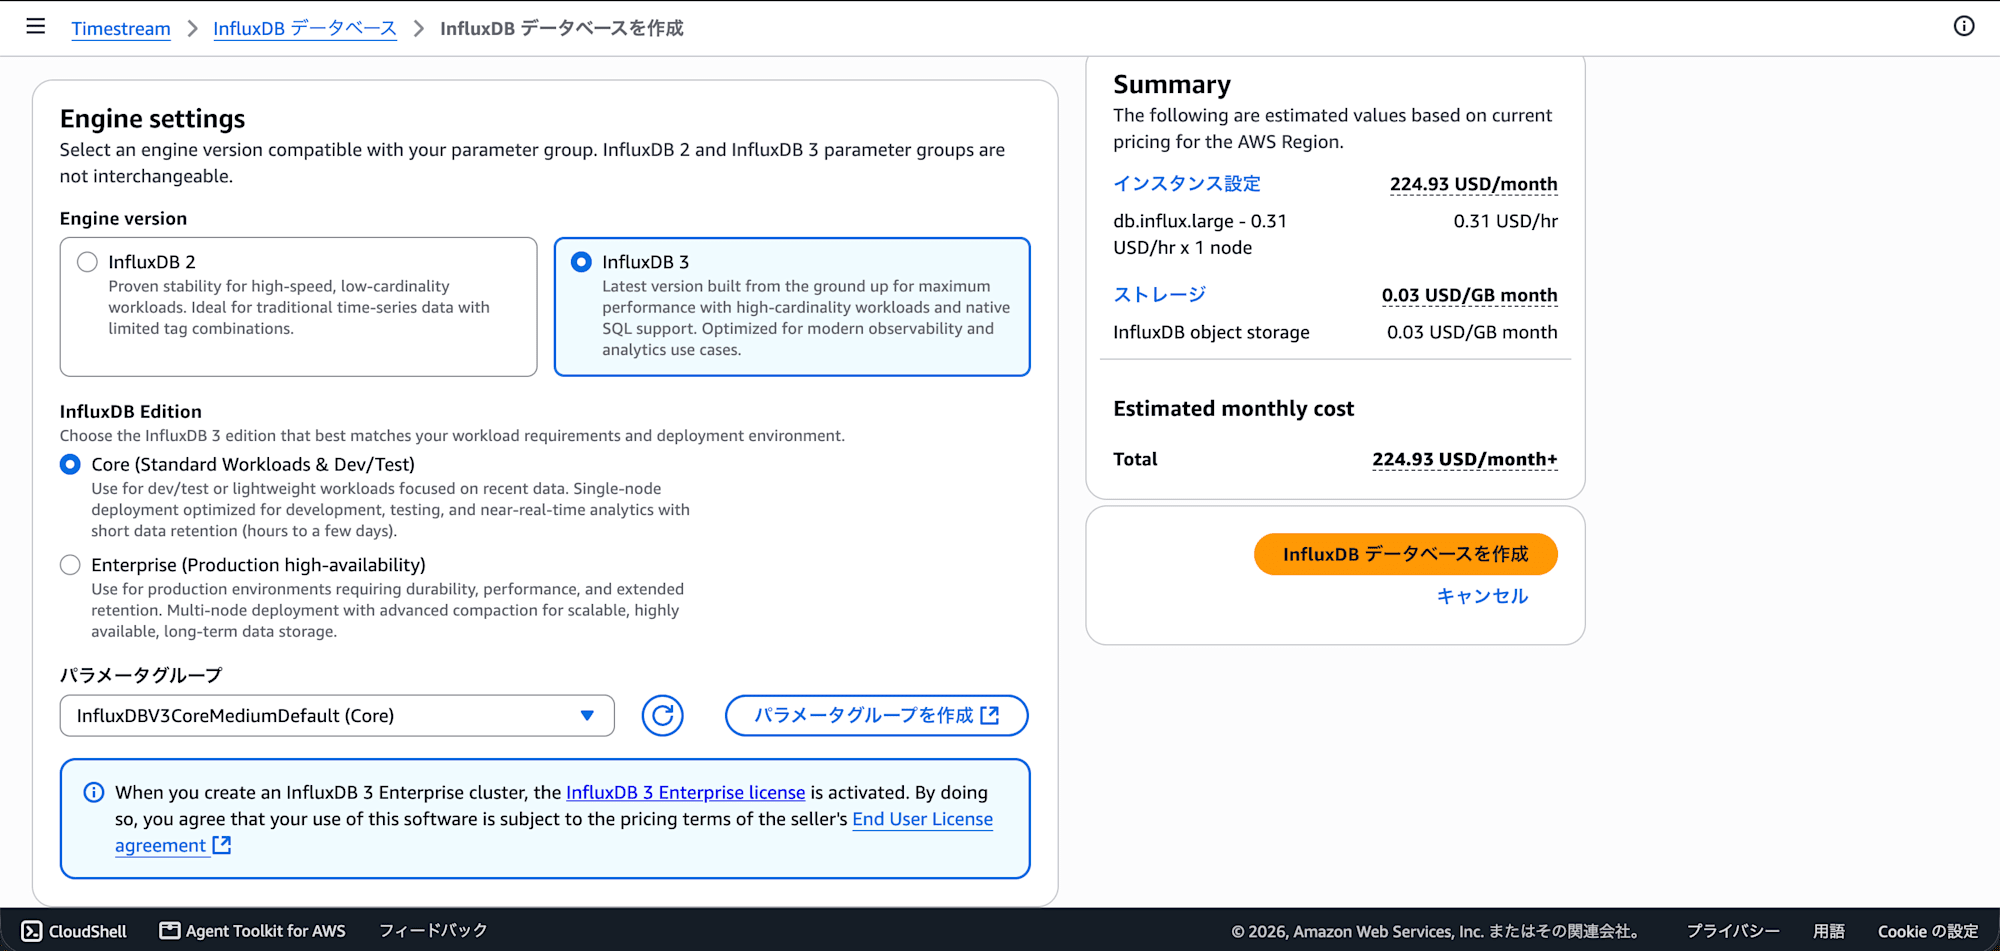
Engine settingは添付のように、Engine version = [InfluxDB 3], InfluxDB Edition = [Core (Standard Workloads & Dev/Test)] を選択し、パラメータグループには InfluxDBV3CoreMediumDefault を設定します。
-
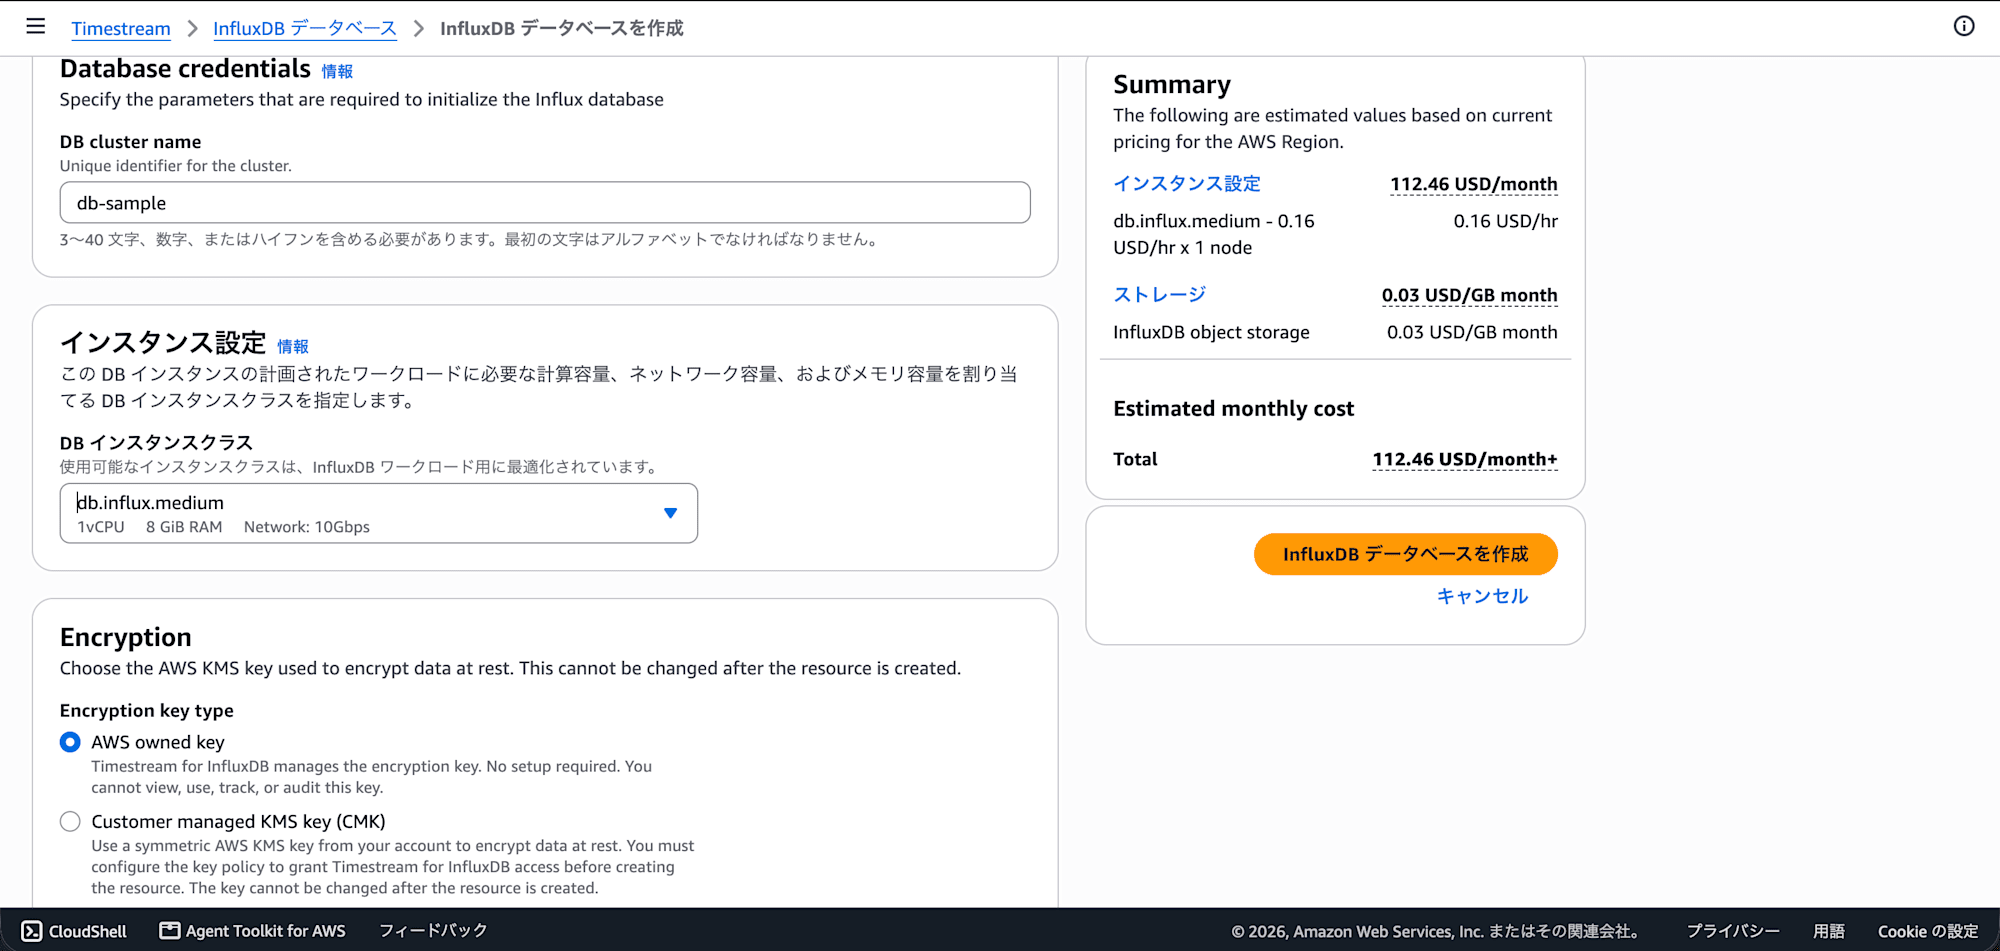
DB名を任意に設定し、インスタンスサイズはmediumで作成します。鍵はマネージドのものを使います。
-
以降の設定値は一旦このまま、InfluxDB を作成 を押下します。
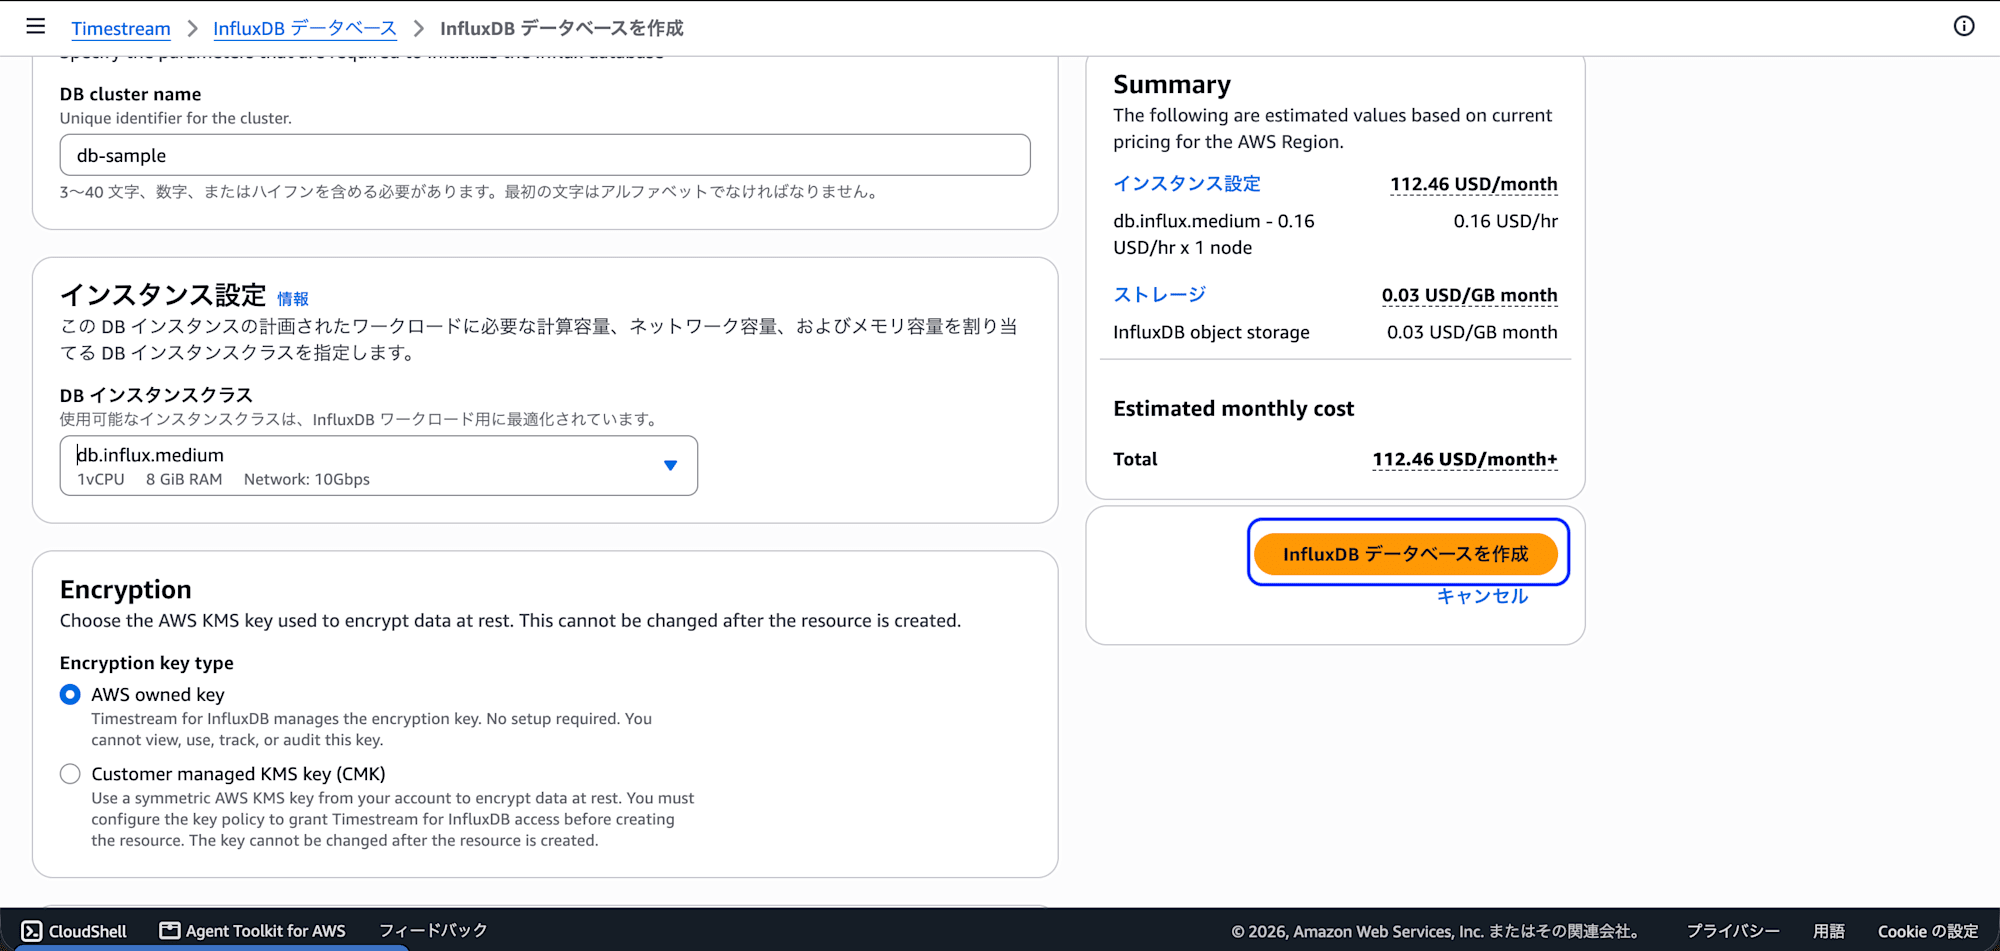
※ 注意: private の Timestream for InfluxDB を設置するVPCには、S3エンドポイントが関連づけられている必要があります。
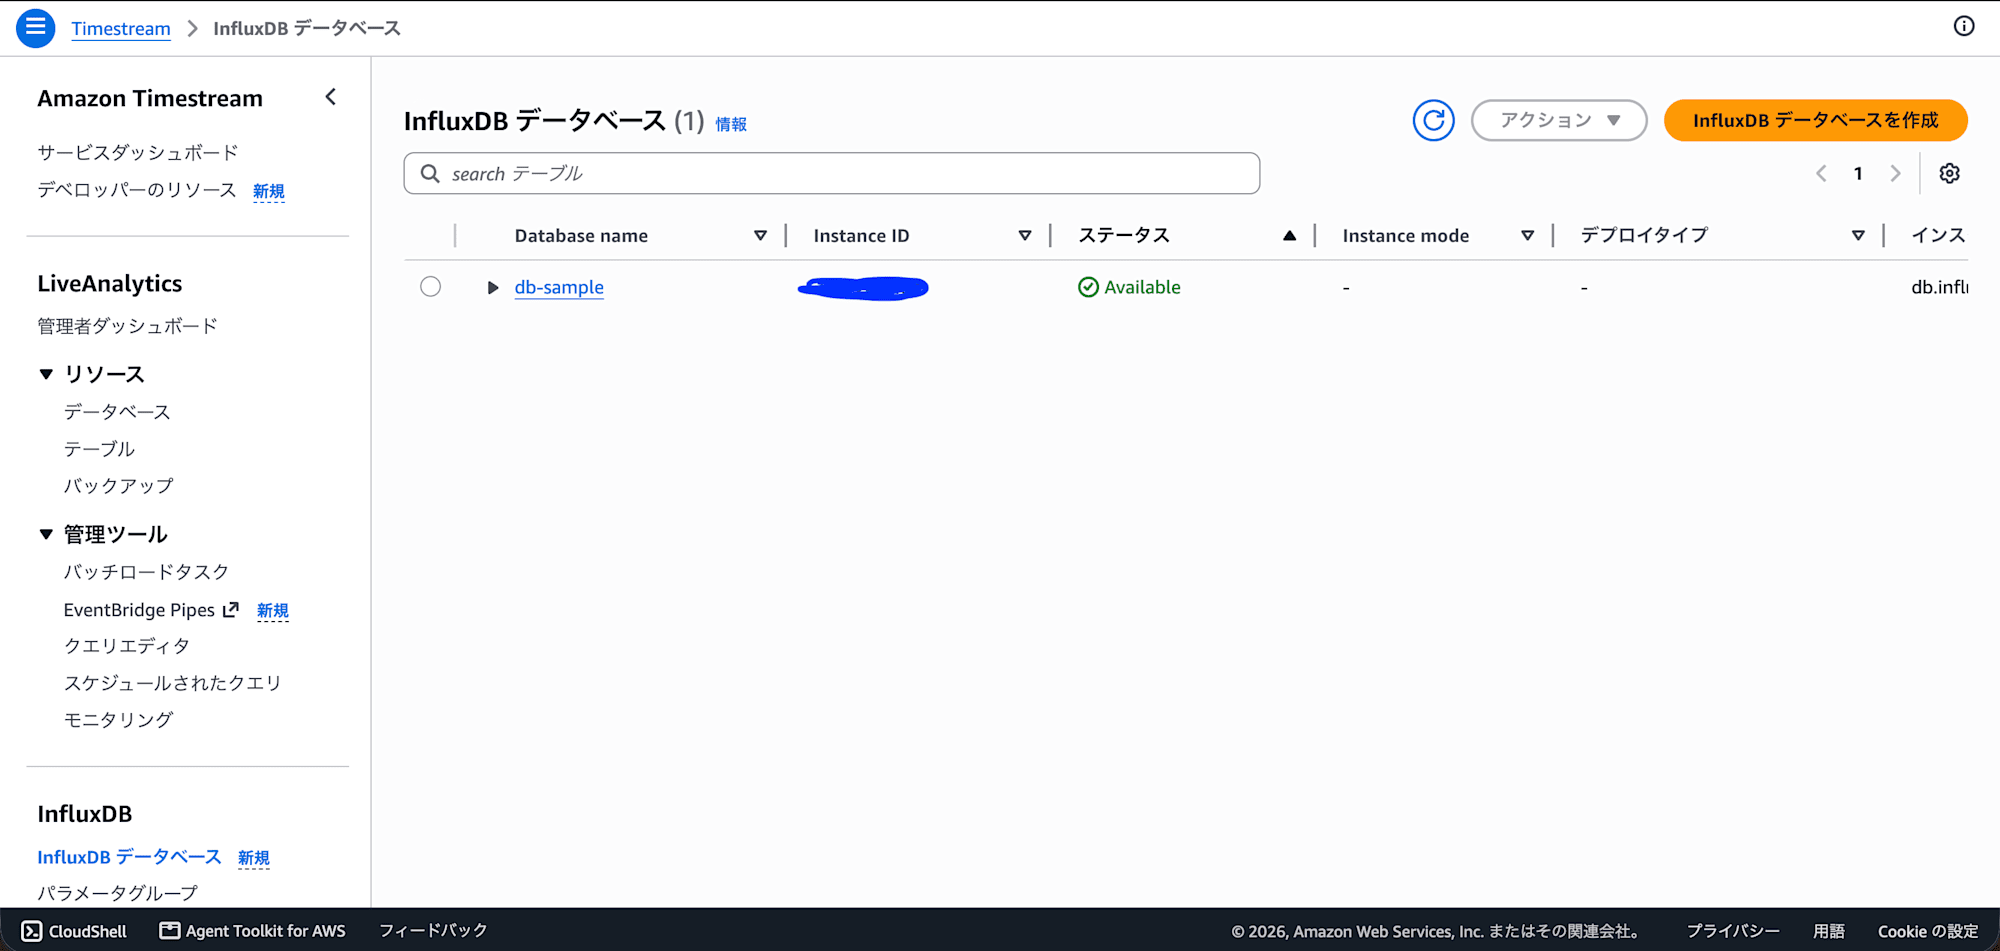
これで、新たにTimestream for InfluxDB を起動することができました。(隠すべきなのかわからないですが、念の為IDは隠しています。)
CDK化
マネジメントコンソールで構築したTimestream for InfluxDBを、AWS CDK(TypeScript)で再現できるように実装していきます。
プロジェクトの初期化
まずはCDKプロジェクトを作成します。pnpm 運用にしたいので node_modules と package-lock.json を削除して pnpm で入れ直します。
cdk init app --language typescript
rm -rf node_modules package-lock.json
pnpm install
pnpm update aws-cdk --latest
Timestream for InfluxDBのCDK対応状況
現状、Timestream for InfluxDB には L1 コンストラクト (CfnInfluxDBInstance, CfnInfluxDBCluster) のみが aws-cdk-lib の aws-timestream モジュールに提供されています (手元の aws-cdk-lib 2.265.0 で確認)。L2 コンストラクトはまだ提供されておらず、L1 をそのまま使う必要があります。パラメータグループ自体を作成する CloudFormation リソースもまだ存在せず、CDKリポジトリの関連issueにも needs-cfn (CloudFormation側の対応待ち) ラベルが付いています。
ネットワークとシークレットの用意
マネジメントコンソールでの構築時の注意事項どおり、private サブネットには S3 ゲートウェイエンドポイントが必要です。CDK で VPC を新規作成し、endpoint も合わせて作成します。
初期パスワードは平文で書きたくないので、Secrets Manager で自動生成し、CloudFormation の動的参照でインスタンスに注入します。
const vpc = new ec2.Vpc(this, 'InfluxVpc', {
  maxAzs: 2,
  natGateways: 0,
  subnetConfiguration: [
    { name: 'influx-private', subnetType: ec2.SubnetType.PRIVATE_ISOLATED, cidrMask: 24 },
  ],
});

vpc.addGatewayEndpoint('S3Endpoint', {
  service: ec2.GatewayVpcEndpointAwsService.S3,
});

const securityGroup = new ec2.SecurityGroup(this, 'InfluxSecurityGroup', {
  vpc,
  description: 'Allow InfluxDB client access from within the VPC',
  allowAllOutbound: true,
});
securityGroup.addIngressRule(
  ec2.Peer.ipv4(vpc.vpcCidrBlock),
  ec2.Port.tcp(8086),
  'InfluxDB API access from within the VPC',
);

const adminPassword = new secretsmanager.Secret(this, 'InfluxAdminPassword', {
  generateSecretString: { excludePunctuation: true, passwordLength: 24 },
});
パラメータグループの指定について
CfnInfluxDBInstance には dbParameterGroupIdentifier というプロパティがあり、マネジメントコンソールの画面に出ていた InfluxDBV3CoreMediumDefault のようなパラメータグループを明示的に紐づけることもできるはずです。ただし、Timestream for InfluxDB のパラメータグループを作成する CloudFormation リソースはまだ存在しません(aws/aws-cdk#31862 でもAWS側から同様の回答があります)。
実際に、マネジメントコンソールの画面表示どおり InfluxDBV3CoreMediumDefault を dbParameterGroupIdentifier に明示指定してデプロイしてみたところ、"The parameter group with id does not exist" というエラーで断続的に CREATE_FAILED になりました。同じ値を指定しても成功する場合と失敗する場合があり、原因を明確に特定できなかったため、今回は dbParameterGroupIdentifier の指定を省略する方針にしています。AWSの公式ドキュメントにも「DB parameter groupを指定せずにDBインスタンスを作成すると、InfluxDBのエンジンデフォルトが使用される」旨の記載があり、この方法であれば安定して作成できています。
最終的なスタック
import * as cdk from 'aws-cdk-lib/core';
import * as ec2 from 'aws-cdk-lib/aws-ec2';
import * as secretsmanager from 'aws-cdk-lib/aws-secretsmanager';
import * as timestream from 'aws-cdk-lib/aws-timestream';
import { Construct } from 'constructs';

export class TimestreamInfluxDemoStack extends cdk.Stack {
  constructor(scope: Construct, id: string, props?: cdk.StackProps) {
    super(scope, id, props);

    const vpc = new ec2.Vpc(this, 'InfluxVpc', {
      maxAzs: 2,
      natGateways: 0,
      subnetConfiguration: [
        { name: 'influx-private', subnetType: ec2.SubnetType.PRIVATE_ISOLATED, cidrMask: 24 },
      ],
    });

    vpc.addGatewayEndpoint('S3Endpoint', {
      service: ec2.GatewayVpcEndpointAwsService.S3,
    });

    const securityGroup = new ec2.SecurityGroup(this, 'InfluxSecurityGroup', {
      vpc,
      description: 'Allow InfluxDB client access from within the VPC',
      allowAllOutbound: true,
    });
    securityGroup.addIngressRule(
      ec2.Peer.ipv4(vpc.vpcCidrBlock),
      ec2.Port.tcp(8086),
      'InfluxDB API access from within the VPC',
    );

    const adminPassword = new secretsmanager.Secret(this, 'InfluxAdminPassword', {
      generateSecretString: { excludePunctuation: true, passwordLength: 24 },
    });

    const instance = new timestream.CfnInfluxDBInstance(this, 'InfluxInstance', {
      name: 'db-sample-cdk',
      username: 'admin',
      password: adminPassword.secretValue.unsafeUnwrap(),
      organization: 'test',
      bucket: 'demo',
      dbInstanceType: 'db.influx.medium',
      dbStorageType: 'InfluxIOIncludedT1',
      allocatedStorage: 20,
      deploymentType: 'SINGLE_AZ',
      networkType: 'IPV4',
      publiclyAccessible: false,
      vpcSecurityGroupIds: [securityGroup.securityGroupId],
      vpcSubnetIds: vpc.isolatedSubnets.map((subnet) => subnet.subnetId),
    });

    new cdk.CfnOutput(this, 'InfluxEndpoint', { value: instance.attrEndpoint });
    new cdk.CfnOutput(this, 'InfluxAdminPasswordSecretArn', { value: adminPassword.secretArn });
  }
}
cdk deploy を実行し、無事にDBインスタンスが作成できました。
サンプルアプリを作る
ロードマップの3番目、サンプルアプリを作ります。構成はシンプルに、以下の2つです。
- edge : IoT機器を模したコンテナ。5秒おきにダミーの温度・湿度データを生成し、InfluxDBに書き込みます。
- viewer : 書き込まれたデータを集計し、グラフとして表示するWebアプリ。ALB経由でブラウザからアクセスできるようにします。
どちらもECS Fargateで動かします。
edge: センサーデータを書き込む
const ENDPOINT = process.env.INFLUX_ENDPOINT as string;
const BUCKET = process.env.INFLUX_BUCKET as string;
const ORGANIZATION = process.env.INFLUX_ORG as string;
const TOKEN = process.env.INFLUX_TOKEN as string;
const DEVICE_ID = process.env.DEVICE_ID || 'edge-01';
const INTERVAL_MS = Number(process.env.WRITE_INTERVAL_MS || 5000);

function randomInRange(min: number, max: number): number {
  return Math.round((min + Math.random() * (max - min)) * 10) / 10;
}

async function writePoint(): Promise<void> {
  const temperature = randomInRange(18, 28);
  const humidity = randomInRange(30, 70);
  const timestamp = Math.floor(Date.now() / 1000);
  const line = `sensor,device_id=${DEVICE_ID} temperature=${temperature},humidity=${humidity} ${timestamp}`;

  const url = `https://${ENDPOINT}:8086/api/v2/write?org=${encodeURIComponent(ORGANIZATION)}&bucket=${encodeURIComponent(BUCKET)}&precision=s`;
  const res = await fetch(url, {
    method: 'POST',
    headers: {
      Authorization: `Bearer ${TOKEN}`,
      'Content-Type': 'text/plain; charset=utf-8',
    },
    body: line,
  });

  const text = await res.text();
  if (!res.ok || text.trimStart().startsWith('<')) {
    console.error(`write failed: ${res.status} ${text.slice(0, 500)}`);
    return;
  }
  console.log(`wrote point: ${line}`);
}

setInterval(() => {
  writePoint().catch((err) => console.error('write error', err));
}, INTERVAL_MS);
Timestream for InfluxDBには CfnInfluxDBInstance (DB Instance、今回使っている単一インスタンス) と CfnInfluxDBCluster (DB Cluster、Enterpriseのマルチノード構成向け) という2種類のリソースがあります。Writing data to your Timestream for InfluxDB 3 cluster にはネイティブのLine Protocol書き込みAPI (/api/v3/write_lp) が案内されていますが、これは名前の通り DB Cluster 向けのドキュメントです。一方、DB Instance の作成・接続チュートリアルである Creating and connecting to a Timestream for InfluxDB instance では、書き込みにTelegrafのInfluxDB v2互換出力プラグイン (outputs.influxdb_v2) を使う手順のみが案内されており、v3ネイティブAPIへの言及はありません。
実際に今回作成したDB Instance (Core・単一インスタンス) に対して /api/v3/write_lp へリクエストすると、InfluxDBのUI (SPA) のHTMLがステータス200で返ってくるだけで、データは書き込まれていませんでした。ステータスコードだけで成功判定すると、この状態に気づけません。
viewer: 集計してグラフ表示する
viewerはInfluxDBに書き込まれたデータを集計し、ブラウザから見られるグラフとして表示するWebアプリです。クエリ側も同様で、Querying data from Timestream for InfluxDB 3 が案内するv3ネイティブのSQL API (/api/v3/query_sql) やInfluxQL API (/api/v3/query_influxql) にリクエストしても、書き込みAPIと同じくSPAのHTMLが返ってくるだけでした。一方、v2互換のFluxクエリAPI (/api/v2/query) では期待通りの結果が得られたため、今回はこちらを使っています。
import * as http from 'http';

const ENDPOINT = process.env.INFLUX_ENDPOINT as string;
const BUCKET = process.env.INFLUX_BUCKET as string;
const ORGANIZATION = process.env.INFLUX_ORG as string;
const TOKEN = process.env.INFLUX_TOKEN as string;
const PORT = Number(process.env.PORT || 8080);

const BASE_URL = `https://${ENDPOINT}:8086`;

const FLUX_QUERY = `
from(bucket: "${BUCKET}")
  |> range(start: -1h)
  |> filter(fn: (r) => r._measurement == "sensor")
  |> filter(fn: (r) => r._field == "temperature" or r._field == "humidity")
  |> keep(columns: ["_time", "_value", "_field", "device_id"])
  |> sort(columns: ["_time"])
`;

interface Point {
  time: number; // epoch ms
  value: number;
}

type SeriesByDevice = Record<string, Point[]>;
type SeriesByField = Record<string, SeriesByDevice>;

async function fetchSeries(): Promise<{ ok: true; data: SeriesByField } | { ok: false; status: number; body: string }> {
  const url = `${BASE_URL}/api/v2/query?org=${encodeURIComponent(ORGANIZATION)}`;
  const res = await fetch(url, {
    method: 'POST',
    headers: {
      Authorization: `Bearer ${TOKEN}`,
      'Content-Type': 'application/vnd.flux',
      Accept: 'application/csv',
    },
    body: FLUX_QUERY,
  });

  const text = await res.text();
  if (!res.ok || text.trimStart().startsWith('<')) {
    return { ok: false, status: res.status, body: text.slice(0, 2000) };
  }
  return { ok: true, data: parseAnnotatedCsv(text) };
}

function parseAnnotatedCsv(text: string): SeriesByField {
  const lines = text.split('\n').map((l) => l.trimEnd());
  const dataLines = lines.filter((l) => l.length > 0 && !l.startsWith('#'));
  const result: SeriesByField = {};
  if (dataLines.length === 0) return result;

  const header = dataLines[0].split(',');
  const timeIdx = header.indexOf('_time');
  const valueIdx = header.indexOf('_value');
  const fieldIdx = header.indexOf('_field');
  const deviceIdx = header.indexOf('device_id');
  if (timeIdx < 0 || valueIdx < 0 || fieldIdx < 0 || deviceIdx < 0) return result;

  for (let i = 1; i < dataLines.length; i++) {
    const line = dataLines[i];
    if (line === dataLines[0]) continue;
    const cols = line.split(',');
    const time = Date.parse(cols[timeIdx]);
    const value = Number(cols[valueIdx]);
    const field = cols[fieldIdx];
    const device = cols[deviceIdx];
    if (!field || !device || Number.isNaN(time) || Number.isNaN(value)) continue;

    if (!result[field]) result[field] = {};
    if (!result[field][device]) result[field][device] = [];
    result[field][device].push({ time, value });
  }
  return result;
}
// ...以降、SVGでの折れ線グラフ描画とHTTPサーバーの実装が続きます
温度と湿度は単位が異なるので、1つのグラフに無理に詰め込まず、軸を分けて2つの折れ線グラフとして表示しています。
APIトークンの発行
edge/viewerがInfluxDBに書き込み・クエリするには、初期セットアップ時のusername/passwordとは別にAPIトークンが必要です。コードに直接貼り付けたくなかったので、デプロイ時にLambda (カスタムリソース) でAPIトークンを発行し、Secrets Managerに格納する構成にしました。
import {
  SecretsManagerClient,
  GetSecretValueCommand,
  PutSecretValueCommand,
} from '@aws-sdk/client-secrets-manager';

const secretsClient = new SecretsManagerClient({});

export const handler = async (event: CloudFormationCustomResourceEvent) => {
  if (event.RequestType === 'Delete') {
    return { PhysicalResourceId: event.PhysicalResourceId };
  }

  const { Endpoint, Username, PasswordSecretArn, Organization: OrgName, Bucket: BucketName, ApiTokenSecretArn } =
    event.ResourceProperties;

  const passwordResp = await secretsClient.send(
    new GetSecretValueCommand({ SecretId: PasswordSecretArn }),
  );
  const password = passwordResp.SecretString;

  const baseUrl = `https://${Endpoint}:8086`;

  // v2互換のsignin APIでセッションを開始する
  const signinResp = await fetch(`${baseUrl}/api/v2/signin`, {
    method: 'POST',
    headers: {
      Authorization: `Basic ${Buffer.from(`${Username}:${password}`).toString('base64')}`,
    },
  });
  const cookie = signinResp.headers.get('set-cookie');
  const sessionCookie = cookie!.split(';')[0];

  // organization名からorgIDを解決する
  const orgsResp = await fetch(`${baseUrl}/api/v2/orgs`, {
    headers: { Cookie: sessionCookie },
  });
  const orgsBody = (await orgsResp.json()) as { orgs?: { id: string; name: string }[] };
  const org = (orgsBody.orgs || []).find((o) => o.name === OrgName)!;

  // バケット名からbucket IDを解決する。resource.idを指定しないと、そのタイプの
  // 全リソース(このorganization配下の全バケット)が対象になってしまう
  const bucketsResp = await fetch(`${baseUrl}/api/v2/buckets?org=${encodeURIComponent(OrgName)}`, {
    headers: { Cookie: sessionCookie },
  });
  const bucketsBody = (await bucketsResp.json()) as { buckets?: { id: string; name: string }[] };
  const bucket = (bucketsBody.buckets || []).find((b) => b.name === BucketName)!;

  // 対象バケットへのread/write権限のみを持つトークンを発行する
  const authResp = await fetch(`${baseUrl}/api/v2/authorizations`, {
    method: 'POST',
    headers: { Cookie: sessionCookie, 'Content-Type': 'application/json' },
    body: JSON.stringify({
      status: 'active',
      description: 'timestream-influx-demo edge/viewer token',
      orgID: org.id,
      permissions: [
        { action: 'read', resource: { type: 'buckets', id: bucket.id, orgID: org.id } },
        { action: 'write', resource: { type: 'buckets', id: bucket.id, orgID: org.id } },
      ],
    }),
  });
  const authBody = (await authResp.json()) as { token?: string };

  await secretsClient.send(
    new PutSecretValueCommand({ SecretId: ApiTokenSecretArn, SecretString: authBody.token }),
  );

  return { PhysicalResourceId: `token-provisioning-${BucketName}` };
};
v2互換のsignin APIでセッションを開始し、organization名からorgIDを引いています。InfluxDB v2互換の認可APIはresource.idを省略するとそのリソースタイプ全体 (この場合はorganization配下の全バケット) が対象になってしまうため、バケット名からbucket IDも解決し、対象バケットのみに絞ったread/write権限のトークンを発行しています。
ECS Fargateで動かす
edge/viewerはどちらもECS Fargateで動かします。InfluxDBはprivateサブネットに置いたままなので、イメージ取得・ログ送信・Secrets Manager参照のためのInterfaceエンドポイント (ECR、CloudWatch Logs、Secrets Manager) もVPCに追加しました。viewerの集計結果はブラウザから見られるように、public ALB経由で公開しています。
const vpc = new ec2.Vpc(this, 'InfluxVpc', {
  maxAzs: 2,
  natGateways: 0,
  subnetConfiguration: [
    { name: 'influx-private', subnetType: ec2.SubnetType.PRIVATE_ISOLATED, cidrMask: 24 },
    { name: 'alb-public', subnetType: ec2.SubnetType.PUBLIC, cidrMask: 24 },
  ],
});

const interfaceEndpointSubnets = { subnetType: ec2.SubnetType.PRIVATE_ISOLATED };
vpc.addInterfaceEndpoint('EcrApiEndpoint', { service: ec2.InterfaceVpcEndpointAwsService.ECR, subnets: interfaceEndpointSubnets });
vpc.addInterfaceEndpoint('EcrDkrEndpoint', { service: ec2.InterfaceVpcEndpointAwsService.ECR_DOCKER, subnets: interfaceEndpointSubnets });
vpc.addInterfaceEndpoint('CloudWatchLogsEndpoint', { service: ec2.InterfaceVpcEndpointAwsService.CLOUDWATCH_LOGS, subnets: interfaceEndpointSubnets });
vpc.addInterfaceEndpoint('SecretsManagerEndpoint', { service: ec2.InterfaceVpcEndpointAwsService.SECRETS_MANAGER, subnets: interfaceEndpointSubnets });

// finch/DockerでビルドするMacのCPUアーキテクチャ(arm64)とタスクの実行アーキテクチャを合わせる
const runtimePlatform: ecs.RuntimePlatform = {
  cpuArchitecture: ecs.CpuArchitecture.ARM64,
  operatingSystemFamily: ecs.OperatingSystemFamily.LINUX,
};

const cluster = new ecs.Cluster(this, 'SampleAppCluster', { vpc });

const edgeTaskDefinition = new ecs.FargateTaskDefinition(this, 'EdgeTaskDefinition', { cpu: 256, memoryLimitMiB: 512, runtimePlatform });
edgeTaskDefinition.addContainer('EdgeContainer', {
  image: ecs.ContainerImage.fromAsset(path.join(__dirname, '../apps/edge')),
  logging: ecs.LogDrivers.awsLogs({ streamPrefix: 'edge' }),
  environment: { INFLUX_ENDPOINT: instance.attrEndpoint, INFLUX_BUCKET: 'demo', INFLUX_ORG: 'test', DEVICE_ID: 'edge-01' },
  secrets: { INFLUX_TOKEN: ecs.Secret.fromSecretsManager(apiTokenSecret) },
});

const viewerTaskDefinition = new ecs.FargateTaskDefinition(this, 'ViewerTaskDefinition', { cpu: 256, memoryLimitMiB: 512, runtimePlatform });
const viewerContainer = viewerTaskDefinition.addContainer('ViewerContainer', {
  image: ecs.ContainerImage.fromAsset(path.join(__dirname, '../apps/viewer')),
  logging: ecs.LogDrivers.awsLogs({ streamPrefix: 'viewer' }),
  environment: { INFLUX_ENDPOINT: instance.attrEndpoint, INFLUX_BUCKET: 'demo', INFLUX_ORG: 'test', PORT: '8080' },
  secrets: { INFLUX_TOKEN: ecs.Secret.fromSecretsManager(apiTokenSecret) },
});
viewerContainer.addPortMappings({ containerPort: 8080 });

const viewerService = new ecs.FargateService(this, 'ViewerService', {
  cluster,
  taskDefinition: viewerTaskDefinition,
  desiredCount: 1,
  vpcSubnets: { subnetType: ec2.SubnetType.PRIVATE_ISOLATED },
  securityGroups: [viewerSecurityGroup],
  assignPublicIp: false,
});

const viewerAlb = new elbv2.ApplicationLoadBalancer(this, 'ViewerAlb', {
  vpc,
  internetFacing: true,
  securityGroup: albSecurityGroup,
  vpcSubnets: { subnetType: ec2.SubnetType.PUBLIC },
});

const viewerListener = viewerAlb.addListener('ViewerListener', { port: 80, open: false });
viewerListener.addTargets('ViewerTarget', {
  port: 8080,
  protocol: elbv2.ApplicationProtocol.HTTP,
  targets: [viewerService],
  healthCheck: { path: '/health', interval: cdk.Duration.seconds(30) },
});

new cdk.CfnOutput(this, 'ViewerUrl', { value: `http://${viewerAlb.loadBalancerDnsName}` });
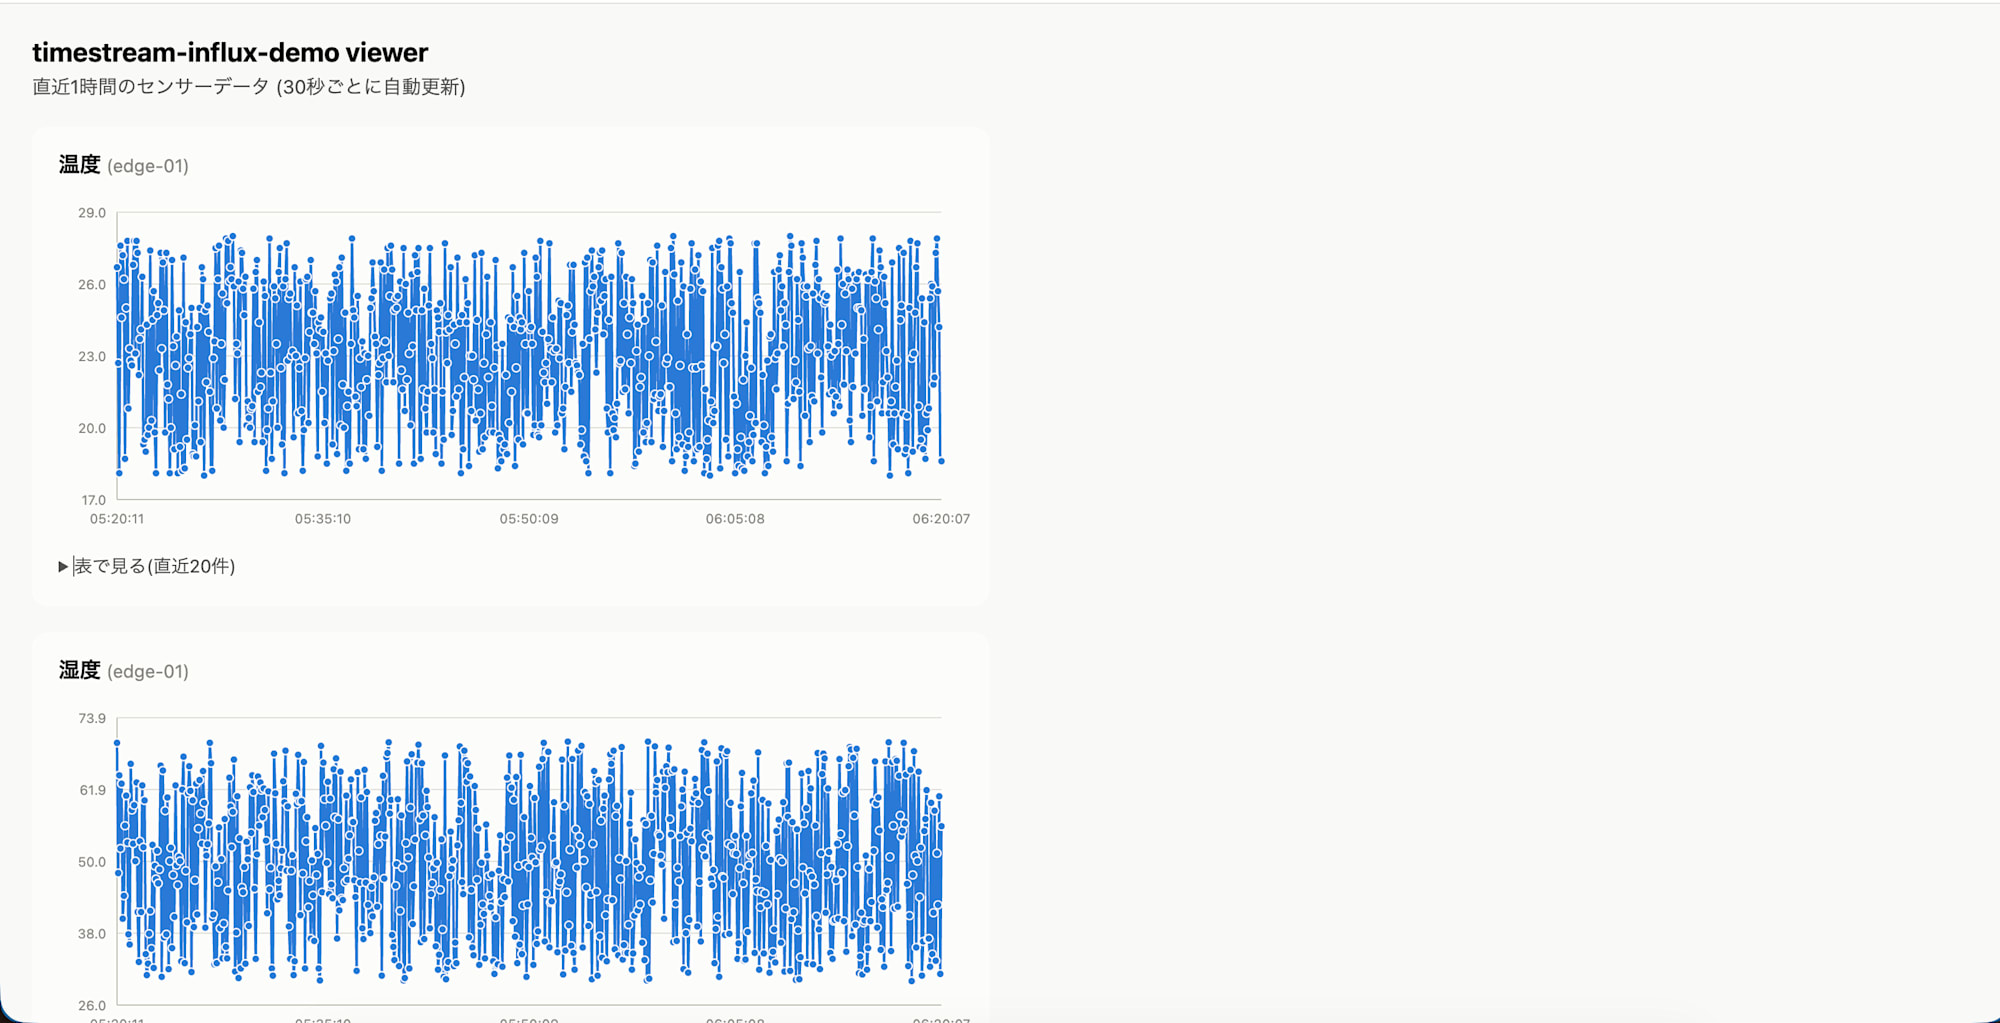
cdk deploy でedge/viewerとALBをデプロイすると、edgeが書き込んだセンサーデータがviewerのグラフにリアルタイムで反映されるようになりました。ALBのURLをブラウザで開くと、直近1時間の温度・湿度の推移がグラフで確認できます。
おわりに
- 今回の検証では何点か「ほんとはできるかもしれないが観測した上ではできなさそう」、という程度で記載している箇所があります。今後一次情報や更新などあれば随時加筆していきます。