
I tried running the Snowflake Openflow Connector for PostgreSQL on AWS
This page has been translated by machine translation. View original
I'm Kasahara from the Data Business Division.
This time, I tried using Snowflake's Openflow Connector for PostgreSQL to see if I could transfer data from RDS for PostgreSQL to Snowflake via CDC (Change Data Capture).
What is Openflow
Openflow is a data integration service provided by Snowflake, based on Apache NiFi. Managed connectors are available to connect various data sources with Snowflake, allowing you to build pipelines and ingest data through a graphical interface.
There are two deployment models for Openflow.
- Snowflake Deployment (SPCS)
- A fully managed deployment model that runs on the Snowflake side (Snowpark Container Services). No need to prepare AWS resources yourself, making it easy to get started.
- As of June 2026, Snowflake Deployment is available in all accounts in AWS or Azure commercial regions.
- Bring Your Own Cloud (BYOC)
- A deployment model that runs on EKS in your own AWS account. You can control the network and data location yourself.
- As of June 2026, Bring Your Own Cloud is available in all accounts in AWS commercial regions.
This time, I wanted to be able to access RDS on AWS and on-premises DBs as well, so I chose BYOC for verification.
The connector used is the PostgreSQL connector. Using CDC (Change Data Capture) method, it first takes a snapshot of existing data, then continuously ingests changes from the WAL (Write-Ahead Log).
Configuration for This Verification
The configuration for this verification is as follows.
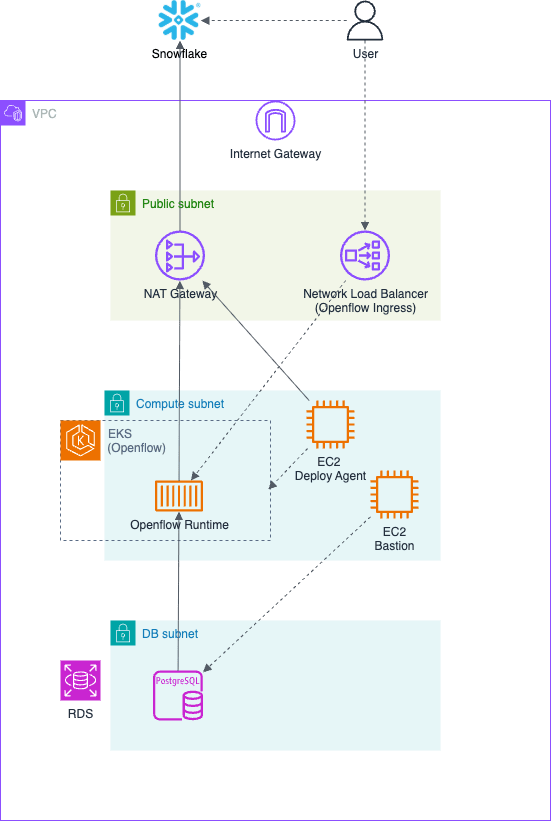
This is an environment where the Openflow runtime operates on AWS.
For the source DB, an RDS for PostgreSQL instance is launched with test data prepared in advance.
As the access route from the Openflow runtime to Snowflake, a NAT Gateway is configured in the public subnet.
Resources to Create in Advance
For this verification, the VPC environment, RDS instance, and bastion EC2 instance for accessing RDS are created in advance. The CloudFormation templates used in this verification are published in this blog for your reference.
Resources Created by Snowflake-Provided CFn
When deploying Openflow, a CloudFormation template is provided by Snowflake.
When you download and deploy this template, an EC2 instance that operates for Openflow deployment is launched. (In this blog, it will be referred to as the "deploy agent EC2".)
Once the deploy agent EC2 starts up, EKS and NLB are built by the script embedded in UserData.
Prerequisites
To build this environment, the following conditions and environment were prepared.
- Snowflake
- An account with ORGADMIN (terms of service accepted) / ACCOUNTADMIN available
- Must be running on AWS. This verification was done in the Tokyo region.
- AWS
- Administrator privileges for CloudFormation/VPC/EC2/EKS/IAM/RDS
- Aligned with the Snowflake region. Tokyo region in this case.
- Local PC
- AWS CLI /
session-manager-plugin/psql - Used to submit queries to PostgreSQL via the bastion EC2.
- AWS CLI /
Setup Steps
1. Network Environment
BYOC requires private subnets for EKS and public subnets for NLB/NAT.
Set the tag kubernetes.io/role/elb=1 on the public subnets. This is for automatic discovery when building the NLB for EKS.
Also prepare a self-referencing security group (shared by deploy agent EC2 / EKS / EC2 Instance Connect Endpoint).
Network environment setup CFn template: 01-network.yaml
AWSTemplateFormatVersion: "2010-09-09"

Parameters:
  ProjectName:
    Type: String
    Default: openflow-pg
    Description: Prefix for resource names and tags

  VpcCidr:
    Type: String
    Default: 10.0.0.0/16

  PublicSubnet1Cidr:
    Type: String
    Default: 10.0.101.0/24
    Description: Public subnet for NLB / NAT (AZ #1)

  PublicSubnet2Cidr:
    Type: String
    Default: 10.0.102.0/24
    Description: Public subnet for NLB (AZ #2)

  ComputeSubnet1Cidr:
    Type: String
    Default: 10.0.1.0/24
    Description: Private subnet for EKS (AZ #1)

  ComputeSubnet2Cidr:
    Type: String
    Default: 10.0.2.0/24
    Description: Private subnet for EKS (AZ #2)

  DbSubnet1Cidr:
    Type: String
    Default: 10.0.3.0/24
    Description: DB subnet for RDS (AZ #1)

  DbSubnet2Cidr:
    Type: String
    Default: 10.0.4.0/24
    Description: DB subnet for RDS (AZ #2)

Resources:
  Vpc:
    Type: AWS::EC2::VPC
    Properties:
      CidrBlock: !Ref VpcCidr
      EnableDnsSupport: true
      EnableDnsHostnames: true
      Tags:
        - Key: Name
          Value: !Sub "${ProjectName}-vpc"

  InternetGateway:
    Type: AWS::EC2::InternetGateway
    Properties:
      Tags:
        - Key: Name
          Value: !Sub "${ProjectName}-igw"

  VpcGatewayAttachment:
    Type: AWS::EC2::VPCGatewayAttachment
    Properties:
      VpcId: !Ref Vpc
      InternetGatewayId: !Ref InternetGateway

  PublicSubnet1:
    Type: AWS::EC2::Subnet
    Properties:
      VpcId: !Ref Vpc
      CidrBlock: !Ref PublicSubnet1Cidr
      AvailabilityZone: !Select [0, !GetAZs ""]
      MapPublicIpOnLaunch: true
      Tags:
        - Key: Name
          Value: !Sub "${ProjectName}-public-1"
        # Tag for AWS Load Balancer Controller to discover subnets for creating external NLB
        - Key: kubernetes.io/role/elb
          Value: "1"

  PublicSubnet2:
    Type: AWS::EC2::Subnet
    Properties:
      VpcId: !Ref Vpc
      CidrBlock: !Ref PublicSubnet2Cidr
      AvailabilityZone: !Select [1, !GetAZs ""]
      MapPublicIpOnLaunch: true
      Tags:
        - Key: Name
          Value: !Sub "${ProjectName}-public-2"
        - Key: kubernetes.io/role/elb
          Value: "1"

  ComputeSubnet1:
    Type: AWS::EC2::Subnet
    Properties:
      VpcId: !Ref Vpc
      CidrBlock: !Ref ComputeSubnet1Cidr
      AvailabilityZone: !Select [0, !GetAZs ""]
      MapPublicIpOnLaunch: false
      Tags:
        - Key: Name
          Value: !Sub "${ProjectName}-compute-1"
        # Discovery tag for internal LB subnets
        - Key: kubernetes.io/role/internal-elb
          Value: "1"

  ComputeSubnet2:
    Type: AWS::EC2::Subnet
    Properties:
      VpcId: !Ref Vpc
      CidrBlock: !Ref ComputeSubnet2Cidr
      AvailabilityZone: !Select [1, !GetAZs ""]
      MapPublicIpOnLaunch: false
      Tags:
        - Key: Name
          Value: !Sub "${ProjectName}-compute-2"
        - Key: kubernetes.io/role/internal-elb
          Value: "1"

  DbSubnet1:
    Type: AWS::EC2::Subnet
    Properties:
      VpcId: !Ref Vpc
      CidrBlock: !Ref DbSubnet1Cidr
      AvailabilityZone: !Select [0, !GetAZs ""]
      MapPublicIpOnLaunch: false
      Tags:
        - Key: Name
          Value: !Sub "${ProjectName}-db-1"

  DbSubnet2:
    Type: AWS::EC2::Subnet
    Properties:
      VpcId: !Ref Vpc
      CidrBlock: !Ref DbSubnet2Cidr
      AvailabilityZone: !Select [1, !GetAZs ""]
      MapPublicIpOnLaunch: false
      Tags:
        - Key: Name
          Value: !Sub "${ProjectName}-db-2"

  NatEip:
    Type: AWS::EC2::EIP
    DependsOn: VpcGatewayAttachment
    Properties:
      Domain: vpc
      Tags:
        - Key: Name
          Value: !Sub "${ProjectName}-nat-eip"

  NatGateway:
    Type: AWS::EC2::NatGateway
    Properties:
      AllocationId: !GetAtt NatEip.AllocationId
      SubnetId: !Ref PublicSubnet1
      Tags:
        - Key: Name
          Value: !Sub "${ProjectName}-nat"

  PublicRouteTable:
    Type: AWS::EC2::RouteTable
    Properties:
      VpcId: !Ref Vpc
      Tags:
        - Key: Name
          Value: !Sub "${ProjectName}-public-rt"

  PublicDefaultRoute:
    Type: AWS::EC2::Route
    DependsOn: VpcGatewayAttachment
    Properties:
      RouteTableId: !Ref PublicRouteTable
      DestinationCidrBlock: 0.0.0.0/0
      GatewayId: !Ref InternetGateway

  PublicSubnet1RouteAssoc:
    Type: AWS::EC2::SubnetRouteTableAssociation
    Properties:
      RouteTableId: !Ref PublicRouteTable
      SubnetId: !Ref PublicSubnet1

  PublicSubnet2RouteAssoc:
    Type: AWS::EC2::SubnetRouteTableAssociation
    Properties:
      RouteTableId: !Ref PublicRouteTable
      SubnetId: !Ref PublicSubnet2

  PrivateRouteTable:
    Type: AWS::EC2::RouteTable
    Properties:
      VpcId: !Ref Vpc
      Tags:
        - Key: Name
          Value: !Sub "${ProjectName}-private-rt"

  PrivateDefaultRoute:
    Type: AWS::EC2::Route
    Properties:
      RouteTableId: !Ref PrivateRouteTable
      DestinationCidrBlock: 0.0.0.0/0
      NatGatewayId: !Ref NatGateway

  ComputeSubnet1RouteAssoc:
    Type: AWS::EC2::SubnetRouteTableAssociation
    Properties:
      RouteTableId: !Ref PrivateRouteTable
      SubnetId: !Ref ComputeSubnet1

  ComputeSubnet2RouteAssoc:
    Type: AWS::EC2::SubnetRouteTableAssociation
    Properties:
      RouteTableId: !Ref PrivateRouteTable
      SubnetId: !Ref ComputeSubnet2

  DbRouteTable:
    Type: AWS::EC2::RouteTable
    Properties:
      VpcId: !Ref Vpc
      Tags:
        - Key: Name
          Value: !Sub "${ProjectName}-db-rt"

  DbSubnet1RouteAssoc:
    Type: AWS::EC2::SubnetRouteTableAssociation
    Properties:
      RouteTableId: !Ref DbRouteTable
      SubnetId: !Ref DbSubnet1

  DbSubnet2RouteAssoc:
    Type: AWS::EC2::SubnetRouteTableAssociation
    Properties:
      RouteTableId: !Ref DbRouteTable
      SubnetId: !Ref DbSubnet2

  OpenflowPrivateSecurityGroup:
    Type: AWS::EC2::SecurityGroup
    Properties:
      GroupDescription: !Sub "${ProjectName} Openflow BYOC private SG (self ingress, all egress)"
      VpcId: !Ref Vpc
      SecurityGroupEgress:
        - IpProtocol: "-1"
          CidrIp: 0.0.0.0/0
          Description: allow all outbound
      Tags:
        - Key: Name
          Value: !Sub "${ProjectName}-openflow-private-sg"

  OpenflowPrivateSgSelfIngress:
    Type: AWS::EC2::SecurityGroupIngress
    Properties:
      GroupId: !Ref OpenflowPrivateSecurityGroup
      IpProtocol: "-1"
      SourceSecurityGroupId: !Ref OpenflowPrivateSecurityGroup
      Description: allow all inbound from itself

Outputs:
  VpcId:
    Description: VPC to select in the Snowflake BYOC template (BYO-VPC)
    Value: !Ref Vpc
    Export:
      Name: !Sub "${ProjectName}-VpcId"

  VpcCidr:
    Value: !Ref VpcCidr
    Export:
      Name: !Sub "${ProjectName}-VpcCidr"

  ComputeSubnetIds:
    Description: Private subnets for EKS to select in the Snowflake BYOC template (2 subnets)
    Value: !Sub "${ComputeSubnet1},${ComputeSubnet2}"
    Export:
      Name: !Sub "${ProjectName}-ComputeSubnetIds"

  ComputeSubnet1Id:
    Value: !Ref ComputeSubnet1
  ComputeSubnet2Id:
    Value: !Ref ComputeSubnet2

  PublicSubnetIds:
    Description: Public subnets for NLB ingress (2 subnets)
    Value: !Sub "${PublicSubnet1},${PublicSubnet2}"
    Export:
      Name: !Sub "${ProjectName}-PublicSubnetIds"

  DbSubnetIds:
    Description: DB subnets to pass to the RDS DB Subnet Group (2 subnets)
    Value: !Sub "${DbSubnet1},${DbSubnet2}"
    Export:
      Name: !Sub "${ProjectName}-DbSubnetIds"

  ComputeSubnetCidrs:
    Description: Compute subnet CIDRs to use as allowed source in the RDS security group
    Value: !Sub "${ComputeSubnet1Cidr},${ComputeSubnet2Cidr}"
    Export:
      Name: !Sub "${ProjectName}-ComputeSubnetCidrs"

  OpenflowPrivateSecurityGroupId:
    Description: SG ID to pass to PrivateSecurityGroup in the Snowflake BYOC template
    Value: !Ref OpenflowPrivateSecurityGroup
    Export:
      Name: !Sub "${ProjectName}-OpenflowPrivateSgId"
2. Database (RDS for PostgreSQL) Environment
Build the DB that will serve as the data source for this verification. A single RDS for PostgreSQL instance is launched in the DB Subnet.
The key configuration points are as follows.
- rds.logical_replication = 1
- This sets wal_level=logical.
- Applied from creation for newly created instances, but confirm with
SHOW wal_level;just to be safe.
- PubliclyAccessible = false
- Only private connections are allowed from the Openflow runtime inside EKS (same VPC), with port 5432 only allowed from the VPC CIDR, so public access is disabled.
DB environment setup CFn template: 02-rds-postgres.yaml
AWSTemplateFormatVersion: "2010-09-09"

Parameters:
  ProjectName:
    Type: String
    Default: openflow-pg
    Description: Same prefix as 01-network.yaml (used for Export references)

  DBName:
    Type: String
    Default: appdb
    Description: Initial database name (DB to connect the connector to)

  MasterUsername:
    Type: String
    Default: pgadmin
    Description: RDS master username

  ParameterGroupFamily:
    Type: String
    Default: postgres16
    Description: DB parameter group family (must match EngineVersion)

  EngineVersion:
    Type: String
    Default: "16.13"
    Description: >-
      PostgreSQL engine version (must match ParameterGroupFamily)

  DBInstanceClass:
    Type: String
    Default: db.t3.small
    Description: Small instance class for sample purposes

  AllocatedStorage:
    Type: Number
    Default: 20
    Description: Storage (GB)

Resources:
  # Secrets Manager for DB credentials
  DBSecret:
    Type: AWS::SecretsManager::Secret
    # Delete secret when stack is deleted for sample environment
    DeletionPolicy: Delete
    UpdateReplacePolicy: Delete
    Properties:
      Name: !Sub "${ProjectName}/rds/master"
      Description: RDS for PostgreSQL master credentials
      GenerateSecretString:
        SecretStringTemplate: !Sub '{"username":"${MasterUsername}"}'
        GenerateStringKey: password
        PasswordLength: 24
        # Exclude characters that tend to cause issues in JDBC URLs / shell
        ExcludeCharacters: '"@/\ ''`'
      Tags:
        - Key: Name
          Value: !Sub "${ProjectName}-rds-master-secret"

  DBSubnetGroup:
    Type: AWS::RDS::DBSubnetGroup
    Properties:
      DBSubnetGroupDescription: !Sub "${ProjectName} DB subnet group"
      SubnetIds: !Split
        - ","
        - !ImportValue
          "Fn::Sub": "${ProjectName}-DbSubnetIds"
      Tags:
        - Key: Name
          Value: !Sub "${ProjectName}-db-subnet-group"

  DBSecurityGroup:
    Type: AWS::EC2::SecurityGroup
    Properties:
      GroupDescription: !Sub "${ProjectName} RDS PostgreSQL access (VPC internal only)"
      VpcId: !ImportValue
        "Fn::Sub": "${ProjectName}-VpcId"
      SecurityGroupIngress:
        # Allow access from VPC CIDR in this verification
        - IpProtocol: tcp
          FromPort: 5432
          ToPort: 5432
          CidrIp: !ImportValue
            "Fn::Sub": "${ProjectName}-VpcCidr"
          Description: PostgreSQL from within VPC (EKS/Openflow runtime)
      Tags:
        - Key: Name
          Value: !Sub "${ProjectName}-rds-sg"

  DBParameterGroup:
    Type: AWS::RDS::DBParameterGroup
    Properties:
      Description: !Sub "${ProjectName} PostgreSQL params with logical replication"
      Family: !Ref ParameterGroupFamily
      Parameters:
        # RDS-specific parameter to enable wal_level=logical
        rds.logical_replication: "1"
        # At least 1 slot / 2 WAL senders per connector
        max_replication_slots: "10"
        max_wal_senders: "10"
      Tags:
        - Key: Name
          Value: !Sub "${ProjectName}-pg-params"

  DBInstance:
    Type: AWS::RDS::DBInstance
    DeletionPolicy: Delete
    UpdateReplacePolicy: Delete
    Properties:
      DBInstanceIdentifier: !Sub "${ProjectName}-postgres"
      Engine: postgres
      EngineVersion: !Ref EngineVersion
      DBName: !Ref DBName
      DBInstanceClass: !Ref DBInstanceClass
      AllocatedStorage: !Ref AllocatedStorage
      StorageType: gp3
      StorageEncrypted: true
      MultiAZ: false
      PubliclyAccessible: false
      DeletionProtection: false
      BackupRetentionPeriod: 1
      AutoMinorVersionUpgrade: true
      MasterUsername: !Ref MasterUsername
      MasterUserPassword: !Sub "{{resolve:secretsmanager:${DBSecret}:SecretString:password}}"
      DBParameterGroupName: !Ref DBParameterGroup
      DBSubnetGroupName: !Ref DBSubnetGroup
      VPCSecurityGroups:
        - !Ref DBSecurityGroup
      Tags:
        - Key: Name
          Value: !Sub "${ProjectName}-postgres"

Outputs:
  DBEndpointAddress:
    Description: RDS endpoint (used in the connector's JDBC URL)
    Value: !GetAtt DBInstance.Endpoint.Address
    Export:
      Name: !Sub "${ProjectName}-RdsEndpoint"

  DBEndpointPort:
    Value: !GetAtt DBInstance.Endpoint.Port

  DBName:
    Value: !Ref DBName

  JdbcUrl:
    Description: JDBC URL that can be set directly in the connector
    Value: !Sub
      - "jdbc:postgresql://${Addr}:${Port}/${Db}"
      - Addr: !GetAtt DBInstance.Endpoint.Address
        Port: !GetAtt DBInstance.Endpoint.Port
        Db: !Ref DBName

  MasterSecretArn:
    Description: Secrets Manager ARN for master credentials
    Value: !Ref DBSecret

  MasterUsername:
    Value: !Ref MasterUsername
3. Bastion EC2 (for SQL Execution)
To execute SQL against the RDS for PostgreSQL instance, I plan to run queries from the local PC using port forwarding via Systems Manager Session Manager. An EC2 instance serving as the bastion for this purpose was prepared.
It is placed in the Compute Subnet.
Also, postgresql is installed via UserData as a precaution so that the psql command is available.
Bastion EC2 environment setup CFn template 03-bastion.yaml
AWSTemplateFormatVersion: "2010-09-09"

Parameters:
  ProjectName:
    Type: String
    Default: openflow-pg
    Description: Same prefix as 01-network.yaml (used for Export references)

  InstanceType:
    Type: String
    Default: t3.micro

  LatestAmiId:
    Type: AWS::SSM::Parameter::Value<AWS::EC2::Image::Id>
    Default: /aws/service/ami-amazon-linux-latest/al2023-ami-kernel-default-x86_64
    Description: Automatically resolve the latest Amazon Linux 2023 AMI from SSM public parameters

Resources:
  BastionRole:
    Type: AWS::IAM::Role
    Properties:
      RoleName: !Sub "${ProjectName}-bastion-role"
      AssumeRolePolicyDocument:
        Version: "2012-10-17"
        Statement:
          - Effect: Allow
            Principal:
              Service: ec2.amazonaws.com
            Action: sts:AssumeRole
      ManagedPolicyArns:
        - arn:aws:iam::aws:policy/AmazonSSMManagedInstanceCore
      Tags:
        - Key: Name
          Value: !Sub "${ProjectName}-bastion-role"

  BastionInstanceProfile:
    Type: AWS::IAM::InstanceProfile
    Properties:
      InstanceProfileName: !Sub "${ProjectName}-bastion-profile"
      Roles:
        - !Ref BastionRole

  BastionSecurityGroup:
    Type: AWS::EC2::SecurityGroup
    Properties:
      GroupDescription: !Sub "${ProjectName} bastion (SSM only, no inbound)"
      VpcId: !ImportValue
        "Fn::Sub": "${ProjectName}-VpcId"
      SecurityGroupEgress:
        - IpProtocol: "-1"
          CidrIp: 0.0.0.0/0
          Description: allow all outbound
      Tags:
        - Key: Name
          Value: !Sub "${ProjectName}-bastion-sg"

  BastionInstance:
    Type: AWS::EC2::Instance
    Properties:
      InstanceType: !Ref InstanceType
      ImageId: !Ref LatestAmiId
      IamInstanceProfile: !Ref BastionInstanceProfile
      SubnetId: !Select
        - 0
        - !Split
          - ","
          - !ImportValue
            "Fn::Sub": "${ProjectName}-ComputeSubnetIds"
      SecurityGroupIds:
        - !Ref BastionSecurityGroup
      UserData:
        Fn::Base64: |
          #!/bin/bash
          # Install psql client (Amazon Linux 2023)
          dnf install -y postgresql16 || dnf install -y postgresql15
      Tags:
        - Key: Name
          Value: !Sub "${ProjectName}-bastion"

Outputs:
  BastionInstanceId:
    Description: Bastion instance ID
    Value: !Ref BastionInstance

  SsmStartSessionCommand:
    Description: SSM session start command
    Value: !Sub "aws ssm start-session --target ${BastionInstance} --region ${AWS::Region}"
4. PostgreSQL Configuration
First, on the PostgreSQL side, we will create a database, schema, and tables as sample data sources.
This time, we will use SSM Session Manager port forwarding to run the psql command from a local PC. First, run the following command in a terminal.
export BASTION_ID=<Bastion EC2 instance ID>
export RDS_ENDPOINT=<DB endpoint>

aws ssm start-session --region "ap-northeast-1" --target "$BASTION_ID" \
  --document-name AWS-StartPortForwardingSessionToRemoteHost \
  --parameters "{\"host\":[\"$RDS_ENDPOINT\"],\"portNumber\":[\"5432\"],\"localPortNumber\":[\"55432\"]}"
Without closing the terminal running the above command, open a new terminal and run the following command.
psql "host=localhost port=55432 dbname=appdb user=pgadmin sslmode=require" \
  -f postgres/01-test-data.sql
The -f option specifies a SQL file to execute.
The contents of the SQL file to be executed are as follows.
Running this SQL file inserts test data.
Test data insertion SQL 01-test-data.sql
-- Schema
CREATE SCHEMA IF NOT EXISTS app;

-- Tables
CREATE TABLE app.customers (
    customer_id  SERIAL PRIMARY KEY,
    name         VARCHAR(100) NOT NULL,
    email        VARCHAR(200) NOT NULL,
    created_at   TIMESTAMP    NOT NULL DEFAULT now()
);
CREATE TABLE app.products (
    product_id   SERIAL PRIMARY KEY,
    name         VARCHAR(100)   NOT NULL,
    price        NUMERIC(10,2)  NOT NULL,
    in_stock     BOOLEAN        NOT NULL DEFAULT true
);
CREATE TABLE app.orders (
    order_id     SERIAL PRIMARY KEY,
    customer_id  INTEGER      NOT NULL REFERENCES app.customers(customer_id),
    product_id   INTEGER      NOT NULL REFERENCES app.products(product_id),
    quantity     INTEGER      NOT NULL DEFAULT 1,
    status       VARCHAR(20)  NOT NULL DEFAULT 'pending',
    order_date   TIMESTAMP    NOT NULL DEFAULT now()
);

-- Initial data
INSERT INTO app.customers (name, email) VALUES
    ('Taro Yamada',   'taro@example.com'),
    ('Hanako Suzuki', 'hanako@example.com'),
    ('Jiro Tanaka',   'jiro@example.com');

INSERT INTO app.products (name, price, in_stock) VALUES
    ('Keyboard', 3980.00, true),
    ('Mouse',    1980.00, true),
    ('Monitor',  29800.00, false);

INSERT INTO app.orders (customer_id, product_id, quantity, status) VALUES
    (1, 1, 2, 'confirmed'),
    (2, 2, 1, 'pending'),
    (3, 3, 1, 'shipped');

-- check data
SELECT 'customers' AS t, count(*) FROM app.customers
UNION ALL SELECT 'products', count(*) FROM app.products
UNION ALL SELECT 'orders',   count(*) FROM app.orders;
Next, we will verify the logical replication settings required for CDC.
psql "host=localhost port=55432 dbname=appdb user=pgadmin sslmode=require" \
  -f postgres/02-logical-reprecation-setup.sql
The contents of the SQL file to be executed are as follows.
The following actions are performed:
- Verify logical replication settings
- Run
SHOW wal_level;and confirm that the value returned islogical- If it is not
logical, change therds.logical_replicationparameter in the DB parameter group to1and restart the DB instance.
- If it is not
- Run
- Create a user for the Openflow connector and grant permissions
- Replace the
<CONNECTOR_PASSWORD>value in the SQL query as appropriate before running.
- Replace the
- Create a Publication
Logical replication settings verification, publication setup 02-logical-replication-setup.sql
-- Check logical replication
SHOW wal_level;          -- Expected value: logical
SHOW max_replication_slots;
SHOW max_wal_senders;

-- user for openflow connector
CREATE USER openflow_user WITH PASSWORD '<CONNECTOR_PASSWORD>';

-- In RDS, the REPLICATION attribute cannot be granted directly to non-superusers,
-- so instead grant the rds_replication role to allow logical replication.
GRANT rds_replication TO openflow_user;

-- Grant for Snapshot / CDC
-- Grant read permissions to the database, schema, etc. where test data was created as the data source
GRANT CONNECT ON DATABASE appdb TO openflow_user;
GRANT USAGE   ON SCHEMA  app    TO openflow_user;
GRANT SELECT  ON ALL TABLES IN SCHEMA app TO openflow_user;
ALTER DEFAULT PRIVILEGES IN SCHEMA app GRANT SELECT ON TABLES TO openflow_user;

-- PUBLICATION
CREATE PUBLICATION openflow_pub
  FOR TABLE app.customers, app.products, app.orders
  WITH (publish_via_partition_root = true);

-- Check
SELECT pubname, puballtables FROM pg_publication WHERE pubname = 'openflow_pub';
SELECT schemaname, tablename FROM pg_publication_tables WHERE pubname = 'openflow_pub';
5. Snowflake Configuration
Next, we move on to the Snowflake configuration.
First, accept the terms of service.
Log in to Snowflake with a user that has ORGADMIN privileges,
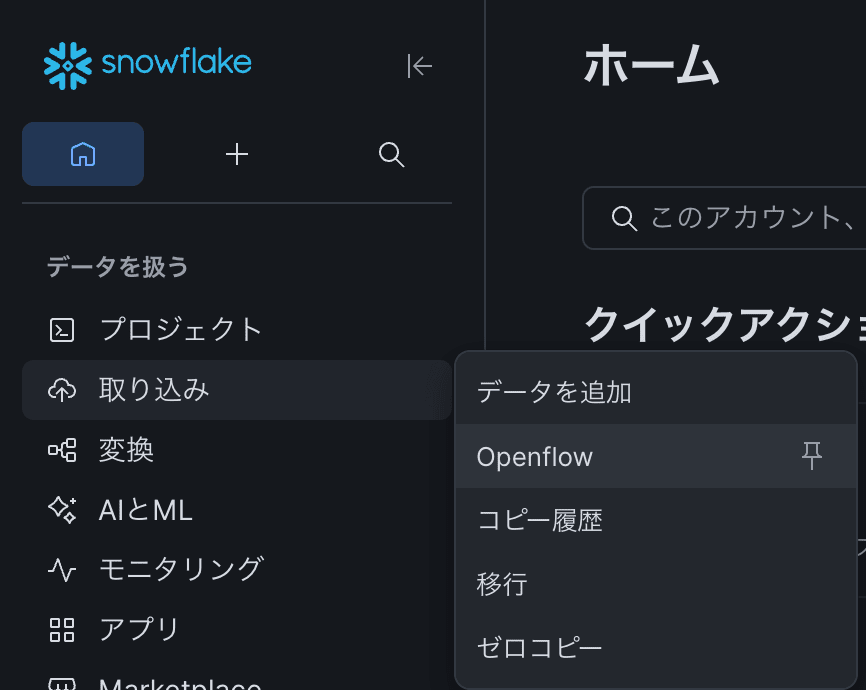
and click "Data" > "Openflow" from the left menu in Snowsight.
On the first visit, the Openflow terms of service will be displayed — accept them.
Next, execute SQL queries from Snowsight.
Note: Replace <your_user> in the query with your actual Snowflake working username.
Enable Openflow 03-openflow-deployment-setup.sql
-- Create Openflow Admin Role
USE ROLE ACCOUNTADMIN;

CREATE ROLE IF NOT EXISTS OPENFLOW_ADMIN
  COMMENT = 'Role to manage Openflow deployment/runtime';

-- Grant to your working user
GRANT ROLE OPENFLOW_ADMIN TO USER <your_user>;

-- Grant for Openflow
GRANT CREATE OPENFLOW DATA PLANE INTEGRATION ON ACCOUNT TO ROLE OPENFLOW_ADMIN;
GRANT CREATE OPENFLOW RUNTIME INTEGRATION   ON ACCOUNT TO ROLE OPENFLOW_ADMIN;

-- OAuth login to the runtime/connector uses the DEFAULT_ROLE of the working user.
-- Even if the working user's role is changed to `OPENFLOW_ADMIN`,
-- if DEFAULT_ROLE is ACCOUNTADMIN / ORGADMIN / GLOBALORGADMIN / SECURITYADMIN,
-- access to Openflow will be denied
-- (the error `The role requested has been explicitly blocked ...` is returned)
-- Therefore, change DEFAULT_ROLE to the non-privileged OPENFLOW_ADMIN and set secondary roles to ALL.
-- After making the change, sign out and sign back in before operating Openflow.
ALTER USER <your_user> SET DEFAULT_ROLE = OPENFLOW_ADMIN;
ALTER USER <your_user> SET DEFAULT_SECONDARY_ROLES = ('ALL');

-- Create Event Table
-- Table to record logs/metrics for the Openflow runtime
CREATE DATABASE IF NOT EXISTS OPENFLOW;
CREATE SCHEMA   IF NOT EXISTS OPENFLOW.TELEMETRY;
CREATE EVENT TABLE IF NOT EXISTS OPENFLOW.TELEMETRY.EVENTS;

GRANT USAGE ON DATABASE OPENFLOW              TO ROLE OPENFLOW_ADMIN;
GRANT USAGE ON SCHEMA   OPENFLOW.TELEMETRY    TO ROLE OPENFLOW_ADMIN;
6. Openflow Deployment Configuration (Agent EC2/EKS/NLB)
Next, configure the Openflow deployment from Snowsight.
Switch your working user to the OPENFLOW_ADMIN role before proceeding.
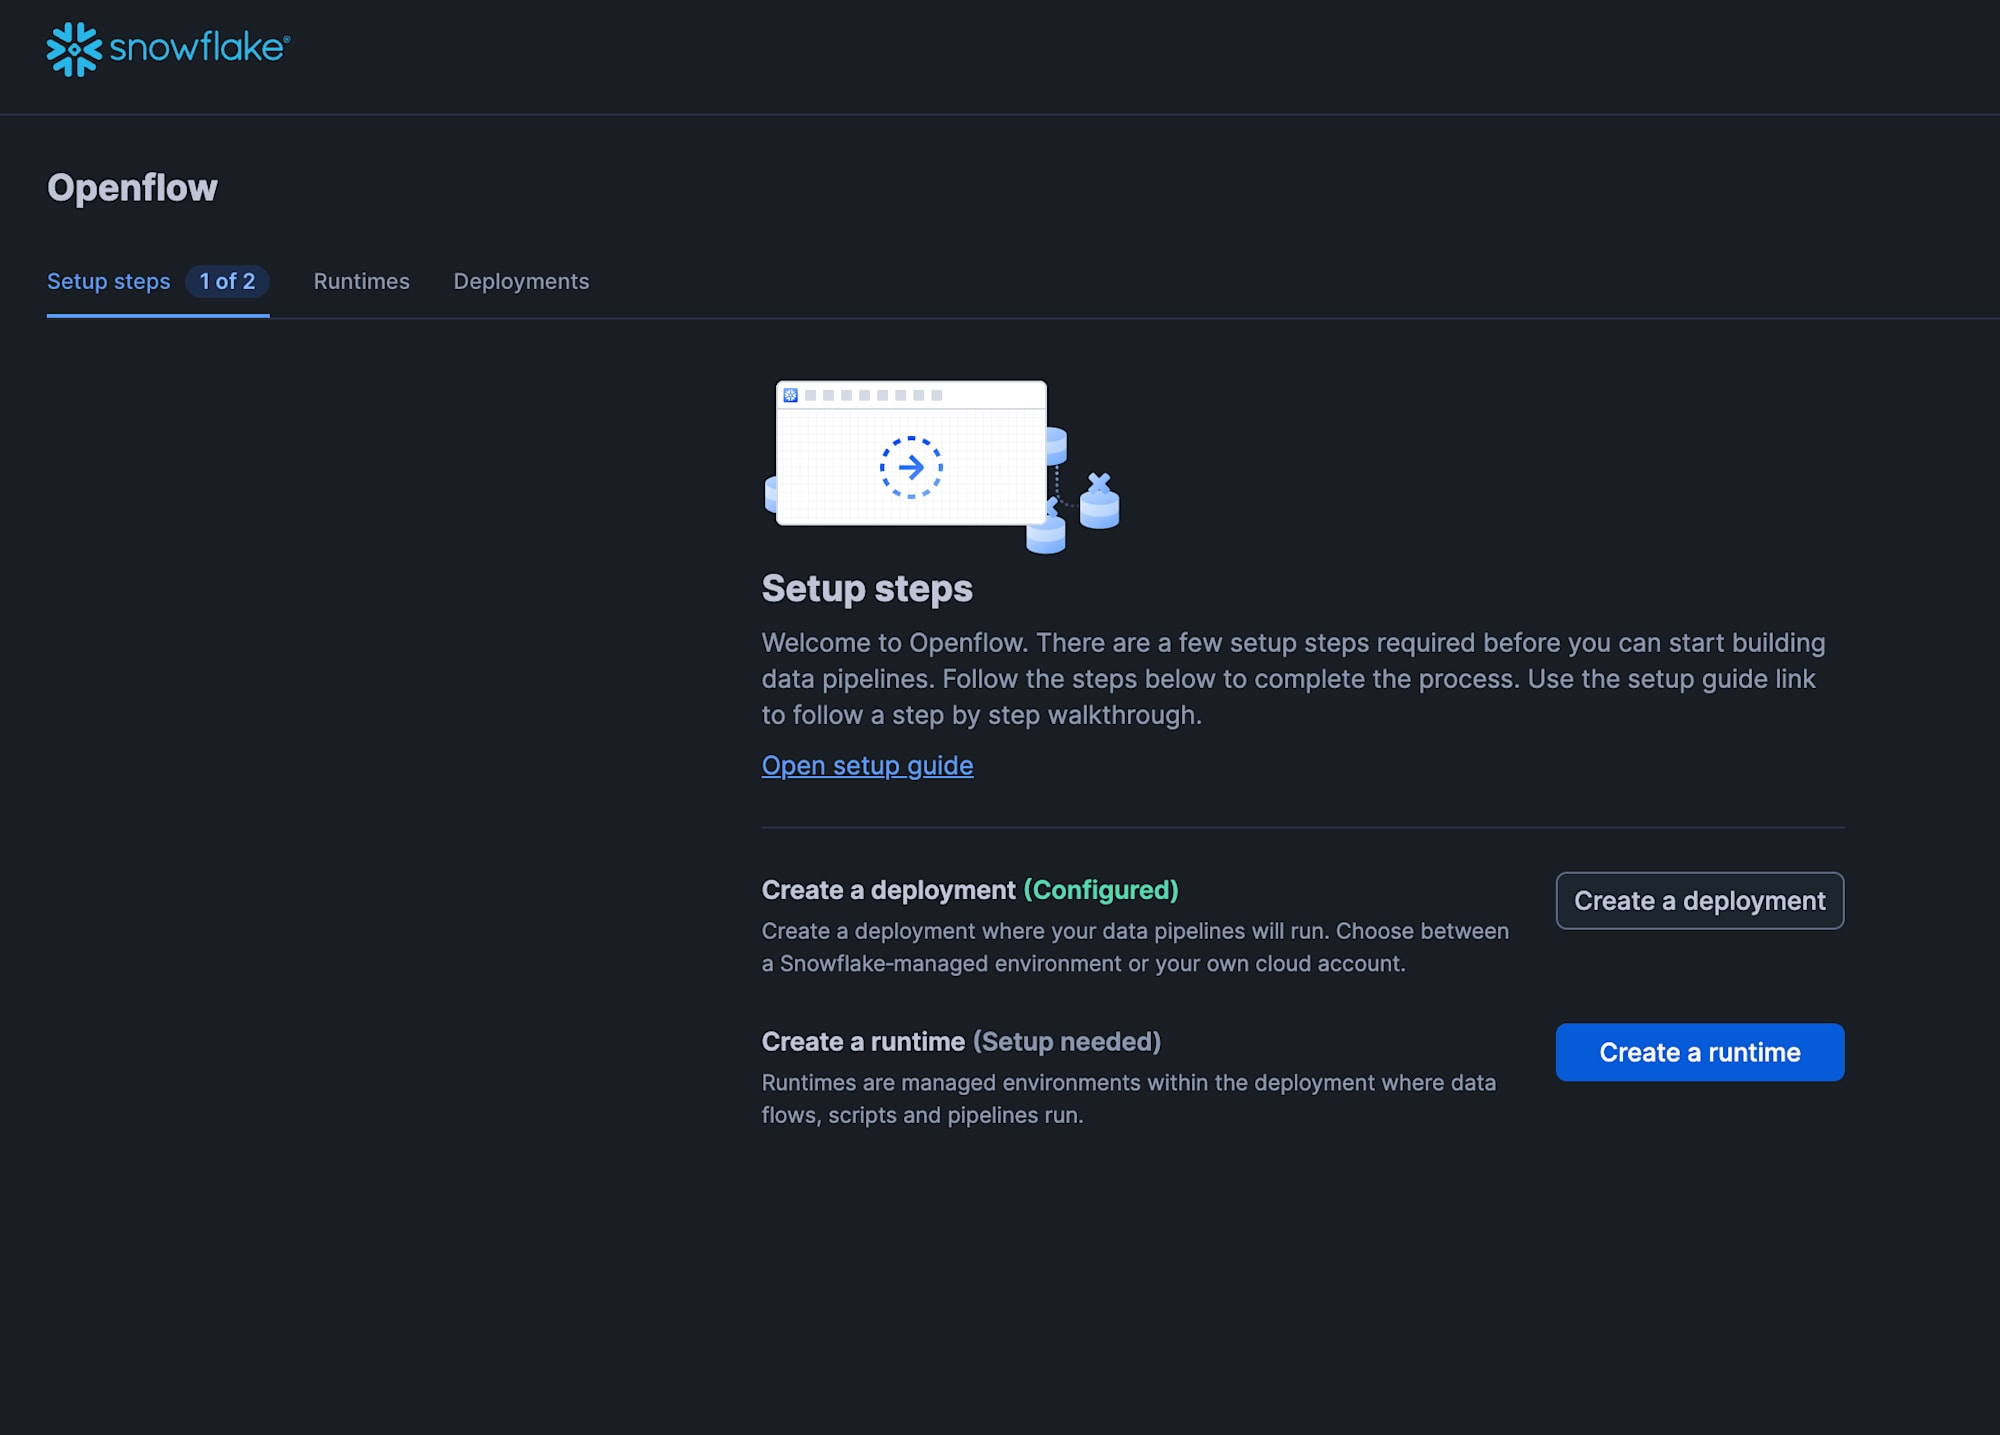
Click "Data" > "Openflow" from the left menu in Snowsight, then click "Launch Openflow".

When the Openflow screen is displayed, click "Create a deployment".
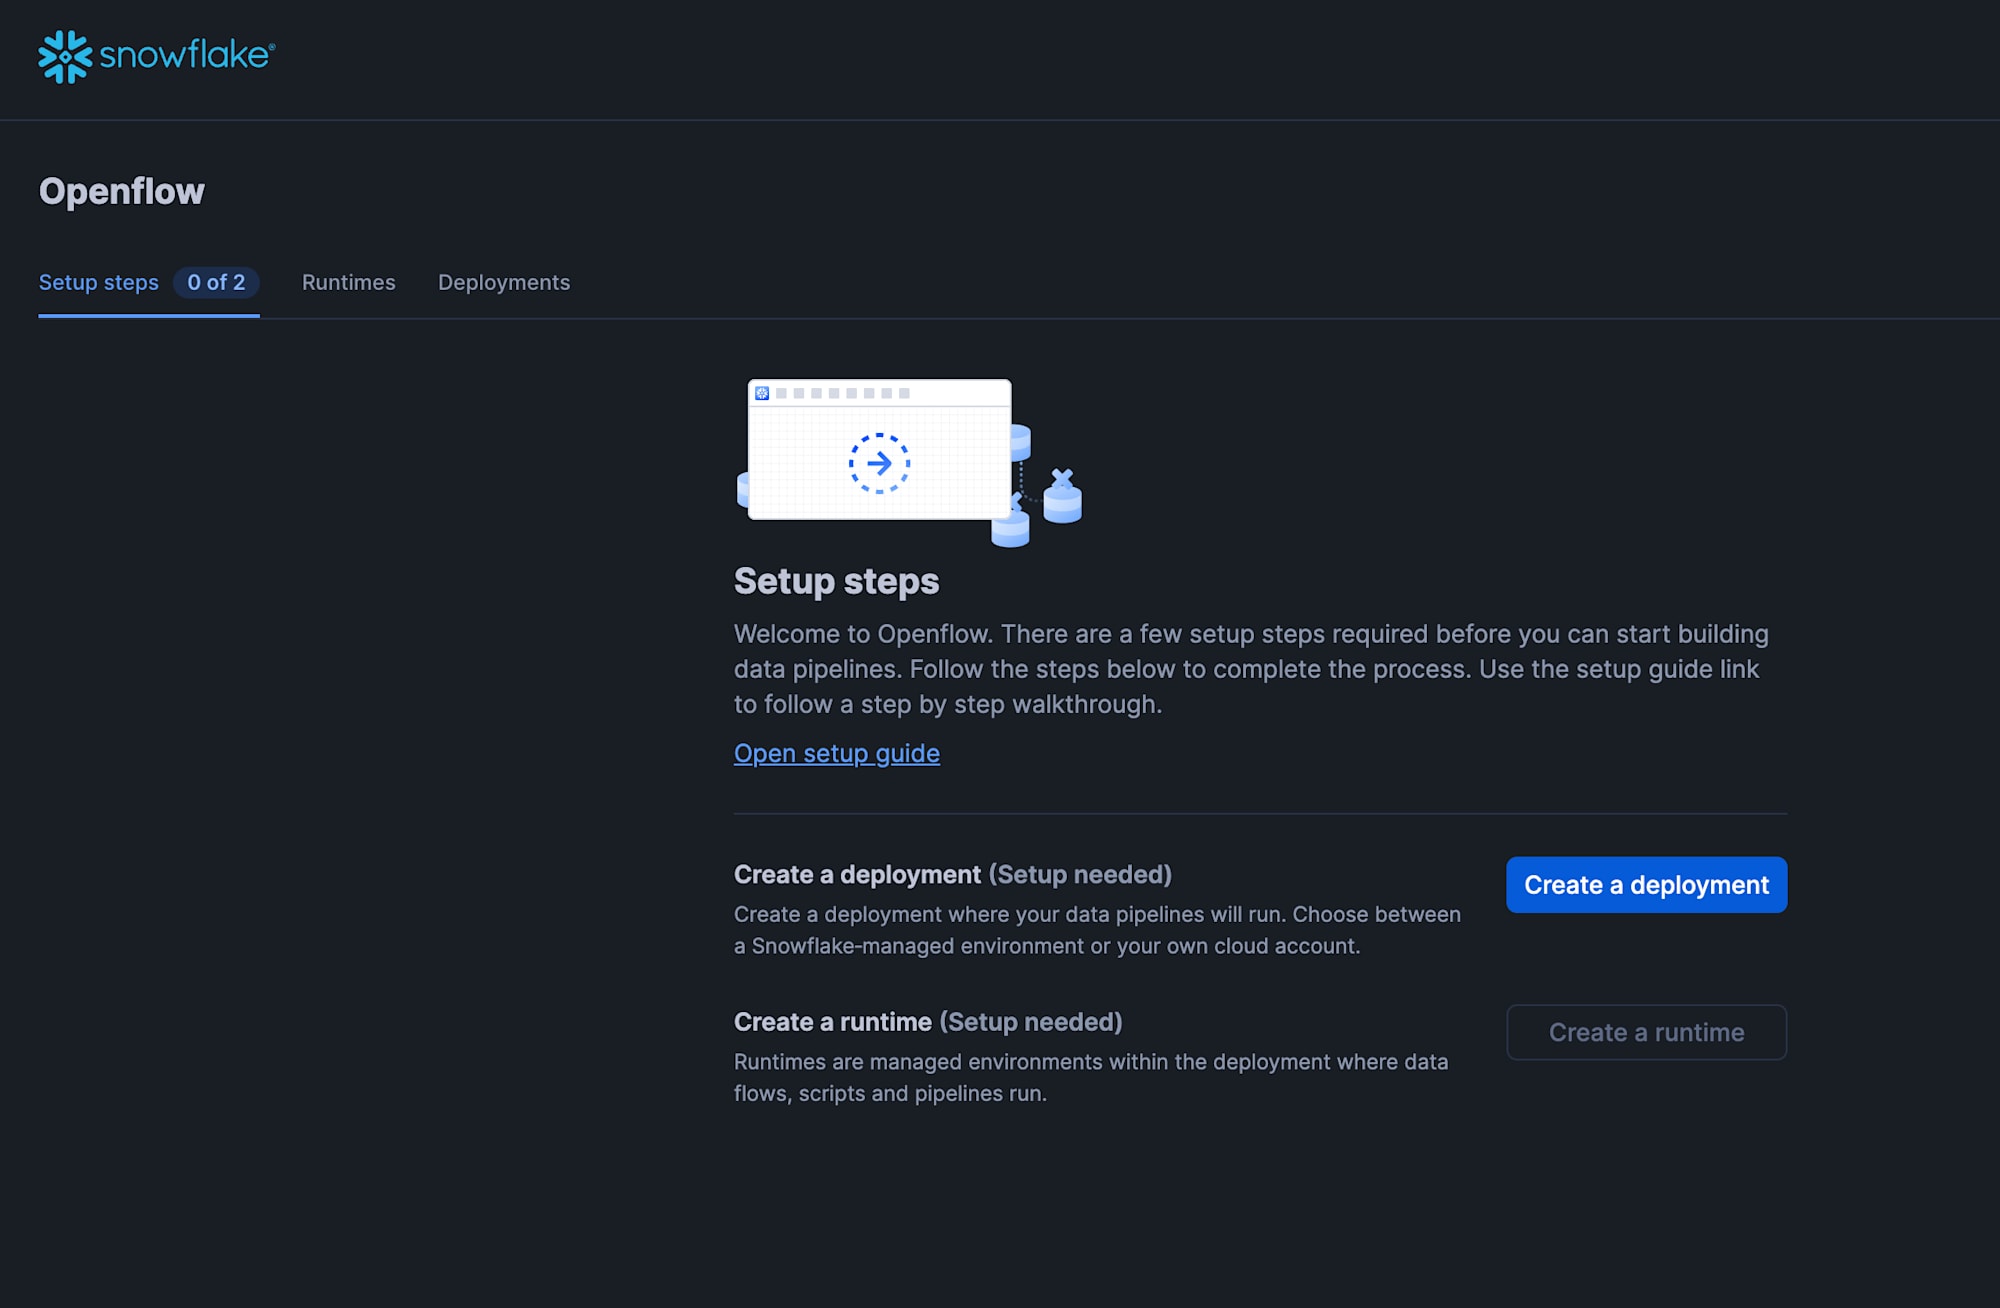
On the "Prerequisites" screen, click "Next".
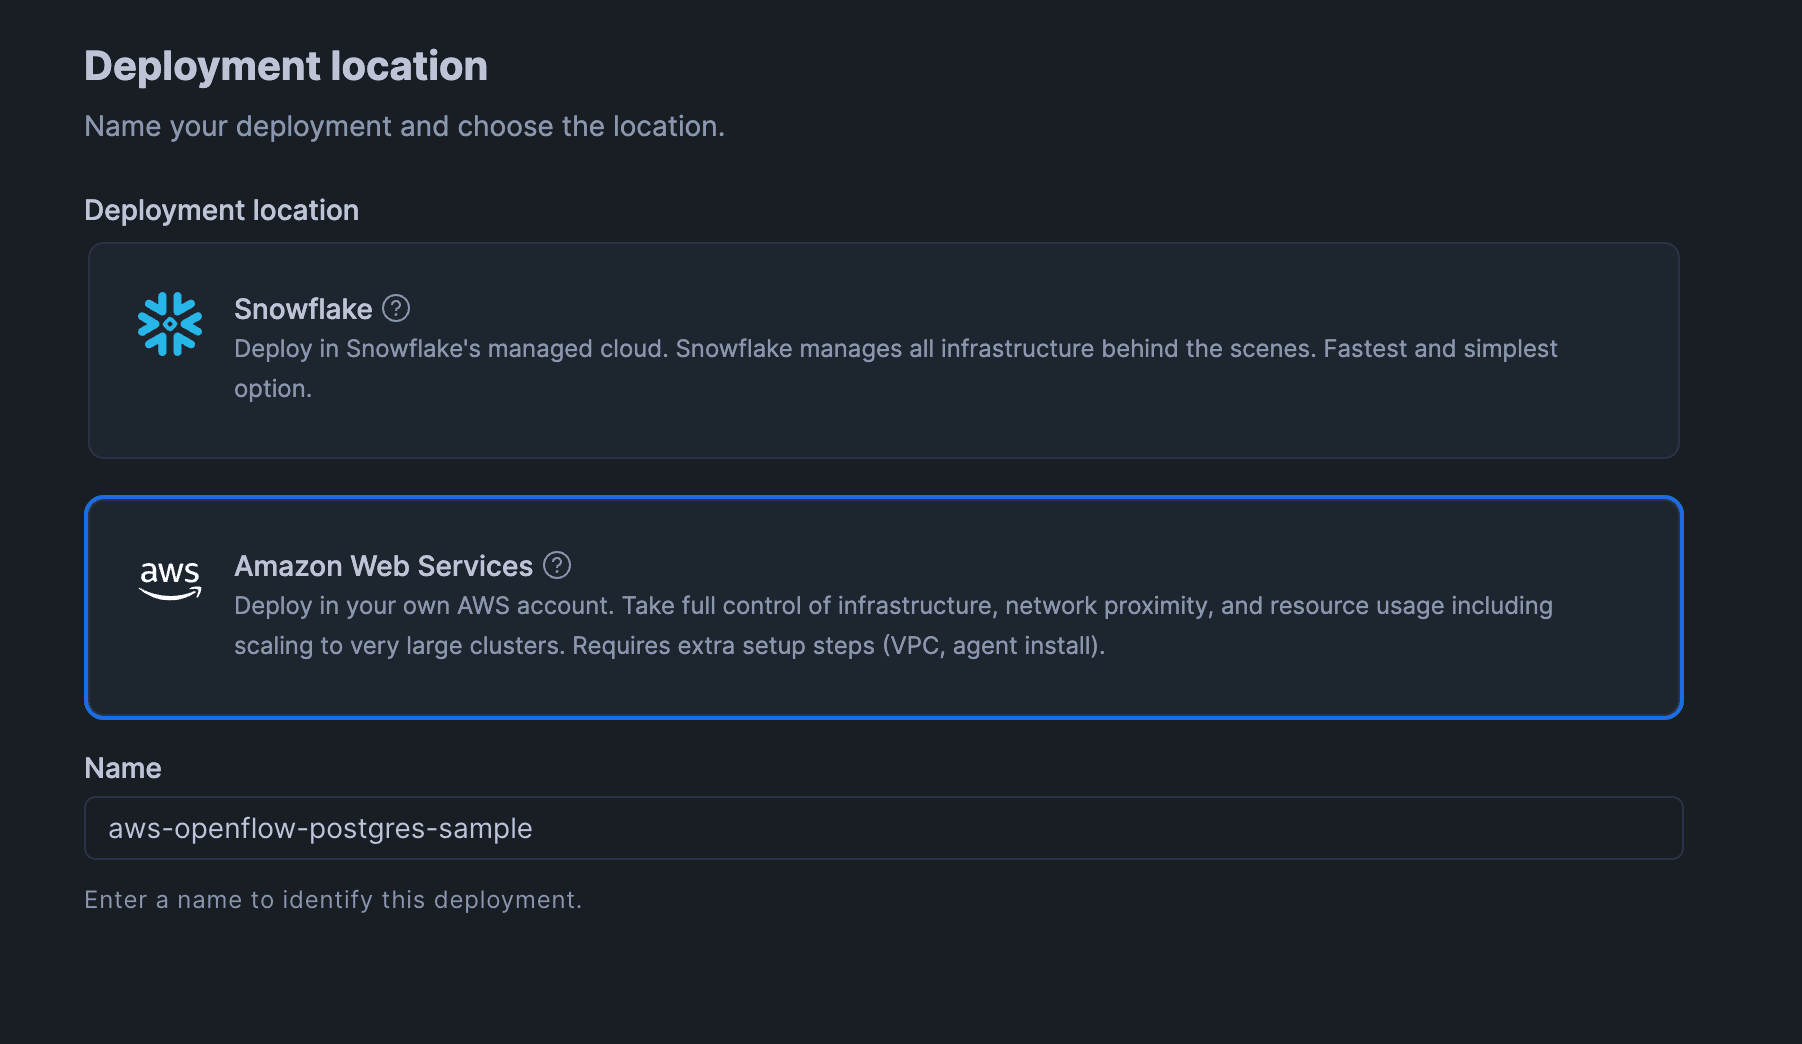
On the "Deployment location" screen, select "Amazon Web Services",
enter an appropriate deployment name in the "Name" field, and click "Next".
On the "Deployment configuration" screen, select "Bring Your Own VPC" under "Select a VPC option" and click "Create deployment".
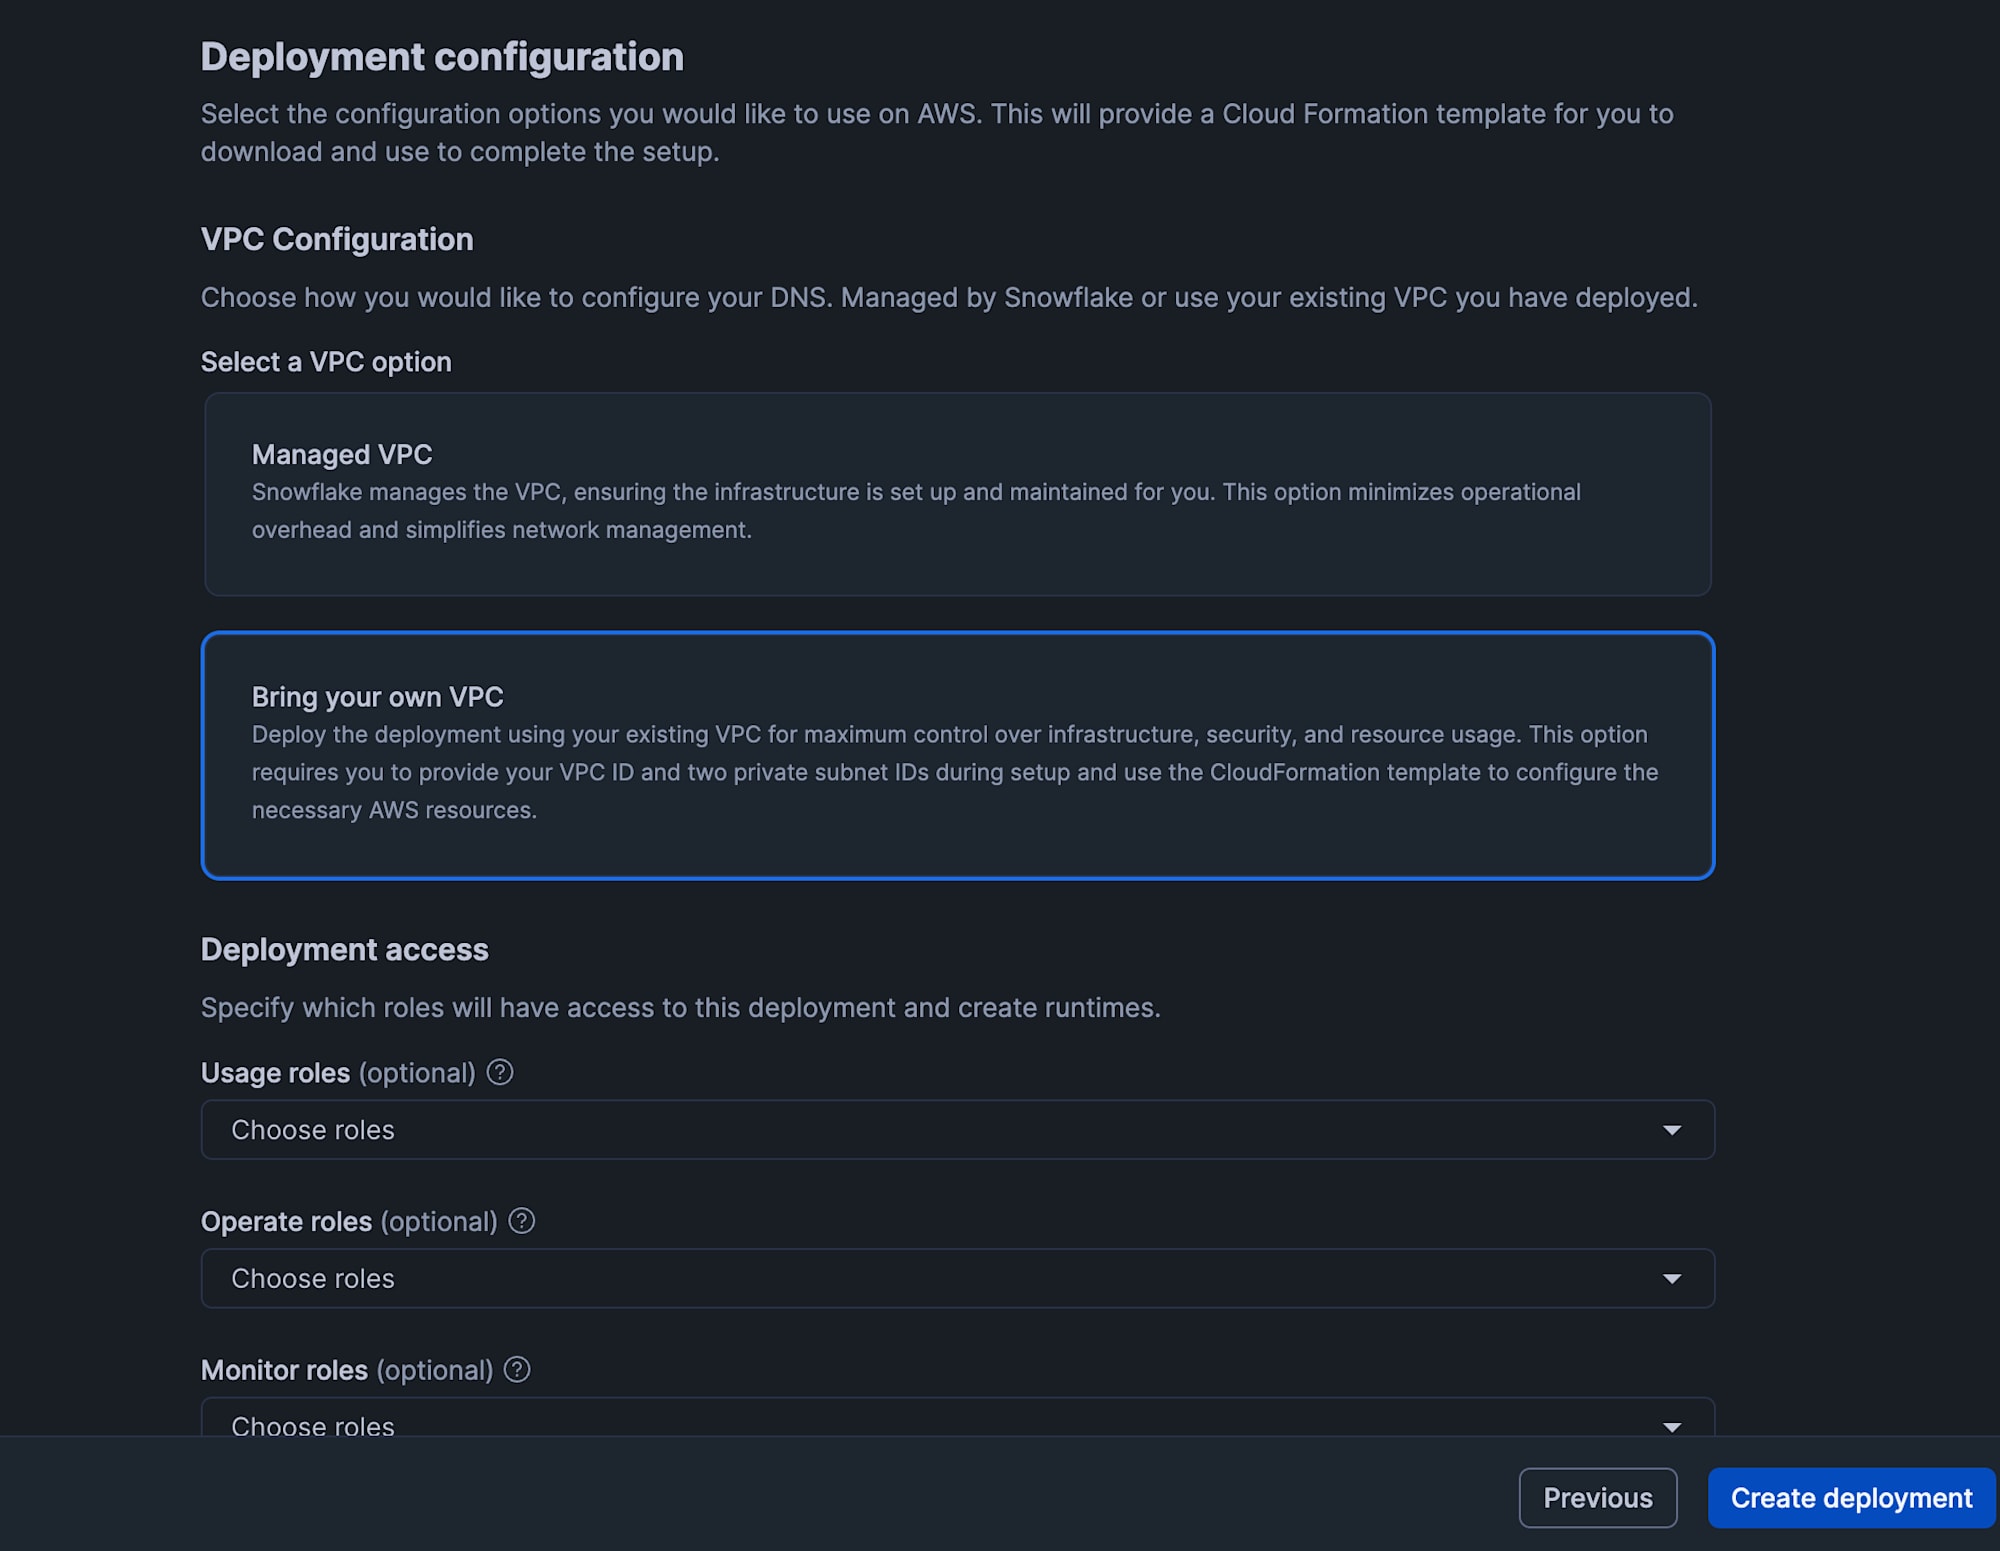
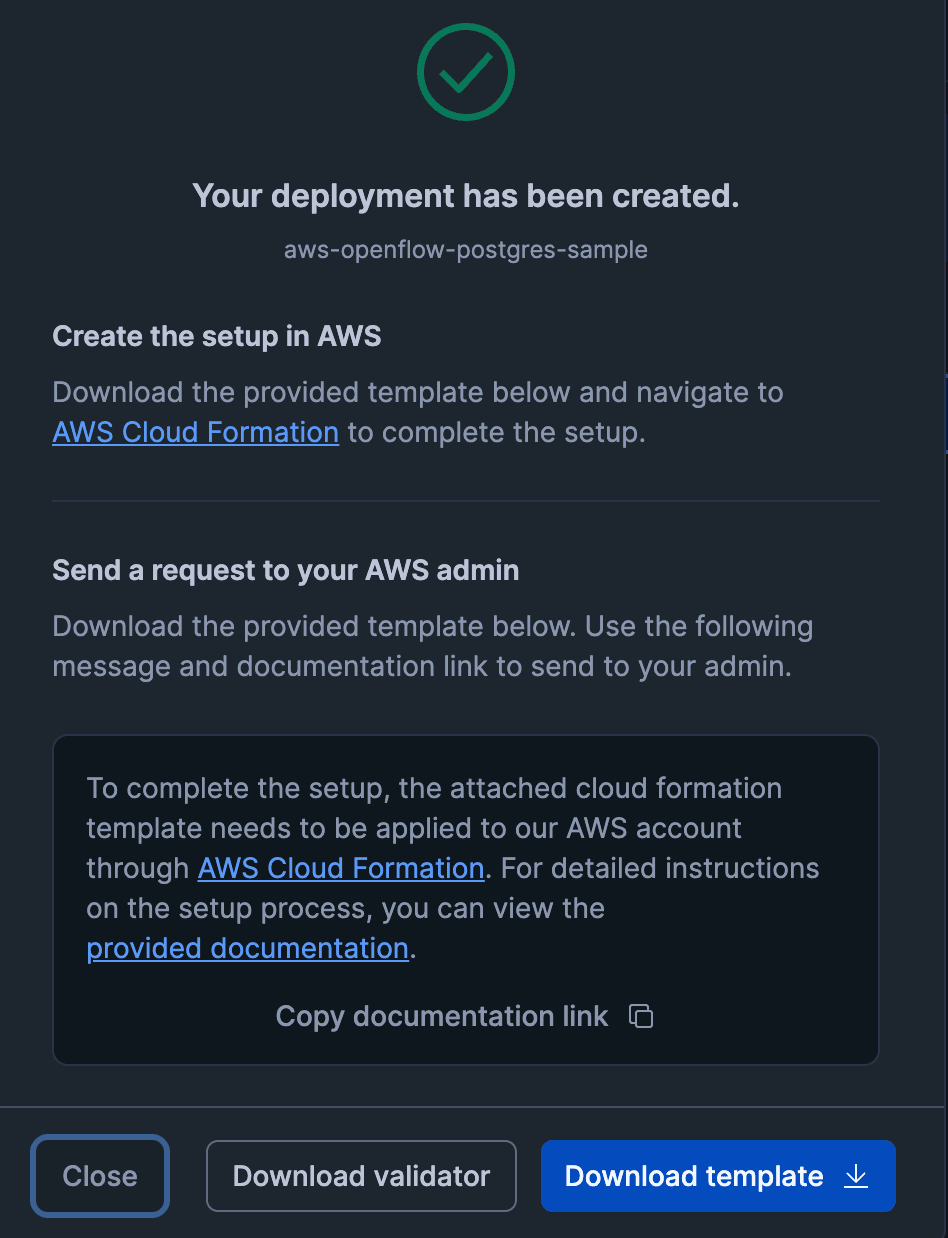
The "Your deployment has been created" screen will then be displayed.
Click "Download template" to download the CloudFormation template.
This template is used to create the deploy agent EC2 that builds the EKS and NLB required for Openflow to operate.
Use the downloaded CloudFormation template to create a stack.
Set the following parameters and leave the rest as defaults.
InfraVPC- Specify the VPC Id created by
01-network.yaml
- Specify the VPC Id created by
PrivateSecurityGroup- Specify the Id of
OpenflowPrivateSecurityGroupcreated by01-network.yaml
- Specify the Id of
PrivateSubnet1- Specify the Id of
ComputeSubnet1created by01-network.yaml
- Specify the Id of
PrivateSubnet2- Specify the Id of
ComputeSubnet2created by01-network.yaml
- Specify the Id of
Once the stack creation is complete, the deploy agent EC2 will start.
When the deploy agent EC2 starts up, the EKS node group, runtime environment, NLB, and other components that make up the Openflow deployment environment will be built.
This Openflow deployment environment setup took approximately 60 minutes.
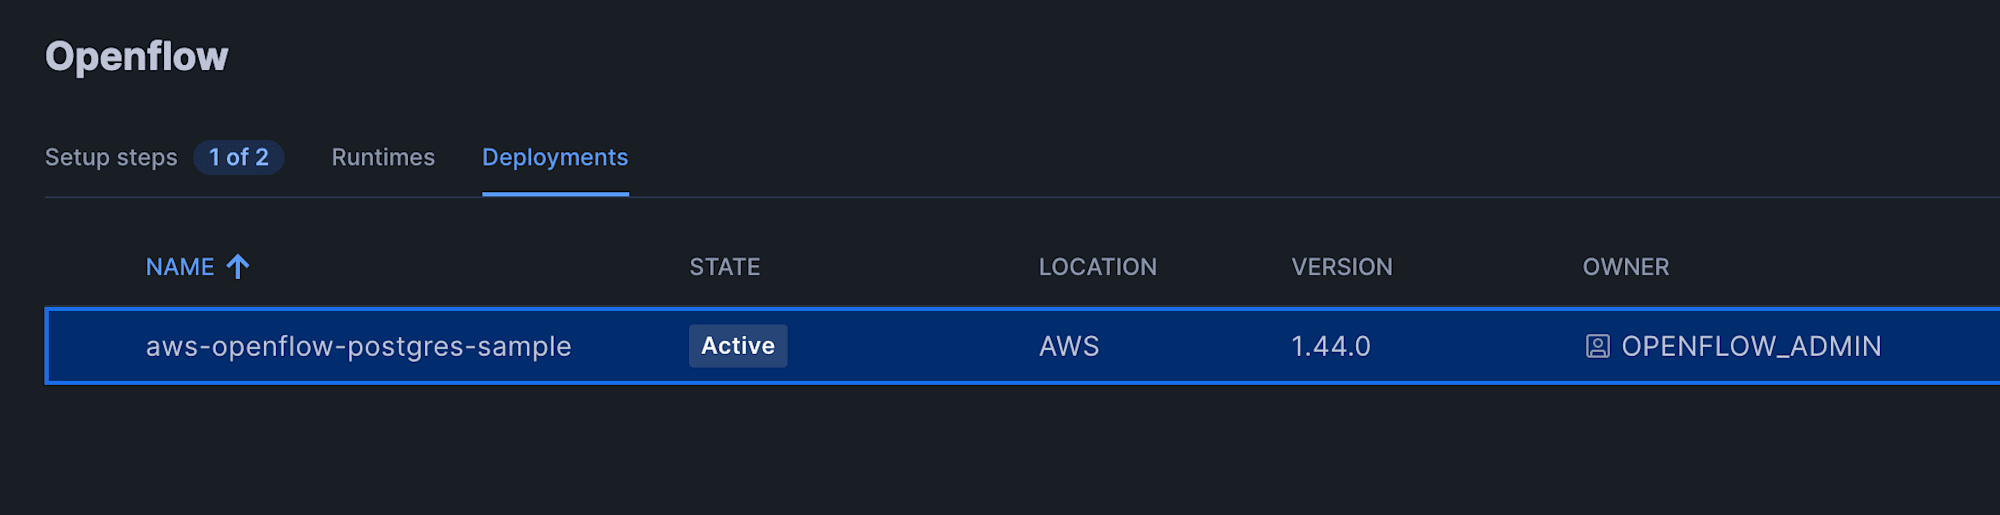
Wait until the status of the Openflow deployment on Snowflake changes from "Inactive" to "Active".
You can also check progress by logging into the deploy agent EC2 and running the following command.
journalctl -xe -f -n 100 -u docker
If All resources applied successfully is displayed on the screen, the required resources have been created.
Note that an EC2 Instance Connect Endpoint is also created in the stack that creates the deploy agent EC2, so if you allow port 22 communication from the created EC2 Instance Connect Endpoint in the deploy agent EC2's security group, you can log in via EC2 Instance Connect.
Once the Openflow deployment status becomes Active, run the following SQL in Snowsight.
Replace <deployment_name> with the name of the Openflow deployment you created.
(In this example, the Openflow deployment name is aws-openflow-postgres-sample)
Associate event table with data plane integration 04-openflow-deployment-telemetry-events-setup.sql
SHOW OPENFLOW DATA PLANE INTEGRATIONS;
ALTER OPENFLOW DATA PLANE INTEGRATION <deployment_name>
  SET EVENT_TABLE = 'OPENFLOW.TELEMETRY.EVENTS';
7. Create Snowflake Objects for Connector Operations
Before creating the Openflow Runtime, create the Snowflake objects that the Openflow Connector will operate on, such as the destination Snowflake database.
Run the following SQL in Snowsight.
Replace <your_user> in the SQL with your working username.
Create Snowflake objects for connector operations 05-openflow-destination-objects-setup.sql
USE ROLE ACCOUNTADMIN;

-- Create database and role for destination
CREATE DATABASE IF NOT EXISTS OPENFLOW_PG_DB
  COMMENT = 'Destination DB for Openflow PostgreSQL connector';
CREATE ROLE IF NOT EXISTS OPENFLOW_PG_CONNECTOR_ROLE
  COMMENT = 'Role for the PostgreSQL connector to write to the destination DB';

-- The connector auto-generates schemas/tables, so grant USAGE and CREATE SCHEMA on the DB
GRANT USAGE        ON DATABASE OPENFLOW_PG_DB TO ROLE OPENFLOW_PG_CONNECTOR_ROLE;
GRANT CREATE SCHEMA ON DATABASE OPENFLOW_PG_DB TO ROLE OPENFLOW_PG_CONNECTOR_ROLE;

-- Create warehouse
CREATE WAREHOUSE IF NOT EXISTS OPENFLOW_PG_WH
  WAREHOUSE_SIZE = 'XSMALL'
  AUTO_SUSPEND   = 60
  AUTO_RESUME    = TRUE
  INITIALLY_SUSPENDED = TRUE
  COMMENT = 'Warehouse for Openflow PostgreSQL connector';

GRANT USAGE, OPERATE ON WAREHOUSE OPENFLOW_PG_WH TO ROLE OPENFLOW_PG_CONNECTOR_ROLE;

-- Grant to the working user who creates the Openflow Runtime,
-- so it appears in the dropdown list on the runtime creation screen
GRANT ROLE OPENFLOW_PG_CONNECTOR_ROLE TO USER <your_user>;
8. Openflow Runtime Configuration
Next, configure the Openflow Runtime.
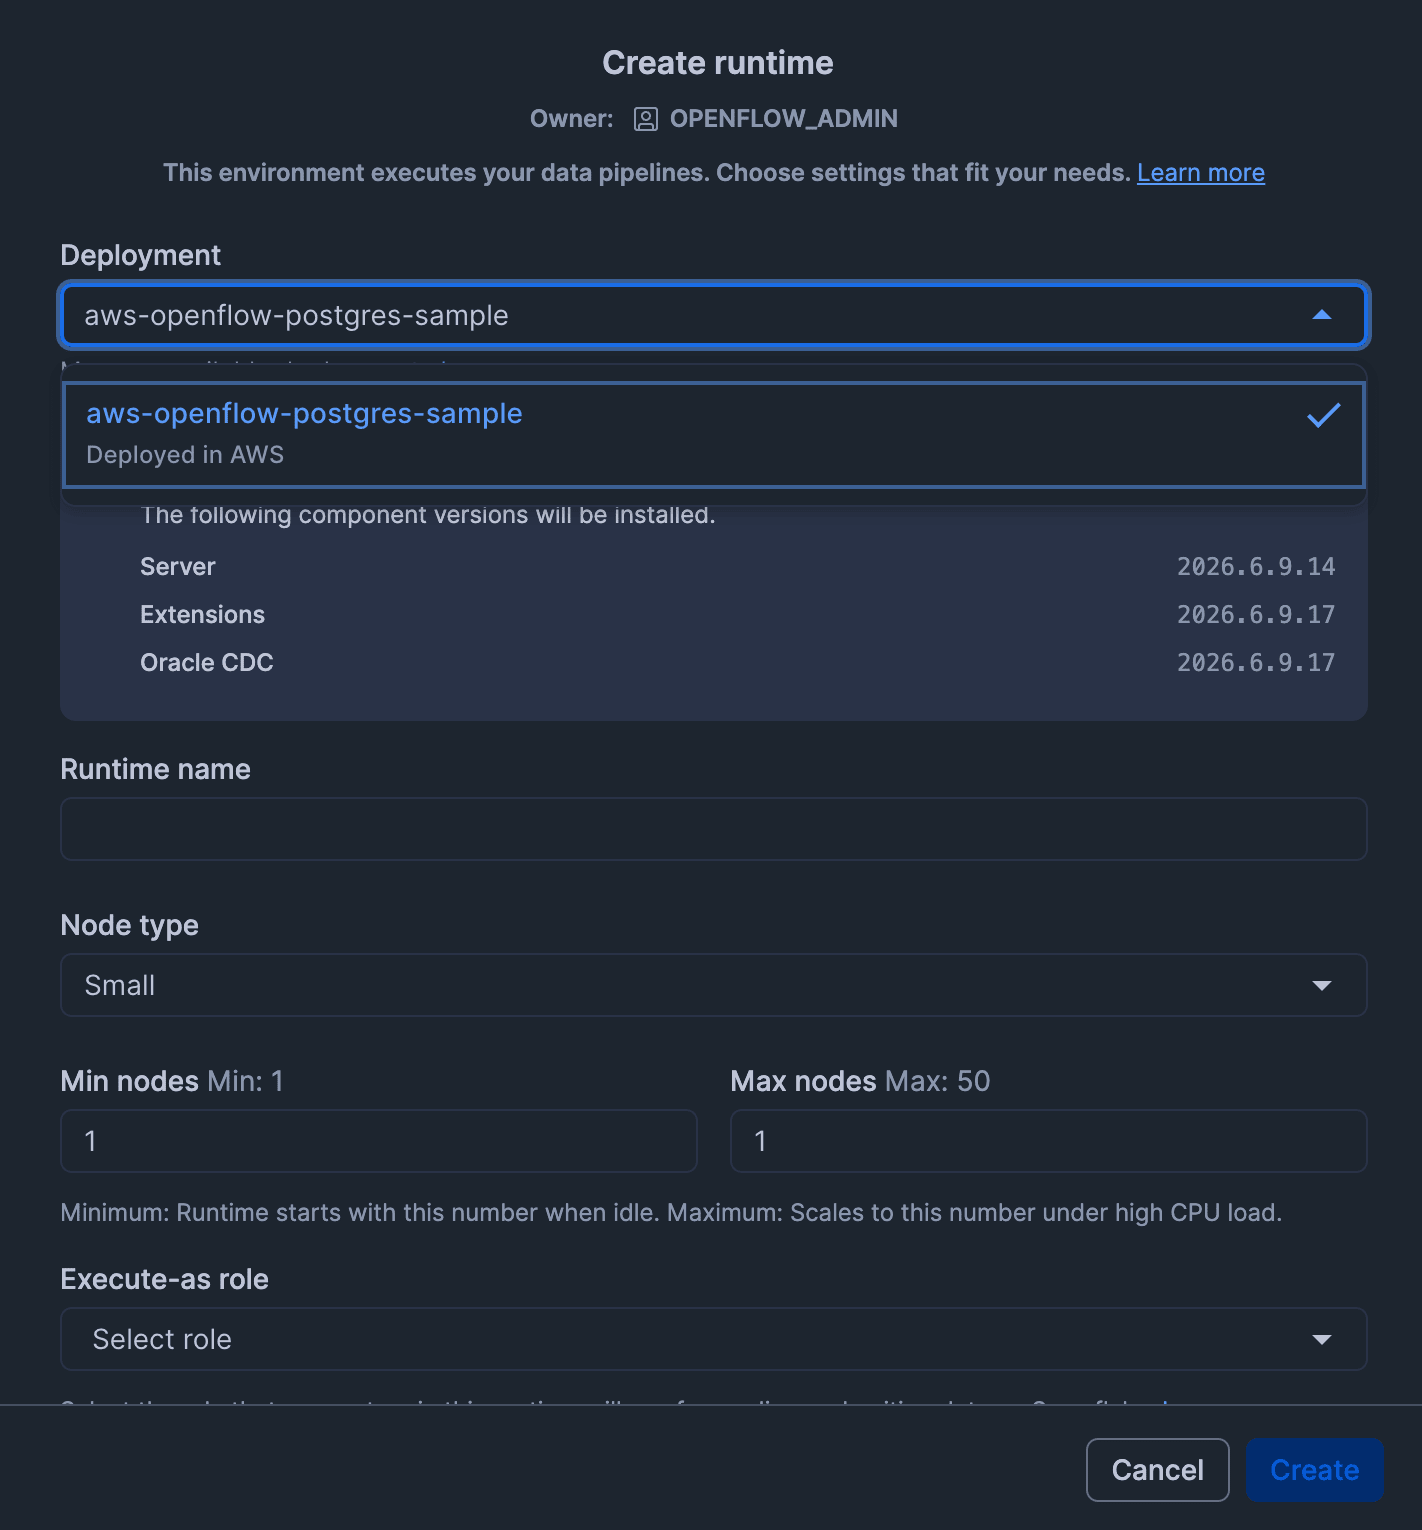
From the Openflow screen, click "Create a runtime".
On the "Create runtime" screen, configure the following settings and click "Create".
- Deployment
- Select the Openflow deployment name you created
- Runtime Name
- Enter an appropriate name
- Here we use
openflow_pg_rt
- Node size
- Select Medium or larger
- Here we select
Medium
- Min nodes
- 1
- Max nodes
- 1
- Due to PostgreSQL connector requirements, multi-node is not supported, so specify
1for both Min nodes and Max nodes to ensure a single node configuration- Reference: Openflow requirements
- Execute-as role
- Select
OPENFLOW_PG_CONNECTOR_ROLE
- Select
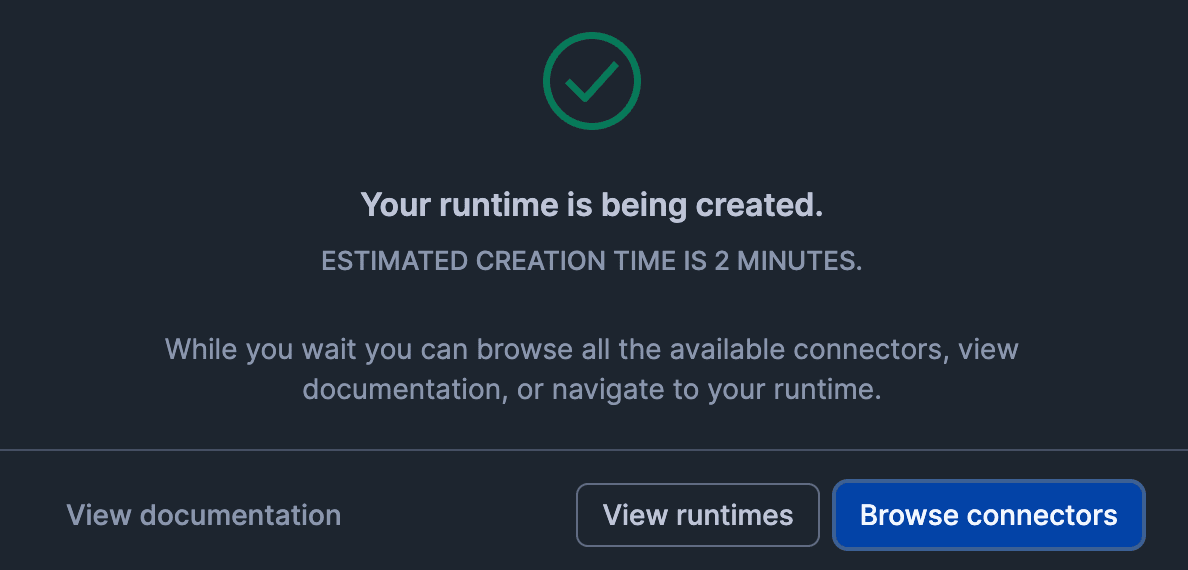
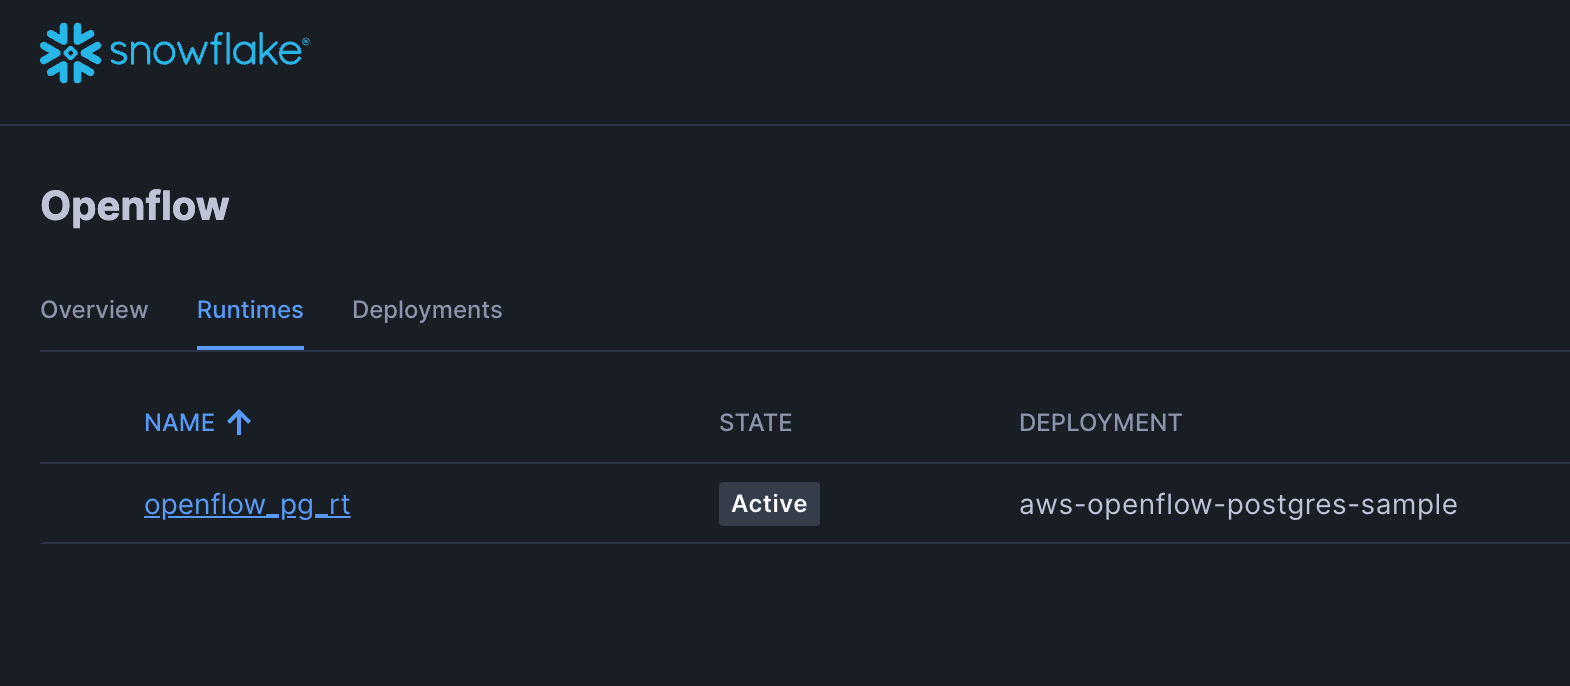
This will create the runtime.
It takes about 2 minutes to create. Wait until the runtime status becomes "Active".
9. Install Openflow Connector
Once the Openflow Runtime is created, install the connector for PostgreSQL.
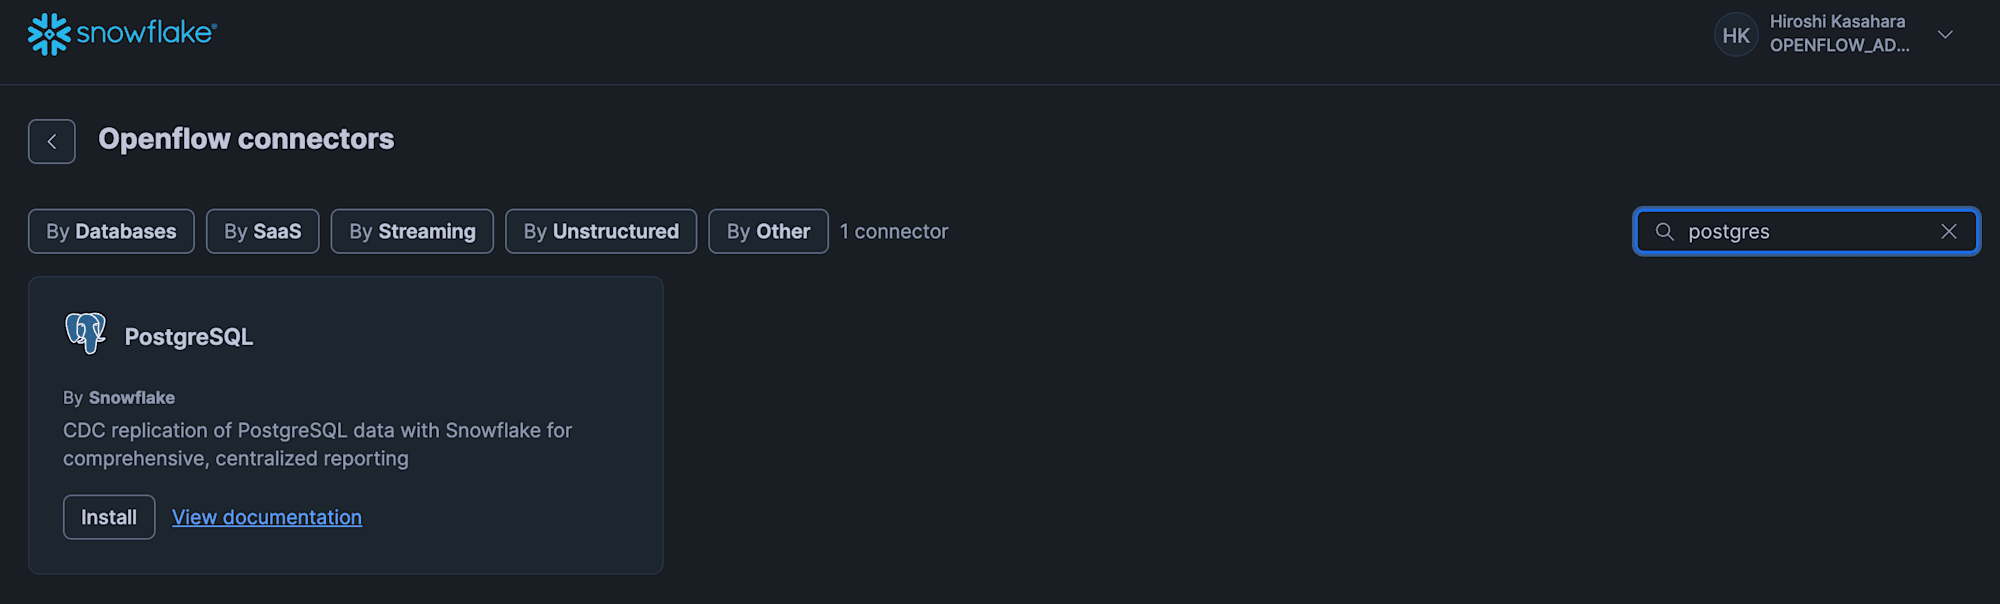
If "PostgreSQL" is displayed under "Featured connectors" on the Openflow overview screen, click "Install" on the PostgreSQL panel.
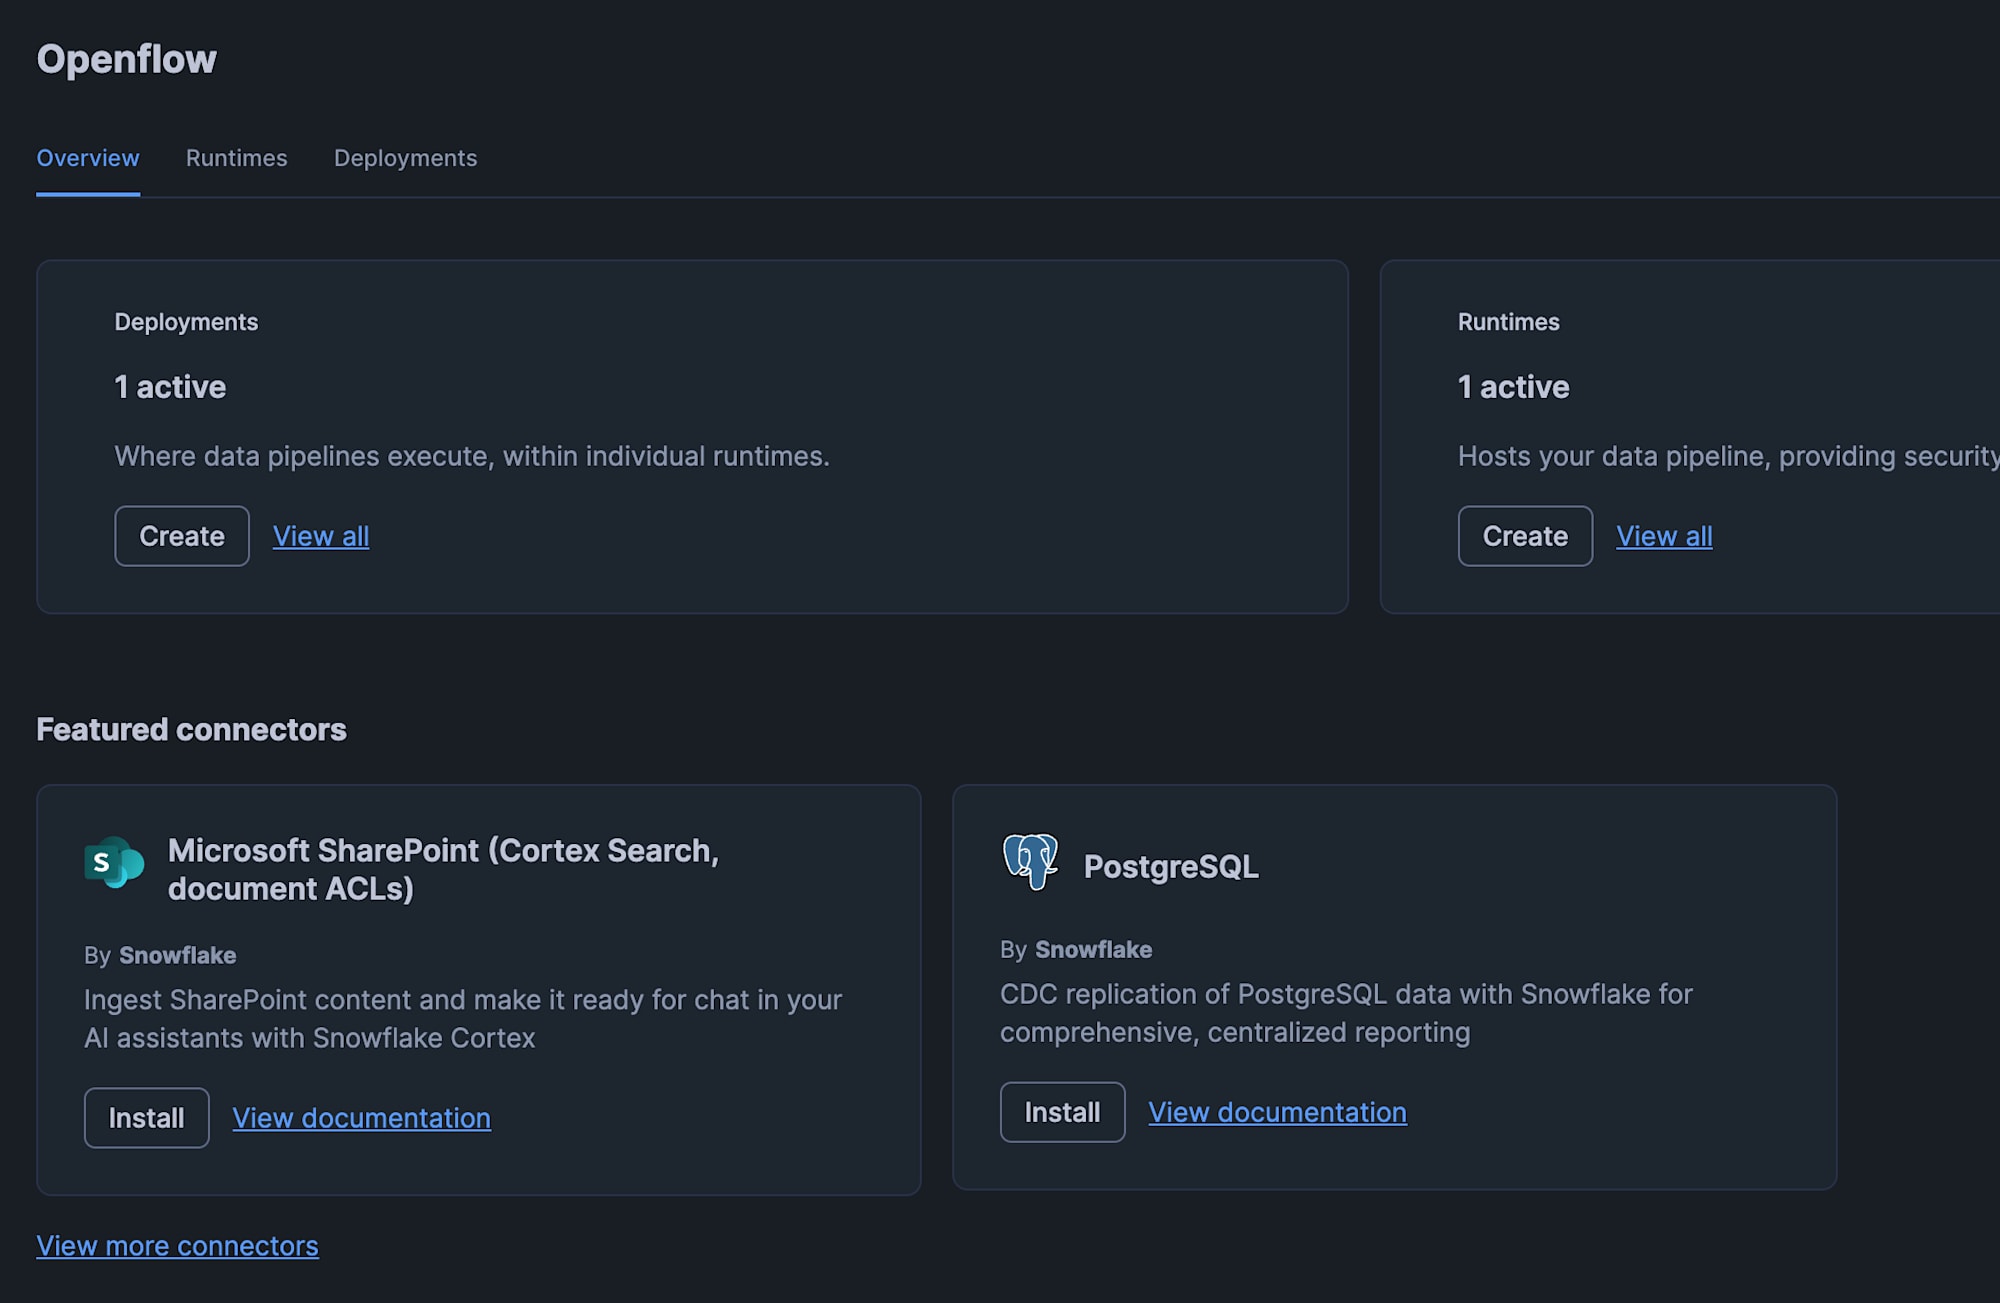
If it is not displayed, click the "View more connectors" link, search for "PostgreSQL" in the connector list, and click "Install" in the same way.
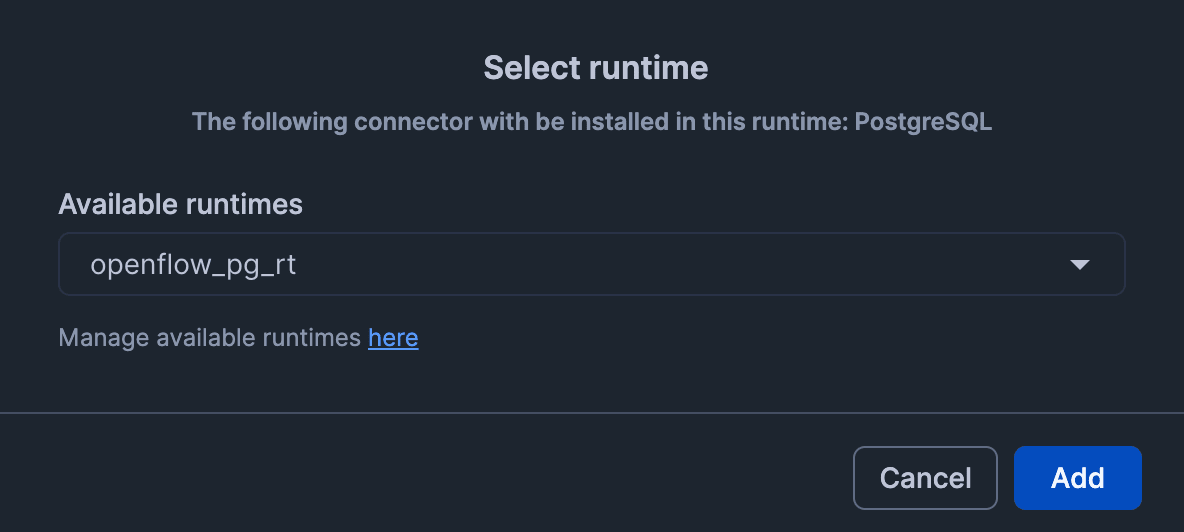
Select the Openflow Runtime where the PostgreSQL connector will be installed.
Here, select the Openflow Runtime you just created.
Clicking the "Add" button will install the PostgreSQL connector on the runtime.
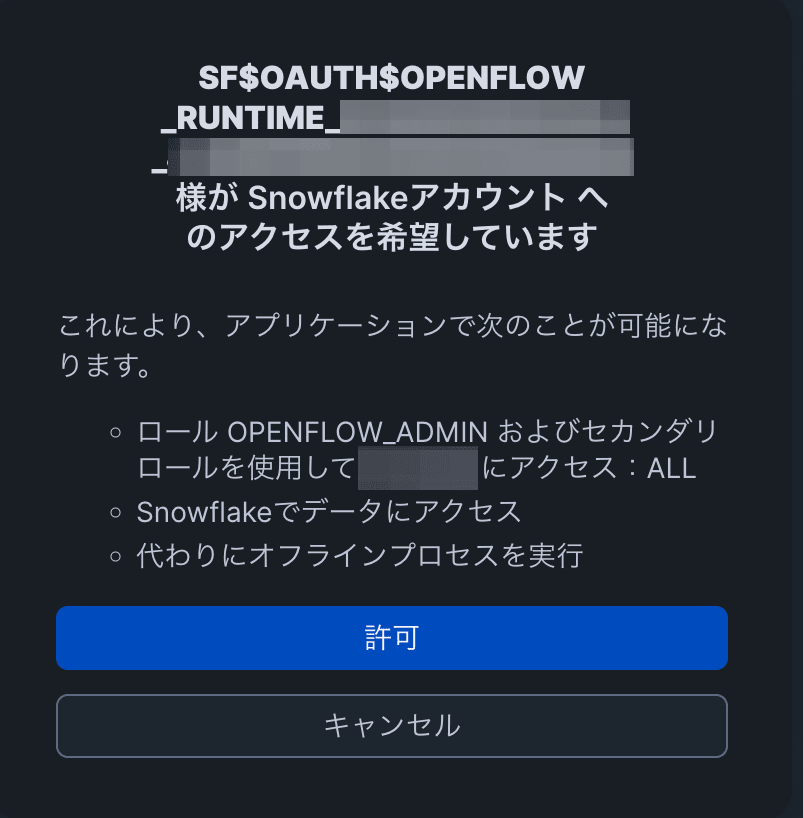
Authenticate with Snowflake credentials and allow access to the runtime.

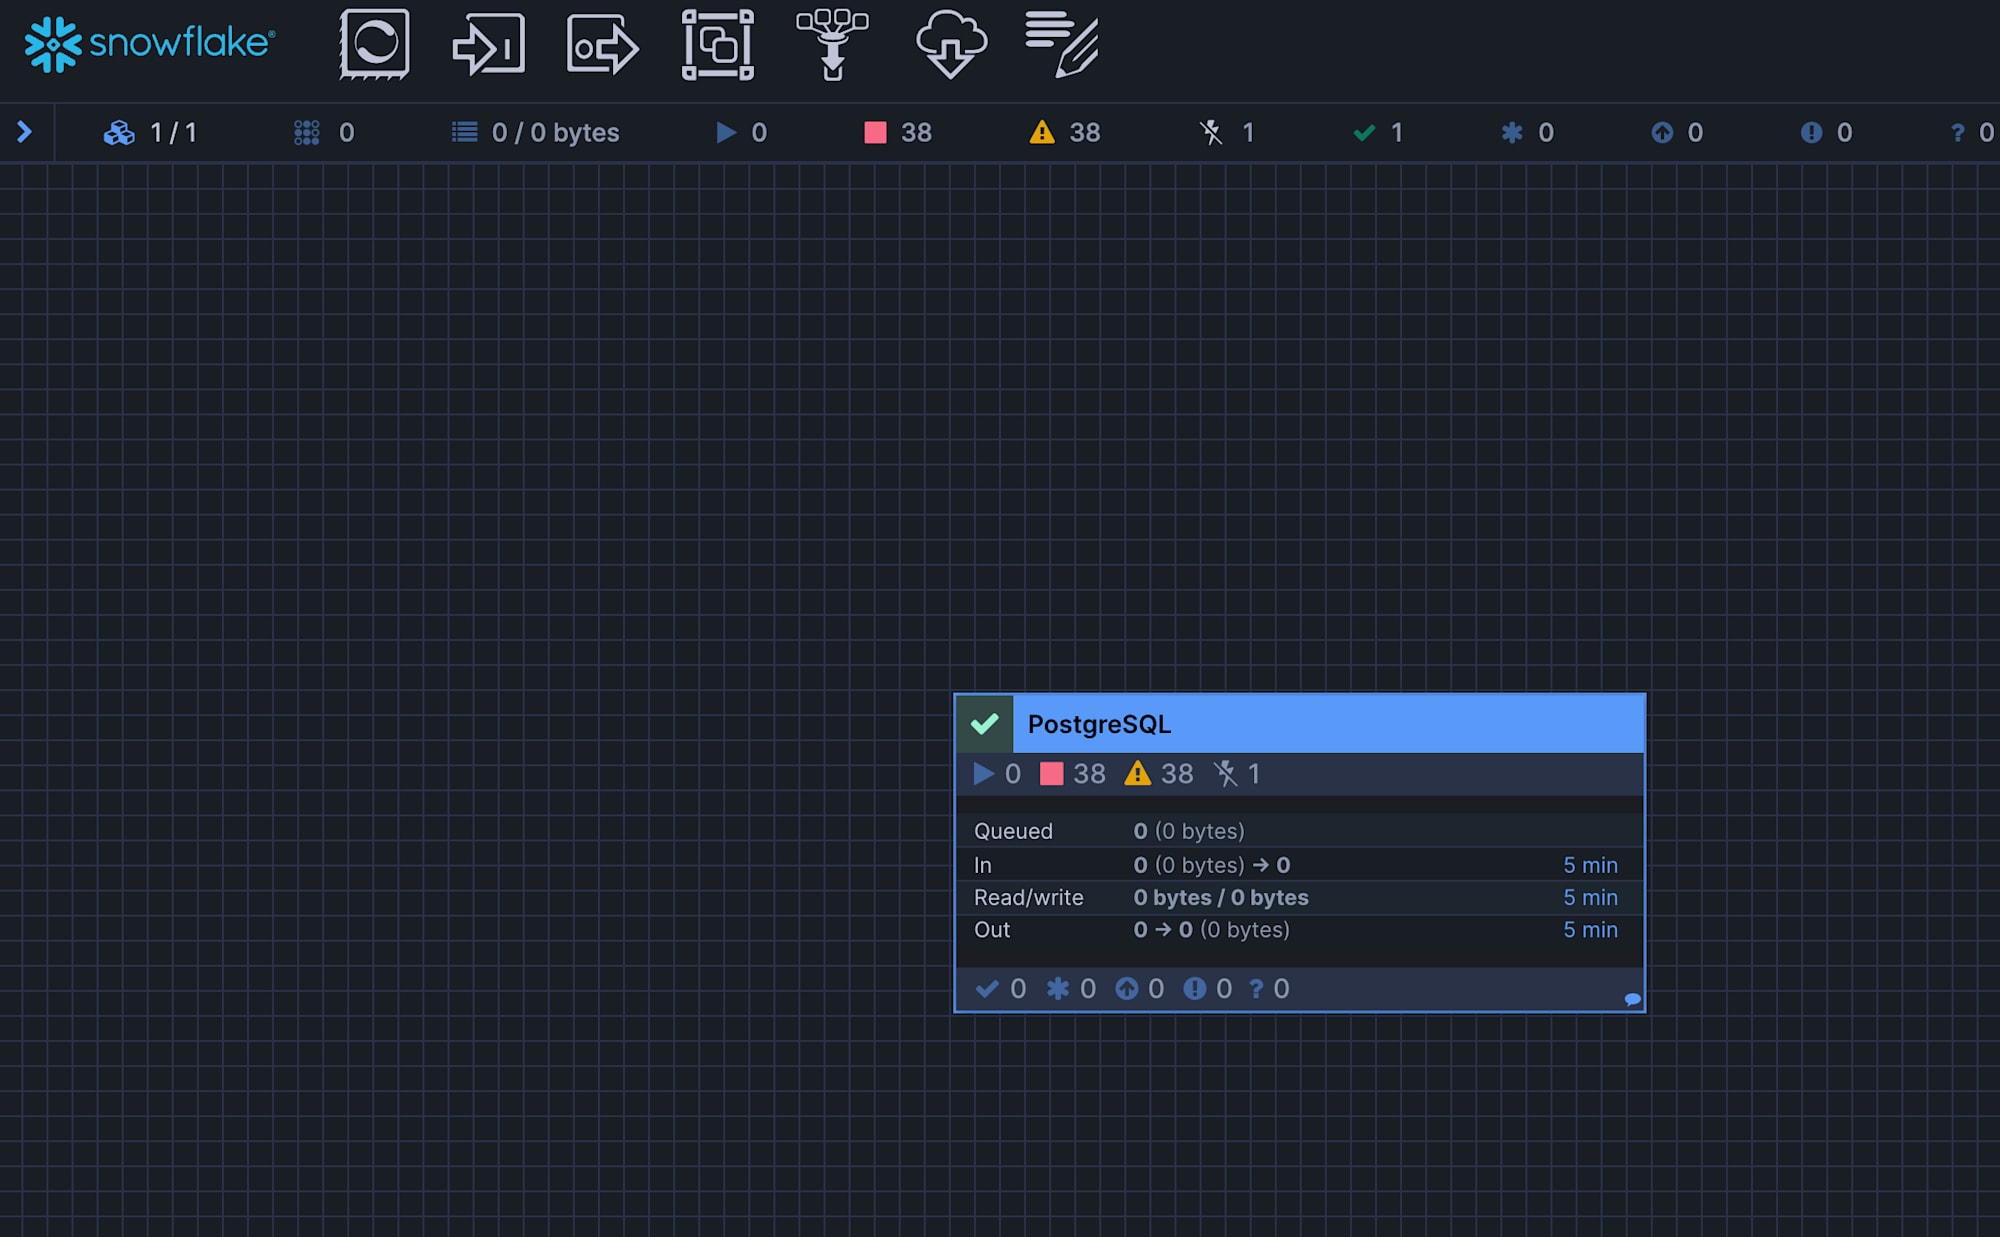
Upon success, the connector's process group will be displayed on the canvas.
Note: If "The role requested has been explicitly blocked for use with this application" is displayed when accessing the runtime and you are redirected to the login screen, you need to change the DEFAULT_ROLE setting of the working user for authentication.
This is configured in 03-openflow-deployment-setup.sql, but if this part has not been applied yet, please configure it again.
ALTER USER <your_user> SET DEFAULT_ROLE = OPENFLOW_ADMIN;
ALTER USER <your_user> SET DEFAULT_SECONDARY_ROLES = ('ALL');
10. Openflow Connector Configuration
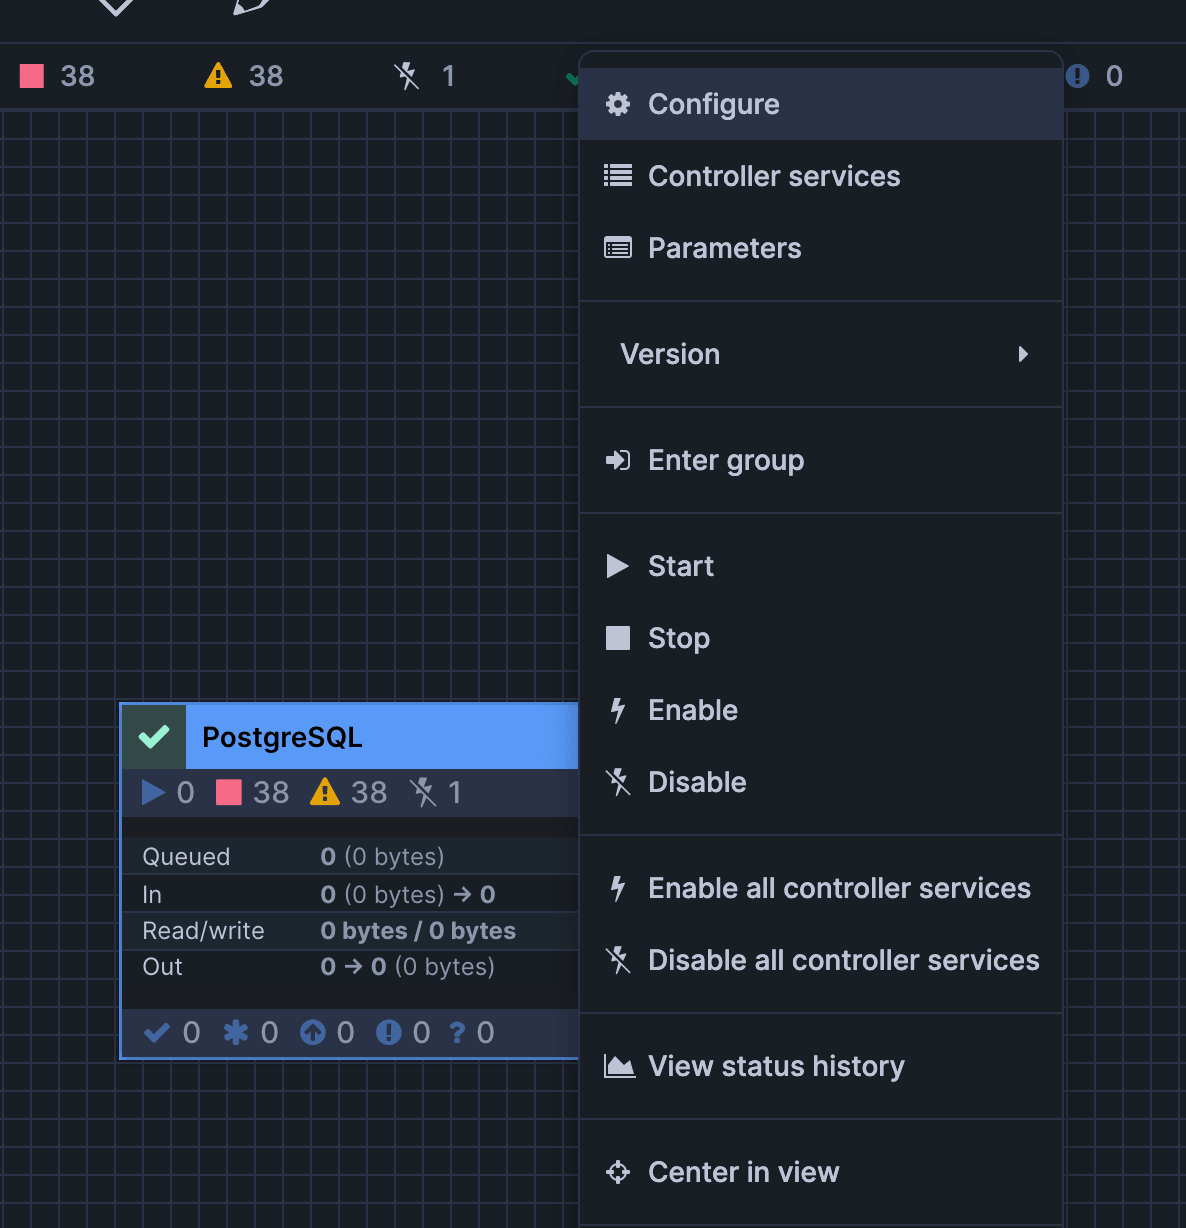
On the canvas, perform the following settings.
First, right-click the box labeled PostgreSQL and click "Parameters".
Set the values for Source / Destination / Ingestion as shown below, and click "Apply" for each of Source / Destination / Ingestion to apply the settings.
When you click "Parameters", one of the parameter setting screens for Source / Destination / Ingestion will pop up, so configure each one as appropriate and then move on to the next parameter setting.
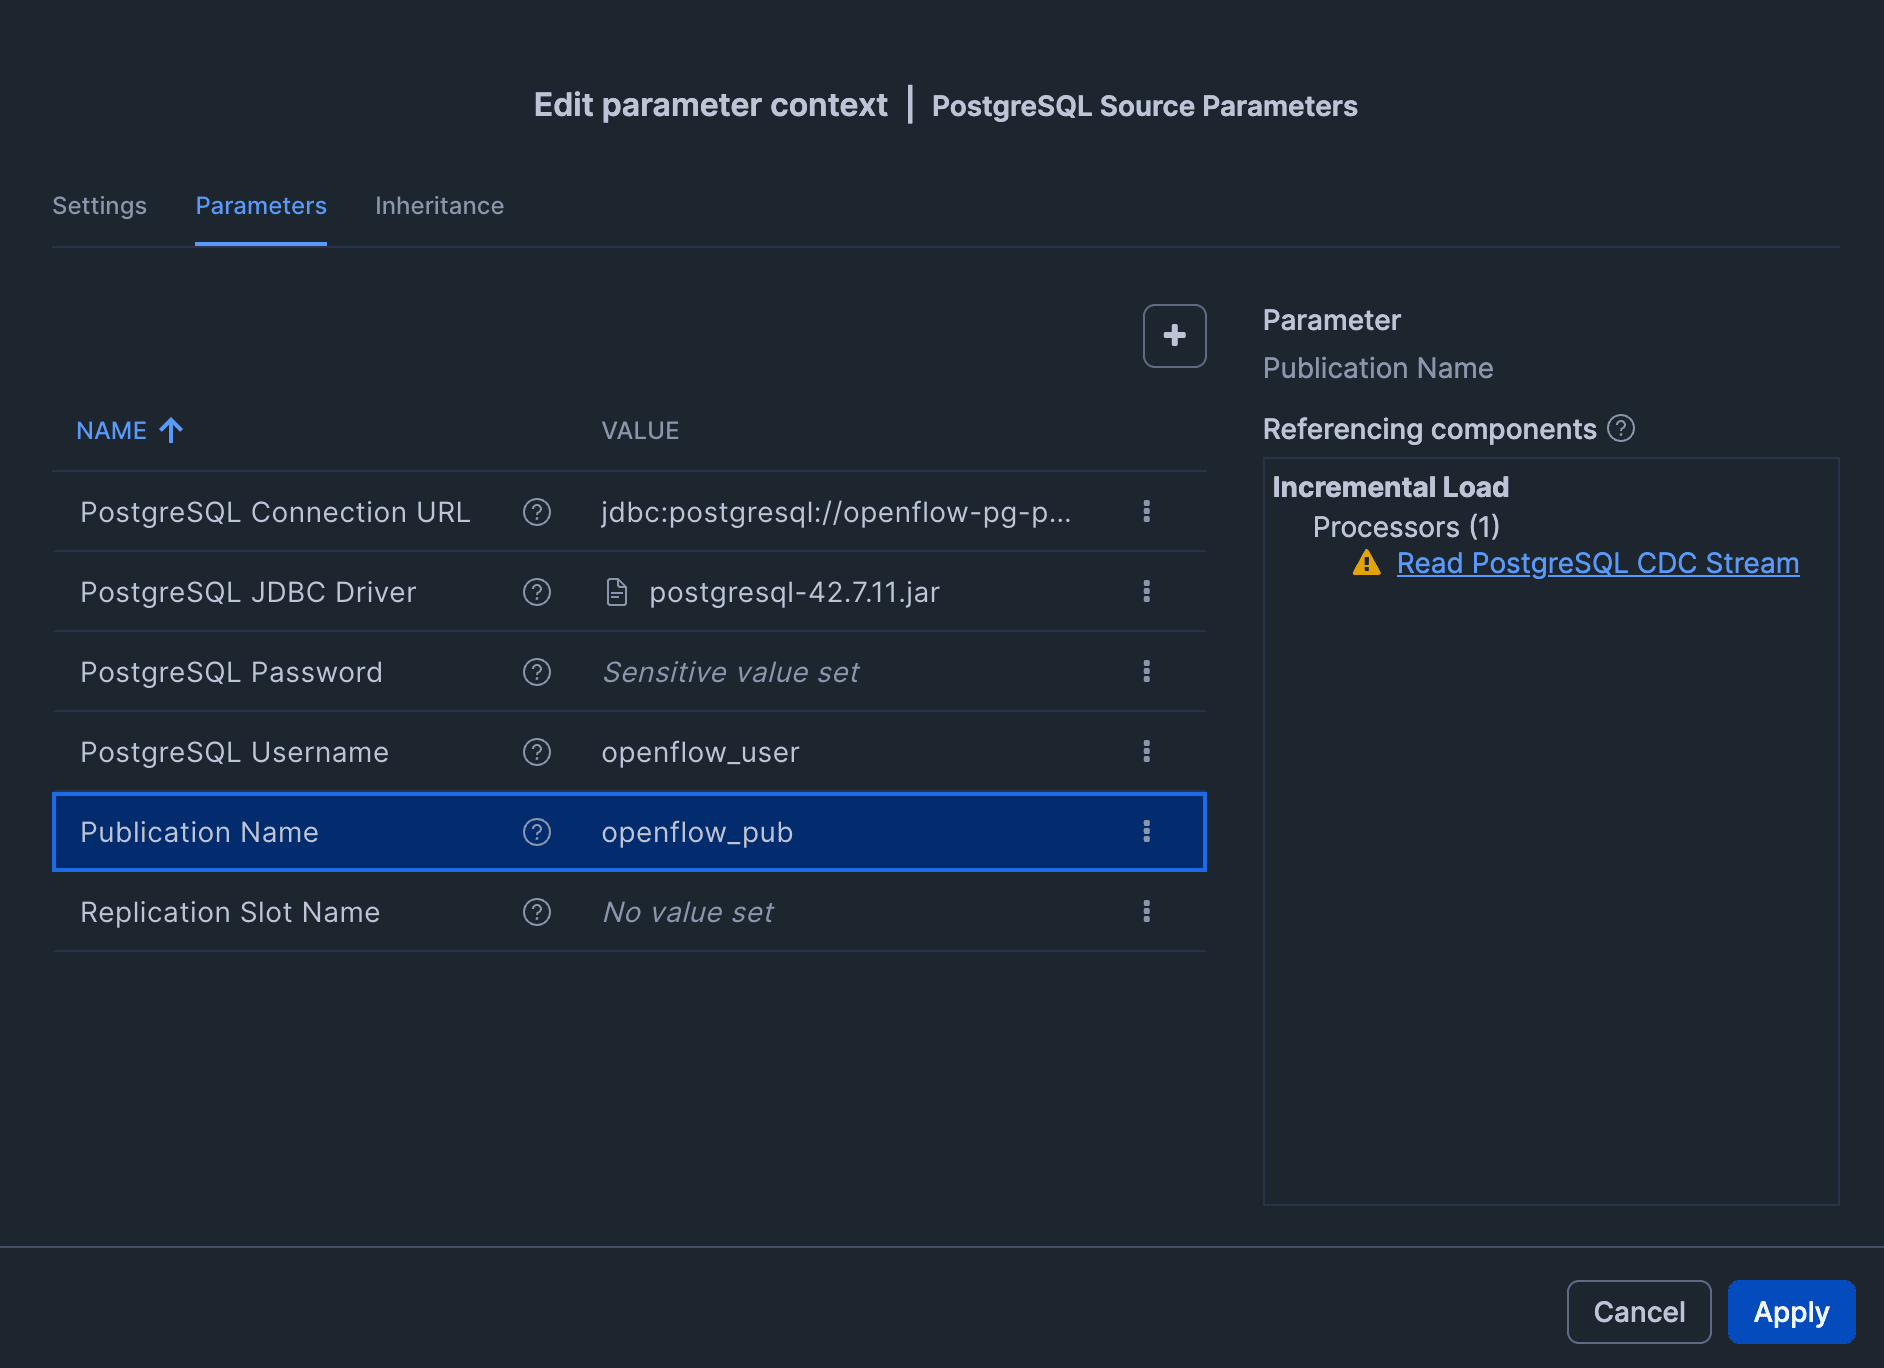
Source (Connection settings to RDS for PostgreSQL)
| Parameter | Value |
|---|---|
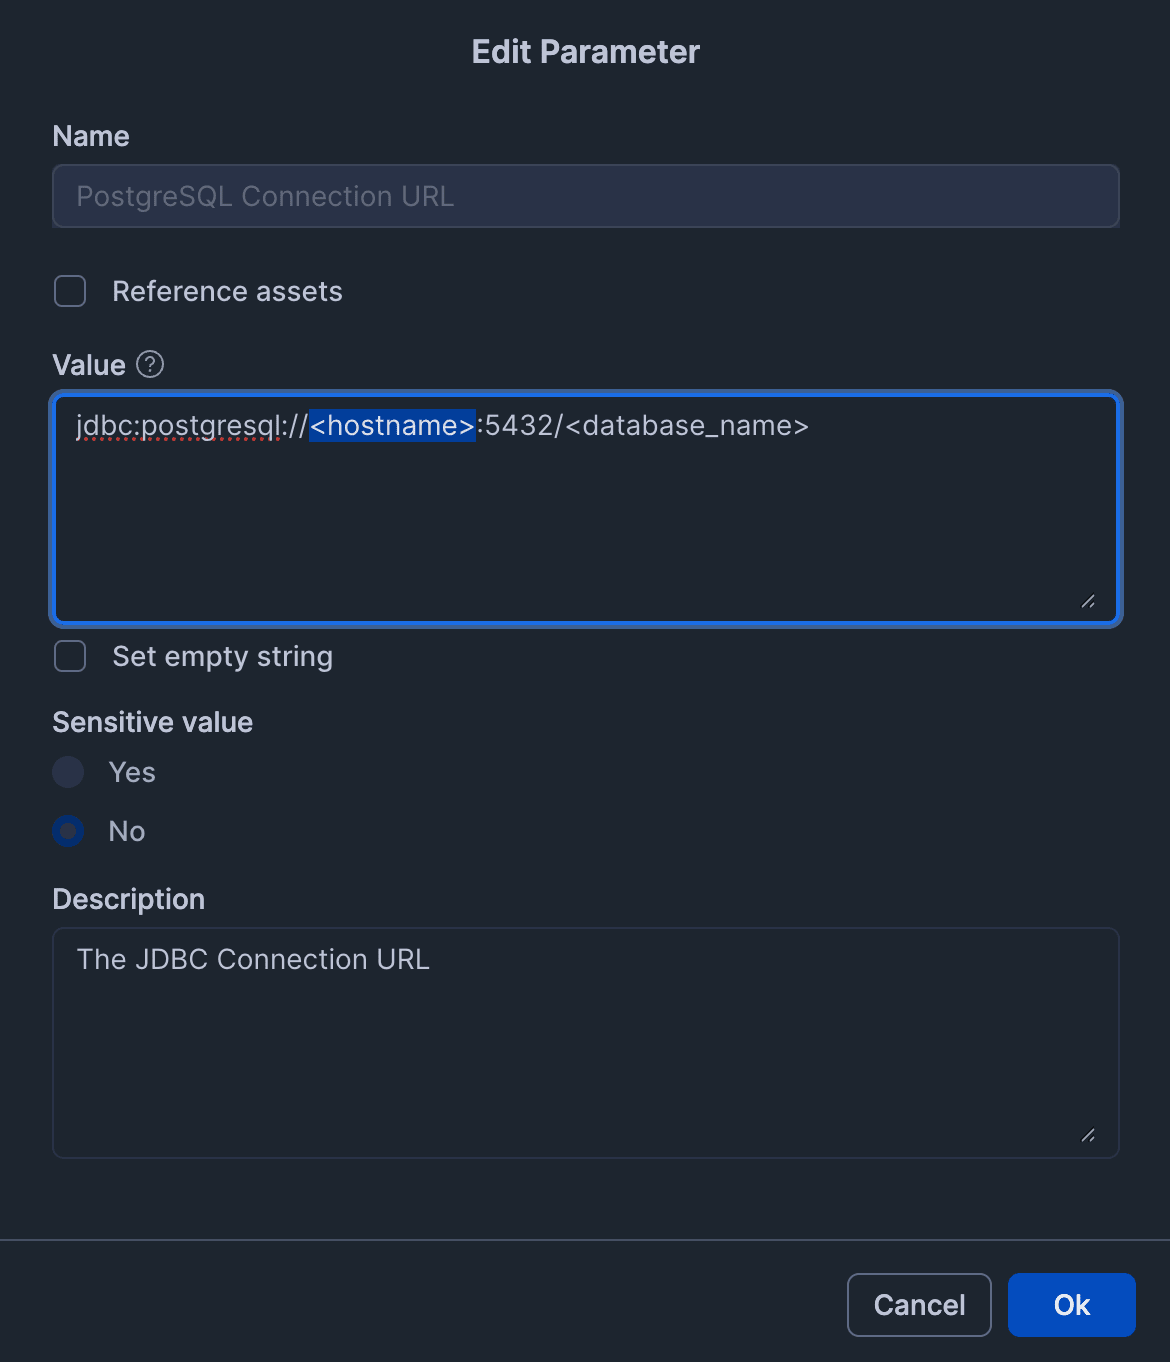
| PostgreSQL Connection URL | jdbc:postgresql://<RDS endpoint>:5432/appdb |
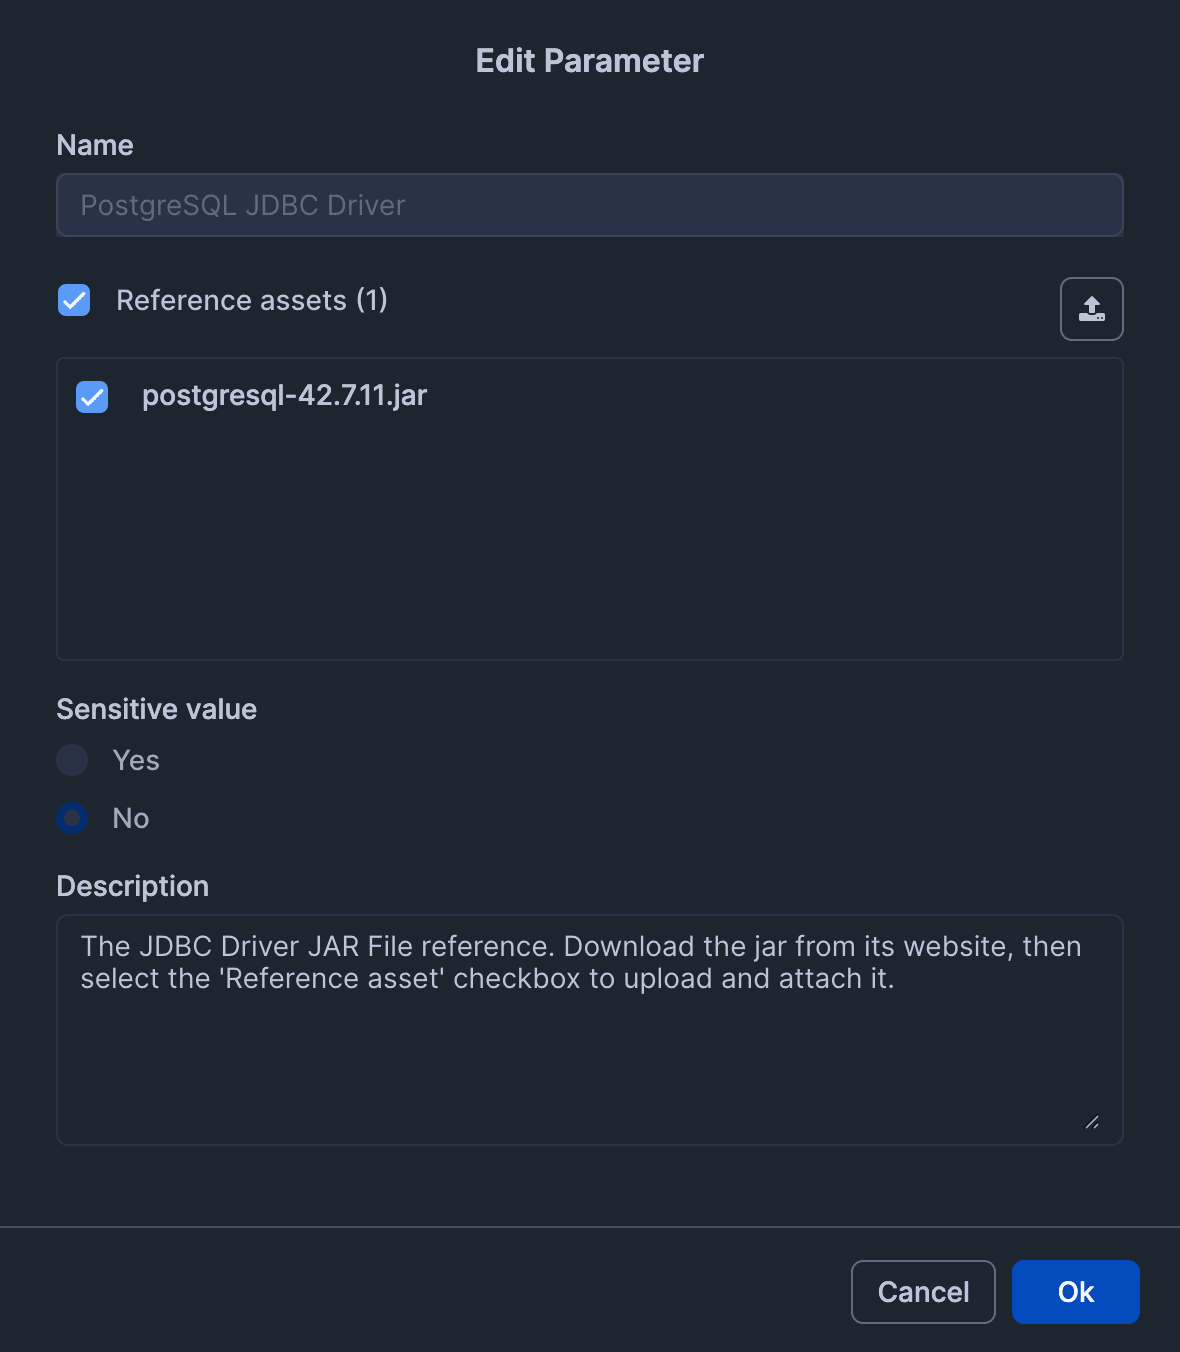
| PostgreSQL JDBC Driver | Upload and specify the JDBC jar from postgresql.org (also check "Reference asset") |
| PostgreSQL Username | openflow_user |
| PostgreSQL Password | The password for openflow_user set in step 4. |
| Publication Name | openflow_pub |
| Replication Slot Name | Can be left blank (the connector will create one automatically if not specified) |
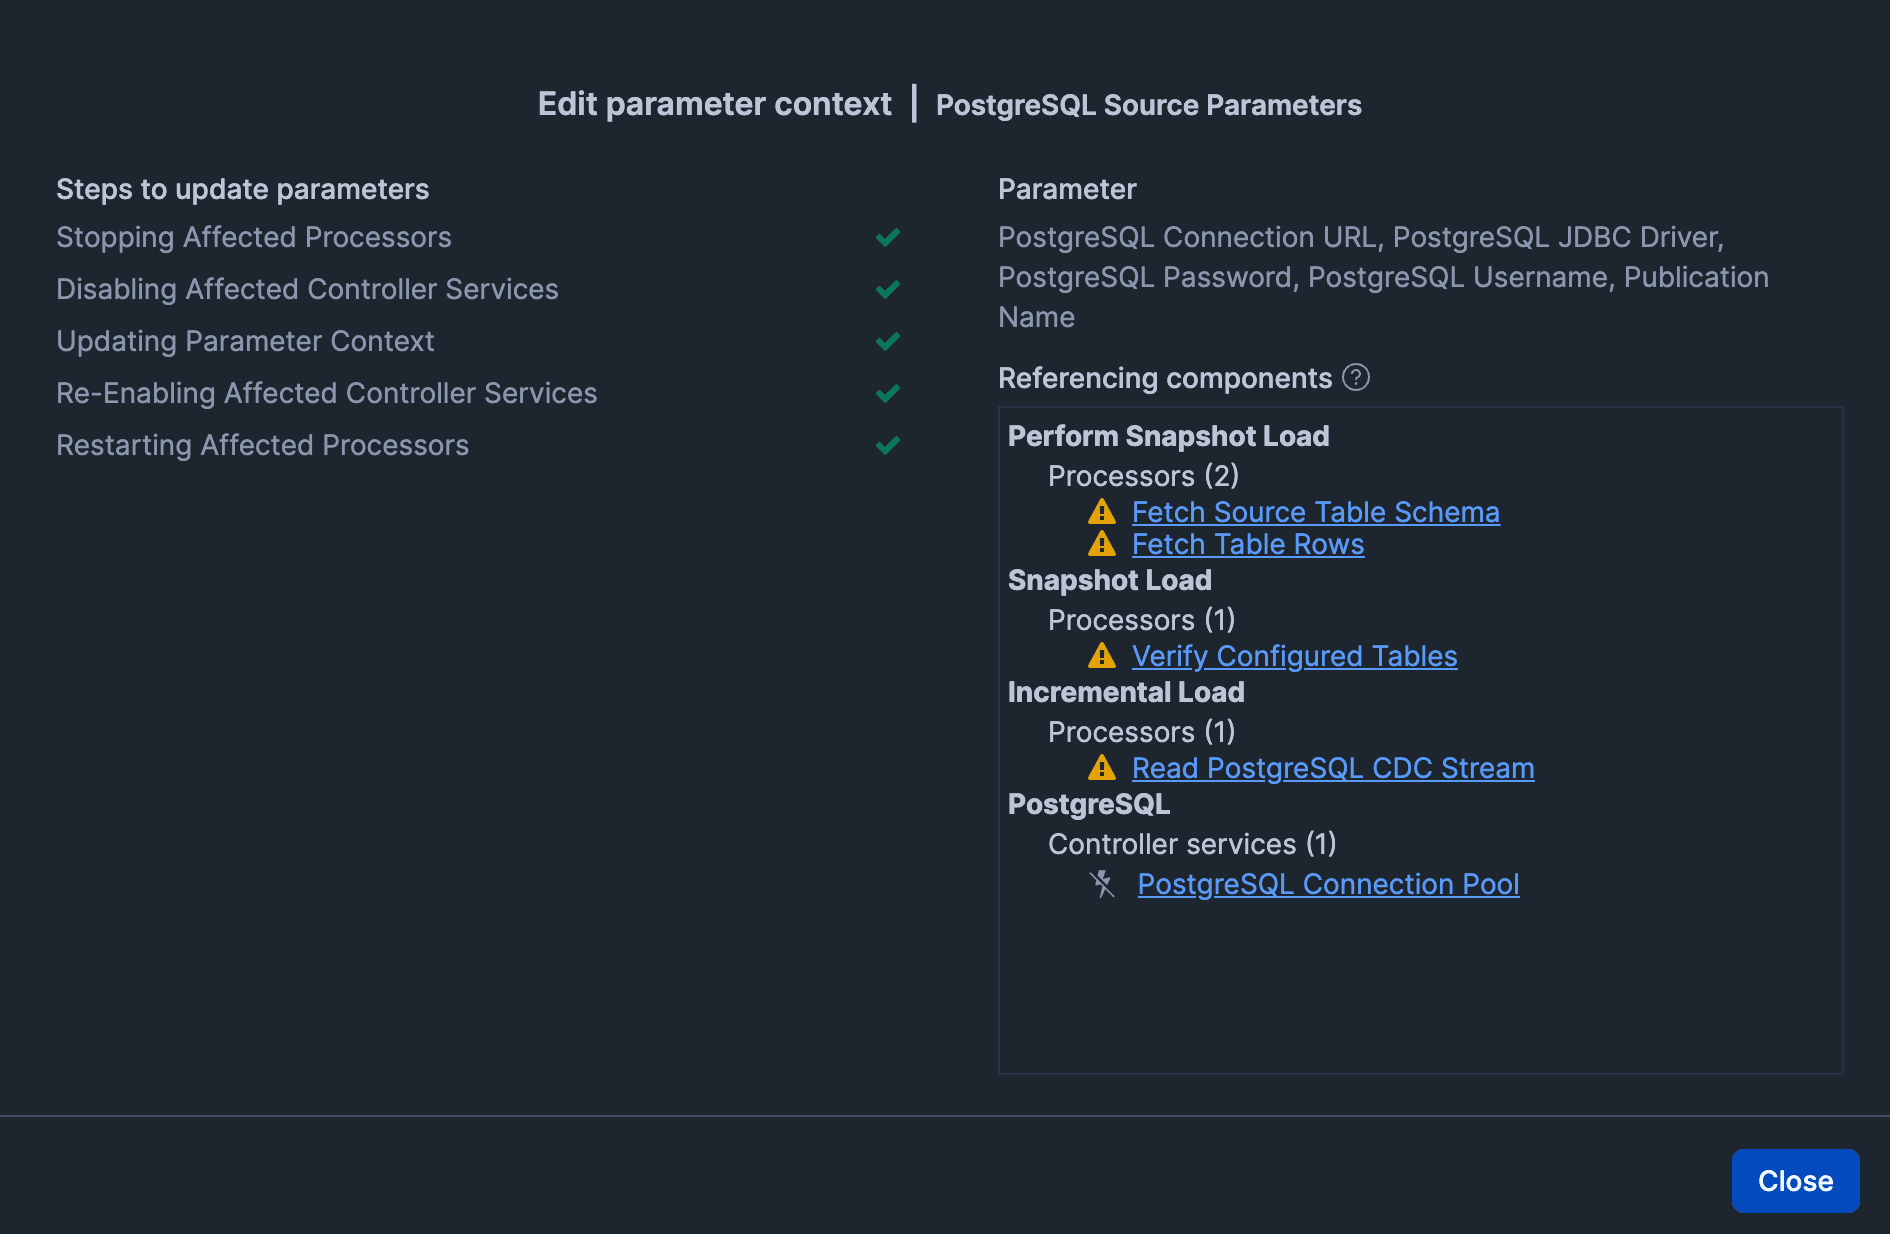
Set the JDBC connection string for PostgreSQL Connection URL. The RDS endpoint will be the hostname, so configure it accordingly.
For PostgreSQL JDBC Driver, obtain the JDBC jar file from the postgresql.org website, then upload and configure that jar file.
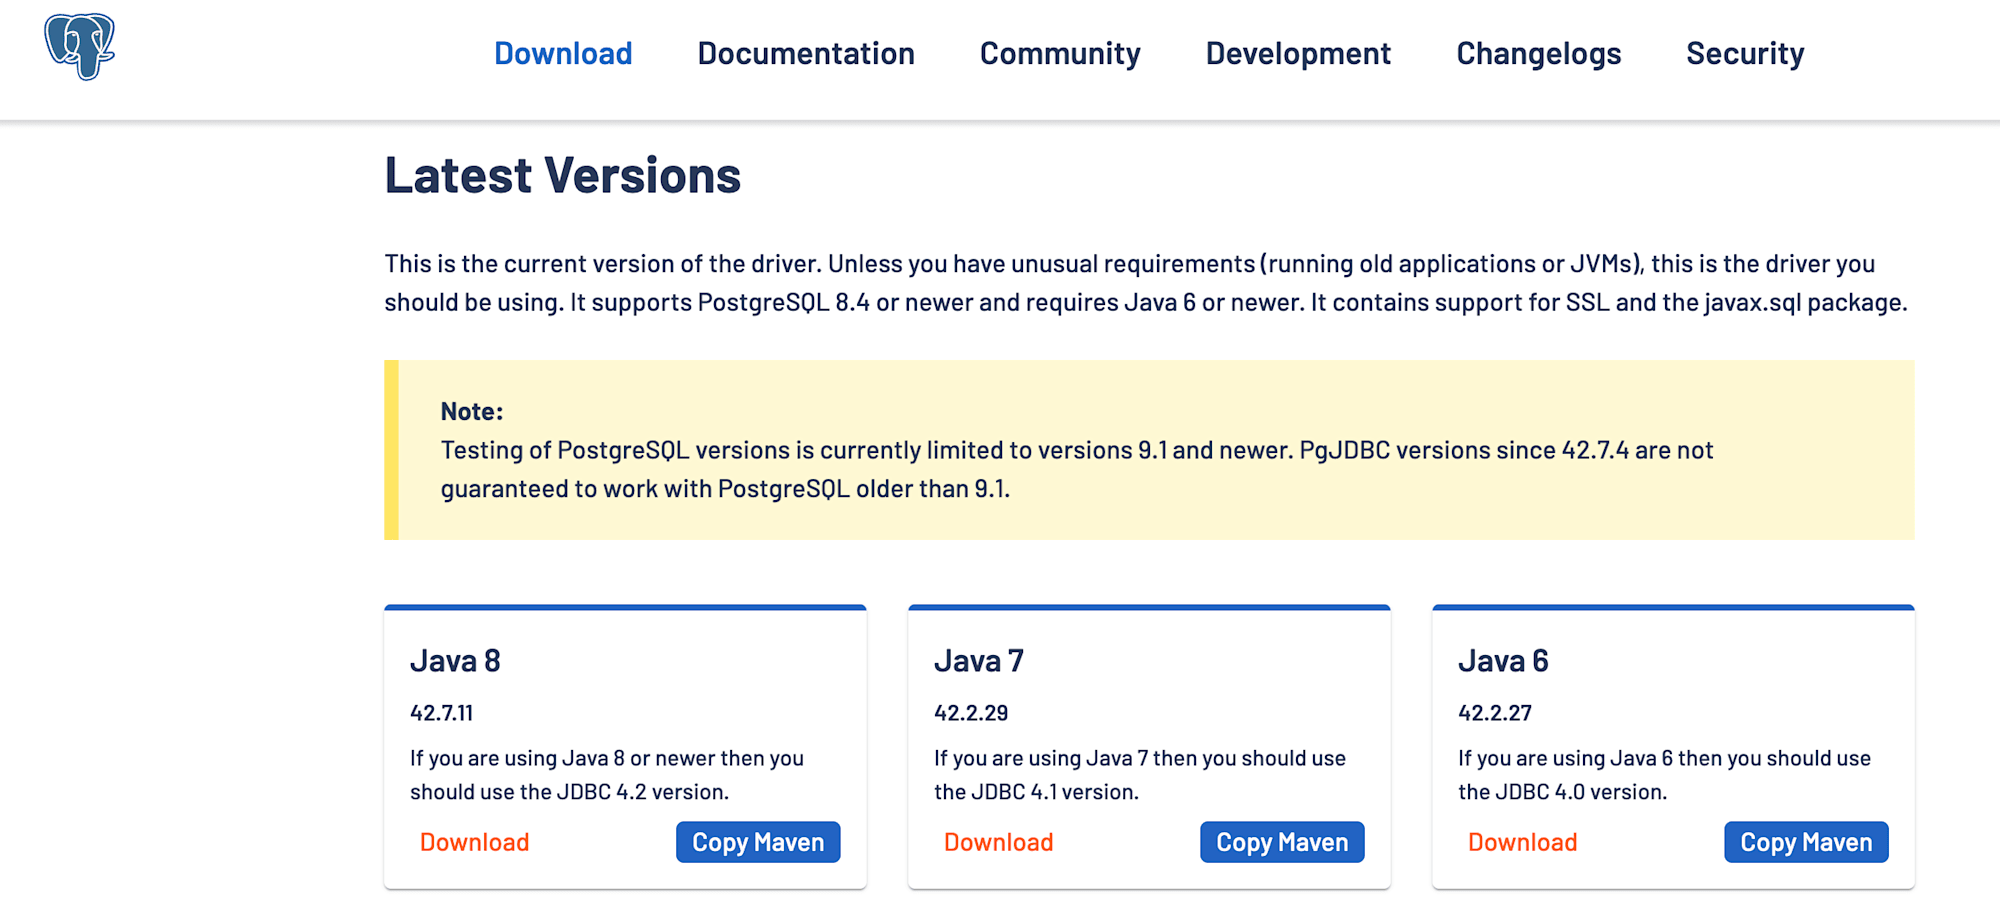
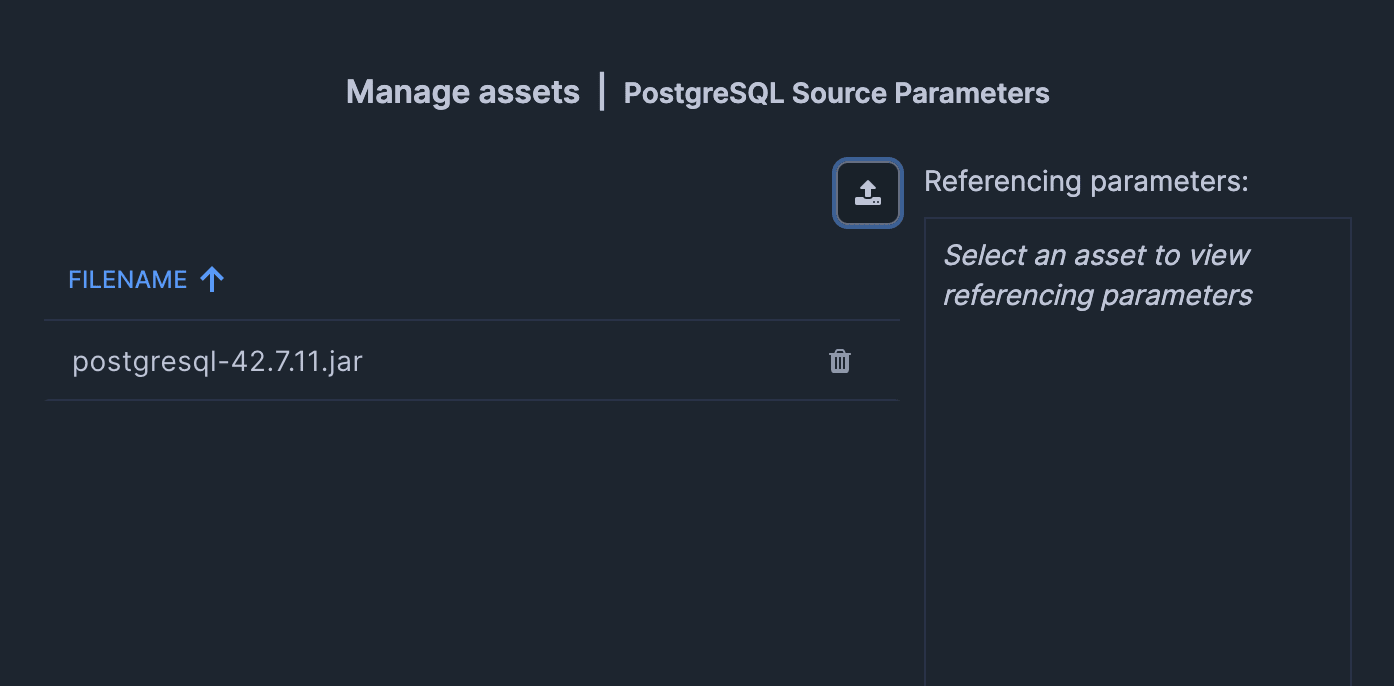
Also check "Reference asset".
After clicking "Apply", confirm there are no issues.
Destination (Connection settings to Snowflake)
| Parameter | Value |
|---|---|
| Destination Database | OPENFLOW_PG_DB |
| Destination Schema Pattern | Example: ${source.schema.name} (reproduces the app schema from the source PostgreSQL) |
| Snowflake Authentication Strategy | SNOWFLAKE_MANAGED |
| Snowflake Warehouse | OPENFLOW_PG_WH |
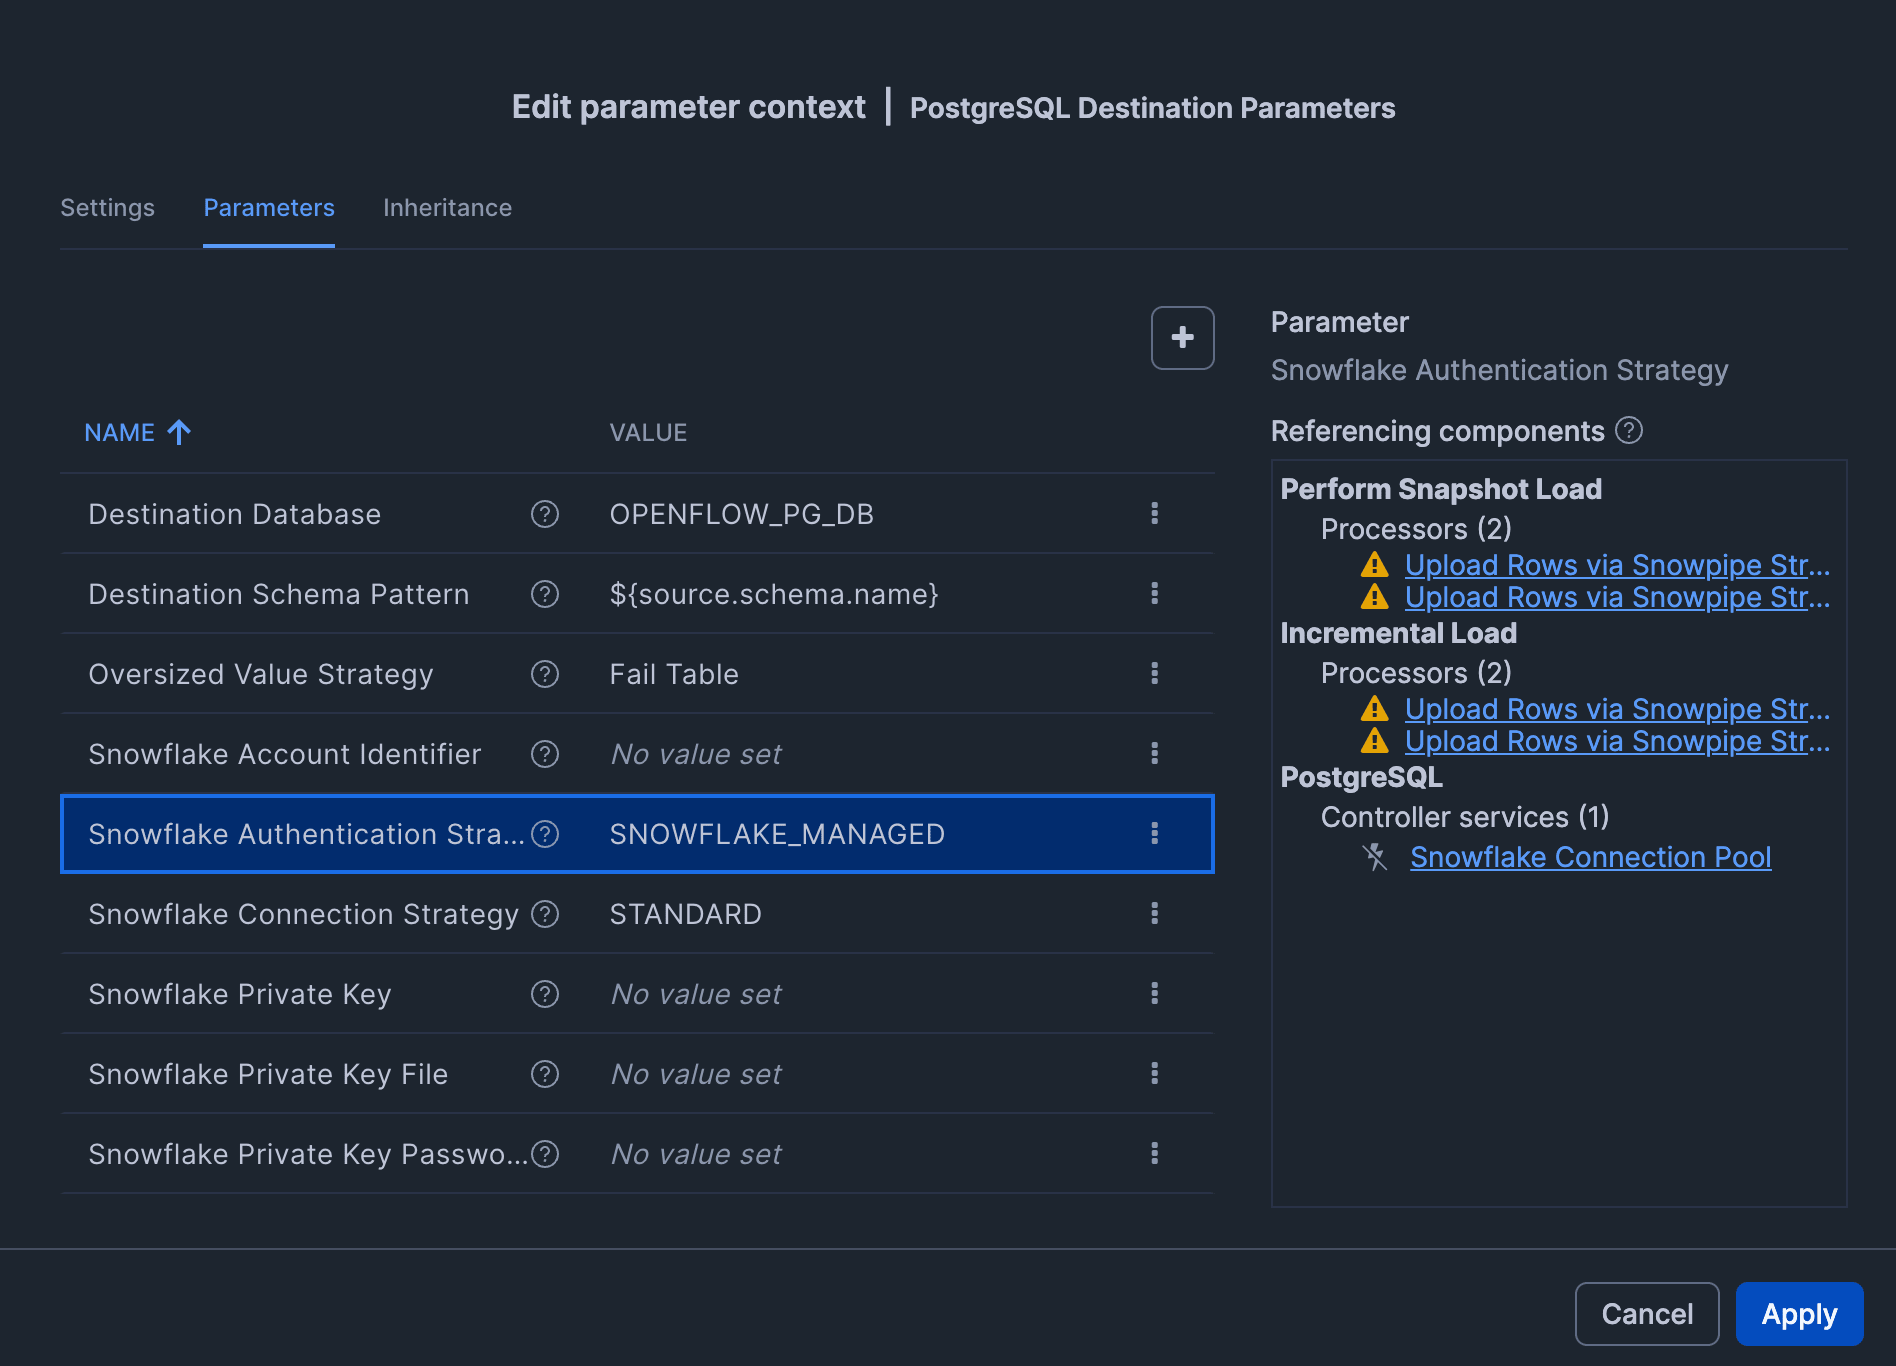
By setting "Snowflake Authentication Strategy" to SNOWFLAKE_MANAGED, the role specified in the Execute-as role of the Openflow Runtime configuration ( OPENFLOW_PG_CONNECTOR_ROLE ) will act as the authentication principal.
Ingestion (Ingestion settings)
| Parameter | Value |
|---|---|
| Included Table Names | app.customers, app.products, app.orders |
| Merge Task Schedule CRON | Example: 0 * * * * ? (configured for every-minute ingestion for verification purposes this time) |
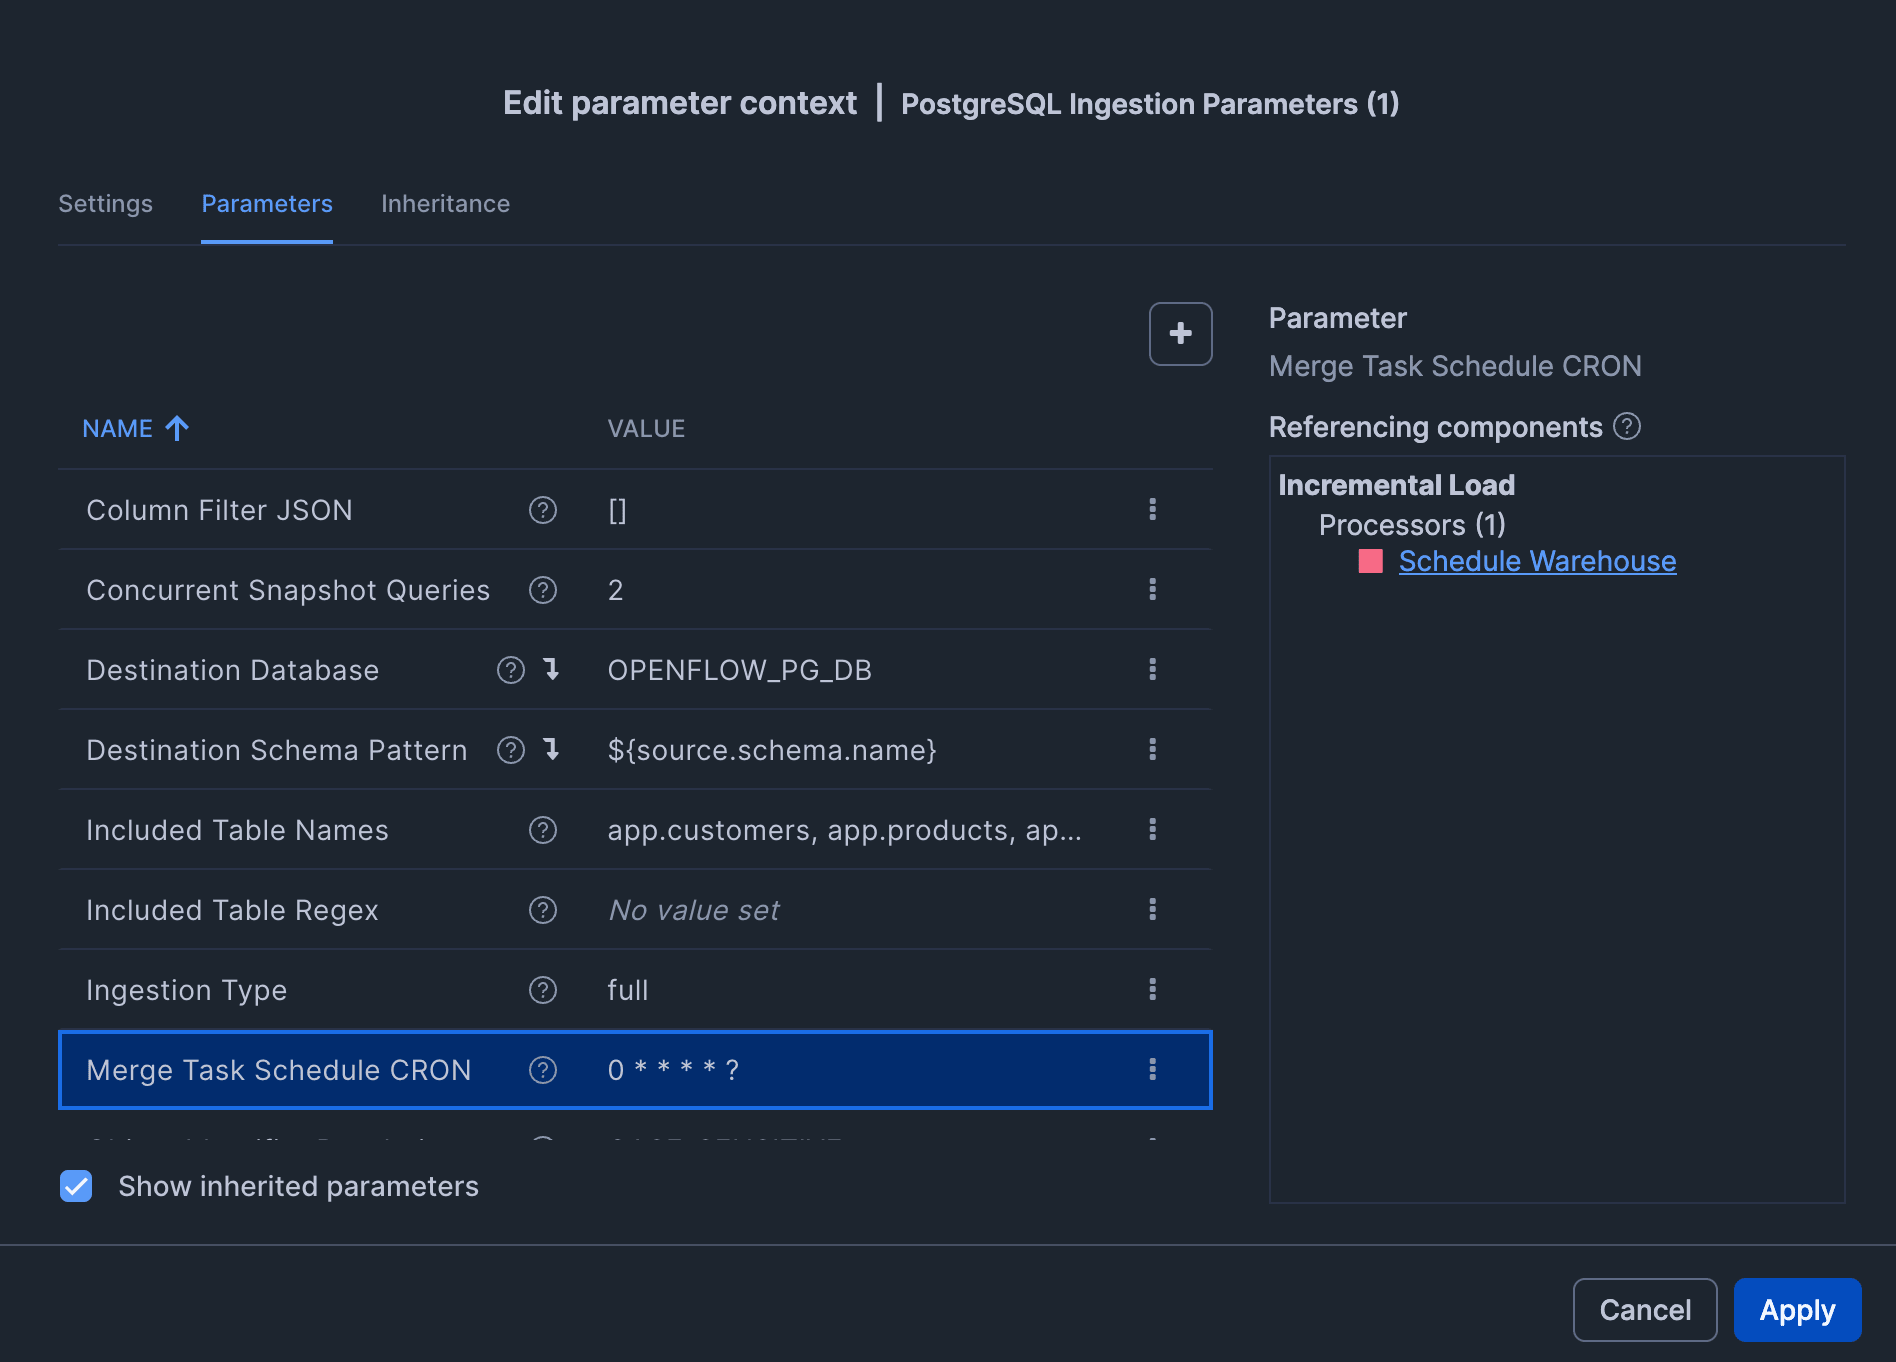
Note: Do not change "Destination Schema Pattern" or "Object Identifier Resolution" after ingestion has started.
11. Start the Flow
Right-click on a non-box area of the canvas and click "Enable all Controller Services".
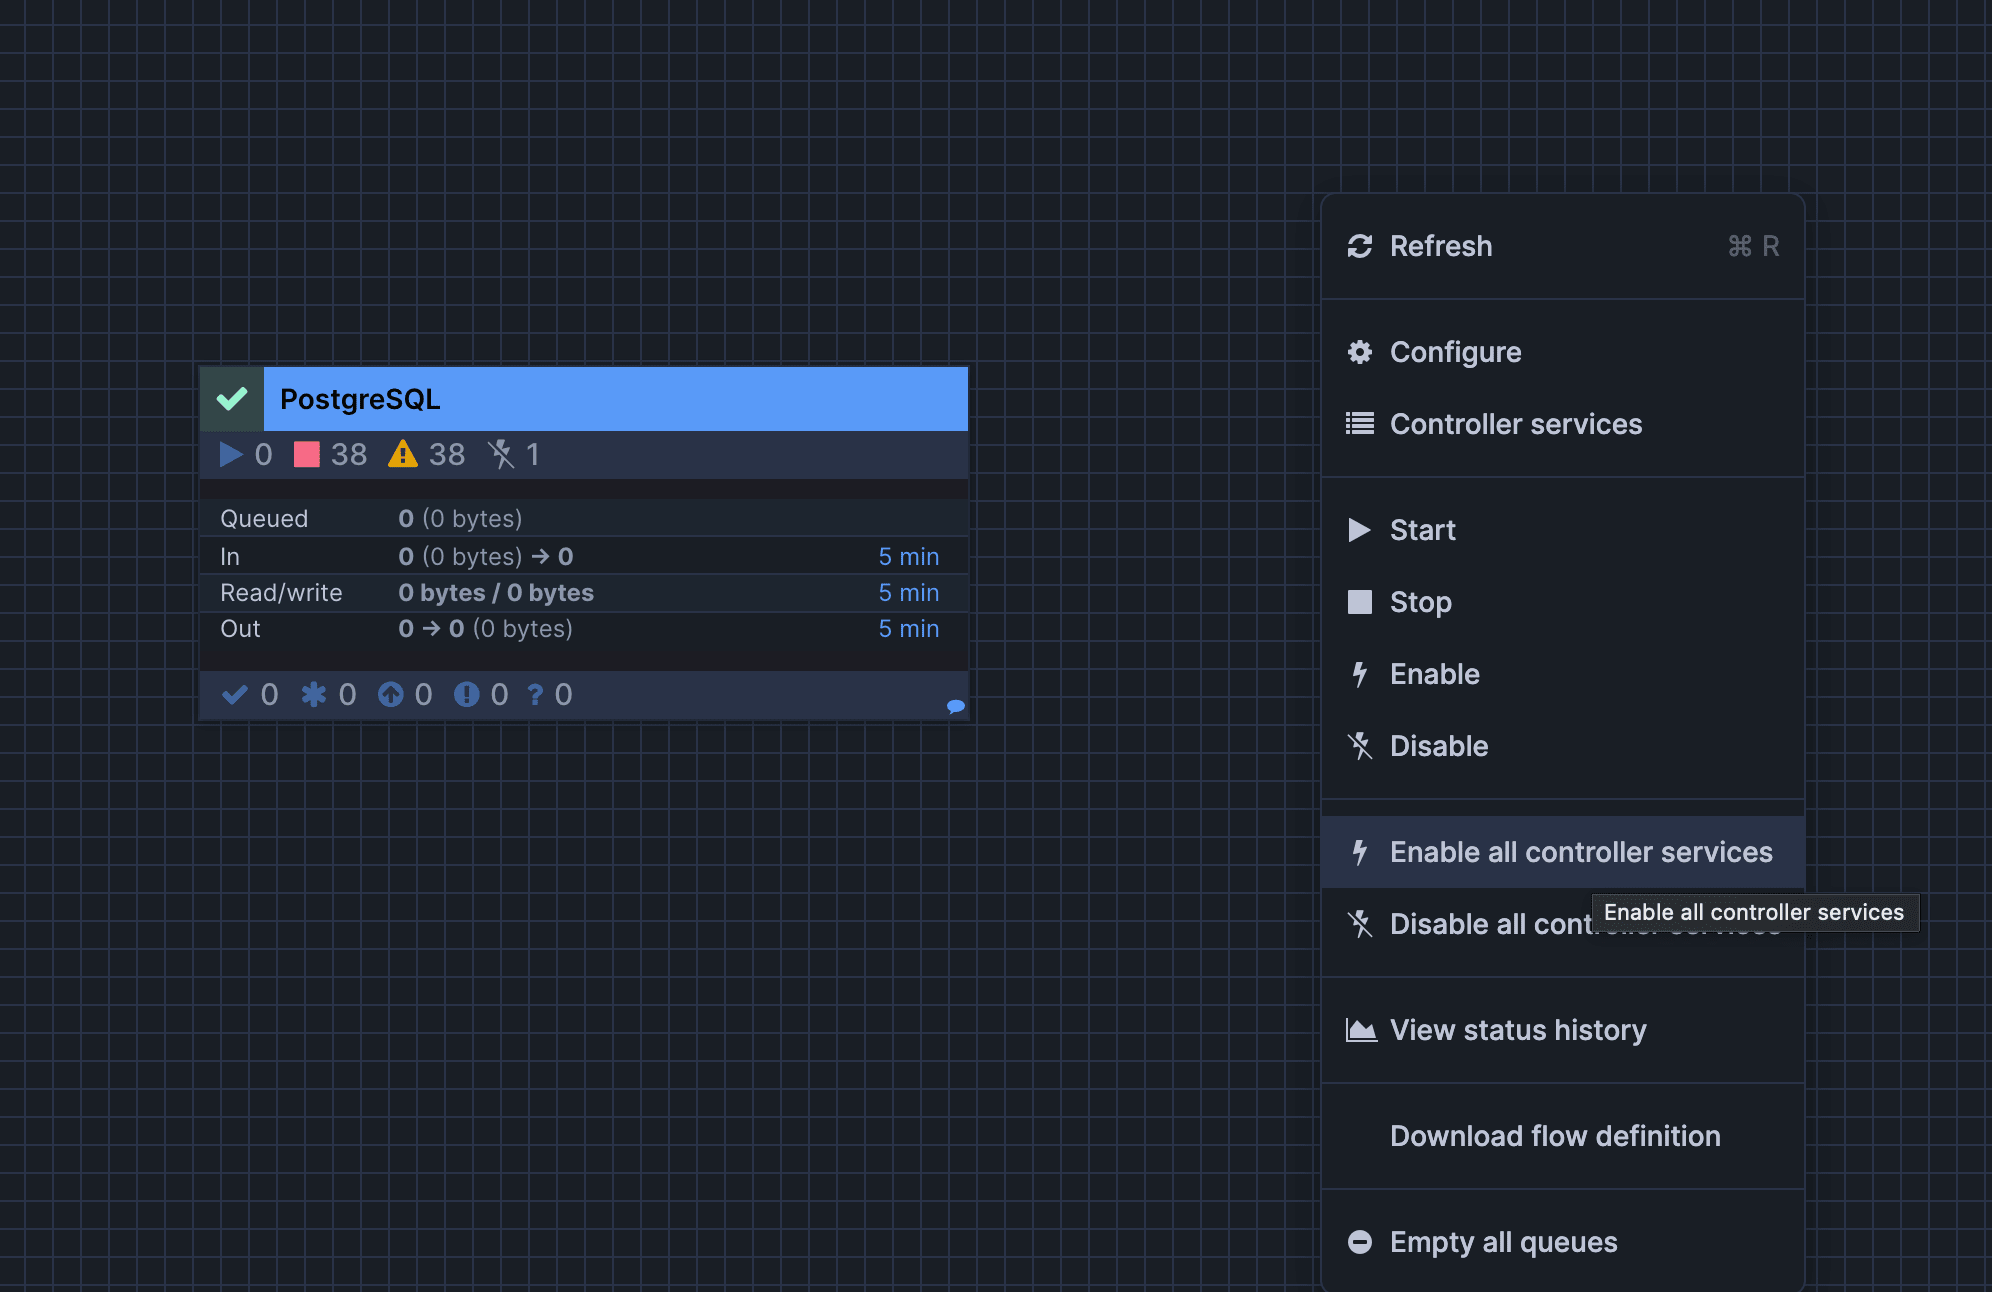
Next, right-click on the box on the canvas and click "Start".
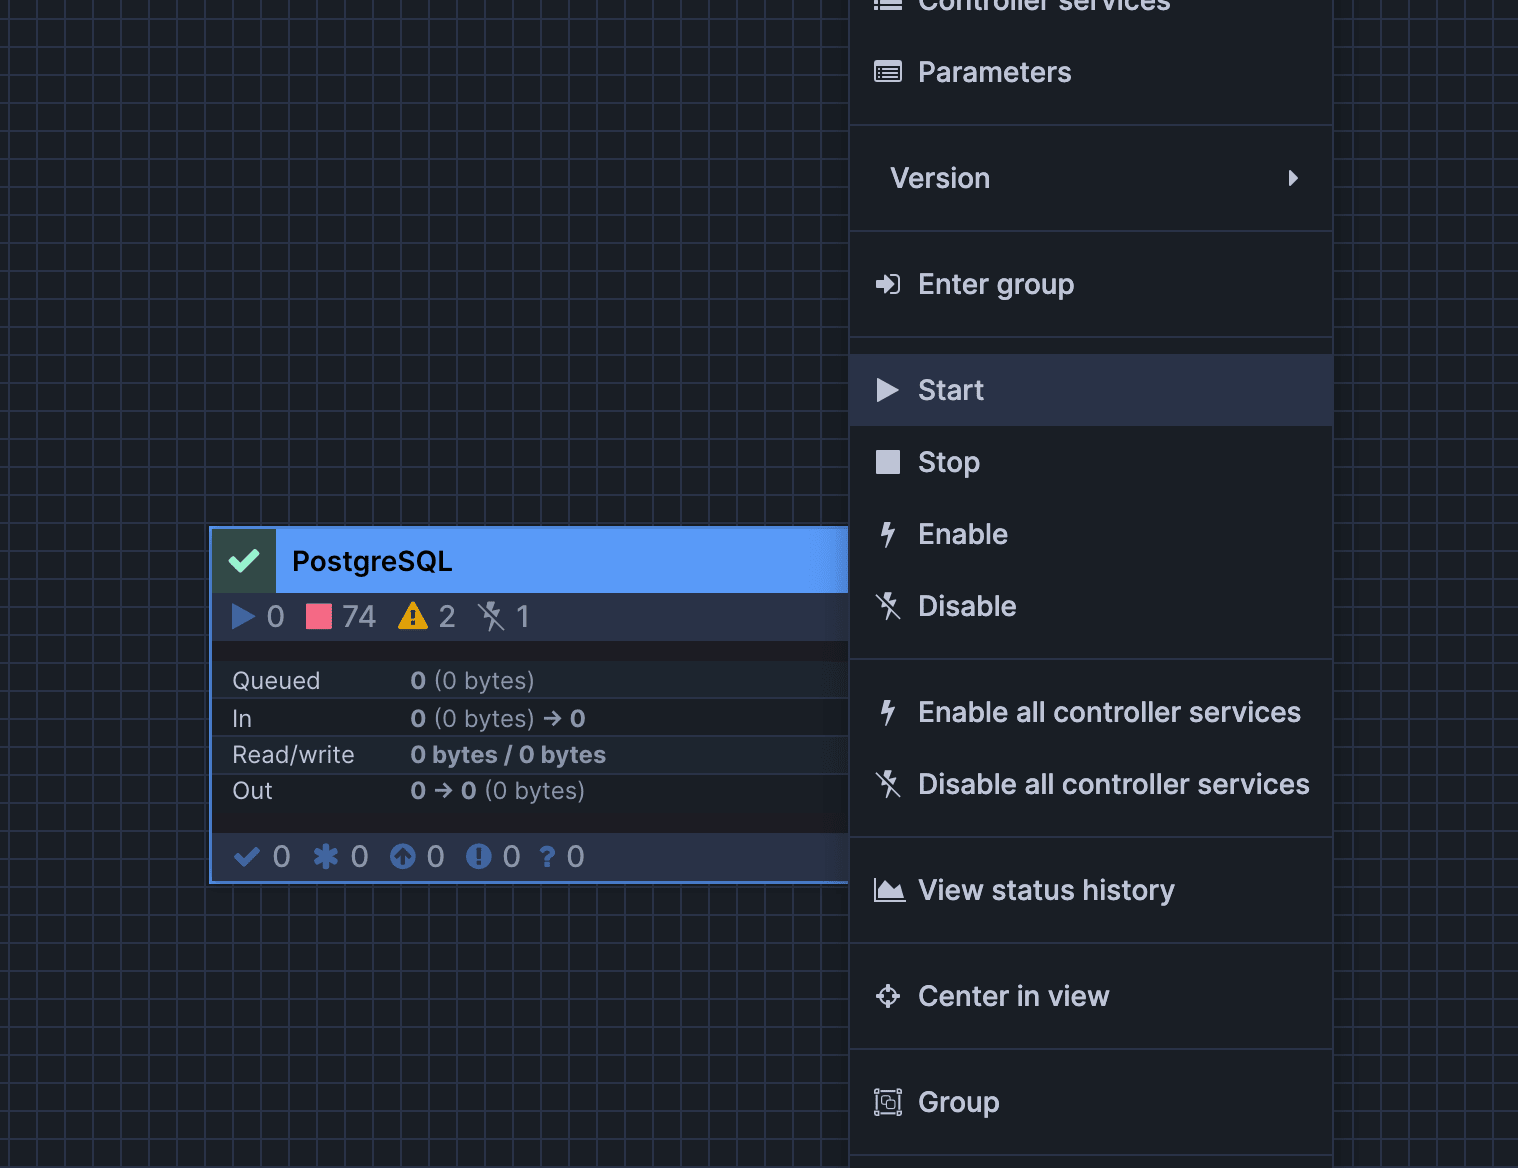
Executing in the above order will start the connector, which will begin ingestion in the order of initial snapshot → incremental (CDC).
Verification
Once the connector is running, verify its operation.
Initial Snapshot
First, let's confirm that the initial snapshot was successful.
Once the initial snapshot is complete, you will see that the target schema app and each table configured in the PostgreSQL publication have been reflected in Snowflake.
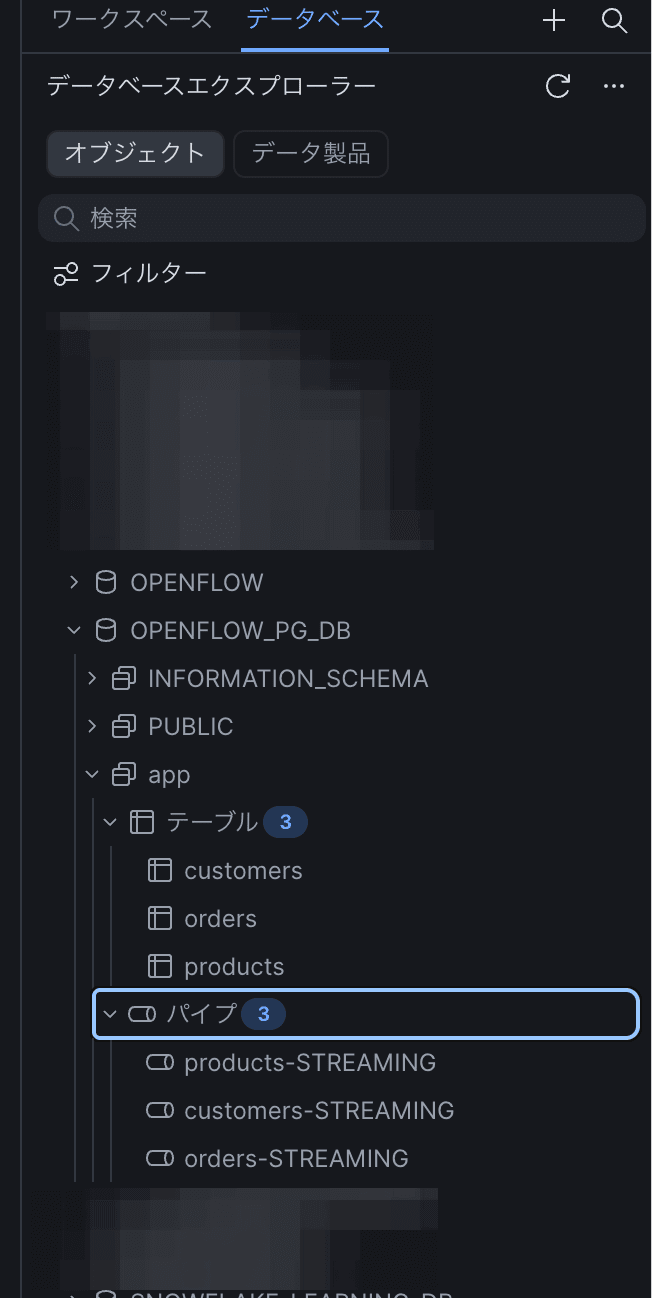
Run the following SQL from Snowsight to verify the row counts.
Initial snapshot verification
SELECT 'customers' AS t, COUNT(*) FROM OPENFLOW_PG_DB."app"."customers"
UNION ALL SELECT 'products', COUNT(*) FROM OPENFLOW_PG_DB."app"."products"
UNION ALL SELECT 'orders',   COUNT(*) FROM OPENFLOW_PG_DB."app"."orders"
ORDER BY t;
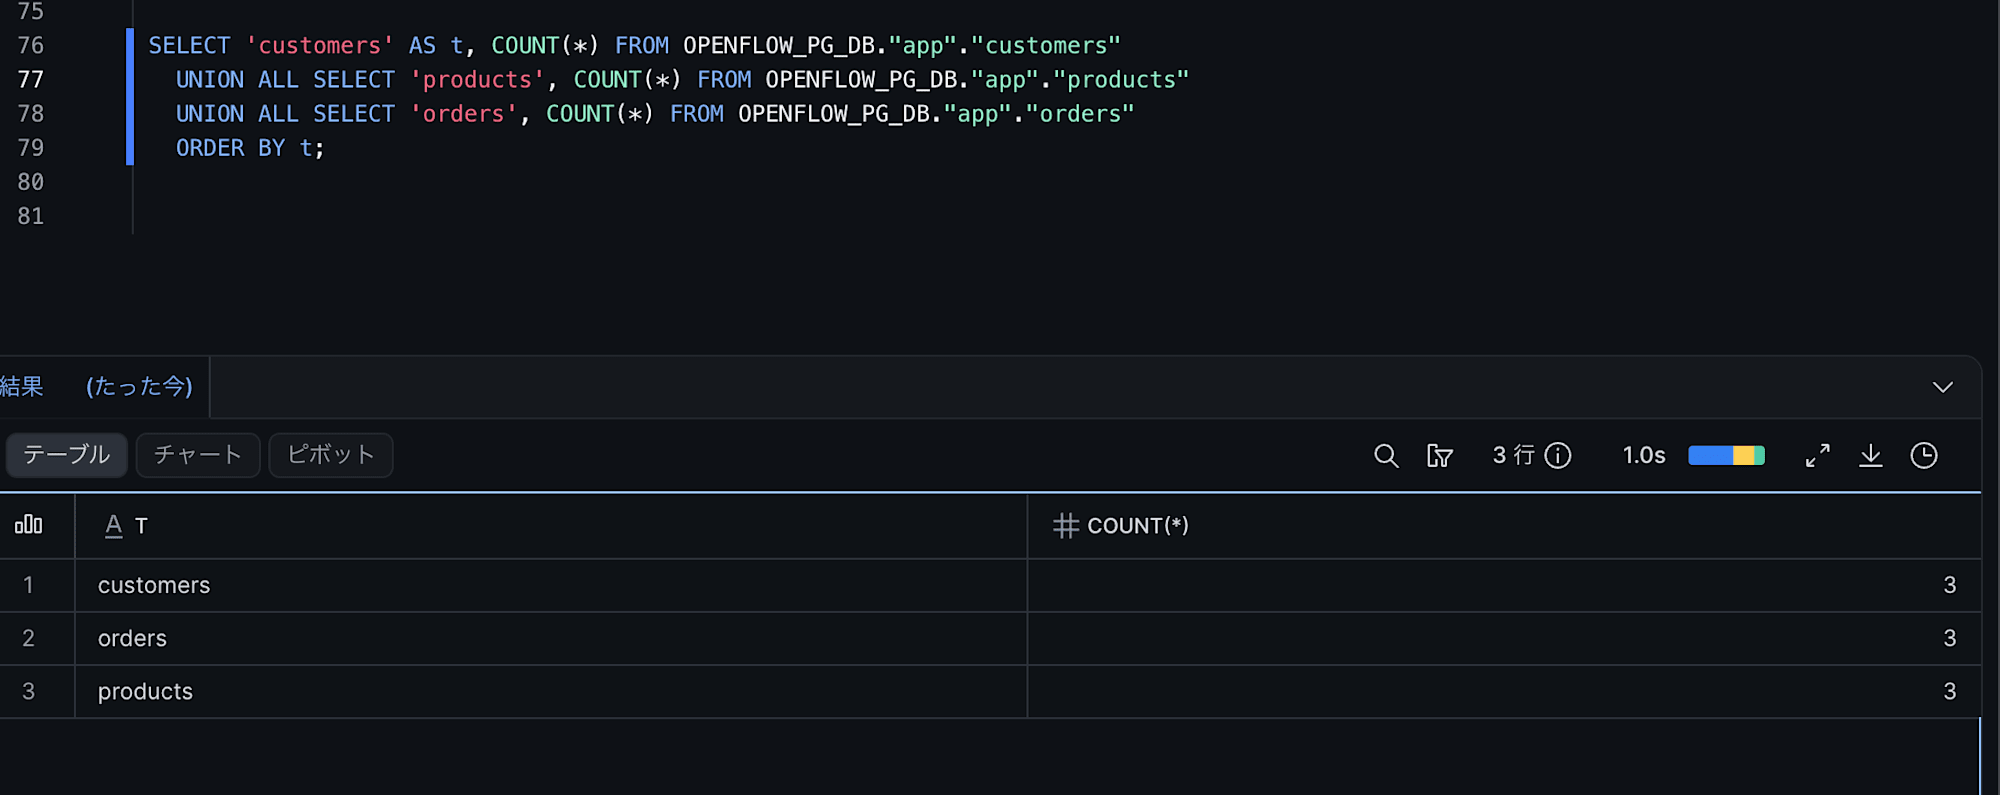
The counts should match the number of rows stored in PostgreSQL.
Note: Since the default setting of "Object Identifier Resolution", one of the connector's ingestion settings, is CASE_SENSITIVE, the schema names and table names in Snowflake ingested from PostgreSQL are case-sensitive in this case. Therefore, lowercase names are enclosed in double quotes ".
CDC (Incremental Transfer)
Next, update data in the source PostgreSQL and verify that the changes are reflected in Snowflake.
The following SQL queries were executed against PostgreSQL to make data changes.
Data changes
-- insert
INSERT INTO app.customers (name, email) VALUES
    ('Saburo Sato', 'saburo@example.com');

INSERT INTO app.orders (customer_id, product_id, quantity, status) VALUES
    (4, 1, 5, 'pending');   -- References customer_id=4 added above

-- update
UPDATE app.products
   SET in_stock = true, price = 27800.00
 WHERE name = 'Monitor';

UPDATE app.orders
   SET status = 'shipped'
 WHERE order_id = 2;

-- delete
DELETE FROM app.orders
 WHERE order_id = 3;

-- check count
SELECT 'customers' AS t, count(*) FROM app.customers
UNION ALL SELECT 'products', count(*) FROM app.products
UNION ALL SELECT 'orders',   count(*) FROM app.orders;
Then, wait for the interval set in the "Merge Task Schedule" cron of the Openflow connector (every minute in this case, so approximately 1 minute) before checking whether the changes have been reflected in Snowflake.
Verify data change reflection
-- Verify count changes (insert / delete)
SELECT 'customers' AS t, COUNT(*) FROM OPENFLOW_PG_DB."app"."customers" -- 3 -> 4 (INSERT)
UNION ALL SELECT 'orders', COUNT(*) FROM OPENFLOW_PG_DB."app"."orders" -- INSERT 1, DELETE 1
ORDER BY t;
-- Verify update changes (update)
SELECT "product_id", "name", "price", "in_stock"
FROM OPENFLOW_PG_DB."app"."products"
WHERE "name" = 'Monitor'; -- Confirm price=27800.00, in_stock=TRUE
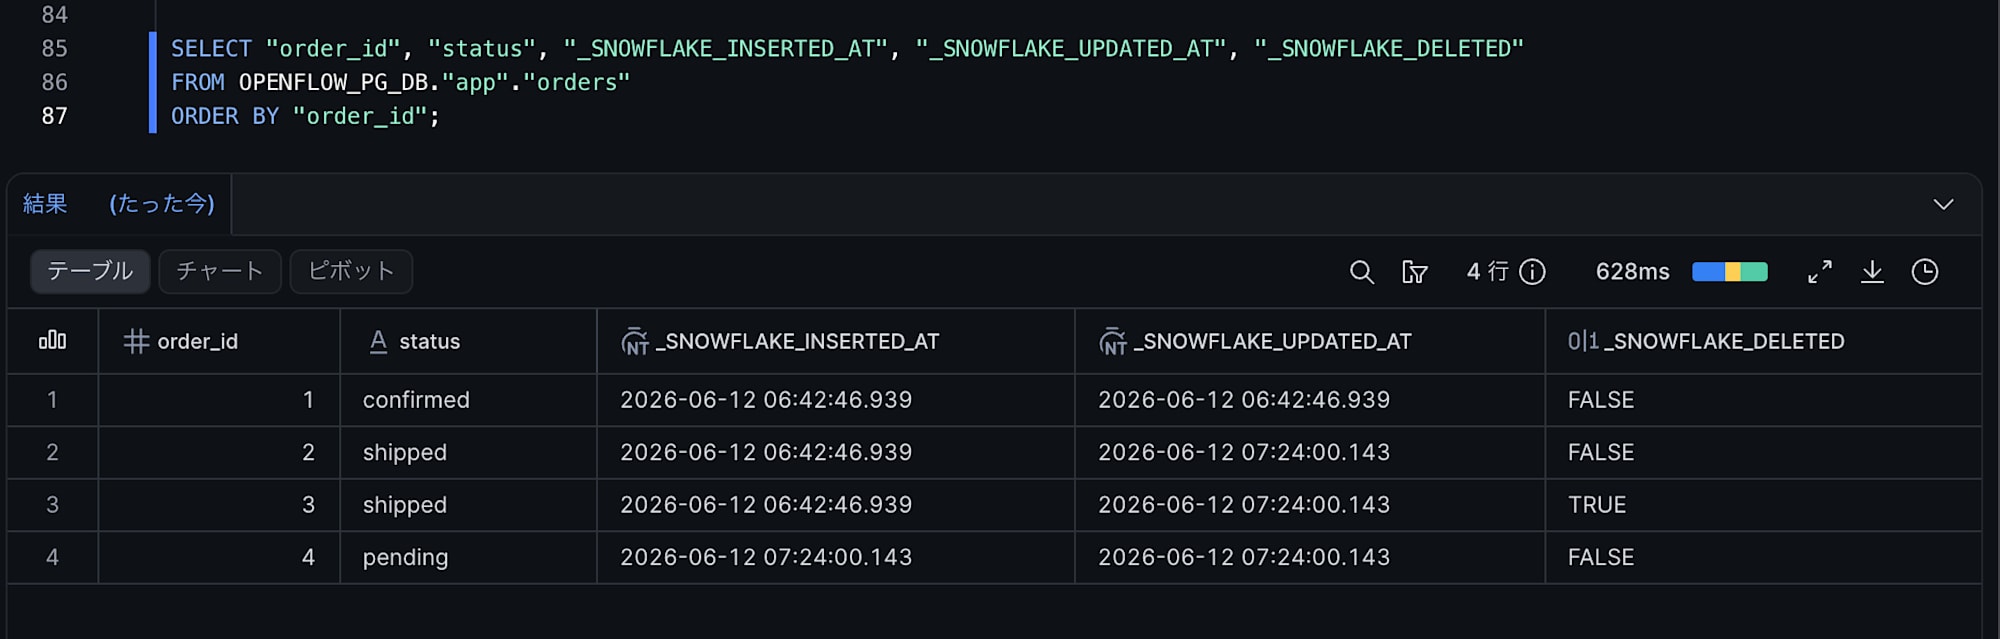
-- Check metadata columns
SELECT "order_id", "status",
"_SNOWFLAKE_INSERTED_AT",
"_SNOWFLAKE_UPDATED_AT",
"_SNOWFLAKE_DELETED"
FROM OPENFLOW_PG_DB."app"."orders"
ORDER BY "order_id";

Each row has metadata columns set, so the following should be reflected:
order_id=2- Updated to
status='shipped'and_SNOWFLAKE_UPDATED_ATis populated
- Updated to
order_id=3- DELETE is reflected and
_SNOWFLAKE_DELETEDis TRUE (logical delete)
- DELETE is reflected and
- New
order_id(order_id=4)- INSERTed and
_SNOWFLAKE_INSERTED_ATis populated
- INSERTed and
Summary
How was it?
I tried deploying the Snowflake Openflow Connector for PostgreSQL on AWS with BYOC.
I struggled more than expected with the preliminary configuration, but I was able to confirm that it works for the time being.
One thing to note is that the Openflow Runtime requires not only outbound communication to Snowflake, but also inbound communication for Connector configuration.
By default, an NLB for Ingress is built on a public subnet, but the official documentation also describes settings that allow an NLB for Ingress to be built on a private subnet, so I would like to verify that behavior at some point.
I hope this article is helpful to you.
